
Alexander Grabovetskiy, woodcarver, School of Woodcarving · Published 2018
How do you carve a lattice that looks woven?
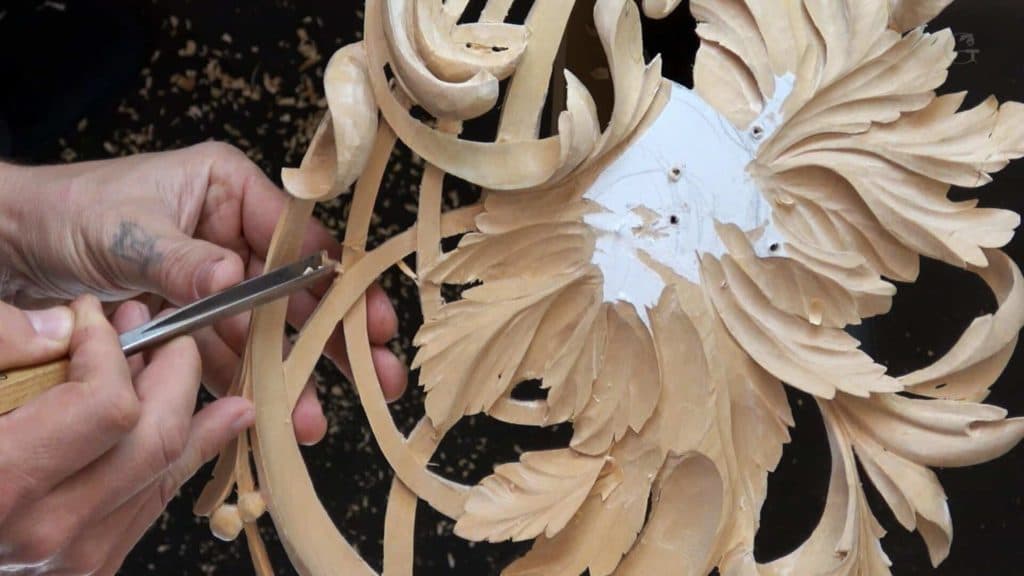
Quick answer: Carving a woven-looking grid is a job of small undercuts. On my Hashemi panel I laid one side of a V tool flat and went 3 to 5 millimeters below the high point, checked which band passes under, worked the back too, then took the whole grid to about 3 mm.
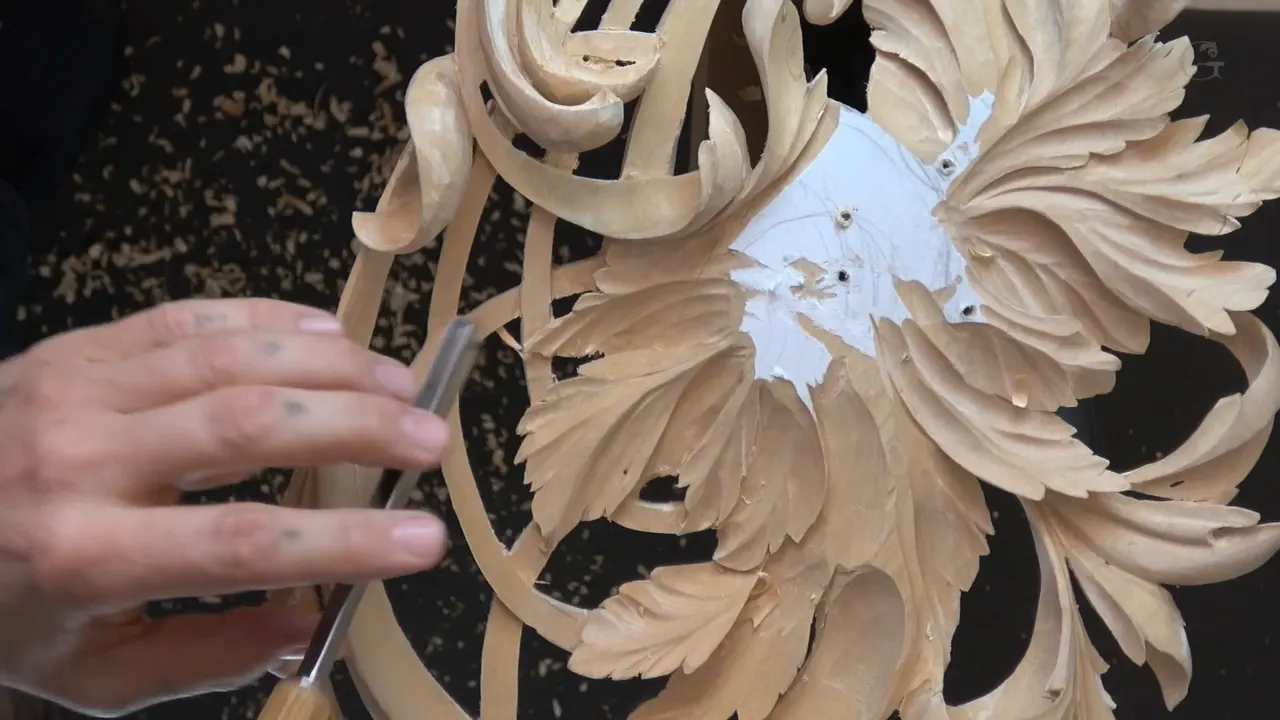
A woven-looking carved lattice is a grid whose bands seem to pass under and over each other. Mine came from a V tool laid on its side, making small undercuts underneath. We have to make it look like it's truly interweaving, I said in lesson 26 of Carving Hashemi Flowers, on the limewood panel from lesson 1.
Have you ever carved a grid that looked fine from the front? And then seen every band sitting at one height, like a pattern drawn on a board? Mine needed small undercuts, from the front and from the back. This page follows that one lesson, five short videos, with my depths, tools and order as I gave them on camera.

Six things I did to the grid in lesson 26
- The V tool laid flat on one side, for an undercut that still leaves the band some support underneath.
- Depth kept small.
- The piece flipped onto its second plate, so the back got the same treatment as the front.
- A check of which band passes under.
- The grid brought down to about 3 millimeters with my number four, then tapered on the inside.
- Pencil, then knife, and only in a few spots, where the flow was not as nice as I wished.
What makes a carved lattice look woven?
An undercut, and the shadow it gives. Even on the backside, I said, we still use a V tool, lay it flat, and make a small undercut, not too big. It's going to create the shadow. Believe me, it's going to look beautiful.
The plan for this lattice goes back to lesson 5, where I said we have to undercut later on to make it look like it's really weaving, and that I wasn't sure I can say that word, but for me it does make sense. It interweaves. Some of that later came in lesson 6, under the leaves, and lesson 26 gave the whole grid its turn.

I have said the same of acanthus. I liked one movement on the Roman acanthus leaf because it's like it interweaves. This leaf goes underneath that one and continues on this side, I said, and the whole idea of acanthus, it's an interweaving.
Baskets and acanthus go back a long way together, at least in the story I told in the Corinthian acanthus course. An architect and sculptor named Callimachus was in a Corinthian cemetery, and on the grave of a young girl he saw a basket with some cloth in it. An acanthus plant right underneath it didn't grow through. It tried to interweave around the basket, and that, the way I told it, was the birth of the Corinthian order, the capital itself. My Hashemi panel has the pair too, a basket grid with acanthus leaves around it.

How do you undercut with a V tool on its side?
Lay the V tool on one of the sides, on one of the chisels, I said, and make it a V cut, but not as deep. We still have to make sure the band does have support. My goal was the high point. From the high point downhill it's no more than 3/16 of an inch, or maybe even less, maybe 3 millimeters, which is 1/8 of an inch. Anyway, between 3 and 5 millimeters, that's the highest spot.
Right then I was working against the grain, but I didn't want to rotate. So I just laid it on its side and made my undercut, almost until the wall disappears, and left a very small amount standing. Then just work everywhere, from all the sides.

I showed the same move on the Roman acanthus leaf, with a 45 degree V tool. It doesn't have to be 45 degrees, I said, or number 16. Any V tool will work. Just lay it flat, and one side of the V tool will stay flat. Later on, at the clean line, it creates a beautiful shadow line, because it looks like a deep excavation underneath.
There was a warning on that leaf too. Be careful when you're using a V tool for undercutting, I said. Believe me, it's more dangerous than you think, and you can break your tool. My own number 16, and the angle I like on it, have their own page in lesson 22.

Which band goes below, and which goes above?
After the flip I had to check that, which one goes below and which one goes above. Looks like I have to take this one, I said. Well, first of all, definitely I have to take both down, but this one the most, because it looks like it's flipping on the opposite side, above that one.
Then I changed my position and worked the other direction. It felt safer. It's probably a good idea to do that everywhere, I said, so I'll know exactly where each one goes. So this one should go underneath.
Part three had one spot where I stopped myself before a separation. Let me double think, I said, this one actually has to go underneath, so let me leave it like that right now.

Do you have to carve the grid from the back?
I didn't really have to, I said, and it still would look nice. But I wanted it even better than just nice, like it's true interweaving, and I did have access from the backside. Why not do that?

Then came the flip. I put back my plate, the one I had before, and found the right location for the holes I used. With this system I can actually have a plate on both sides, just flip it, and have another one already installed there, so it's not in my way. The plates and the two vises are in lesson 21.
I have to be really careful again, because I don't want to overdo it. And you already saw I am capable of overdoing it. I am not perfect, for sure.
Later on the piece will be applied either to the wall or to a background, whatever a customer decides. Raised above that background, it creates another shadow casting. There will be shadow underneath it, and supposedly it will look beautiful.

The Roman acanthus got the same idea. Because of a second line there, I said, most of it sits above the background, and that creates even more beautiful shadow. If you place it in a frame on a wall with the right lighting hitting it, you get a beautiful effect, even as bare wood with no finish.
Behind the grid the undercut was not much, just a little bit. But still, every little bit is helping, for the shadows, of course. Even tiniest shadow casting will do a big difference, I said later in the course, in lesson 49.
How thin should a carved lattice be?
About an eighth of an inch, 3 millimeters, on my panel. Part two is where I said I want the thickness of this grid much less, maybe about 1/8 of an inch. But I hope I won't break it. And again, I proved that I am able to.
A semi-flat gouge took the back down to the right desired thickness, never past 3/16 inch overall in my case. In the third video I said you could use a number five and it still works, even a number seven, if you have one. We were making it thinner, I said, but that was not the final step yet, and I said that part twice.

For the final thickness I took number four. Marked number four, it really looks more like number three, in 10 millimeters (3/8 in). With that same gouge I made the grid even thinner, all the way to three millimeters. Again, really carefully.
A leaf on the same panel goes thinner still, and how far is in lesson 7.

Can a grid look thinner than it really is?
It can, and part four shows how. I wanted to undercut a little bit, though I wasn't sure should I or not. To make it appear even less than an eighth of an inch, I had to remove those walls. I could do it from the backside, or even from this side. At least I can start from this side, and I can always finish it on the backside.
Once that's done, the band reads as less than a 16th of an inch thick, while the real wood is about an eighth, or even five millimeters. Only the edges are exposed. It's tapered on the inside, undercut on the inside, and it stays stable and strong.

I did the same thing on the Tray of Blessing. I carved up to the knife edge, so it looks really thin, but it's only visual. It looks paper thin, but it's not, I said. A tray is a practical use thing, so I didn't go extreme there, and if it were a piece of decoration on the wall, I said, I would do extreme under.
In the Venice Room I wanted that illusion of a paper thin too, and I said real paper thin would be a mistake in that case. That piece has a job beyond ornament, so it must be somewhat solid. But still, illusion.
What does the grain do on a woven grid?
In a few places I worked against the grain. There was no way to attack those from the side that goes with the grain, I said, and I'm okay with that. Some spots, I probably have to use a smaller V tool, and that is an end grain again, so the tool must be really, really sharp.
End grain has its own page, lesson 23. Once I attacked a spot from the opposite direction, with the grain. Near the end I said just keep an eye on the direction of the grain, and I took one thick spot from one side because of it.

The other technique for spots like that is just to use a knife, maybe a little shorter knife. Mine was the same #12 knife I used before. I broke my tip and had to resharpen it, I said, and I actually like how it works, the shorter version. I can get my results exactly the same, just using a knife.

These are the tools I named on camera that day.
| Tool used | What it did on the grid that day | Where in the lesson |
|---|---|---|
| Small V | A #16 at 3 mm, for some spots | Late in part one |
| Bigger V | The #16 at 6 mm, though any works | Part four, early on |
| Semi-flat gouge | Took the grid toward 3/16 or 1/8 inch | Part two, the back |
| A #4 | Final thickness, all the way to 3 mm | Part four, later on |
| #12 knife | Its tip broke, and I like it shorter | Part one, mid video |
Why go slow when the step is quick?
This step is actually kind of quick, I said in part five, and doesn't take too much time. Just be really careful how you operate with your gouge.
Too much pressure is the mistake. Just don't create too much pressure, I said in part four. It's tempting, I know, because I'm also trying to rush it, but that would be a big mistake. Earlier I had said it plainly. Just don't force it. Speed itself is the subject of lesson 18.
Don't worry if it doesn't look perfect as far as the lines, I said on the back. You can see it's looking choppy a little bit, but that's still possible to fix. No problem. And a few spots I didn't even have to do, because they will be almost invisible.

How is a flat lattice different?
On the plate with butterflies, a flat lattice was knife work. There I spaced the lines approximately 3 millimeters apart (1/8 in), and said I think it's a good lattice. The knife should not go more than one millimeter deep, I said. Don't press too hard, or you can break those details.
If you would ask me why I don't use a V tool, I said, you won't get a really sharp V cut with the V tool. The knife gives you the true, really sharp line at the bottom of the groove. The Hashemi basket is pierced through, and its bands go under and over each other.
What is the last pass on a woven grid?
Knife work, along a pencil line. Once the walls are off, the final stage will be to refine the grid with the fine line, I said, and we can just use a knife so it looks really nice and fix all the flowing line. It just has to naturally, organically flow. Lesson 9 is about how a line flows.
Right then I could see it's not as nice as I wish. So I established my final line with a pencil mark and took my knife, in only a few spots, not everywhere. With no thickness left there, that's much easier for me. If I need a V tool, I take a V tool and just clean it. Once you establish the final form, it looks really sharp and nice.

All of lesson 26 and the rest of the Hashemi panel, lesson by lesson, is inside tuition at the school, along with the basket weave of lesson 5 and the leaves around it. Limewood comes from Tilia, the lime tree. The last thing I did that day was one band that still looked a little too thick, taken down with a knife from the side the grain allowed.
How it's done
- Use the V as a chisel. Put the tool on one side, like a chisel, and make a small undercut, not as deep as a full V, so the band keeps its support.
- Stop short. Keep the depth under 3/16 inch down from the high point, and leave a tiny bit standing where the wall almost disappears.
- Flip it. With two plates on the piece it just flips, and the back gets the same small undercut once you know the band that goes underneath.
- Take the grid down. A semi-flat gouge on the back, then the number four, until the grid is about 3 mm (1/8 in) thick everywhere. Light pressure.
- Taper the bands on the inside. Remove those walls so only the edges show.
- Pencil, then knife. Mark the final line and fix the flow with the knife, in the few spots that need it, taking each the way the grain allows.
Frequently asked questions
How deep should the undercut be on a woven grid?
Three to five millimeters below the high point, on the Hashemi grid, and I said no more than 3/16 of an inch. With the V turned on its side, stop before the wall disappears, because the band still needs support underneath it.
Can a knife do the undercut instead of a V tool?
In spots where the grain ran the wrong way, I said I can get my results exactly the same with a knife. Mine is the same number 12 I used before, and its tip broke. I resharpened it, and I like it shorter.
Do you have to undercut the back of a carved lattice?
Strictly, no. I said the grid still would look nice without it, but I wanted better than nice, like true interweaving, and I could reach the back. On that side I laid the V tool flat again and made a small undercut. Every little bit helps the shadows.
What to carve next