
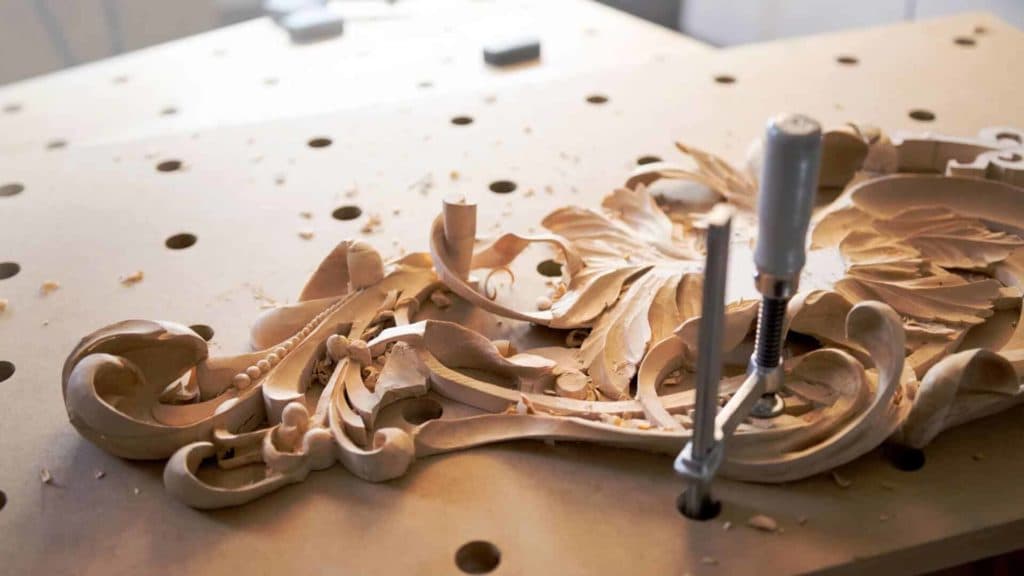
Alexander Grabovetskiy, woodcarver, School of Woodcarving · Published 2018
How do you carve beads and berries in relief?
Quick answer: Carving small berries on a relief panel is outlining each one with a V tool, taking the ground down on one side, and rounding the shape with a gouge. For depth, I set one berry deeper than its neighbor on my limewood Hashemi panel, and I said the small ridges can stay, because they catch the light.
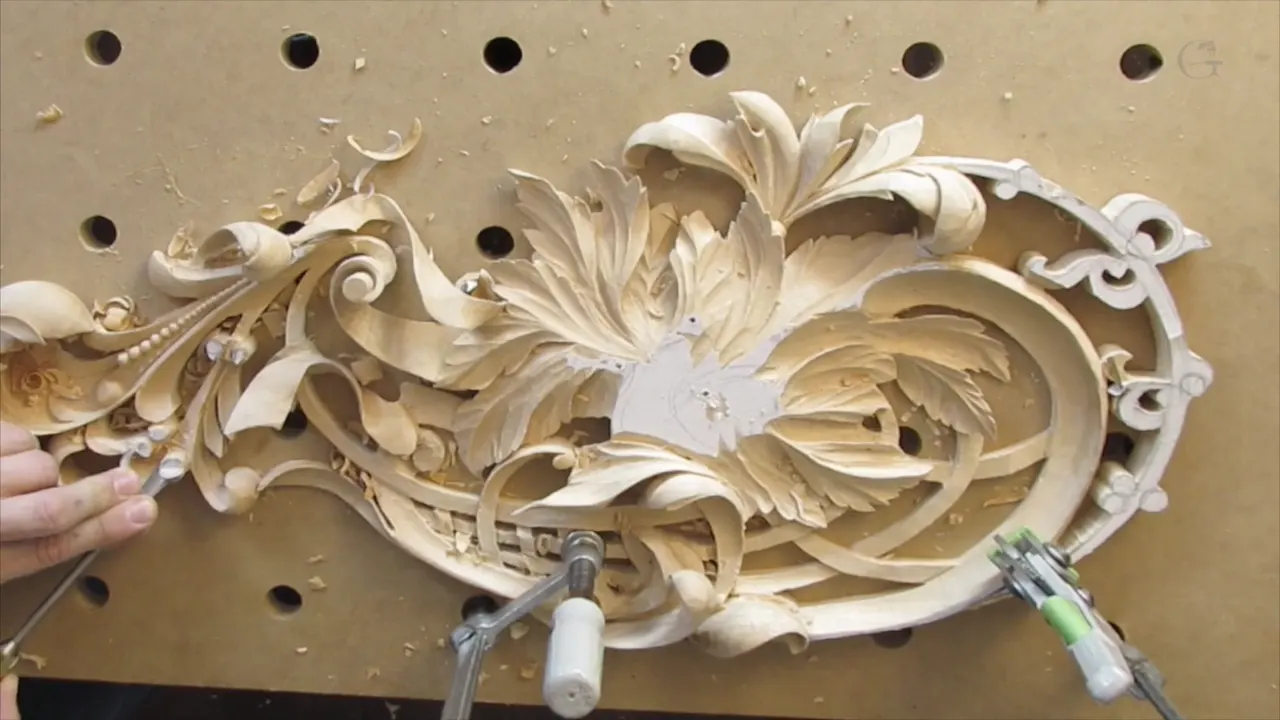
Carving berries and beads in relief is separating each small round shape from the leaves with a V tool, lowering the ground on one side, and rounding it with a gouge until it looks like a true sphere. That is the work of lesson 19 in my Carving Hashemi Flowers course, on the piece of limewood I showed you in the first lesson.
I wasn't even sure what to call them. "I don't know, could you call them berries?" I asked on camera, and then I said it's probably a legit name for those. Those small details make a world of difference. It just looks much better than just the leaves.
Have you ever picked a berry and turned it in your fingers? Did it look round? When you look closer, it isn't really round, as I said on a later berry in this course. A carved berry is the same. It has to look round, and it does not need to be perfect.
Below are the tools I picked up, in the order I picked them up, and the places where I changed my mind.
Beads and berries on the Hashemi panel, the short version
- A number 16 V tool, 6 mm (1/4 in), went around each future berry first.
- I used a small mallet, only 12 ounces (340 g), and barely hit it.
- One berry sits below its neighbor, for a three-dimensional look.
- The straight down cuts went in with very little pressure, since little support was left.
- The same gouge rounded them, ridges and all.

What do you call small round shapes in a leaf carving?
Berries is the word I settled on, and I kept doubting it. "I'm not sure if I can even call them berries, but they sure look like berries," I said in the third video. The fourth went further, and I said it's not really a berry, I don't know what it is. The row of small round shapes along the stem I call beads. Those were carved before this lesson, and while I rounded a berry I said the idea is the same as when we did those beads.
Two lessons earlier the idea had no home yet. In lesson 17 I said I wanted some interesting detail on the inside, like a berry, but I wasn't sure where to put it.
By lesson 23 it was two berries and one volute. A curl on the inside, in the architectural world, is called a volute. Sometimes I call it just a curl.

Which tool goes around a berry first?
A V tool. Mine was the number 16, the 6 mm one, and it made the separation cut around those future berries. Any V tool will work. I like this one because it is 35 degrees, not 45, so I can make deeper V cuts without hitting the sides. If you have 45 or even 60 degrees, it's still going to work.
Not every maker makes them at 35 degrees. Pfeil does, the one some of you call Swiss Made, and the card in that video says the same thing: number 16 is 35 degrees.
Then I picked up a mallet, a small one, just 12 ounces. I didn't want to overdo it, which is why I barely tapped it. "Now let's make a zipper right here," I said. After that I continued with my hand. Whether to use a rubber or a brass mallet is the question of lesson 8.
The V tool came first on the later berries too. Lesson 21 used the same number 16, 6 mm again, for the preliminary cuts. And on the last two berries, in lesson 25, I said it plainly: same approach, V tool first.


How low do you take the ground beside a berry?
Low, and lower on one side. In the first video one part was already low, and that meant the side next to it had to be really low too, going gradually upward and then downhill. I set my high point there and took a one-inch number 7 (25 mm) to remove the rest gradually. "I'm actually doing a sweeping move," I said. Keep an eye on that.
In video four I had the same number 7 in its 3/8 inch size (10 mm). I went around the future berries with it, then took this side down, almost to the same leaf. That way there's less to excavate underneath. Then, on camera, I doubted myself, because maybe I should excavate and make it more like a 3D look.
Direction matters too. That side goes downhill one way and this side goes downhill the other way, so the tool followed each of them. From the opposite direction I went against the grain, carefully, and removed the waste little by little.


Why does one berry sit lower than the next?
For a three-dimensional look. "The berries, they're not going to be on the same level," I said in the first video. One sits lower, another one higher.
The fifth video is where I made the choice. It's preliminary, I said, and I need to decide which one goes lower. I made this one lower and took it out. Looking straight at the piece, you can still detect it, but it is not as noticeable. Look from the side and you'll see the big difference. That is why I don't keep those details at the same height.
The same thinking ran through the later lessons. Lesson 23 put two berries lower than the volute, with a quarter-inch number 5 (6 mm), to give the volute some pop. Then three berries in lesson 24 looked too high for me, so I lowered them. That area is weak and really fragile, so I took a smaller tool. The smaller tool is safer.


The tools I picked up for these berries
Every tool here I named on camera in lesson 19, and three of the sizes come from the cards on screen.
| Tool and size | What it did on the berries | Which video |
|---|---|---|
| V tool #16, 6 mm (1/4 in) | Made the separation cut around the future berries | Video one |
| One-inch #7 (25 mm) | Swept the low side down, gradually, from my high point | Video one |
| Fishtail #8, quarter inch (6 mm) | Excavated inside the curl where I had little support | Video two |
| Smaller #7, 5/16 in (8 mm) | Blended it in, then went on with a lighter hand | Video three |
| Number 9, a quarter inch (6 mm) | Worked the end grain inside, not clean, so I switched | Video three |
| A #3 at 5/16 in (8 mm) | Blended those ridges before a #8 fixed my flow line | Video four |
| The #7 at 3/8 in (10 mm) | Went around the berries, then all the way straight down | Video four, twice |
| Dockyard #8, 1/8 in (3 mm) | Started removing waste once it felt tight | Midway, video four |
| Same #8 at 3/32 in (2.4 mm) | Removed most of the waste, carefully | Video five |
| Spoon gouge #3, about 5 mm (3/16 in) | Took the waste out before the #8 came back | Video five |
The number 7 came back in three sizes. For the last two berries of lesson 25 I used a 5/8 inch number 7 (16 mm) and told you it could be a different one, because more than one tool can get the same result. That's why I like to have multiple tools in my arsenal. Sometimes I get tired of using the same tool over and over.


How round should a carved berry be?
Round enough to pass for a true sphere. Back in the fifth video I went to the same 10 mm number 7 and rounded it around. The idea is still the same as with the beads, I said, just with the same tool. Get that around until it looks like it's a true sphere.
Five lessons later, on another berry, I said something that sounds like the opposite. They don't have to be perfectly round, I told you. They have to look round. Like in nature, you look at a berry and it looks round, but when you look closer, it's not really round. You can find all types of forms. I made those with a number 4, the 10 mm one, and when they came out too big, I came at them from the opposite side and made them a little smaller.
Both lines are mine, said on two different berries in the same course.


Should you sand the ridges off a carved berry?
On this panel my answer was no. You don't have to make it look absolutely perfect without any ridges, I said while I rounded these, because those small ridges create beauty. They look like small diamonds or precious stones. When the light hits every little ridge, it casts a shadow, and that creates the beautiful thing.
I said the same about facets in the Modern Acanthus course. They are like brush marks, and they make the piece like a piece of diamond, with different angles, so the light hits from different points and gives a different look. I have cleaned a piece to perfection, and it takes a lot longer than to carve it. Then it just looks like plastic.
On the Venetian flowers rosette I turned off the main lights and rotated it to show you from different points of view. Just like a diamond. Different looks from different sides, and I love it.
Nothing wrong with sanding, I said in lesson 24. It's a different culture and different traditions, and some customers ask me to make it really smooth and sand it. Some even paint over my carving. As long as they pay, I'm okay with that. Light sanding with Dutch reed should be fine too, because it doesn't take out those ridges. It just makes it smoother. But honestly, in my opinion, it looks better with tool marks.


How much pressure can a fragile berry take?
Very little. With the smaller number 7, the 8 mm one (5/16 inch), I said it twice: much less pressure, much less pressure. Later the number 7 at 10 mm went all the way straight down, like 90 degrees, and I warned you right there. Still don't create too much pressure. Don't forget, there's not much support we have left.
When it feels tight, change tools. If you feel like there's too much tension, it's better to take a smaller tool, clean inside, and then continue to work. I reached for a Dockyard number 8, and the card on screen says 1/8 inch (3 mm). That was a little too big, so I went to 3/32 (2.4 mm), which was better right between them.
The later berries asked for the same care. Lesson 25 was the same, and I told you I was barely creating any pressure, even if it is impossible to see on a camera. My pinky went right below for support in lesson 24. I can't press too much there. And during lesson 23 my hands stayed above the carving, with one finger down and nothing else. There is such a thing as air carving, I said, your hands in the air, like airbrushing.
One more thing, so you don't mix two of my courses. On a grape onlay none of my cuts are 90 degrees down, and every one is aiming toward the next grape. Those words were about a bunch of grapes. On these berries, the straight down cut is what I did, gently.


What do you do when part of a carving comes loose?
This time I left it unglued. A part of this panel had separated from the main part, and I wasn't too careful. I did that a few days before, when I was showing how to clamp it sideways. I noticed it and decided not to glue it. I could glue it back and connect it, but on the other hand, it doesn't have to be connected. It still moves on its own, so I can take it out, and I think it should be safe.
Working next to it was harder. With the one-inch number 7 I had to be careful not to break it, knowing I would undercut a little later. There's not much support, and it is wiggly. So I went to a smaller tool, a number 8 at a quarter inch, because I don't have much support. I could clamp it right there for more support. But a clamp would be in the way of the camera, and I don't want to block your view, so I didn't put one there.
That number 8 is a fishtail, by the way. Fishtail gouges have a separate name, but I still count this one as a straight gouge, because it's not much of a fishtail, especially this one.

When does a V tool need the strop?
In this lesson it came in the third video, right before I worked around the berries. "It looks like I need to strop my V-tool," I said. Then I stropped it just from the inside, with the leather and the green paste. I still like the green paste by Koch, a German brand, and I think it's one of the best, although other pastes are also going to work.
A stropping tool is a good idea to have, I said four lessons later. It's easy to attack the inside with it. And you can strop on the leather on the outside. Whether stropping rounds the edge of a tool is a question with its own page.

What to take to your own bench
Any V tool will work. When it binds, take a smaller tool and clean inside first, then go on. Keep the pressure low near weak spots. Your gouge can differ from mine, too, because more than one tool can do the same job. And ridges can stay on a berry.
One thing the camera caught that I could do nothing about. Somebody was mowing grass in my backyard, or some kind of landscaping, and I apologized for the noise. They always decide to do stuff like this when I'm filming. I think it's a law of whatever, Murphy, how you call it.

Lesson 19 is five short videos of this work, starting with the first V cut and ending as I went straight down with a number 3, and the whole course is inside the school.
How it's done
- Separate each berry first. Run a V tool around every future berry before any rounding at all, as I did using a number 16, the 6 mm one.
- Tap lightly, if at all. Use a small mallet and barely hit it, the way I did.
- Take one side down. Go almost to the leaf, and there's less to excavate underneath.
- Go smaller when it binds. Too much tension means a smaller tool, so clean inside first and then continue to work.
- Go straight down, gently. Ease off on each straight down cut, because little support is left by now.
- Pick the low berry. Decide which one goes lower and which one higher, then compare the pair from one side.
- Round it and keep the ridges. Go around with the same gouge until the berry reads round, and leave the small ridges on to catch the light.
Frequently asked questions
Do carved berries need to be perfectly round?
Mine only had to look round. On lesson 19 I worked them with one gouge until each looked like a true sphere, and I said there was no need to take off every small ridge. Five lessons later I added that a real berry sometimes looks round at first and is not quite round up close.
What size mallet works for small carved details?
A small one, used gently. Mine weighed 12 ounces, about 340 grams, and the taps were barely there, because I did not want to overdo the separation around those berries on my limewood Hashemi panel. After that I continued by hand.
Should every berry sit at the same height?
I set mine at different heights on purpose, one lower and one higher. From straight in front the change is hard to notice. From the side you see a big difference, and the group gets its three-dimensional look on the Hashemi panel.
What to carve next