
Alexander Grabovetskiy, woodcarver, School of Woodcarving · Published 2018
How do you read a flower carving pattern before you carve it?
Quick answer: Reading a relief flower pattern is a matter of asking what each shape becomes in the wood. On my Hashemi panel the round shapes become ground under the flowers, the scroll and ribbons take the high points, the wreath sinks below the leaves, and the flowers arrive on a second drawing.
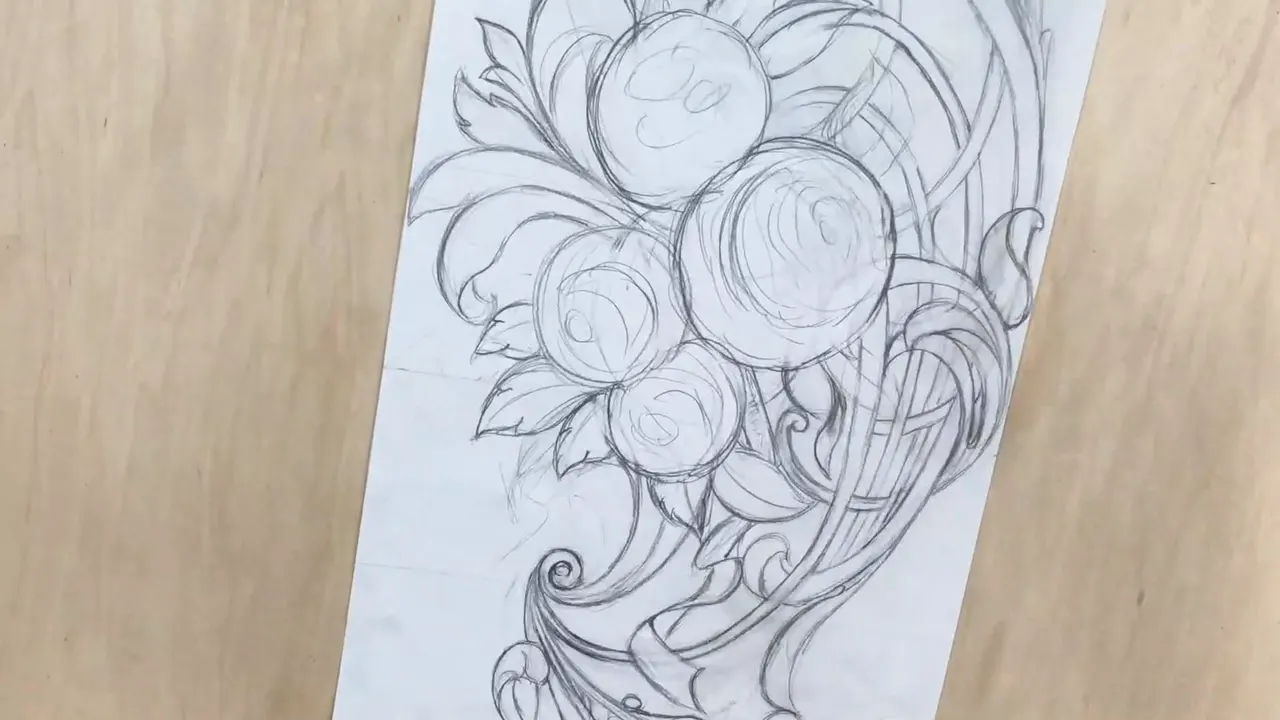
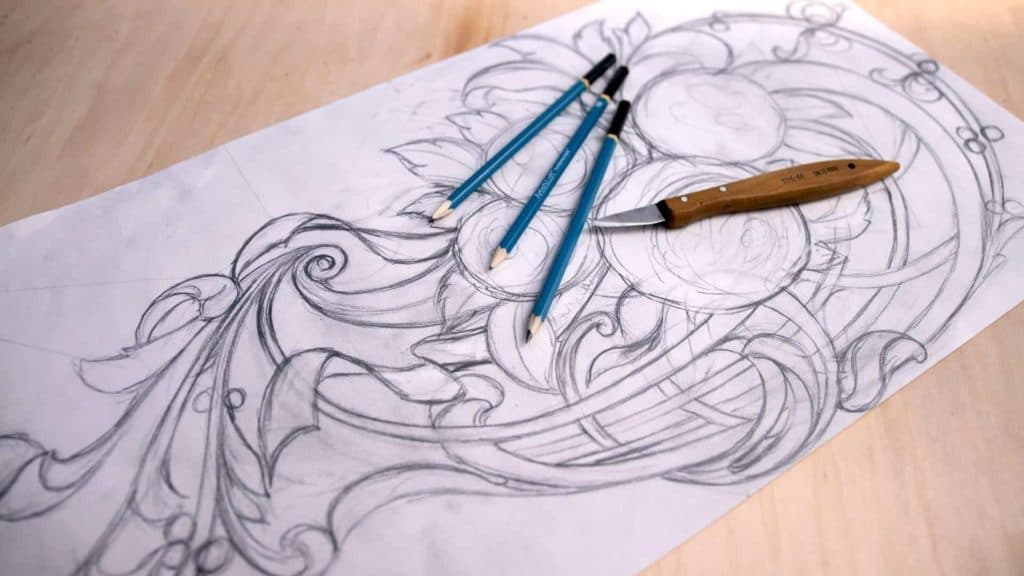
Reading a carving pattern for flowers means asking what each shape on the paper becomes once the wood has depth. My Hashemi flowers panel turns the round shapes into the ground under the flowers. The ribbons and the scroll take the high points, a wreath drops under the leaves, and the flowers come on a second drawing of their own. Flower wood carving patterns are flat paper. This panel ends up about four to six inches thick, roughly 100 to 150 mm, so every line on it has a job you can't see yet.
Would you like to know which circle is a flower and which is only the floor under it? Would it help to see which line stands tallest before your gouge touches the board? Then read this drawing with me, one shape at a time, the way it went on my bench across the whole Carving Hashemi Flowers course. You'll see what each part became, and the spots where I let the drawing go on purpose.
The Hashemi pattern in seven lines
This lesson gives you a one minute drawing film and two patterns, one per layer.
Round shapes mark the flowers, and on the first layer they become ground.
High points go to the scroll and the ribbons.
A wreath sinks below the leafage.
Which strap of the basket rides on top, I settled in pencil on the wood itself.
The second drawing goes with its biggest flower on your right.
I dropped one flip from a ribbon in lesson 14.
What comes with this pattern lesson?
Two patterns and a short film. When I got to the second layer, in lesson 27, I told you I had already uploaded it to the school, with the dimensions, in PDF format. Download the first layer and the second layer any time. The film on this page is the whole design being drawn in pencil, start to finish, in about a minute and without a word from me.
I drew it for a customer. He liked a bigger panel of mine, and he wanted something smaller, so we came to about 12 by 24 inches (305 by 610 mm), a little simpler than the big one. The board under the drawing is 7/8 of an inch, about 22 mm. That board is the first layer.
About another download, the pattern for my flower rosette, I said you should be able to print it at full scale, one to one, which means one inch equals one inch. The second Hashemi drawing came about another way. I took a picture of it and scaled it down, and it looks like I did that upside down. More on that below.

What the drawing film shows
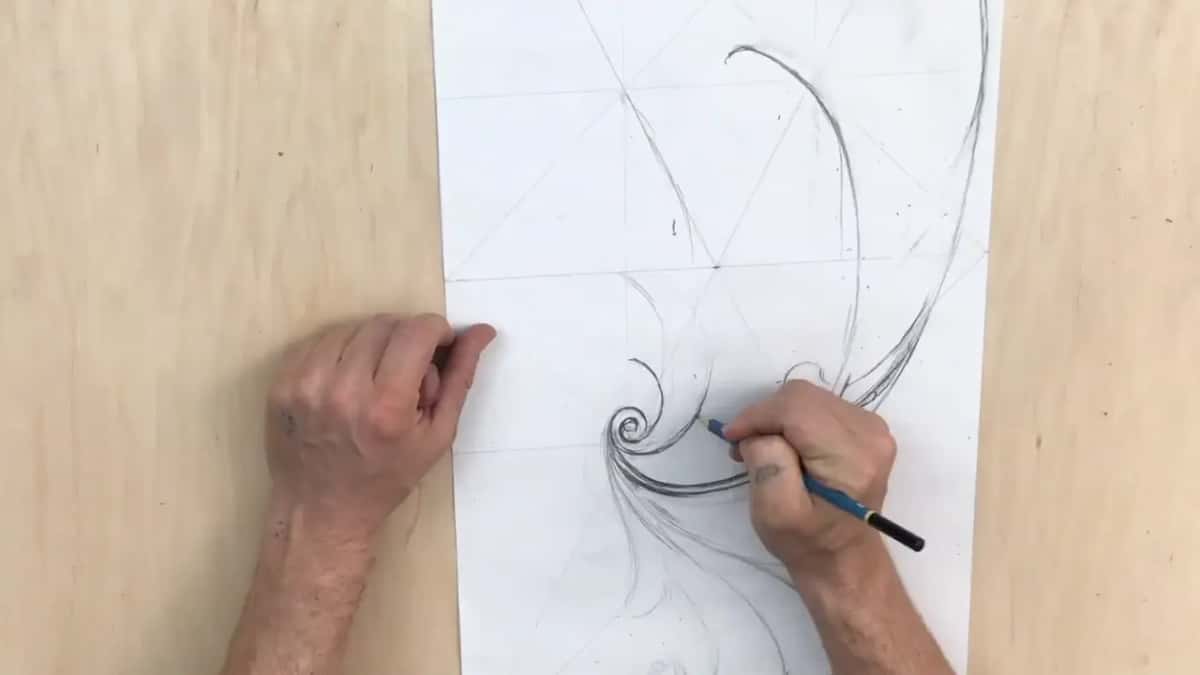
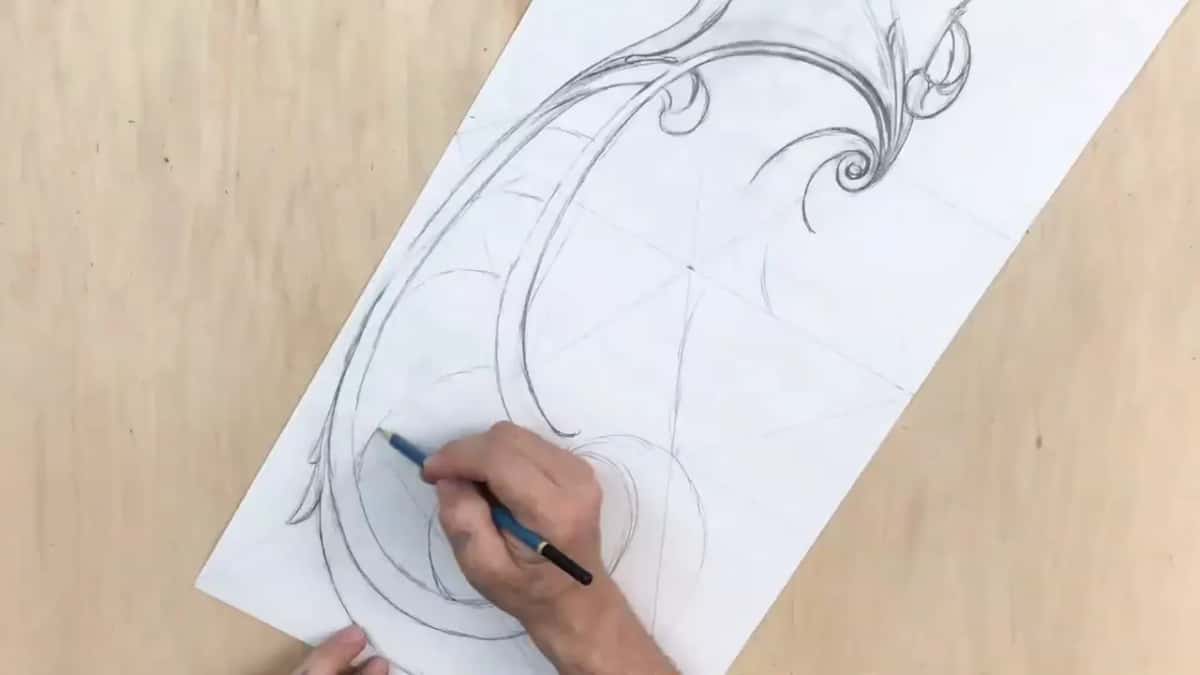
Two hands, a blue pencil and a pink eraser, filmed from above. The sheet starts out already ruled. Both diagonals run corner to corner, one line goes down the middle, and more lines split it in thirds each way, with a few extra running out from the corners.
Then the drawing grows on top of that grid. My left hand keeps the sheet flat, the eraser stays close by, and I turn the sheet as I go. Scrolls, long sweeping curves and the first plain rings come early, then the straps of the basket. The swirls inside the rings show up near the end. In the final seconds you can see all four flowers together, one big ring and three smaller ones around it.
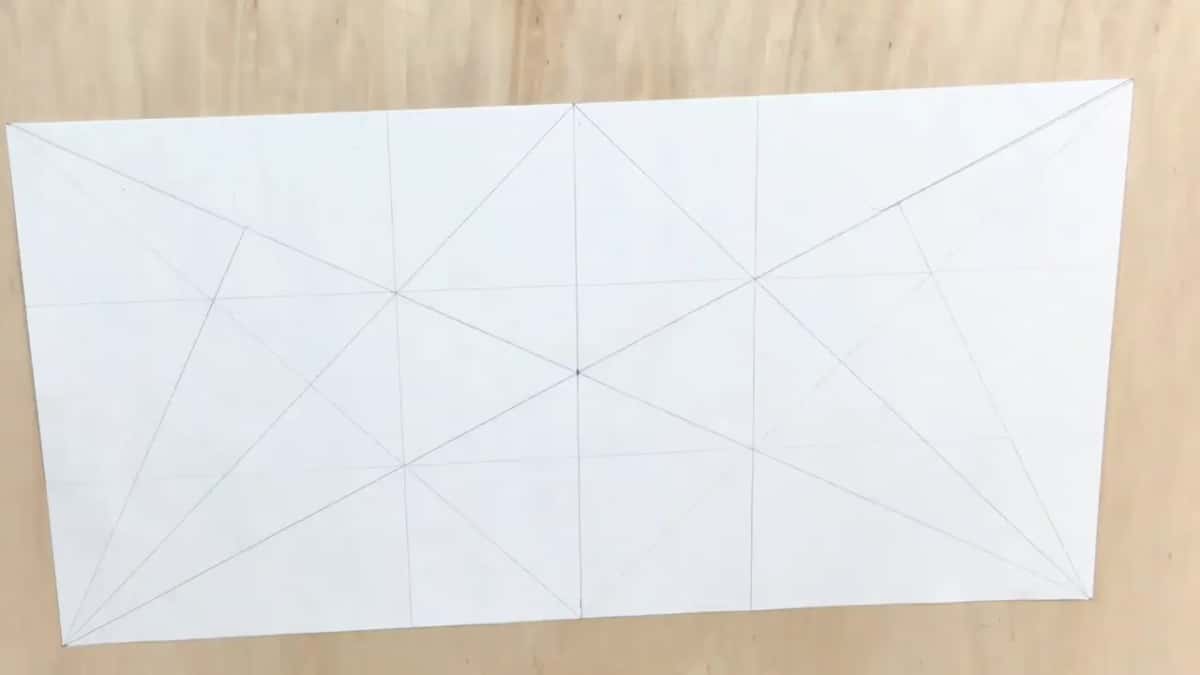
The film is silent. What I said while I carved this drawing, lesson by lesson, is where the rest of this page comes from, because some of it got decided only on the wood.
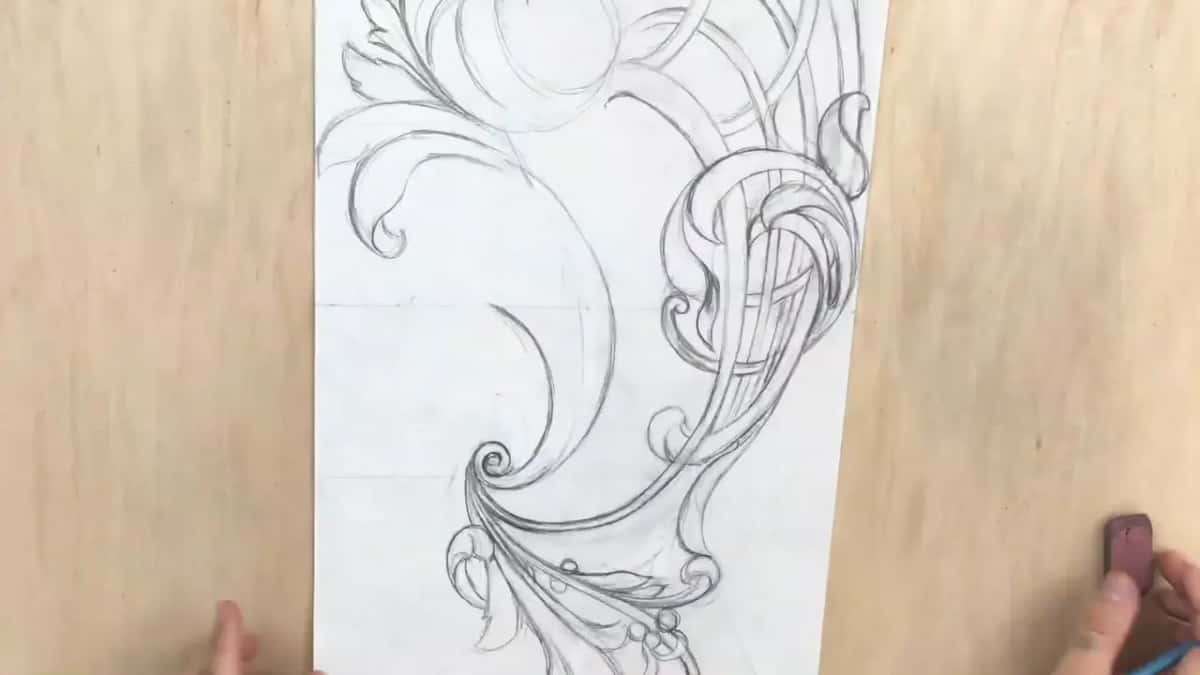
Why are the circles on this flower carving pattern not flowers?
They mark where each flower will sit, and on the first layer they turn into the ground under it. I said so in lesson 1. On my drawings those round parts are my flower positions, but really, that's just the background of the flowers. The flowers themselves go a level higher.
Under each ring I still carved some leafage. Most of it gets covered later, but you still catch it from the side, and the whole panel looks much better for it.
So each of the four rings on the paper stands for two things stacked. Down low, a floor with leaves around it. Up high, on a different block of wood, the flower itself.
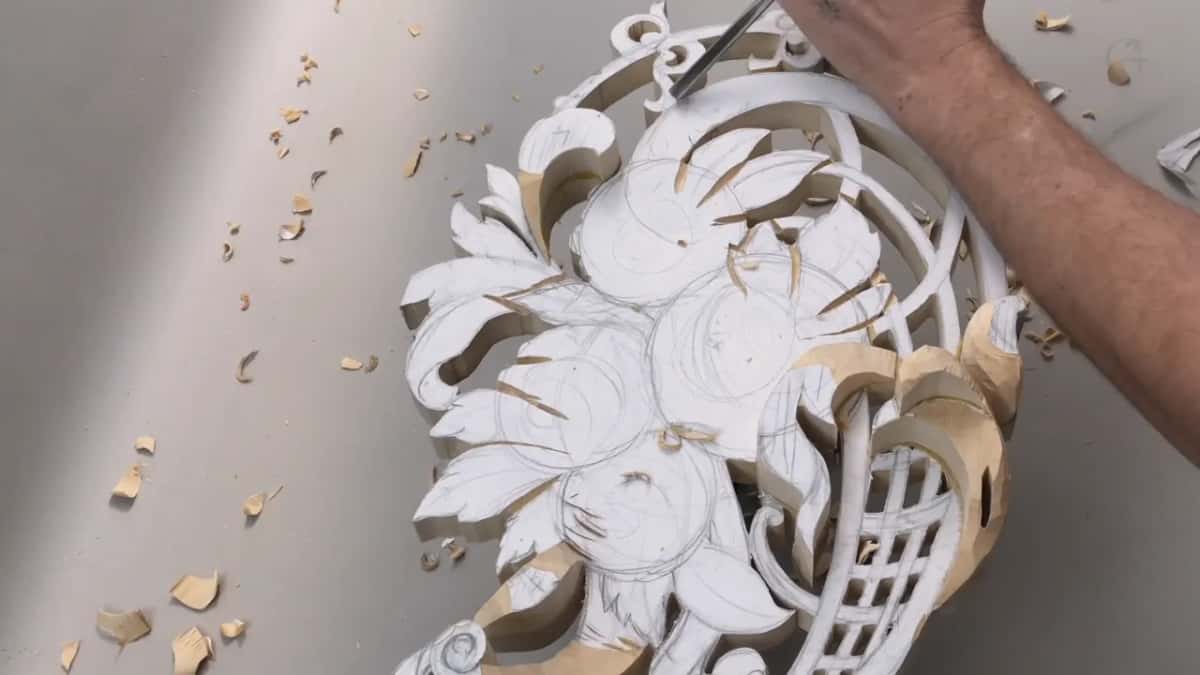
Which lines stand highest on the panel?
Two shapes, the scroll and the ribbons. Before I carved anything in lesson 1, I glued a third layer onto just a couple of spots, the scroll and one more spot, because those were going to be my high points. Then, with the gouge already working, I picked the middle of one ribbon as another high spot I wanted to keep. Lesson 2 brought the same words about a ribbon. I want to make sure this ribbon stays my top spot, I said.
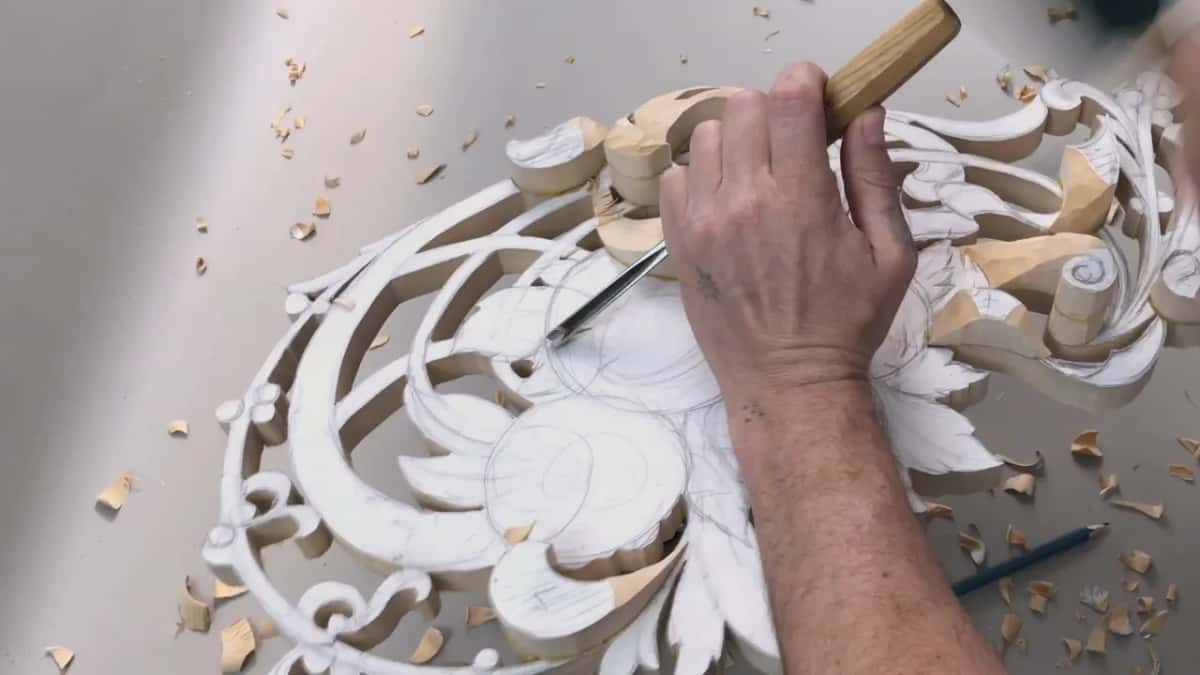
The paper keeps telling you where you stand. While a scrap of the pattern is still on top of a spot, I haven't taken that height away. My paper is still there, I told you in lesson 6, so I still kept my high point. Lesson 15 had one more scrap. This paper is my high point, I said.
The wood under all that paper was a beautiful piece of limewood. I'd had it for over ten years, I believe, and it had gone a rich, darker color. Almost pinkish.
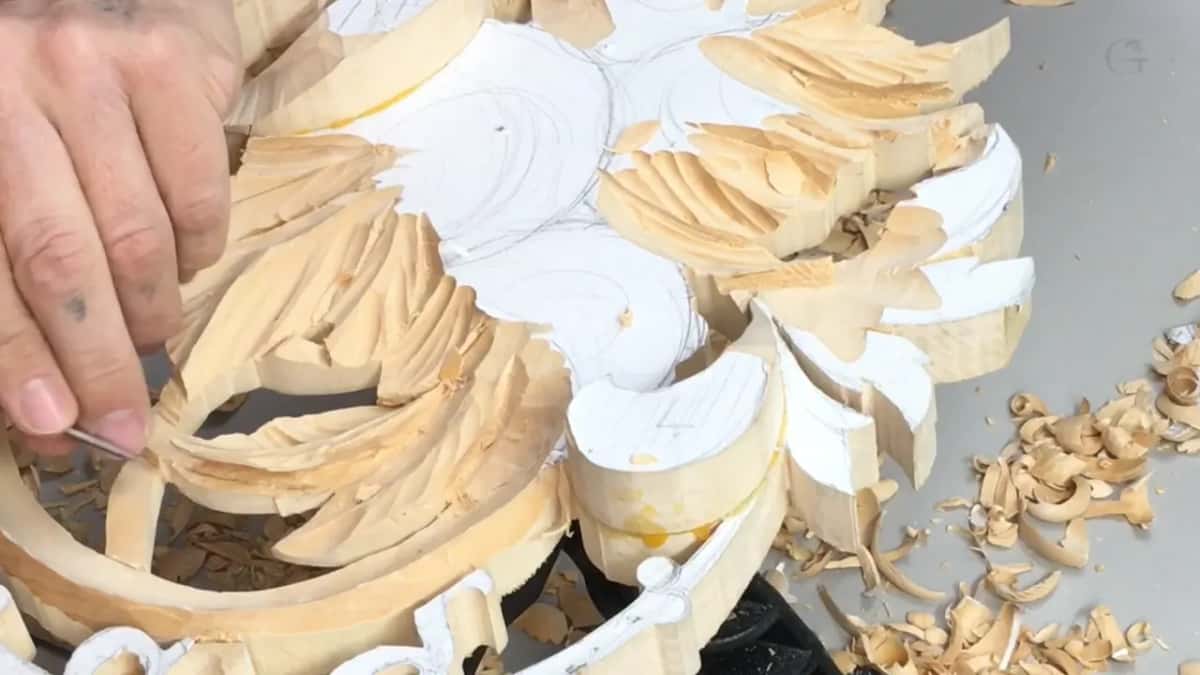
Where does the wreath go?
Below the leaves. I started to lower my wreath in lesson 1, and I was honest with you. I didn't remember exactly how I wanted to do it. One thing I knew for sure. It was going right below.
A few minutes later I said it plainly, with the V tool in my hand: that wreath will sit below those leaves, and that creates more of a 3D look.

Does the paper decide the basket's weave?
I did, with a pencil, on the wood. Which strap goes over and which goes under got settled there. Part of this design actually goes above the grid, I said in lesson 2. Call it grid, call it basket, whatever is more convenient for you.
Pencil marks went right on the board in lesson 5, and I asked myself how I was going to divide it. After that I decided which strap rides above and which goes below, and I liked it. How that weave gets its shadow is on the page for lesson 26.
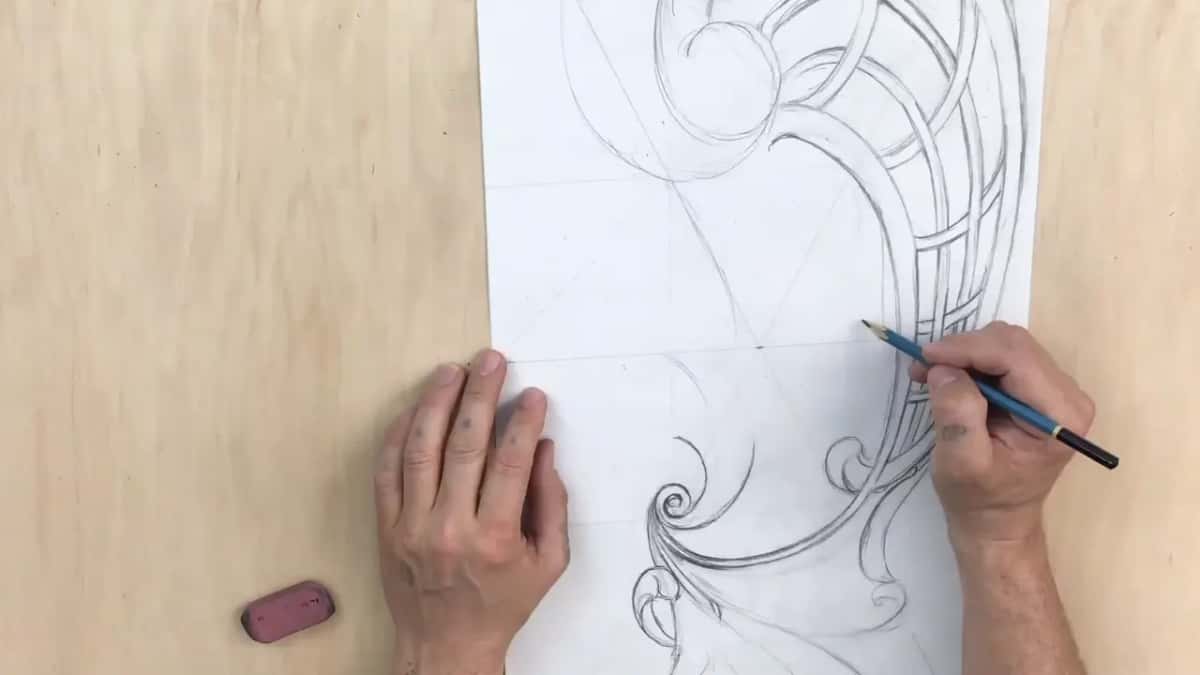
What happened to the ribbon?
It got a high spot and a name. Two ribbons run through this design. The name Hashemi goes on one of them later, and you can always put your own name there instead.
Its shape moved, though. Back in lesson 13 I called what I had just preliminary, only how the ribbon is going to move. Then in lesson 14 I made a little change to one ribbon. No extra flip, I said, otherwise it would just get lost to small details. So it goes uphill, downhill, flips, and comes back.
The ribbon also passes under things. This ribbon part, I mentioned in lesson 2, was going to go from underneath a leaf, and that would create even more of a three-dimensional look.
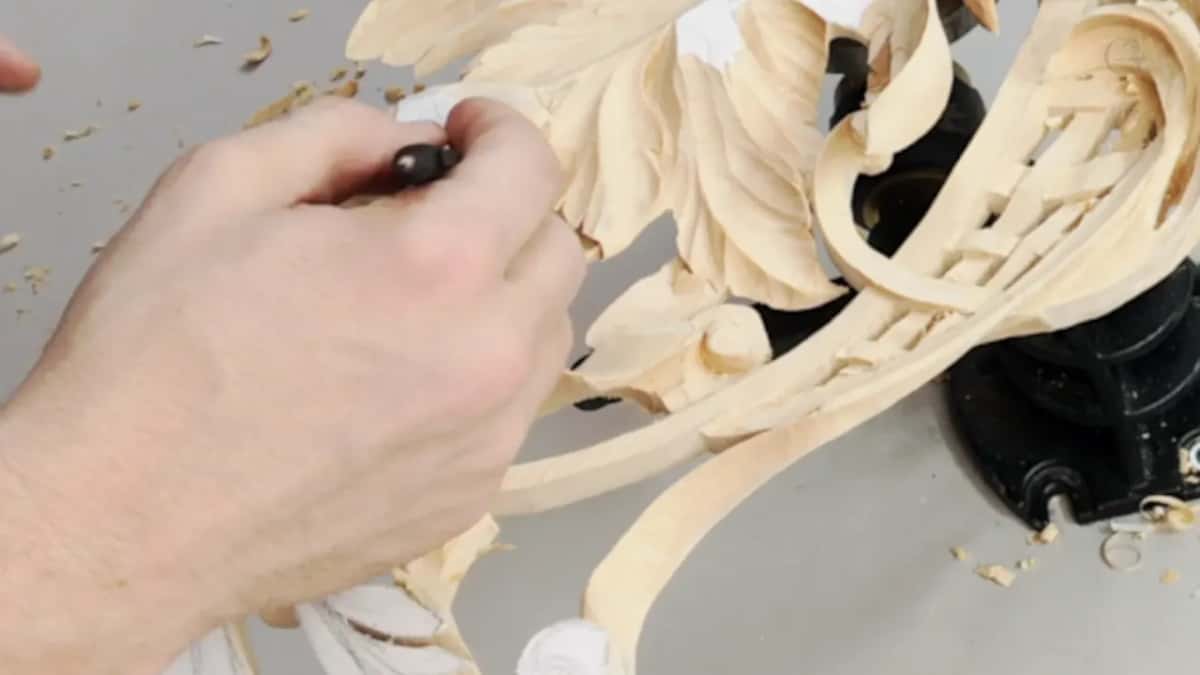
How should the second drawing sit?
With the biggest flower on your right-hand side as you look at the piece. I told you that in lesson 27, right after I noticed my picture looked upside down. Make sure of it when you download that drawing.
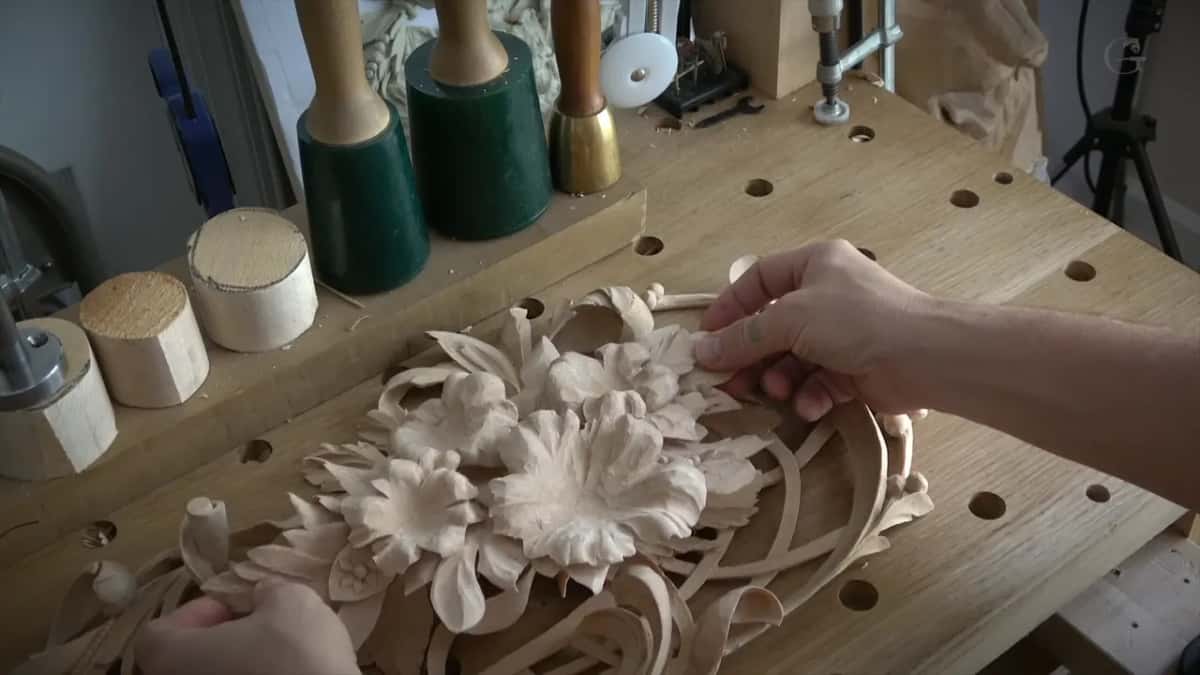
There are four flowers on it, the biggest one and three smaller ones, and all four are a little different in size. One of them is a peony. The blank for this layer was eight quarter stock, one inch and 15/16 after planing, about 49 mm, roughly 13 inches tall and 7.25 wide, which is about 330 by 184 mm.
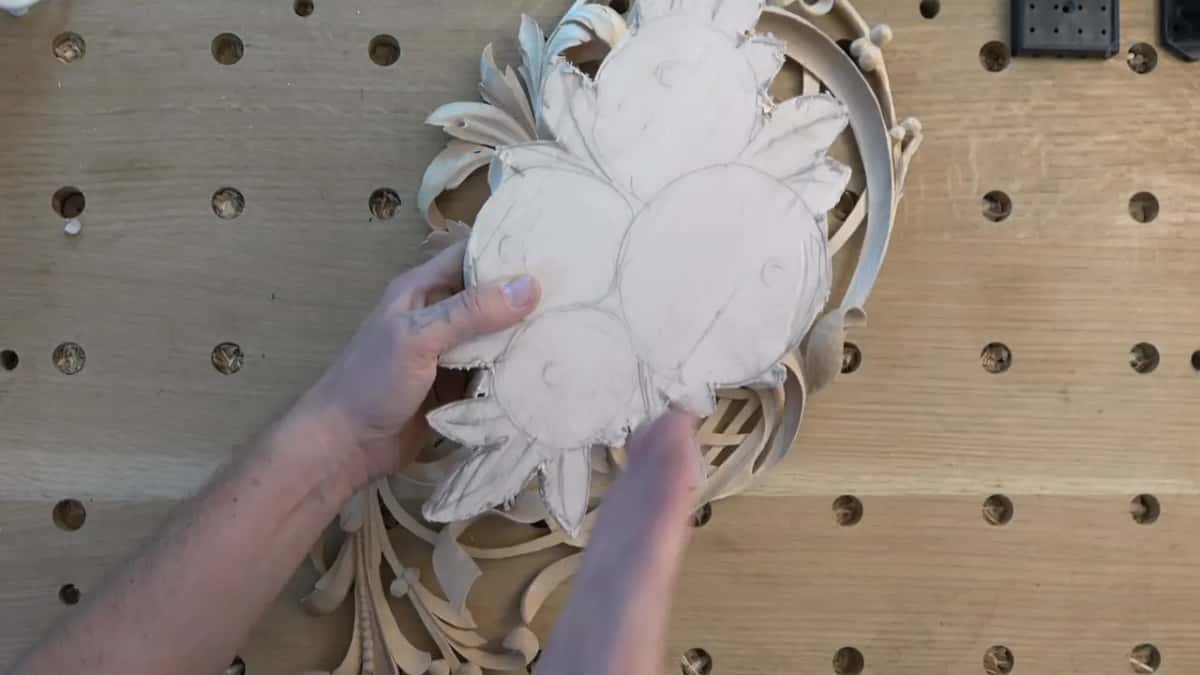
Once that layer sat flat on the first one, I marked on it which direction each flower should face and where each center sits. Based on those marks I dug every flower a bowl shaped socket.

Later, off camera, I glued the second layer on top of the first so I could see the whole arrangement before any final cleaning. You'll find that in lesson 49.
What do you still draw on the flower blocks?
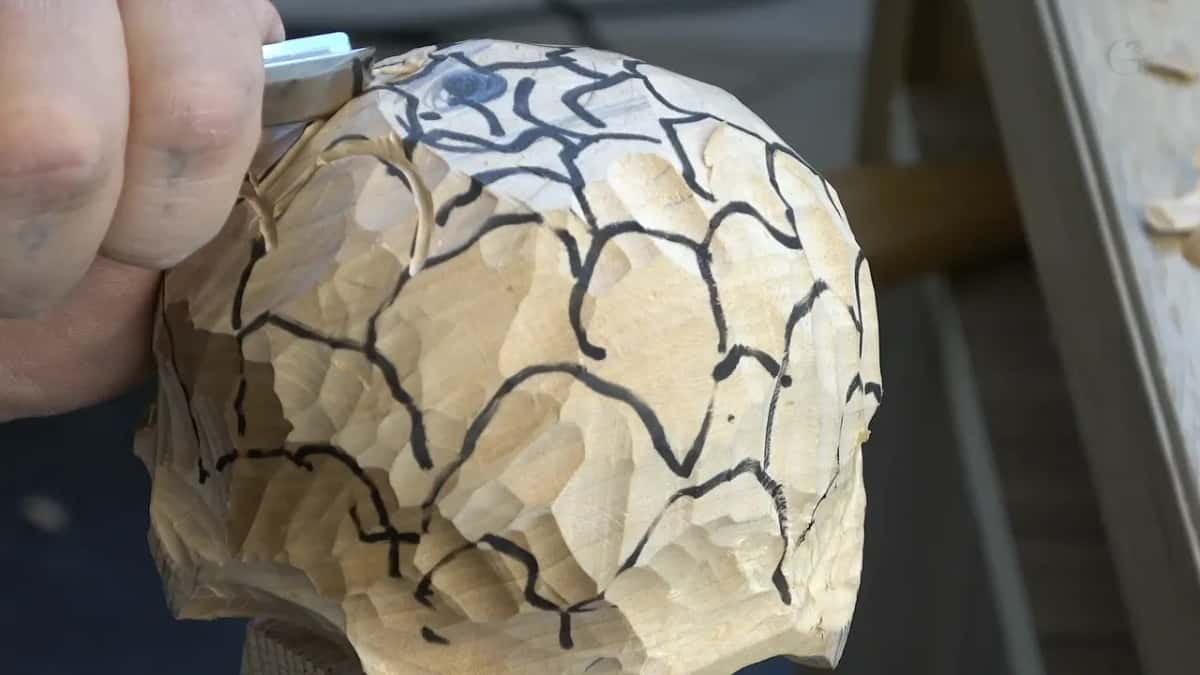
The petals. I drew the petals of the peony on the block itself, in lesson 43. I used a marker only because I was filming. I'd rather you use a pencil, I said, and then took half of that back, since pencil isn't the best idea either. Your piece gets really dirty after too much of it. A V tool works as a marking tool too, and a few passes with it show you all the divisions.
Draw the petals as wavy as you can, never a true arc, some of them bigger and some smaller. Then follow whatever you drew with the V tool. If that's almost impossible for you, don't worry about it. You can always fix the movements later.
Where did the panel leave the drawing?
In at least four places, and each time I said it out loud. In lesson 9 I'd said I didn't want to go lower than my original board. Then I changed my mind. I think I could, I said, as long as I'm not at the same level as the main grid, because it will look more 3D. A bigger number 8 or 9 went in deeper.
Back in lesson 6, undercutting the basket beneath those leaves, I'd warned you that later I would have to redesign the main movement of the basket, the part hidden underneath. And on a flower in lesson 48 I looked at two of its parts and said that originally, I think, I wanted a movement like that. This one goes on top of that one, and I'm okay with that, though it's a little challenging.

With the flowers I wasn't measuring anything. My goal, as I said in lesson 29, was to make them look as close as possible to nature and still be more or less accurate to my design. If I'm off a little bit, I'm okay. Earlier, in lesson 6, finding the middle line of some leaves, I said I was just eyeballing it. We are doing flowers, and if there are some inconsistencies, it should not be a problem.
Shape on paper | What it turned into on my panel | Lesson number | The reason I gave on camera |
|---|---|---|---|
Round flower shapes | Ground under each flower, not the flower | Lesson one | flowers go a level higher above |
Point on scroll | Third layer glued on, the tallest spot | Same lesson | I wanted the panel highest there |
The drawn wreath | Dropped under the leaves for more depth | First lesson | it creates a more 3D look |
One drawn ribbon | Lost its extra flip, uphill, downhill, return | Lesson fourteen | it gets lost to small details |
Basket's hidden movement | To be redesigned later, below the leafage | Lesson six | it is hidden underneath the leaves |
Area beside basket | Carved deeper than the original board face | Lesson nine | I think it looks more 3D |
Second layer drawing | Biggest flower turned to the right side | Lesson twenty-seven | the scaled picture looked upside down |
Even losing the drawing didn't scare me. I almost lost my original design in lesson 6, and I told you I wasn't that worried. I can always reestablish it. And near the very end, in lesson 49, I said it to you straight. I know it's impossible to repeat exactly what I'm doing.
Getting the first drawing onto the board
Lesson 1 is where the first drawing meets the wood and the wood carving begins. I glued it to the board with photo mount glue, the kind used for photos, and it is really mild, so it leaves no residue on top and the paper still comes off easily. Next it went on the scroll saw. I scrolled around the lines and kept every offcut, because there's not going to be any waste.
After that I peeled the paper off and laid it back down on an offcut. Draw the direction of the grain on it, match that grain, and get the color as close as you can. That is how the drawing climbs into a second and a third level of relief.
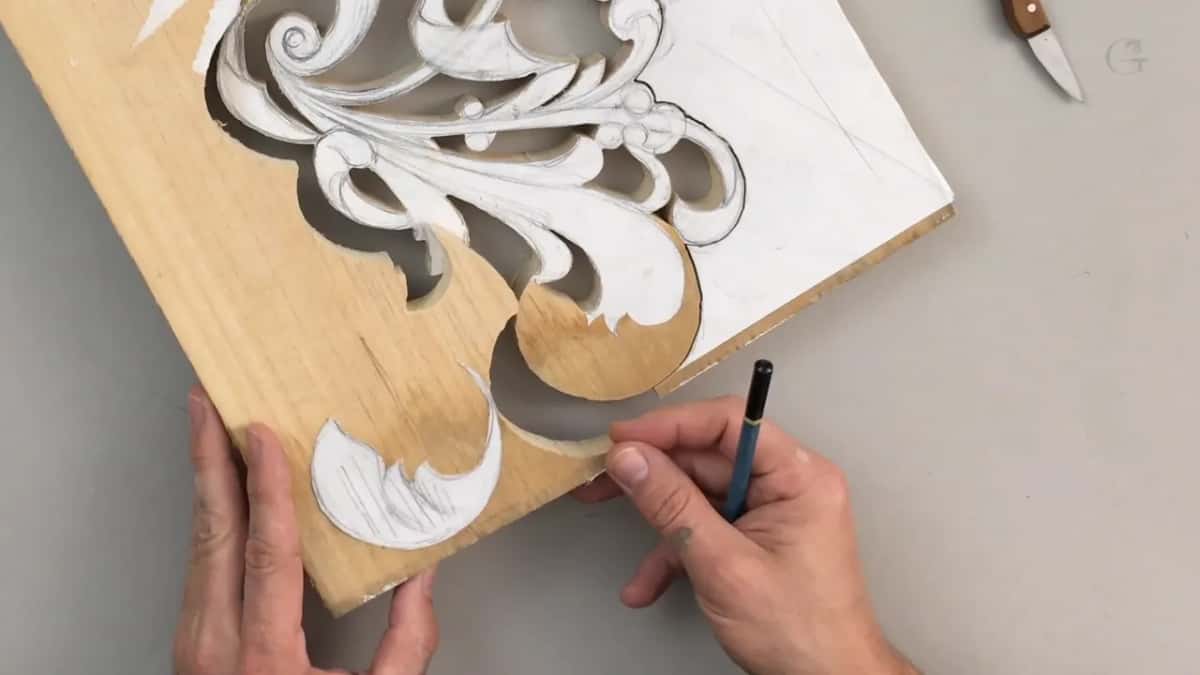
Too close to the line for comfort? You can step away about a sixteenth of an inch, about 1.6 mm, or an eighth, about 3 mm. It's safer, I said, and that's a fact. Me, I felt okay and comfortable working right on the line.
Do you have the drawing open now? Can you find the scroll, both ribbons and the four rings? Then you're ready for lesson 1, where the glued layers meet the gouge. The whole course is on the Tuition page.
How it's done
- Download both drawings. Get both the first and the second layer. I put both up as PDF files with their dimensions.
- Find the high points. Find the scroll first, then the middle of a ribbon. They carried the tallest wood on my panel, with a third layer glued on at the scroll.
- Treat each ring as ground. A ring marks where a flower sits. Down on the first layer it becomes the floor under that flower, with leaves below.
- Sink the wreath. Take it lower than the leafage around it.
- Settle the basket on the board. Pencil which strap goes over and which goes under on the wood itself, as I did in lesson 5.
- Turn the second drawing. Set it with the biggest flower to your right.
- Mark directions and centers. Show on the second layer which way each flower faces and where its middle is. Each bowl shaped socket gets dug from those marks.
Frequently asked questions
Which drawings come in the Hashemi pattern download?
Two, by my own words on camera: the first layer and the second layer. Lesson 27 is where I said I had put them up in PDF format with the dimensions. The lesson page also carries a one minute film of the whole design going down in pencil.
Is the second layer drawing upside down?
Mine looks that way. I took a picture of the drawing, scaled it down, and it came out like that. Rotate the sheet until the biggest flower sits on the right-hand side as you look at the piece, the way I told you in lesson 27.
Are the circles on the pattern the flowers?
On the first layer, no flower lives there. Each circle is ground the flower will sit on, a level lower than the flower itself, which comes on its own block. Under every ring I carved some leafage anyway, and you mostly see it from the side.
What to carve next