
Alexander Grabovetskiy, woodcarver, School of Woodcarving · Published 2018
How do you attach a carved flower to a panel?
Quick answer: Attaching a carved flower to a panel is done with a hidden joint. In lesson 27 of the Hashemi course I carve a bowl-looking socket in the flower, drill through its middle and put in a screw or a wood dowel. The middle of the flower, carved from a separate piece, goes in on top and hides it.
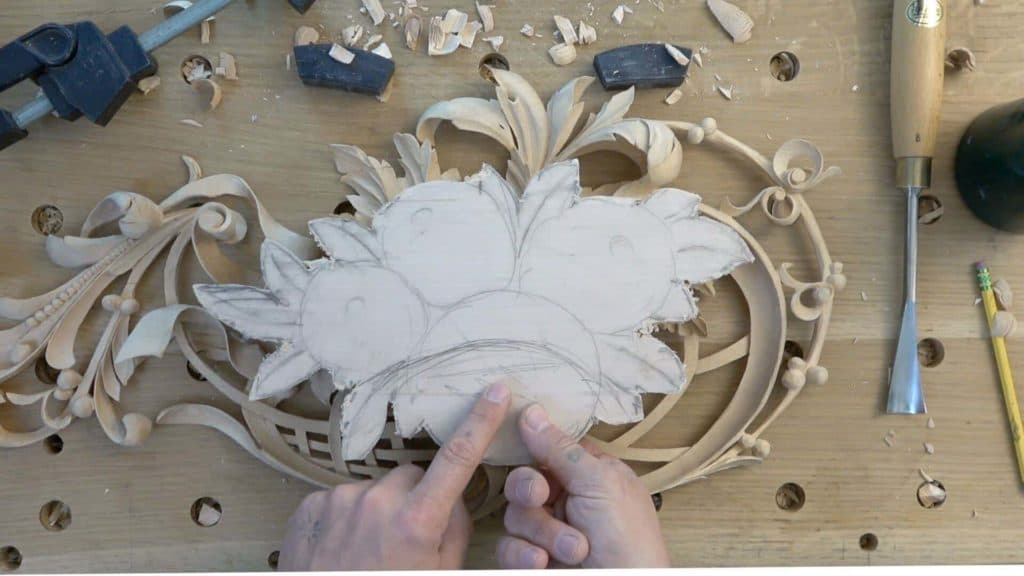
Fixing a carved flower onto a panel is a job for a hidden socket and a dowel or screw. In lesson 27 of my Hashemi flowers course I gave the main approaches for the second layer, at least three as I know, and the third one is what I took for this carving. Each flower gets a socket. I drill a hole through its middle and put in a screw or a dowel, and then the middle of the flower, carved from a separate piece, goes inside.
Have you seen flowers carved high on a panel? Did they look solid? That is what I was after here. It's going to look like just a really solid piece, I said on camera, but that way we can hide the connection points.
Below is how I planned it, and how I dug out the blank's backside until it sat flat on the first layer, all before a single petal got carved.

Attaching a carved flower on this panel, in five lines
- Three layers on this project, altogether.
- The second layer is an 8-quarter piece, 1 15/16 inches (49 mm) once planed.
- Its back gets dug out first, so it sits flat.
- Each flower gets a bowl-looking socket, drilled through the middle for a dowel or screw.
- A separate middle covers it.
What are the three ways to build the second layer?
Three main approaches, at least, as I know them, for the flowers on the second layer and maybe even the third. The first one takes a solid piece four inches (about 100 mm) tall. That's 16 quarters, so double the size of my board, and you carve the whole thing from that single block and then attach it to the first layer.
The second approach is to carve all the leafage and all the flowers separately, and I've done it also. It actually looks beautiful when you take one flower, carve it, and then apply it. That was done in the 18th and 19th century too, on carvings you can find in some really beautiful palaces.
The third approach is the one I took for this carving. Sockets. I'm not sure what's the better term to use, I said.
| The building method | What I said about it in lesson 27 | What else I said |
|---|---|---|
| One solid block | Four inches tall, 16 quarters, double the board | Then it gets attached |
| Separate applied pieces | Every leaf and flower carved apart, then applied | Seen in beautiful palaces |
| Sockets with inserts | Hollow inside, drill through, then screw or dowel | My choice this time |

Why not carve it all from one block?
I only gave the size of that block in this lesson. The reason came later, in lesson 42, when the main parts of the flowers went into the sockets we created. One flower there is kind of high, and I said I would have to have a six-and-a-half-inch thick block (165 mm), and there's no reason.
It would be really hard for me to reach the areas inside. Really hard to undercut, too. For those inserts I took two different sizes, an 8-quarter board and a 16-quarter one, and the thick block came out at about three inches and 5/8 (92 mm), so not exactly four inches. Because we created the sockets, I can easily use just blocks of wood, and the socket is kind of deep, so approximately one inch (25 mm) of the insert goes in.

What size is the board for the second layer?
I took an 8-quarter piece of material, which is approximately two inches. To be exact, one inch and 15/16 after I planed everything (49 mm). The size of it is approximately 13 inches tall and about 7.25 inches wide, which in the metric system would be about 330 millimeters tall and about 184 millimeters wide.
I uploaded the drawings of both layers to the school, with the dimensions, in PDF format. You can always download the first layer and the second layer. Just be careful with my picture, because it looks like I did that one upside down. The biggest flower goes on the right-hand side if you look at the piece.

What is a socket on a carved flower?
A hollow inside the flower, a bowl-looking socket, if you wish to call it that. Every flower has layers too. The first layer usually goes backwards, so it's like a ring of petals falling downward, and then the rest of them falling upward.
So I create the sockets on the inside. I take a gouge and carve it out, and then I drill through those sockets right in the middle.

I did the same thing on the Venice Room. There I called it the lower layer with the socket, with just a hollow, almost like a bowl carving. My number 11 at 10 millimeters (3/8 in) made the first excavations, and then a big number 9, three-quarters of an inch (19 mm), excavated the socket to receive my middle part.
I have to be really mindful how deep I'm going, I said, because there's not too much material left. And I needed some space for the second layer, because the second layer gets doweled down on the inside. Off camera I did those inserts the way I did them on the Hashemi flowers. I carved just the outside ring, then the insert, and that insert just goes inside the socket.
Screw or dowel, which one holds the flower?
Either one. You can use a screw, or you can use a dowel, just a wood dowel like they would use in the 19th century and the 18th century. Then the flower's middle, carved from its own piece, goes in on top, and the dowels or screws stay hidden.
And they did use screws. Even Grinling Gibbons, the greatest of the greatest carvers, used screws, I said in this lesson, and he had no problem with that.

My Byzantine acanthus class heard much the same about dowels. When you look at a piece like that, it looks solid, like it's done from a solid piece. You won't even detect it, and you can just take it apart. And like I mentioned before in that class, Byzantine used dowels.
High relief, I said there. We were using just three-quarters of an inch on top (19 mm), but most of the time it would be thicker, two inches (51 mm) for the upper layer, and that gives a bigger head.
Do you glue the flower as well?
Yes, this one gets glued too. I had to take some material off its backside, to make sure it's flat on the area where it will be glued.
By the way, I decided to glue my second layer right away, I said in lesson 49. Later on, I said, I'm going to put the dowels right through, and it's going to reinforce it.
The lily box got the same idea. I planned to carve its central part separately and glue it in, because I needed that space later on to drill through and connect it with some kind of dowel to the main surface. Then we can cover that dowel. A lesson later I said I would drill the hole, put the dowel in, and cover it with the second part. I want to make it invisible.
The Venice Room had one too. In its third lesson I said one flower was going to be my gluing point and dowel point.

Why hollow the back of the second layer first?
I want it to fit perfectly, and for that I have to work on the backside first. Parts of the first layer are in my way, this piece and that piece. I know it's not going to be as visible as some people would love, but when you look from the side, you will see that.
So approximately, and I don't have to be exact, I have to dig out almost half of the flower on the backside of it. The approach, I said, would be exactly the same.

How deep does the hollow behind the flower go?
Almost an inch and a quarter deep (32 mm), I would say. I'll check that and double-check it, I said on camera, but this chunk has to be gone.
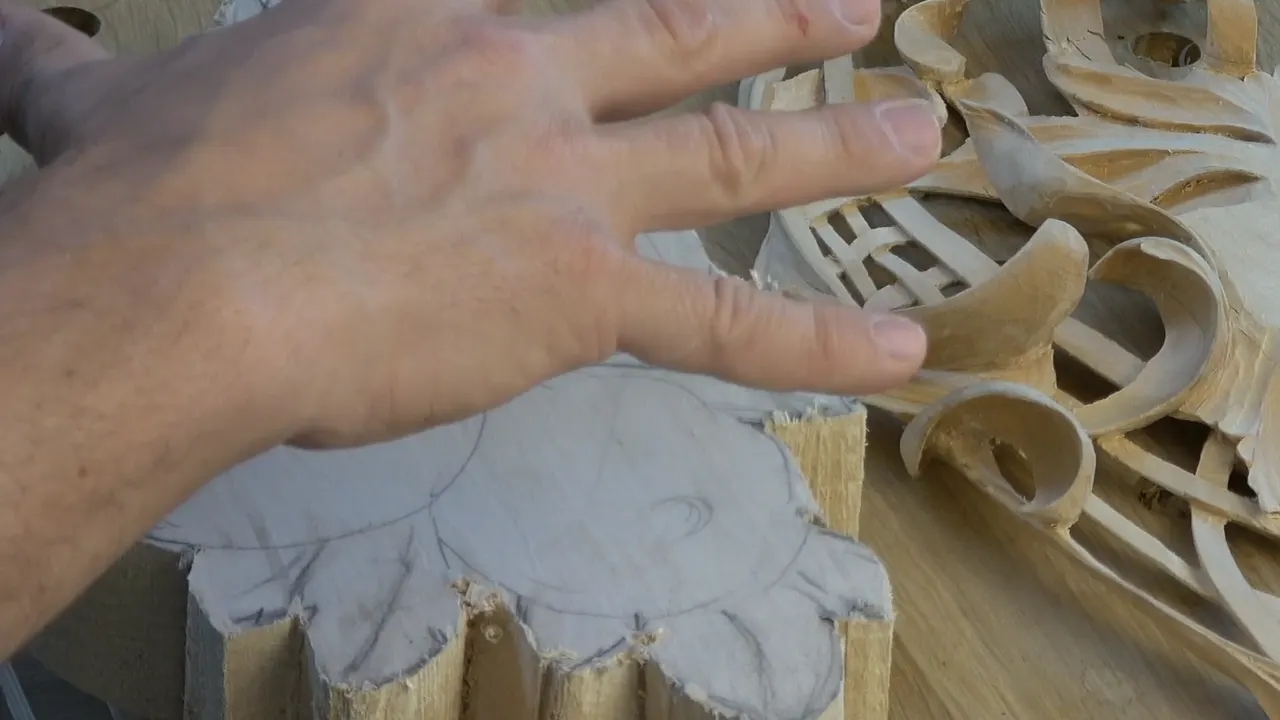
Then came the checking. I took the piece over to the first layer to see if it fits or not, again and again, and more than once I found another spot. Mark that down, I said, and mark this down. One more I took off just in case, and another one had to come down too before the next check.

Which gouge digs out the waste?
Any big gouge. A number eight or a number nine will do it, and the one in my hand was a number eight, about one inch (25 mm). I could actually use even bigger than that, a number seven and a huge three inches (76 mm).

Should you carve along the grain or across it?
Both, depending on the spot. You could go along the grain, and I feel comfortable doing it there, because there's a lot of material we need to take out. But be careful in areas like this one. This is the weak spot.
I cut that outline with a jigsaw. Any of them works, I said, jigsaw, bandsaw or scroll saw, to cut around the material. In one spot it would not be smart for me to hit it with the grain as well, because it can break somewhere right there. That piece I had to approach differently.
See? That's what I was afraid of, I said a moment later, but I still have plenty of the material. Definitely safer would be to get across the grain, just like that.
One part looked too fragile in the last video. The right way, I said, the correct way. And by the way, it's always safer to do that across the grain. Then I took that bit by hand.

What holds the blank still while you dig into it?
On the workbench, with my clamps. I can just use the workbench to dig this out, I said, and it would be easy enough. Then I cleaned those holes in the bench.
And if you have a question why I didn't drill them all the way through, I could, and maybe should. But this workbench top is only two inches thick (51 mm), I've got multiple holes, and I didn't want to make it weaker. For me, I thought it would be more stable if I just drilled them partway. Maybe I'm just trying to be overprotective.
I think, what's the best way to clamp that? Those were my words out loud, and a few seconds later it was solid enough.

How do you know the fit is right?
And yes, definitely they're not going to go all the way, I said, so later on we'll make it a nicer shape. For now the goal was to fit it on the first layer. It was almost there, with one spot I had to take care of.
Then it fits actually perfectly. So it's a solid laying on the first layer, and that was enough from the backside as of now. Of course, once I establish all the shapes, I will refine it.

What does a good fit tell you about the flowers?
I know exactly what I've got left now, the material for this flower and how much I've got on those flowers. So I can lower one side a little bit, and the other one becomes my higher spot. A little lower spot gets the smaller flowers.
I also indicated the direction of those flowers, how they're supposed to look, and the centers of the flowers. Based on that I'm going to dig my hollow spot, the bowl-looking socket. Lesson 28 is where I went on to dig out inside each of those flowers.
What about the first layer underneath?
Off camera I under-carved it from the backside, wherever I found a wall on the carving. There was nothing exciting about it, and I don't think you need instruction for that. Just attack that from underneath. It does look a little rough there, which is absolutely fine.
After that it's details, and that's up to you now, how far you want to take it and how nice you want to see it. Like I said, I do like this project left a little rougher. I worked from the back of this panel in lesson 4 too, and it's the limewood I showed in lesson 1.

All three videos of lesson 27, and the whole Hashemi panel, come with tuition at the school. Lesson 26 comes right before this one, and lesson 27 ends with the second layer dug out underneath and the flower centers marked.
How it's done
- Under-carve the first layer. Wherever you find a wall on the carving, attack it there. Rough is absolutely fine.
- Saw out the second layer. Jigsaw, bandsaw or scroll saw, any of them goes around the outline. Mind the weak spots.
- Clamp the blank and dig out its back. Take out the chunk under the flower on the workbench, close to 32 mm (1 1/4 in) on mine, with a big gouge such as a number eight.
- Go across at weak spots. Following the fibers is fine where there is plenty of wood. Near anything fragile, change direction.
- Check, mark, take it down. Lay it on the first layer, mark the high spots, remove them, and check again until it lies solid.
- Mark the flowers, then the sockets. Draw each flower's direction and center. The bowl-looking socket comes from those marks, drilled in the middle to take the fixing.
Frequently asked questions
Can you use screws to attach a wood carving?
Yes. I said in lesson 27 that screws are fine, and so are dowels, and that even Grinling Gibbons, the greatest of the greatest carvers, used screws and had no problem with that. On this panel the fixing sits in the socket, and a separate flower middle covers it.
How thick would one solid block need to be?
Four inches, about 100 mm, or 16 quarters for this Hashemi design, double the 8-quarter board I used. One tall flower in lesson 42 would have needed a six-and-a-half-inch block, about 165 mm, and I said there's no reason. Reaching inside and undercutting would be really hard.
Why dig out the back of the second layer?
To make it fit perfectly on the first layer, which has pieces standing in the way. I had to make it flat where it gets glued, and that meant almost half of one flower, close to an inch and a quarter deep, 32 mm. Look from the side and you will see a bad fit.
What to carve next