
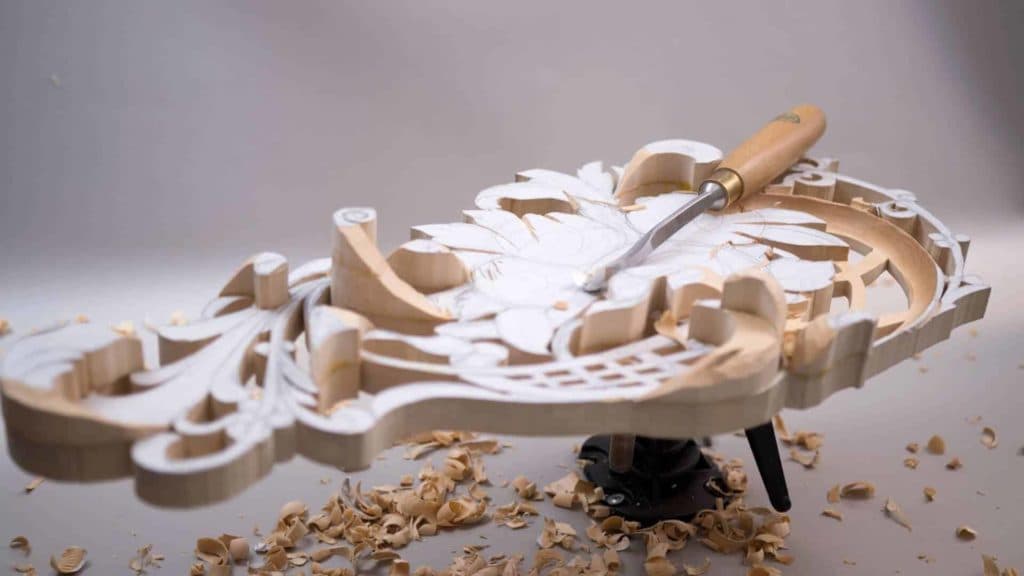
Alexander Grabovetskiy, woodcarver, School of Woodcarving · Published 2018
How do you stop a carving looking like a staircase?
Quick answer: Flow is a carved surface that goes on moving, downhill from its highest part and then up again, instead of resting on straight cuts. On my Hashemi flowers panel each section comes down to about 13 mm (1/2 in), gets that movement while it is still rough, and is checked side-on before I carry on.
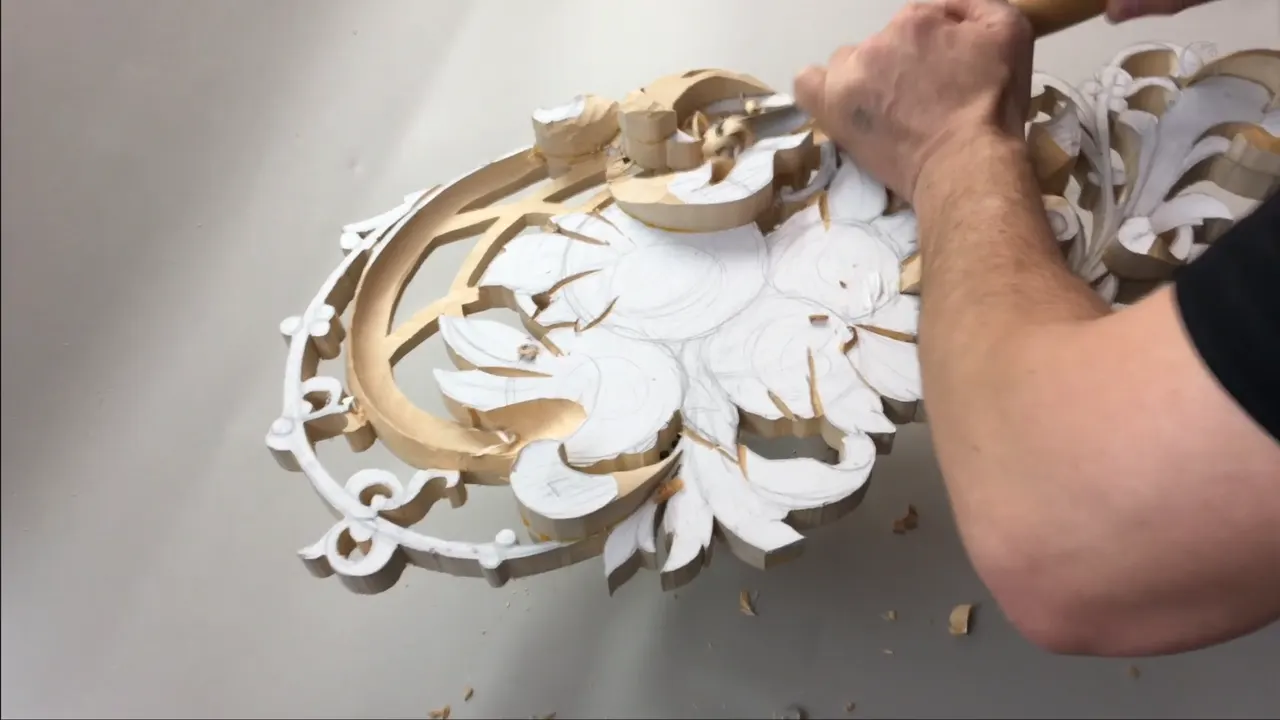
Flow is a carved surface that keeps moving from a high point, lower, then high again, rather than sitting on straight cuts. I put it in plain words in lesson 2 of my Hashemi flowers panel. I can just make a really nice flow going from high point, then lower, then going high, and even higher.
Want the leaves on a carving to move? Want one to dip under a flower and come up somewhere else? Then that movement goes in while the section is still rough, well before the final detail.
This lesson works on one side of the grid. You can call it grid, you can call it basket, as I say on camera, because it is a basket pretty much. It comes down to about half an inch (13 mm), gets high points and downhill runs, and one leaf drops under its neighbour so a ribbon can pass beneath it later.
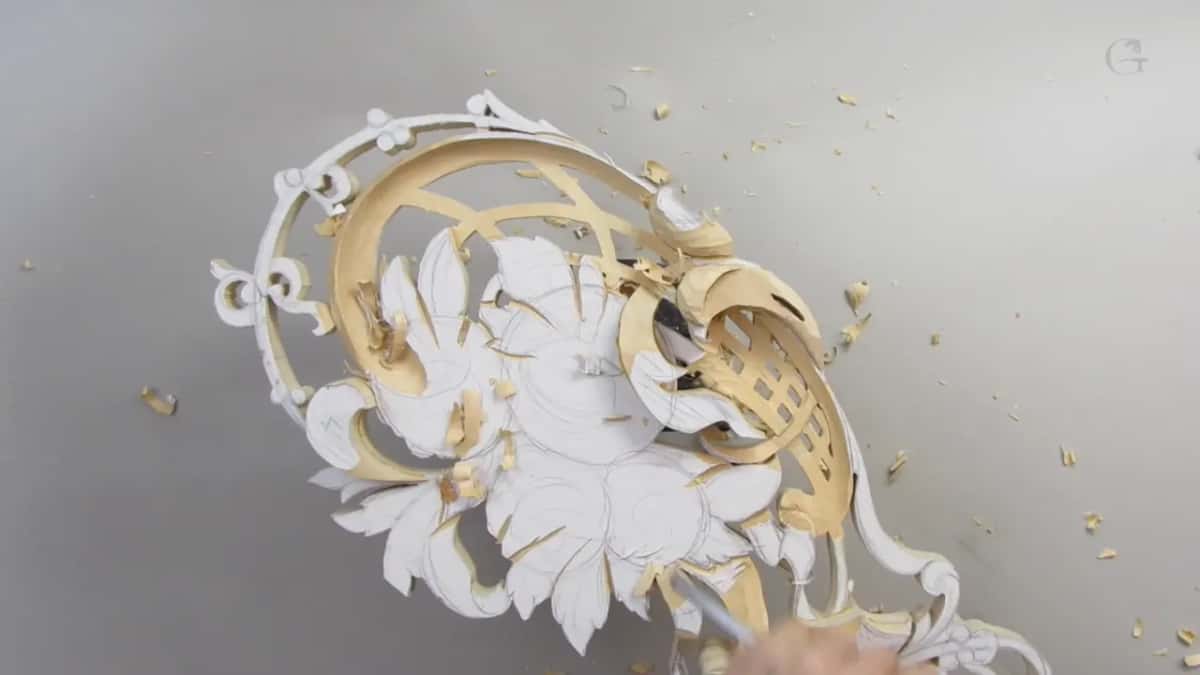
What lesson 2 does to one side of the panel
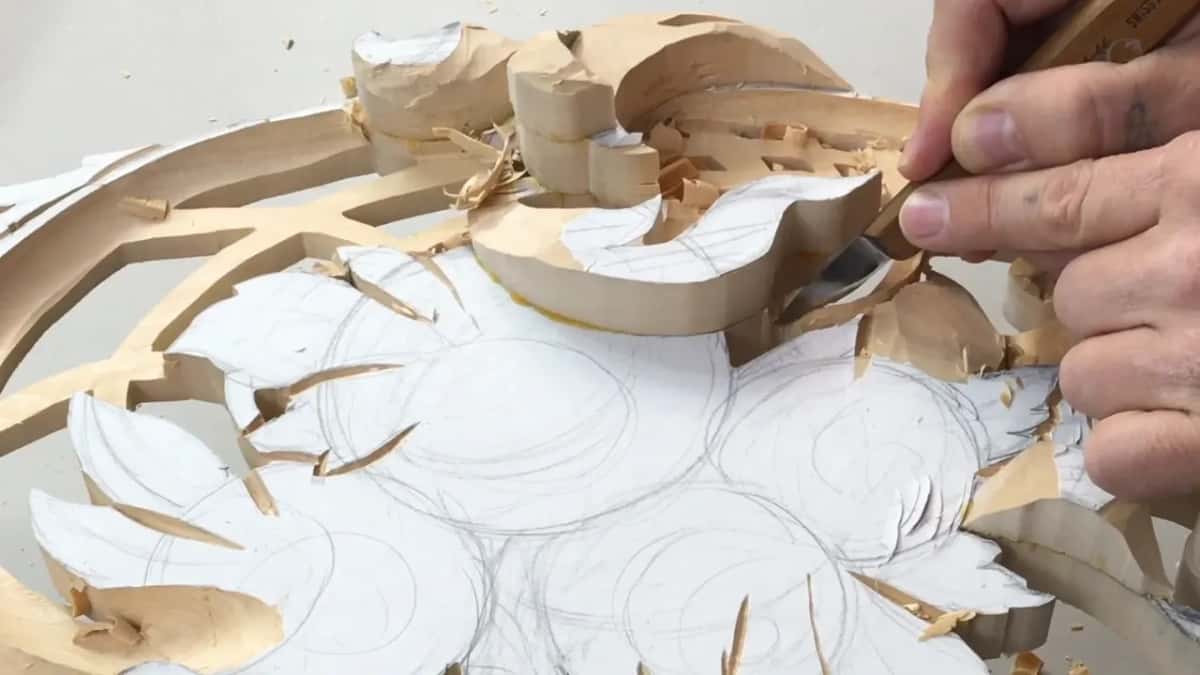
A V tool goes around the perimeter first, then around the ribbon, where I made a zipper.
The whole section comes down with a number nine, working cross grain because that is safer.
Its thickness matches the part I left before it.
Each part gets a high point and a way downhill, and some climb again.
One leaf under the flowers goes lower than its neighbour.
I check the flow line in a side view before I go on.
What does flow mean on a carved panel?
A surface that keeps going somewhere. Part three is where I say it most plainly, while I shape one leaf. If you look from this side, this is the high point of this detail, I said, and gradually, nicely, I have to create a flow.
What I mean by that, I added, just really flowing. So not just straight cuts. After that, a number three shaped it, gradually.
Two sections were settled earlier, in part two. This one has to go downhill also, I said, and this one should go just above. And underneath.

Downhill and uphill are my words for it all through this course. On the ribbon in lesson 14 I called it a full 3D move. From high point, going downhill, then go upward.
Where does the high point go?
The design decides. Lesson 12 is where I said my design has to look fine, this line is supposed to be the high point, and so this piece should not be lower than this. Then again, it could go downhill somewhere right there.
Later on, that rule got stricter. I can't go below this high point, I said, I have to keep that high point untouched.
Here the ribbon got the job. Along both sides of one detail that goes underneath the main grid, a V tool went in, and around the ribbon too, and I said I want to make sure this ribbon will be my high point.

Not every part has to climb. One section in lesson 13 could go either way. I can also turn this one downhill, that is one option, I said. Other option, it can go uphill, but I don't think it would look too good. It went downhill a little bit.

Why outline with a V tool before lowering?
To keep the next detail out of the way of the gouge. Before the whole section came down in part one, I said it was probably a good idea to take the V tool and make a cut around the perimeter.
Then the ribbon. I probably should make a cut around my ribbon, I said, and I can actually make a zipper. One more line went in where a part will be over a leaf.
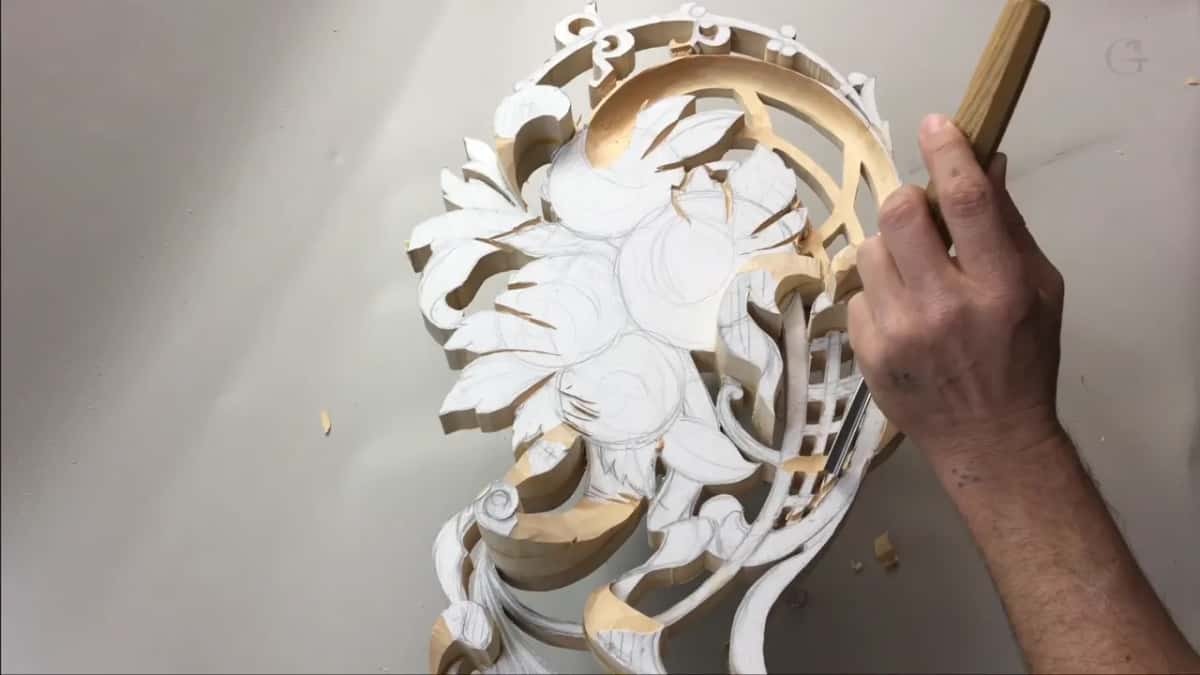
There is a name for a line like that in lesson 12, a marriage line, kind of zip. With it there, I'm not forcing the gouge, and I still attack from both sides.
The reason comes out plainly in that lesson too. I don't want to touch my detail, the round detail right here, I said, so let me make a separation cut with the V tool. This lesson has the same worry in part two, about one edge. Just watch the edge, I said, so I don't hit this detail.
Any V tool will do. Mine in part two was a number 15, 6 mm (1/4 in). On the scroll in lesson 3 I kept it approximately 1/32 of an inch (about 1 mm) away from the final line.

How thick should each section be?
The same as the parts around it. My goal in part one was to lower down to the same, about, I would say right here, half an inch thickness.
Part two opens on the same worry. I have to keep an eye on it, I said, so that my thickness matches what I left right here. Maybe I can use number 3 and 20 millimeters, and a minute later it does look like I'm really, really close.
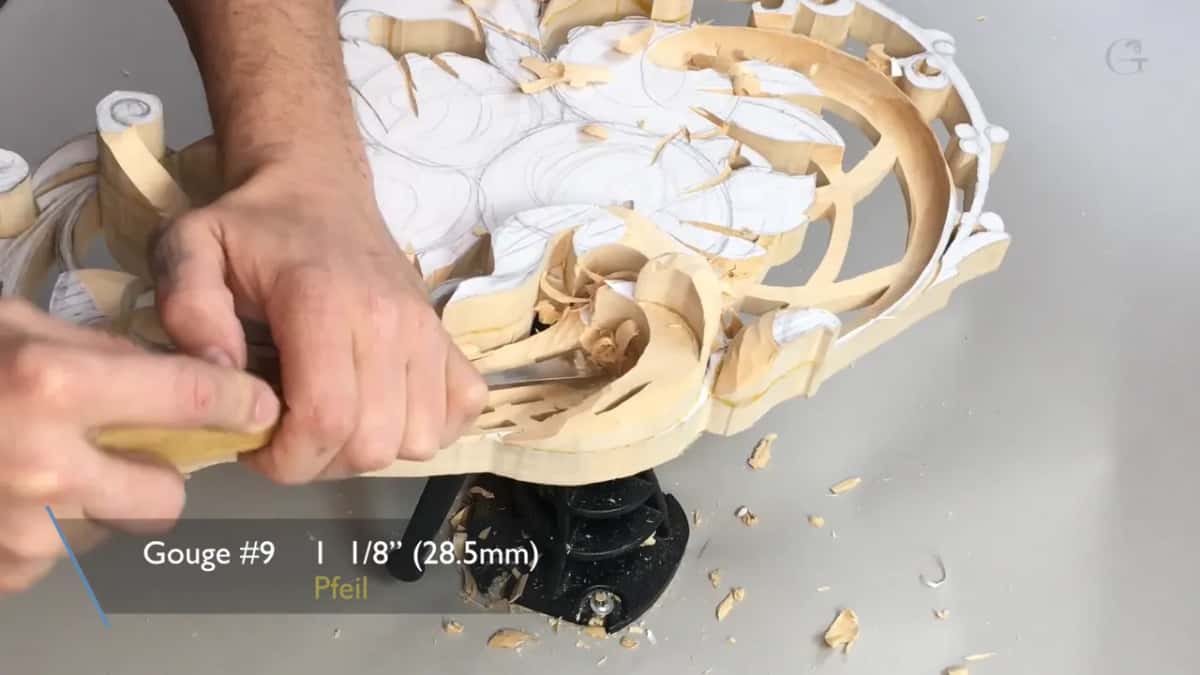
Near the ribbon in part five, one area came down until it was about the same on the inside, same like I have everywhere else. I do have to watch the distance, okay? I could go even lower, like 3/8 (10 mm), and we will go lower a little later.
The flowers are not on this level at all. Back in lesson 1 I said the flowers themselves get raised a level. Some flat spots have to stay, to glue on the next levels, next layers.
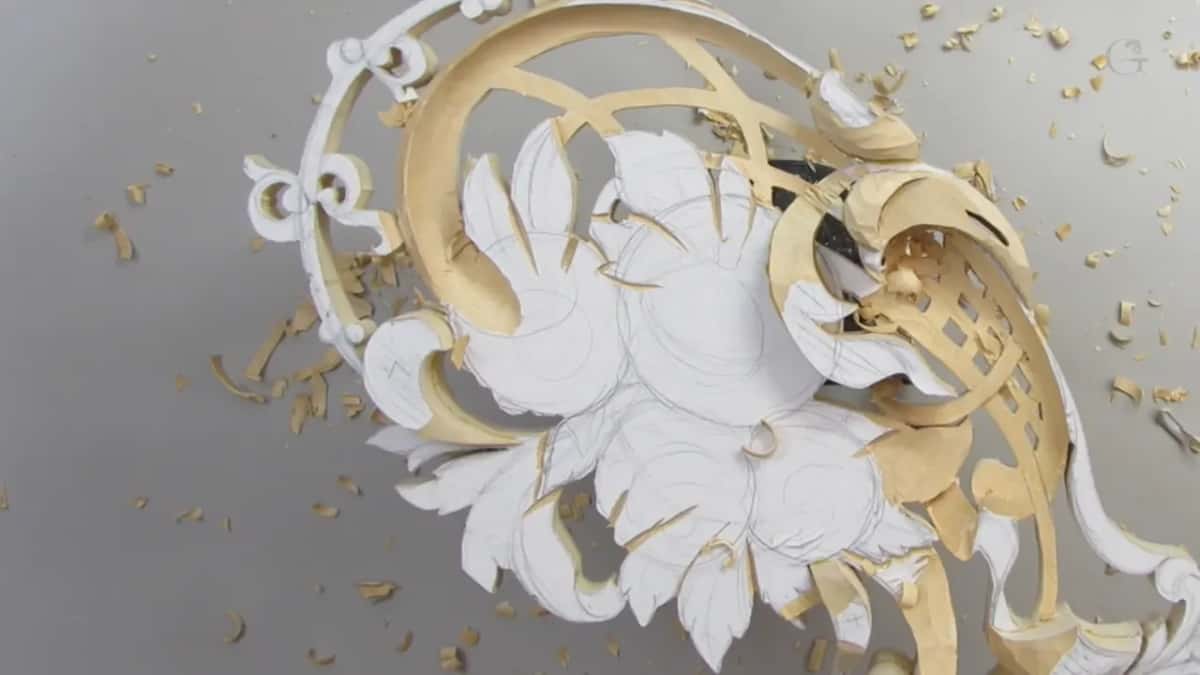
Which tools did lesson 2 use?
Mostly gouges, plus one knife and the V tool. These are the ones I named in the five videos, and the job each one did.
| Tool and size | Job | Said in the video |
|---|---|---|
| The same number nine I used before | Taking sections down | I would use the same tool, exactly the same |
| A three-inch number seven (76 mm) | Bulk removal | Maybe it's too big for this case, maybe not |
| A number three, 20 mm (3/4 in) | Checking thickness | So my thickness is the same as what I left |
| V tool number 15, 6 mm (1/4 in) | Outlines and edges | Any V tool will do |
| Smaller number eight, about 1/4 inch (6 mm) | Preliminary line | So let me actually take a smaller gouge |
| Number five, about 10 mm (3/8 in) | Concave cut | Hopefully, you're able to see my idea on the camera |
| Number eight, about three-quarter of an inch (19 mm) | Ribbon outline | Just fits perfectly in the main outline of my ribbon |
| Knife number 12 | Reworking one spot | Or I could use actually just a knife |

Why use a gouge that looks too big?
Speed, mostly. Like I said before, bigger tools, they give me a lot more flexibility and speed. That's probably the most.
An even bigger one came out on this section too, a number seven three inches wide, and really often I am using that. My number nine came back after that.
I know it looks rough, but it's okay. That was partway through part one, and near its end, I know I am removing a lot of material at once right now.

As advice, lesson 12 says it this way. Try to use the big tools all the time, as much as possible, because that way it is much quicker, easier, and you can always go back and just clean with the smaller tools. Bigger tools you use, cleaner the cut, I said, so much less to clean later.
Smaller tools have their place, as lesson 14 shows. I chose them on purpose there, because I can control smaller cuts, a lot less pressure right now.
Which way should the gouge go through the fibers?
Across them, when that is safer. Well, I could actually work with the grain, I said in part one. I have no problem. Although, safer would be across the grain.
Going against it is allowed too. I am working against the grain, I said a couple of minutes later, but if I'm just slicing, it doesn't create any problem.
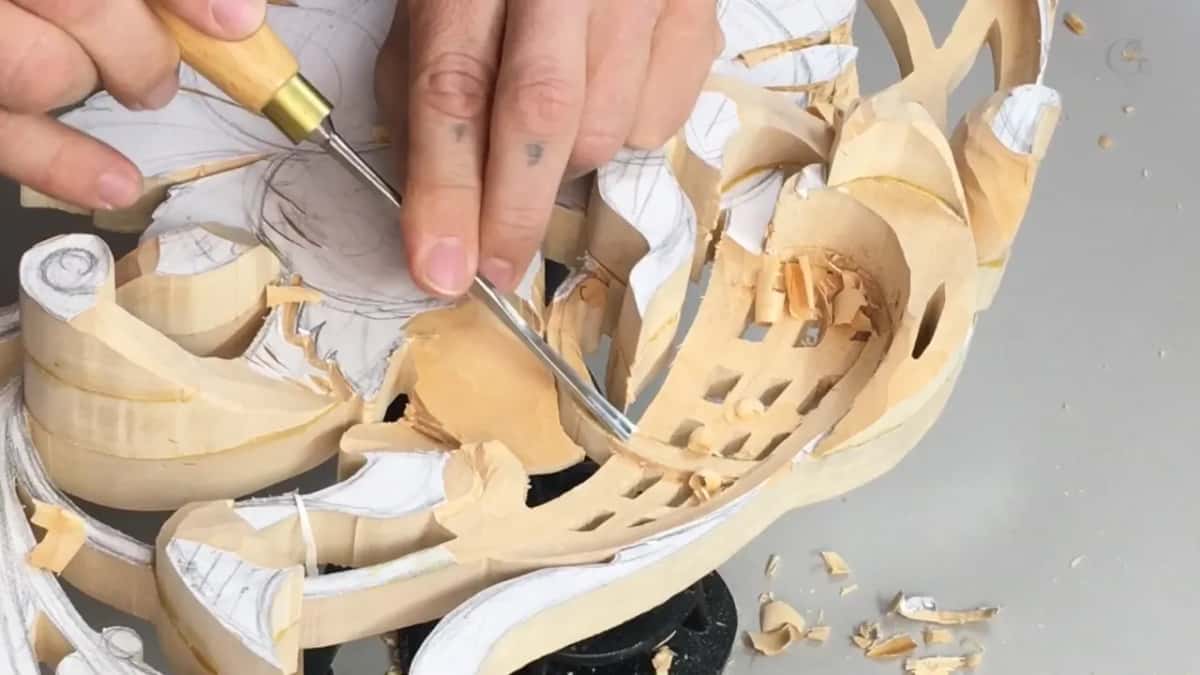
Part five shows when it did make one. Number eight again, against the fibers here, that's not good, and so the number nine came at it from another side.
Along the grain has its own trap, as lesson 12 shows. Working that way, I said I have a tendency to break too much, and it will not look too good. The trick is always make the rotation move, my sweeping cut, rotating the tool like that.
Why drop one leaf below its neighbour?
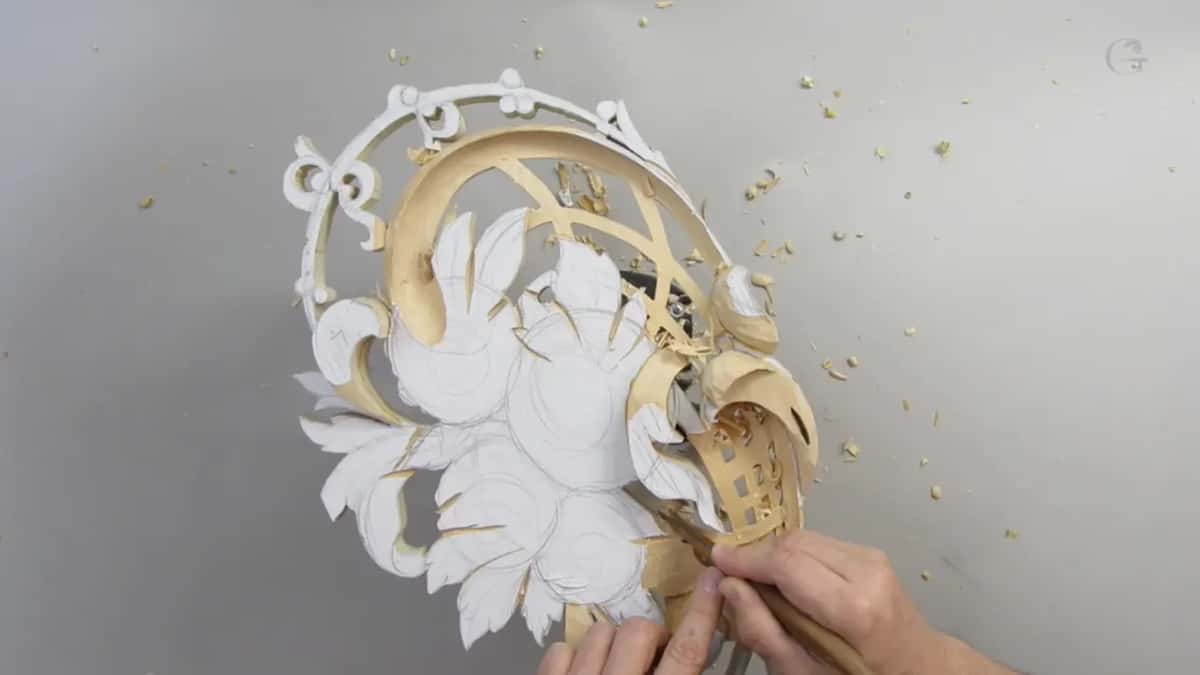
To hide it a little, and to let something pass under it. That leaf sits underneath the flowers. In part two I said I can actually lower down lower than this piece, and then it will not be as visible, but it will go downhill.
The ribbon is the second reason. Later on, this ribbon part will go from underneath of this leaf, and that is going to create even more of a three-dimensional look.
So I took a smaller gouge, a number 8, approximately a quarter inch, and made my preliminary cut, because I don't want to lose later on the overall picture.

Part three opens on a leaf. I think it's going to look good like this, I said, and you can see already, it just gives a really good three-dimensional feel. I took it even deeper after that.
Lesson 1 planned for it. Below my flowers, I have to develop some leafage, I said there, because it will look much better, and you can still detect that from the sides.
Shadow is the reason I give in lesson 7 for undercutting a back that, most of it, you are never going to be able to see. It's all about lights and the shadows. Even if a small amount of light travels behind, it will create a shadow. Painters have a word for that play of light and dark, chiaroscuro.

Which view shows the flow line?
A side view, every so often. It's a good idea to check that from the side view, I said in part three, and I look sometimes just from the side, and if I'm happy with the flow line, then I'll continue to work on it.

Other angles help too. In lesson 9 a bump spoiled my main flow, and I said naturally, it just doesn't flow good. The easiest way to see it is to look from different points of view, from different angles, and that way you can see exactly what is going on. A number 12 knife took that bump out.
From where you sit you can't always see it. I can't see from this side what is going on, I said in lesson 7, so I flip it and look at it.
Fixing a flow line is part of the job. Fix my flow line is a phrase I say more than once in this course, and in lesson 8 it meant one part has to go down like this, so a leaf looks like it is growing from underneath.
What is a hollow that starts almost flat?
A concave cut that begins with almost no depth and then turns. In part three I reshaped the edge first, then made the concave cut with a number three, carefully. Just follow the line.
Smaller tools came next. Number five or smaller number three, I said, and I took the number five. I corrected my own words twice there. Fixing this side became making my cut nicer, and the cut became the design lines.
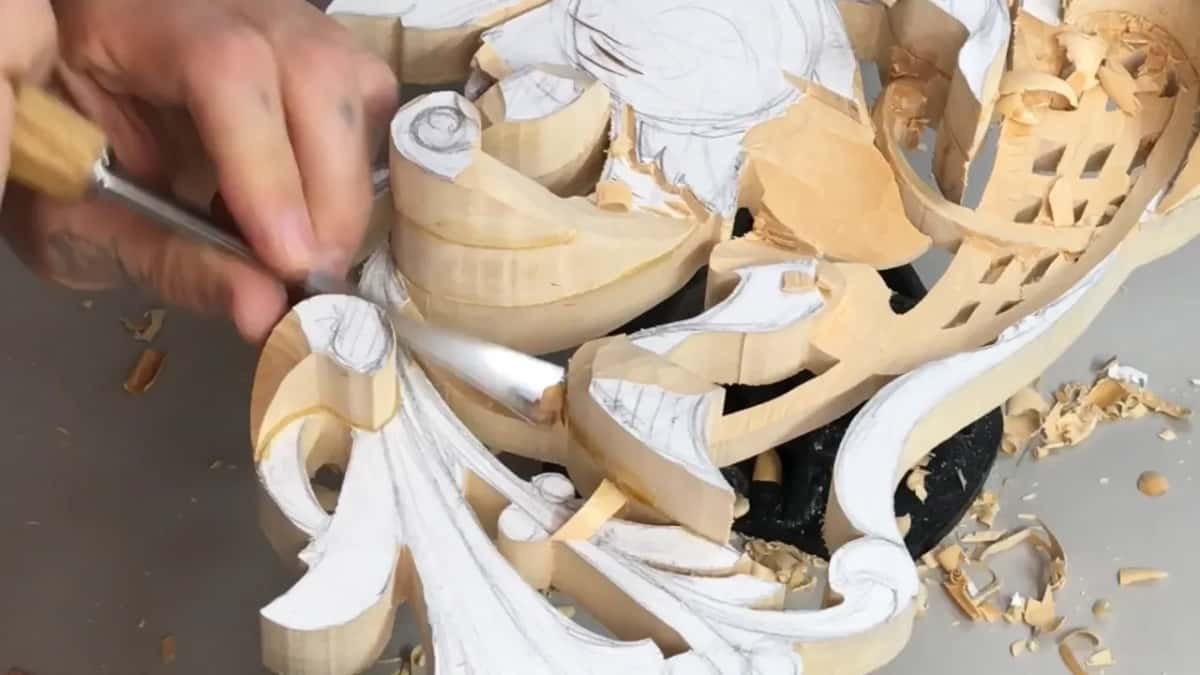
I'm not sure if you're able to catch that on the camera, I said, but my concave cut is almost right in the middle. What I want to do is come from the almost invisible concave line and just twist like this.
Part four began on the same shape. The number nine was a little too big, so a bigger number five, about 10 mm, did it. It just starts from almost flat and then goes like this, I said, which means this side has to repeat it.
A smaller number five cleaned it after. I am not 100% happy with what I see, I said, and reached for a knife.
What did the knife do?
One more pass where the gouge left me unhappy. This is number 12, cheap carving knife, one of my favorite knives. Like I mentioned before in different workshops, this one has a flexible metal, and that helps a lot actually.
Then the number five again, and I said let me leave it like that for now.
Which parts stay thick for now?
The weak ones. Just be careful, don't press too much, I said near the start of part five, because the grain goes this direction, and this part right here is kind of weak.
Later in that part, a second spot. That one will be really fragile because the grain goes this direction, so until I am ready to work on the final detail, I'm not going to go all the way down yet.
Both sides of it come up in lesson 12. Early on, I said even in this case, I could use carefully a mallet. Later the piece became more fragile, and I can't make really heavy cuts because I can easily break it. So even with the big tools, I still have to be kind of really careful.
Pencil or V tool for marking?
A V tool, mostly, though I still pick up the pencil. Near the end of part five I marked a line and said you would probably ask why I'm doing that multiple times, outlining with the V tool and a pencil. To be honest with you, I don't have to, and I still don't have an answer why I do that. Just a habit, I guess.
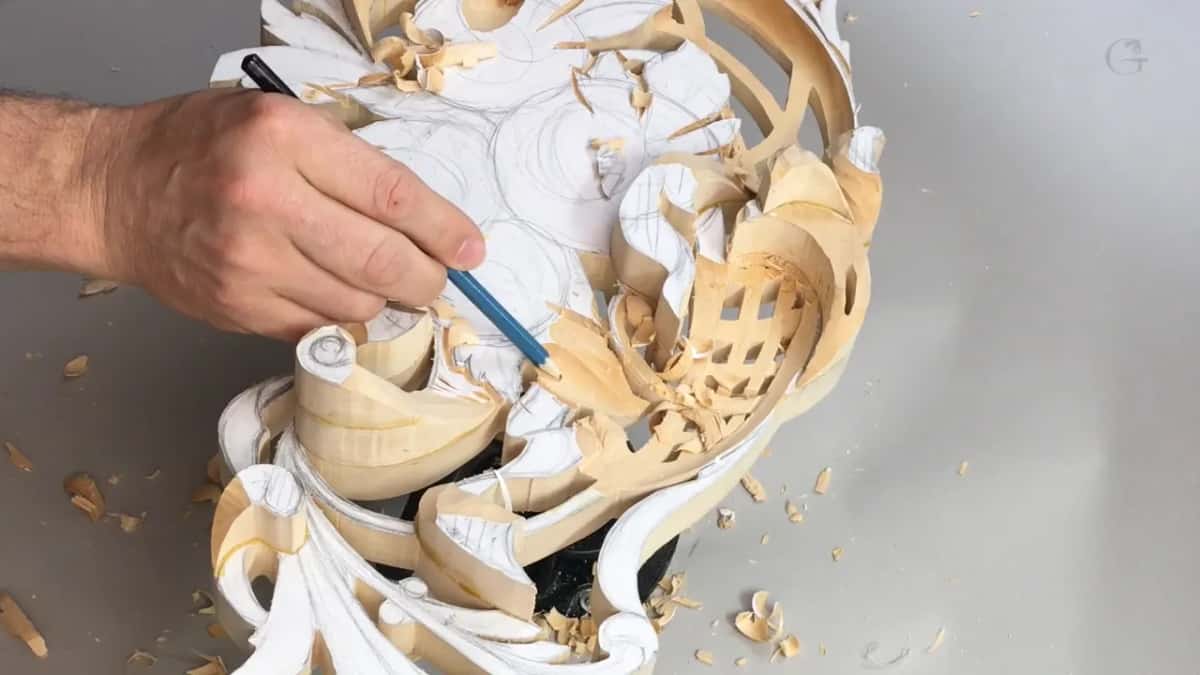
It is much better not to use any pencil, I said. And most of the time, I don't use a pencil right on the wood after I started to carve. Then I took it back, because I shouldn't say most of the time, and sometimes I still do, but I try not to.
There is a reason in lesson 43. Pencil is also not the best idea because your piece becomes really dirty after too much use. What you could use, actually, is just a V tool, as a marking tool.
Rough for now, with room for changes
Right now it's kind of rough, I said while refining one line, and I didn't want it to look rough, so I made it a more or less refined line. Just a really nice flowing.
The last minute of the lesson says where things stand. It's still not the final cut, because I need to make sure everything is just how I pictured it, and sometimes I leave a room for changes. Then a V tool again, outlining this side.
A line from lesson 24 belongs here too. Woodcarving takes the same tools like 2,000 years ago, I said, same setup, same thought process. So you still have to develop three-dimensional thinking. It's a really art of deduction.
A scroll is the subject of lesson 3, the next one, and it opens on a V tool again. All five videos of this lesson, and the rest of the openwork panel, carved from limewood with a basket grid in its design, come with tuition at the school.
How it's done
- Outline the section with a V tool. Run it all the way round the section, and around any ribbon or detail that must stay untouched.
- Lower the whole section. Use a number nine, working across the fibers, or a bigger gouge if you have one.
- Match the thickness. Keep it the same as the parts already carved, and keep an eye on it as you go.
- Set a high spot, then run the surface downhill. Then let it come up again, and higher still.
- Drop a leaf under its neighbour. Lower it so it shows less and a ribbon can pass beneath it later.
- Check the flow line side-on. If you are happy with it, carry on. If a bump spoils it, look from different angles and take it out.
- Leave weak parts thick. Where the grain makes a part fragile, stop short and come back at the final detail.
Frequently asked questions
How thick should the sections of a pierced panel be?
On this panel, roughly 13 mm (1/2 in), matched to whatever is already carved next to it. My number three at 20 mm helped me check, and some of it could come down to 3/8 inch (10 mm) later. The flowers go on top as separate layers.
What does downhill mean in wood carving?
Downhill is how I describe a surface getting lower as it moves away from its highest part, and uphill is the reverse. Some parts of the Hashemi panel drop and rise again. For one section in lesson 13 I chose downhill, because I didn't think uphill would look good there.
Is it better to carve with the grain or across it?
Either can work. Along the fibers gave me no problem in this lesson, although going across was safer. Against the grain is fine while you are slicing, and when one spot went badly, I switched to a number nine and came at it from another side.
What to carve next