
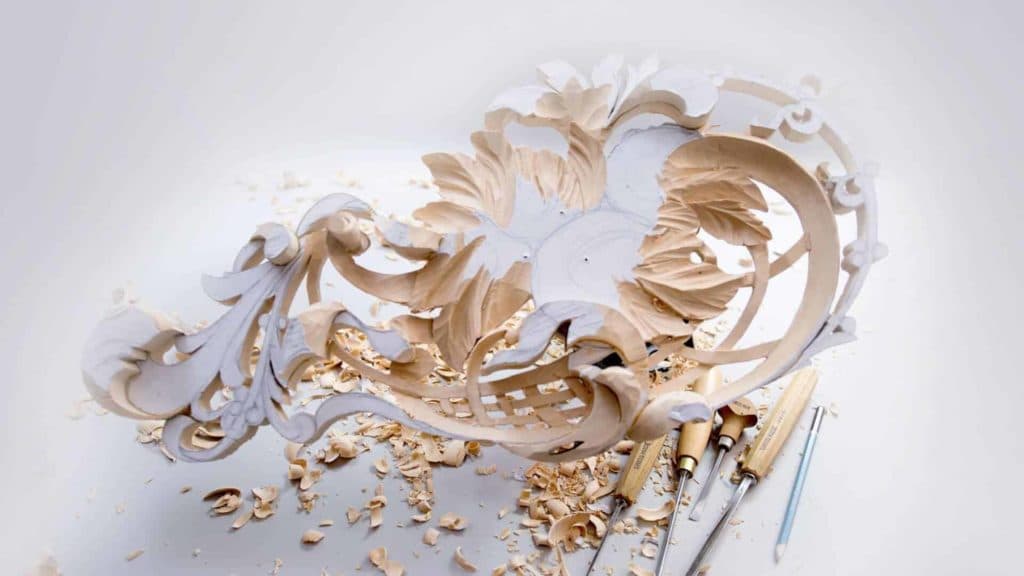
Alexander Grabovetskiy, woodcarver, School of Woodcarving · Published 2018
How thin should a carved leaf be?
Quick answer: A carved leaf is ready for its final edge, on my pierced wall panel, once the overall thickness is down to about 1.6 mm, a sixteenth of an inch. I take that wood off from behind, working upside down, and turn it often to check the front. The edge then looks paper-thin while it stays somewhat solid.
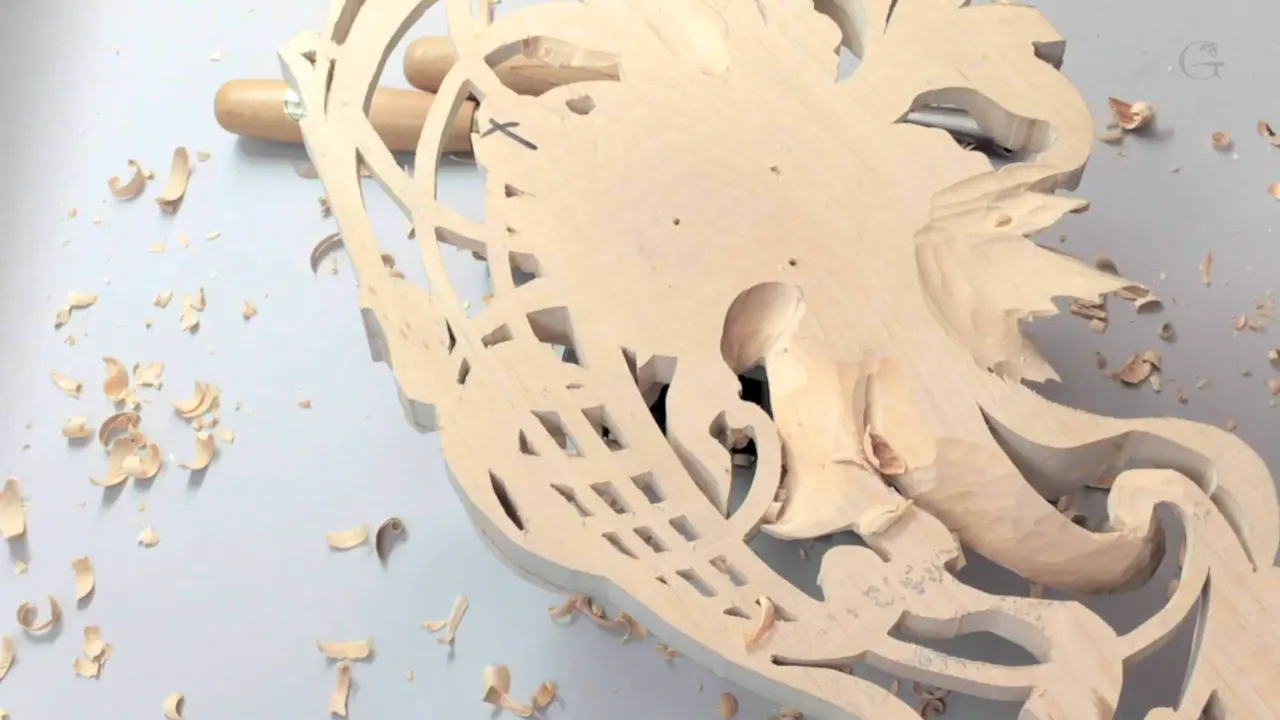
A carved leaf is taken down on my Hashemi panel, working from behind, until a 16th of an inch of overall thickness is left, roughly 1.6 mm. Only then do I set its edge, and the edge looks paper-thin, although it's somewhat solid. That was lesson 7 of Carving Hashemi Flowers, a pierced openwork panel carved from limewood, a piece I had for over 10 years, I believe.
Have you seen a leaf on a tree throw a shadow? Does a little light still get in behind it, around its edge? That light is why I take so much wood off the reverse of a carved one.
A thin leaf is a fragile leaf. Below is what I said on camera about thickness, which gouge took the big waste, and where I stopped on purpose.
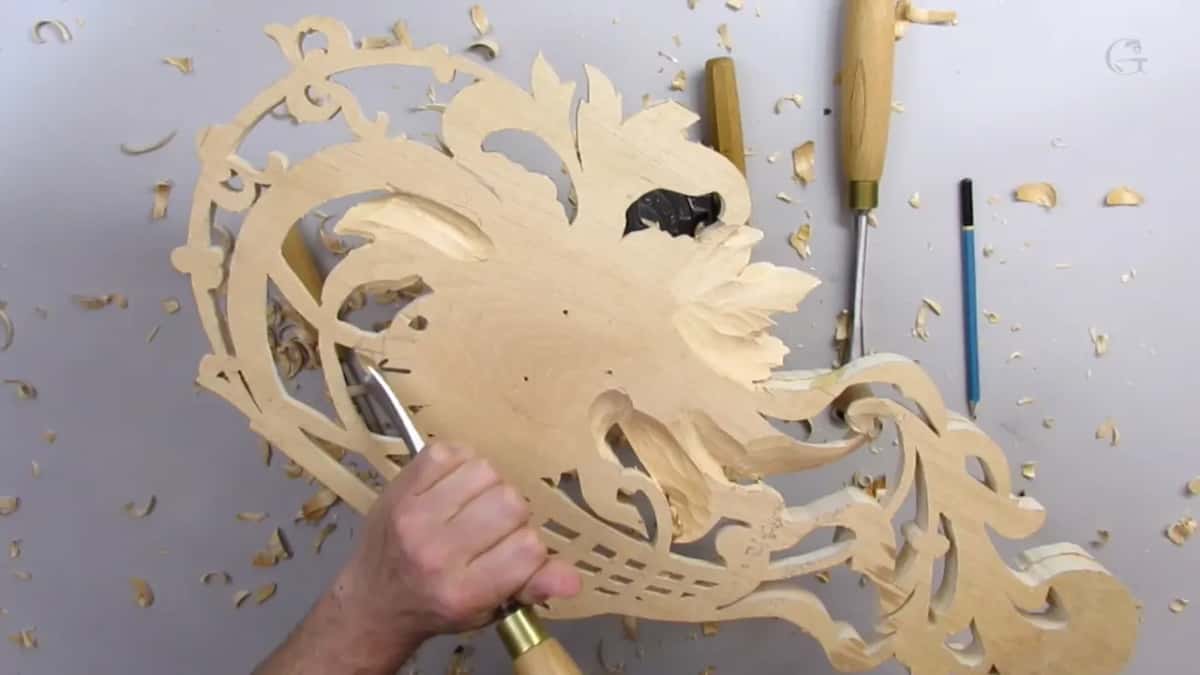
Lesson 7 on thin leaves, in six points
A sixteenth of an inch overall, and only then the edge.
The waste comes off with the panel upside down.
Big gouge first.
I turn it over often and look, because I can't see the edge from behind.
Every pass goes to the edge.
Where two parts got really close in part six, I kept the connection.
How thin should a carved leaf be on a pierced panel?
That was the thickness in lesson 7 when I said I could set the final edge. Before that, I just followed the main shape. My edge was not worked yet, so the edges of that leaf were not in their final form.
With that little thickness left overall, I could easily give the edge its final form, and it would look like paper-thin, although it would be somewhat solid.
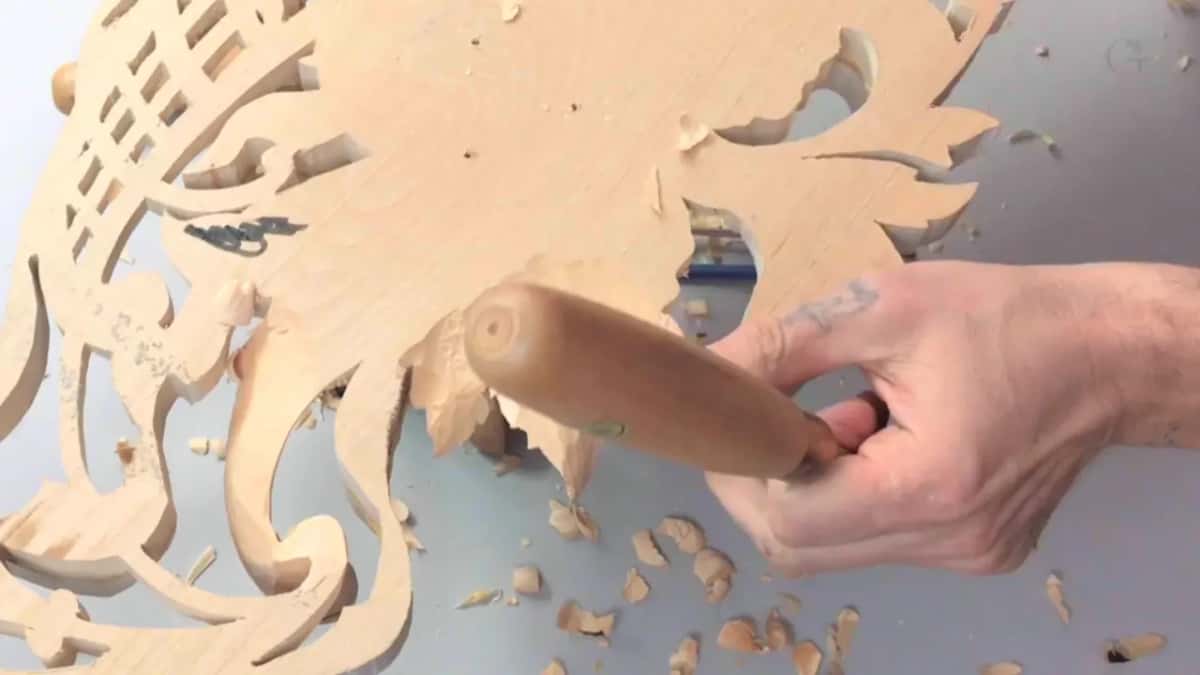
Some leaves went further. By part three I could already see through a few of them. My goal in part five was to carry everything to the edge, to make it really, really, really fragile and paper-thin.
Thin still needs watching. Late in the lesson I stopped to check if I had enough thickness on one leaf, and it looked like I did.
Why take so much wood off the reverse?
For light and shadow. Most of the backside you'll never be able to see, especially once it's on the wall, and all you'll see behind it is pretty much the background you choose, a wood background or just a bare wall.
So why would I undercut so extremely? Easy answer. It's all about lights and the shadows. Believe me, even if a small amount of light travels behind, it's going to create a shadow. That is a tiny detail, but really important. And overall, it makes the piece much, much lighter.
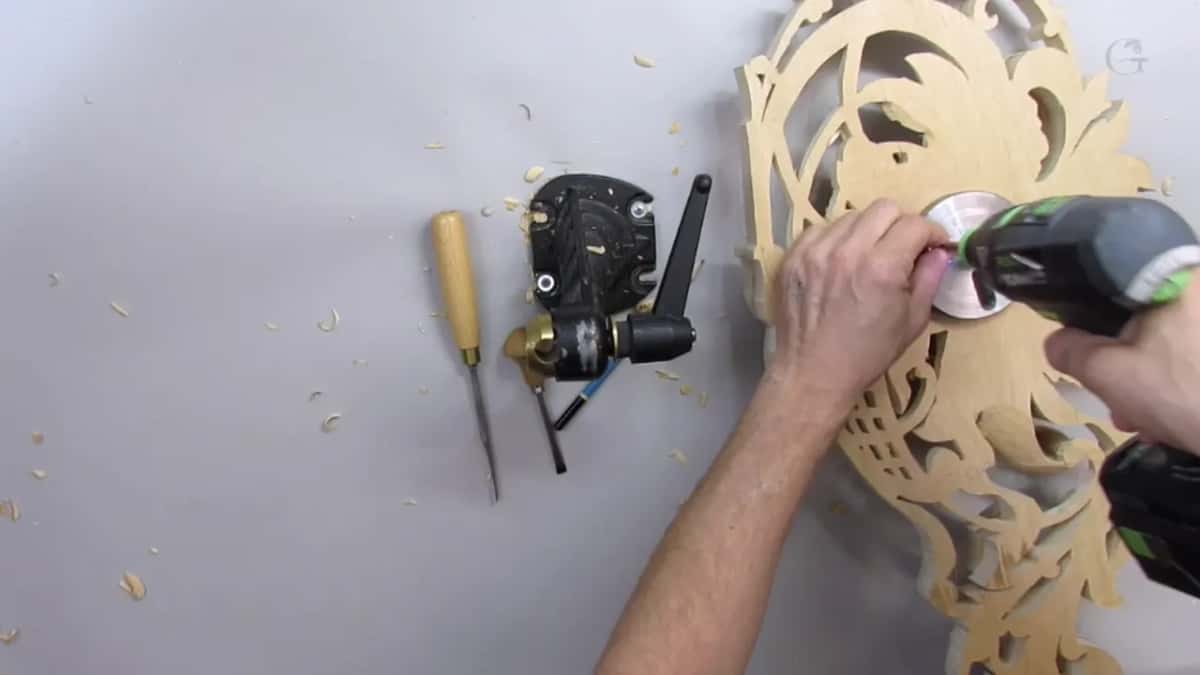
I strongly believe the shadows and the lights are the most important thing in wood carving, especially if you're not going to finish the piece. Every little detail like this adds depth. You won't see it by eye, but supernaturally, you're going to detect that.
Why I carve the backside at all is in lesson 4, on the back of a pierced panel. Here the question is only how far.
How do you take a leaf that thin from behind?
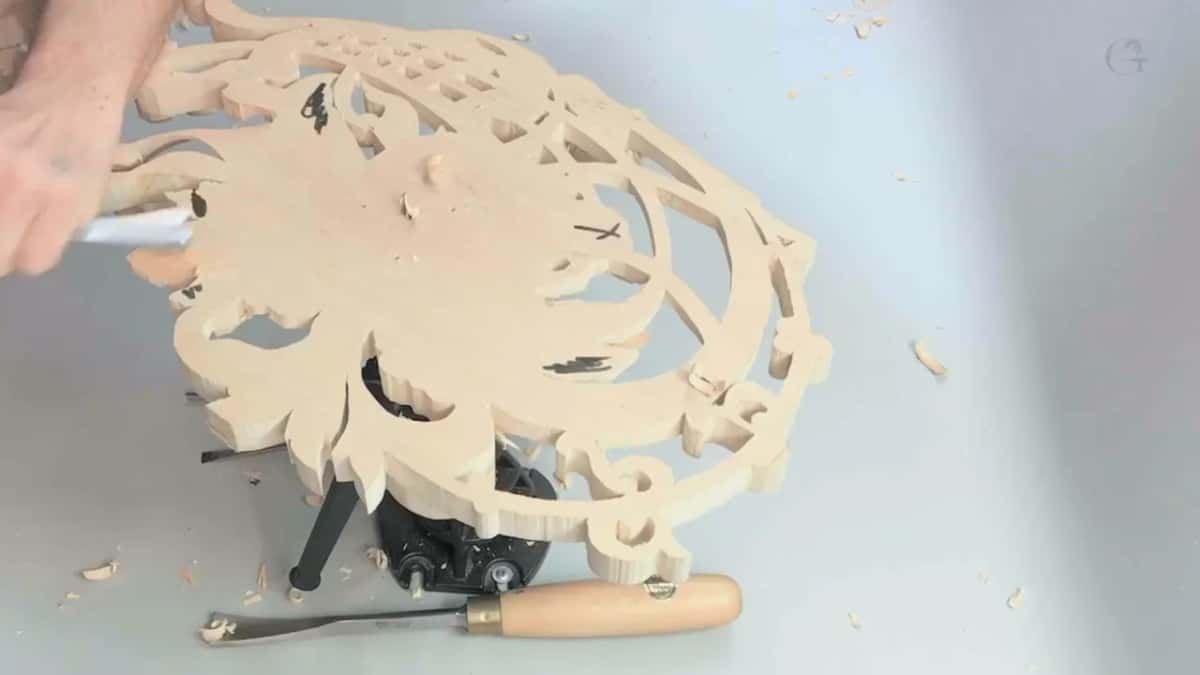
I flip the panel over and undercut to the almost final form. That way I know exactly what is happening, at least with some of the leaves.
The idea is the same as before. Out of the vise it comes, I take my drill, and I use the same holes. This middle part will be solid, so all those holes end up hidden.
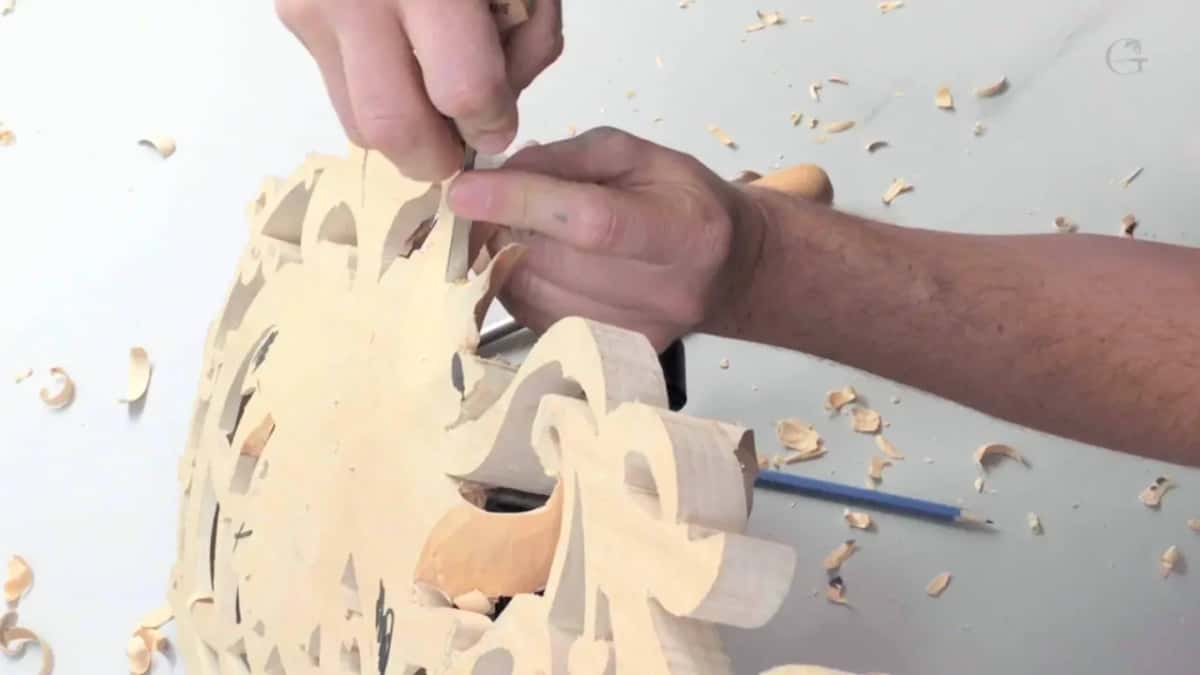
There is another option, which I gave in part four, if you don't like to see those holes. Glue a piece of paper on a block of wood, glue that right on the piece you're working on, and put the screws into the block. Later you just remove that block, and you won't see any screw holes.
Next, I think about which leaves can come down. A black marker marks the ones I can easily take out right now. The others, I can work from the opposite side with no problem.
For the big waste I picked up a number eight, one inch, the same big one. Then I changed my mind. Maybe I should take a number seven instead, I said, so the big number seven, about one inch, started removing wood nearly up to the top.
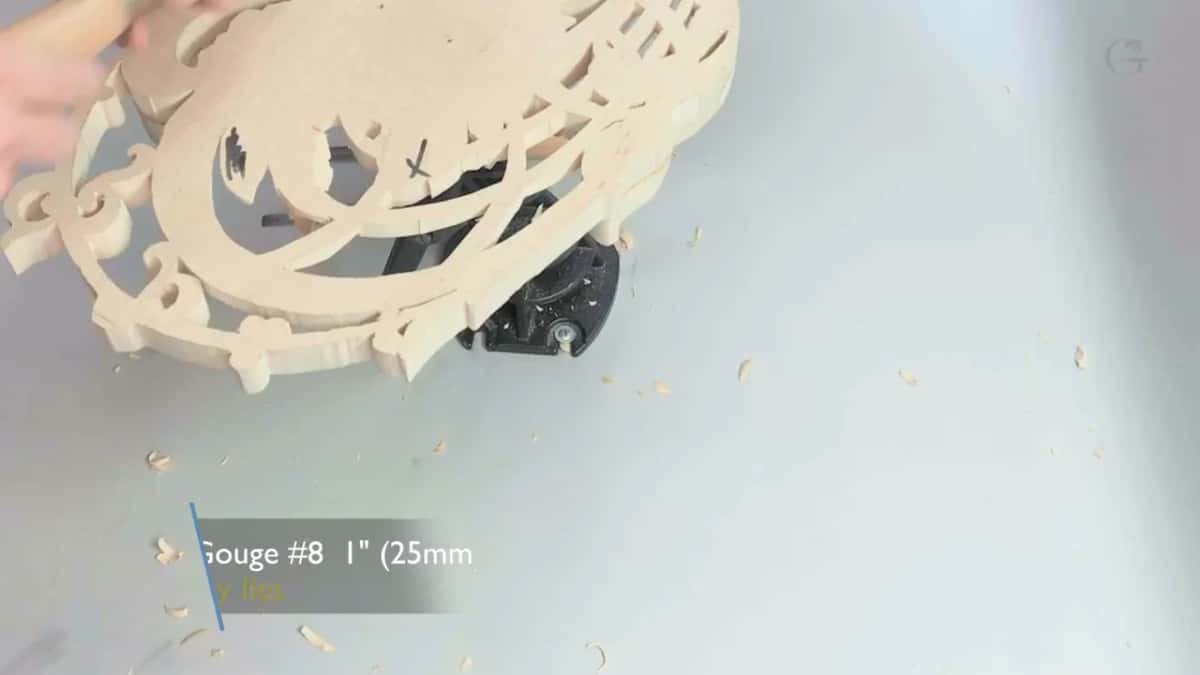
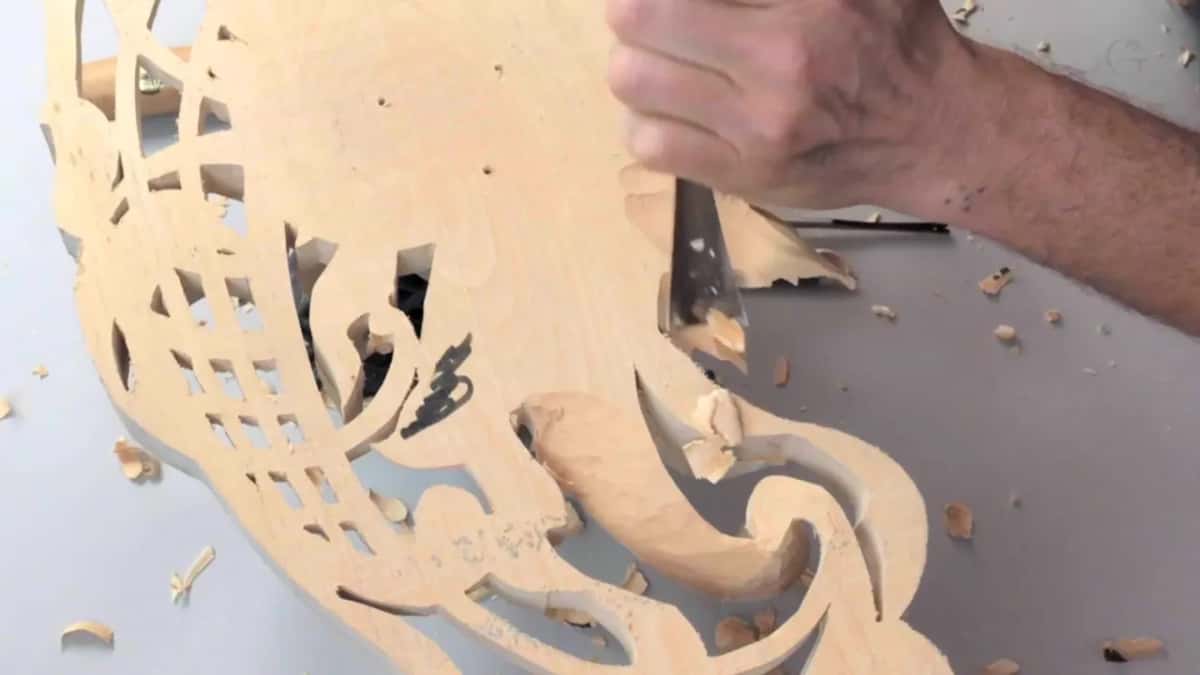
I work upside down and against the grain, and I have to check constantly so I won't overdo it, which is really easy. In part two I called this probably one of the biggest secrets, how I undercut really extremely by working from the backside.
How can you tell how much wood is left?
Flip it and look. From the reverse I can't see what is going on. Once I turned the panel in part one, I could easily see I was close to the edge, but not that close.
About an eighth of an inch, roughly 3 mm, still had to come off right there, and a number one would do it, or any other gouge will work also.
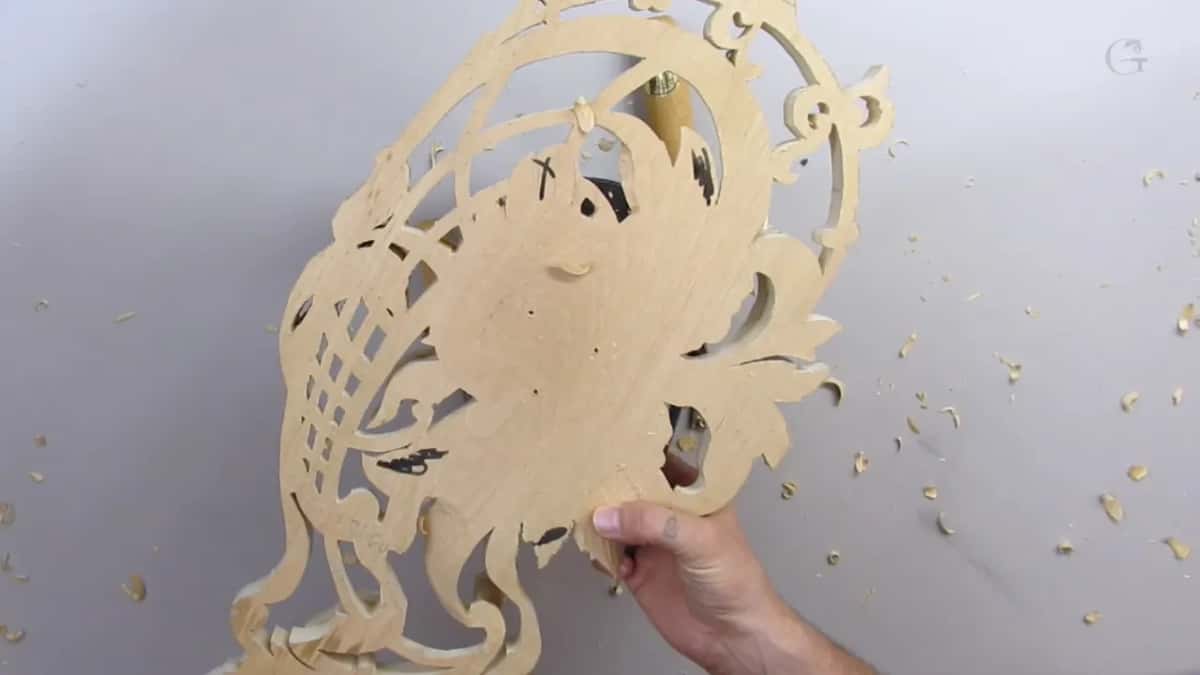
Light is the other test. Checking the other side in part three, I could see through some leaves already. In lesson 8 of the same course I put a number on it. When I can see the light coming through, that means I've got less than a 16th, probably paper-thin there but still solid, and I have to be really careful not to overdo it anymore.
Carving a small flower for the Lily box, I saw a paper-thin spot that was almost impossible for you to see on camera. But I saw it, because the light hits through.
A background is the third test. Partway through part four I flipped the panel, placed it against the background, and you could already see some shadows and some lights, just because we had already done the preliminary undercut.
Does every carved leaf have to be paper-thin?
It depends on where the piece will live. The Hashemi panel will sit in front of a background, wood or a bare wall, and on it I went to the extreme. I know I am taking it to the extreme, I said, but that's the way I like.
A piece that people use is another story. In Acanthus over Moldings, lesson 8, I said you could take it to the extreme if it's not going on furniture or a panel. A decoration piece for the wall, you can make paper thin. But I couldn't do that there.
With the Lily box I had to stop myself, because I have a tendency to make it paper thin. That box was going to be an everyday use piece, hopefully, so I couldn't make it too fragile. If it were just a wall decoration, I said, I could do it.
Some work has to be strong. In the Venice Room, lesson 69, about 10 millimeters (3/8 in) stayed between the upper point and the lower one, like the ceiling of a future dome. It also has to be strong, I said, so not on every carving would I go paper-thin.
And sometimes thin is only a look. For lesson 77 of the Venice Room I wanted an illusion of paper thin. Real paper thin would be a mistake in that case. That piece had to be somewhat solid, but still, the illusion.
The edge makes that look. Teaching the Byzantine acanthus, an acanthus leaf, I said you really have to get to the edge if you want it to look light and almost airy. It's thick, but people are going to think it's just like a paper thin. You could leave about one millimeter or one and a half (1/32 to 1/16 in), and later attack that from the opposite side and make it like a knife cut.
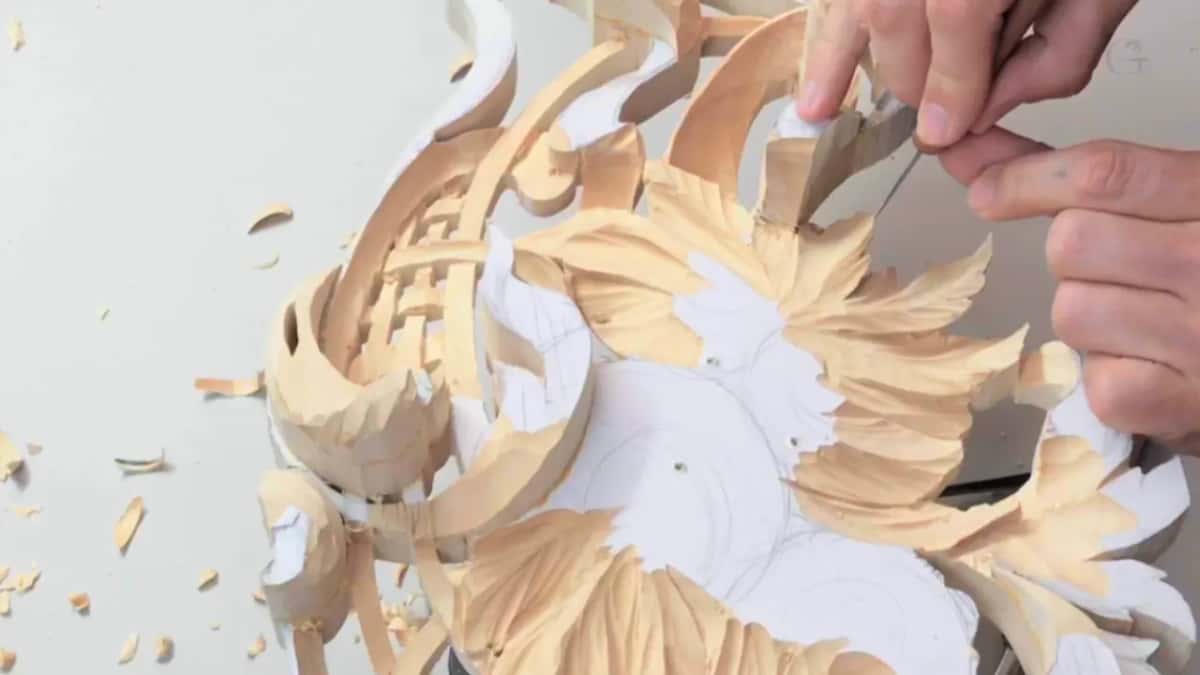
Thin also comes late. Later on I wanted the grape onlay, lesson 13 like a paper thin almost, but for now, I said, I was leaving approximately five millimeters (about 3/16 in) of thickness.
Which gouges did the thinning in lesson 7?
Big ones did the heavy work, and small ones came in where I needed to be safe.
| Tool and size | What it did on the leaves | Where in lesson 7 |
|---|---|---|
| Number seven, about one inch (25 mm) | Removed the waste almost to the top | Part one |
| Number one, or any gouge | The last eighth of an inch on one leaf | End of part one |
| Micro knife | Reached the edge, though not the final edge | Part two |
| Small number nine, maybe 10 mm (3/8 in) | A shadow cut right beside the main detail | Part three |
| Number eight, only 5/16 inch (8 mm) | Small distinguishing cuts | Part four |
| V tool, number 16, 3 mm (1/8 in) | Separation cuts in a few good spots | Part six |
| Spoon gouge, number nine, 5 mm (3/16 in) | Went deeper to refine one point | Near the end |
When do you set the final edge of a thin leaf?
Last, after the backside is down. Early on I had only followed the main shape, and the edges were not final yet. Even when a micro knife took me right to the edge in part two, I said it was still not the final edge.
With the preliminary undercut done, I could establish the edges of those leaves in more or less their final form.
I really like to divide my leaves in three parts, with bigger divisions, and that gives me more of a 3D look. No pencil marks go on for it. My chisels or gouges do it, and for this I could use a knife or just the number one chisel.

A knife is easy, little by little. Or take the same V tool we used, a number 16, start the notching, and then fix it with the knife, creating some kind of relief cut, if you wish. Part six brought out a smaller V tool, one-eighth of an inch, number 16, which is three millimeters, for my separation cuts.
Not every leaf has to have that division, but in some spots it's not going to hurt.
That small knife helps me a lot right there. I have much more control. With sharp enough tools a quarter-inch number five (6 mm) can also work its way in, and later, when I flip it upside down again, I'll see where it ends up and make a cleaning cut.
On delicate work like this, I'm always going all the way to the edge. All the way to the edge, always.
What is a shadow cut?
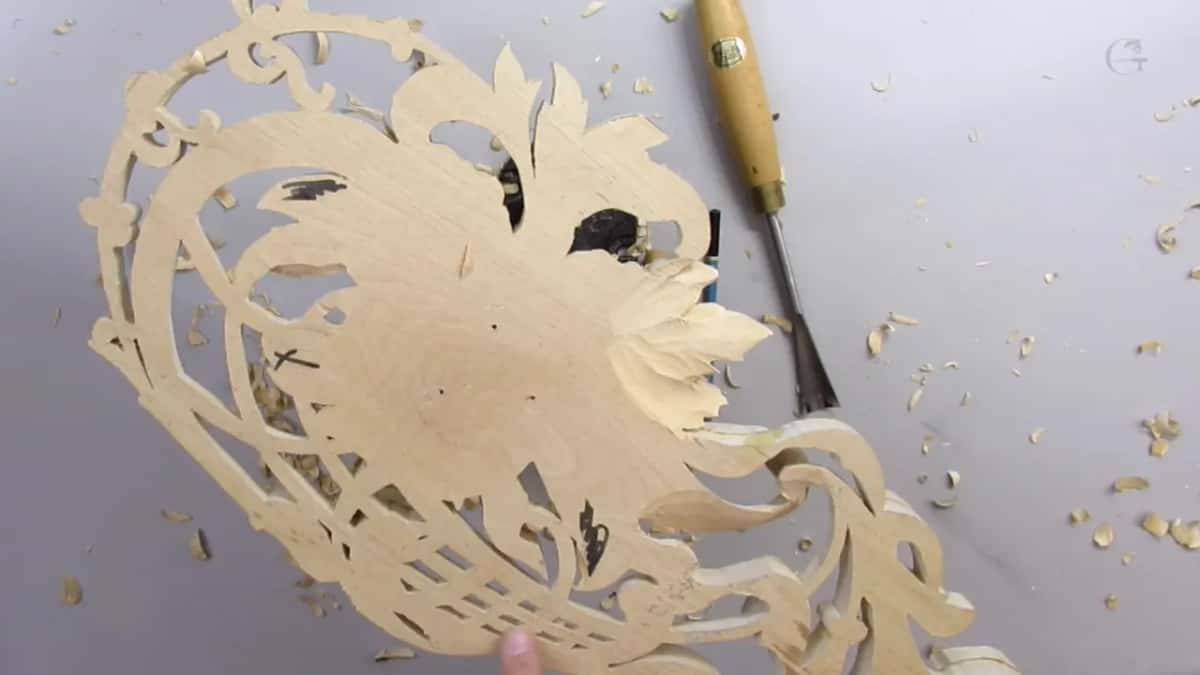
A shadow cut is what I call the one I make for the sake of the shadow, right on the side of a main detail. My main movement in part three was in one place, and I wanted my shadow cut right beside it, even though I knew it would not be visible.
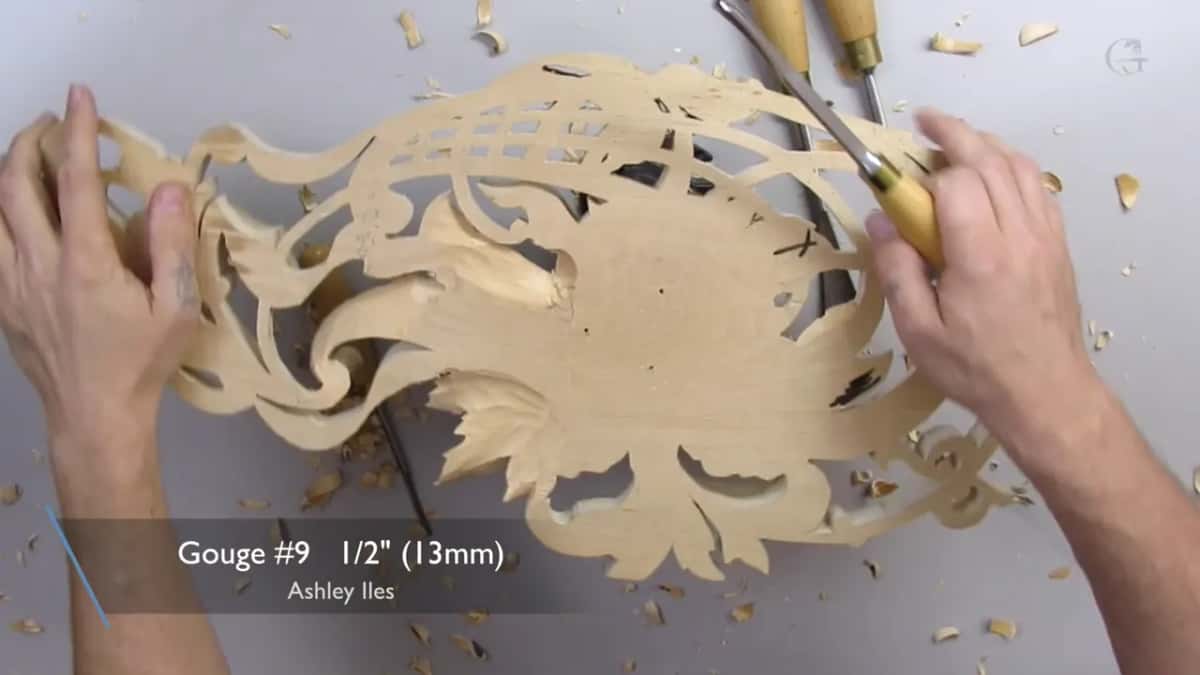
For that one I took a small number nine, maybe about 10 millimeters. Earlier, with a number nine of half an inch (13 mm), I went in so the light would go deeper underneath and create an even nicer shadow.
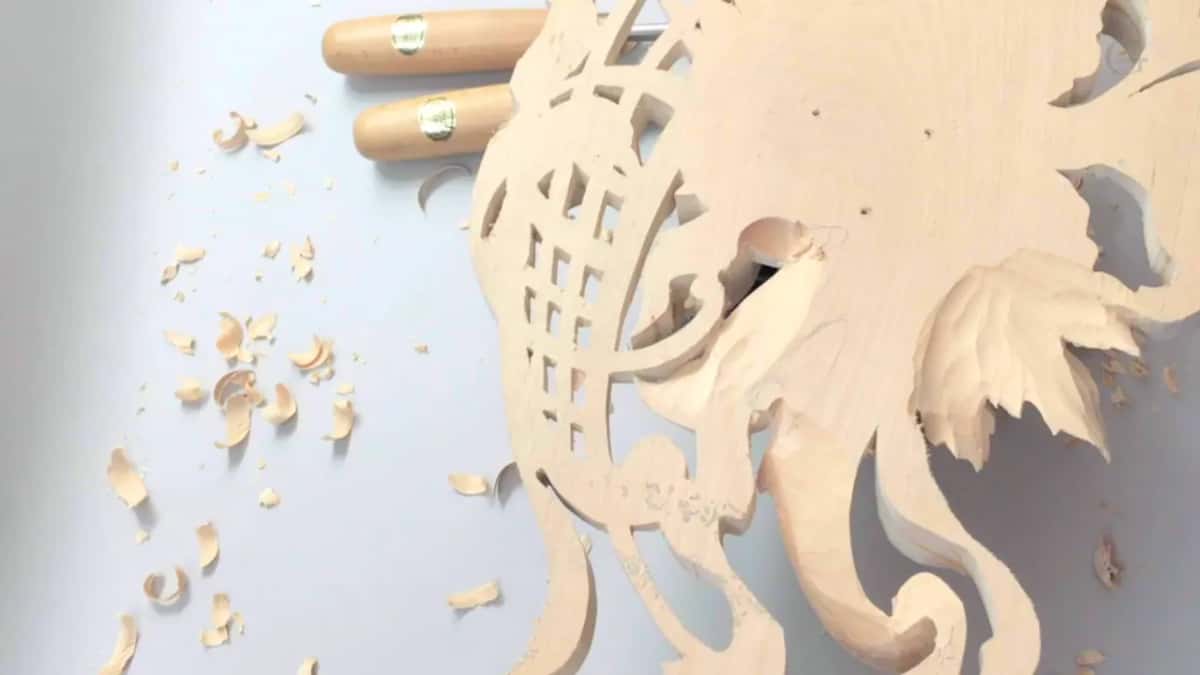
Some of you probably would say it's maybe overkill, and I probably have to agree with you. But for me, to make it as overkill makes sense. I know it's almost impossible to see, but believe me, light and a shadow will create beautiful movements.
Where should a thin leaf keep its wood?
At a connection, in one spot on this panel. In part six I wanted to change one shape, but I still wanted to keep a connection between that piece and a leaf, and the only way they connect is where they get really close. So I left it for now and didn't touch it.
The basket was the other place. On one leaf I could have kept going, but I had to be really careful, because my basket was going down right there, and that would probably be risky for me. Taking a number seven later, I took care not to hit the main basket or grid design.
Part seven was a different spot. A number seven of about 10 mm went underneath one leaf there, and it could actually go underneath the grid, the basket. My main structure I don't want to hit, although I'm still going to undercut even those.
How the basket itself got undercut, slice by slice, is in lesson 6.
What if you take off too much?
On this panel it was mostly okay. If I'm going to overdo it, that's okay too, I said, right after saying how easy it is to overdo.
Once I got really close to the edge and took a little bit of the edge, which is okay. Then I did it again, which is fine also. It's just going to create the natural shape, actually.
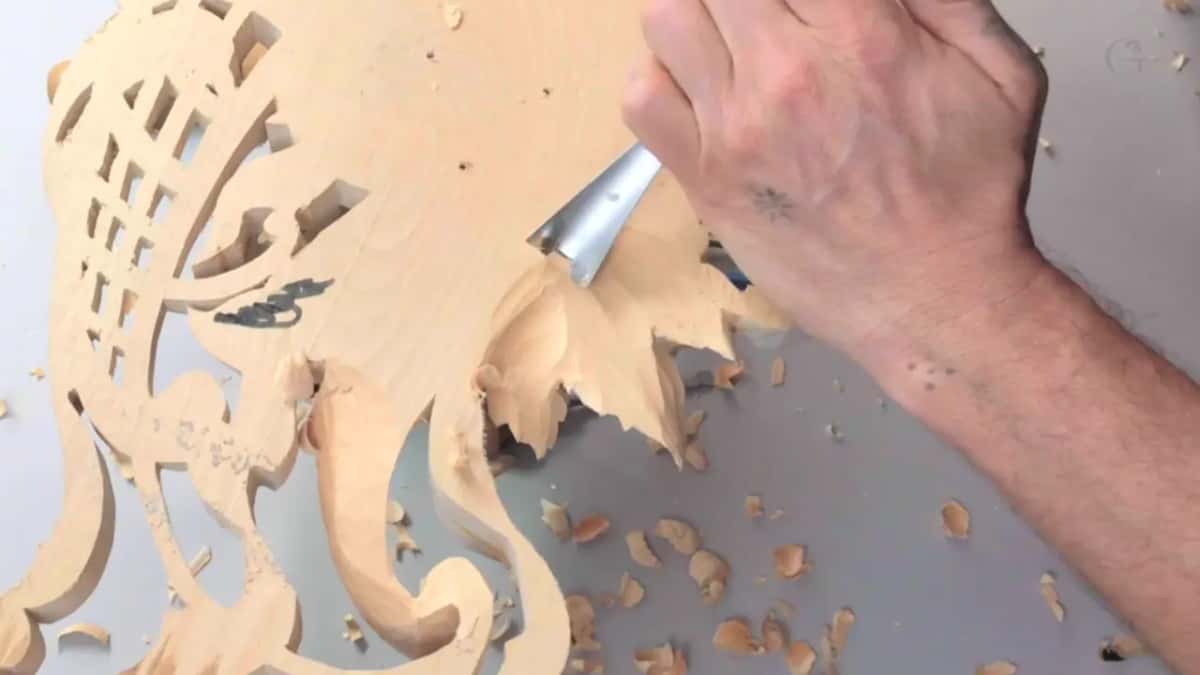
Part five had more of them. I refined my edges and took too much, which is okay. Usually I'm more careful, but I didn't know why I was rushing so much. See? A mistake after another mistake. Too many mistakes.
Against the grain, the wood can split. Using a number five that way in part six, you could see some spots trying to split. That's okay. Near the end of that part I didn't like the mess I created on one leaf, and I wasn't too happy with its overall shape either.

Fast or slow, the leaf has to look right
Sometimes it's a quick process, sometimes it's a much slower process, and so what? I want to make sure it looks beautiful. None of my pieces should look just like production, like somebody cut the corners.
Yes, I would like to make it as fast as possible. But quality, and how beautiful it's going to look at the end, just makes more sense to me.
That same part opens with a story about Riemenschneider, a German carver who would always make it look nice from the backside.
By its end I was happier with one leaf, but for some reason it was still not completely what I imagined, and I left it for now.
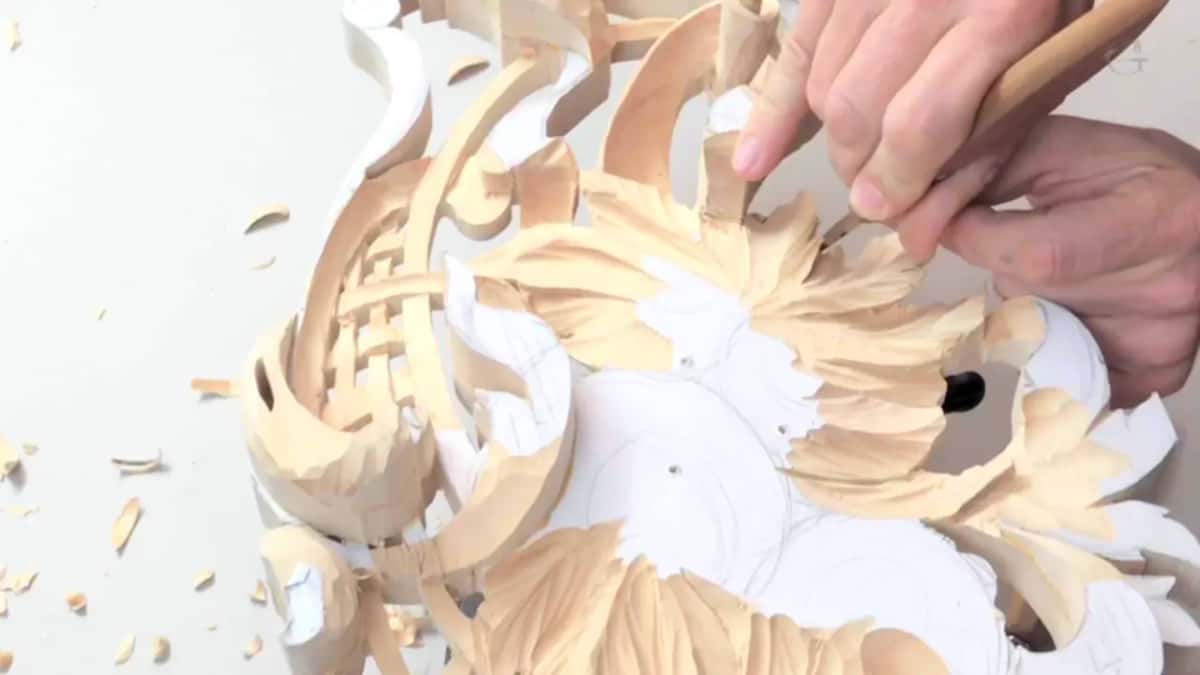
Can you turn a carving over? Can you see its back, the side most people never get to see on a wall? Then you can start from behind. All seven parts of lesson 7 are inside the school, mistakes and all.
How it's done
- Screw the panel down through solid wood. Take it out of the vise and reuse the same holes, in the middle part that stays solid, where they stay hidden.
- Mark the leaves that can come down. A black marker shows which ones you can easily take out right now.
- Remove the waste with a big gouge. A one inch number seven, worked upside down, nearly to the top.
- Flip the panel and look. From behind you can't tell, so turn it over, see how close the edge is, and go back in.
- Stop near 1/16 inch. With that much overall thickness left, the final edge comes easy.
- Set the edge last. Knife or number one chisel, no pencil marks, everything taken to the edge.
- Check it against a background. Place the panel against a background and look for the shadows and the lights the undercut made.
Frequently asked questions
Is a 16th of an inch thin enough for a carved leaf?
On my Hashemi panel, that much overall thickness was the point where I could easily establish the edge. Light coming through a leaf, I said in lesson 8, means less than a 16th, still solid, and past that point I must not overdo it on the inside anymore.
Which gouge takes the waste off a leaf from behind?
A big one first. I picked up a number eight, one inch, then switched to the big number seven for most of the waste. Nearer the rim I went smaller, a number one, or a quarter-inch number five to get even nearer.
Can light show through a carved leaf?
When a leaf is taken thin enough, it can. By part three of lesson 7 I could see through a few leaves already. On a small flower for the Lily box, one paper-thin spot hardly showed on camera, but I saw it, because the light hits through.
What to carve next