

Alexander Grabovetskiy, woodcarver, School of Woodcarving · Published 2020
How do you carve a sphere shape in relief carving?
Quick answer: Carving a ball in relief is chopping a rough lump first, then rounding it with a smaller gouge and a flatter one while you look from all around. In workshop 69 that ball was an acanthus head still joined to its panel, and I worked to keep its round feel through the hollows that came after.
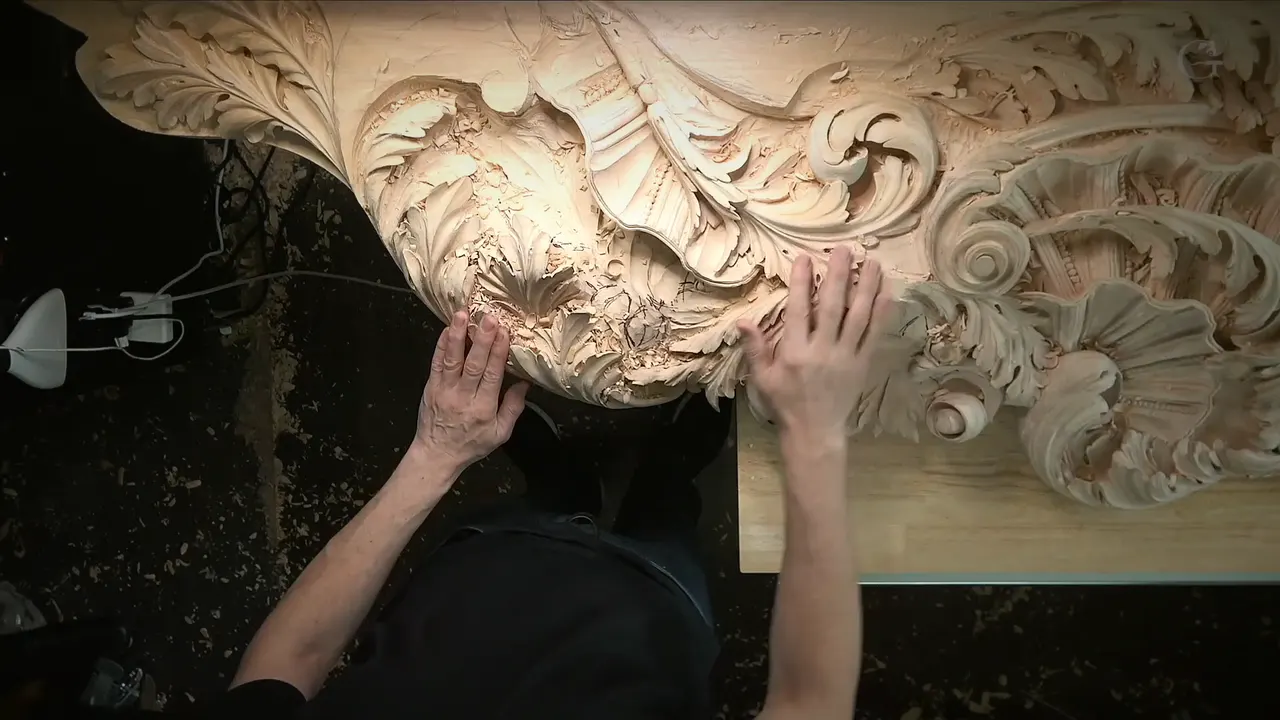
A sphere in relief is a ball that stays joined to its board. You rough it out with a big gouge, round it a little at a time with smaller ones, and keep checking it from every side until it reads as round. People ask me how to carve a sphere out of wood, and most of them mean a ball you can hold in your hand. This one was different. In workshop 69 the ball was the head of an acanthus leaf on a Venetian style panel, and a good part of it lived inside the wood.
Most of what I did carries over to any round form you carve. Big tool first, then a smaller one, then a flatter one on the ridges. One thing does not carry over, and further down I show you the spot where the board itself stopped my tool.
Can you look at a lump of wood and see that it isn't round yet? Could you move your head and look again from lower down? Then you can bring it to a ball, one small chop after another, the way I did on this panel.
Six things the ball in workshop 69 showed me
A #9 of 20 mm, like 3/4 of an inch, and a mallet made the first shape, and not much of it.
No huge tools? A 14 millimeter #7, about 9/16 inch, will still do the job.
An undercut with a #11 made the roundness easier to set.
Over and over I checked the ball from new places, and for a while it still did not feel right.
Once the ball is there, a flatter tool knocks the ridges down.
Hollows went in shallow, only 3 mm deep for one overlap, an eighth of an inch, so the ball kept its sphere feel.
Carving a sphere out of wood when half of it stays in the board
This head sits at the end of a leaf's middle line. Before touching it I had to decide how that line ends, and I leaned toward a point about 20 millimeters below, not twisting up. The acanthus head itself has its own long story in part 2 of this room. Here I only follow the ball.
I told the camera I needed a really nice, roundy look for it. Roundy is not a word. Still, it came out of me too many times, and then I owned up that I made that word up.
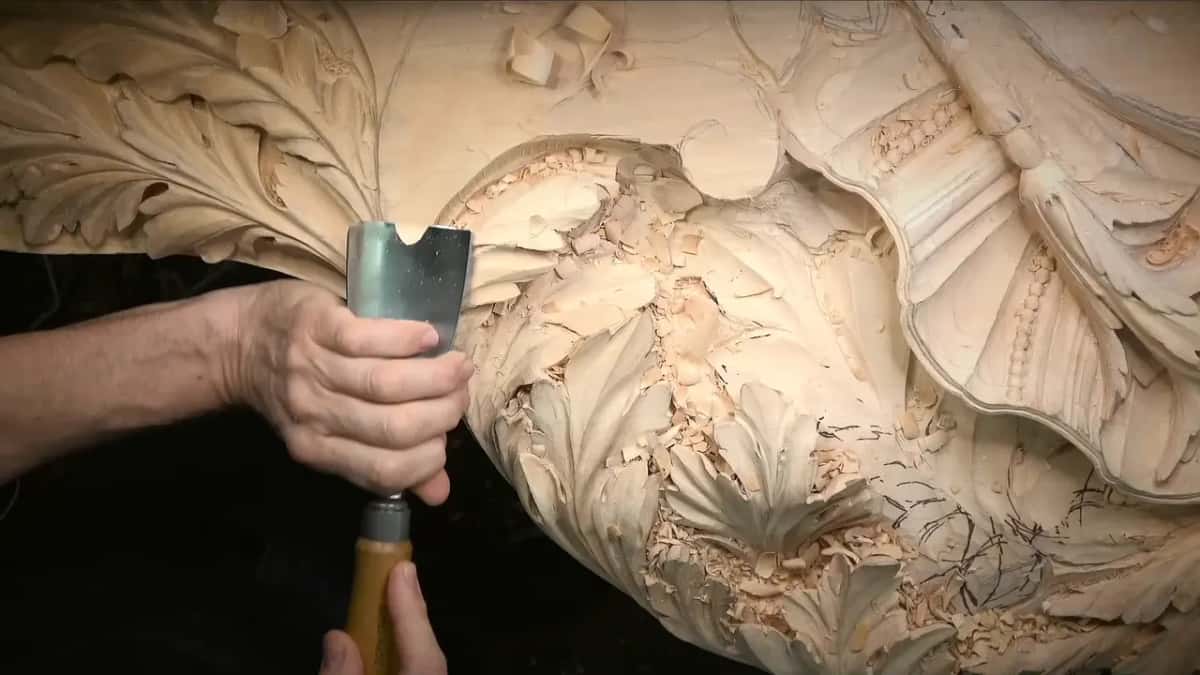
For the first shape I took a 20 mm #9, like 3/4 of an inch, and chopped a little bit. Not much. I did not want to rush it, I really didn't. Then the mallet came out.

All I wanted at that stage was access to the future head. The final shape could wait. The main shape, the form, if you wish, was all I was after.
Huge tools just give me a much quicker result, and I know not all of you have exactly what I have. So here is what I said on camera for everybody else. If you don't have huge tools, you just have to be more careful, and if you can find a number seven in 14 millimeters, that is an excellent tool to make the shape, any shape pretty much. I wrote more about that sweep in what a #7 gouge is used for.
Let's not dig in too deep. Little by little, the main form comes.
Why put an undercut in before the ball is round?
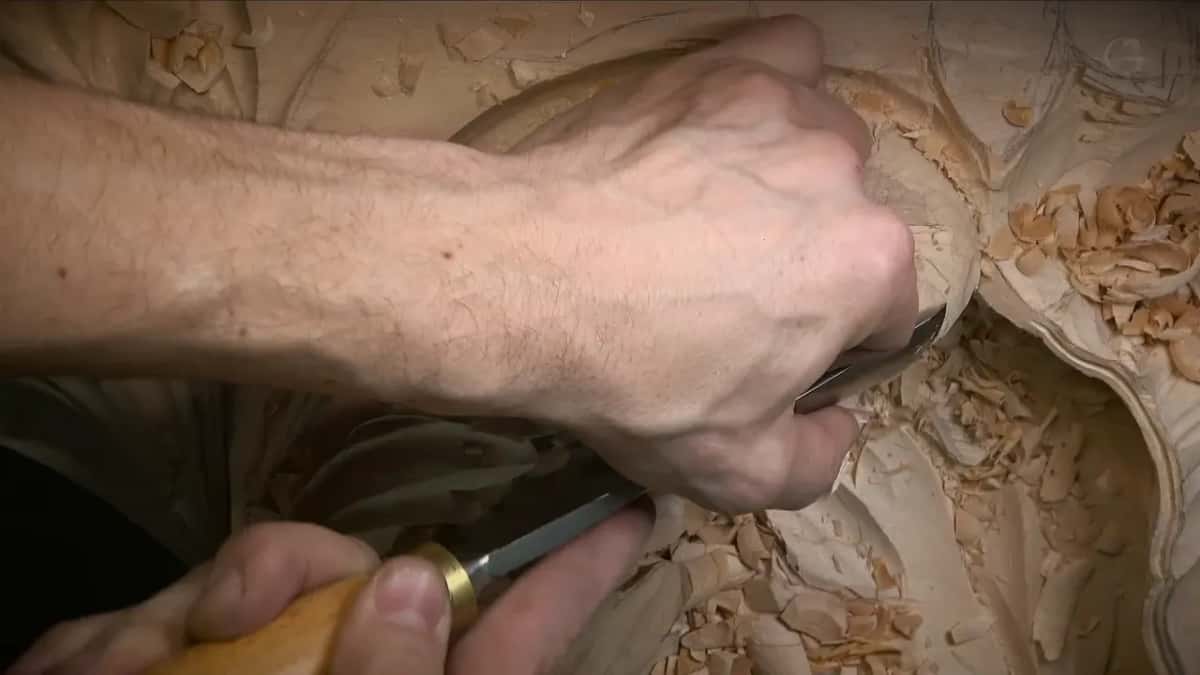
An undercut made the roundness easier for me to set. I took a #11 of 10 millimeters, about three-eighths of an inch, and got a little undercut done.
Then I went bigger, to a 20 mm, three-quarters of an inch, for a cleaner pass that was also quicker. Got to be careful there, and watch out for the grain. A #7 of 14 mm, I said, could carry on the same way until I was happy with the overall shape.
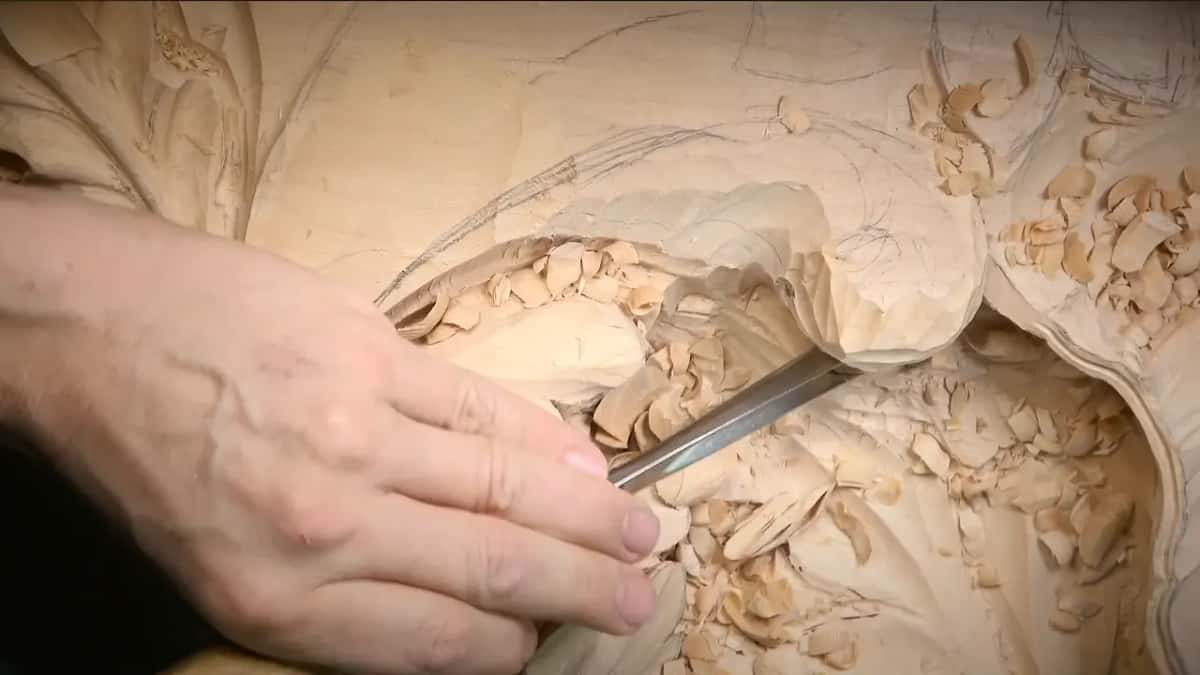
Partway through I told you the tool in my hand was a number 11. It wasn't. It was a number 17, one of the specialty tools, and it looks like a number 11 until you read it. Somehow that 17 got inside the wrong drawer.
So I took a real #11 of 20 mm and kept going around the line. The grain broke right away. While the head was still rough, that was okay, but if it had been closer to the finish line, going on like that would have been a big mistake.
I said sometimes those mistakes are unforgivable, and then I took the word back. Almost every mistake is forgivable. The consequences you can't change. Same like in the Bible, actually: you can be forgiven, and you still face what you did.

Tool marks at this stage don't bother me. I can clean them with no problem later, and I told the camera so.
When is the ball round enough?
You look at it from every position you can get to, and you keep doing that. I was constantly checking how it felt overall, and for a good while it still did not feel the way it was supposed to feel, which was okay.
At that point I stopped myself. I still had to carve the upper part later, so I held back from overdoing it. It's kind of a ball, I said. That's what I'm after, the almost perfect ball.
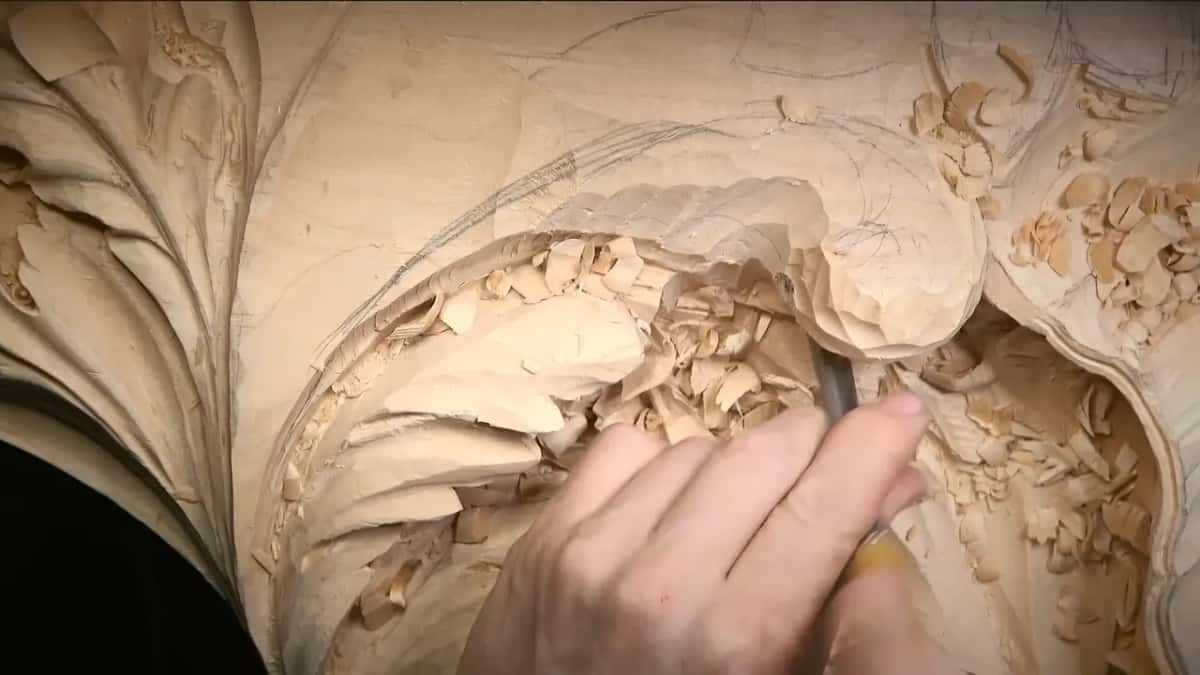
From a different point of view there was too much of a spot on one side, so I had to attack it again. Another #7, a different brand, roughly the same size again. After that it looked much better.
Watch my hand while I do this. It looks like I'm holding it really high, but I'm resting on a finger, sometimes on three, so the hand always has a place on the piece.
Later in the workshop I said something I want you to keep. When I stop and take a moment, it helps me see what is going on. I step away and look from different points of view, because sometimes a shape looks good from one angle and wrong from another. Just step away for a couple of seconds and look at it. If it makes sense, it's good. When it doesn't, change it.

What smooths the ridges on a round shape?
A flatter tool, run right on the ridges, is the quick way. I said a number three would do it. Then I said I had the wrong tool in my hand, and that most of you don't have tools like mine, so I should do it my normal way.
The normal way was a bigger tool that fits. Mine was an Ashley Iles number 7 whose bevel I had never set up the way I like, and I hadn't finished it, so I sharpened it right there. Just with a number seven, though, I had made the main form really quickly. Relatively quickly, I should say.

The sharpening took a couple of minutes, maybe a little longer for a huge tool like that. A bevel of about 10 mm, three-eighths of an inch, starting at 80 grit, in the same Tormek jig I used for large tools in earlier tutorials, on a Work Sharp. Then finer grits up to 6,000, a leather strop and a finer blue paste. Sharpening has its own course, so I won't teach it here.
The edge was worth it. It sliced like butter, and I said it would take a lot less effort now to make that ball shape, or whatever you call it, a sphere shape, which is probably a better name for it. I kept the bevel from going too low on purpose. I planned to hit that tool with a mallet, and I still needed to raise it a little while carving.
I checked from all the positions and said I was getting a really good sphere. Double check. Beautiful sphere.
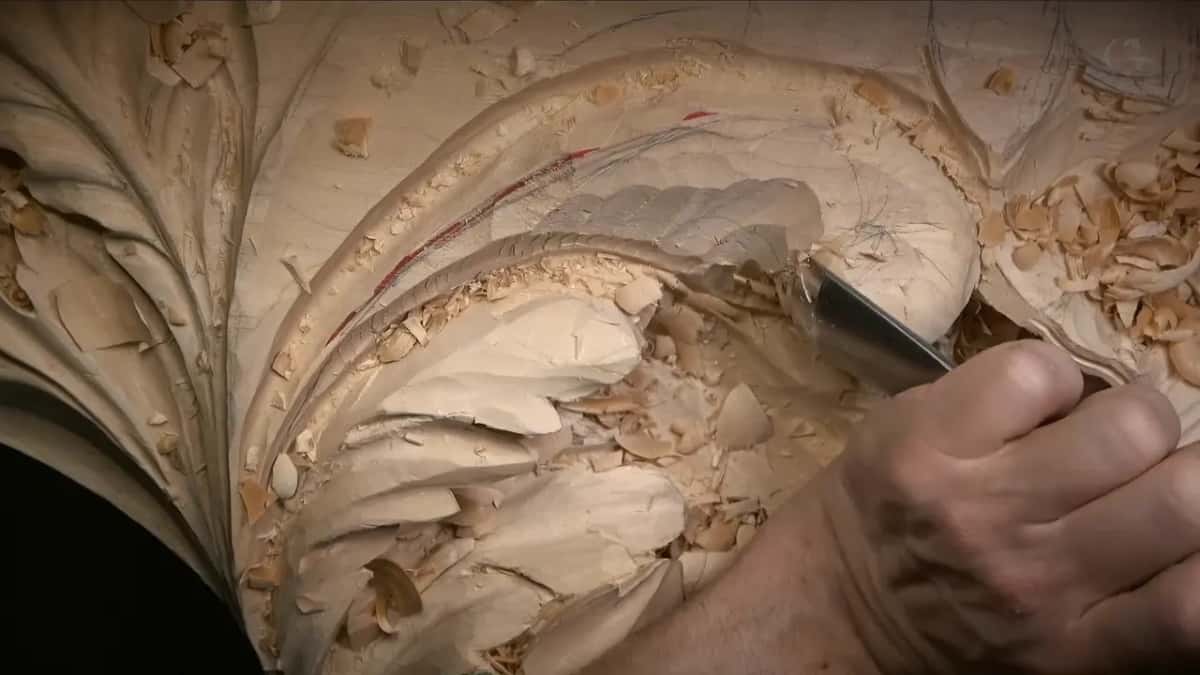
Can a skew chisel shape a ball?
A skew can, and while I was rounding this head I said a knife or a skew would probably do it even better. First I came at the ball slowly, without the mallet now, so I would not leave too many tool marks.
I was using a 20 mm #11 and said a 30 mm would give an even better result. I tried the 30. Too big right now. So the 20 went on, then a 7 mm to take out what I didn't need, and I wanted more roundness in one area, so I asked for something flatter, maybe just a number three.
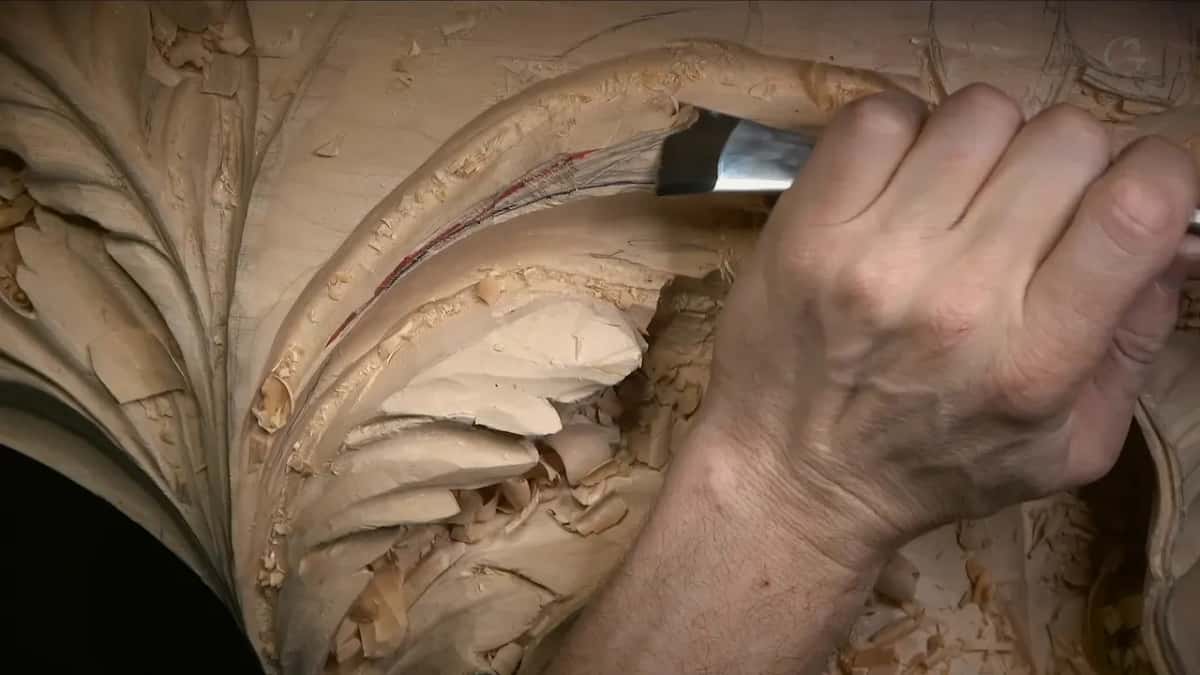
Then the skew. Not just any skew, I said. I really like that 22 and a half degree one. I kept checking from all points of view, fixing a little, not too much, and never down to the final line, because the inner movements were still to come. Skew was a really good idea in that spot.
It could be done with any tool pretty much. It's not the only way. You can do a lot of shaping with a skew. The school's course on tools is there if you want to go further.

What changes when the sphere belongs to a relief?
The board stops your tool on one side. With a small bead you can turn the work and take one small facet at a time until it looks round from any angle, the way the beads and berries lesson does. On this head I knocked the ridges down with a number three, one side, then the other, and then I got to the part I could not reach.
I'm not able to attack that from the opposite direction, I said. That is already ceiling. For me it's impossible to place a tool there, so whatever the ball needed on that side came from the sides I could reach.

The panel will be seen mostly from below, and that decided more than the order of my passes. I placed the eyes a little closer than usual, because a farther eye would not be visible from there. Small details on a leaf like this have their own page in workshop 9.
The middle line of the head came from simple arithmetic. I had about an inch and a half to the point, and I divided that right in the middle, and that became my middle line. The opening after it went in with a 20 mm #11 veiner and a mallet, carefully, because the grain meets there and I had to come at it from two sides.

How do you keep the sphere when the hollows go in?
Keep them shallow, and think before each one. One part of the leaf had to overlap the main body of the head, and I chose which one overlaps because of the view from the bottom. I went in about 3 mm (1/8 in) there, not too deep. Otherwise I'm going to lose my feel of a sphere, I said, and I don't want to lose it.
After that I blended into it. The easiest way was a huge gouge going around the head, almost perfectly round, because other wood was in my way.
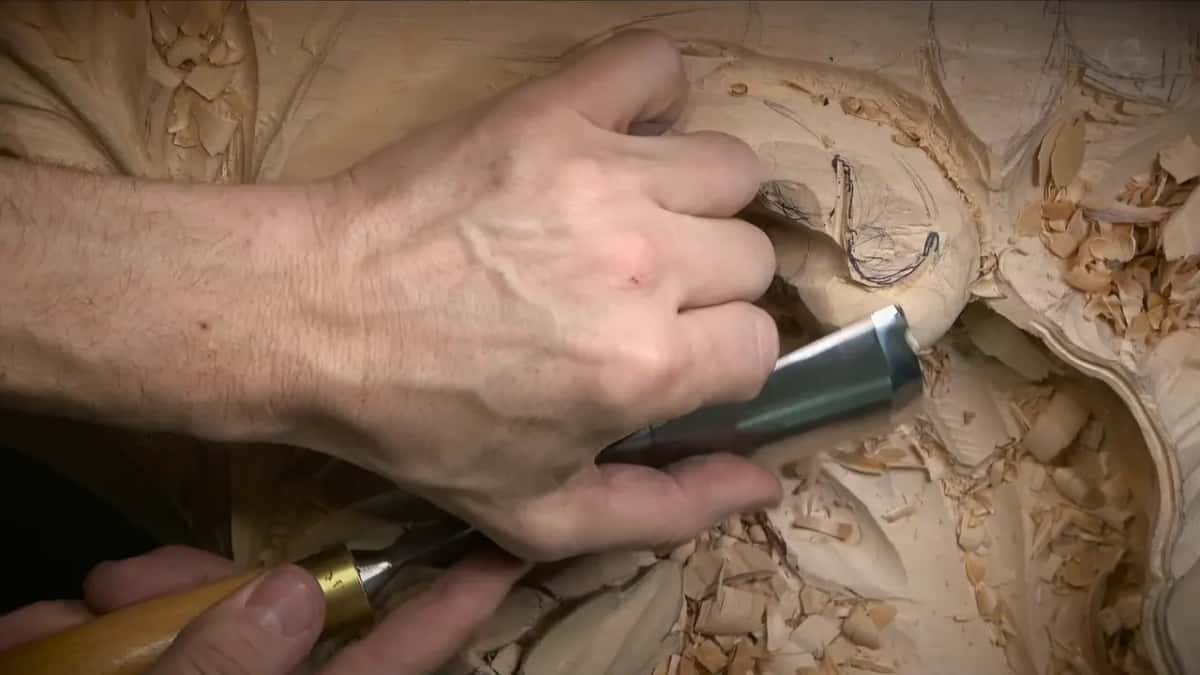
The biggest hole came from a small tool. A 6 mm #9, a quarter inch, from Auriou, started what I called a huge eye with a plug removal cut, to get it really deep. It gives me extra shadow, and I think extra movement too.
While digging in there I left about 10 mm (3/8 in) between the upper point and the lower one, like a ceiling of my future dome. I still had to make sure everything worked out before getting close, and it has to be strong. Not every carving of mine gets made paper-thin. The hole itself went about 20 mm, like three-quarters of an inch.
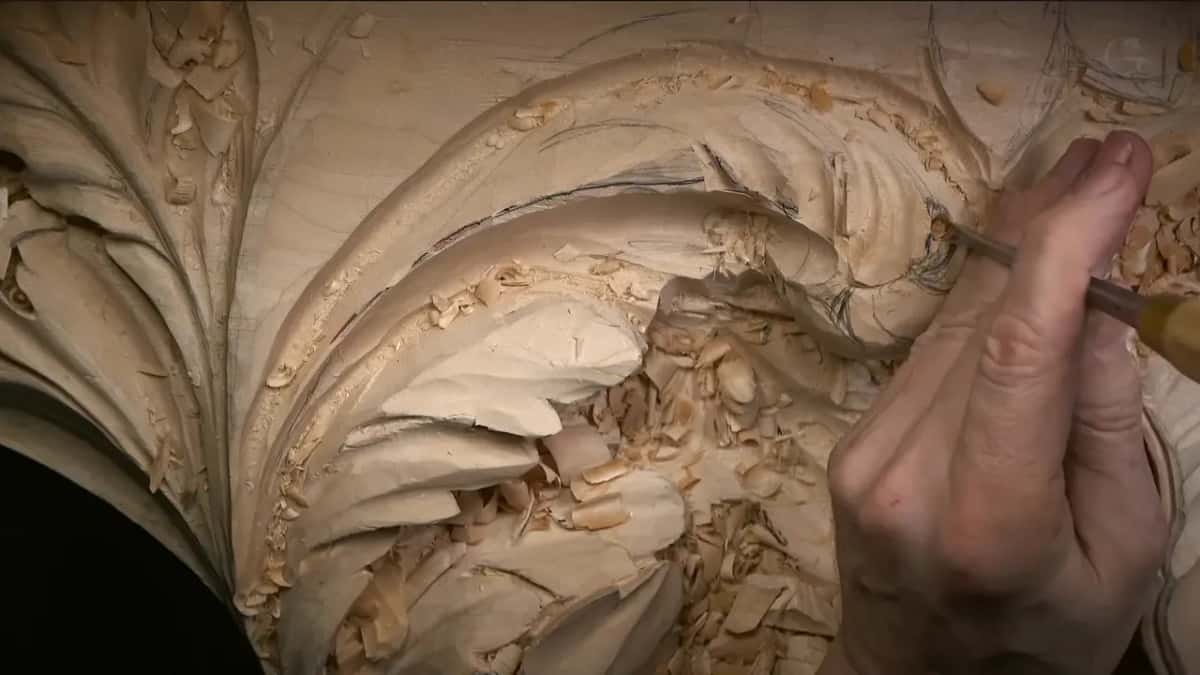
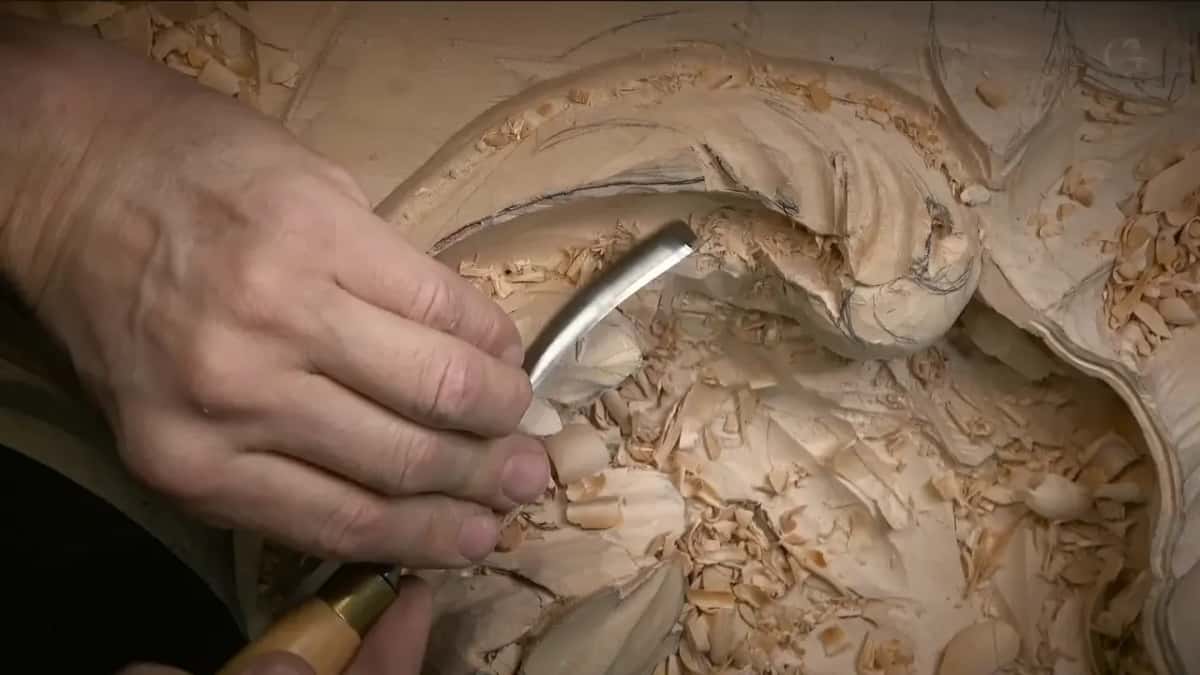
A #7 of 14 mm did not work out there, because I was carving against the grain very much, so a long bend #11 went in. I first called it 10 mm and then corrected myself, since it's really about 12. It's a bigger tool, and if I push too much I can lose the whole head. That would be a big mistake.
So how deep should the next concave go? I asked out loud, and I answered myself: probably not deep, because I don't want to lose the overall sphere feel. In the last part of the workshop a #6 of 20 mm rounded one side a little more without losing the feel of the concave, and then it felt much more organic.
Which gouge did what to the ball
| Tool and size | Job on the ball | What I said or did about it |
|---|---|---|
| #9 of 20 mm (3/4 in), mallet | First rough chop | Just a little, because rushing it was the last thing I wanted |
| Small #11, 10 mm (3/8 in) | Undercut for roundness | A little of it, so the roundness would come easier later |
| Bigger #11, 20 mm too | Cleaner, quicker passes | Broke the grain once, fine while the head was still rough |
| Round #7, near 14 mm or 9/16 in | Most of the form | Made the main form really quickly, relatively quickly anyway |
| Skew ground at 22.5 degrees | Rounding the ball | Kept checking from every angle and fixed only a little |
| Long bend #11, about 12 mm (1/2 in) | Inside the eye | Pushed gently, since pushing too much could take off the whole head |
Do you want a ball that still looks round after the eyes and hollows go in? Would you like to see each of those tools working on one head, pass by pass, instead of reading about it? Then workshops 62 to 73 are open to you with school access, and workshop 69 is the one with the ball. The lessons on each side, workshop 68 and workshop 70, carry on the same panel, and workshop 62 explains what high relief means on it. Never held a gouge? Start here first.
Grapes need the same kind of round, smaller and all around, in the grape onlay course, and the middle of a relief flower goes to half a sphere in the furniture panel.
How it's done
- Chop the first shape. A big gouge and a mallet, a #9 of 3/4 inch, 20 mm, in my case. Take a little, enough to get at the head.
- Undercut along the head. A 3/8 inch #11 (10 mm) first, then a bigger one of 20 mm for cleaner, quicker passes. Mind the grain.
- Round it with a #7. I used one of 14 mm, a bit over half an inch, and went slowly, never digging in too deep.
- Look from every position. Attack any spot that sticks out from where you stand. Step away for a couple of seconds and look again; if it doesn't make sense, change it.
- Knock down the ridges. Run a #3 right on them, or a skew. Mine was ground at 22 and a half degrees.
- Keep each hollow shallow. An eighth of an inch (3 mm) for the overlap on this head, so the ball still feels round after the detail.
Frequently asked questions
What tools do you use to round a ball in a relief carving?
On the acanthus head in workshop 69 a #9 and then a #11, both 20 millimeters, or 3/4 inch, took off the bulk. A #7 near 9/16 inch (14 mm) made most of the form. Then a #3, flatter, and a skew at 22.5 degrees finished the rounding, and I said a knife could do it too.
Do you need huge gouges for a round shape?
Big tools only make the job quicker for me, and I know not everybody has what I have. If you can find a number seven in 14 millimeters, that is an excellent tool to make the shape, any shape pretty much, so go little by little and don't dig in too deep.
How deep did the hollows go on this carved ball?
One overlap went about 3 millimeters, 1/8 inch, deep, and above the big hole I left roughly 3/8 inch (10 mm) of wood like a ceiling. A deeper concave, I decided, would lose the overall sphere feel. Those are the figures for this head; not every carving of mine gets made paper-thin.
What to carve next