
Alexander Grabovetskiy, woodcarver, School of Woodcarving · Published 2020
What is high relief wood carving?
Quick answer: High relief wood carving is carving deep enough that each form shows its sides, while its back stays in the panel. On a Venetian ceiling I stopped short of a true round on one volute and carved it closer to an oval, which reads as more organic.
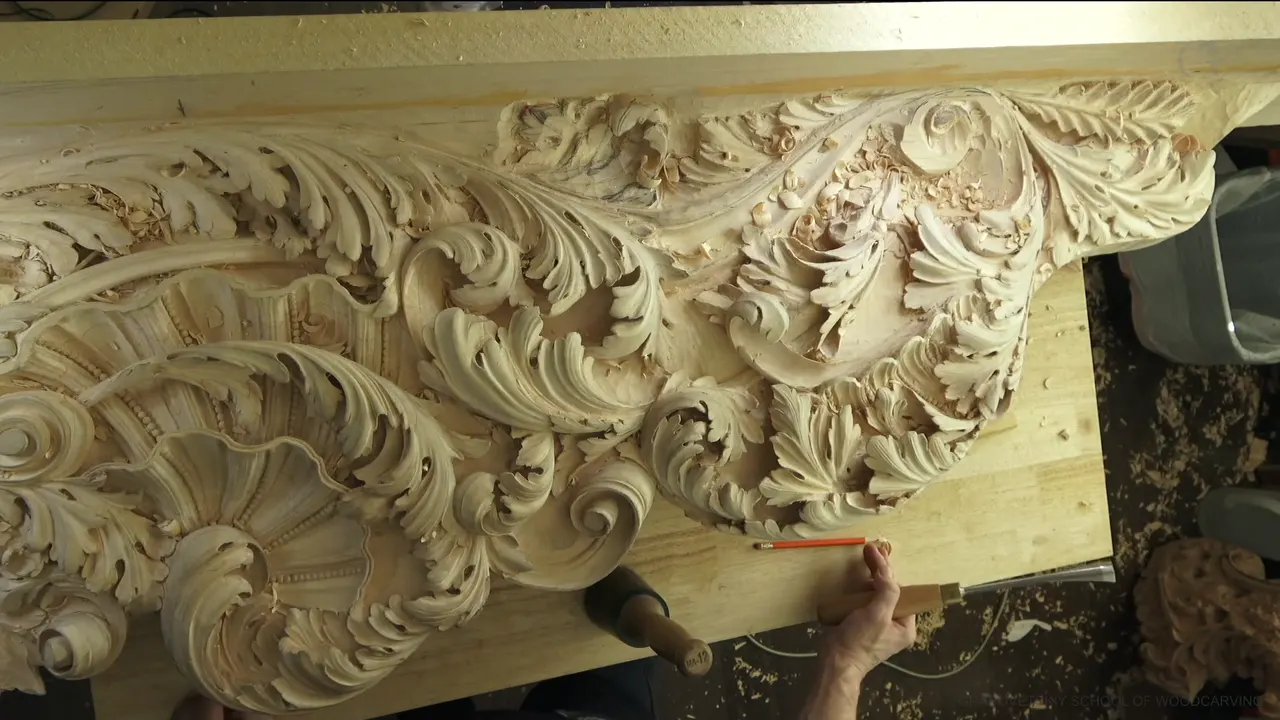
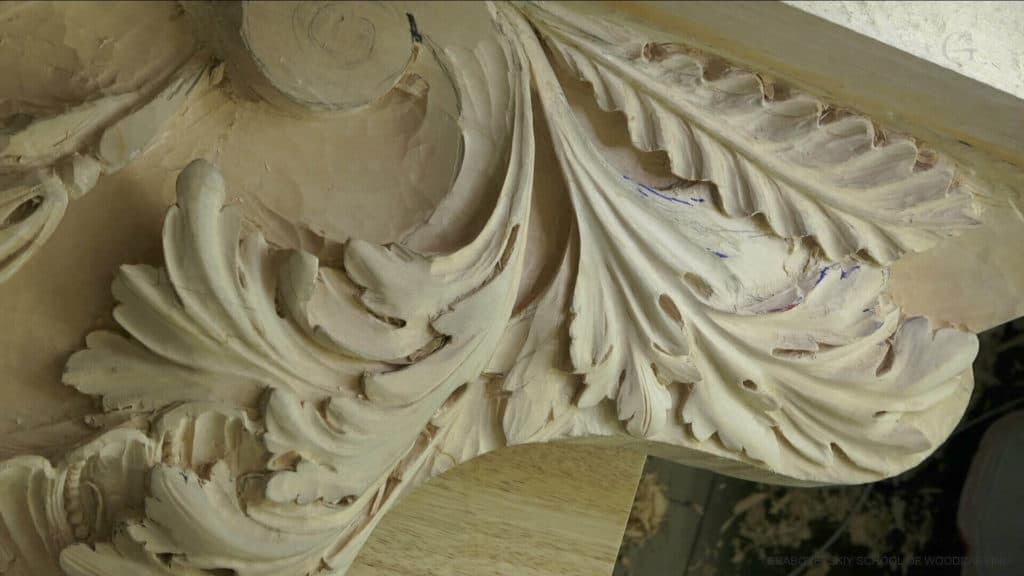
High relief carving is relief work carved deep enough that the sides of each form come into view, while every form stays joined to the board behind it. Where that stops, and carving in the round begins, came up in workshop 62 with a volute on a slope right in front of me. I said it plainly on camera. This one is not full three-dimensional carving. It is a high relief, and so the form I could have carved as a true round became an oval.
Relief comes in kinds named for how far the forms stand out from their background, low, middle and high, and a sunk kind besides, and I will leave the measuring to the books. What I can give you is where the line fell on a real ceiling, and why a true round looked wrong there.
Do you like it when a carved leaf looks ready to lift off the board? Would you like to know how far a form can come out before it stops being part of that board? Then follow one volute on a slope through workshop 62 with me.
What the volute showed me
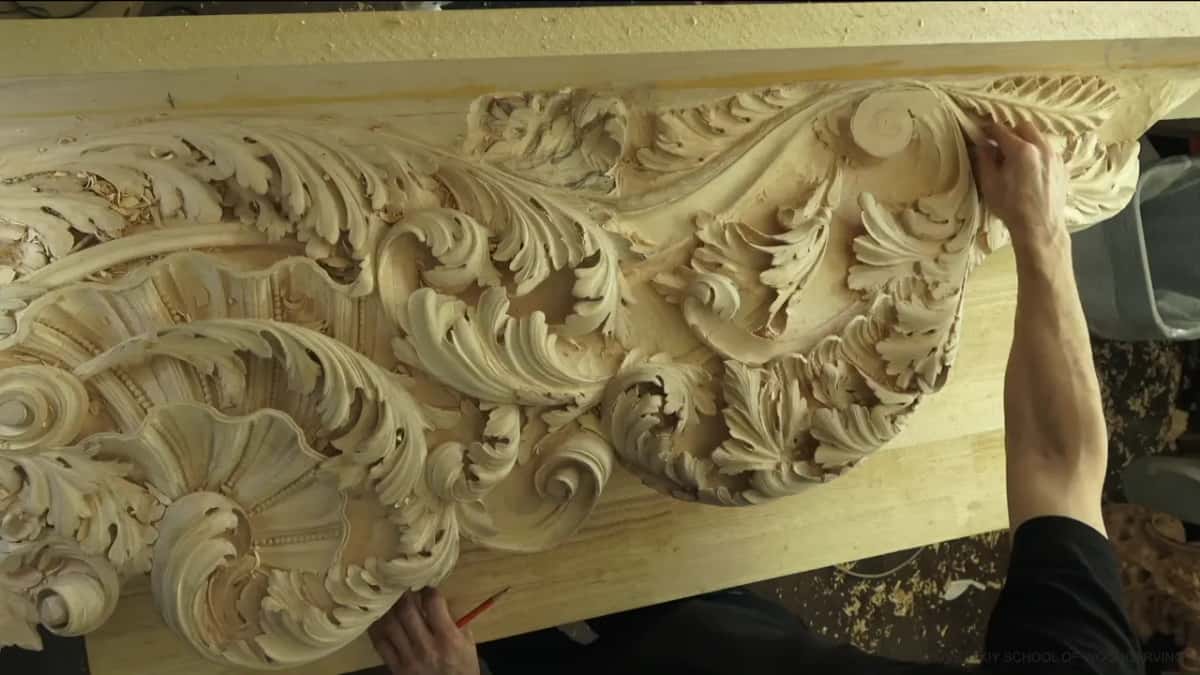
A form in high relief shows its sides, and its back stays in the board.
Where I could have carved a true round, I carved an oval, because a round there would not look good.
Rounding a form opens up its side.
The walls take light pressure, since a hard push leaves tool marks you fight later.
I kept one ridge high on the slope so the climb would not get lost.
The mass came out with big gouges, the widest of them a #7 that is 80 mm (3 1/8 in) across.
It all looks confusing at first.
How is high relief carving different from low relief?
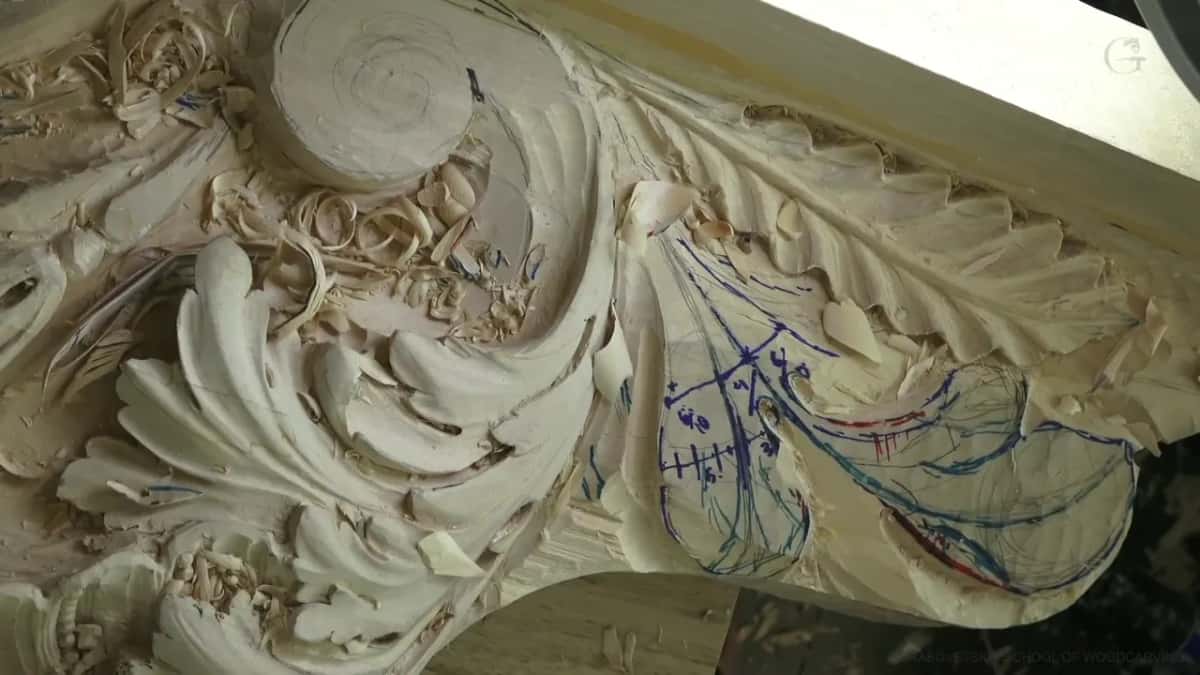
Depth is most of it. Low relief barely lifts off its background, and high relief stands far out from it. There was a point, with the #5 in my hand, when the volute still looked like the shallow kind. Right now it's just pretty much like a relief carving almost, I told the camera. Then I lowered the wood around it, because I really needed to expose that barrel, which is only my word for the round middle of a volute.
If your board is thin, there is a separate page on getting deep relief out of a thin board by adding wood. Working shallow is its own subject too, and there is a page on making low relief look three dimensional. How carving differs from sculpture is another talk again, one I gave in workshop 55.
Why does a round form turn oval in high relief?
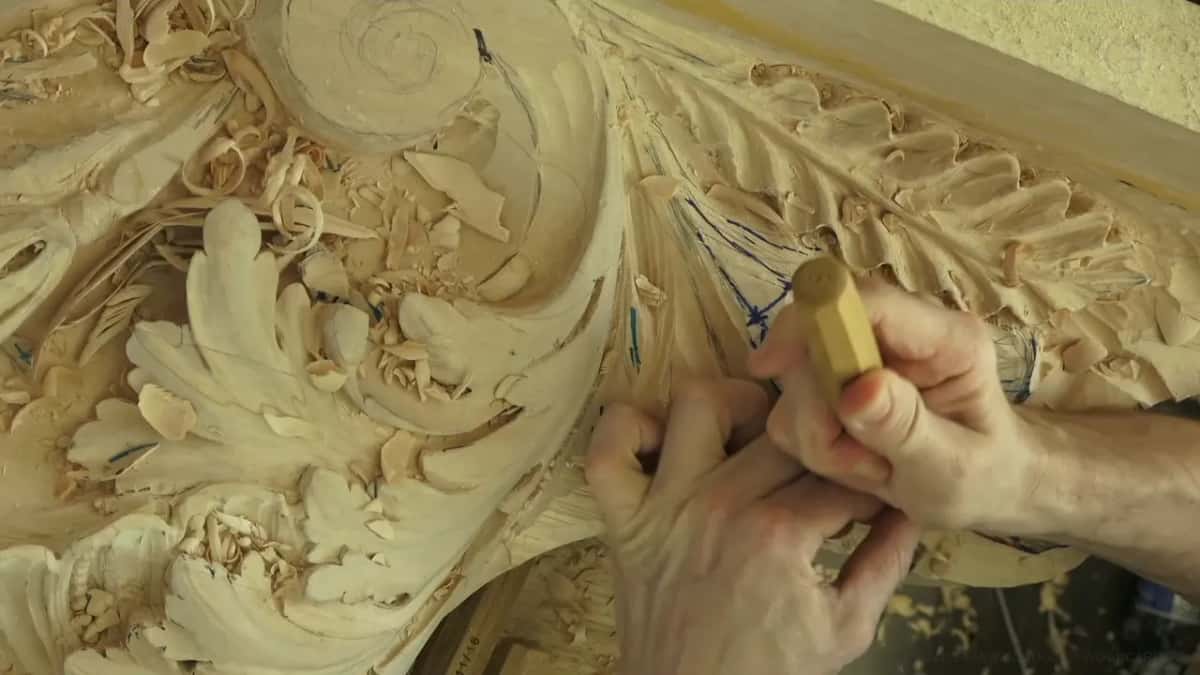
A true round would have looked wrong on this board, and I said so while the gouge was still going around it. What I was carving was not full three-dimensional carving. It was high relief, so the visual was not a true round, and I made the form more like an oval. An oval looks more organic to the human eye. Those are nearly the words I used, and I left it there.
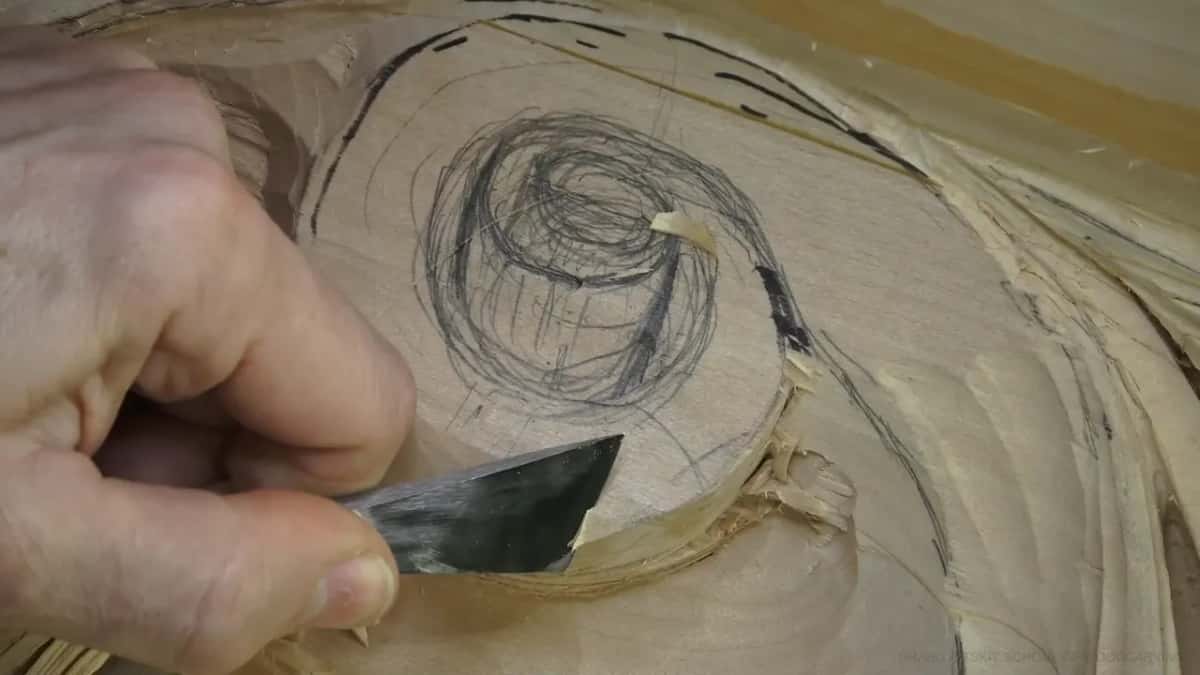
The rounding itself stayed small. On the slope I wanted more than a plain slope, just a little bit of a rounding effect, and a big skew laid it on. Later a #11 went around the inside of the element, only part of the way and only as a first pass, so I would not lose the feel of it. When I showed the whole thing, it looked really organic. It started in one spot and moved around. At the start of the last part I gave it a more organic slope, and I could develop more or less how it was supposed to look, and that didn't take a long time.
When does the side of a form get carved?
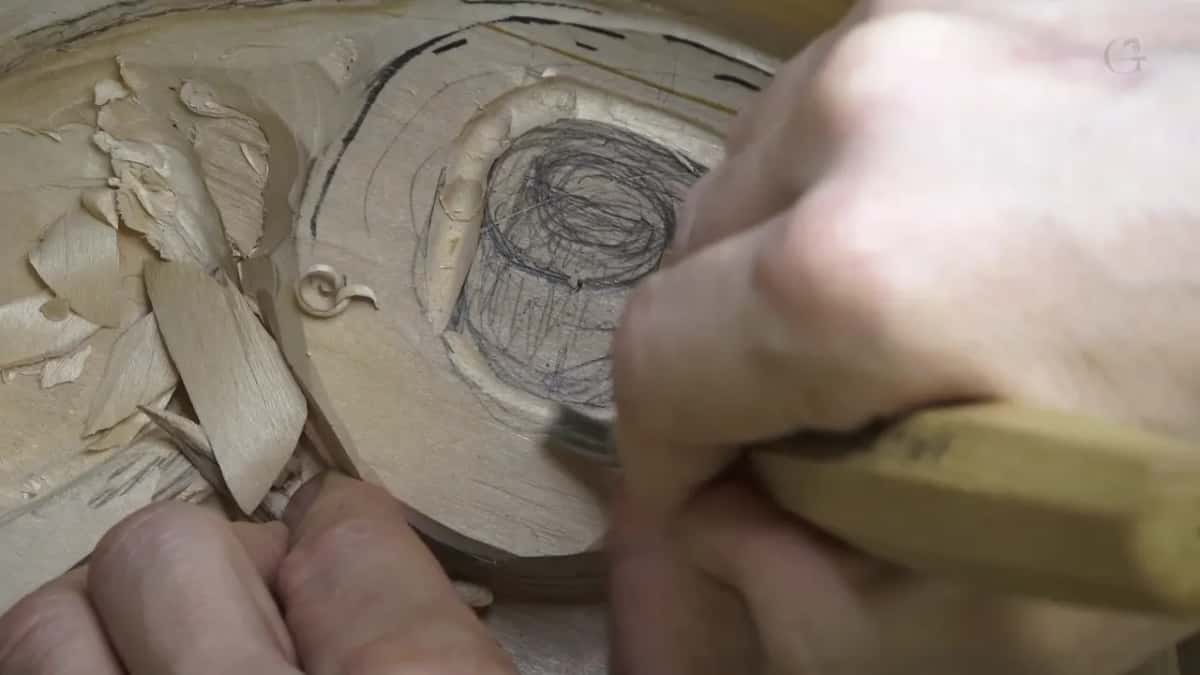
As soon as the top gets rounded, the side shows, and then the side needs carving too. Planning this volute I said it straight out, if I round this part I also need to expose the side, so it has to be more three-dimensional. A little later I took more wood out beside it, because there was too much, and exposed more of that side. This board goes on a ceiling, where the side will be visible from the bottom, and carving for that view from below is its own lesson.
It also had to look good from every point of view in this room. Camera came out first. Not camera, points of this room, I guess I'm used to the camera. The main view still came first, and the inner part of the volute was not allowed to distract from it. Holding all of those views in your head at once is a skill, and seeing a carving in three dimensions has its own page. On my board I worked the volute from the inside out, little by little, without rushing too much.
What is the wall of a form?
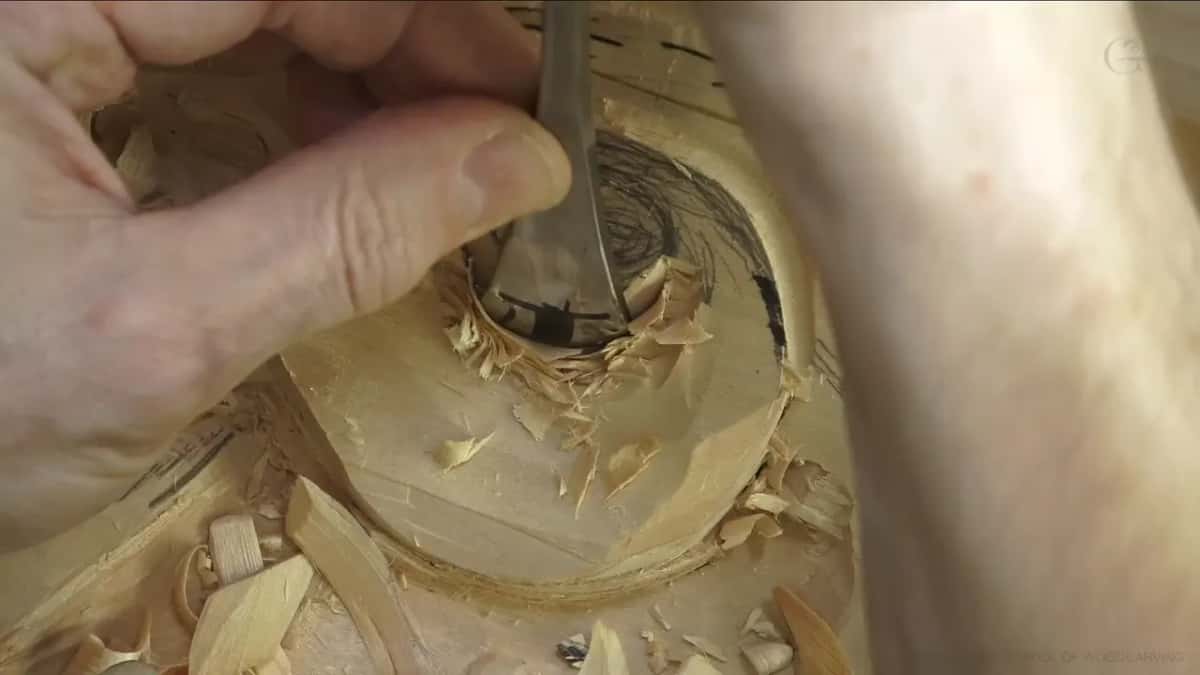
The wall is the side you make when you chop down beside a form. For the volute's wall I used a #7 about half an inch wide, 14 mm, and it was the same wall repeated once more, but on a higher level. For that wall I could have used a #11, a bigger #7, or even a #8.
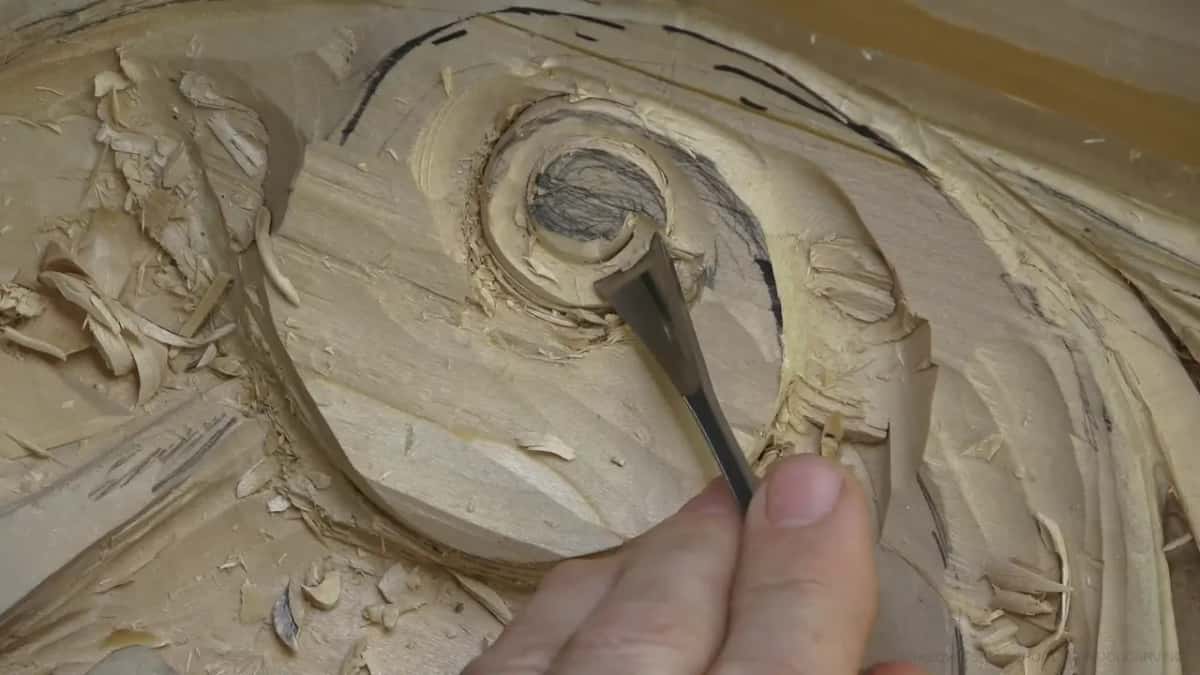
Then comes the careful part. I had to be careful not to press too hard, because I didn't want to damage the wall. Push too hard and you create tool marks, and later on those are a real problem to clean up. Near the end I stopped short on purpose and did not push all the way in, to keep the wall of that element, since otherwise it gets really hard to clean. It's always better to clean that with a #11. Always, always better to be more careful, extra careful, I should say.
Up near the top I took a little out of the upper part and hit a glue line.
What changes when the form sits on a slope?
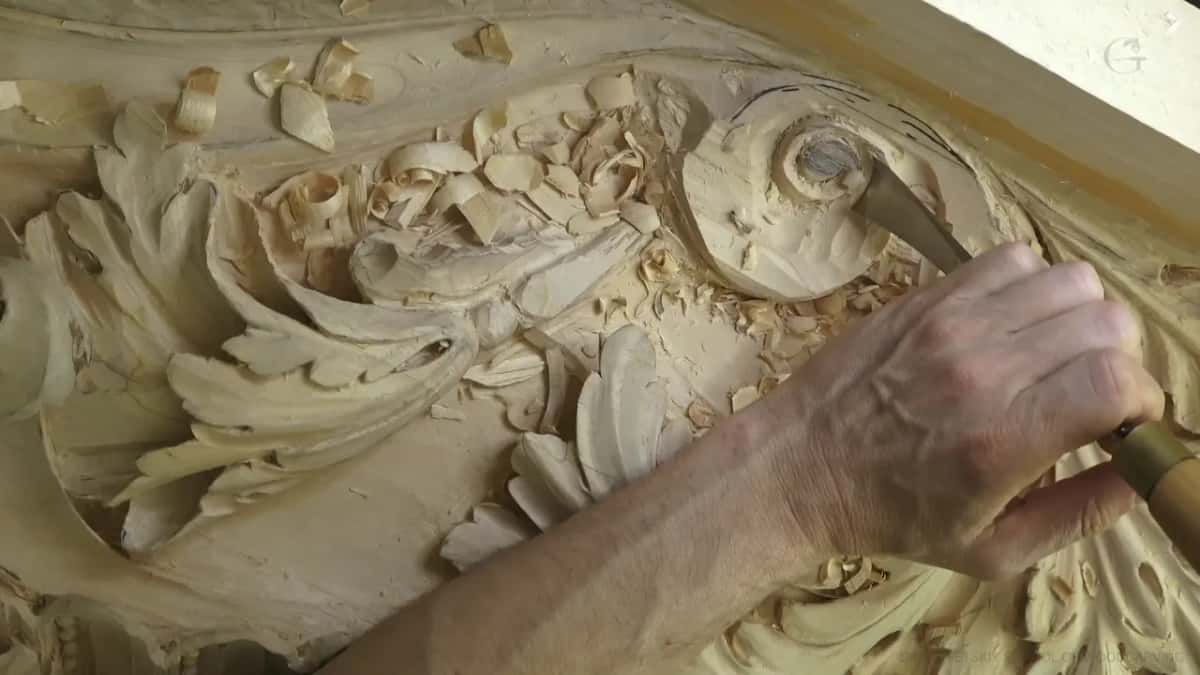
Two things start to fight, the rounding and the slope. The problem with this volute is that it sits on a slope, and when I round it, it has to be more three-dimensional, but the slope going up makes that a little problem. It still has to read when you look straight at it from a different point of view. This volute came down to us from ancient Greek culture, and its best known place is the top of an Ionic column, where you find four of them.
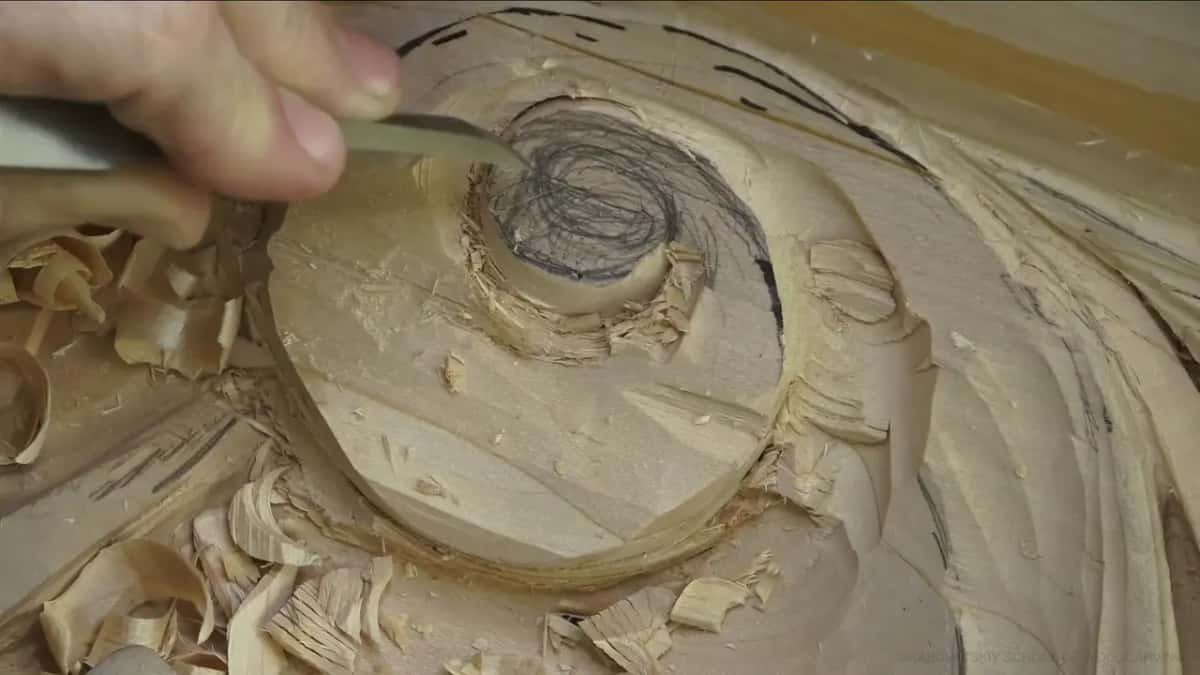
What saved the climb was one ridge. I had to be more careful there, because I didn't want to lose that ridge, I wanted to keep it high, and without it the transition upward would be gone. With the corner of my tool I started an uphill pass, and then the #7 went back to chopping down. I have to be really careful how I'm doing it, I said out loud, and I wasn't. I was not.
Before any of that, while I outlined the inner part with a small #11, the grain kept trying to split on me. A #1 had set the slope, going all the way in, and I matched it on the other side until both sloped about the same degree. Then a #5 exaggerated it a little more, because I thought it would make more sense. There are lots of ways to approach a volute like this, and the one in workshop 62 is just one of the approaches I like.
How far do you push one form?
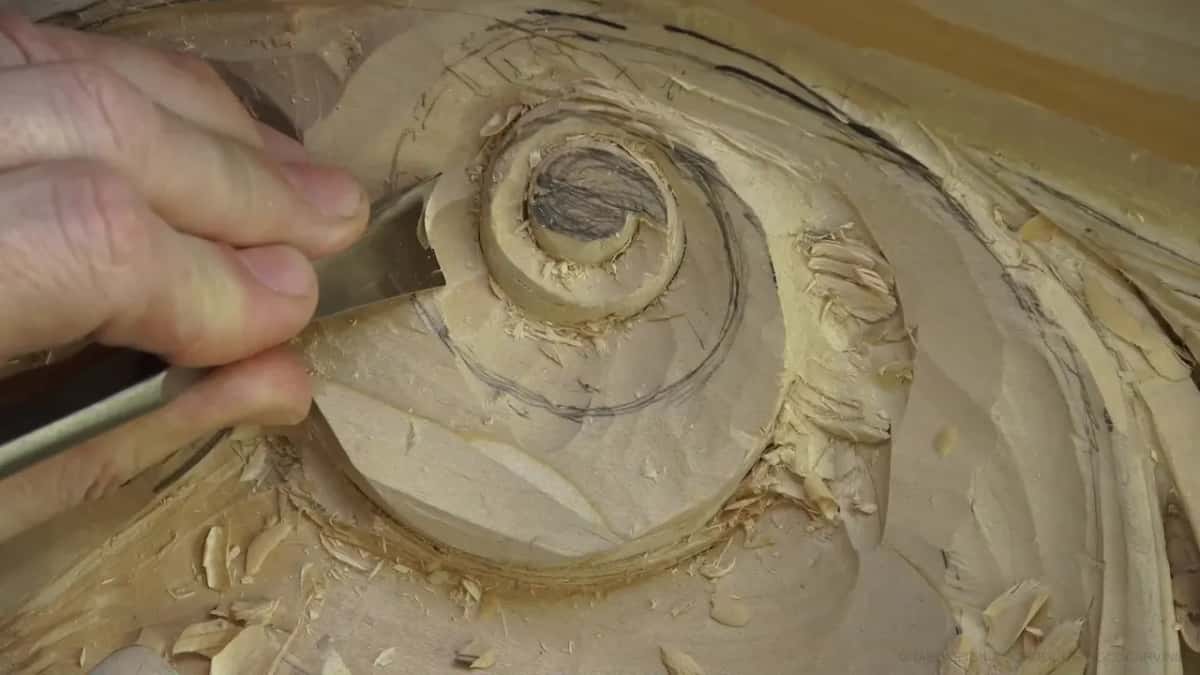
Far enough to look right, and that's all about how it feels in the overall design. Sometimes I change mine and excavate deeper, but I'm not doing it from jump number one. I look at it first and see what is going to look better. Beside the volute I took an 18 mm #11, a little less than three-quarter of an inch, and excavated much deeper, just to get more aggressive on that side. Maybe I got too aggressive, but it's okay. Right then it was a starting point, a really good starting point. I held back near the bottom, because I did not want to make a mistake.
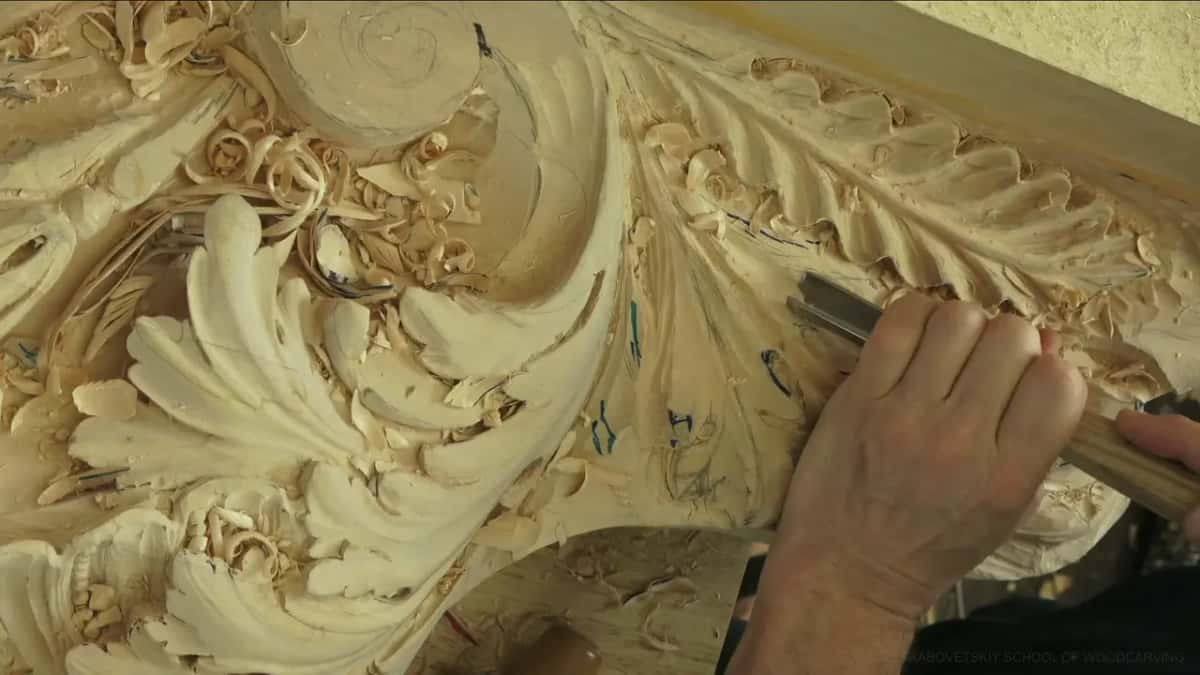
At one spot I was after getting really close to the full two inches (about 5 cm) of this board, and at a ridge I left about 5 mm, 3/16 of an inch, because we were going to need that. Early in the workshop I wanted a really massive concave, because I really, really, really wanted to see some movement, some shadows. I meant to use an 18 mm #11, then changed my mind and took a 30 mm one, about 1 3/16 in, since I really wanted to exaggerate everything. By the end of the first half the excavations on the sides were deep enough to divide that piece from the rest. Where an edge will be seen I undercut it as well, and undercutting has a course of its own.
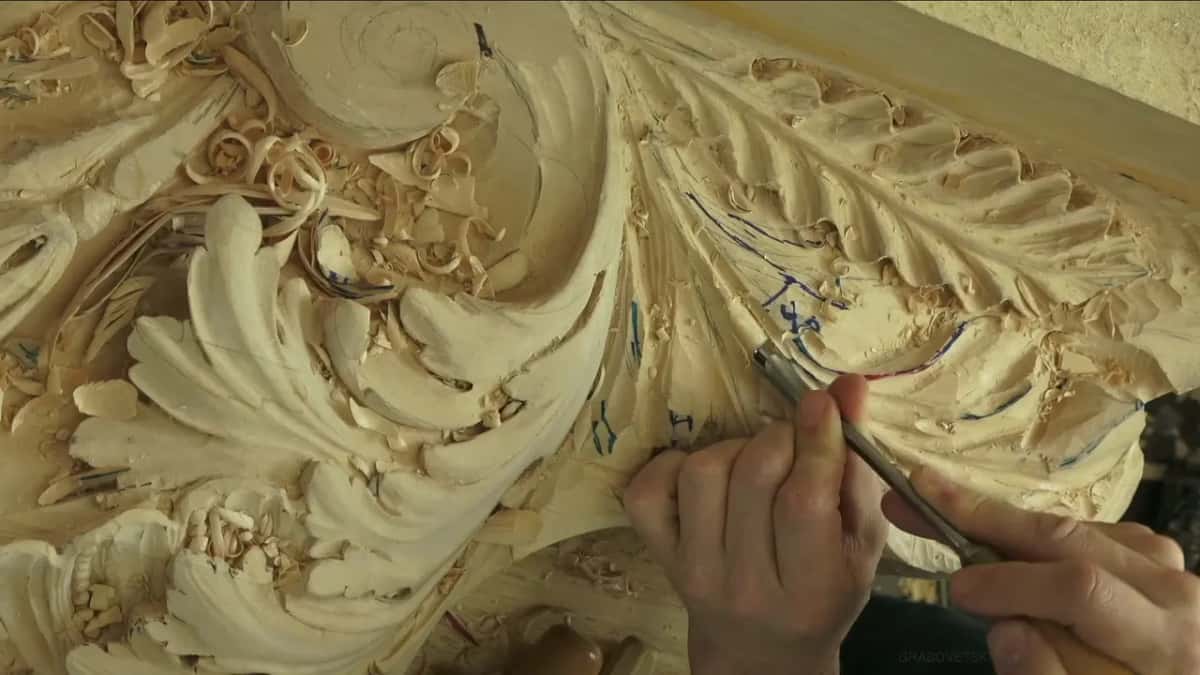
Which part goes under, and which rides higher?
Whichever looks better, and I decide it right on the wood. Let me tell you a story. Workshop 62 opened with me changing my mind about one line on the acanthus. Logically, that line was supposed to go somewhere underneath, and I didn't like how it looked, so I got that ridge higher and let the other part go underneath. A few minutes later the same kind of choice came back. I believed it would look much better with that side higher, and the main part going underneath. Same tool as before for the outline, maybe a little too big, but it was okay. This is a Venetian style acanthus, and I said on camera that anyone who has watched all my videos on this project should be able to develop some of these movements already.
Which gouges did the heavy work?
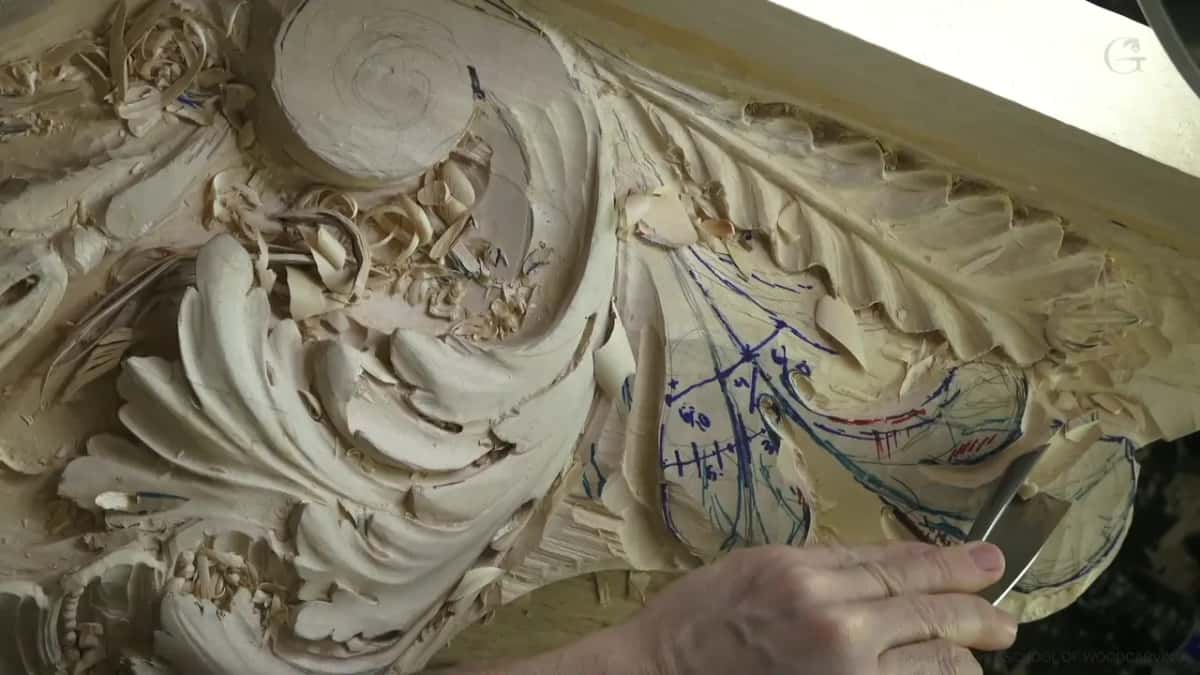
These are the gouges from workshop 62, and each had one job.
| Gouge | Job | Place |
|---|---|---|
| Widest eleven | Dug out the massive concave on the leaf | First half |
| Eighteen millimeter eleven | Went much deeper, more aggressive, beside the volute | Volute side |
| Half inch seven | Chopped straight down to make the wall | Wall line |
| Inch wide seven | Cleaned up, then went a little deeper | One side |
| Big seven | Gave a better movement and the right outline | Last part |
| Big six | Outlined the form and took off excess | First outline |
| Number 5 | Pushed the slope further than before | The slope |
| Small eleven | Outlined the inner part, only its sides | Inner part |
| Spoon veiner | A little deeper, though a normal one works | Inner part |
| Big skew | Put a small rounding on the slope | Top surface |
In both systems, the widest #11 was 30 mm, about 1 3/16 in, and the one I took along the side was 18 mm, a little less than three-quarter of an inch. Three of the #7s were 14 mm (about half an inch), 25 mm (one inch) and 80 mm, which is 3 inches and 1/8. The small #11 was 7 mm, about 1/4 in.
Why does high relief look confusing at first?
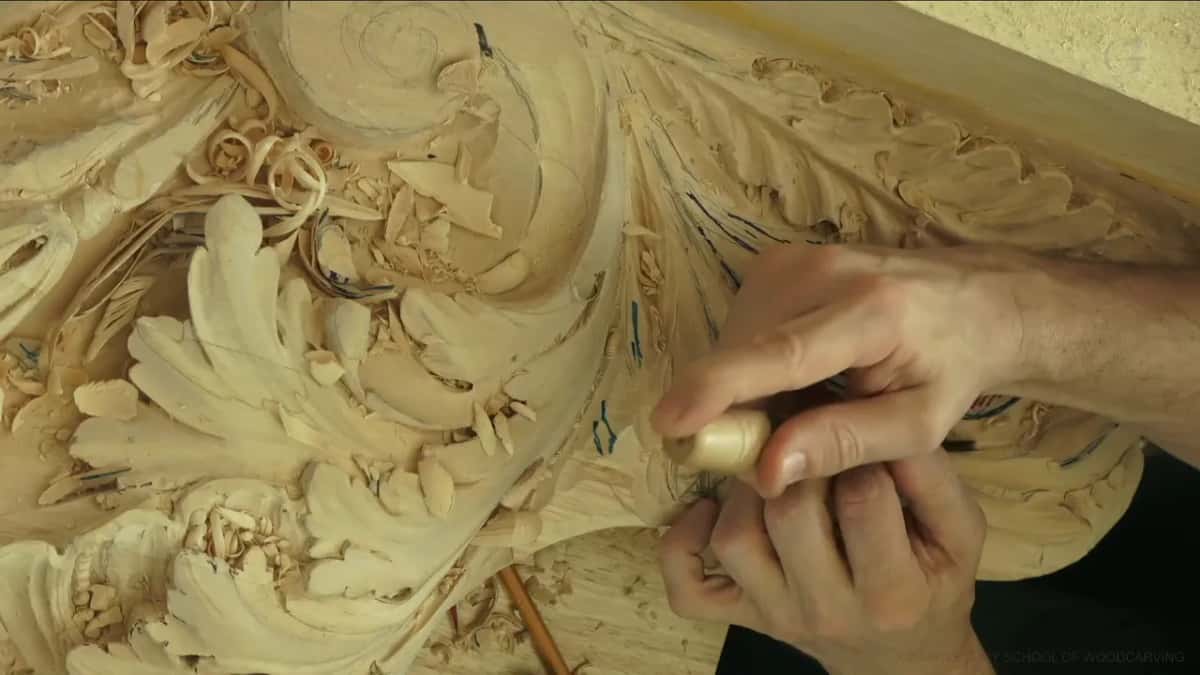
Several movements happen at once, and the form has to look right from every point while it slopes. I'm going to be honest with you. It was confusing for me too when I started to carve these. I know it is hard to understand and hard to see, especially if you have never carved one on a slope like that, and it's not as easy as some people think. Take your time, and if you're going to do volutes like this one, take your time, because they can be really frustrating.
Early on, I told the camera it did not make much sense yet, but it would, and a little later I said the same thing again in different words. Toward the end I caught myself talking to myself. It's going to look awesome, Alex, you can do it. I know I can, because I've done it, and more than a couple of times.
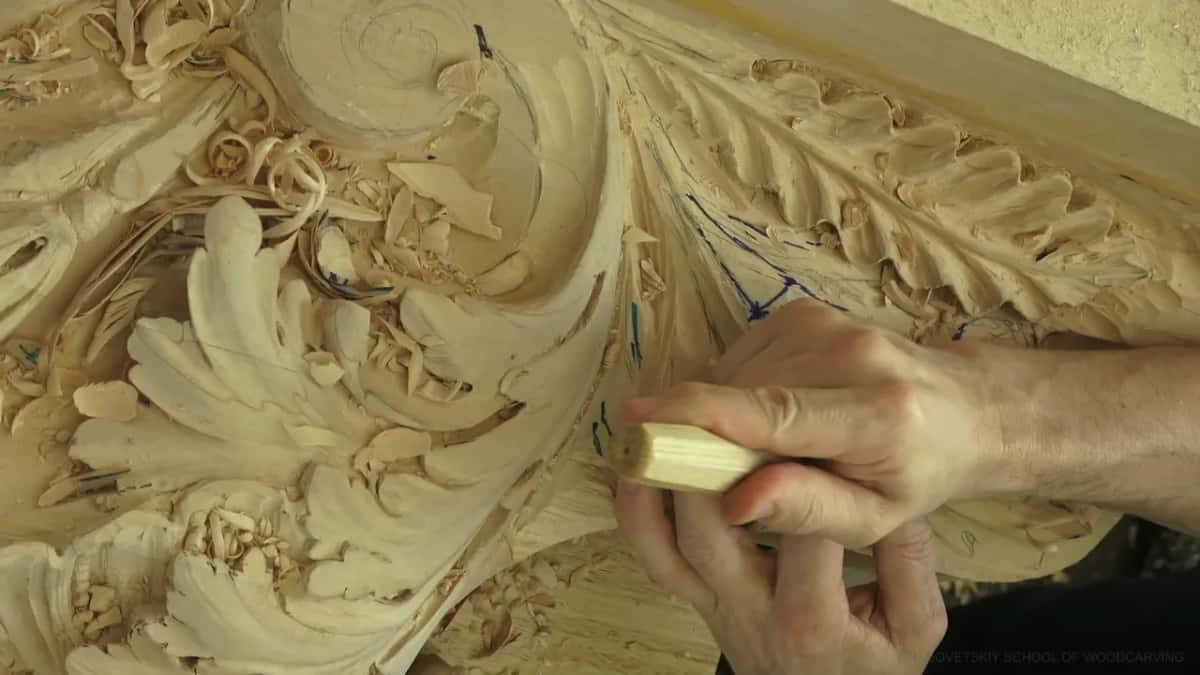
Where does workshop 62 leave the volute?
At a stage, with preliminary passes still on it. I said so myself, this is the stage I'm going to leave it at for now, and the clean passes come later. Next came the bottom part. After that I carved a concave that starts from almost nothing and dies inside the volute. The room keeps going in workshop 63, inside the Part 6 course, and it all began back in Part 1.
Would you like to watch that volute come off its slope, pass by pass? Would it help to hear why each gouge went in while it was still in the wood? Then start here, or open the map of every lesson and see where this room sits.
At the very end I stopped to think, and said out loud that I have no idea why a #6 ends up in the drawer with the #11s.
How it's done
- Give the top a little roundness. Before anything else, put a slight round on the top of the form. On my volute a big skew did it, and I kept it gentle.
- Trace the inner part. A small #11 runs around just the sides of the inner part, carefully, since the grain may try to split.
- Set the slope. Knock the top down toward the inside and match the far side until both lean about the same. A #5 can push that lean further.
- Lower the wood around it. Take the extra material out beside the form so its middle and its side can show. I went much deeper there with a big #11.
- Chop the wall. A 14 mm #7, roughly a half inch, goes in vertically next to the form and repeats the wall below it one level higher.
- Keep the high ridge. Leave the ridge that carries the climb standing tall, or the move upward is lost.
- Clean with a light hand. Stop short of the wall on purpose and finish with a #11, pressing gently, so no tool marks stay behind to fight.
Frequently asked questions
Do you need a spoon gouge for high relief?
On this volute I reached for a spoon veiner, then said I did not have to use one, because a normal veiner would have done. For one concave I called a spoon the best tool of all, took a 7 mm veiner (about 1/4 in) instead, and then thought a #6 or #7 might be enough.
Can you use a small part of this design somewhere else?
While carving this ceiling I said you can take a small section of it and use it somewhere else. In the same minute I asked whoever was watching whether they could see the development, and to let me know if the project even helps them.
Where does the word volute come from?
From the Latin voluta, which means a scroll. The ornament came down from ancient Greek culture, as I said on camera while carving one, and I admitted that I call it just a swirl, because a swirl is exactly what it is.
What to carve next