
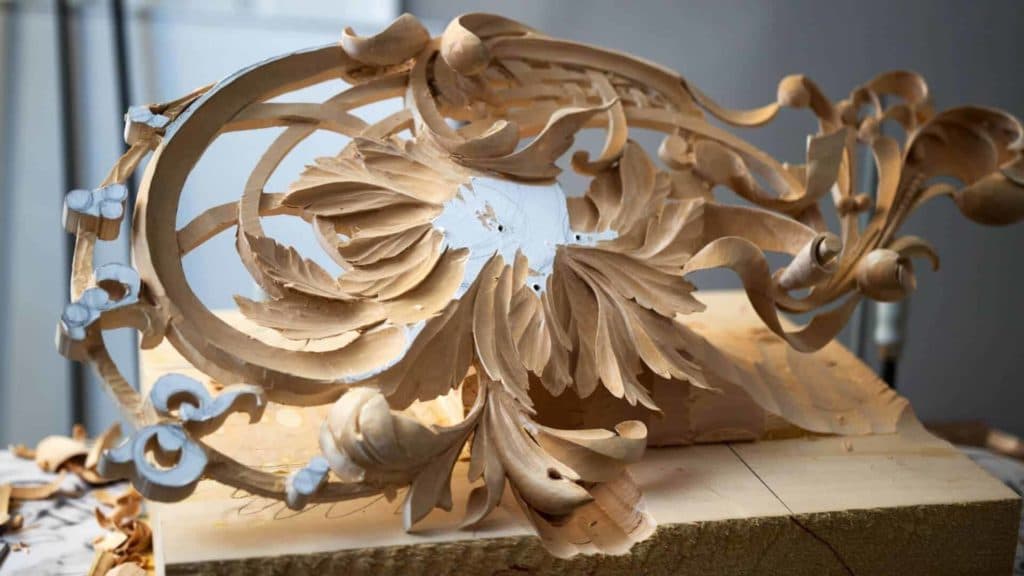
Alexander Grabovetskiy, woodcarver, School of Woodcarving · Published 2018
Do you need a carving post, or will two vises do?
Quick answer: A carving post is a post that stands in a shop with a shelf you can clamp at any height, right up to eye level. I use a pair of carver's vises instead. One sits on my workbench, the other on a board, so I can reach the work from any corner and nothing stands in front of my face.
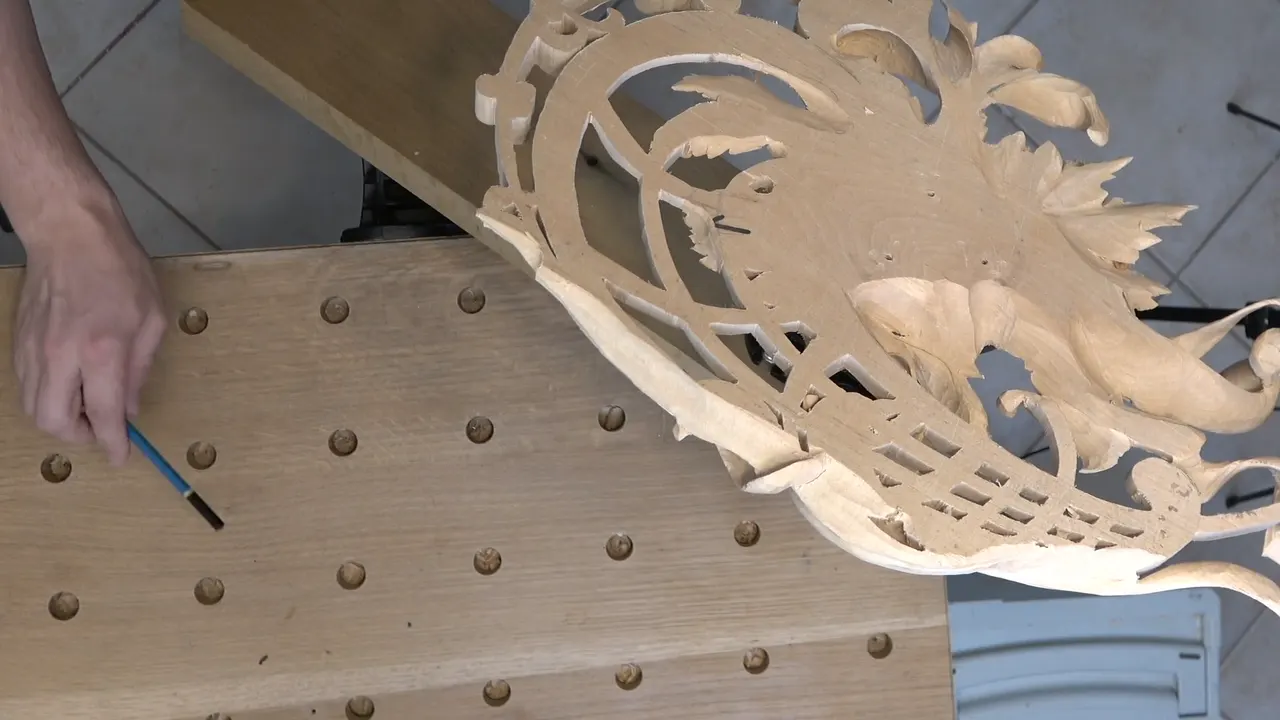
A carving post is a post you mount in the middle of your shop, and its adjustable shelf moves up to eye level or down as low as you wish. I don't use one. In lesson 21 of my Carving Hashemi Flowers course I showed a little different setup instead, two carver's vises, one on the side of my workbench and a second one on a board.
I do understand not every one of you is able to do that setup. For me at least, it's more professional, and it just works fine. From different angles and positions I can access the piece, and I can attack it from different sides.
Have you ever leaned over a table to see something small? Did your back tell you about it later? Carving is the same. If the work sits too low, I bring it up closer to my eye level.
You'll get the setup as I showed it, why I don't like a post, and what I carved on the pierced Hashemi panel once it sat in the vise.
Carving post or two vises, the short version
- Posts stand in the room, their shelves clamped high or low.
- I kind of don't like a post in front of me.
- One vise sits on the bench, and the second one rides on a board, a longer one or a shorter one.
- It doesn't need to be a Veritas.
- With two plates on the piece, front and back, you stop taking it apart.
- Where the area looks weak, a small number seven of about 5 mm (3/16 in) goes in.

What is a carving post, and why don't I use one?
If you're familiar with the carver's post, you mount it right in the middle of the shop, or room, or studio, whatever you use. Its shelf is adjustable. You clamp that shelf higher or lower and bring the work to eye level, or you drop it down as low as you wish.
But that post is always at the front of you, I said, and I kind of don't like the idea of having a post at the front of my face. So for that, I really like just the bench. My tools can still lie on it. Some of them.
The Lift for wood carving lesson in my tools course comes at the same question from another side. A Veritas vise rides on top of a lift there, and the page explains the plate on the back of the block.
| Setup | Holding | Verdict |
|---|---|---|
| A carver's post | Mounted in the center of a studio, with its shelf brought up toward your eyes or down low | Always standing in front of me |
| A pair of vises | Mounted on the side of my workbench, the second on a board, longer or shorter | Any corner, any height, nothing in my way |
| Workbench, vise left in place | Take that board out when I wish to work just on a horizontal surface | Of course I can still use it |
| MDF board with 20 mm holes | Clamp the piece on it, then unclamp it to flip it over and see the back | Lesson 15, and really stable |

How do two carver's vises hold one panel?
I told you before, I really like the Veritas carver's vise, and a couple of them are mounted to my workbench right now. One Veritas sits on the side of the workbench. The second one is on a board. I actually use different boards, and this one is a longer one, but I also use a shorter one.

With that board I attack the work from different positions, from different points, and just start rotating it in any direction, from any height. You can see it's easy.
Just to show you, I had flipped my piece over. Because I have a lot of free space around me, I can attack from any corner, like I said before, and I took it tight and went at it from the opposite side, working from different directions and rotating as I went.

Too low? Then I make it higher and bring it up closer to my eye level if I need to. It's absolutely limitless what you could do with just the two vises.
In the second video I said that's like a freedom for me, since I can angle it any direction as I wish and nothing is in my way. Then I angled it slightly toward myself, just because of my camera. Big pieces, small pieces, I can always raise it or lower it, and all it takes is the two vises.

The vise went on in the first lesson. I screwed it to the backside of the piece, approximately in the middle, on a solid spot I left there for it, about seven eighths of an inch thick (22 mm), with screws about one inch long (25 mm). You could just clamp a piece like that to the workbench. But I really like this vise, and I use it on almost all of my projects.
Does it have to be a Veritas vise?
Any carver's vise will do miracles if you have a couple of them, I said in the first video. The second video put it plainly. It could be other brands, I said, and it's not about the brand.
I really like Veritas, and that's just my personal preference. Mine has been with me a long time and holds really nicely, for many years, with absolutely no problem. Also, the beautiful thing about Veritas is that you can always buy separate plates, or holding plates.
Why keep a plate on the front and the back?
An extra plate also helps. Leave those plates in place, front and back, and mount whichever side you need, so you don't have to take it apart all the time. In this lesson I leave the second plate off, just because it's going to be in the way of my camera. Sometimes it's a good idea, though, to have two plates on the piece at one time.
The reason is the screw hole. Use your screw multiple times and you make the hole from it much bigger, and you have to retighten.
Loose screws showed up on camera in lesson 12. The panel started to wiggle, and I apologized for that wiggle. I didn't want to over-tighten my screws on the bottom, I said there, and they were already kind of loose.

Where do the tools go if the bench holds a vise?
On shelves. Too many tools on the bench at one time is something I try not to do, because a thousand tools can't all lie on a workbench. You can get lost really quickly.

My system is different, a shelf system, with every tool on the shelves. All the numbers and the positions are in my head, so I know exactly where I'm working, what I'm grabbing and what I'm using, and I'm placing it back.
For a couple of tools, three tools, a bench is a good idea. Because that vise is mounted on the side, I can still attack from different points, and it just helps me a lot. Laying out a bench has a lesson of its own, Work bench organization, in the All about tools for wood carving course.

Can you still carve flat on the bench?
Of course I can still use this table. All I have to do is take that board out, leave the vise right in place, and use my workbench if I wish to work just on a horizontal surface. Still, I like this as a much nicer setup, one of my favorites.

What did I carve once the panel was mounted?
Off camera I had flipped the piece and gone a little ahead of the game. I found my high points on the other side and brought my undercut over to them. Not much, I said. We're going to do a lot more.
Then it went back on, remounted on the back side. Pretty much that side was done, and this side was going to be a final stage, pretty much, for this layer. After it comes another layer, with the flowers. I know it's kind of slow, but we are getting there.
The details here were exactly the same as before, the berries and whatever the micro moves are. Tool number one was a V tool, the same number 16 at 6 millimeters (1/4 in), for my preliminary cuts. I said I could probably even use a small mallet, and I went carefully, barely hitting. With the mallet I have much more control over my cut.

For now I left approximately 10 millimeters, or 3/8 of an inch, of space all around. Later on, I can always trim it. This line will help me.
To remove all that waste I brought a gouge, a number 7 at 5/16 inch (8 mm). A number eight or a number nine would give about the same results, I said at the start of the last video. Don't worry about cleaning that section right now, I said, since later on we're going to work on the inside, and I kept bringing the main movement to the line.

When does the work need a support under it?
Definitely, I could use support, I said. But let me see if I'll be able to do without it, I added during the preliminary cuts. If it feels dangerous like that, then I'll use exactly what I've done before, my MDF board. For now, I can probably just attack it like this.

The MDF board came in lesson 15. Always rotating and flipping the piece, I took it off the vise and clamped it on an MDF board with 20 millimeter holes (about 3/4 in). Whenever I need to flip it and check the back side, I just unclamp it, and it's really stable. Not that thick, that board, and its holes sit four inches (about 10 cm) apart.
MDF is not the only choice, I said there. Solid wood works, and so does plywood. One of the students online saw the idea and made his from solid pine, yellow pine, and it works exactly the same way. That board went in the vise too, and I could still rotate it and attack from different angles.
Why do I work across the grain?
For me, it's always easier. The grain on this panel goes one direction. I do have a tendency to attack it the other way too, but I don't like it, and for me it's better to go across.
I'm not going to force it, I said, and little by little I brought a V tool all the way to the cut. Careful with the V tool in a spot like that. I barely hit it, because first of all, it is with the grain, and secondly, it's becoming weak. You don't want to make a mistake. Too much pressure is something you don't need either, if you don't have to.

Later the grain changed direction. Sometimes what you have to do is just rotate and attack from a different position. Against the grain on one side, in the last video, I said I have to be really careful now.
I know you're not supposed to wiggle, but I do sometimes. I think it's all right. Two lessons later, in lesson 23, on details in the end grain with a 5/16 inch number nine, I said that's why sometimes I do have to wiggle.

Which tool size goes in a weak spot?
A small one. Near the end came an area that grows from a leaf, and I needed to figure out how to do it. I have to make sure I'm doing the right thing, I said. After the V tool cleaned it, a smaller tool was wiser in this case, a number seven of about 5 millimeters.
Then came the last section, and the small one again. The area looks weak, and I'm afraid that a bigger tool could break it. I don't want to break it. Any number eight or number nine will work in a case like that too.

In the third video I asked you, please don't press too hard, or you can break it easily in areas like this, where there's not much support. If you feel comfortable with the smaller tools there, just do that. I just don't like, sometimes, to use too many small tools.
Sometimes you just have to feel. I should speak just about myself, I added, and sometimes I just have to feel if it's too dangerous or not. Where there's enough strength, the bigger tools are much quicker. They're not always the safest.
Three tools went side by side in the third video, small, mid-size and bigger, and I said this one is an airplane, that one is a car, and that one is walking. The one about speed is lesson 18, and it quotes that same comparison in full.
Is the number stamped on a gouge the real size?
The small number seven from near the end is marked 6 millimeters. It's not. I can see by the size of it, it's more like 3/16 of an inch, like 5 millimeters, and it's not even near to a quarter inch, which is what six millimeters would be.
Manufacturers are not too accurate when they mark the tools. It doesn't really matter as long as it works, and if it's small enough for the spot, it should not be an issue at all.

With a number seven at six millimeters in lesson 39, I said it's actually pretty much five, even if it's marked six. The sweep was off in lesson 48, a gouge marked as number six that looked more like a number seven.
On the Venice Room I put it this way. Even if they sell it as a sized tool, it's still not accurate. It's always just approximate.
Why does the room behind me keep changing?
I was in the process of moving my shop, and that's why sometimes you see the environment changing. My tools don't change, just the room. The tools and the approach are still the same.
The panel stayed the same as well, the piece of limewood from lesson 1. Back then I said I'd had it for over 10 years, I believe, with a darker, almost pinkish color.
All four videos of lesson 21 come with tuition at the school, everything I described here included. If you have never held a gouge, this page is where to begin. Long bend and short bend gouges are the subject of lesson 20, just before this one, and lesson 22 comes next.
At the end of the fourth video we brought it almost to the line. Well, I actually could bring it all the way, I said, with absolutely no problem. That is enough for today.
How it's done
- Mount one vise on the bench. Put a carver's vise on the side of your workbench, as I did with my Veritas.
- Put the second vise on a board. Mount another carver's vise on a board. Boards can differ, a longer one and a shorter one, and the board comes out when you want the bench flat.
- Raise the work. If it's too low, raise it toward your eye level.
- Keep a plate on each side. With an extra plate, leave one in front and the other on the back, and you won't need to take it apart each time.
- Rotate when the grain turns. When the grain changes direction, rotate the piece and attack it from a different position.
- Keep only three tools out. A couple of tools, three tools, on the bench, and the rest on shelves where you know every number.
Frequently asked questions
Do you need a Veritas vise to hold carving work this way?
No brand is required. Other brands will do, and a pair of any carver's vises will hold the work, since the brand is not the point. Veritas is simply my own preference, and mine has held for many years without a single problem.
How much wood should you leave around the outline at first?
About 10 mm, or 3/8 of an inch, all around. On lesson 21 I left that much for now, and later on I can always trim it. I said that line will help me. The V tool groove was just a preliminary separation, I said.
What can you clamp a carving panel to besides a vise?
On lesson 15 I clamped mine to an MDF board drilled with 20 mm holes set four inches apart, and then unclamped it whenever I needed to see the back. Solid wood or plywood works as well. One student online built his whole board out of solid yellow pine.
What to carve next