

Alexander Grabovetskiy, woodcarver, School of Woodcarving · Published 2022
How do you fill the empty spaces in a carved panel?
Quick answer: Filling the empty spaces in a carved panel is done with small flowers, cut between the larger shapes rather than added around them. Keep each one between 5/8 and 1 inch, which is 16 mm to 25 mm, tally them once the drawing is finished, and land that count on a Fibonacci number.
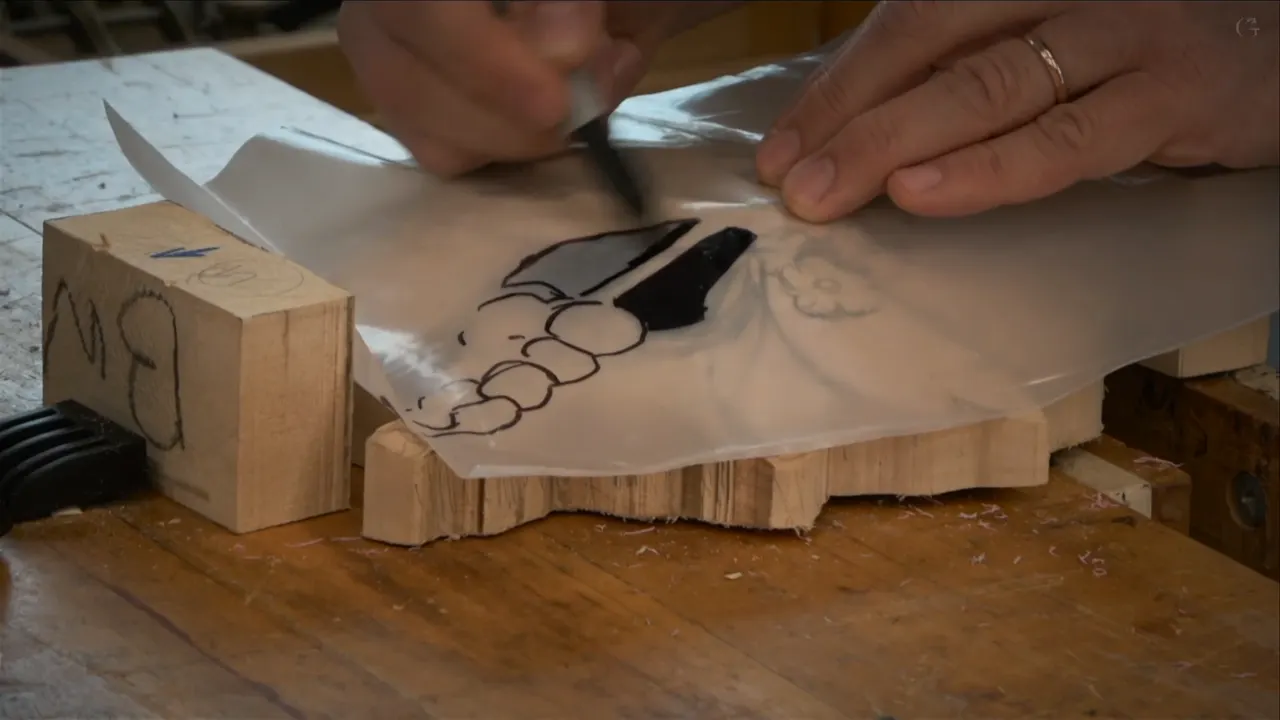
Empty ground on an ornamental panel gets carved full, never left bare. Small blooms go in between the big shapes, each one no smaller than about 16 mm, and the finished tally lands on a number out of the Fibonacci run. Gibbons did it across every panel he built, in corners a viewer never consciously looks at.
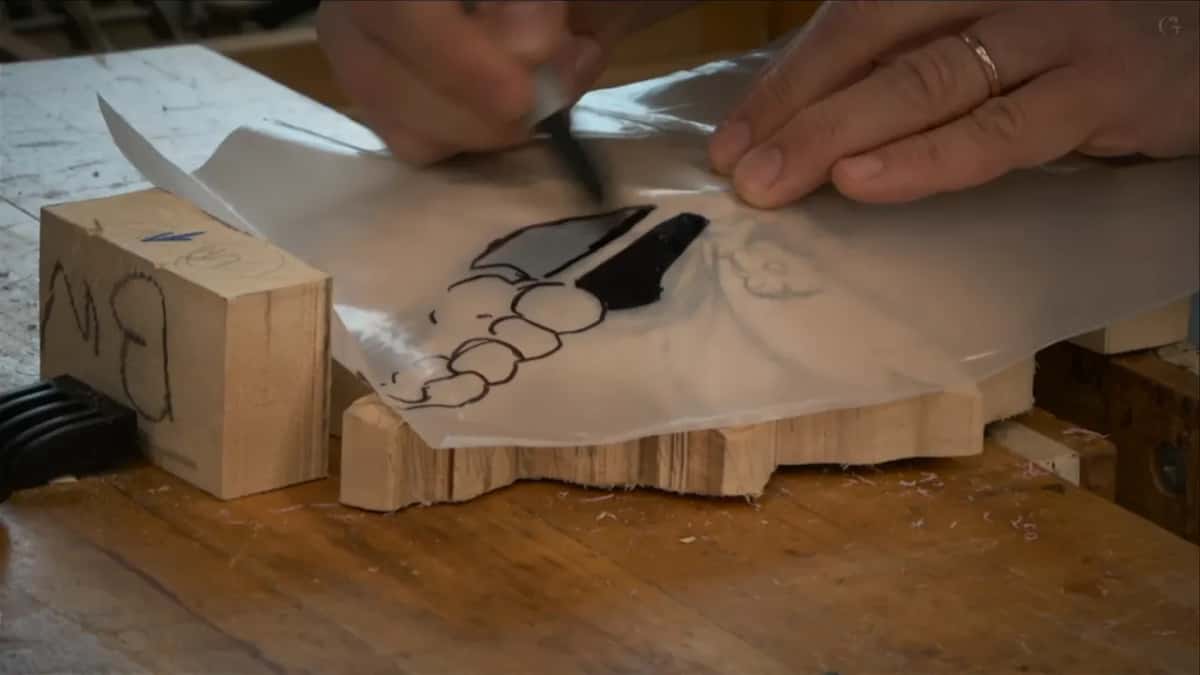
Have you ever finished the main flowers on a panel and found a bald patch staring back at you? Moved the drawing around for an hour trying to make it disappear? Wondered whether to just leave it and hope? That gap is a design problem with a three hundred year old answer.
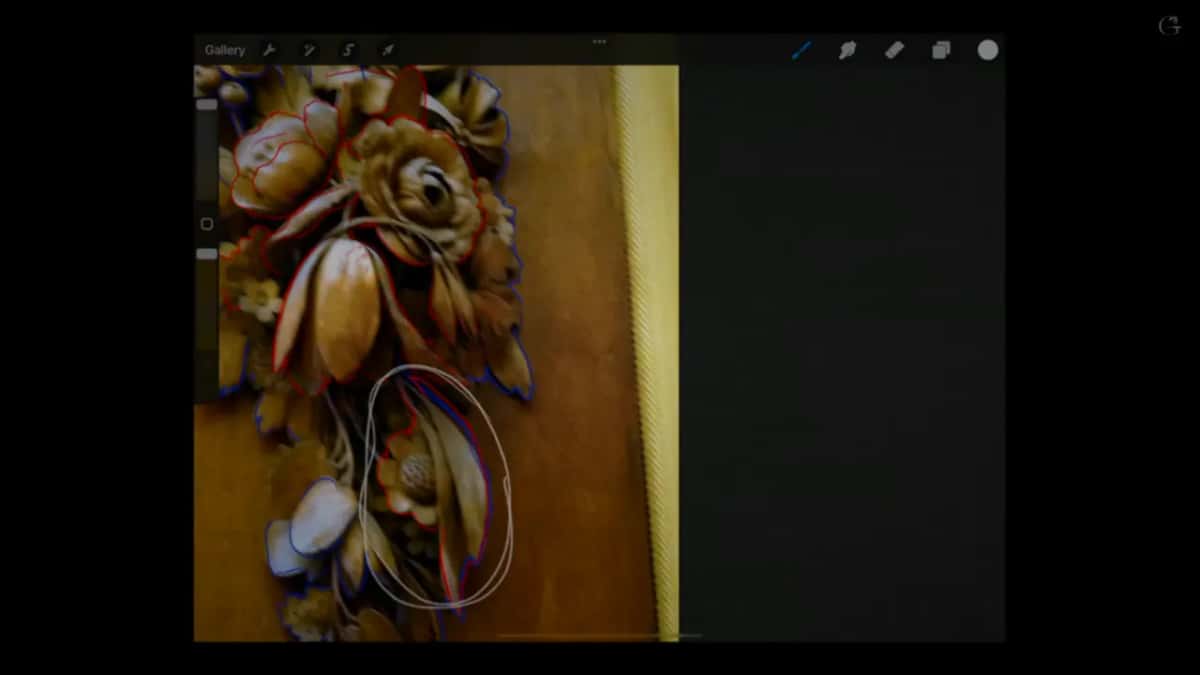
In the second Maine class we spent most of the morning on nothing but that. The big shapes were already settled. What ate the time was reading the original closely enough to see how much of it is small flowers doing quiet work in the background, and then drawing our own version of the same thing.
What follows covers how big those blooms go, how many belong on one board, why the count matters more than it sounds, and what you draw them on before any of it reaches the wood.
What the small flowers are really doing
- Sizes run from 5/8 to 1 inch across, which is 16 to 25 mm. Anything below that size turns into a speck once it is carved.
- Tally them once the drawing is done, then move that number onto the Fibonacci run.
- Black marker on the drawing means deep excavation, and those blooms sit above the darkness.
- Garden plastic carries the drawing. Painter's plastic runs too thin to transfer through.
- A sheet of carbon and a ballpoint pen move the pattern across in a couple of minutes.
- Exact placement buys you nothing, because a gouge moves any line by 2 mm later on.
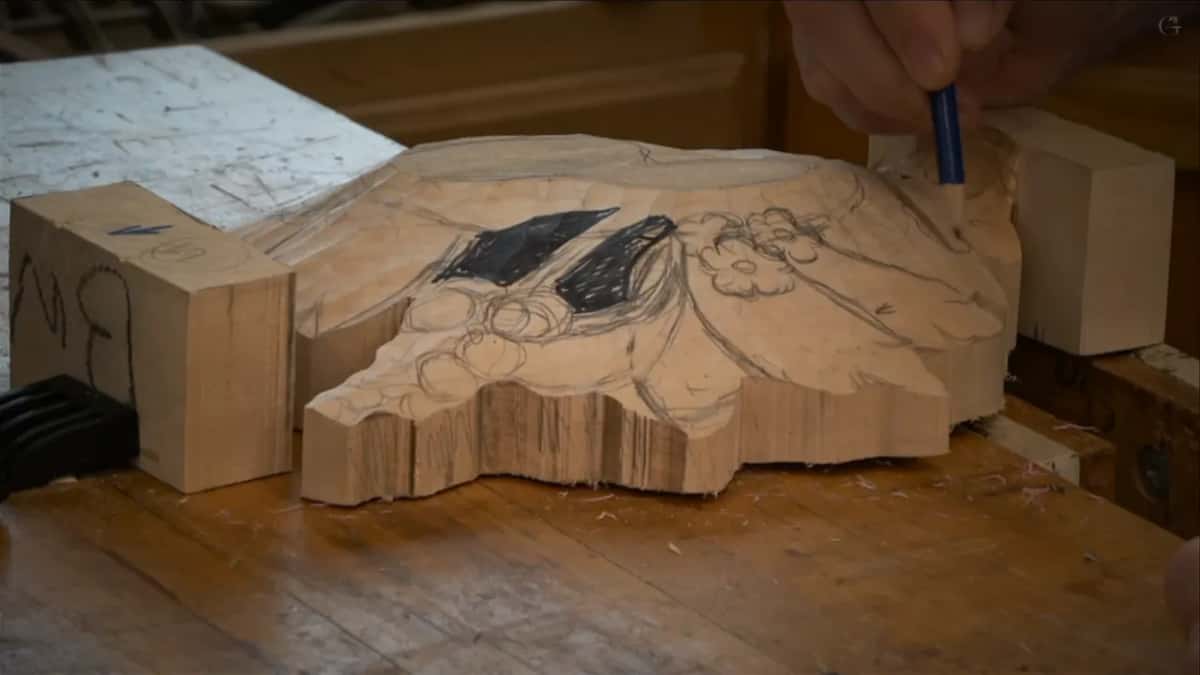
Why did Gibbons put small flowers everywhere?
Empty ground kills an ornamental composition, and he knew it before anybody wrote it down. Look closely at one of his panels and you find these little blooms tucked into every dark corner, behind the leaves, under the main flower, filling the awkward triangle where two stems cross. Count them in one photograph and you will lose track.
My honest reading is that he reached for them when he did not know what else to put there. That is not a criticism. A working carver like Gibbons, with a shop full of orders, needs a shape that suits any gap, and a small round bloom suits every gap ever drawn.
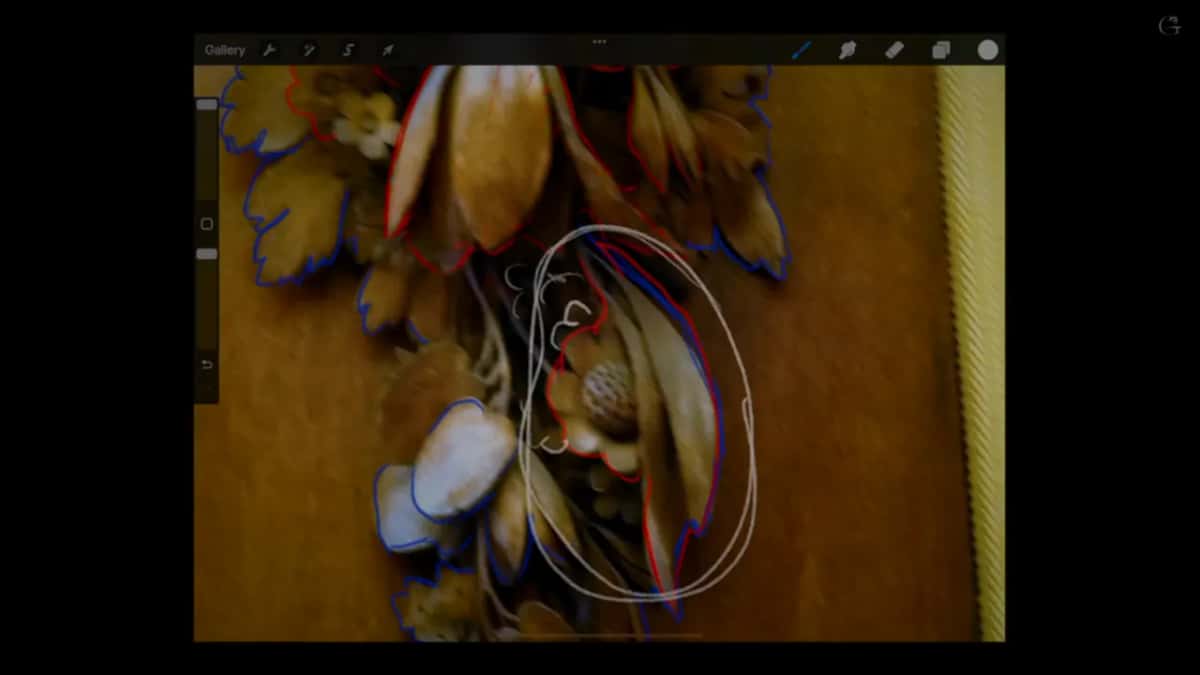
We copied his habit exactly. Wherever the design left a hole, in went a small flower, and the section that had looked thin in the drawing came alive. You can see the same instinct at work in the Hashemi panel, which is a smaller piece built on the same logic.
How big should one of them be?
Between 5/8 and 1 inch across, so between 16 and 25 mm, and I would rather you erred large. Students shrink them out of respect for the main flower, and then find that a bloom carved at 8 mm leaves nowhere to put petals, nowhere to put a centre, and throws barely any shadow at all. Under the eye it is a dimple.
Size also decides what tools you can use. At 20 mm a number 7 and a number 9 can shape the whole thing. Drop to half that and you are shopping for the micro gouges Pfeil and others make for that scale, then fighting the wood for an afternoon per bloom, which is a poor trade for something nobody will look at directly.

Keep them roughly consistent too, but not identical. Three at 25 mm, four at 18 mm and a couple at 16 mm looks like a garden. Ten identical circles look machine made, and there is a whole course on flower forms if that distinction interests you.
How many of them go on one panel?
Count the drawing, then move the count to a Fibonacci number. One, two, three, five, eight, thirteen, twenty one. Our board counted out around fifteen, which belongs to no part of that run, so the drawing kept changing until the tally sat on a number that does.
People laugh at me for this and I let them. Nobody looking at a finished panel counts flowers. The thing is, I would know, and it would bother me every time I walked past the piece, which is reason enough for any decision a carver makes alone in a shop.
There is a defensible version of the argument too. The Fibonacci sequence shows up in how real plants arrange leaves and seeds, which is called phyllotaxis, and ornament built on plant forms has borrowed plant arithmetic since antiquity. Whether a viewer senses it is a question I cannot answer honestly, so I will not pretend to.
Where does the darkness behind them come from?
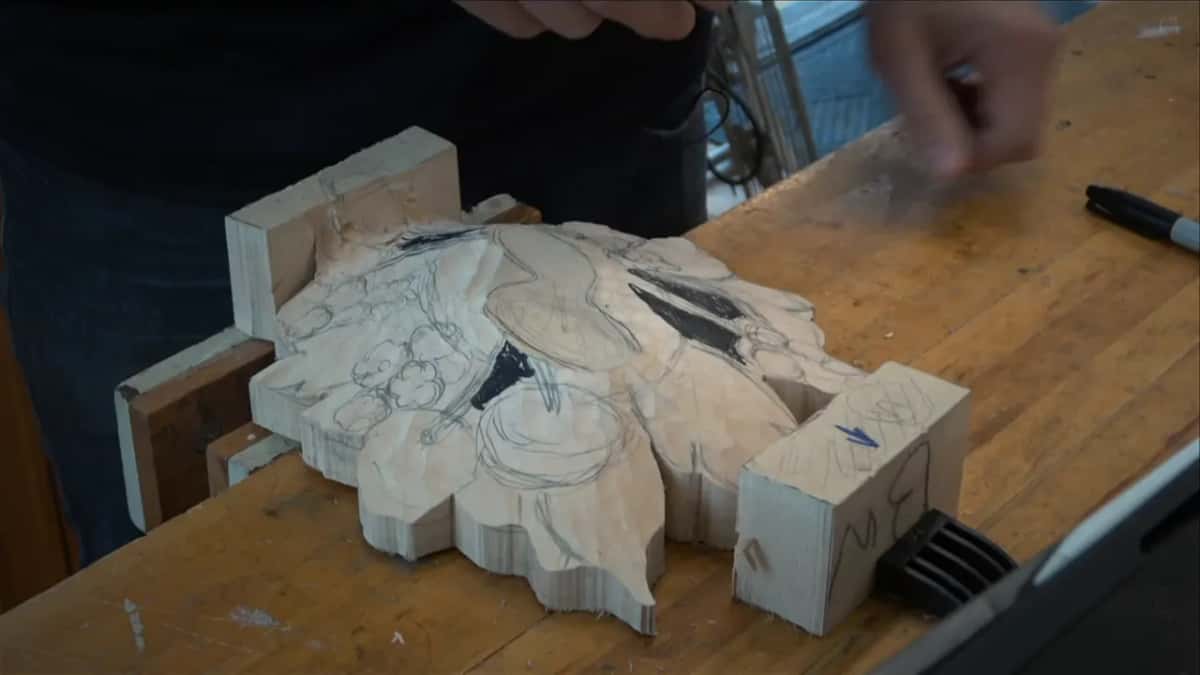
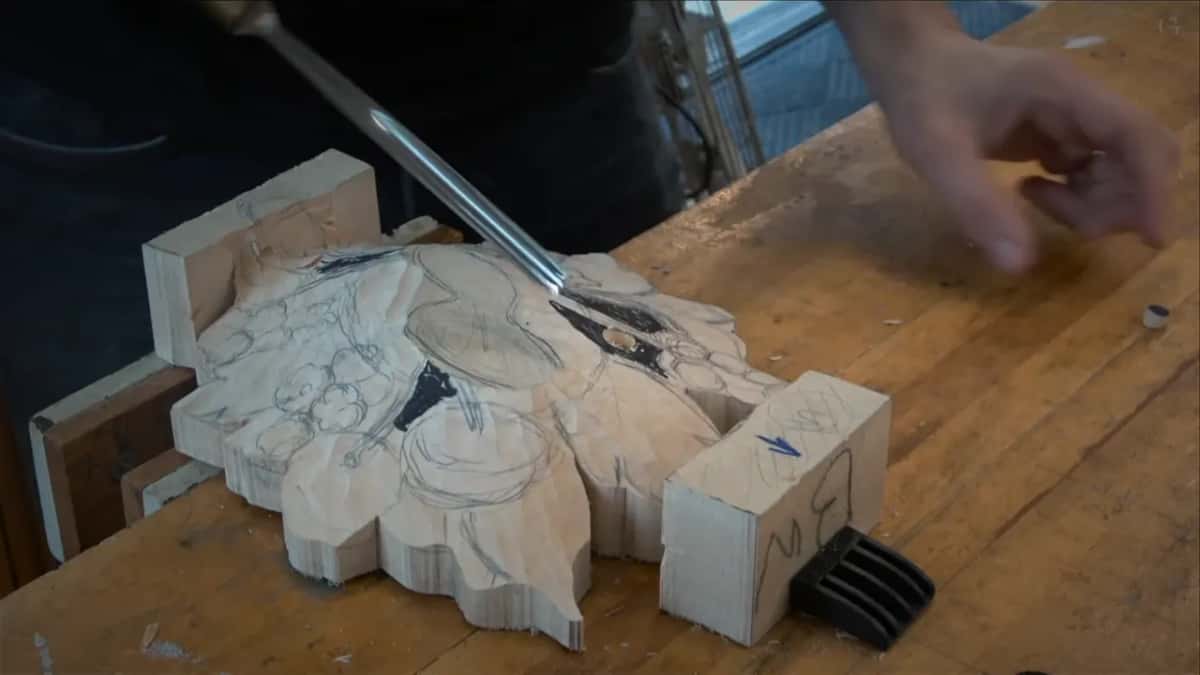
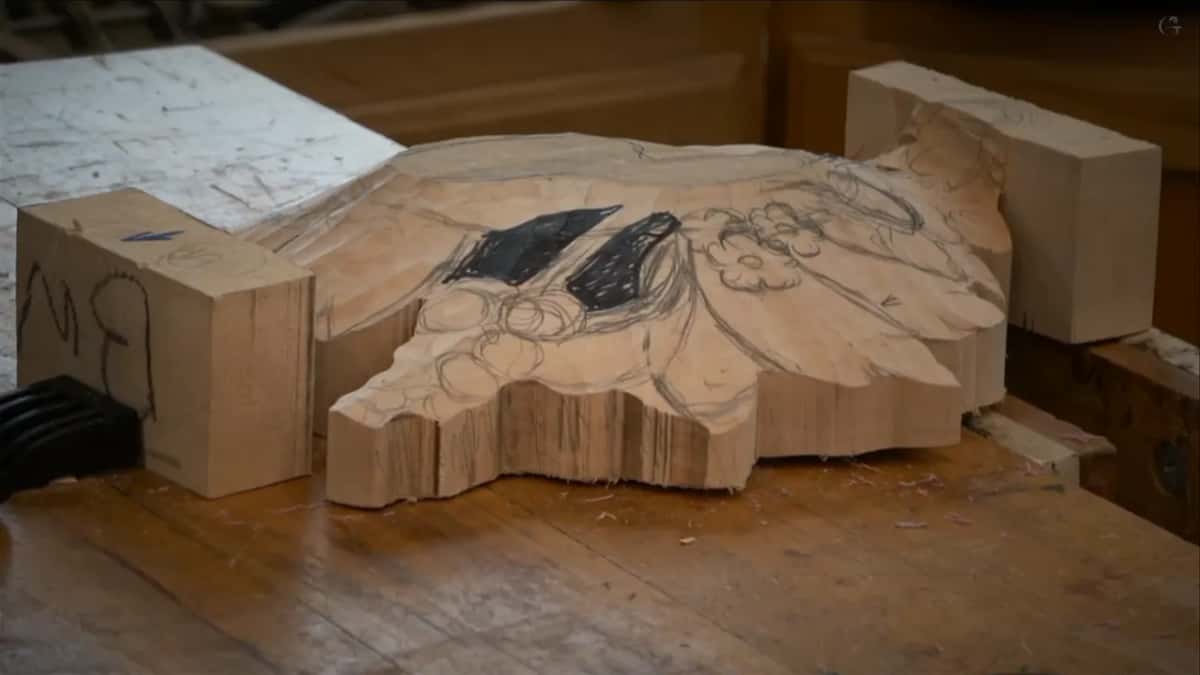
Deep holes, carved before the blooms are shaped. On the drawing I fill those areas with black marker, and black means one thing to the whole class: that wood is going away entirely. A small flower sitting over a black area gains a shadow that no amount of surface carving can imitate.
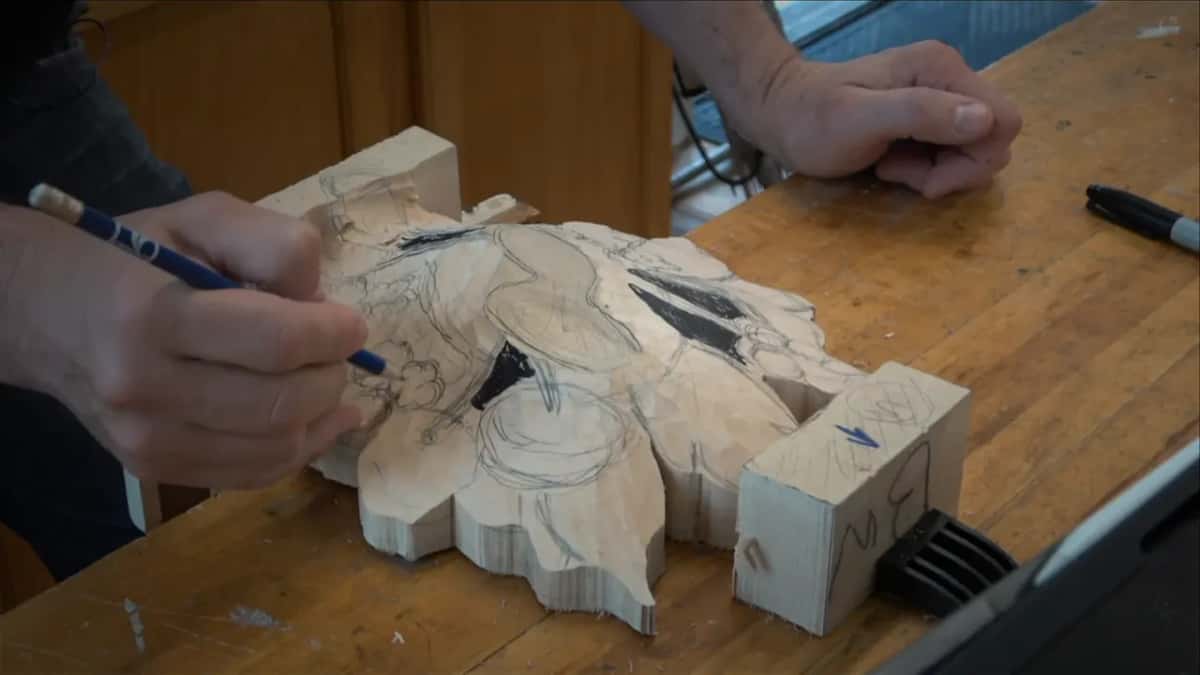
Depths on the back of the upper layer run to about half an inch, near enough 12 mm. Where an opening goes right through the board I take it roughly 7/8 of the way and finish it from behind later, once the panel is flipped. Aiming from the back is a skill of its own, and missing by 3 mm from that side is easy.
The technique for opening those holes without a scroll saw gets its own treatment in the Byzantine acanthus course. Eighteenth century shops had no fine saw blades and no drill press, and the answer they used still beats both for speed on a small area.
What else fills the ground besides flowers?
Leaves and stems carry the rest of it. Alongside the blooms his design runs a scatter of parsley leaves, or something standing halfway between parsley and acanthus, a shape he appears to have invented for the purpose. Either way it fills a long thin gap that no round bloom can.
Stems are the ones that get lost. Reading the original I found two, and one of them ran almost hidden behind a leaf, passing under the main group and surfacing on the far side. A stem like that disappears in the first hour of roughing unless somebody has drawn it and said out loud that it stays.
Mark them, then take a little ground away on either side so each stem reads as passing underneath instead of lying on top. The Greek acanthus course and the grape leaves course both drill that habit hard, and it separates ornament that grows from ornament that was stuck on afterwards.
What do you draw all this on?
Clear garden plastic, the heavy sheeting sold to keep weeds down. A roll costs about ten dollars and will outlast you, which is not a figure of speech. I raise it in class because people reach for painter's plastic instead and then cannot get a line to transfer through it.
Thin plastic is the problem. Painter's sheeting stretches under a marker, the line wanders, and laying it over a blank to check a position tells you very little. Heavy sheeting lies flat and takes a permanent marker cleanly, which is the whole requirement.
One more mark worth adopting. Three dots drawn on a shape means that shape goes up. I write the word as well where there is room, because a sheet gets picked up dozens of times in a day and a carver reading it upside down will carve a whole area in reverse before noticing.
How does the drawing reach the wood?
Carbon paper and a ballpoint pen, which is as old fashioned as it sounds and takes two minutes. Carbon down, plastic over it, trace, lift both away. Some carvers prefer to draw straight onto the blank freehand, and on a simple shape I do that myself.
Accuracy at this stage buys you nothing. The line is a suggestion, not a contract, and a number 9 gouge moves any edge by a couple of millimetres the moment shaping starts. Students slow themselves down badly here, tracing at a crawl to protect a line they are about to carve straight through.
What does matter is knowing which lines belong to which layer before you start. Our first Maine class is entirely about that sorting, and everything on this page assumes it has already been done.
Which tools handle work this small?
Most of it falls to a 10 mm number 9, backed by the same sweep at 20 mm for the ground around. Two gouges will carry an entire field of small blooms, and the tools course explains why a wide sweep beats a narrow one while mass is still coming off.
| What you are doing | The tool and the size I reach for | How deep that goes |
|---|---|---|
| Opening a hole right through | A number 9 at 10 mm, or 3/8 inch | About 7/8 of the way down |
| Hollowing behind the upper board | That same sweep widened out to 20 mm | Half an inch, near enough 12 mm |
| Rounding one small bloom | The number 7, 14 mm across | Shallow work, only a few millimetres deep and never more than that |
| Marking the ground that disappears | Black permanent marker, used on the plastic | Nothing cut yet, it is only a note to the room |

Hold the gouge low through all of it. Raise the handle and drive forward and the edge dives, leaving a pit with a hard lip that you will spend an hour blending out. Every pass wants a rotation through the cut instead, and one hand stays flat on the bench while the other drives.
How much glue holds two carved layers together?
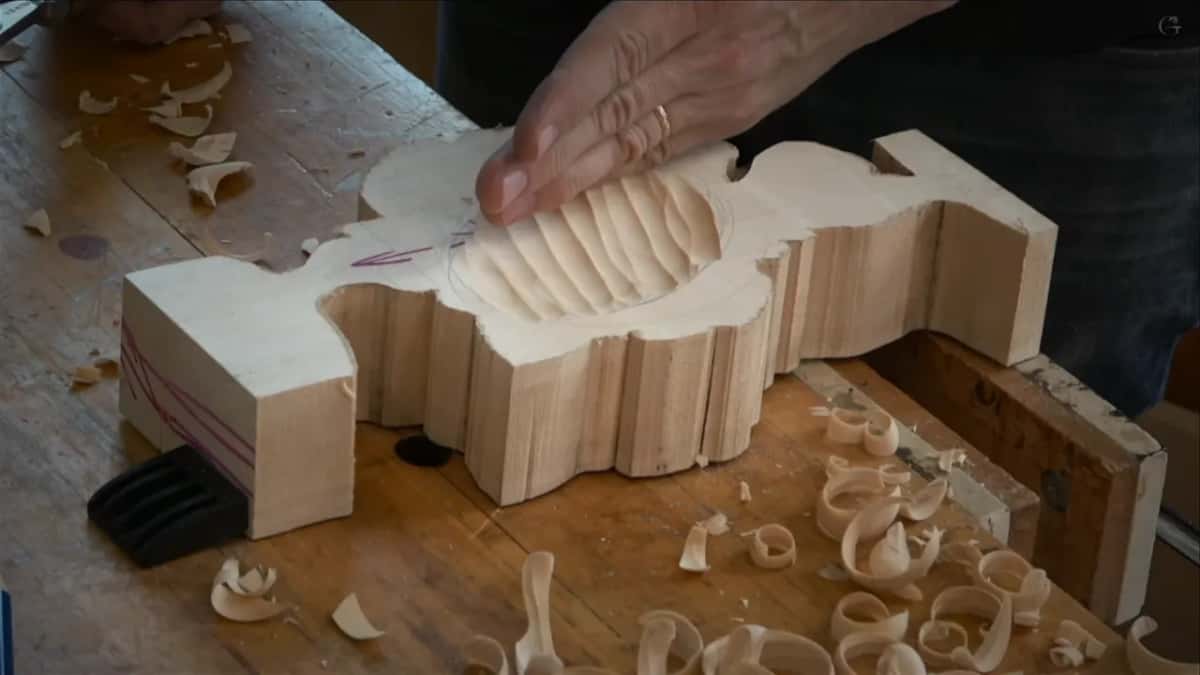
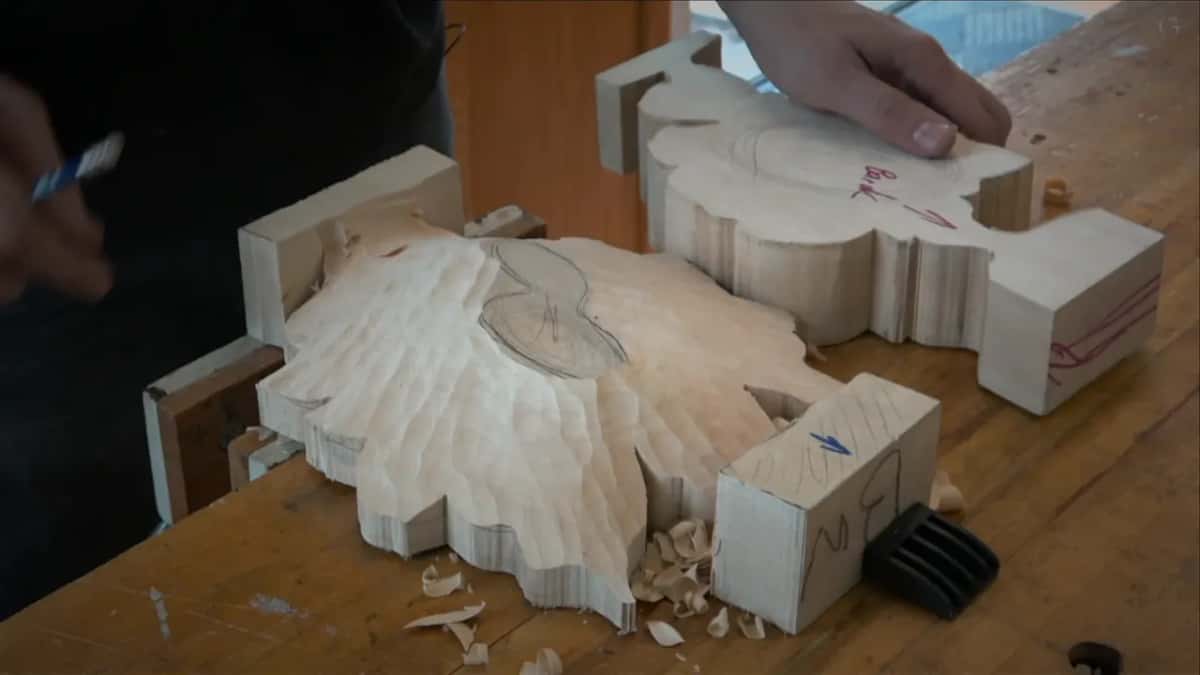
Less than most people assume. Once the upper layer has been hollowed behind and the lower layer has been domed to match, the two meet at a handful of points, and that is plenty. Nobody needs a broad flat joint here, and chasing one would flatten the very shapes that make the panel work.
Think about where the load actually goes. A carved panel hangs on a wall and carries its own weight, nothing more. Two or three well fitted contact patches of wood glue hold that indefinitely, and the fit between the dome and the hollow does more work than the adhesive does.
That fitting stage is worth the patience. Lay the two boards together, look along the joint from the side, and shave the high spots until the upper piece settles down without rocking. Rushing it shows up later as a shadow line where two layers should have read as one.
Does any of this show in the finished panel?
Every bit of it, though not in a way a viewer could name. A panel carved with full ground reads as abundant. The same panel with bald patches reads as unfinished, and most people will say they like the first one without being able to tell you a single reason why.
Ornament works on the eye the way rhythm works on the ear. A pause in the wrong place is felt as a fault even by somebody with no training at all. Filling the ground is how a carver removes those pauses, one small bloom at a time, in places nobody will ever stare at.
Once you can see that in one of his photographs, you cannot stop seeing it in any ornament, anywhere. It changed how I look at every panel I carve, and I still catch myself counting blooms in the museum collections that hold his work.
If your own panels keep coming out thin in the corners, the fix is a morning of drawing rather than a newly sharpened gouge. All eighteen Maine classes sit behind the tuition page, and this one is early enough to be worth starting with.
What happens if you skip the small flowers?
Bare ground draws the eye straight to itself. Wood left flat between two carved shapes catches light evenly, while everything around it is broken into bright edges and shadow, so the flat patch glows like a hole in the composition and the balance of the whole panel tips toward it.
Carvers usually notice this at the finishing stage, which is the worst possible moment. By then the surrounding shapes are modelled, the depths are committed, and adding a bloom means cutting into carving that is already right. An hour of drawing at the start saves that entirely.

How it's done
- Read the original for its gaps. Study a photograph until you can see how much of it is small blooms doing quiet work behind the main shapes. Try counting them in one photograph and you lose your place.
- Draw a bloom into every hole. Anywhere the design leaves bare ground, in goes a small flower. The thin looking sections come alive as soon as the drawing is full.
- Keep each one 16 mm and upward. Five eighths to an inch. Smaller than that leaves nowhere for a centre, nowhere for petals and no shadow of its own.
- Adjust the tally to a Fibonacci number. Five, eight, thirteen, twenty one. Nobody will ever check the arithmetic, which is beside the point when the carver knows.
- Black in the areas that go deep. A black area on the drawing tells the whole room that wood is leaving entirely. A bloom over a black patch gains shadow no surface carving imitates.
- Transfer with carbon and a ballpoint. Two minutes of work. Precision is wasted here, because a number 9 moves any line by a couple of millimetres once shaping starts.
Frequently asked questions
What is a filler flower in wood carving?
A small carved bloom whose job is occupying space between larger shapes. Nothing gets designed around one. Ornament from any European tradition uses them, and a raised centre ringed by a few petals suits almost any gap a drawing leaves behind.
Can you leave bare wood between carved shapes?
Flat ground catches light evenly while everything around it breaks into bright edge and deep shade, so a bare patch glows like a hole. Viewers rarely identify the fault, yet they reliably prefer the panel where the ground has been filled.
What plastic works for carving patterns?
Heavy garden sheeting, the kind sold to keep weeds down. A roll runs about ten dollars and lasts for years. Painter's sheeting is too thin, stretches under a marker, and makes transferring a line to the wood unnecessarily hard.
What to carve next