
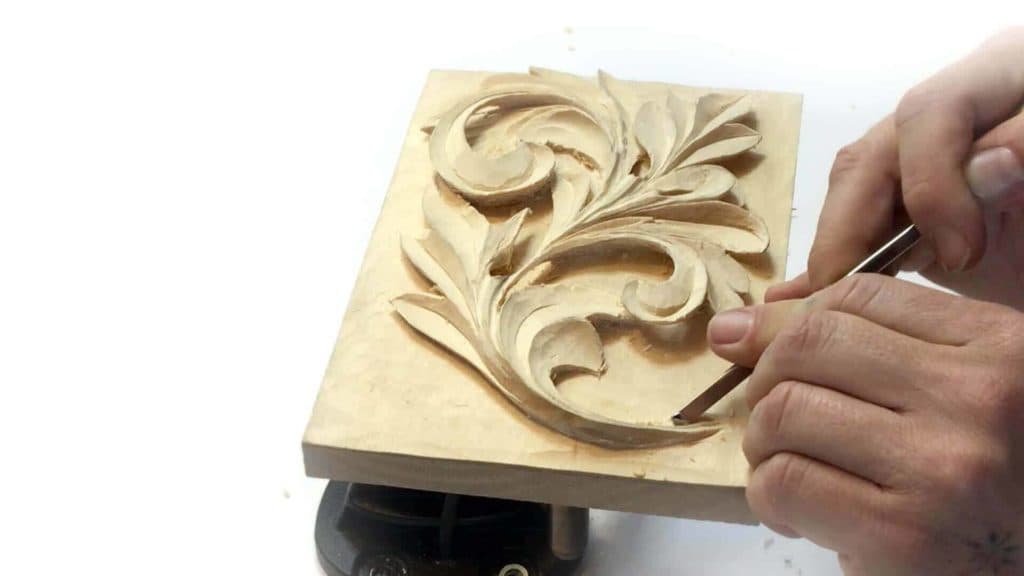
Alexander Grabovetskiy, woodcarver, School of Woodcarving · Published 2018
What gouge do you use for the tiny spots in a carving?
Quick answer: Carving the tiny spots is work for a gouge three thirty seconds of an inch across, a one millimetre V, plus a knife. Blades that narrow slide beneath a raised pipe and lift waste from behind it, which no wide gouge can manage on a leaf at this scale.
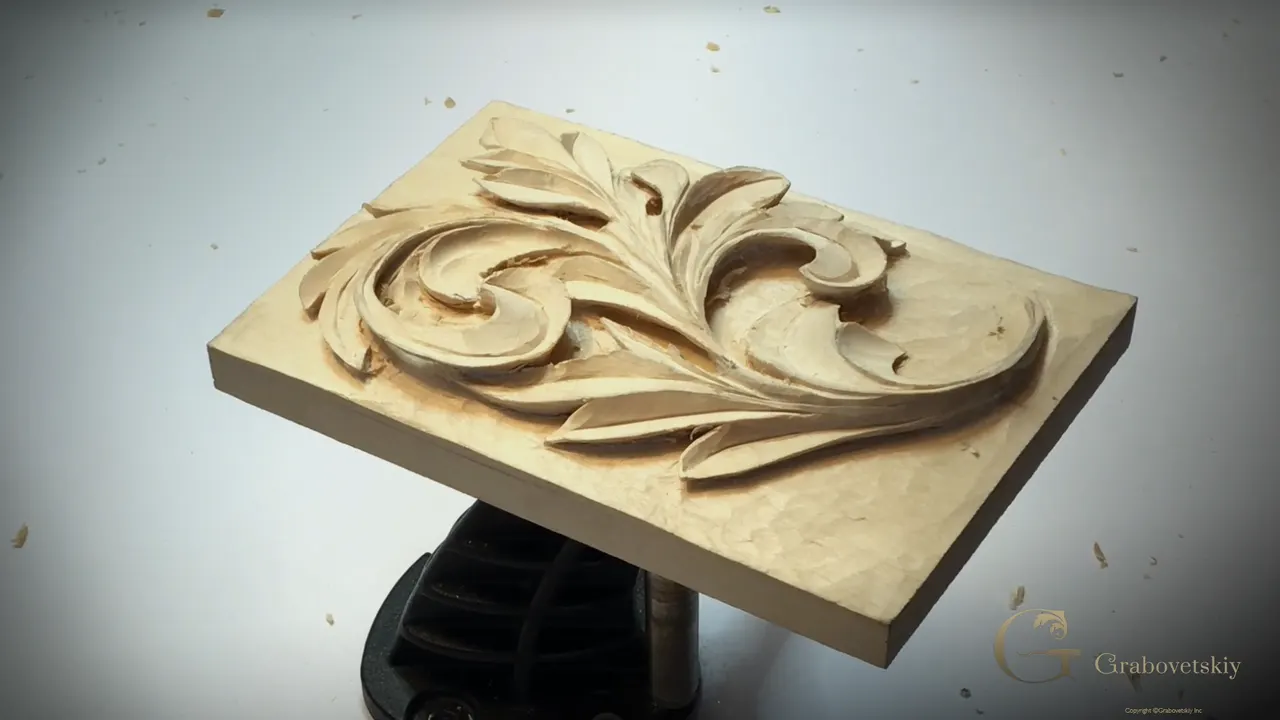
The last part of this leaf got carved with tools about as wide as a pencil lead. A 3/32 in (2.4 mm) gouge made by DockYard, a 1 mm V tool, and a knife. My big number 7 never touched the panel in workshop 14, because it physically could not reach the places that were left over.

Look at your own bench for a second. Are your smallest tools the ones you bought last? Did you ever try to clean beneath a leaf that stands proud, using a gouge three times too wide for the gap? Then you already know the feeling I am talking about.
Big tools take a flat board and give it shape. Small tools decide whether anybody believes it. Both of those ideas run through this workshop, which is also the day I broke two pieces on camera and used both breaks on purpose.

What the last small tools actually change
- Blades the width of a pencil lead go where a 14 mm gouge cannot, and most of workshop 14 happens down in those places.
- Depth nobody sees turns into shadow, and shadow lifts the leaf off its board.
- Lift the knife clear of the wood before it arrives at the ground, or a finish will darken that scar forever.
- A break gives you access. Twice today it let me carve a place my hand could not otherwise reach.
- Deep undercutting suits a wall panel. On repeating furniture carving, an error you cannot repeat eleven more times is a real problem.
- Subdividing a heavy lobe calms it down faster than removing wood from it.
Why carve deep in a spot the light never reaches?
Deep carving in a hidden spot pays you back in shadow, which is the first thing an eye reads. I get asked about this more than almost anything else. Somebody watches me dig 10 mm (3/8 in) under a leaf that sits flat against a wall and thinks I am wasting an afternoon.
Put the finished panel under a lamp and you see it. A shallow hollow gives you grey. A deep one gives you black, and black is what makes a leaf lift off the board. Wood holds the relief. Light is what a visitor actually sees.

Believe me, when you put it in light, it makes a big difference how it looks.
There is a lot of junk left underneath where I have been digging, and it does not matter. Nobody is going to lie on the floor with a flashlight. What matters is the edge. Wood stops, air begins, and that one line carries the whole leaf.

What size gouge reaches a hollow the size of a grain of rice?
A gouge three thirty seconds of an inch wide reaches almost anything on a leaf this scale, and mine is an unmarked one by DockYard. Judging by the curve, I would say it is a number 8 sweep, maybe a number 9. Hard to tell on a blade that small, and the maker never stamped it.

What I love about the little ones is that I can get into the tiny spots just like that. I can run underneath a pipe, and I can undercut from below the pipe, which no wide blade will ever do.

Here is everything that touched the panel in this workshop.
| Tool | Where it went on the leaf | Size | What a wider blade cannot do |
|---|---|---|---|
| DockYard small gouge | under a pipe, into a hollow the size of rice | 3/32 in | undercuts a pipe from below |
| V tool number 16 | underneath the undercut, and the division line | 1 mm | leaves a crisp shadow line where a gouge would crush the fibre |
| Number 15 V tool | around the outside of a lobe | about 3 mm | takes the waste in one pass |
| The bigger number 15 | the long open flow line down the leaf body | marked 6 mm | the handle says six and my eye says seven |
| Number 1 gouge | blending, shaping a pipe before its final form | several widths | makes two carvings read as one surface |
| Back bent number 25 | jigging deep behind a raised leaf | 13 mm wide | gets in behind what is already carved |
| Carving knife number 12 | hooking out, and fixing a flaw in an edge | one blade | stops short of the floor below it |
Two of those are Pfeil numbers, and the sizing on the 6 mm one is a small joke between me and the factory. It says six on the handle. It looks like seven to my eye, possibly eight. They know better than I do, so I keep carving with it.

Which way does a V tool travel around a curve?
Follow the grain, and change hands at the top of the curve instead of pushing through it. Carving toward myself works on the right flank of a pipe. The left flank wants the tool running the other way, or the fibres tear out instead of slicing.
You usually can feel the grain when you are making those cuts. Feel, not see. Your hand knows before your eye does, and when the tool starts to fight you, stop and turn the panel around.

I found that whenever I can use a V tool on an outside edge like this, it is much quicker. Today's society, everything is time. Go, go, go.
Then the number 1 follows behind, blending that groove into the surface beside it, so the two do not read as separate events. A gouge with almost no sweep is the quietest tool in the box, and I reach for it about as often as anything else.

Why does the outer line matter more than the middle?
An edge is where the eye lands, and a choppy one tells on you from across the room. I looked at the outside line of this lobe today and it was going in small steps instead of one clean sweep. It had been that way for two workshops and I had been ignoring it.

Either tool will fix that. A knife works, or a number 1 gouge, held almost flat and taken along the line with small careful passes until the steps disappear and the whole thing flows as a single line. I used the number 1, and it took maybe forty seconds.

Middles forgive you. A hollow that is 1 mm (1/32 in) off does nothing to anybody. An outline that wobbles kills a leaf, because the silhouette is the first thing the brain processes and the last thing it forgets.
Trace the outline of any leaf on a good Baroque panel with your finger sometime. The line never stutters. Neither luck nor talent did that; somebody went back afterwards and fixed every one of the steps.
What do you do when a piece breaks while the camera is running?
Turn it into access. I broke a section early in this workshop, and the hole it left let me undercut a place my hand could not have reached otherwise. Before the break I could not even get in there. Afterwards I could carve as deep as I liked, which is a strange thing to be grateful for.

Twenty minutes later a second piece let go. Two errors in one day, and I said so out loud on camera. I said in an earlier workshop that if something breaks, it was meant to be, and I still think that is true more often than carvers admit.

The design does not change. The route to it does. This piece now runs down to the very bottom instead of stopping halfway, and I am the only one who will ever know it was supposed to be different.
Nobody else is going to know that I made a mistake right there, beside you who are watching me.
What stops a knife leaving a scar on the background?
Lift the blade out before it lands. When I run a knife in under a raised piece, the floor of the background sits right behind it, and the moment the point touches that floor it leaves a mark you will see forever under a finish.
Watch how deep you carve, because you can hit the bottom piece and make a knife mark, and that is not going to look nice. It is going to look messy. So just before you arrive there, raise your wrist and pull the edge up out of the wood instead of driving it forward.
The other half of that move is the panel itself. My vise squeaks, and I keep meaning to loosen it and set it again properly, but I found it is much quicker to just rotate the whole thing. So I rotate, and the squeak is on the recording forever now.
Once the waste is out, the number 1 cleans the floor, or a small V tool gets underneath. Then you see it. The shadow falls from the undercut piece down onto the ground, dark and sharp, and that dark line under the leaf is the entire reason for the last twenty minutes of work.

Would you carve this way on real furniture?
Never on a repeating pattern, and that is the honest answer. A panel like this absorbs an error and lets the design bend around it. Put the same leaf on a set of chairs in the Chippendale manner, where the same acanthus repeats twelve times, and I cannot allow those mistakes at all.
A repeat has to match. If one leaf on chair four dives 3 mm (1/8 in) deeper than the other eleven, the eye catches it across a dining room, even in a client who could not name what is wrong. So on furniture I carve shallower and I stop earlier, and I sleep better.
This panel is going on a wall. Different rules. I can go extreme here and the only thing that will ever touch it is light.
Teaching the wall piece first comes out of exactly that. You want to learn what deep looks like before you learn where deep is a bad idea, and doing it in that order costs you one board instead of one commission.
What do you do with a lobe that looks wrong?
Subdivide it. When a lobe looked heavy and wrong to me today, I did not sand it or scrape it. I carved a new division line through it with the knife, working from both sides, and the heavy shape became two shapes that balance.

It is a strange thing about ornament. Adding a line almost always calms a shape down, while taking material off usually makes it louder. Ancient carvers knew this. Go and look at a Corinthian capital and count how many small divisions hold each big leaf together.
I also lowered one flow line so it runs downhill instead of sitting flat. Small move, maybe 2 mm (1/16 in) of wood. The whole lobe settled after it.

Ready to carve this leaf with me instead of reading about it? Pick a course and start here, or take the whole school with Yearly Access and work through all fifteen workshops at your own bench.
What does carving right through the panel do?
Piercing opens the leaf to whatever is behind it, and it changes the panel from carving into wood carving you can see daylight through. In two places today I went right through on purpose. I think it looks really nice, and I am aware that is a taste, not a rule.
For the deep work behind a raised leaf I use a back bent, number 25, 13 mm (1/2 in), and jig it in small strokes. A back bent curves the wrong way on purpose so the edge can work in behind something that is already carved, which a straight gouge simply cannot do.
At this stage it is not really necessary to go all the way extreme like I am doing. I like it, though. The shadow and the light make a big difference in wood carving, and once you have seen a pierced leaf lit from the side you will understand why I keep going past the point of sense.
One warning. Every hole you open is one more undercut edge with nothing supporting it, and basswood is soft. Two mistakes in one day came out of exactly that.

When do you stop working on one leaf?
Stop when the next change would be for you and not for the piece. I said out loud today that I am tired of one side, so I jumped to the other side. That is a real technique, and it is not laziness.
Your eye goes blind to a shape you have stared at for forty minutes. Move to fresh wood, come back in an hour, and the flaw you could not see is suddenly obvious. I have carved for over forty years and I still cannot beat that.
And one more time, because this is the thing that will save your panel. This is a weak point. Slow your hand down when you arrive at one.

How it's done
- Measure the gap with your eye, then pick the blade. Lay a tool across the opening you want to reach. Anything wider than the space bruises both edges going in, so drop to the smallest gouge you own and keep the wide ones for open ground.
- Find which way the fibre wants to part. Each flank of a pipe takes the tool in a different direction, and your hand notices the fibre lifting before your eye does. When a stroke starts to fight, turn the panel round rather than pushing harder.
- Define the pipe before you go underneath it. Carve down both sides of the pipe with the small gouge, then shape its top with a number 1. Anything you have not defined is a shape you will damage from below, because you cannot see where its edge sits.
- Take the outside waste with a V tool. A number 15 at 3 mm clears an outer lobe faster than anything else in the box, and a 1 mm number 16 gets the last of it from underneath. Small bites, and let the tool travel along the curve.
- Raise your wrist before the point reaches the floor. Run the knife in under the raised piece, and just as the point nears the background, bring the edge upward and take the waste out that way. Pushing straight on leaves a scar that no finish will hide.
- Tidy underneath, then hold the panel to a lamp. A number 1 or a small V tool clears what is left down there. Light the panel from the side afterwards. Grey under a leaf means waste you have not found yet, while black means the job is done.
- Slow down at the necks and change sides often. Where a leaf narrows, halve the bite you were taking. When your eye goes dull on one area, move to the far side of the board and come back to the first one in an hour.
Frequently asked questions
What is the smallest gouge a wood carver actually needs?
Most relief work gets finished with something around two and a half millimetres across the edge. Mine came from DockYard with nothing stamped on it, and by eye the curve looks like a number 8 or a number 9 sweep. One blade that narrow covers almost every tight place on a leaf.
Why do carvers undercut deeper than a viewer can see?
Depth nobody notices still turns into darkness, and darkness separates a raised leaf from the board behind it. A shallow hollow reads grey under a lamp. Another quarter of an inch, roughly 6 mm, turns that grey black and the leaf appears to float.
Can you repair a piece that breaks while you are carving?
Glue and one night under a support puts most breaks back. Sometimes redesigning around the gap is the better answer, because a break often opens access to a place your hand could never reach, and the new route leaves a cleaner result than the original plan.
What to carve next