
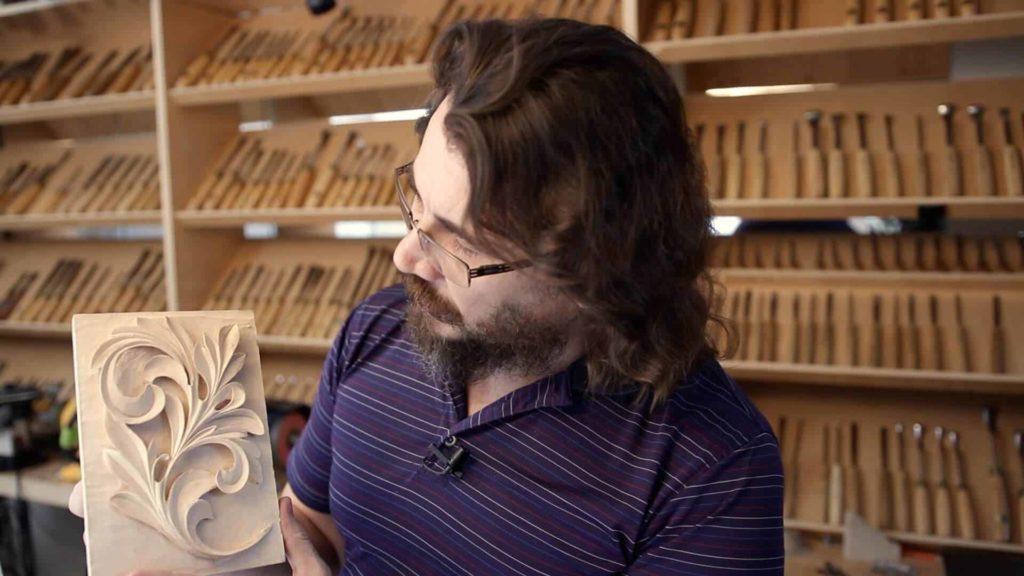
Alexander Grabovetskiy, woodcarver, School of Woodcarving · Published 2018
How do you clean up a wood carving without sandpaper?
Quick answer: Cleaning a wood carving without sandpaper is a job for a knife and a dried stem of Dutch reed, the plant Equisetum hyemale. Enough silica sits in that skin to make it work as fine as 400 grit, while every tool mark on the surface survives.
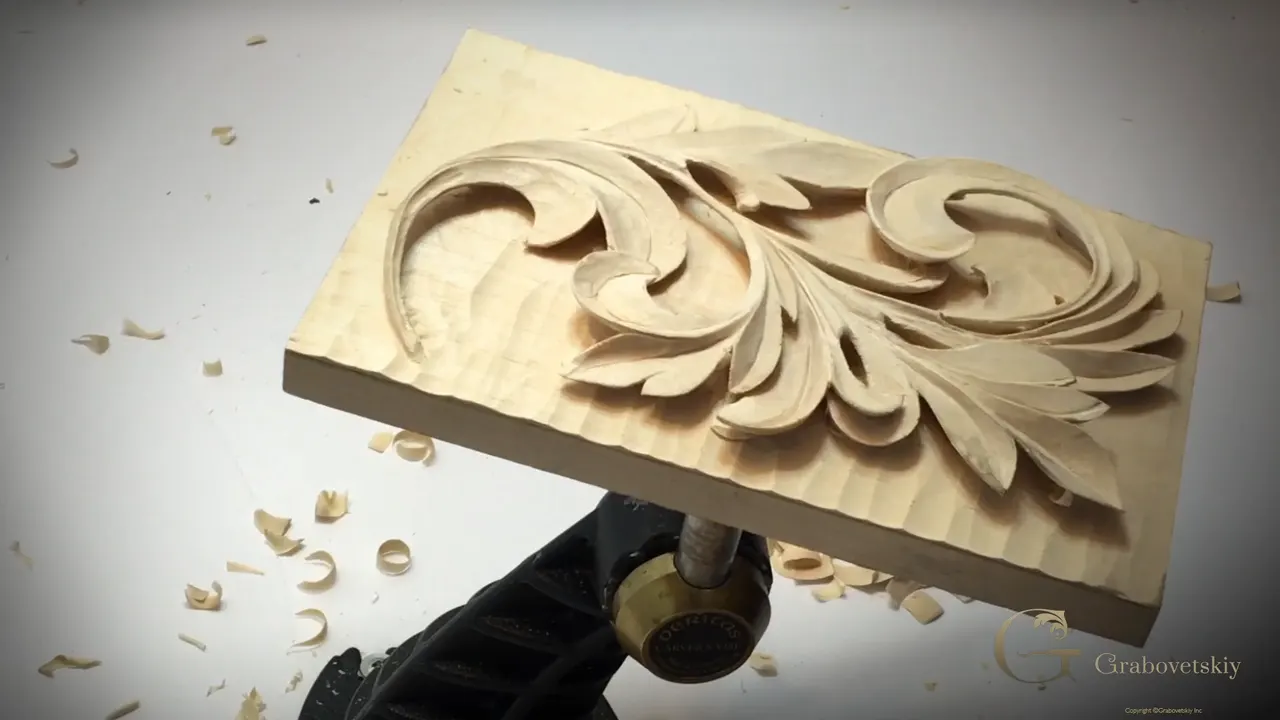
I have never put sandpaper on a carved acanthus leaf, and I am not going to start in the last workshop of this course. What I use instead is a dry stem of Dutch reed, about an inch and a half long, which carvers were already using in London three hundred years ago.

Does your carving look rough along every edge when you hold it up to a window? Did somebody tell you to sand it smooth? Have you noticed that sanding kills the very thing you spent forty hours carving?
Then this is the workshop where all of that gets sorted out. We clean the edges, we lower the background, and the leaf becomes a finished relief piece instead of a panel with carving on it.

What the last workshop of a course actually covers
- Fuzz along an edge is normal. Sharpness and skill reduce it, and neither one removes it.
- A dry reed stem cleans to roughly 400 grit while every tool mark survives.
- Sandpaper stays off a carved surface.
- The background drops 3 mm, marked with a gauge or a braced finger.
- Carve the ground crosswise, stay 1/32 in above your line, and hold the gouge parallel to the surface you want.
- Whether the ground ends up glass smooth or slightly rough is your taste, not a rule. Mine is slightly rough.
Why does a sharp gouge still leave fuzz on an edge?
Wood fibre does not always shear, sometimes it bends and springs back. Doesn't matter how sharp your tools are, doesn't matter how good a carver you are, you are still going to have some rough edges. Everybody gets them. I get them, and I have been at this over forty years.
The fuzz is worst exactly where the work is best. On an extreme undercut, the edge runs out to a point and there is nothing left underneath to support the fibre, so it folds away from the blade instead of parting under it. The better the undercut, the more fuzz it hands you.

You do not have to be perfect when you are cleaning. Understand that first, because a carver who chases perfection at this stage will scrub the life from a good panel.

Can a knife clean a rough edge?
Run that same number 12 knife along the edge and take off what should not be there. My preferred way, and the fastest. The blade travels along the line rather than into it, and the fuzz comes away in a thread.

Depending on the grain you can also scrub with that same knife, almost sideways, with short strokes. Be careful how you do that. It cleans all the fuzz out, and it will also take a chip out of a fragile edge if your hand gets confident.
While the knife is in your hand, check every line on the panel. I looked at mine today, decided a line was not flowing where it meets its neighbour, and fixed it in about fifteen seconds. Much better after.
At some point you have to stop, and I have to stop, because you can always find imperfections in your carving.

What did carvers use before sandpaper existed?
Dutch reed, also called scouring rush. The plant is Equisetum hyemale, and the outer skin of its stems is loaded with silica, which makes a dried piece behave like a very fine abrasive that grew instead of being manufactured.
One of my favourite carvers in all of history, Grinling Gibbons, worked in England about three hundred years ago and used exactly this. Dutch carvers used it, and so did the Belgians. I know that for sure about the English ones.
Mine come in small dry sections, roughly forty millimetres each, and I did not break them to that length. That is how they arrived.

You rub the stem down each edge, sometimes without even touching the surface beside it. Touching the surface defeats the purpose. What you get is about 300, 320, maybe 400 grit, and it depends on the piece, it could be finer than that.

One more thing about the reed. It leaves the surface semi sanded rather than sanded, so the panel keeps its facets and still loses the whiskers, and you can run the stem the whole length of a pipe without the shape going soft.
Here is the difference that matters. You still have an authentic carving out of the chisel afterwards. You can still see all the tool marks, which I like, and which is the entire reason anybody wants a hand carved panel instead of a moulded one.
Why not just use sandpaper?
Grit rounds every crisp arris you carved. A sheet of sandpaper does not know the difference between fuzz and a deliberate edge, so it takes both, and what you are left with looks like it came out of a mould.
I would not recommend using sandpaper. For a smoother look, use the reed again and go a little further with it. Same tool doing more work, which is not the same as a different tool doing damage.
There is one more thing sanding does that nobody warns you about. It fills the pores of basswood with its own dust, and then the finish goes on unevenly and the panel looks patchy under a lamp three weeks later.

What do the holes right through the leaf do to the light?
They change the shadow every time you move the panel. In several places on this leaf the design goes all the way through the board, and I did that on purpose across the earlier workshops rather than by accident.
It gives you really nice shadow lines. Depends how the light actually hits the piece, and it gives me an absolutely different shadow from one hour of the afternoon to the next. A solid panel gives you one picture. A pierced one gives you a different picture every time the sun moves.
Remember what this leaf is, by the way. One variation of acanthus out of many, based on an ancient Greek one, and there is a great deal more to work on after it.
What is the toothpick for?
Pressing the centre of a leaf, which sounds small and is not. I take an ordinary toothpick and press it down into the middle of each little leaf, a fraction of a millimetre, just enough to dent the fibre.

I know it is not that visible. Believe me, it does create a big difference. The dent catches light differently from the flat around it, so each leaf reads as having a real centre instead of being a shape that stops.
Try it on a scrap before you try it on your panel. Press too hard and you have a hole, and a hole in the middle of a finished leaf is not a detail, it is a repair job.
Where does the background line go?
Ride a finger down the side of the block and draw. Your finger rides the edge of the wood, the pencil stays a fixed distance from it, and the line comes out straight and accurate. My preferred way, and much quicker than setting anything up.

If that does not feel comfortable, use a marking gauge. I set mine with that same knife clamped in it instead of the usual pin, tighten it down, and run it around all four sides. Two passes on each side. The result is accurate, and the knife leaves you a clean edge where the pencil would only leave a colour.
We left an eighth of an inch, 3 mm, all the way round. Some spots have less, some have more, because the board was never perfect and neither was I.

Which gouge lowers a background, and in which direction?
The number 7 around 14 mm (9/16 in) does the work, and its strokes run at right angles to the grain. People ask me why across. I feel much safer that way, and much more controlled, and control is the whole game once you are working next to finished carving.
Stay about 1/32 in (1 mm) above the marked line and leave that for cleaning later. Hold the gouge parallel to the true surface you want to end up with, not to the surface you happen to be standing on.

Do not force it. Force it here and you break it, and I mean that as a promise rather than a warning. You have forty hours in the panel. The last hour is where carvers lose pieces, because they are tired and the end is in sight.
Make sure your tools are really sharp. You can hear how sharp a gouge is by the sound it makes going through basswood. A sharp one goes quiet. A dull one crunches, and your ear tells you long before your eye does.

Ready to carve a Greek acanthus leaf from the first pencil line to this one? Start with a course here, or take everything at once with Yearly Access and work through all fifteen workshops at your own pace.
What takes the ridges off a carved ground?
Sweeping strokes, and a flatter tool than the one that made them. First option is the same number 7, laid over the marks and swept sideways in a little rotating move until they fade. A micro sweep, and it works.

Better is a different tool. Swap to a number 3 at about 12.7 mm and ridges come out faster, because its shallower curve bridges two of them at once. Angle it about 45 degrees to the direction you are travelling and make your cleaning passes.

If you have the budget for proper grounding tools, this is where they earn it.
| Tool | Sweep or size | What it does to a ground | Worth buying? |
|---|---|---|---|
| Number 7 | 14 mm, or 9/16 in | takes the bulk of the waste down, going over the fibres | most carvers own one already |
| Number 3 | half an inch | bridges two ridges at once, and flattens what is left | buy this before any dedicated grounder |
| Ashley Iles | 2.5 sweep | almost flat, wide ground cleans fast | when the budget stretches that far |
| Grounder number 47 | roughly one inch wide | my own favourite of the group for open background work | worth having |
| Small grounder | five eighths of an inch | reaches tight corners the wide blade skips | later, not first |
| Block plane | small, whatever you already have | dead flat on open ground, and dangerous the moment it meets carving | careful hands only |
My grounders are by Ashley Iles, and the sweep is somewhere below a number 3. Two and a half, I would say. Almost flat, but not flat, and that tiny curve is what stops the corners of the blade from digging in.

A small block plane also works on open ground if you are really careful. Just be careful not to damage your main design, because a plane does not stop when it meets something precious.

Which tools make the very last passes?
Small V tools and the knife, the same three that have been in my hand all course. My number 15 at 3 mm handles the inside corners. Its 1 mm sibling, the number 16, cleans the places the bigger one is too fat for.
Then the knife goes a little deeper in one or two spots where the shadow was not dark enough for me.
 It is all about the lights and the shadow, and about the use the piece will get.
I did extreme undercutting on this one. For furniture it would not be a good idea, because people touch furniture all the time and it is going to be too fragile. Frame it and put it on a wall and it is absolutely fine.
Should a carved background be smooth or left rough?
Taste, and yours is as valid as mine. Some carvers leave the ground rough exactly as the roughing gouge left it, and there is nothing wrong with that at all. That choice is yours, and so is how much time you put into it.
Myself, I really like a little rougher look on the background. When the finish goes on, all those small facets catch light in a way a sanded plane never will, and the carving sits on a surface that is alive instead of dead.
True perfection will take you a long time, which is absolutely fine with me. Nobody is timing you.

Off camera I will spend a few more minutes and clean it a little better. For now I would call it done, and here you go, an acanthus leaf in the Greek style.
How it's done
- Draw the line the ground will come down to. Ride a finger along the edge of the board and run a pencil round all four sides, or set a marking gauge with a knife blade in place of its pin. Either way the line wants to sit 3 mm below the lowest carved surface.
- Score the line with a blade before any waste moves. A gauge fitted with a knife leaves a severed edge rather than a colour, and wood breaks cleanly at a severed edge. Two light passes on each side are enough on basswood.
- Carve the waste away across the fibres. The number 7 at 14 mm takes the bulk down. Travelling across the fibres rather than along them keeps the blade from diving, and the whole point right now is that the tool goes exactly where you send it.
- Stay a thirty second of an inch high. Leave roughly a millimetre of wood above your line for the cleaning passes. Arriving right on the line with a roughing gouge gives you nowhere to go if a corner tears out.
- Flatten the ridges with a shallower blade. Swap to a number 3 about twelve millimetres wide, or to a proper grounder if you own one, and sweep it sideways across the marks with a small rotating motion. Tip the handle to about 45 degrees for the final passes.
- Clear the corners with the smallest V tools. Where the ground meets carving, a 3 mm V goes in first and a 1 mm one follows it into the places the larger blade cannot enter. Take the last waste out and stop.
- Decide how smooth you actually want it. Some carvers leave a roughing texture on the ground and it looks right under a finish. Others go on until the surface is glass. Both are correct, and the choice belongs to whoever will look at the panel every day.
Frequently asked questions
What can you use instead of sandpaper on a wood carving?
Dried scouring rush, sold to carvers as Dutch reed, does the work. The outer skin of the stem holds enough silica to behave like 400 grit, and the fibres stay soft enough that tool marks survive. English, Dutch and Belgian carvers had it long before manufactured abrasive sheets existed.
Why should you never sand a carved surface?
Grit rounds over every crisp arris you carved, because abrasive paper cannot tell a deliberate edge from a whisker of fibre. What comes out the far side looks moulded rather than carved. Dust driven into the pores also makes a finish go on patchy, which only shows up weeks later.
How deep should the background of a relief carving be?
About 3 mm, an eighth of an inch, below the lowest carved surface on a panel this size. Mark that line before anything else, carve down to within a thirty second of an inch of it, and keep the last millimetre for cleaning passes.
What to carve next