
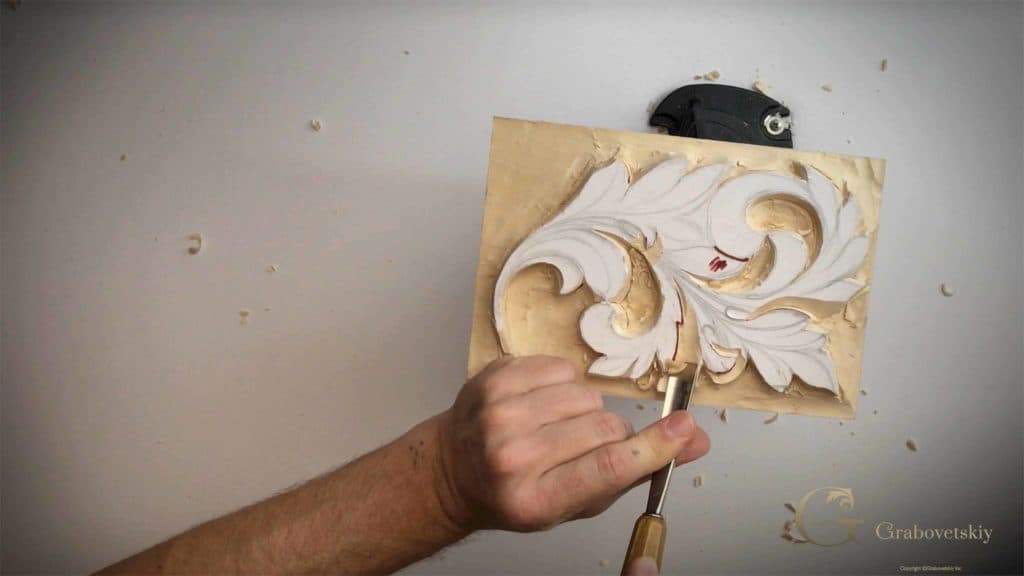
Alexander Grabovetskiy, woodcarver, School of Woodcarving · Published 2017
How do you carve one leaf overlapping another?
Quick answer: Overlap in relief carving is made by standing a square wall against the leaf that lies on top and dropping the one underneath away from it. A marker settles the order first. That gap runs deep on the outside of the panel and comes to almost nothing near the centre.
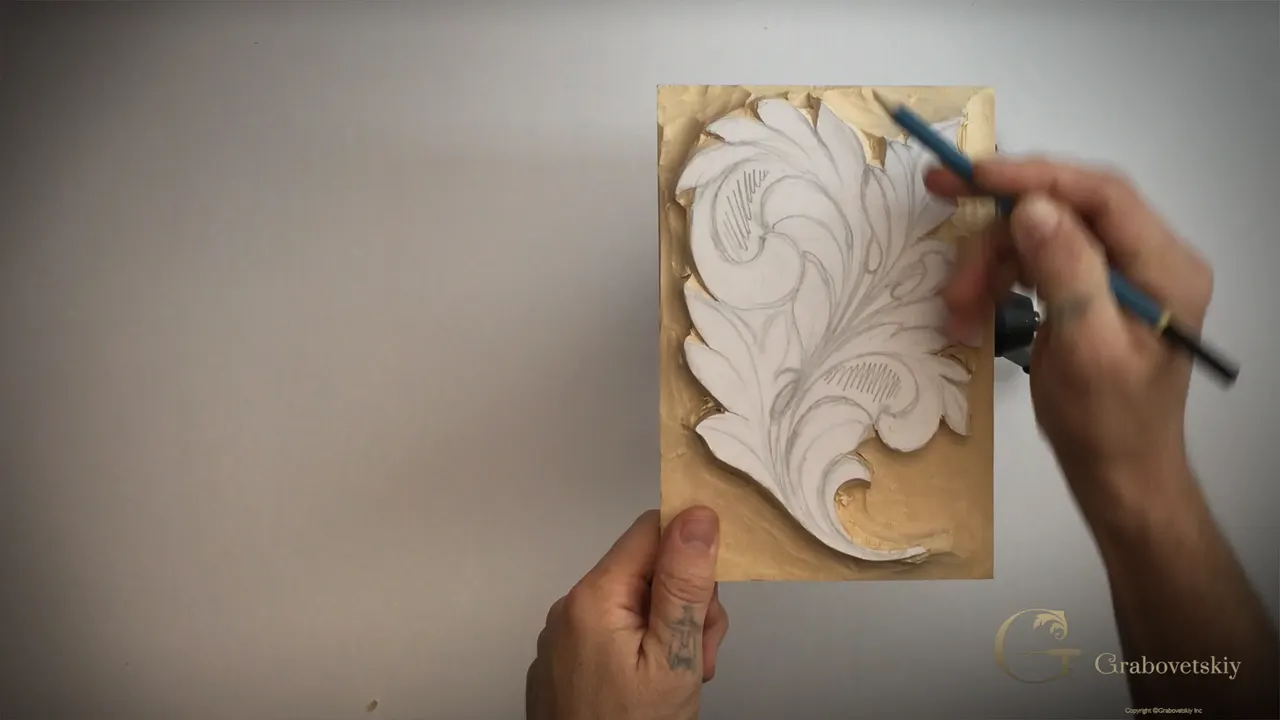
A marker settles the order before any tool touches the leaves. Two of them meet, one has to lie on top, and until that is decided on the surface of the wood you are only guessing. Then the wall goes in square facing whichever leaf won, and the other one falls away.

Yesterday this panel got its silhouette and its floor. Today three pockets inside the design have to drop to that same floor, every wall on the job has to stand upright, and the leaves that cross each other need sorting into layers. Not one bit of it is shaping, and all of it decides whether the shaping works.
Two of those pockets are small enough to hide a mistake in, which is exactly why they go wrong.
Key takeaways
- Marker first, tool second.
- A knife leaves a sloped face, and that slope is what keeps the leaf edge safe while a gouge works the ground beside it.
- Rest your carving hand on the wood.
- Every wall stands upright until the very end, even in the smallest pocket, because a wall that leans inward now is an undercut you never planned and cannot take back.
- Deeper at the outside.
- The overlap wall faces the leaf on top.

Which parts of the drawing drop to the floor?
The gaps between the lobes. Three of them sit inside this design, and they finish level with the main ground. Picture the same design as fretwork and those are the holes a saw would take right through the board. Ours keeps its ground, so they get carved rather than cut out, and the depth has to match what is already around the leaf.
The approach is what you used on the outside in the last lesson. Knife round the line first, waste out after.

Where does your hand go while the knife works?
Onto the wood, every time. My palm sits flat on the panel itself rather than floating in the air above it, and that single habit is the difference between a controlled pass and a slip. A hand with nothing under it is steered by your shoulder. A hand resting on the board is steered by the small muscles inside it, and those muscles are far better at moving two millimetres than your arm will ever be.

What are the micro passes doing?
Buying you control in small instalments. I press with the inside of my palm, the blade advances a short way, I release, I shift the heel of my hand forward, and I press again. Nobody could hold a steady line across the full length of that curve in one push. Broken into twenty little moves, the same curve is easy.
There is a leverage trick inside it too. My index finger pushes down on the spine of the blade while the other four pull the handle toward me, and the two forces meet in the edge. Deeper passes come out of that leverage rather than out of shoving harder on the handle.

Why keep the second hand off the blade line?
A knife that slips travels exactly where it was pointed. Your free hand belongs on the far side of the blade, never in front of it. I say it in every beginner class and I will keep saying it, since the one time a student forgets is the time the wood gives way under the point.

Is this relief carving or something else?
Semi relief, and the distinction matters for how you hold the work. A panel with a ground behind it lets you plant your hand anywhere. Once the design gets pierced right through, there is nothing solid left to lean on, and leaning is how people snap the delicate parts of a pierced panel. This leaf is a prototype of relief carving, standing above its floor with the floor still there.
How fast can waste come out with a knife?
Faster than most carvers expect. Set the blade about a quarter inch outside the line, or 3/16 if you want a margin, and run a sloping pass toward the pocket. Come at it from the other side and the two slopes meet. What comes out is a wedge, and the wedge is most of the waste in that pocket.
Then lay the knife almost flat and shave the centre, away from you first, back toward you after. A dozen passes clears a pocket.

What is the meat in the middle?
The ridge left standing when both slopes meet and neither reaches the floor. It is the last thing holding that pocket up, and the knife cannot always get under it. Any small gouge finishes the job. Mine was a seven at 14mm, purely because it was already lying on the bench.

Does it matter that the ground looks rough?
Roughness inside a pocket costs nothing at this stage. Speed is what it is buying, and a torn surface inside a pocket that still has to be refined, walled and undercut is a surface nobody will ever see. Although every stage is probably important. Let me not say this one does not matter, since it does, and a pocket carved too deep now cannot be brought back up.

When does a number 3 earn its place?
When its curve happens to match yours. A 20mm number 3 is nearly flat, and laid against the outline it will fit a long gentle stretch perfectly and nothing else on the whole panel. That is the honest limitation. You hunt for the two or three places it suits, drive it upright, and then you pick up something else.
How do you hold a V tool for a wall?
With one wing standing vertical. A V tool is really two chisels joined at a corner, and for a wall you want the wing on the leaf side pointing straight down at the floor while the other wing does the clearing. Get that wrong by a few degrees toward the leaf and you have undercut the thing without meaning to.

Why a 45 degree V tool rather than a 60?
You can actually see the angle on a 45. On a narrow 60 degree tool the two wings look almost the same, and judging which one is vertical becomes guesswork. Open the angle to 45 and the difference is obvious from above. My 6mm number 15 is the one I keep reaching for in tight work, and it drops into pockets a wider tool cannot enter.

What can go wrong in a tiny pocket?
Everything, and quickly. A narrow neck of wood between two lobes has very little strength across the grain, and the mallet does not know that. Ease off in those places. One heavy blow in a pocket the width of your tool and the piece you were protecting is on the floor of the shop.

Can the V tool clear its own waste?
Most carvers reach for a second tool at this point, and no need exists for that. Stand the wing up, drive your wall. Then roll the tool over so the flat outer face of that same wing lies on the wood, and use the flat of it to sweep the loose material off the waste side. One tool, two operations, no swapping.
Watch the lean while you do it. The roll wants to carry the edge in under the leaf, and it is far too early for that.

Telling which leaf lies on top
Take a marker and draw it. Four went down at once on this panel, and a fifth turned up later, after I had put the marker away and thought that job was finished. The moment the ink is on the surface the decision is made and your tools stop arguing with each other.
Every acanthus of any period has these crossings. Corinthian runs straighter and has fewer, Byzantine stacks its leaves into three flat layers, and the Greek form uses the crossing to sell the curl.

How deep should an overlap go?
Deep, and unevenly so. Near the rim of the panel I go a long way down, since that is where the eye reads the separation on a furniture panel and where a shadow can actually form. Nearer the middle the same overlap barely drops at all. A uniform step all the way round reads like a stencil, which is the thing everybody complains about in machine work without being able to name it.
A mallet helps here. Tapping gives finer control than pushing does, which sounds backwards until you try it.

Knife or V tool for the overlap wall?
Either, with one caveat. The V tool goes in with its wing upright and takes the wall in a single travel. The knife does the same job in two moves: one pass straight down at a right angle, a second sloping pass in to meet it, and a fat chunk of wood lifts out between them. Speed goes to the knife.
Breakage also goes to the knife. A blade concentrates force on a point, so ease back on anything narrow and let the V tool take those.
Why not undercut now?
The leaf is not final yet. Lines will move, planes will drop, and an edge that has already been undercut has no material left to move with. Undercutting is the very last thing that happens to this leaf, and when it comes I go at it happily, because a carving with air behind its edges looks much, much better than one sitting flat on its ground.

How the three approaches compare
| Approach | Speed | How far down it reaches | The risk |
|---|---|---|---|
| Knife outline, then a gouge | Steady | Right to the floor | Very little, since the slope guards the edge |
| Knife laid almost flat | Fastest of the three by a good margin | Not always | Stalls short of the floor |
| V tool | Slow | Yes, with a mallet | Too much force in a tiny pocket and the whole thing is gone |
| A number 3 that matches the curve | Quick, in the few places it fits | Only on a stretch whose curve the sweep happens to match | You will not find many spots on a panel this size |

Where the clean edges came from
That slope you left with the knife. Look along the inside of any pocket on this panel and the wall is crisp, even though a gouge has been hammering into it all afternoon. The slope absorbed every one of those blows. Not one of those blows reached the line, and none had to, since the whole sloped surface disappears the day this leaf gets undercut.

Which direction for the waste beside a thin section?
Take it crossways, without exception, when something fragile is nearby. Run a pass along the grain next to a narrow neck and the tool follows the fibres straight under it. The piece lifts out in one go and nothing will glue it back in a way anybody fails to notice. Rough and safe beats smooth and short a lobe.

Does the vice matter for work this small?
More than the tools themselves do, on some days of the week. My vice takes a plate screwed to the back of the panel and turns the whole thing under my hands, so when a pocket needs carving from the far side I spin the work instead of reaching across it. Reaching across a panel is how a hand ends up in front of a blade, and it is how a pass ends up running along the grain when it should have gone across.
Rotate the job to suit the tool. Twisting the tool to suit the job is how people get hurt.

How long does a stage like this take?
One sitting on a leaf this size, and no shortcut in it is worth taking. Three pockets, a wall standing round every one of them and round the outside of the leaf as well, and the crossings to settle. A Roman leaf asks for the same stages in the same order, and so does the Baroque work that grew out of these forms. All the time goes into the stages nobody photographs.
People see the finished carving and assume the detail took the time. The detail is the quick part of the whole business.

What is still to come
Eyes and pipes, then the planes. The eyes go right down to the ground, the pipes run up from them to the centre line and finish standing proud of everything around them, and after that the whole leaf stops being flat. None of that works on a panel whose walls lean, which is why today was spent on walls.

Sharpen, then look at your drawing, then pick up the marker before you pick up anything with an edge. Sharpening first because the slope only protects an edge that is actually severing fibres, and design first because no tool decides which leaf goes on top. The rest of this course is waiting behind one door. Shall we carve?


How it's done
- Outline the inner pockets. Number 12 knife, a shallow slope, right on the line or a whisker outside it.
- Plant your hand. Palm flat on the panel. Short presses from the muscles inside the hand, then shift and press again.
- Wedge the waste out. Sloping passes from both sides until they meet, then lay the blade almost flat and shave the centre.
- Take the meat with a gouge. Any small sweep reaches what the knife left standing in the middle.
- Stand every wall up. A V tool with one wing vertical, or a number 3 wherever its curve fits the outline. Square, never leaning in.
- Roll the V tool over. The flat outer face of the wing works as a chisel and sweeps the loose material off the waste side without a tool change.
- Mark the crossings. Draw over every place two leaves meet and settle which one is on top before anything gets lowered.
- Drop the lower leaf. Wall facing the top one, deep out where the panel ends, shallow in the centre. Leave undercutting alone.
Frequently asked questions
What does setting in leave behind for this lesson?
A silhouette and a floor. The waste around the leaf is already down near final depth, which means today starts on the pockets inside the design and on the walls, rather than on the outline.
Should the wall lean at all?
Upright, right through this stage. A wall leaning in toward the leaf is an undercut, undercutting belongs at the very end of the carving, and once material has gone from under an edge there is nothing left to adjust.
Which tool puts a square wall into a tight pocket?
A small V tool ground at 45 degrees. The open angle lets you see which wing is vertical, and a 6mm one drops into necks between lobes where a wider sweep simply will not reach.
What to carve next