
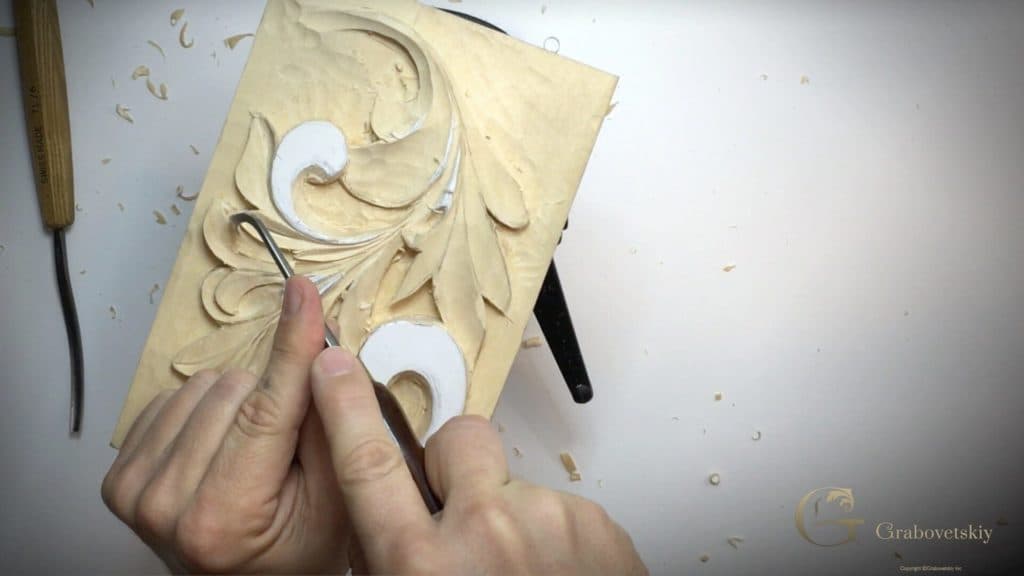
Alexander Grabovetskiy, woodcarver, School of Woodcarving · Published 2017
Where should the middle line of a carved acanthus leaf go?
Quick answer: The middle line of a carved acanthus lobe belongs off centre, shifted toward whichever flank rides up. Shadow then gathers on one flank and the lobe reads as a turning plant rather than a stamped pattern. On one lobe here the shift measured about three thirty seconds of an inch.
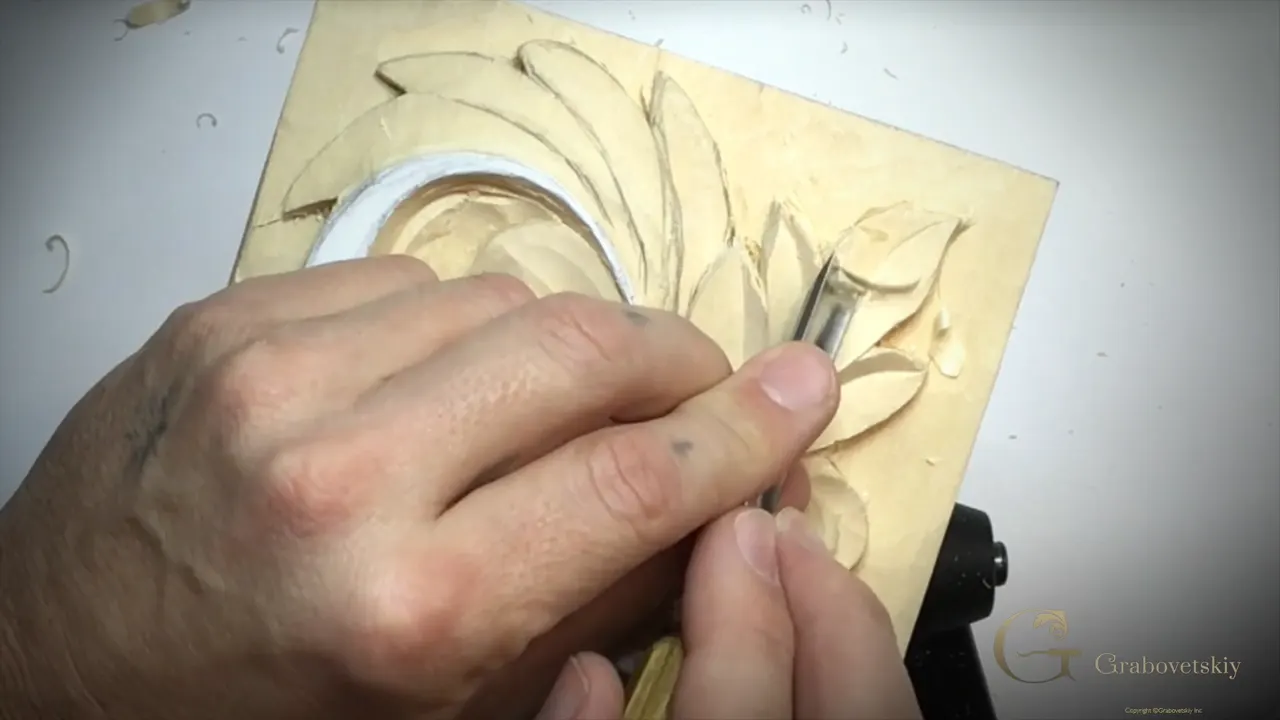
The line down the middle of a carved lobe should not be down the middle. Push it toward whichever flank rides up and the shadow gathers on one flank instead of splitting evenly, and the lobe stops looking like a diagram of an acanthus and starts looking like one.

On one lobe the offset came out at roughly a tenth of an inch. Not a lot. Enough that the light lands differently, and the difference is visible from across the room even though nobody can name it.
Today comes down to that one decision. The rest is ridges, and taking them off.
Key takeaways
- Middle line first, sides second.
- Offset it toward the higher side, because the shadow has to fall where the leaf is leaning and an evenly split lobe reads flat however deep you carve it.
- Micro cuts.
- A 45 degree V tool reaches into a corner without touching the walls on either side of it, which a 60 cannot manage, since it takes material from both faces of the carving at once.
- Knife for every ridge the V tool leaves behind.
- Plant your hand on something solid and work from the muscles inside it.

Which V tool for the smallest spots?
A 45, and mine is a number 15 at 6 millimetres. Any V tool will carve a groove. What the narrower angle gives you is access: the edge goes into a tight corner and comes out again without the far wing scraping the wall beside it. I can travel a very long way into a detail with this tool before anything gets in the way.

What does a 60 degree remove that a 45 does not?
Too much, in a small space. A wider angle takes material off both faces of the groove at once, which is efficient on a large lobe and destructive on a small one. Save the 60 for long open runs and reach for the 45 the moment a detail shrinks.

Where does the first cut go?
On the middle line, before anything else happens to that lobe. Establish it the whole length, then go back and work each side separately. Doing the sides first leaves you guessing where the centre was, and by then the wood that would have told you is on the floor.

Why is the glued paper still useful?
Hardly anybody mentions it, and it is a depth gauge. Bits of the pattern are still stuck to the high points of this relief panel, so when I carve a lobe I go almost until that paper has gone, which tells me the level the drawing sat on. Lose it too early and the reference has gone with it.

What takes the ridges out?
The knife, always. Wherever two passes meet a small ridge is left behind, and those ridges are what makes an ornament look tooled rather than grown. Each gets the point of a blade taken along it until nothing stands proud. The result is genuinely beautiful, and the tool is not what made it so.
Watch the far wall while you do it. A knife that finishes its pass by nicking the opposite side of a groove has cost you more than the ridge did.

How close should your hand be to the edge?
As close as it will physically go. My left hand sits right up against the edge of the tool and my right rests on something solid, and the whole movement then comes from the small muscles inside my hands rather than from my arms. Micro cuts become possible. No arm on earth travels two millimetres on purpose, and the small muscles inside a hand do it all day long.

Can a number 7 make a rounder V?
It can, and sometimes it should. Swap the V tool for a 14 millimetre seven in an open area and the groove in the limewood comes out as a soft trough rather than a sharp crease. Still a V, only rounder. Whether that is even the right way to say it I could not tell you, but you will see what I mean the moment you try it.

Does the light really notice?
More than you do. Half these decisions look like nothing while you are carving, a slightly different angle, a groove a hair deeper, two passes meeting cleanly instead of nearly. Put the panel under a lamp and they all show. Carving is the arrangement of shadow, and the tool marks are only how the shadow gets there.

What is a marriage line?
My own word for it, for the place where two grain directions meet. Approach a lobe from one end and then from the other and the two passes come together somewhere in the middle, and that meeting leaves a fine line across the surface. Marriage line. You will not find it in a book.

How far off centre should the line move?
Call it three thirty seconds on the lobe I actually measured. Divide the width in half by eye, find the true middle, and then walk the line toward whichever side stands higher. Very small details get left centred, since no width exists there for an offset to register in.

Why does the shadow decide the offset?
A leaf leaning one way throws its shadow the other. Push the groove toward the high side and you exaggerate that shadow, and exaggeration is what makes carved ornament read from a distance. It looks more organic. It looks more three dimensional. Split the lobe evenly and it looks like a pattern stamped into a board.

What stays on the middle line while you work?
The keel, which is the sharp bottom corner where two wings meet. It stays parked on your drawn line the whole time while the right hand wing does the work up the flank. Shift that corner and the line itself has shifted. Lean the tool instead and all you have altered is how much comes off the side.

How do you make a leaf twist?
A concave cut inside it. I wanted one of these lobes to turn a little more than the drawing showed, so a number 9 at 5 millimetres went in from both sides of the carved surface, hollowing the surface rather than grooving it. The movement that creates is worth the two minutes. Then the knife goes over the ridge it left until that has disappeared completely.

What happens when you damage your own work?
You fix it and you say so. Carving down beside one leaf on this panel I went too far and took a piece off the one next door. The V tool repaired it after a fashion. That area still bothers me. It stays in the finished piece, and I will always know exactly where to look for it.
Anyone telling you their panels come out clean is carving easier panels than mine.

Which tool undercuts a place a knife cannot reach?
There is a tool made for it. Chris Pye designed a set that Ashley Isles produces, and they work exactly like a knife except they get in deeper and undercut harder, and they come in right hand, left hand and straight. One tiny pocket on this leaf would have been genuinely tough with a blade. This got in there and cleaned it.
You pull it toward yourself. Using it any other way looks impossible to me.

Where a long bend earns its place
Under an overhang. A number 7 long bend reaches material sitting beneath a leaf that a straight tool would have to fight past. Several such places exist by now, since the knife has already gone round the edges at a slight angle and left them half undercut. Most of the real undercutting comes later.

Why rotate instead of pushing through?
Push a tool through a change of grain direction and the wood decides how the pass ends. You will feel it start to tear a fraction before it happens, and by then the shaving has already lifted a chip out of the surface you were shaping. Turning the panel costs five seconds. A split costs an hour and sometimes a lobe.
The vice here rotates under one hand, which is most of why I use it. Beginners tend to walk round the bench instead, and then reach across their own blade.

How many uses does a V tool have?
More than you would guess from its shape. It grooves, it outlines, it separates one leaf from another, its flat wing works as a chisel, and its keel walks a line more accurately than a pencil does. Nothing in a woodworking shop gets reached for more often, and it is far too easy to file it away as a specialist thing.

Does the same offset work on other acanthus?
The principle carries, the amount does not. A Corinthian lobe runs straighter and needs less of a shift, a Roman one asks for a different amount again, and Byzantine work often has the whole lobe lying in a flat layer where an offset would be invisible. Look at the leaf in front of you and decide there.

What does it mean to be somewhat happy?
It means the stage is over and the piece is not finished. I say it several times on this panel and I mean it literally. A lobe can be correct in shape, correct in depth, correct in the direction of its groove, and still not be right, and there is no point chasing that feeling before the design has been lifted off its floor.
Somewhat happy is a legitimate place to stop for the day. Every carver I know who produces finished work has learned to leave a panel alone at that point rather than push on and spoil something that was nearly right.

How the offset changes what you see
| Where the line sits | Shadow | How it reads across a room | When |
|---|---|---|---|
| Dead centre exactly | Even down both flanks, with nothing at all to choose between them | Flat patterning | Only where the detail is simply too small |
| Toward the high side | Deep along one flank and very nearly nothing at all on the other | A turning leaf | Almost always, on any lobe with width enough to show it |
| Pushed toward the low side | On the wrong flank, so the light falls where the leaf is already falling | Simply confusing | Never, and it is always worth checking |
| Leave the groove out | Whatever the hollow happens to give you on the day | A rolled edge | Later periods, which gave the groove up almost entirely in the end anyway |

Not sanding an owl
That is the phrase I keep coming back to. Anybody can shape a block and then sand the shape until it is smooth, and what comes off the sandpaper is a soft, blurred, characterless thing. The surface a sharp tool leaves has edges on it. Keeping those edges is most of why sharpening matters as much as it does.

Where the grain will split if you let it
Along the fibres, under pressure, at the thinnest place. Every lobe on this panel narrows somewhere, and that narrow point is where a pass that is going slightly too fast will run out through the side rather than along it. I lost a piece of one leaf today doing exactly that, and it was the pressure rather than the sharpness that did it.

Fingers can do what an arm cannot
Travel two millimetres on purpose. Holding a V tool by the fingers alone, with the shaft resting against the pad of one of them, gives a range of movement measured in fractions, and that is the only way a groove between two touching lobes gets carved without damaging either. Grip the handle and your arm takes over, and an arm has no small movements in it. You can watch the difference on the video without being told which is which.

What is left to do
The remaining lobes, then the curl, then the undercutting that lifts the whole leaf off its floor. Several areas on this panel I have called somewhat happy rather than finished, and they stay that way until the last stage, since undercutting changes how everything above it reads.

Sharpen, plant your hand, put the middle line in before you touch a side. The previous lesson got the border back and the floor flat, which is what makes today possible, and the tools course covers the V tool angles if 45 against 60 means nothing yet. The rest of this course sits behind one door. Shall we carve?


How it's done
- Halve the lobe by eye. Then walk your line away from that middle, out to the flank that rides up.
- Pencil the offset full length. Tools follow a drawn mark far better than they follow an intention.
- Groove the centre before the flanks. Shallow, the whole way along. Start on a side and you are guessing where the middle used to be.
- Let the bottom corner stay put. Tip the tool to take material off a flank, and leave that corner exactly where the pencil put it.
- Carve almost to the paper. Bits of glued pattern on the high points are a depth gauge. Stop a whisker before the last of them lifts away.
- Spin the panel when the grain turns. Forcing a pass through a change of direction is how wood splits, and turning the work costs five seconds.
- Run the point along every ridge. Until the surface comes back as a single plane and no line is left standing.
- Get in underneath. A long bent seven for material beneath a lifted edge, and the Chris Pye tools where a blade cannot find an angle.
Frequently asked questions
Should the centre line ever sit dead centre?
Only on a detail with no width to spare. Everywhere else the groove shifts to the flank that rides up, since a lobe split evenly throws even light and the eye reads it as pattern pressed into a board.
Why choose 45 degrees over 60 for detail work?
Access to small places. A narrow angle slips into a pocket and comes out again with neither wing scraping what sits either side, while a wider tool takes from both faces at once. Long open runs are where a 60 belongs.
A V tool leaves a ridge, so what takes it off?
The point of a blade, worked along until nothing stands proud. Mind the far side of the groove while you do it, because nicking that costs a great deal more than leaving the ridge would have.
What to carve next