
Alexander Grabovetskiy, woodcarver, School of Woodcarving · Published 2017
How do you see the tool marks left in a wood carving?
Quick answer: Seeing your own tool marks is a lighting problem before it is a carving problem. Put the lamp almost level with the board, or spin the board under the lamp you already own, and a ridge two hundredths of an inch high throws a black stripe you cannot argue with. Carve that stripe away.
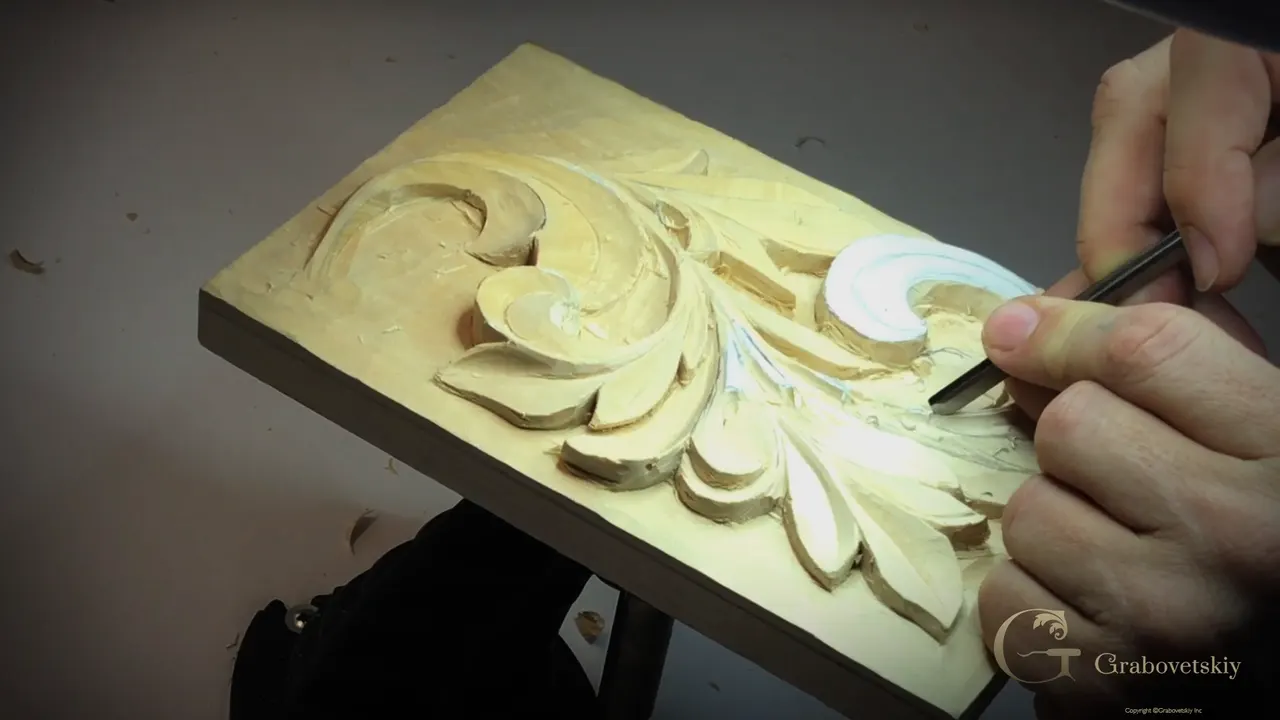
A ridge you cannot see is a ridge you will leave in the wood. Most of the time the mark is already there and the lamp is in the wrong place. Turn the panel forty degrees, or drag the light to the far end of your bench, and the surface you were ready to call done fills with small shadows. Those shadows are the work you have left.

Your eye gets used to one angle, and there sits the whole trap. Sit under the same bulb for an hour and you stop reading one wall of every groove. The grain helps the lie along. Later on I move my lights, look from two or three directions, and every tool mark and every ridge I left comes out of hiding. Then they get cleaned off, and I want you doing exactly that on your own bench tonight.
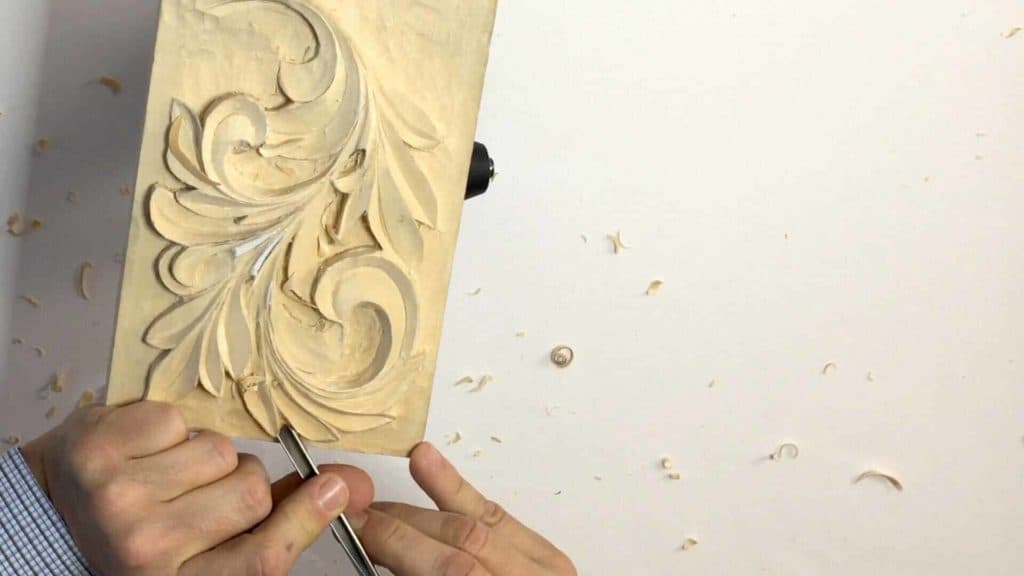
This lesson is the long details of the Greek acanthus: carrying a centre line out to a far tip without a wobble, stepping a flank down with a number 7, blending it with a knife, and the very first undercut of the whole panel.
What actually decides whether this panel is finished
- Move the light, not your head.
- A long detail gets one continuous line, and the line has to reach the tip in one clean run, because a wobble halfway along is the thing a visitor's eye will follow instead of the leaf you spent a week on.
- The exit is where the hole gets dug.
- Step the tool across contrary grain rather than sweeping it.
- Press less and come back more often.
- One shallow undercut under one edge changes how a whole cluster reads, which is why I open it long before the shaping is anywhere near done.

Why does moving the lamp show marks you could not see a minute ago?
Low light across a surface throws a shadow off anything standing proud of it. Conservators call that raking light, and museums use it to read tool marks on objects three hundred years old. Same physics on your bench for twelve dollars. A bulb sitting barely above the surface turns a ridge two hundredths of an inch high into a black stripe you cannot miss.
Straight overhead light does the opposite. Everything flattens.
How far does the centre line have to run on a long detail?
All the way to the very end, with nothing interrupting it. Some of these details run four or five inches, roughly 110 millimetres, and the groove down the middle has to arrive at the tip as one unbroken line. Stop halfway and start again and the join shows for the rest of the panel's life.

Which V tool carries a line that long?
A small one, and smaller than most people expect. Mine here is a 45 degree V at 3 millimetres, an eighth of an inch. A narrow throat follows a curve, and a wide one wants to travel straight and fights you the whole way. Once the line exists I come back over it with the 6 millimetre, number 15, and give it some depth.

Does the angle of the V tool matter?
Less than the books suggest. Forty five works, sixty works, ninety works. What changes is the width of the groove for a given depth, and on a line this long you will not see the difference from three feet away. Pick up whichever V tool is sharp.

What goes wrong at the exit point?
People drive the tool off the end of the detail and leave a pit where the tip should taper to nothing. Watch the last half inch. Your groove should start high where the detail ends and run down into the leaf, so on the way out you barely touch the wood and then you are gone. Damage is what a pit reads as, never carving.

Slow down for that inch. Everything else on a long detail forgives you.

What is a stepping cut?
My own name for it, and it goes like this. Enter on one corner of the blade, rotate the handle, move along, rotate again, move again. Step, step, step, step. Each little rotation slices across the fibres instead of pushing into them, and on cross grain that is the whole difference between a clean wall and a torn one. Other carvers have their own name for it, and I am not going to argue about vocabulary. Watch the hands.

Why does the grain change halfway down one lobe?
A leaf drawn on a board does not care which way the tree grew. A lobe curves, the fibres stay straight, and somewhere along that curve the wood stops running downhill under your edge and starts running uphill into it. Keep pushing and you tear out a chunk below your line. Turn the panel, come from the other end, and the same pass behaves.

My number 7 does most of this flank work. Twenty years of it.

Is a knife better than a gouge for blending a flank down?
For the last pass, usually. A knife has one edge doing the work, and a gouge has a curve that only touches where the curve matches. Bring the flank down to the centre line with the blade, little by little, and the wall comes out smoother than any sweep I own can leave it.

Keep your eye on the edge, not on the handle. Bury the tip and the chip you take comes from under your own line.

When should you stop and recut?
The moment the chip refuses to lift. A chip that will not come away is telling you it is still attached somewhere, and pressing harder is how you find out where. Take the same pass again, a shade deeper, from the same direction. Then the waste falls out on its own. I would rather make three passes than glue one lobe back on.

Where do two grain directions meet?
At the crown of every curve, and you can feel it before you see it. Slicing turns into dragging inside a few millimetres. Stop there. Walk round the bench, approach from the opposite side, and finish the pass coming the other way. Half the torn wood I see in students' work happens within an inch of that meeting point.

What does a short bent V tool add?
Reach, and control over the very last of the depth. A straight shaft runs out of room once a detail sits below its neighbours, and the short bend drops the edge into the hollow while your hand stays clear above it. On this panel I use it to sharpen the middle line after everything else has softened it.

Why open the first undercut before the shaping is done?
Shadow tells you whether the shape is right, and until something is undercut there is no shadow to read. Lay the V tool over on one wing, slide it beneath a rim, take almost nothing, and a dark line appears where the leaf meets its ground. Suddenly you can judge the whole cluster. Undercutting everywhere comes later, and the next lesson is nothing else, but a single rim now saves you guessing for an hour.

One pass. A dark line. Right there, the panel starts to look carved.

Which tool for which job on this panel
| Tool | Job here | Why I pick it up |
|---|---|---|
| The 3 mm V tool | Carries the middle line out to the tip | Narrow |
| Number 15 at 6 mm | Depth | One travel evens both walls and leaves the tip high |
| A number 7 | Steps a flank down | Twenty years on this bench and still the first thing my hand finds |
| Flat number 1, 8 mm | Flattening, and blending one face into the next | Its corner |
| Carving knife | Last pass on a wall | One edge, and no curve to argue with |
| Sweep 5 at 10 mm | Takes a section down where one leaf passes beneath another | Long reach |

Which brand of gouge is worth your money?
My own hand keeps going to Ashley Iles, made in England, and the number 5 at 10 millimetres you see here is one of theirs. Something about the way the outside of the shaft rounds off under your fingers. My hand is less tired at the end of a long day with those in it. I also own Henry Taylor, some German, some Swiss, and a set of old Marples from before that name was sold overseas. Sheffield steel, never too soft, never too hard. I love them.

Pfeil is on my bench too, and I will be honest with you, it is not my favourite. Good steel, honestly. A few I wish were better, and one of mine turned up from the factory with a crack in the metal. The tools course works through the numbering system and the sweeps properly.
Do you need a big collection to carve this leaf?
Count what sits on the bench today. A couple of V tools, a 7, a 1, a 5, and a knife. There is a wall of gouges behind me and I could have picked the one matching this exact curve, then done the whole area in a single pass. Most of you do not have that wall, and you should not be watching a man use tools you will never buy. So I work with the few that are lying there.

Buy sharp before you buy many. Sharpening decides more than the badge on the handle ever will.
Where does this lesson sit in the course?
Right at the hinge. Lesson six moved the middle lines off centre, lesson seven explained the V inside every lobe and where it came from, and this one carries all of that out along the long details. What follows is the undercutting, which is where a flat panel turns into something with air behind it.

The Corinthian leaf is shallower than this one, and the Byzantine version pushes the same shapes further again. Every one of them is the same plant argued over by different centuries, and you can trace that argument in the sculpture galleries of any decent museum.
How much space goes between two details?
Less than you think, and I will not pretend there is a rule. Looking at these two, the gap here wants to be tighter than the gap further down. My opinion, nothing more. A tight gap throws a deeper shadow and the cluster reads as one plant rather than several separate leaves sitting near each other.

Is this the only kind of acanthus leaf?
Far from it, and that is half the reason this course exists. Carvers have been arguing about this plant for two and a half thousand years, and every century bent it a little. What sits on my bench today is one honest version of the Greek form, carved the way the Greeks would recognise. The Corinthian order took the same plant and stacked it. Byzantine carvers pushed it further again, deeper and busier, and yet the main idea underneath is what you are looking at right now.
We take the types one at a time instead of inventing some hybrid nobody ever carved, and the Roman leaf is fatter again.
Should the outside edge look rough at this stage?
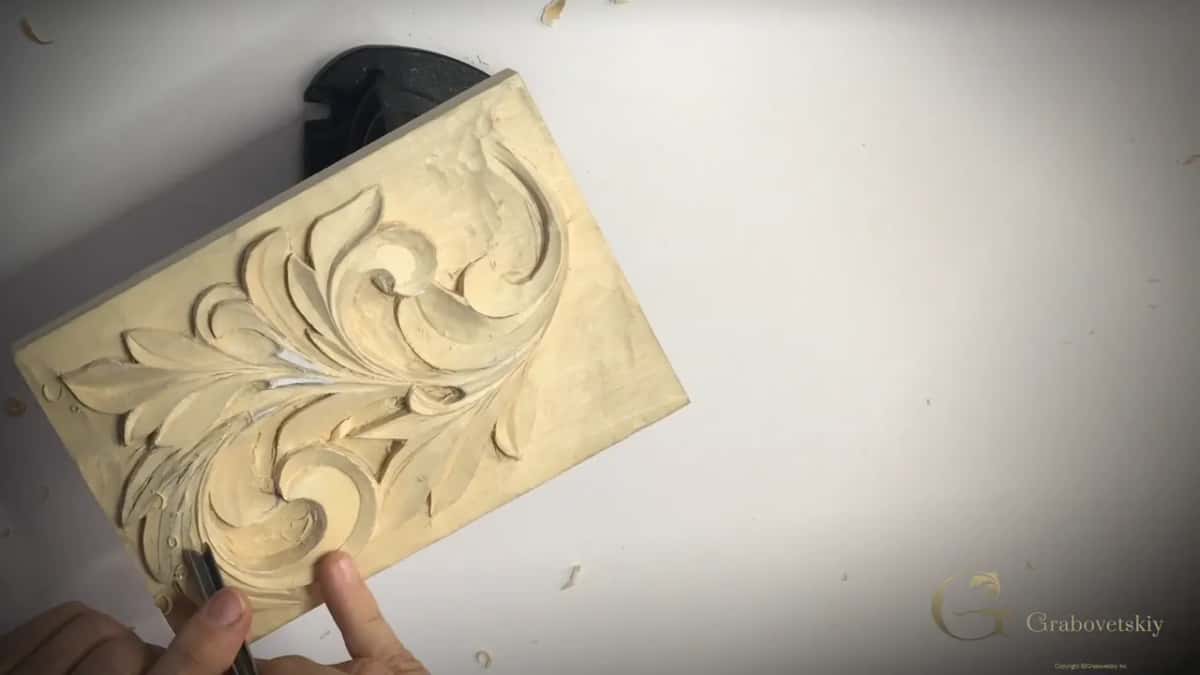
Mine is rough, it bothers me, and I am leaving it alone. Every outline on this panel is going to get hit again when the relief gets undercut and the background drops another eighth of an inch, about 3 millimetres. Refine an edge now and you refine it twice. So I look at the rough outside, make a note of it, and carry on with the middle of the leaf where the work actually counts.
What is still wrong with this panel
One cluster bothers me. Its lines are not as nice as I want. I know full well I will come back and refine every one of them. And I am saying so out loud rather than editing the moment out, because a finished panel is not what this stage looks like. My lamp flickered halfway through filming as well. Nothing here is precious yet.

Move your light before you decide anything is done. Run one long line in a single pass and stop being gentle at the exit. Then lay a V tool on its wing under one edge, take one breath of a pass, and look at what that dark line does to the shape above it. The drawing lesson set these proportions, design explains why they work, and the rest of this course sits behind one door. Shall we carve?

How it's done
- Rake the board with a side light. Drop your lamp until it nearly grazes the surface, then walk round the bench. Ridges invisible under a ceiling bulb turn black.
- Draw the long groove with the 3 mm V. One run down the whole detail. No stopping in the middle to shift your hand.
- Deepen it with the 6 mm. Number 15 back over the same track, evening both walls, and the far end left high.
- Ease off as the detail runs out. Hardly any pressure at all across that final half inch. Push past where a long detail stops and the tip is no longer repairable.
- Step the flank down. Lead with the 7 on its corner, twist, travel, twist again. Rotation is what slices contrary fibres instead of crushing them.
- Finish the wall with a blade. Small passes. Stop the moment a chip refuses to lift, then take that same pass again.
- Open one shadow and read it. Wing of the V tool underneath a single rim. What the dark line shows you is whether the form above it is right.
Frequently asked questions
Does a carver need a special lamp?
A desk lamp on a clamp will do. Height matters, price does not. Held down near the board it grazes the surface, and every high spot throws a shadow long enough to catch your eye.
Why is my V tool tearing on one side of a curve?
Grain flipped underneath your edge partway round the bend. Walk to the far end of the bench and finish that pass coming the other way, and the same tool behaves perfectly.
What size V tool suits a long acanthus detail?
Three millimetres at 45 degrees draws it, six millimetres deepens it. Anything wider wants to travel in a straight line and will argue with every curve you ask of it.
What to carve next