
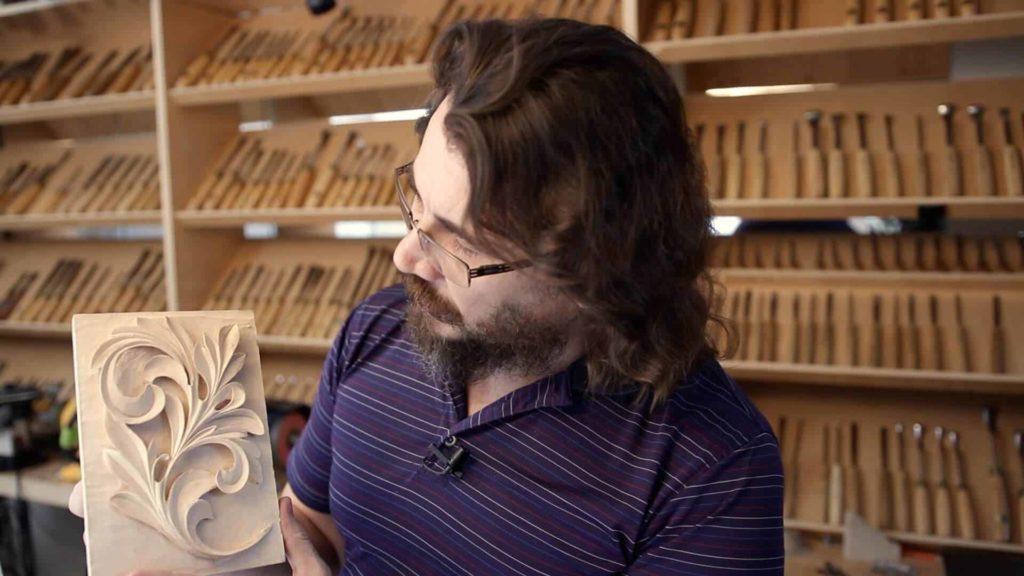
Alexander Grabovetskiy, woodcarver, School of Woodcarving · Published 2018
How should you photograph a wood carving?
Quick answer: Photographing a wood carving is a lighting job before it is a camera job. A single lamp, low and off to one side, rakes across the surface so every undercut throws the shadow it was carved to throw. Light thrown straight at the panel erases all of that.
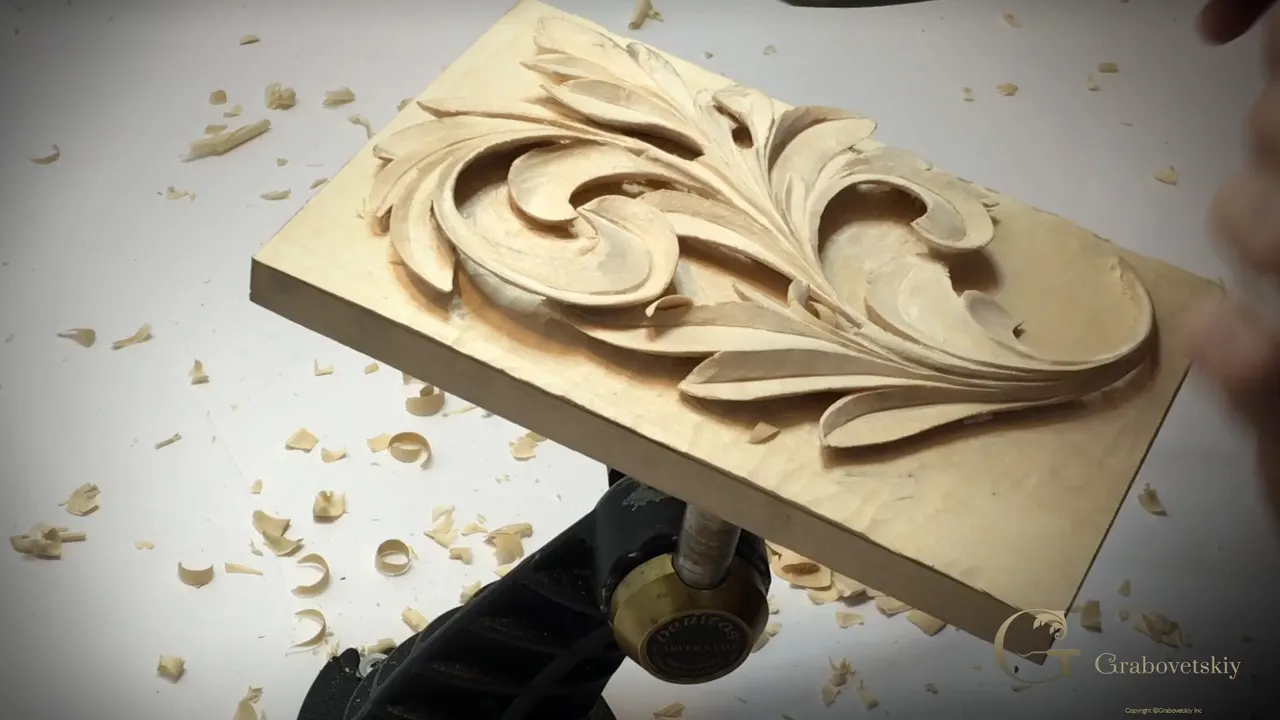
This page asks you for one photograph, and I will look at it myself. Not a portfolio, not a video, not a written report. One picture of work you carved during this course, and a certificate follows if the progress in it is real.

Have you ever photographed something you carved and felt the picture was flat and dead compared with the panel in your hands? Did the shadows vanish? Did the whole thing look like a photocopy of itself?
A carved surface is made of light. Photograph it badly and you hide the only thing you spent forty hours building, which would be a sad way to end a course about shadow.

What this page needs from you, and what I look for
- One image, jpg or png. A zip file cannot be opened here and it will not reach me.
- Shrink it first. The upload has a size limit and a fat file simply fails.
- You get one chance while the page is open. The button goes away.
- Light coming from one side beats light arriving from everywhere at once.
- Progress is the standard, not perfection. A finished leaf is welcome and a half carved one still counts.
- Shoot the panel at a slight angle rather than straight on, so the undercutting reads as depth.
What does this page actually ask you to send?
One course related picture, in jpg or png, run through a size reducer before you upload it. Those are the rules on the page itself, and they are short for a reason.
Please do not use zip. A zip file arrives here as a package nobody on my end can open inside the review tool, so the submission goes nowhere and you have spent your one chance.
Make sure the picture is ready before you open this page. You have only one chance while you are on it. That upload control disappears once you have sent a file and left the page, which catches people out.
Then I review it, and based on your progress I certify you. Progress, please notice. Nobody expects a Corinthian capital at the end of workshop 15.

What were fifteen workshops supposed to teach you?
One variation of acanthus, carved the ancient Greek way, and the habits that go with it. This leaf is a single version out of many. Roman, Byzantine and later versions all behave differently under a blade, and there is a great deal more to work on after this one.
What carries over is not the shape. It is the order of operations: draw it, set the overlaps, carve the pipes to the centre line, model the lobes, undercut, then clean and lower the ground. That order works on any leaf in the ornament family and on most flowers as well.
It also teaches your hand where the wood is weak. Basswood is soft and forgiving until a leaf tip gets thin, and then it is glass. Fifteen workshops is about how long it takes for that knowledge to move from your head into your wrist.
So when I look at your photograph, the leaf shape is almost the least interesting thing in it.

Why does one lamp beat a bright room?
One lamp makes shadows, and a room lit from every side erases every one of them. Every undercut in your leaf was carved to throw a dark line. Light the panel from all sides at once and every one of those dark lines fills up with soft grey.

I run into this on camera constantly. Turn the panel, and my light hits from a different position, and suddenly I can see much better where I have to clean it a little more.
The same trick is your photograph. Turn out the room light. Set one lamp low, off to one side. What was invisible becomes obvious, and the picture starts to look like the object in your hands.
Bring the light really close, too. In the workshops I say it would be easier for me if I just brought a light in close to the relief, and that is as true for a camera as it is for an eye.

Where should the light sit?
Low down and away to the side, roughly where afternoon sun would come through a window. That angle rakes across the surface instead of falling into it, so every raised edge casts a line and every hollow goes dark.

Move it and shoot again. I reposition my lights and look from different directions, because you get used to certain angles of the light and then you see one side of the carving and miss the other. Your camera has the same blind spot you do.
A sheet of white paper propped on the far side helps as well. It bounces a little light back into the deepest hollows so they read as dark rather than as holes, which is the difference between a shadow and a black blob in a photograph.
Four frames from four lamp positions costs you nothing. Send the one where the leaf looks most like the thing on your bench.

Avoid the flash on the front of a phone. A light sitting beside the lens throws its beam along the same line your eye travels, and that is the single direction in which nothing casts a shadow at all.

What do I look at first when a picture arrives?
Shadow depth, then the outline. Those two carry most of the information about how somebody worked, and they are visible even in a mediocre photograph.

Here is roughly what I read off an image, in the order I read it.
| What I look at | What that tells me about the work | Where it usually goes wrong |
|---|---|---|
| Shadow depth | how far the undercutting really went underneath | grey in places that ought to read black |
| The outline, seen whole | whether the silhouette flows in one sweep | small steps |
| The ground around and between all the leaves | whether it sits at one level and how it was finished | ridges running in several different directions |
| Edges and corners | fuzz left along an edge, or the welcome absence of any fuzz | edges sanded soft round |
| The centres of the small leaves | whether each little lobe has a middle rather than simply stopping flat | flat shapes that stop wherever they happen to stop |
None of that requires a good camera. A phone in one hand and a desk lamp in the other will show me all five, as long as the room light is off.

How do you judge your own carving before you send it?
Move the light and look again. That is the whole method, and it takes two minutes. Carvers stare at a panel under one fixed lamp for hours and go blind to it, and then somebody photographs it from another angle and every flaw jumps out.
Give the panel a quarter turn. Then shift the lamp across to the other side and look at the whole thing again in daylight near a window. Each move shows you a face of the carving your eye had stopped registering, because you get used to certain angles of light and stop seeing past them.

Then stop. You can always find imperfections in a panel of your own, and at some point every carver has to put the tools down. I say that out loud in the last workshop because I need to hear it as much as anybody.
If two of the three angles look right to you, send the picture. Waiting for the panel to be flawless means waiting forever, and the next piece teaches you more than the last one ever will.
Does the panel have to be finished?
The standard here is progress, so a half carved leaf is a perfectly good submission. Somebody who has taken the design to the undercutting stage and stopped has still done the work this course teaches.
Send what you have. I would rather see an honest unfinished panel with clean grain work than a rushed one hammered to the finish line the night before.
And if a piece broke on you, photograph it anyway. Mine broke twice in workshop 14, on camera, and the design absorbed both breaks. Yours can too.

What should the background look like in the picture?
One level, all the way round, with the tool marks going in an orderly direction. A ground that wanders up and down reads badly in a photograph even when the leaf above it is good, because the eye uses that flat plane as its reference for everything else.
Whether the ground is glass smooth or slightly rough is entirely your taste. Some carvers leave the roughing texture exactly as it fell and it looks beautiful under a finish. Others take it down with a grounder until it is dead flat. I like a little rough myself.
What does not work is half and half. A ground that is polished in the open middle and ridged in the corners tells me somebody ran out of patience, and a raking light shows it up more cruelly than daylight ever would.
Check the ground at the corners before you shoot. Corners are where a wide gouge cannot reach and where most panels give themselves away.

Why do you have to shrink the file?
Uploads have a size ceiling, and a modern phone shoots well past it. Run the picture through TinyPNG first and it comes out a fraction of the size with no visible change.
Drag the file onto that page, wait a moment, download what comes back. The whole thing takes less time than reading this paragraph, and it turns a failed upload into one that works.
Formats are simple. A jpg, or a png. Nothing else. A heic straight off an iPhone and a zip archive both fail, so convert first if your phone is saving in its own format.

What makes a carved panel photograph badly?
Flat frontal light does most of the damage. After that comes a busy background, then camera shake, then shooting from too far away and cropping in afterwards until the detail turns to mush.
Lay the panel on something plain. A sheet of paper, a clean bench, a folded cloth. The eye should go to the acanthus and nowhere else.

Brace your elbows on the bench or lean the phone against a book. A carved surface photographed at one thirtieth of a second by a tired hand at nine at night is a blurred carved surface.
Ready to carve the panel this page is asking you to photograph? Start with a course here, or take everything at once with Yearly Access and work through all fifteen workshops at your own bench.
Is the certificate the end of acanthus?
Hardly the end. This Greek leaf is one door into an ornament family that ran from Athens through Rome and Byzantium into the Baroque workshops of the seventeenth century, and every stop on that road carves differently.
The Byzantine version is flatter and more geometric. The Corinthian one stacks in tiers up a capital. Put them beside each other and you can read a thousand years of taste in the depth of a single hollow.

Take the certificate, hang the panel, and pick the next one. That is how a carver builds a hand, and it is why the lesson map exists.
What happens after you upload?
I open the picture and read it the way I have described above. That takes a few minutes per panel, and it is genuinely the part of this I enjoy, because a photograph of somebody's first acanthus leaf tells me what they understood and what they have not met yet.
The certificate follows when the progress is there. A student who sends a leaf with real shadow under it and a ground at one level has learned what fifteen workshops were built to teach, whatever the leaf itself looks like next to Grinling Gibbons.
A certificate is a small thing and I know it. Nobody hangs one in a gallery. What it marks is real. A person carried one piece of wood from a drawing, through overlaps and pipes and modelling and undercutting, down to a lowered ground, and came out the far side holding a leaf. Most people who buy a set of gouges never do that.
Keep the panel afterwards. Hang it where the light moves across it during the day and you will see it change from morning to evening, which is the whole argument for deep undercutting in one sentence.
Mine sits on a shelf in the shop with about two hundred gouges behind it, and I still pick it up when somebody asks what Greek acanthus means.

How it's done
- Turn the room lights off. Overhead lighting reaches a panel from every direction at once and fills in every shadow you carved. Kill it. The room wants to be dim enough that one lamp becomes the only thing the surface answers to.
- Set a single lamp low and to the side. Somewhere around the height of the bench, to the left or the right, and close in. That angle skims the surface rather than dropping onto it, which is what turns a hollow into a dark line.
- Prop a white sheet on the far side. Paper, card, a tea towel, anything pale. It throws a little light back into the deepest places so they photograph as shade rather than as holes, and it costs nothing.
- Set the panel on something plain. A clean bench, a sheet of paper, a folded cloth. Anything with pattern behind the piece competes for attention, and attention is the whole reason you are taking the picture.
- Brace the camera. Elbows on the bench, or lean the phone against a book. Handheld at the end of an evening gives you a blurred picture of sharp carving, which is a cruel way to lose a submission.
- Shoot from several lamp positions. Take three or four frames, moving the light between each one. Your eye adapts to a fixed angle and stops seeing half the surface, so let the camera check the other faces for you.
- Squeeze the file, then upload once. Run the chosen frame through a size reducer, save it as a jpg, and have it sitting on your desktop before you open the upload page. Your one chance is while that page is open.
Frequently asked questions
What kind of photograph does a carving certificate need?
One image of work from the course, saved as a jpg or a png. Archives fail. Reduce the file before uploading, since phone cameras produce images far larger than the page will accept from you.
Why does carving look flat in photographs?
Front lighting removes the shadows. Relief depends entirely on dark lines under raised edges, and a light source sitting beside the lens sends its beam along exactly the axis that produces none. Shift the lamp to one side and the depth comes back immediately.
Do you need a real camera to photograph a carved panel?
A phone handles this perfectly well. Lighting decides the result, not the sensor, so a desk lamp plus a braced phone beats an expensive camera under ceiling lights every single time. Keep the lens steady and get reasonably close instead of cropping in later.
What to carve next