
Alexander Grabovetskiy, woodcarver, School of Woodcarving · Published 2017
How do you refine the outline of a relief carving?
Quick answer: Refining a relief outline means redrawing the lines the roughing stage destroyed, then bringing the border back with a knife rather than a gouge. A number 12 chip knife reaches corners nothing wider can enter. The floor behind it still has another sixteenth of an inch to lose.
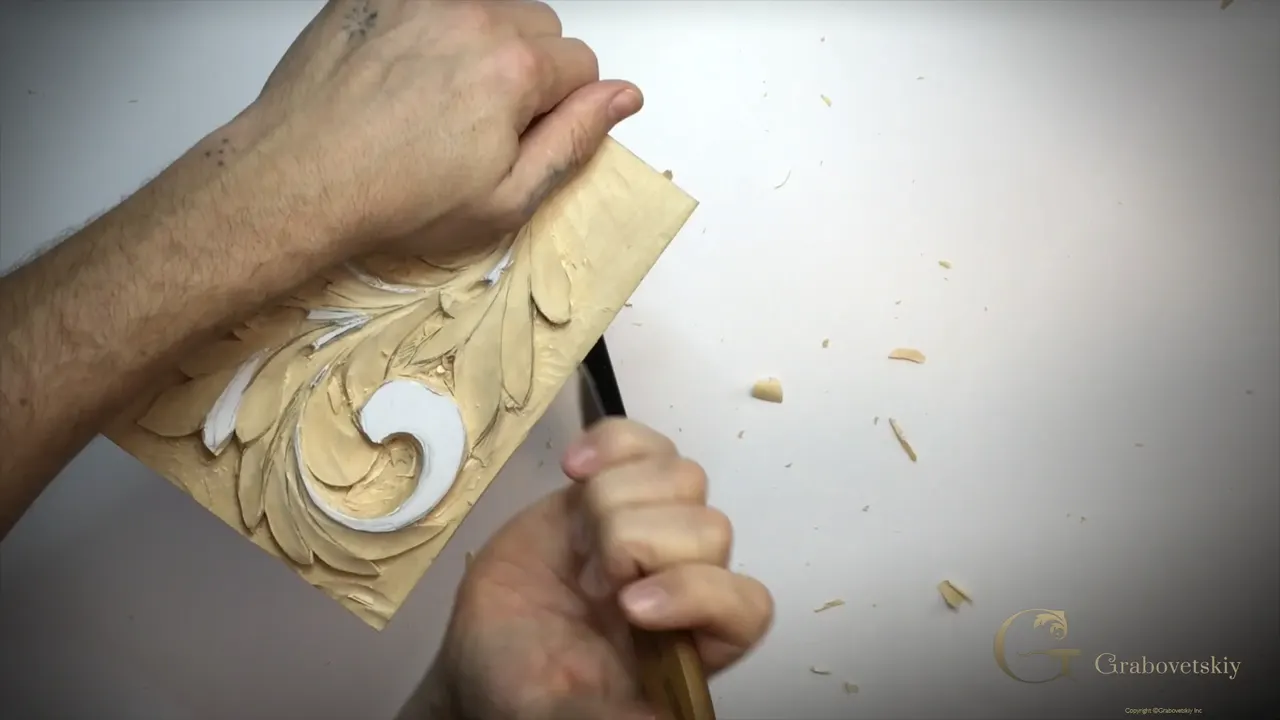
Three days of roughing destroyed most of the fine outline, and the pencil goes back on before any tool does. Perfectly normal. The shape you are carving toward lives on paper, and the board only ever holds an approximation of it.

Look along the outside of this panel and the crisp drawing from lesson one is mostly gone, buried under chips and boasting, which is what every relief panel looks like at this stage. Redrawing it is not tidying up. It is the moment you decide, with everything now in three dimensions in front of you, what this leaf is actually going to be.
And I change my mind here, the way I do in most sessions once the thing is standing up in front of me.
Key takeaways
- Pencil before tool, every time.
- Print the drawing again and copy it onto the wood if eyeballing worries you, because a line that is slightly off the original costs nothing and a lobe in the wrong place costs the panel.
- Flow lines.
- The number 12 chip knife refines a border faster than any V tool, and it reaches corners the V tool cannot enter at all.
- Ground with a grounding tool, and never below the floor.
- The Greek leaf grooves all of its lobes and leaves no ridge behind.

Why redraw lines you already drew?
Every rough stage eats detail. The waste came off, the walls went in, the planes dropped, and the crisp edges of your ornament are now approximate at best. The pencil goes back on and restates them. My own habit is to eyeball it against the design in my head, and if I drift a little from the original nobody will ever know.
Lay the printed sheet beside the board if that makes you nervous, lay it beside the board, and copy line for line.

Flow lines, and why every line answers to one
I call them flow lines. Each individual line on an acanthus belongs to a larger movement running through the whole design, and a line that ignores that movement looks wrong even when nobody can say why. Redrawing is mostly checking that every small curve still points where the big curve is going.

Can the design change this late?
Mine changes constantly. One leaf here I decided should tuck further underneath than the drawing showed, so it now does. Another section I simply did not like the look of, and it is gone. A drawing made on paper before a single chip came off cannot know what the wood would do, and only a fool refuses to answer the wood.
There is a limit. The proportions from the drawing lesson stay where they are, and so does every crossing you settled with the marker. What moves is detail.

How does a 90 degree V tool sit?
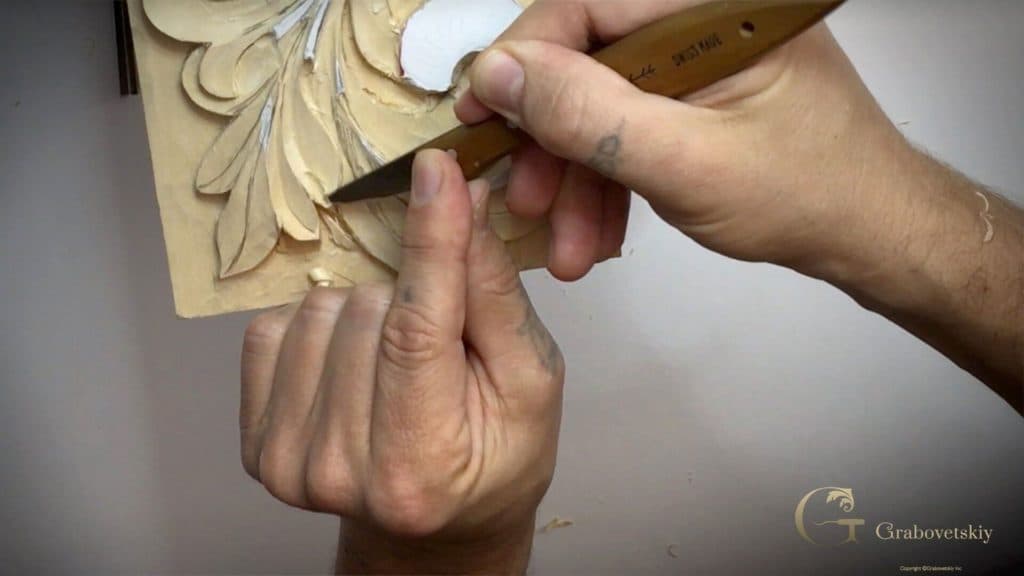
One wing lies right down on the ground. A V tool ground at a true right angle lets you stand one of its two chisel faces square against the ground while the other rides up the side of the leaf, and you creep along the outline taking a thread at a time. Keep it honest. Do not let it dip underneath yet.

Why the knife beats the V tool here
Reach. My preference for this whole stage is a cheap chip carving knife, and I mean cheap. Mine happens to be a number 12, and the brand matters far less than the edge on it. Where a V tool arrives along the line of its handle, a knife point goes wherever your wrist goes, into corners and under points and around a curve that doubles back.
Down on the line first, then clean beside it. One tool for the whole perimeter, no swapping.

Where does a knife slip?
End grain, and it slips fast. Those are the places where the fibres run straight into your edge instead of across it, and a blade that skids there takes a piece of the leaf with it. Slow right down whenever the grain turns to meet you, and watch where your other hand is sitting.

How far down is the background going?
Another sixteenth, maybe an eighth, depending what you left. The refining I do today is on a floor that has not reached its final depth, which sounds wasteful until you try it the other way round. A border defined against a floor that then drops is a border you can adjust. A finished floor locks everything above it.

What happened when a stranger copied this carving?
He watched one of my videos, carved the same piece, and sanded every detail smooth. No complaint from me. Sanding is still carving whatever anybody tells you, and I simply prefer the tool marks left where the tool put them. He also had no idea what wood I was using, said so in his video, and I went and put it in the comments: limewood.

Is limewood really soft?
People call it a soft wood and it is not, not in the way they mean. Limewood holds detail better than almost anything on my bench, and it has been the sculpture wood of choice in the palaces of England for more than three hundred years, in Europe for longer still. Some carvers call it the queen of the woods. I will not argue with them.
You can damage it. You can damage oak, walnut and cherry too, and I have never understood why anyone would want to.

Which tool clears a background?
A grounding tool, and until you own one you will not believe the difference. Mine is an eighth of an inch, made by Ashley Isles, and it exists for exactly this job: taking a floor down flat between details that are already standing. They come smaller and larger. I would call it a must-have for anything with a background behind it.

What does the bend in it buy?
Reach past an obstruction. Mine carries a slight bend along its length, so when a carved leaf stands between me and the patch of floor I want, the bend lets the edge get in there while the handle stays clear. A straight one gets close. Not quite as close.
Chris Pye grinds his at a sweep of two and a half, straight rather than bent, which is neither a 3 nor a 2 and sits deliberately between them. Different answer, same problem.

How deep can you safely ground?
To the floor, and not one shaving past it. Which is the whole discipline of this tool, and it is easier to break than it sounds, because the grounding tool cuts so pleasantly that you keep going. A pocket carved below the background cannot be brought back up. Everything else on the panel would have to come down to meet it.

Why does a Greek leaf have a V inside?
History demands it. A Greek acanthus carries a V groove down every lobe, and later forms of the classical plant abandon it, so if you round that groove into a hollow you have carved something else and called it Greek. We will meet the leaves that drop the V later in the series. Here it stays.

Where does the V groove actually go?
Down the middle, except when it does not. Follow the central movement of the lobe rather than measuring its width, because a leaf that leans downhill wants its groove pushed off toward the fall, and that offset is what sells the movement. On one lobe here I left noticeably less room on the right of the line than on the left.

How do you start and end a V cut?
Dig in, then escape before the edge. Never run a V tool off the end of a lobe, since the moment it breaks out at the tip you have a notch nobody can repair. Enter on the line, travel, and lift the tool clear while there is still wood ahead of it. Then repeat the pass, easing the angle over a little each time.
Micro cuts on the small lobes. Anything the width of a pencil gets tiny passes and nothing else, never one confident stroke.

Should a Greek leaf keep a ridge?
Usually not. On the Corinthian leaf we deliberately left a raised ridge running the length of each one, and on the Greek form there is most often nothing, just the clean V. A ridge would still be authentic. When I catch one glinting under the light here I take the knife to it until it has gone, because I do not want to see too many lines.

How the three refining tools compare
| Tool | Best at | Reach | Risk |
|---|---|---|---|
| Number 12 knife | Border, sharp points, anything with a corner in it | Wherever your wrist can go | Skids |
| The 90 degree V | A long even wall, and honestly not a great deal else | Straight runs | Cannot enter a corner however patient you are |
| Grounding tool | Floor | Its bend gets past a standing leaf that would block anything straight | Going under the ground level |
| A 45, six millimetres | The groove running down the inside of a lobe | Small lobes only | Breaking out at the tip, which leaves a notch that nobody can repair afterwards |

What the knife does to an outline
Watch it come back. Half an hour with a sharp point and the perimeter that had gone soft under boasting is crisp again, every sharp tip restored, every hollow cleaned out. This step is not strictly necessary at this stage, and I do it anyway, because seeing the semi-final outline tells me whether the next stage is worth starting.

Against the grain, with a sharp enough edge
Rotating the panel is always the better answer. Here I did not bother, and went against the grain anyway, which works only because the knife is genuinely sharp. A dull edge tears in that direction and leaves a fuzz that shows up under finish. Sharpen first and the rule relaxes a little; skip sharpening and no rule saves you.

What does sanding actually cost you?
Every edge the tool left. A sanded surface is soft everywhere, and soft everywhere means the light has nothing to catch on, so a carving that looked alive on the bench goes flat the moment it is smoothed. The man who copied my piece produced something perfectly competent and perfectly quiet.
Sand it if you want it smooth. Know what you are trading.

Why refine against a floor that will still drop?
A border you can still move is worth more than a border that is finished. Everything here gets one more pass at the background after today, and every edge I am cutting now will be adjusted when that happens. Work the other way round, finishing the floor first, and every correction above it becomes impossible.

How much does the pencil actually matter?
It is the only record of what you meant. Wood does not remember a plan. Once a plane drops, the line that told you where that plane ended is gone, and if you did not put it back you are now guessing at your own design. My panel spends this entire lesson covered in pencil, rubbed out and redrawn, and none of it survives to the finish.

How long does refining take?
Longer than it looks, and it shows less progress per hour than any other stage. Work the border for a good while and the panel still looks much the same from three feet away, which is exactly the point. Refinement is the difference you only see when somebody stands close.
Nobody photographs this stage. Everybody notices when it was skipped.

Where the leaf came from, and where it goes
This form sits between two others we carve. The Corinthian leaf came first and runs straighter, the Roman version came later and fleshes out, and Byzantine work stacks the whole thing into layers. Carve all four and the differences stop being facts you memorised and become things your hands know.
The groove is the marker for this one. Lose it and you have carved a different century.

What is still ahead
The middle lines, then the undercutting. Every lobe still needs its groove placed and cut, the planes need their final shaping, and the whole leaf then gets undercut off its floor. Today was about getting an outline worth refining toward, and about the two tools that do it.

Sharpen, then find your drawing, then mark the wood before you put anything with an edge on it. The tools course covers the grounding tools and the sweeps if any of these numbers are new, and the design course covers the flow lines properly. The rest sits behind one door. Shall we carve?


How it's done
- Put the pencil back on the wood. Restate every major line the roughing stage ate. If eyeballing worries you, copy it off a freshly printed sheet instead.
- Check the flow. Each small curve has to point where the big movement is going. Fix the ones that do not.
- Decide what changes. A leaf can tuck further under, a section can go. Proportions and crossings stay.
- Refine the border with the knife. Straight in on the line, then a clean pass beside it. The 12 reaches corners nothing else can.
- Slow down at the end grain. That is where a blade skids and takes a piece of the leaf with it.
- Ground the floor flat. An eighth inch grounding tool between the standing details. Stop level with the background and not a shaving lower.
- Draw the groove off centre. Follow the movement of each lobe rather than measuring its width. A leaf leaning downhill wants its groove pushed toward the fall.
- Cut the V and kill the ridge. Dig in, escape before the tip, repeat with the angle easing over. Take the knife to any ridge the light finds.
Frequently asked questions
What is a grounding tool for?
Taking a background down flat between details that already stand above it. An eighth inch one reaches most places, a slight bend in the blade gets it past a leaf that would block a straight tool, and the whole skill is stopping level with the floor.
Why does the Greek acanthus carry a V inside each lobe?
Historical accuracy. The Greek form of the plant grooves each lobe down its length, and later versions of the acanthus give that up, so a rounded hollow there turns the leaf into something from another period.
Can you refine a carving with only a knife?
Most of a border, yes, and faster than with a gouge. A knife point follows your wrist into corners, around a curve that doubles back, and under a sharp tip. A V tool has to arrive along the line of its own handle.
What to carve next