
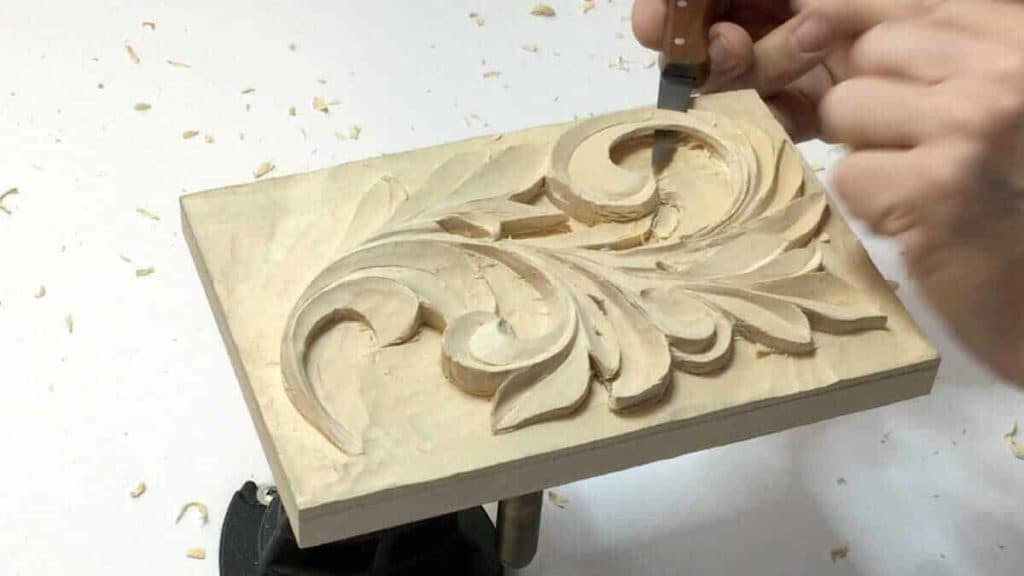
Alexander Grabovetskiy, woodcarver, School of Woodcarving · Published 2017
What does undercutting do to a relief carving?
Quick answer: Undercutting is the work of taking wood from underneath an outline so the shape stands away from its own background. The top surface never changes. What changes is the band of shade beneath it, and shade is what lets a person read a leaf as a leaf from the far side of a hall.
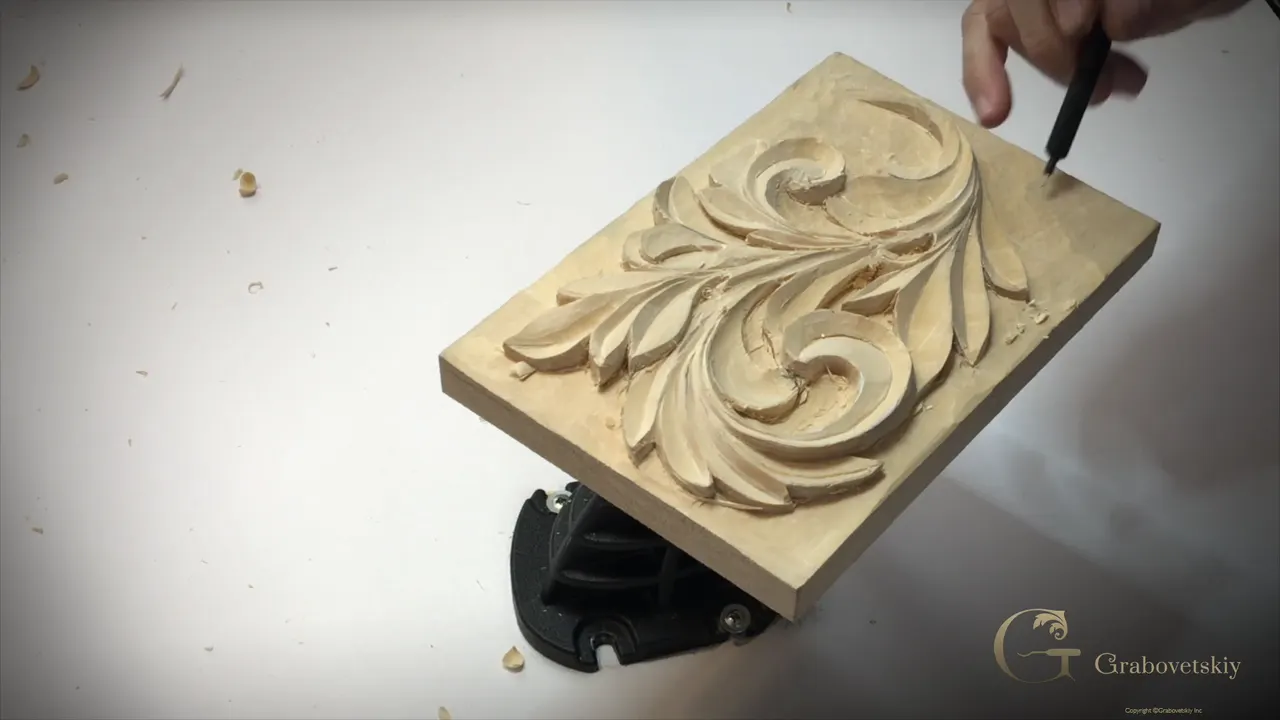
Take a little wood from under an edge and a dark band appears beneath it. Nothing about the top of the leaf has changed. Only the shade underneath. And that shade is the entire reason a carved panel reads as a plant from across a hall instead of as a pattern scratched into a board.

Plenty of carvers never do this. Leaving a relief sitting flat on its ground is faster, safer, and nobody will call you out on it. You can break a gouge. A lobe that took three hours can break away under your thumb. Sometimes the whole job takes longer than roughing the main form did in the first place.
I do it anyway, every time, on every piece that is going to stand on its own as carving. Today the Greek acanthus starts lifting off its background.
What you are actually buying with all this risk
- Shade, and nothing else.
- A V tool laid over on one wing works like a chisel and starts the shade faster than anything else on the bench, which is exactly why carvers who try it without respect end up with a broken wing.
- A bent shaft reaches where a straight one cannot.
- Many light passes, never one hard dig.
- Cast work is the exception, and it is a real one.
- The deeper you take the hollow underneath, the darker the band, and past a certain depth the leaf stops looking attached at all and appears to hang in front of the wood.

What does undercutting do to a carving?
Shade. Remove material from beneath an outline and light can no longer reach the wood immediately under it, so a hard dark line runs along that whole edge. Your eye reads darkness as distance. A leaf with a black band under its rim looks like it is standing forward, even though it never moved.
Flat relief at ten feet turns into wallpaper. Undercut relief at ten feet is still a plant.
Which tool starts an undercut?
My 6 millimetre V tool, number 15, tipped over onto its left wing. Set the tool right down on the background and one wing turns into a chisel pointing sideways, straight in beneath the edge of the leaf. Slide it forward a few millimetres, then pull back. There is your shadow line.

Why do carvers snap tools doing this?
A wing is thin steel with a leaf pressing down on it. I know carvers who broke a V tool undercutting, good carvers, and the break happens the instant they lever instead of slice. Keep the handle low, remove almost nothing per pass, and never twist to free a chip. Not everybody masters this. Plenty of people decide the risk is not worth it and I understand them.

When should a carver skip undercutting entirely?
When the piece is going to be cast. Years ago a company hired me to carve models for their plaster work, and every undercut I might have made was forbidden, because a mould cannot release from a shape that hooks back on itself. For production moulding it simply is not practical. A standalone piece of carving has no such problem, and there I undercut everything.
Ask that question before you start, not after.

How extreme does undercutting get?
Look at Grinling Gibbons and you will see the far end of it. Limewood swags where flower stems stand completely free of the panel and you can pass a wire behind them. Most extreme undercutting anybody has ever managed, and it has survived three hundred years of English houses. Our Gibbons class in Maine spends most of its week on exactly that problem.
This panel goes deeper than the Corinthian leaf did, which means the shadows available to us here are better.

What is a back bent gouge, and why does it matter here?
A gouge whose last inch curves backwards, away from the hollow side. Mine is a number 25 at 13 millimetres, roughly half an inch, and it spends more time in my hand during an undercut than anything else. The reverse curve lets the edge dig in under a leaf while the shaft stays clear of the leaf itself. A straight tool would be resting its whole length on the thing you are trying not to touch.

Own more than one if your budget ever allows. My 13 millimetre will not enter a tight pocket, and the 6 millimetre version of the same number 25 walks straight in.

How many passes should one undercut take?
As many as it needs, and always more than one. Try to clear the whole hollow in a single hard push and the tool eventually breaks free of the wood, travels, and lands somewhere you did not want it. My edge has escaped before. Small bites remove the same material with none of that risk, and the extra two minutes are the cheapest insurance in the workshop.

How deep can you go before you hit something?
Until the middle line of whatever sits above starts getting close. Push past that and you have carved through the back of a groove you already finished, which cannot be undone. Look at the top surface, picture where its centre sits in the thickness of the board, and stop a comfortable distance short.

Where does the undercut begin when one leaf passes under another?
At the exact point the two outlines cross. From there it runs downward along the buried edge for as far as the eye would expect to see nothing. Get the starting point wrong and the overlap stops being believable, and an overlap nobody believes is the difference between carved ornament and a flat drawing with grooves in it.

Does every lobe get a V groove inside it?
Many Greek leaves carry one, and plenty carry a concave scoop instead. Both exist in the old work. On this panel I picked one lobe and hollowed it with a gouge rather than grooving it, purely so you can see the two side by side and judge for yourself which suits your design.

Rule stays the same either way. A scoop still has to run toward the centre line even though that line is never carved and nobody will ever see it. Invisible geometry is still geometry, and design is where this course explains why.

Does a bigger gouge leave a cleaner hollow?
Every time, as long as it fits. A wide sweep touches more of the hollow at once, so the surface arrives smoother with fewer facets to clean up afterwards. My five eighths of an inch Ashley Iles number 8 did most of this one. Start with the biggest that will fit and only drop down when the shape refuses it.

Why keep a micro bevel on the inside of a gouge?
My reason is what the facet lets a tool do upside down. Picture a very short polished bevel on the inner face of the edge, a degree or two at most. I keep one on every tool I own. With that facet there the gouge will work turned upside down, bevel against the wood, which is how you skim a paper pattern off a surface or flatten a background without the corners digging in. Sharpening covers how to put one on without wrecking the edge.

Why run the rim downhill before hollowing a lobe?
An edge that drops away gradually looks alive; an edge that stands up square looks stamped. Before any gouge touches the inside of that lobe I take the number 12 knife round its rim and walk the whole thing down into the ground, a little more at the tip than at the base. Thirty seconds of work. The scoop that follows then sits inside a shape that already flows.
Skip it and you will spend twenty minutes later trying to rescue a hard bevel you could have avoided.
How far off centre does the line sit on this leaf?
Three thirty seconds of an inch, a shade over 2 millimetres, pushed to the right of the true middle. Measure the real centre between the two outlines, then walk your line that far toward whichever flank will stand higher when the carving is done. Lesson six worked out why, and the pipes lesson set up the geometry all of these grooves run into.
Even a gouge fresh off the strop cannot rescue a groove put down the wrong place.
Which tool for which part of the undercut
| Tool | Job here | Why I pick it up |
|---|---|---|
| V tool, 6 mm | Opens the first shadow all the way round an outline, fast | Flat |
| The 3 mm at 45 degrees | Tight corners | Its big brother will not fit, and a corner left square ruins the line |
| Back bent 25, 13 mm | Deep work | Reverse curve keeps the shaft clear of everything already carved |
| The 6 mm version | Small pockets | Same trick in a space the size of a thumbnail |
| Short bent V tool, 3 mm | Reaches past a raised detail that blocks a straight shaft | Safety |
| Carving knife | The last hair of waste right under the rim | No tool in the rack gets closer to an edge without touching it |
| Sweep 8, five eighths | Hollowing a lobe | Wide sweeps leave fewer facets behind |

Do you have to know the size of the tool in your hand?
Honestly, I never check. Forty years at a bench and my hand reaches for the right one before my head has named it. Nothing clever about it, and nothing to be proud of. Repetition does that to anybody. You will get there too. Until then, read the numbers stamped on the shank and learn the sweep system properly, because guessing early costs you wood.

Can you hear whether a tool is sharp?
Yes, and this is not mysticism. A sharp edge parts fibres with a faint clean hiss, and a dull one thumps and crushes. Close your eyes on the next pass and listen. Sharpening is the skill that takes years, not the carving, and the sound is the fastest feedback you will ever get about it.

One quick pass on a buffing wheel changed how the number 8 behaved halfway through this lesson. Same tool. Completely different cut.

Should a leaf ever be carved right through to daylight?
On this one, I decided yes, and I thought about it for a while first. Where a tip lifts high above the ground you can take the hollow underneath all the way through, and then the leaf genuinely floats with air behind it. My knife came out the far side. Enormous gain in depth for a small piece of nerve.

Mind the weak point though. Where grain runs across a thin neck, too little material left behind means the whole tip snaps off in your fingers.

What about the awkward places a knife cannot reach?
Zip in first, then come back. A shallow starting slice down the line gives the later tool something to break into, even when your hand cannot get the blade round to finish the job. Turning the panel solves most of the rest. My bench is clear on three sides for exactly that reason.

Where does lesson nine leave the panel?
Rough looking and much better than it was. Every outline is bruised from the tools going underneath it, and none of that matters, because edges get refined at the very end once nothing else is going to disturb them. Lesson eight carried the long lines out to their tips. Lesson ten finishes what today started and gives the technique its proper name.

Believe me about the rough stage. Once the background drops and the outlines get cleaned, this panel will look like nothing you are seeing now.

Why this technique is worth the fear
Because a carving without it stays a picture. Everything we have done on this leaf, the offset lines and the pipes and those eyes, was a setup for the moment light gets underneath. Baroque carvers understood this better than anyone since, and every altar that still stops people in a doorway is doing it with shade, not with detail.

Sharpen everything first, and I mean everything, including the two tools you were planning to skip. Lay a V tool over on one wing, take almost nothing from under one single rim, then step back four paces and look at what happened to the shape above it. If that shadow does not convince you, nothing in this course will. Should it convince you, the techniques library and the rest of these lessons are behind one door. Shall we carve?


How it's done
- Settle the casting question first. A model headed for a mould gets none of this. Anything standing on its own as carving gets all of it.
- Put a real edge on every tool. Dull steel crushes fibres in a place you cannot reach afterwards to repair them.
- Tip the V tool onto one wing. Down on the ground, sliding sideways beneath the outline, a few millimetres only. Withdraw and look at what it did.
- Move to the back bent when you want depth. Reverse curve keeps the shaft off the finished surface while the edge goes further in.
- Take small bites, over and over. Four light approaches are safer than one heavy approach, and they clear the same material.
- Finish beneath the rim with a blade. Nothing else in the rack gets that close to an outline without touching it.
- Hook the waste clear. Corner of the edge, tiny movements, drawing the chip toward you. Shoving it inward only buries it.
Frequently asked questions
How does undercutting work in wood carving?
Wood taken from beneath an outline so light cannot reach the ground immediately below it. A dark band appears along that whole rim, and the eye reads darkness as distance, which is why the shape seems to stand forward.
Can you undercut a carving that will be moulded?
No mould releases from a shape that hooks back on itself. Models made for casting have to stay free of it, and I have carved plenty of those, with every rim left square on purpose.
Which gouge suits undercutting best?
A back bent, number 25, somewhere near 13 millimetres. Its reversed curve puts the edge under a rim while the shaft stays above the carving. Buy a second, smaller one as soon as you can.
What to carve next