
Alexander Grabovetskiy, woodcarver, School of Woodcarving · Published 2017
How do you sharpen a back bent gouge?
Quick answer: Sharpening a back bent is the same multi-step routine I use on most of my tools, from 80 grit up through 6,000 and on to leather and felt. Its bevel goes down in the Tormek SVS-32 jig. What changes is the bar, which drops beneath the wheel instead of riding above it.

Sharpening a back bent gouge is the same multi-step job I do on most of my tools, with one change in the setup. My bar goes below the wheel, where for a straight gouge it sits raised above. And the bevel side goes down in the jig.

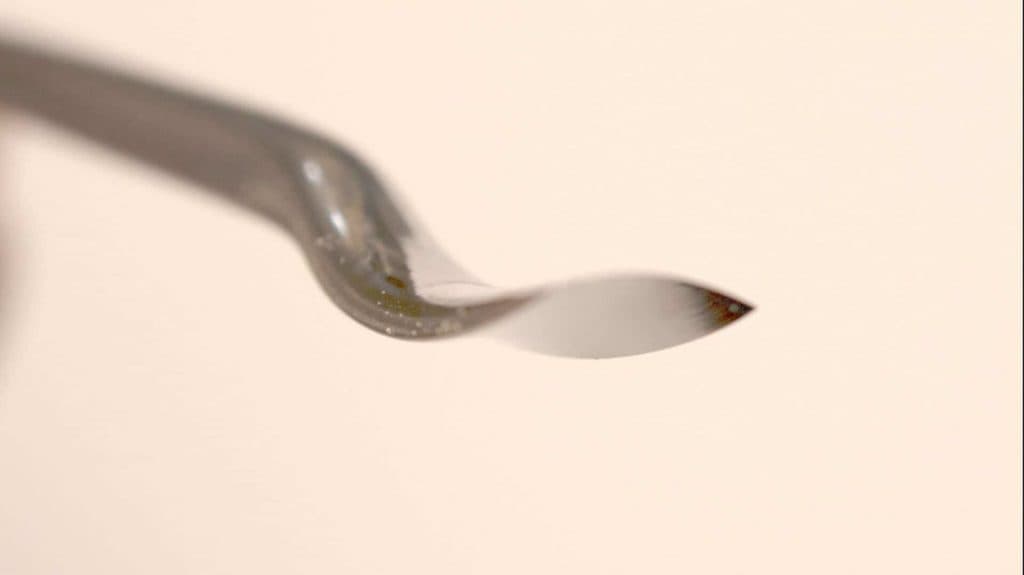
You know a plain straight gouge? And you have seen a spoon gouge, with its bend near the edge? Back bents bend the other way, and the bevel sits on the opposite side. The machine needs the bar in a different place too.
The tool on my bench today is a number 25, thirteen millimeters, by Pfeil. I've got multiple back bent gouges, and this is the one I picked to regrind and sharpen on camera. At the end it leaves the wood really clean, and the tool comes out like a mirror.
The back bent routine at a glance
- The usual order, 80 grit, 220, 3,600, 6,000, then a leather wheel and a felt buffing wheel.
- In the Tormek SVS-32 jig the bevel faces down.
- For this shape the bar sits lower, under the level of the wheel, and the jig has to stay somewhat away from the machine, or its outside ring gets in your way.
- My eye sets the bevel, roughly 3/16 of an inch (5.5 mm) long, with no degrees measured.
- On 80 grit I stop a hairline short, so the edge doesn't go wavy.
- Most of the burr comes off on leather and felt, and the last of it on the end grain of a soft wood.
What is a back bent, and how is it marked?
A back bent is a bent carving gouge whose blade bends backward, the opposite way to a front bent like the spoon gouge. Most tools you buy as a beginner are straight gouges, and a straight gouge is completely straight, like it sounds. Bent tools split two ways. Front bent, which has three members, and back bent, which has only two.

Front bents come short, medium and long. A spoon gouge, which is what carvers usually call the short front bent, has a bend that starts really close to the edge. The long bent starts almost at the handle and bends a really long way. The medium front bent starts its bend somewhere in between, right in the middle.
Back bents only come in two of those, short and medium. The one I sharpen here is a short back bent.

Put a front bent and a back bent next to each other and look at the bevels. On a front bent the bevel is on the back side. The back bent has it on the opposite side, and the blade bends backward. The one bending the opposite way is what sits in my jig today.

So what does the 25 mean? In lesson 8 of the Hashemi flowers I read that stamp out. Pfeil marks a back bent like this one 25/13. The 2 means a back bent, the 5 is the sweep, and the 13 is millimeters, which is half an inch.
A lesson later I named a number 7 by Ashley Iles that is marked 37, because Ashley Iles marks the back bents a little differently. And that number 7 looks almost like a number 8 sweep.
Back in lesson 5 I took a number 1 of 10 millimeters, three-eighths of an inch. I called it a back bent, but pretty much like a spoon gouge, with the bevel at the upper part of it.
Which way up does a back bent go in the jig?
I sharpen on a Work Sharp 3000 together with some Tormek attachments, and you can see how easy it is to sharpen a back bent on that machine. Today the attachment is the SVS-32, made by Tormek. For me it is one of the most useful I found, and I use it on multiple tools.
The Work Sharp has its own attachment that takes Tormek jigs, and I found it the most useful attachment for that machine. If yours has no Tormek bar, this course has a lesson on an L-bracket for the Work Sharp. There are probably multiple ways to sharpen this shape. I think mine is among the best I found, and it is really helpful for me.

On one side of the jig there is a spot for the handle. The ground face points down toward the wheel, not up. And slide the tool all the way along toward the handle end of the cradle before anything gets locked. I line the blade up against the little corner of the jig and eye it, then nip the screw down.

Where does the bar go for a back bent?
Below the wheel, and that is really important. With a straight gouge the bar is raised above, so you usually do not hit the edge with the gouge. Here it is the reverse.
The first time I set the jig on the bar, I needed to lower it a little. So I loosened the bar, set it lower, and then saw I could go even slightly lower than that before I tightened it again. It looked perfect.

How far the jig sits out matters too. If you get it too close, the outside ring of the machine will be in your way, so it has to be somewhat away. Then find a spot where you can hold that distance without drifting back and forth, and stay there. I also try not to slide too much along the bar, toward myself or toward the other end.


What bevel do you grind on a back bent?
I eyeball the angle rather than measuring it, and I could not tell you the degrees on a back bent if you asked me. What I aim for is a slope running about three sixteenths of an inch back from the edge, five and a half millimeters.
I start grinding and check how it works. Once the steel touched, my bevel already looked excellent, and you can see on the tool where the wheel takes the metal out.


How close to the edge do you grind?
Eighty grit does the shaping and it goes quickly. Barely any weight from my fingers. And I was really, really near the edge already.

The right-hand side needed a little more, so I took a little more there. Stop before the edge. I leave about 1/28, like a hairline, and go no further on 80 grit. Otherwise the edge comes out too wavy, and I don't want to see that waviness.
A little waviness is not a big deal, though. Sometimes the metal thickness is not consistent, and then you see it. Carving quality is untouched by it. What suffers is only how the tool looks to you. I have some wavy tools myself.

A couple more passes on 80 grit, and there was about a hairline left on my edge.
Which grits go on a back bent, in order?
The whole order fits in one table, with what I watch at each stage.
| Step | Job | Bar | Watch |
|---|---|---|---|
| Eighty grit paper | Grinds the bevel fast, barely any pressure | Bar below | Leave a hairline at the edge |
| Two twenty grit | Removes the tool marks from eighty grit | Same height | Every coarse scratch gone from the steel |
| Thirty six hundred | Polishes off the micro marks, for beauty | Wheel changed | You are free to skip it |
| Six thousand grit | Flip the wheel and polish once more | Flipped over | A burr shows on this side |
| Leather wheel, green | By hand, with the jig taken off | Bar removed | Green paste turns black from metal |
| Felt wheel, blue | Main bevel, then the inside micro bevel | Hand held | Lighter and lighter toward the finish |
| Lime or basswood | A couple of passes take the burr | Hand only | The edge leaves a clean surface |
Clean the wheel between grits. For the 220 I flip the wheel over to its other side. I do not change the bar or its height for the 220.

The 220 takes out the tool marks the 80 grit left, and that is a really quick process too. That's why I love this machine.
The 220 shows what I meant about the metal thickness. I make exactly the same movements, but one point looks a little higher than the other point, and that does no harm at all. When the 220 was done, there were absolutely no tool marks left from the 80.

Next I change the wheel and go to 3,600 first, and after it I flip to 6,000. And yes, you can skip two of them. Two papers plus buffing is genuinely plenty. I polish because I like to remove all the marks, down to the tiny ones. It doesn't change my work at all. For me it's more beauty than anything else.

By the end of the 3,600 almost every mark was gone, even the micro marks. Beautiful.
Glass wheel or MDF wheel?
Glass, for me, though MDF works too. A glass wheel costs money, so I use both sides of it, and that saves me money. If you do not want to buy a glass wheel, you can make a half-inch (about 13 mm) MDF wheel and glue the paper on it. I prefer glass because it is easier to take the sandpaper off and change it quick, and it leaves a clean surface. Either way is fine, and it all depends on the sandpaper you use.
The paper itself is the original Work Sharp stock. I found the quality excellent, and it lasts really long, much longer than cheap sandpaper. I've got about four or five wheels, but most of the time I use just three. When I filmed this lesson, I had not changed my 3,600 and 6,000 papers for more than four years. Three and a half, maybe.
What happens on the leather and the felt?
My two finest papers left some burr on one side. I could see it, and I could feel it with my finger, but I left it for now. The leather wheel comes first.
On the leather I work by hand, with no bar. The wheel turns sideways, and with a bar the tool could catch the leather, and that's not the best idea. Stropping, honing and buffing have their own lesson in this course.
The green paste I like is by Koch, a German paste. I found it one of the best green pastes I ever used, though any other green paste will do, and it'll still work. For some reason it's a lot less messy for me too.
With the paste on, the jig comes off, carefully. I strop one side first. After it comes the inside, where I make a micro bevel with the same stropping wheel. All you do is find the right bevel of your tool and strop it. After that the burr was almost gone, and the green paste turned black, which means it took some metal off. I clean the tool with a napkin.
Next comes a felt buffing wheel, set right on top of the leather wheel. There is no glass in it, just solid felt pressed together. This time the paste is blue, also by Koch. I work the main bevel on it first, and then the micro bevel inside, using the rim of the felt.
Turned on, the felt wiggled a little, because the hole in the middle is a bit too big. A slight wiggle is fine. You can micro-adjust it so it doesn't wiggle that much.
The micro bevel inside is somewhat important on a back bent, but not as important as on straight gouges and spoon gouges. I barely put any pressure on the tool. I hold it and let the felt wheel do the work, and for the final touch I use even less pressure, just the polishing. Then I flip it and work on the inside, and give the outside a couple more passes.
How does the last burr come off?
Even when you don't feel much, there is probably still a micro burr, and under a microscope you would probably see it. I take it off on a piece of soft wood, like basswood or lime wood. Look at the grain direction on the piece. I set the edge of the tool right on the end grain and make a couple passes, and that removes all the burr.
I tried it on the same piece. Really, really sharp. It left a really clean surface, and the final result was like a mirror.
Where do I use a back bent?
I use a lot of back bents for my under carving and so on. When you're carving complicated or advanced pieces, there are areas you can't even get to without back bents.
With back bents, I said in lesson 9 of the Hashemi flowers, I can get to the spots no other tool would let me. A little later I took a half-inch one with a number 5 sweep where, because of that movement, a straight tool could not get there at all, and I could still work from some interesting positions.
On a furniture panel acanthus there was a part in the way, and it is hard to use a tool upside down. The tool I grabbed was a back bent, a number 25 of 2 millimeters by Pfeil, a little bigger than a sixteenth of an inch.
Workshop 66 of the Venice Room had a number 5 going against the grain. A tool must be really sharp for that, I said, but it is still possible. In workshop 72 I gave some convex to the middle part with a quarter-inch one, six millimeters, sweep 5, and said I could probably use a bigger one.
During workshop 65 I said a tool must be really sharp, that the one in my hand didn't look super sharp, and that maybe a skew would help. So I picked up a normal back bent that I had reshaped as a skew, and it sliced much better. In workshop 161 I reached for my skewed back bent, so I could work pretty much any direction. A skew bent gouge gets its own lesson in this course.
The whole back bent lesson runs about 28 minutes at my bench. The rest of the Carving Tool Sharpening course takes the other shapes, the V-tool and micro tools among them, and all of it is open with Access.
How it's done
- Set it in the jig. Put the tool in the Tormek SVS-32, bevel facing down. Push it right up to the handle end and tighten it straight toward the small corner.
- Lower the bar. Set the bar under the wheel, and keep the jig back a little so the outside ring stays clear.
- Grind on 80 grit. Grind a bevel of roughly 3/16 in (5.5 mm) by eye, with barely any pressure.
- Stop at a hairline. Leave about 1/28 at the edge, so it does not go wavy.
- Clear the marks on 220. Turn the wheel over and clean it. Keep the bar and its height exactly where they were.
- Polish if you like. Go to 3,600, then flip to 6,000, or skip both, since two papers and buffing are plenty.
- Strop on leather by hand. Remove the jig. With green paste, strop the bevel first and then make a small inside bevel.
- Buff on felt. Blue paste on the felt wheel, main bevel first, then the inside on its rim, with the lightest touch at the end.
- Take off the burr. Run the edge across the end grain of basswood or lime wood a couple of times.
Frequently asked questions
Which jig holds a back bent on a Work Sharp?
The Tormek SVS-32, which I use on multiple tools, held by the Work Sharp attachment that takes Tormek jigs, the same attachment I use for other gouges. What moves is the bar. For this shape it drops lower, and the jig sits somewhat away from the machine.
Do you measure the bevel angle on a back bent?
By eye. I do not measure degrees, and on back bents especially, so I could not even tell you the number. My target on the steel is a bevel running back roughly three sixteenths of an inch from the edge, or 5.5 millimeters.
Is a wavy edge a problem after grinding?
Some waviness is not a big deal. Sometimes the metal thickness along the tool is not consistent, and it shows up on the edge. Your carving will not change, only how the tool looks, and a few of my own tools are wavy.
What to carve next