
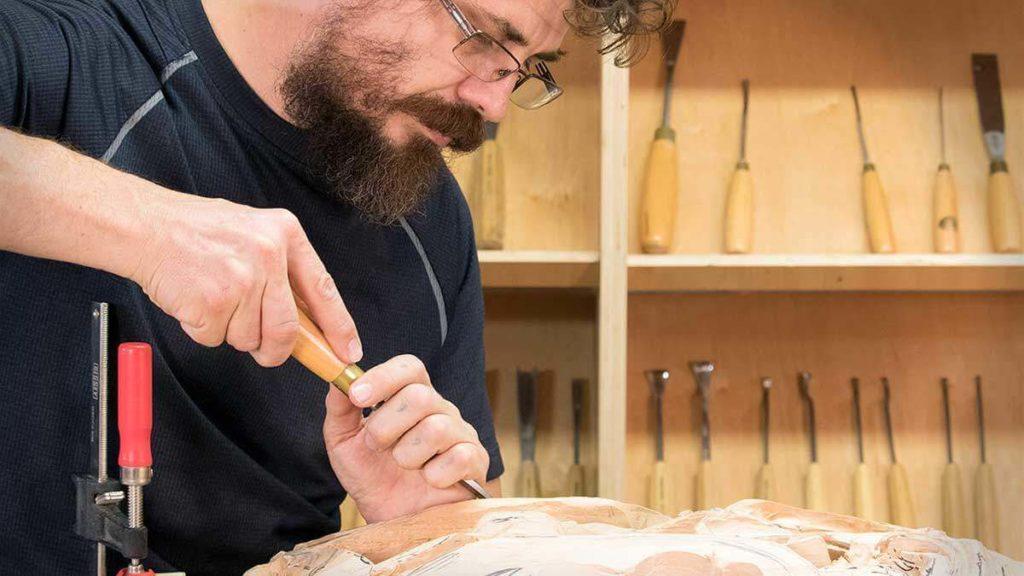
Alexander Grabovetskiy, woodcarver, School of Woodcarving · Published 2017
How do you sharpen a V-tool?
Quick answer: Sharpening a V-tool is work on three parts, two chisels joined together and a small rounded gouge at the bottom called the keel. The keel comes first, with the longest, lowest bevel. Then I grind one side, flip the tool and match the other, and finish with finer grits and paste.

A V-tool is three tools in one. Look at it as two chisels joined together and a small gouge at the edge. That small gouge is the keel, the place where the two chisels join, and it is where I always start when I sharpen a V-tool on my Work Sharp. Begin with the sides instead, come to the keel last, and sometimes you end up with a kind of channel. The tool looks weird.

Have you ever looked straight at the end of a V-tool? It makes the letter V, right? That shape gives it the name, and it is the tool I call the most difficult one in wood carving, because it is the hardest to sharpen.
During one class about a year before I filmed this, one guy brought a brand new set. His V-tool needed to be resharpened. He tried for a couple of hours and ended up really frustrated. Many people who try wood carving quit just because of the V-tool, and that's the truth.
And yet, when I'm carving, the V-tool comes almost number one, for outlining, for undercutting and many other ways. My biggest friend in wood carving is this tool. Treat it as a friend, kiss it and say I love you, V-tool, and see, it will respond, and it won't be that difficult at all.
Why is a V-tool so hard to sharpen?
Three parts have to come out right on one tool, and you have to be more careful with it than with just a gouge. One chisel, a second chisel, and the keel. I call it the most difficult one to sharpen, or should I say one of the most difficult ones.

Your tool travels on the keel in the wood. And as I showed you before with how you hold the tool, a lower angle is better for carving, so I start there and set the keel at the lowest angle I can.
I know many people who are really good wood carvers, masters in wood carving, and they start a different way, shaping the edge on a stone. My approach is a little different. For me the keel matters most, more than the chisel parts you see on the sides.
Both ways can work. In the V-Tool Problem lesson I said that if your tool has no problem, you can start with your chisels and work the keel after. But I think the better approach is to attack the keel first.
What are the three parts of a V-tool?
Chisel number one is one face, and when you turn it over you see chisel number two. Where they join together is the keel.

That keel stays a little round, like the smallest gouge. You can look at it as a number 11 with a really tiny round, so I rotate the tool slightly as I grind.
On the Roman acanthus leaf I said it the same way. There is no such thing as a really, really sharp edge V-tool, it's a chisel, a chisel and a small gouge in the bottom, and of course I exaggerate that. A number 17 is the same idea with a slightly bigger gouge part.
| Part I grind | How I set the bar for it | Grind order | Bevel I got on this tool |
|---|---|---|---|
| Rounded keel underneath | Jig bar at its lowest, long keel | Comes first | Ten millimeters, about three eighths inch |
| First chisel side | Bar set a little higher than keel | Comes second | About ten millimeters from the edge |
| Second chisel side | Tool flipped over, resting on the bar | Comes third | The same as the first side |
| The micro bevel | Arm raised slightly, made on the felt | Comes last | Barely see it, like a hair |
This is why I don't start with the sides. Work the chisel parts first, bring them together, then go to the keel, and sometimes you get that channel I don't even have a name for. Starting on the keel, I know exactly when I'm coming to the edge. After that I can make it all straight and work my chisel parts on the sides.
Which V-tool angle do you use most?
The 60-degree V-tool is the most common, and it's probably what you'll use the most, about 90% of the time. There's also a 90, and there is such a thing as a 45. Besides straight ones, they come as spoons, short bend and long bend, in different brands, of course.

I named one more on the acanthus, the 35-degree angle. I really like that one, a number 16 by Pfeil, Swiss made.

Before anything touches the wheel, check the edge. It has to be really straight, perpendicular to the surface. And there is absolutely no problem sharpening V-tools, as long as you don't rush.
How do you hold it on the machine?
Same approach as with all chisels and all gouges, and the same exact jig from Tormek. The video caption names it, the Tormek SVS-32 jig. I love this machine because I can put an attachment on it, an arm that receives all the Tormek jigs, and it's adjustable. The machine itself is a Work Sharp.

Place the tool so your screw lands right in the middle of the metal part. Eyeball it, then make it tight.
Now lower the angle, as low as possible, for a long keel. The bevel on the keel is going to be much longer than the bevels on the sides. I don't know how much metal I have, though, so I'm really careful.

First comes a coarse grit, 80 grit sandpaper stuck right on top of the glass wheel. I'm not afraid of it. Hold the tool really straight down and go little by little, and don't create pressure, you don't have to at all.
To see better, I color the keel with a red marker, and that way I see what is going on with my tool. Check, grind a little, mark it again.

And this machine never overheats your tool, and you have a lot of control over what you do.
How long should the bevels be?
On this tool the keel bevel came out about 10 millimeters, or 3/8 of an inch. Later I took it almost to half an inch (about 12 mm), right to the edge, and that was plenty.
The sides can be a little higher than the keel. I usually eyeball it and have no idea what the bevel will be, but I like a low bevel, down to five degrees, or as low as three. Out of the box, a V-tool usually comes with a short bevel, a high angle. I like the low angle.

On the sides I have to be really parallel to the wheel, and I usually don't move from one spot, I just hold it. One side first. That side measured a quarter inch (about 6 mm) at first, and by the end I had about 10 millimeters from the edge, the bevel I like for the V-tool. I eyeballed that, and I guess I was lucky, or blessed, on the first try.

Without a lot of pressure, you won't see too many scratch marks from your sandpaper. You kind of have to feel it. I don't take the main bevel all the way to the edge, stopping about one millimeter (about 0.04 inch) short and then closer, because the micro bevel still has to go on.

Then flip the tool, rest it on the bar and find the right position, checking constantly that it grinds the right way. The metal on this V-tool is somewhat curved, so I make micro movements to follow it and take the metal evenly from the whole thing.
In the in-person class at the Maine Coast workshop I told the students the same. Tools are not consistent, especially machine tools, so you slightly wiggle it and check. Really tiny movements, without pressing too hard.
When one side just transfers to the other, uniform, that's how the tool is supposed to look. I keep going until both sides have exactly the same bevel, checking and rechecking that my edge is the same all the way.

A micro bevel goes on almost all of my tools. Not all of them. For me it helps to carve. You don't use it on carpenter's chisels, but you do on a plane iron, and I use the same idea on my carving tools. It's just a fraction of a millimeter.
What if one side is thicker than the other?
Brand new tools sometimes come thicker on one side and thinner on the other, and it can create a problem. Still, it's workable. I wouldn't tear my hair over a tool like that. You sharpen it, you use it, and you don't throw it away. A really nice tool comes with certain brands, and a nice tool is going to cost nicely, too.
We zoomed in on a tool in that Maine Coast class, and you could see the thickness of the walls was different. Inside, the machining was true, but outside they were off, and that's why you really have to wiggle. Closer to the edge, it gets thinner.
Sometimes you'll see waviness on the back side after you sharpen. Some people call that a big problem. I'm in business of carving wood, and if my edge is a little wavy sometimes, I'm okay as long as it's super sharp. A notch from that uneven metal has its own lesson, the V-Tool Problem.
Which grits take it to a finish?
The next step is not polishing yet. I take 220 grit, flip the wheel and take out those sandpaper marks, keel first, then the sides, with micro movements again. Stage number three is the polish, 3,600 grit and then 6,000, with my bar raised slightly, keel first again. By 6,000 it's like a mirror.

Now the felt. My felt wheel sits right on top of the main abrasive wheel, so the metal ring on the side of the machine is not in my way when I use the edge for inside bevels. You don't have to set it up that way.
I use two pastes by Koch, green first and then blue. Any paste works, the regular green one too, and the yellow one by Flexcut is also really good. For some reason I just like Koch, and it isn't as messy as other ones. It's a really fine paste, crunchy and hard like a rock, so it melts into the felt, and you can't smoosh it with your hands the way you can the soft ones.

My paste became black. That means it takes the metal out and does polish it, and I use just one hand here to prove the point, with no pressure.
A finer paste is optional, but I do use it. Then the tool glides really easily, and it's just a joy to use.
Some guys are afraid of rounding the edge on a wheel like this, and I know exactly why, but I'm not. It would only create a problem on a carpenter's chisel.
After polishing the main bevels I still had to make the micro bevel. I raised my bar just slightly for a higher angle and made it on the felt, though a stone is up to you. Holding it against a piece of wood, I see no gaps, so it's really nice and straight.

Then the inside bevel. Usually I take that to the Tormek, where I have a small wheel, but this time there was not much burr inside, so I did it by hand.
I have different slip stones, tiny ones, and this one looks like it's made at exactly 60 degrees. The brand is Spyderco, and it's not that expensive. Oil or water on them is fine, and I didn't need either, because I had barely any burr left. I move it only out, never the other way some guys do.
For honing inside I use a leather strop, pressing one side and then the other, always moving toward myself. Woodcraft sells blocks for this, I think, but a block is only a piece of wood. Make one yourself from basswood, put some paste on the profile and use it as a strop.

The stropper in my stropping lessons has different profiles, so I can get inside the V-tool, and you can always make that one yourself. Even the Koch machine I love has a limit here. On those wheels you can't do a V-tool.
Once I take a tool out, I put it back right away, so my table doesn't get messy. That's a good habit I established in my life. Then I try it. Nice and clean.

Do you sharpen it by hand or by machine?
I do both, power and by hand, and power just saves me a lot of time. You're still using your hands, don't get me wrong. By hand you move the tool on the stone, while on the machine you hold it and the machine rotates, the same movements sped up, like 20 times. I'm saving at least 20, 25 minutes that way.
It's like making a cope for crown molding. A coping saw takes about five minutes and a jigsaw half a minute, maybe a minute, for the same result, and time, we know, is money.
And that's true, some people control sharpening by hand a lot better than a machine. Most people do it by hand, which is absolutely fine with me.
The sharpening course has a lot more. Separate lessons handle straight gouges, large gouges and spoon gouges, then fingernail, back bent and skew bent shapes, and seven videos go to stropping and honing. Micro tools and diamond discs get their own, and so does the L-bracket I made myself after Work Sharp stopped making that bar.
Once you understand what comes first, what comes second and what is third, it gets easier. I know everybody can overcome that problem. Come and take the whole course.
How it's done
- Look along the edge. It has to be really straight, perpendicular to the surface, before anything touches the wheel.
- Clamp the tool in the jig. Get the screw right in the middle of the metal part, eyeball it, and make it tight.
- Set the bar low. Drop it to the lowest angle, so the keel gets the long bevel.
- Mark the keel. A red marker shows what is going on with the tool as you grind.
- Grind the keel on 80 grit. Hold it straight down, little by little, with no pressure, and rotate slightly.
- Grind one side. Park it parallel to the wheel with the bar a bit higher, and finish that side first.
- Flip and match. Rest it on the bar again and keep going until both sides carry exactly the same bevel.
- Take out the marks. 220 grit, keel first, then each side.
- Polish. 3,600 grit and 6,000, then green and blue paste on the felt. Watch the paste turn black.
- Add the micro bevel. Raise the bar slightly and make it on the felt.
- Do the inside. Move a slip stone only out, then hone with a leather strop, always toward you.
Frequently asked questions
Why do so many carvers give up on the V-tool?
A lot of people who try wood carving quit just because of this one tool, and I call it the hardest to sharpen. Three parts have to come out right, two chisels on the sides and a tiny gouge underneath. One guy in my class tried for a couple of hours and ended up really frustrated.
Which part of a V-tool should you sharpen first?
The keel, the rounded bottom where the two chisel sides meet, gets my first and lowest bevel. You can begin on the chisels if the tool has no problem, and both ways can work. Starting on the keel, I know exactly when I come to the edge.
What is the keel on a V-tool?
Underneath, where the sides meet, sits a tiny rounded part, like a number 11 gouge, so I turn it a little while grinding. Your tool travels on the keel in the wood, so I give that part the longest bevel of the three.
What to carve next