
Alexander Grabovetskiy, woodcarver, School of Woodcarving · Published 2017
How do you sharpen a straight carving gouge?
Quick answer: Sharpening a straight carving gouge is three stages. First you grind the main bevel, as low as you can for soft wood like basswood and higher for oak. Then a finer grit takes out the coarse marks. Last you polish to a mirror and add two tiny bevels, one outside at the edge and one inside.

Sharpening a straight gouge is three stages, grinding, then taking out the scratches, then polishing it to a mirror. Any sharpening I do, by machine or by hand, I divide into those three main parts. The first one is the shape of the tool, and that is the main work. You have to know exactly how the tool is supposed to look, what angle it gets, and whether it carries a main bevel and a micro bevel.
I'm going to be honest with you. Sharpening is the main and the most important part of wood carving, because you can't carve anything with dull tools. It's absolutely impossible. So it's one of the first skills you have to learn, and in this lesson I take one gouge through all three stages on camera.
You want a gouge that lies low on the basswood? You want your hand down on the work instead of raised almost to the elbow? Then start with the bevel.
I remember when I bought my first tool set. It was just a few gouges, and all of them came out of the box ready to carve. I knew how to sharpen one gouge, but I didn't know how to sharpen so many, a whole set. I had to develop that, many years ago.
My teacher had his own word on this. When I started to carve, I came to him one day and asked why he gave me that bad piece of wood. He said there's no such thing as bad wood. It's dull tools, that's the only problem. I tell that story in the in-person sharpening class in Maine, and when he was teaching me to sharpen, it was all by hand.

Six things to hold on to from this lesson
- Soft wood gets as little angle as possible, and oak or another hard wood gets a higher one.
- I establish three bevels on carving tools, the main one, a micro bevel outside, and a tiny one inside.
- If you see the edge blue, you killed your tool.
- Too much pressure slows the wheel down and still takes the same metal from the back.
- Near the end of grinding you can't relax.

Why does a new gouge make you raise your hand?
Most tools come with a really high angle when you buy them, and a high angle lays the tool on its bevel, so you can't carve. I have two gouges of the same thickness. One is a number seven by Ashley Iles, made in England, and I resharpened it. The other one I didn't do anything to. It's about the same profile, but how different it is.
On the reground one the bevel runs approximately half an inch, about 13 mm, back from the edge, and it has a micro bevel too. With the high angle, the tool just lays on that part and you really can't carve anything. You have to raise your hand really high, almost the elbow. Is it possible? Yes, absolutely, it's not a big deal. And when I carve oak, I prefer that type of bevel, because it's stronger.

But for fine detail in lime wood or basswood, I want a really low angle. Lay your hand down, and almost the second hand is laying on the wood too, and you already can carve without raising your hand. You get really, really fine details. Most of my tools have a really low angle like this.
The gouge I grind in this lesson isn't new. I used it a long time on oak with the angle it came with, and it was never reground. On camera I change that angle, and it doesn't take so long at all.
What angle should a carving gouge have?
As low as you can get it for soft wood, and higher for oak and other hard woods. I can't say how many degrees it is. It could be just about five degrees, even lower than five. With a low angle you're still able to carve oak, but the probability of breaking it is much higher, because there's not much meat left behind the edge.
| Stage on camera | Wheel, grit or stone I used here | Which bevel | What I said about that step |
|---|---|---|---|
| Grinding, stage one | 80 grit glass wheel, rod set low | Bevel one | The main work, the most important |
| Taking out scratches | Flip the wheel to the 220 side | Same one | Almost polishing already, hardly any marks |
| Polishing to mirror | 3,600 wheel, then 6,000, rod not moved | One, polished | 6,000 is plenty, mirror is optional |
| Outside micro bevel | Raise the bar slightly, then the felt | Bevel two | Sits right at the tool's edge |
| Inside micro bevel | Arkansas slip stone, dry, one direction out | Bevel three | About 1/64 inch, all I need |

Is a Work Sharp better than a bench grinder?
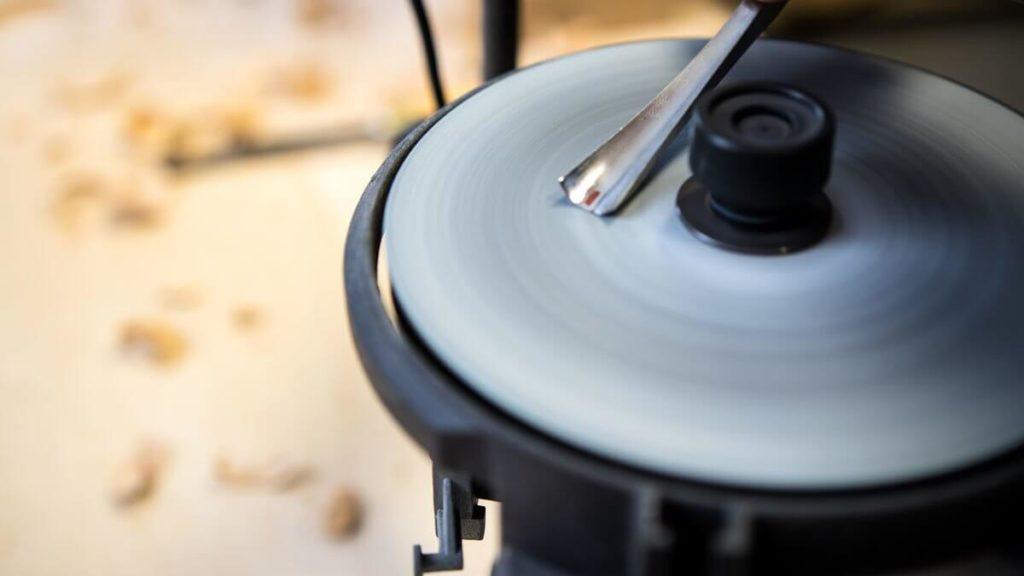
For my gouges it is. A regular grinder can burn your tools, and with this wheel you never burn your tools. For some reason it goes so slow, but it takes the material out quickly.
The machine is made by Work Sharp, and in this video I called it my favorite setup of the last four or five years. The guy who invented it, he's a genius. It's pretty much just glass wheels with different abrasives.

They sell abrasive separately, but any sandpaper with a sticky back will do. Half inch (13 mm) MDF wheels work as well, with your own grits stuck on them. I still recommend glass, because it's really hard and nice. It doesn't need any water or oil.
I take it to my job sites, because some projects I have to carve outside. I live in Florida, where it can be sunshine and then suddenly the heavens open and pour the water on you. It was the quickest setup to get out with.
I'm not trying to sell you this product, though for me it's a workhorse. Compared with sharpening stones, which I also use, you spend about the same money, sometimes even less, depending on the stones.
Which grits do I run, and in what order?
Four of them, 80, then 220, then 3,600, then 6,000. I grind on 80. A 120 also takes the metal really quickly, but I'm using 80 and I'm not afraid. Even the 80 didn't leave really bad marks.

After that I flip the wheel to 220 to remove all the coarse marks. Even at 220 it's a really nice finish, almost polishing, and that comes from the speed of this machine and from how you rotate your tool.
Next I said 3,000 on camera and corrected myself, it's 3,600. On the last wheel I said 8,000 before I noticed what I wrote on the paper itself. It's a 6,000 grit, which is plenty. I don't even have to go that far, but I usually do, because I really like the mirror finish.
When I change wheels I don't touch the rod. It stays the same height from the wheel, so the fine grit works the same spot as the coarse one.
What holds the gouge at the right angle?
A jig on a rod, or just your hand if you don't have a jig. Mine is a long rod that accepts the jigs from Tormek. I have a Tormek 2000, the older model with a metal body, and I've had it probably from day one when it got on the market.
Here I use just one, the Tormek SVS-32. It's a really simple jig with two sides, and one side has a cavity. The tool goes in the center, though that's not critical. All the way to the edge gives me the lowest angle possible with this jig. I can still go lower, because the rod comes with an adjustment, a couple of knobs to make it lower or higher.

Before grinding, I mark the area I want to take out with a Sharpie. Red, black, any Sharpie will do. It gives you an idea how much material you already took out.
Some people say the corners have to be really, really sharp and pointy. Not necessarily true. It's good, but we're carving wood, we're not trying to show how nice we got the corners, and this does the job quickly.
Watch the pressure. Lean on it and you slow the wheel down, but it's still going to take the same amount of material from the back side. You don't need to. Just take your time.

I start on the left side and rotate the tool across, moving in and moving out, so I use the whole sandpaper. That way I can control it easily. At one point on camera I got too close to one edge and still had meat in the center, so I worked only the middle section to make a uniform bevel.
Near the end almost nothing is left, and I was at probably about a millimeter, a little over 1/32 inch. That end of the grinding stage is the most important part. Now you can't relax, you have to watch what you're doing and constantly check it.

How many bevels does a carving gouge need?
Three, on my carving tools. The main bevel is the long one. The micro bevel sits right at the edge of the tool. And on the inside there's one more, I don't know what you'd call it, a micro bevel too. When you go in and start carving, that micro bevel on the inside helps take your tool out of the dig.
For the outside micro bevel I raise the bar slightly. Then comes the felt, and I place the felt wheel right on top of the sandpaper wheel. I put three fingers on top of the tool and feel the main bevel.

Any paste will do. The regular green one you can buy works, and the yellow one by Flexcut is really good too. My preference is two pastes made in Germany, a green one and a blue one, by Koch, and I buy them from Woodcraft. That's just my preference, and it doesn't have to be yours.

The green is the coarser one. I like it because it's a little harder than the regular green, which is softer and makes a lot of mess on the wheel. Later, in a Hashemi flowers lesson, I still called the green Koch one of the best.

Where I used the tool, the felt became black. That means metal is coming off, so the felt actually removes some material. I don't apply much pressure at all. The paste takes care of the scratches and the marks. After a wipe it's just like a mirror, and there's a whole lesson on stropping, honing and buffing if you want more on this stage.

What do I use on the inside of the flute?
A slip stone, moving in one direction only, out. I like two different brands of slip stones, and this one is an Arkansas stone. Water or oil is fine on it, but even dry it still works really well.
I know people who move differently on the inside bevel. I found it doesn't help me much, so I only go out. An even finer one comes next. About a 64th of an inch, roughly 0.4 mm, is all I need. Back in the workshop I put some paste on the edge of the felt wheel and use that edge to polish the inside bevel.

In the carving with the grain class I asked how you get rid of the wire edge inside a half millimeter number 11. The solution was 6,000 grit automotive sandpaper from Home Depot. I even keep sandpaper in the kitchen. When my wife asks me to sharpen knives, I put it on the countertop, and she always has the sharpest knives.
What does blue steel mean?
Blue means you burned the edge. If your metal is blue, you killed your tool and you wasted your money. The colors steel shows as it heats are on Wikipedia's page on tempering, and blue is one of them.
It's not the end of the world. Regrind the edge and eat some of it to take out all the blue. How wide the tool will be after that depends on what you're using, and I'm using fishtails most of the time. A fishtail has an end like the tail of a fish, and with it you can dig to the tiniest corners.
How is a gouge different from a carpenter's chisel?
Carving gouges get a main bevel and a micro bevel, the same as a plane iron. On a carpenter's chisel a micro bevel on that side is absolutely a no-no, because you won't be able to do straight work, like when you're making dovetails. My carpenter's chisels I sharpen only by hand.
People say you don't have as much control sharpening on a machine, and on a regular grinder that's true. There you can take too much material. Here I'm controlling it, it still takes quickly, and the marks are a lot nicer.

I try it, and it goes through like butter. At the end I put it next to a tool I never ground. That one has the factory bevel, a really high angle. The one we just did has the same thickness, but we reground it, reshaped it and repolished it, and it's ready to go.
Other shapes get their own lessons in the sharpening course, like the V-tool, a large gouge, a spoon gouge and a fingernail gouge. There is even one on the V-tool problem. One more shows an L-bracket for fitting Tormek jigs to a Work Sharp.
Sharpening is where it starts, and God permits, the rest is going to take us a long time. Come and learn it with me.
How it's done
- Choose the angle for your wood. Basswood and lime wood get the lowest angle you can manage. Oak and other hard woods get a higher one, with more meat behind the edge.
- Mark the bevel. Color it with any Sharpie so you can see how much metal comes off.
- Grind on 80 grit. Set the gouge in the middle of the jig, set the rod, then rotate the tool from the left side, moving in and out, with light pressure.
- Watch the end of grinding. When almost nothing is left, keep checking it, because this is the stage where you cannot relax at all.
- Clear the marks on 220. Turn the wheel over and keep the same steady rotation until the coarse scratches are gone.
- Polish on 3,600 and 6,000. Change wheels but leave the rod alone, so each grit works the same spot.
- Lift the bar a little. That gives the gouge a small second bevel right at its edge.
- Hone on the felt. Set the felt over the sandpaper wheel, rest three fingers on the tool, then green paste first and blue after, with almost no pressure.
- Make the inside bevel. Run a slip stone outward only, then a finer one, and polish the inside along the felt's edge with paste.
Frequently asked questions
How long does it take to change a gouge's angle?
Less time than you would think. The gouge in this lesson still had its factory angle after a long time on oak, and changing that angle on camera was quick work. A dull veiner on the furniture panel needed only stropping on the Work Sharp and was ready in under a couple of minutes.
Can you sharpen a carving gouge by hand?
By hand is the old way, and I do love sharpening by hand. When you carve for a living it is sometimes just too long, so I use machines for my gouges. Both ways get your tools sharp, and in the Maine class I called hand work the way masters did it for centuries.
What grit should you grind a carving gouge on?
Eighty is what I grind with on this slow wheel, and a 120 works as well, quick too. After that, 220 clears the coarse scratches, and I polish on 3,600 and finish at 6,000, all without moving the rod between wheels.
What to carve next