
Alexander Grabovetskiy, woodcarver, School of Woodcarving · Published 2017
How do you sharpen a spoon gouge?
Quick answer: Sharpening a spoon gouge is, for me, pretty much the same job as any gouge, on the same machines. I clamp it straight in a Tormek SVD-186 jig on my Work Sharp 3000, shape the bevel on 80 grit, clean up on 220, polish on 3,600 and 6,000, then strop on leather and buff on felt.

Sharpening a spoon gouge is pretty much the same work as any gouge, done on the same machines. I said so live in April 2020, with a Schaaf short bent on my bench. This lesson opens on a question, whether the spoon gouge needs a different approach than the regular gouge. My answer is to show you, start to finish, on a number 26 by Ashley Iles.

Want that bent edge to leave the wood clean behind it? And quick, with both corners still whole? Then watch my way, which I call sharpening on steroids.
The whole routine in six lines
- A Tormek SVD-186 jig holds the gouge on a bar on the Work Sharp.
- Set the tool absolutely parallel in the jig before you lock it.
- Grit 80 shapes the bevel, and 220 clears its scratches in a couple of minutes.
- Then 3,600 and 6,000 polish it to a mirror.
- Leather with green and then blue Koch compound comes next, and felt on top for buffing by hand.
- Round the heel too, as I did in the 2020 stream, so it won't crush the fibers.
What is on my bench for sharpening?
I've had a Tormek for a long time, many years. There's a Koch machine too, a German one, and I say that name the German way. And of course there are just the stones, and sometimes I still sharpen by hand.
But I carve for a living. For me, the quicker I can do it with the best results, the better. I start early in the morning and carve until late at night, daily, as I told viewers that April, because that's my life. The quickest way I found is my Work Sharp 3000. I love this machine. Alone, though, it's not complete.

What I did was add a bar attachment. It's made by Work Sharp, but it takes the Tormek jigs, so I can use all of mine. That bar was probably the wisest decision for this machine. Late in 2017 we found out Work Sharp didn't make those bars anymore, and my L-bracket lesson shows how I mounted a Tormek bar after that.
Why a Work Sharp and not the Tormek wheel?
Tormek is a great machine, no doubt, one of the best machines for wet grinding, and its jigs are just awesome. But for me it has some limits. If I can use those jigs elsewhere, I would.
Number one, it leaves a hollow grind, and that weakens the edge. I have to do a little sharper micro bevel there, which I've done. It's not a big deal. Still, I prefer a flat bevel, and for that I need a really flat surface.
Number two is grit. You can make the Tormek stone 220 and higher, with its two dressing sides, but it's only two. The Work Sharp takes almost unlimited sandpaper choices on a piece of really flat glass. That's why I use that machine, because it's flat, and the Tormek jigs to hold my tools.
| What I compare | What the Tormek wet grinder gives me | Work Sharp | What that means at my bench |
|---|---|---|---|
| Shape of bevel | A hollow grind that weakens the edge | Flat glass | I add a sharper micro bevel |
| Choice of grit | 220 and higher, two dressing sides only | Almost unlimited | Changing the wheel is really quick |
| The tool rest | A double bar standing on two legs | Single bar | I stand in about one place |
| Jigs it takes | Its own jigs, and they are great | Tormek jigs | I can use all of mine |
Which jig holds a spoon gouge?
The jig I use today is a Tormek SVD-186. It's kind of a complicated piece, but it's a beautiful jig. Mine is the older model. They have a newer, more advanced one now, and even the old one works really fine. It has a place at the front for your gouge and a cylinder that goes on the bar.
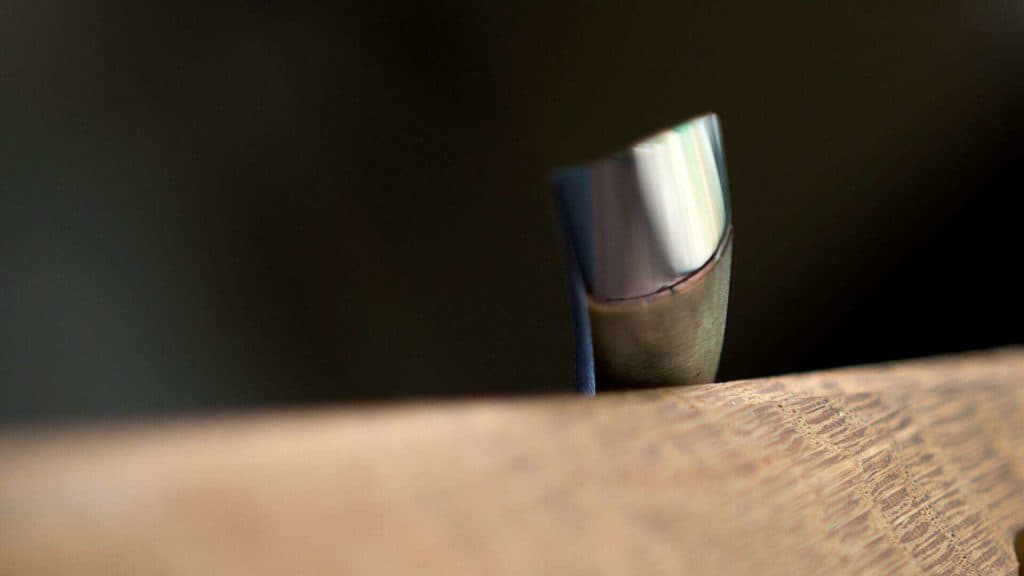
Today's tool is a spoon gouge by Ashley Iles, stamped 26. That's a number six sweep, and the first number, the two, means spoon. Its other name is a short bend spoon gouge, and you can see it does look like a spoon, somewhat.

I'm not too happy with its bevel, so I'm redoing it. When a tool comes brand new, the bevel is not what I like. With a brand-new tool, as I said on that 2020 stream, step number one is to reshape it.

To clamp it, unscrew the upper screw, place your tool inside and make it tight. Really important, check that it sits really, really straight. If it needs it, rotate it slightly until it's absolutely parallel, tighten it down and put the jig on the bar. I just eyeball my bevel from there.

Is the single bar a problem?
People have noticed this bar is a little flimsy, and it's true. A Tormek has a double bar on two legs, and this one is single. Two screws on the back let you bring it close to flat, and a little movement left over doesn't bug me.
It's the main reason I don't sharpen my plane irons on this machine. For carving tools that little offset is no problem at all, however complicated the tool. Stand in about the same place and just rotate your tool. For me it's never been a problem.
What bevel length suits a spoon gouge?
I keep different tools for different kinds of wood, some with a really short bevel and some with long ones. It depends whether you use the tool by hand, just digging, or with a mallet. Hardwood needs a shorter bevel, and in softer wood you can go longer, but me, I'm staying on the longer bevel even for the hardwood. Sometimes I'm using the same gouge on hardwood and soft wood.
This one felt a little too sharp for me, so I set out to give it a little less bevel.
During the 2020 stream I took three questions about the short bent. First was whether you really need the long, low bevel most of my tools have. I told the truth. On some spoon gouges, yes. A number six I use a lot just to clean up, not to excavate, has about 10 millimeters, about three-eighths of an inch, maybe even 11. Most of the time, though, you really don't need it. You're spooning out, digging, digging like that, so you don't take it to the extreme like on straight tools.
Why I round off the heel
The second question was the heel. If you've carved with a tool like that, you know what happens. Digging in is okay. But when you try to escape, the heel pushes down on the fibers and smooshes them. It looks okay at first, then a day or two later those fibers puff back, and sometimes you can see them torn apart. No bueno.
I always round it, even when I'm not making a long bevel. That day I left about 1/32 of an inch (0.8 mm) on 80 grit and rounded the heel freehand. It took one second. By hand, even with a diamond stone, it's going to take you a couple of hours.
What happens on 80 grit?
The first grit is number 80. On the other side of the disc is 220, though mine is used already, so it's more like 280 now. You could mark the bevel with a black marker to see what's going on. I skip that. At 80 grit I can easily see where it's taking metal out.

The wheel can turn toward the tool or away. It's not a big deal while you grind. I prefer it turning away from me, so I move to the other side of the machine. Live in 2020 I added that the outside of the wheel is more aggressive, and closer to the center is less.

I start close to the corner, but I'm still kind of afraid to go all the way. I don't want to kill my tool and create an odd shape. I stay slightly away from it, without too much pressure, back and forth, one finger controlling my rotation. It's one of the quickest ways for me, and it's not overheating my tools.

I keep checking whether I take more metal on one side or the other. That's how I know how consistent my movements are. At one check I'm about 1/16 of an inch (1.6 mm) from the edge. My goal is to reach the edge without hurting its shape, because the thickness can vary a little, and maybe there is some micro waviness in the metal itself.

I barely press, and you can still see how fast the metal comes out. Next check, about 1/64 of an inch (0.4 mm). One more pass, and I stop just short of the edge, the tool still in the jig. That April I said you can go all the way until the burr shows up inside, but then you get that waviness. Some of my tools have it, and that's absolutely okay.
Which finer grits follow?
There's no gradual climb through the grits here. My tool stays in the jig while I go to the 220 side and find about the same position on the bar. Not that critical, but it helps. A couple of minutes took out every scratch from the 80.
Next comes 3,600, same position, same sweeping moves, and it's almost like a mirror already. Then I flip the wheel to 6,000 and rotate right to left, left to right, until it's absolutely smooth. It shows all the reflection.

Back in 2020 I jumped from 80 straight to 800, under 50 seconds, and even 3,600 gave me a mirror. You don't need the 6,000. That's just me. I really like a mirror polish.
The sandpaper lasts quite long. In this lesson I said I'd changed it probably only twice.
Stropping on leather with Koch compound
Next goes on a leather stropping wheel. The wheel and the leather for its top both come from Work Sharp. It's kind of thick leather, but really, really nice, and because it's thicker than the sandpaper, I double-check my bevel and lower the bar slightly.

First comes the green paste by Koch, and already it looks really good, a true mirror. After that I use a finer one by Koch. It's a blue, solid compound, but it melts. I know it takes metal out, because the place where I hold my tool just becomes black. A wipe with a napkin, and it's super shiny.


Why does the felt wheel go on top?
For the final step, or almost final, I put my felt wheel right on top of the disc below it. Put it on alone and it won't rotate properly. It's going to wobble.
Now I don't need the bar anymore, so I remove it and buff by hand with the same blue compound. Because the felt sits raised above, I can use its edge on the inside bevel. Live, I took the tool out of the jig for this as well and just followed the curvature of the sweep. My felt is medium.

Does the inside need a bevel too?
That was the third question from the stream. Logically, you really don't have to have that micro bevel on a tool like this. The only reason is a really long outside bevel, because then the edge becomes really weak, and a bevel inside makes it stronger while the metal stays thin. Carving upside down, which you do with some bent tools, needs it too, or the tool just keeps digging in.
Any stone will do. On camera that day I used just a ceramic one, held right on my finger, until it made the wire edge, leaving about a 64th of an inch (0.4 mm) of bevel inside.
Getting the burr off
A small burr can stay at the edge. Here I clean it with a piece of soft wood, basswood or lime wood, whatever you call it, and rub the edge right on it. That removes the burr without damaging the tool. On the 2020 broadcast I mentioned some people break the wire edge on wood like that, while I personally like to buff it.

Right before that tip I had tried the tool. Oh yes, nice and clean. Then I went to the end grain, and it still left beautifully sharp slices.
Where does a spoon gouge earn its place?
Spoon gouge isn't really the right name, as I told that stream. The normal way to say it is a bent gouge. Most carvers know a couple, the short bent and the long bent, yet there's a medium bent I use a lot, a slightly bent one that's really nice to have, and an extreme spoon made by Marples. The back bent has its own lesson.
You reach for one where a straight tool won't work. In Carving Hashemi Flowers the straight gouge was not going to work in some spots, so I switched to a number nine spoon gouge, about 5/8 of an inch (16 mm). On a Venetian style piece in the live stream, the deep excavation inside the head of the acanthus was done with spoon gouges, in one solid piece.
Other shapes get lessons of their own. You'll find a straight gouge, a V-tool, and a lesson for the V-tool problem. Large gouges, a fingernail gouge and a skew bent are there too, plus micro tools, diamond discs and seven videos on stropping and honing. The whole course is thirteen lessons.
Professional carvers have done all this, and they made a lot of mistakes before they found the right way. I'm not saying my way is the best. It's the way I do it, and the machine saves me a lot of time daily. If you want to learn it with me, come and carve with us.
How it's done
- Look at the bevel it came with. I wasn't happy with mine. Hardwood wants a shorter bevel, softer wood allows longer, and I stay longer even in hardwood.
- Clamp it in the jig. Unscrew the upper screw, set the gouge inside the SVD-186 and make it tight.
- Set it parallel. Rotate it slightly until it sits absolutely straight, tighten it, and place the jig on the bar.
- Grind on 80 grit. Begin slightly away from the corner and go back and forth with barely any pressure, one finger steering the roll.
- Check as you go. Look often for more metal leaving one side than the other.
- Stop just short of the edge. Leave a little, since the steel may carry some micro waviness.
- Round the heel. In my stream I rounded it freehand so it would not push down the fibers.
- Flip to 220. Same jig, roughly the same spot on the bar, until the coarse scratches are gone.
- Polish at 3,600, then 6,000. Rotate right to left, then left to right, until the steel shows your reflection.
- Strop on leather. Lower the bar slightly for the thicker hide, then use green Koch paste followed by the blue compound.
- Buff on felt by hand. Stack the felt on the disc below, take the bar off, and work the inside bevel on the raised edge.
- Clean off the burr. Draw the edge along a scrap of soft wood, then try the tool.
Frequently asked questions
Is a spoon gouge sharpened differently from a straight one?
Very little, in my shop. On my April 2020 stream a Schaaf short bent went through the same routine on the same machines. In this lesson a number 26 Ashley Iles rode in the Tormek SVD-186 on a bar fitted to the Work Sharp.
What does 26 on an Ashley Iles gouge mean?
Six is the sweep. The leading two marks a spoon, so 26 reads as a number six spoon gouge, which also goes by short bend spoon gouge. Mine had a bevel I wasn't happy with, so I reground it on camera.
Why round off the heel of a bent gouge?
A pronounced heel crushes fibers as the tool climbs back out of the hollow. Fresh work may look fine, yet a day or two later that crushed wood puffs up again, sometimes torn. Live in 2020 I rounded mine freehand on the machine in about a second.
What to carve next