
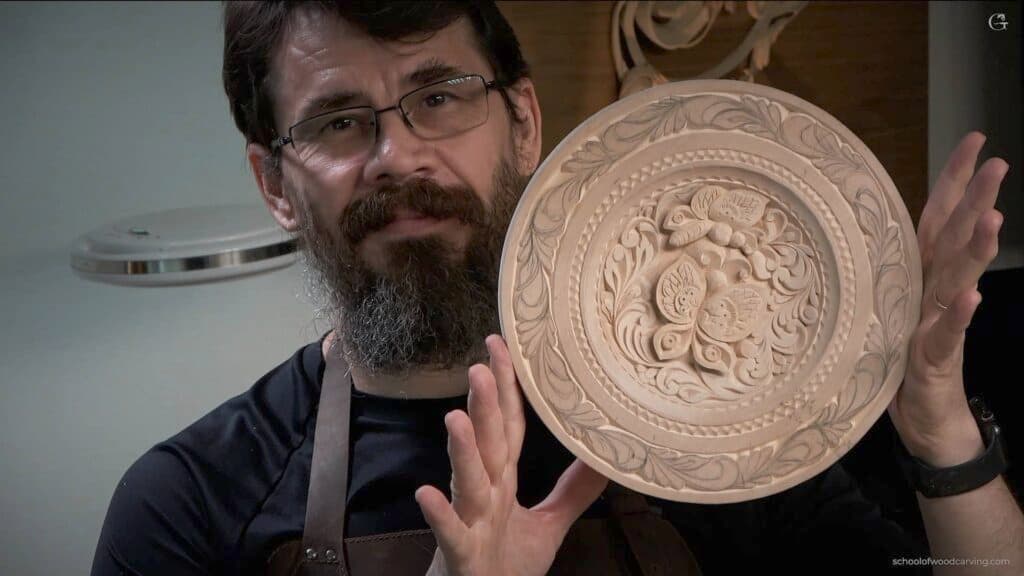
Alexander Grabovetskiy, woodcarver, School of Woodcarving · Published 2023
Can you carve a decorative border on a mirror frame or door casing?
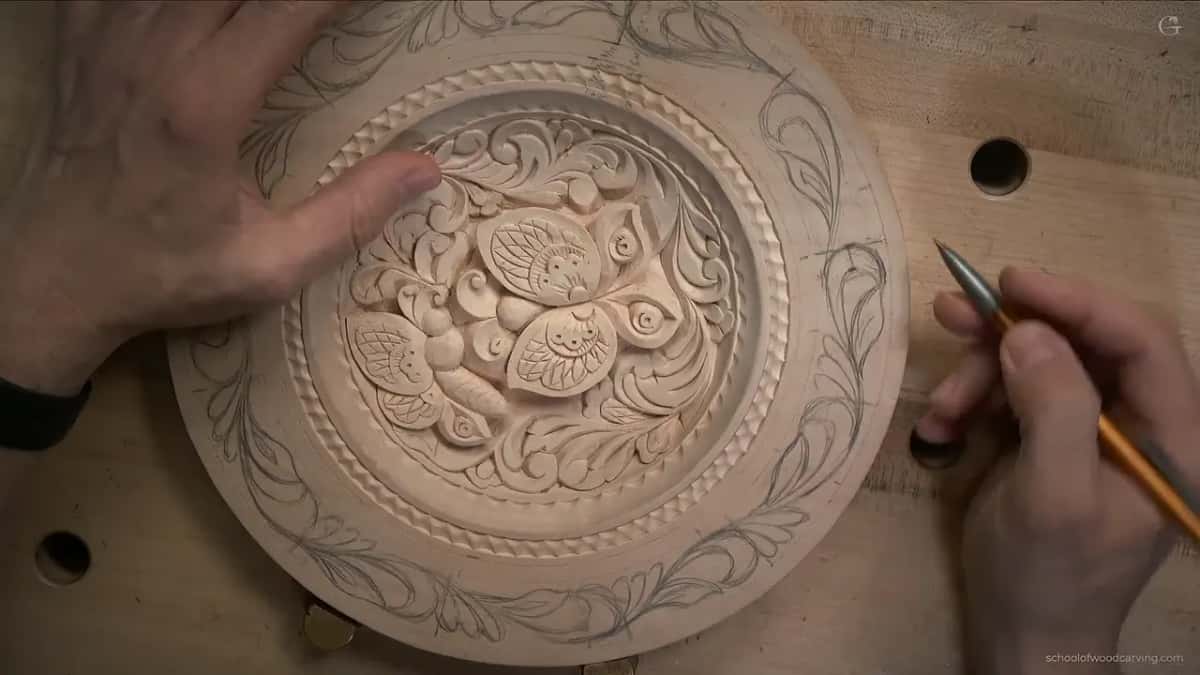
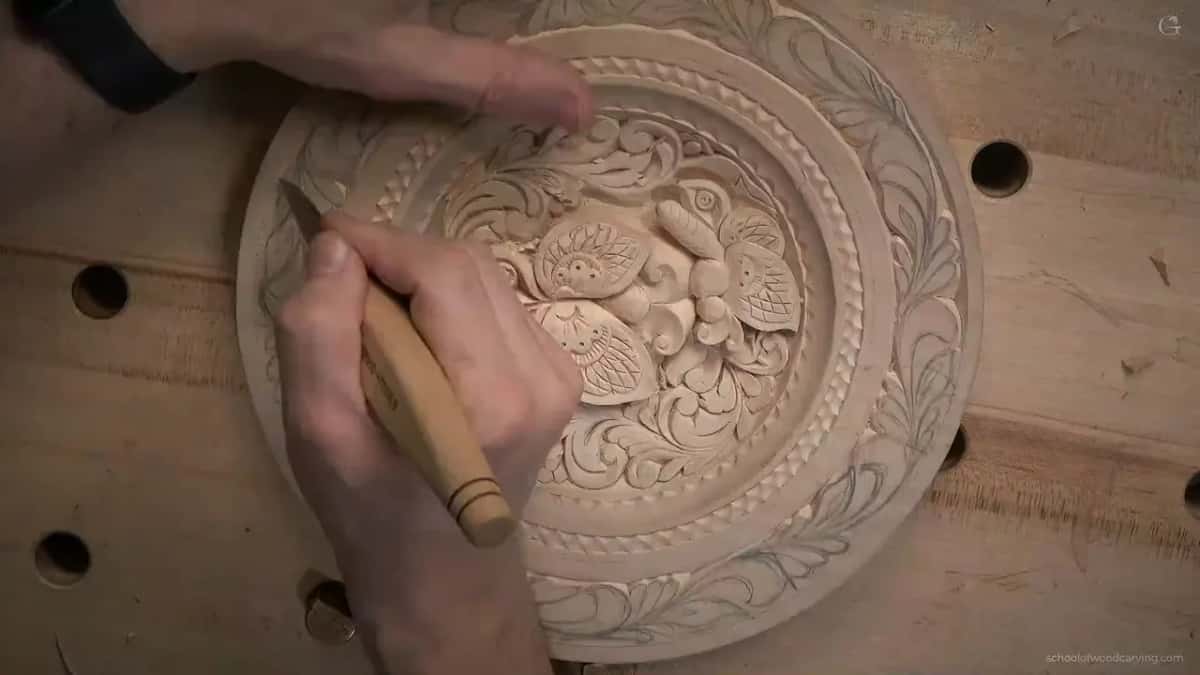
Quick answer: A carved border for a mirror or a door casing is the same band of plain, repeated shapes I carved around the rim of this basswood plate. I have done that style on casings around the windows and doors of some very expensive houses, and on the plate a knife carves the outline of every shape.
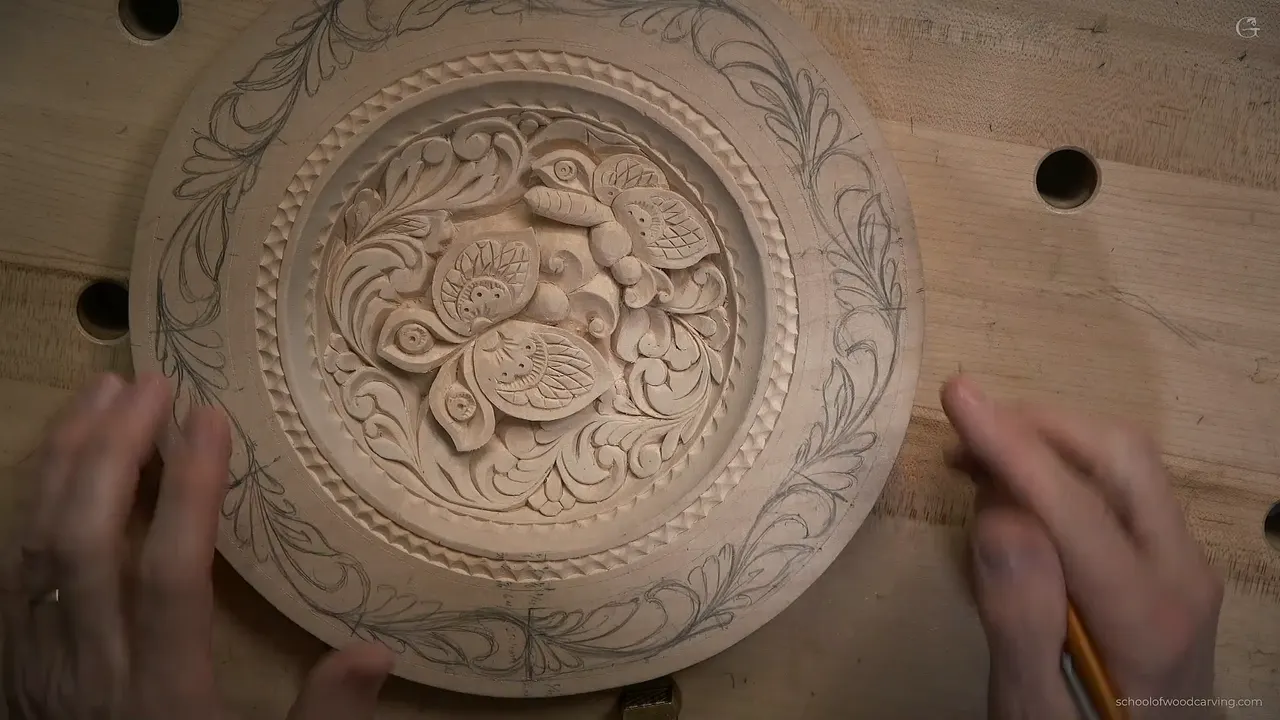
A border carved around a mirror or a door is the same job as the band I carved on the rim of this basswood plate. In this lesson I told you the same technique will dress up a mirror frame. I meant it, and I have carved the same style on casings in real houses.
Have you seen carving around an old door or an old mirror, maybe in a museum or even in a photograph? Did you wonder how anybody carved all of that by hand? Start with a band like the one on this plate, a handful of plain shapes repeated around a circle and outlined with a knife.
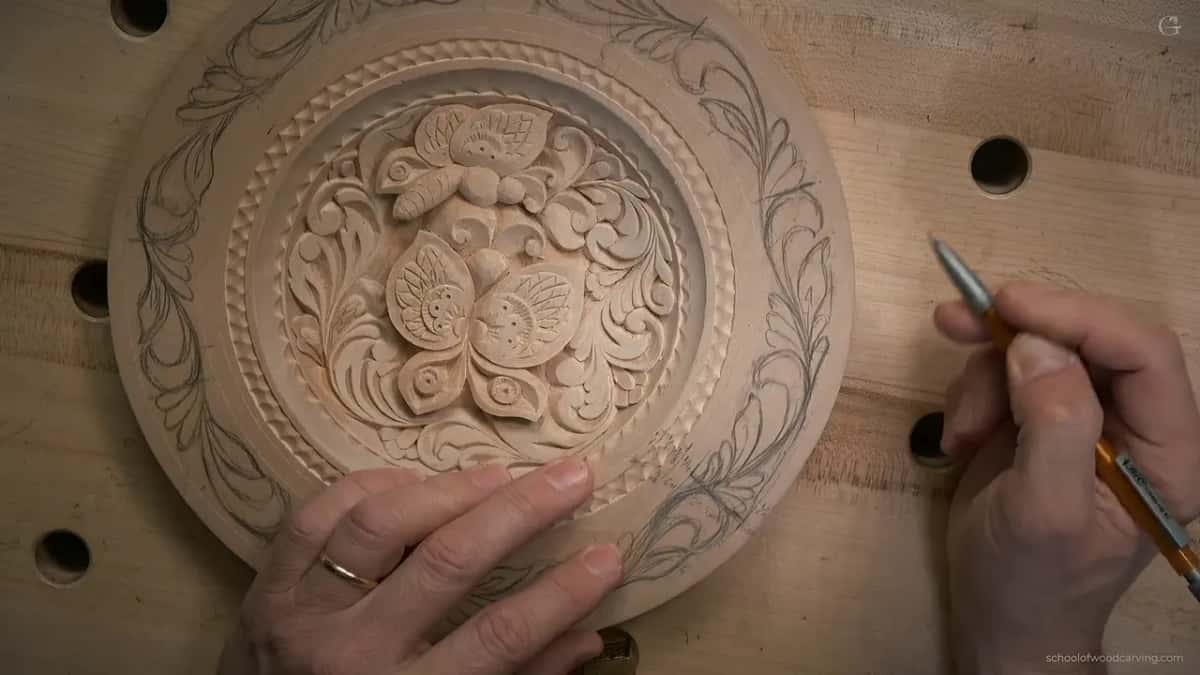
I'll show you the plate band first, because it holds the whole method, and after it the frames and casings I have talked about in my other courses.
What a border on a mirror frame or door casing takes
The band that rims this plate will work on a mirror frame too, and I have carved it on casings in big houses.
Keep the shapes plain; on my plate the two butterflies get the attention, and the band only frames them.
Draw every shape about 1/16 in (1.5 mm) inside the two long lines, so the knife has room for its V groove.
Outline the inner side of each shape first and the outer side after, and let stray chips wait.
In a prison in Russia I carved mirror frames with one small knife.
House carvers, as they used to be called, carved picture frames and egg-and-dart inside people's homes.
Can the same band really go around a door?
It can, and I have done it. Right after I finished drawing this band, I told you about the casings I carved in the same style inside some really high-end homes. The casings themselves were big. My carving was only the detail running around them, around the windows and around the doors.
One house I had a project in was walnut from top to bottom, a special walnut with a purple color to it. Some of you have probably never seen purple walnut, and yet there is such a thing. The doors were almost 3 in (about 73 mm) thick, and all the baseboards and all the casings were that same purple walnut. I kept the leftovers in my shop, and one of them became the furniture panel in another course.
A casing is a long band of wood, and the plate's rim is a band too, only curved into a ring. So the plate is where I teach it.
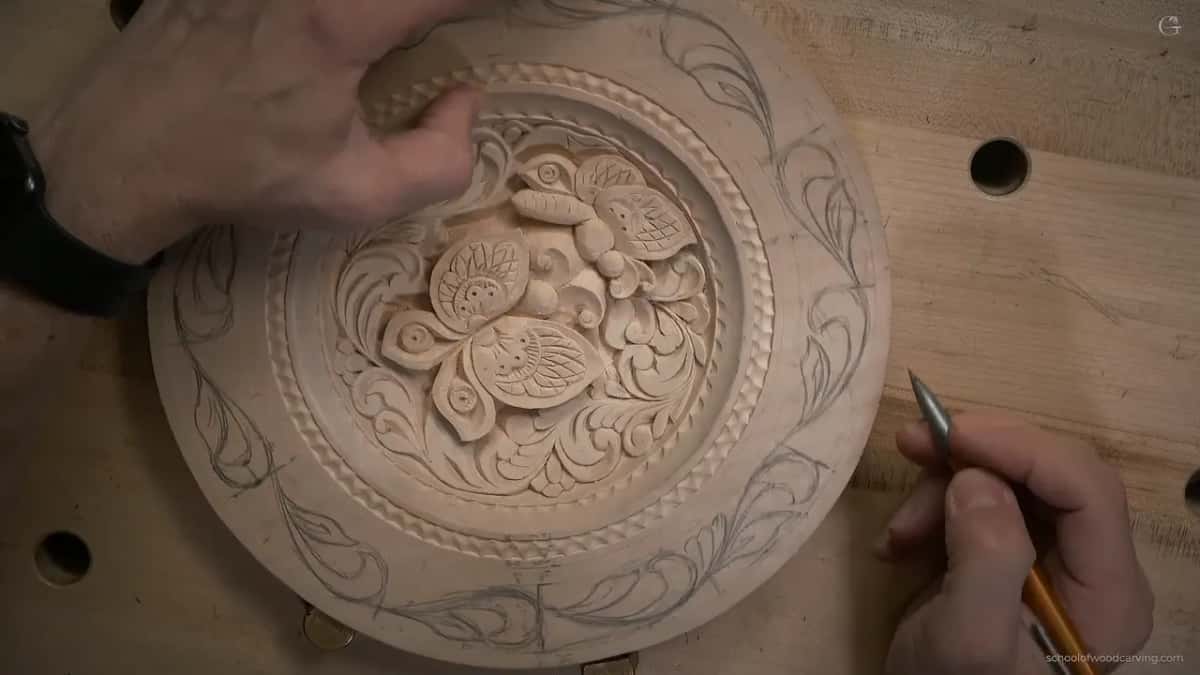
How I drew the band on this plate
The worked example is lesson 12 of my butterfly plate course, the lesson where the rim finally gets its ornament. Back in lesson 4 I told you the border would get a design of its own, and this is the lesson where it does.
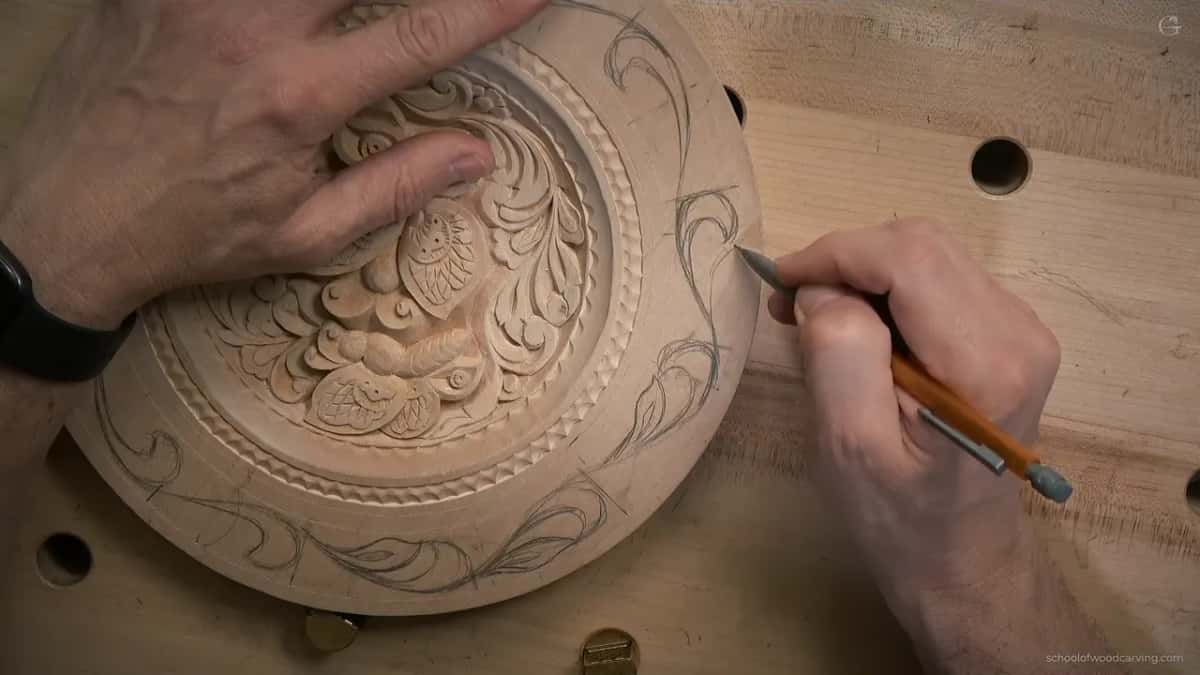
First I stepped the band into six with the calipers. I had played with eight parts and with seven, which is why you can see extra marks on my plate. I picked six because, in the words I used on camera, I think it's going to flow much better. How exact those points have to be is a question I answered on the lesson 1 page, so I'll leave it there. Each step I split roughly in half, and six parts became twelve main curves. I checked each mark a second time before I drew anything, because I could mess it up, and I said exactly that.
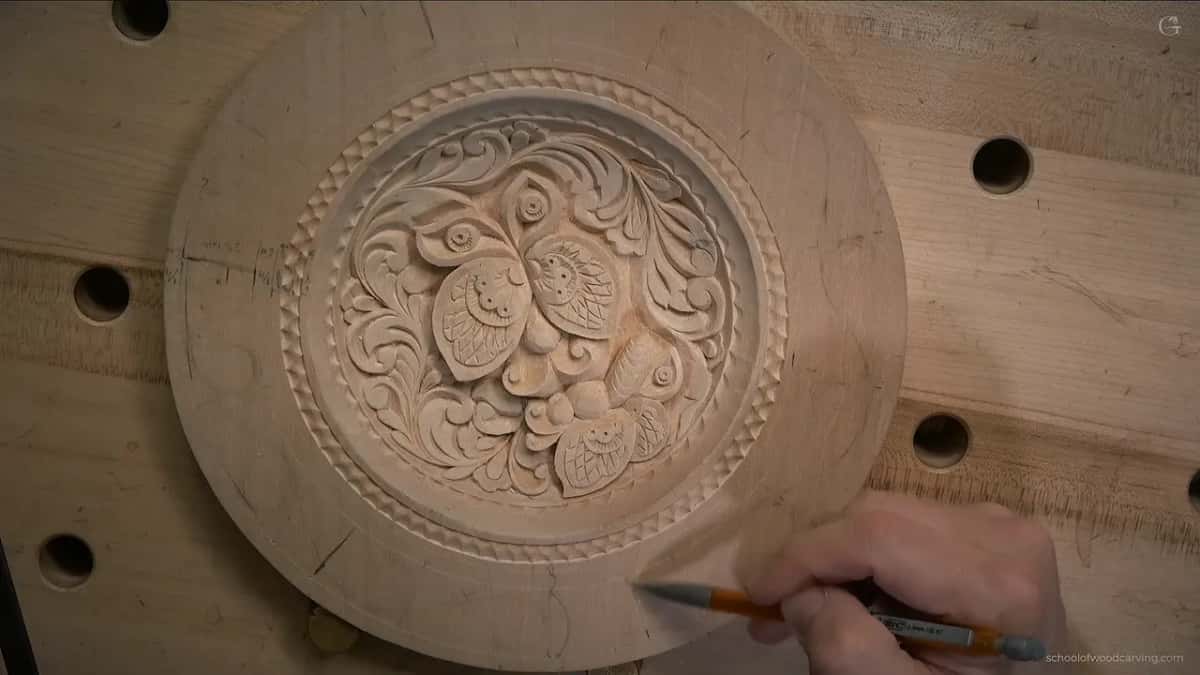
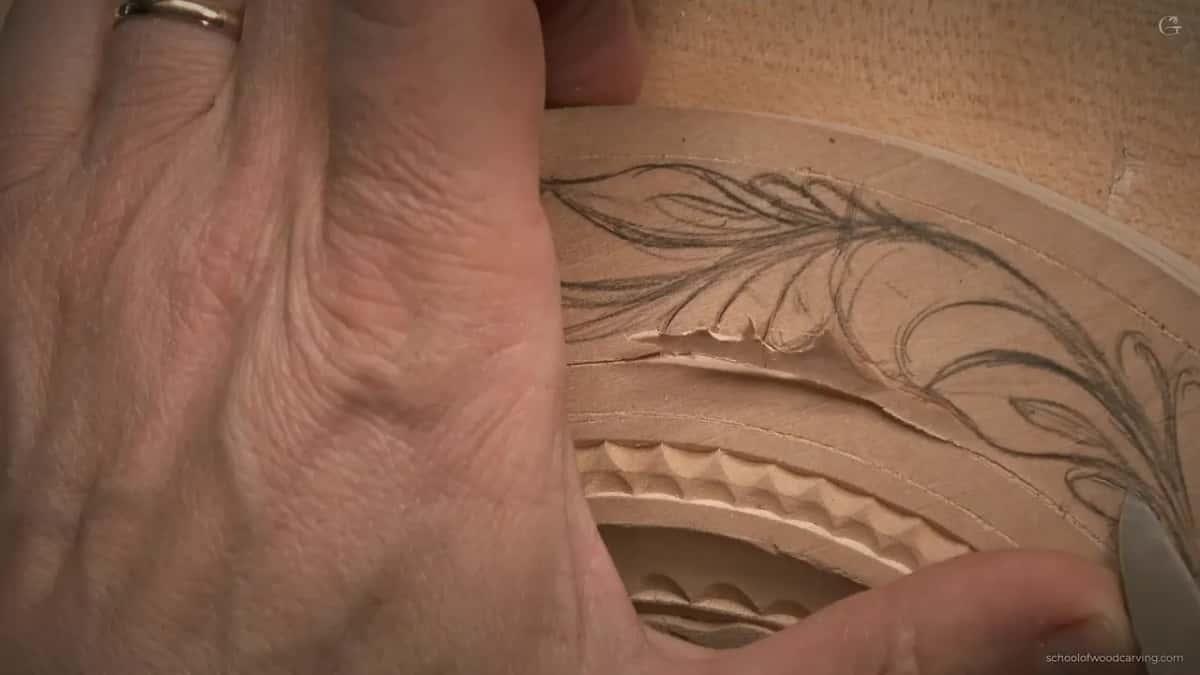
Then the shapes. I kept every one about a sixteenth of an inch, a millimeter and a half, away from both lines of the band. The knife needs that room later for the V groove, and it makes the job a lot easier for you. Partway through I made a small mistake in the drawing, said so out loud, and fixed it.
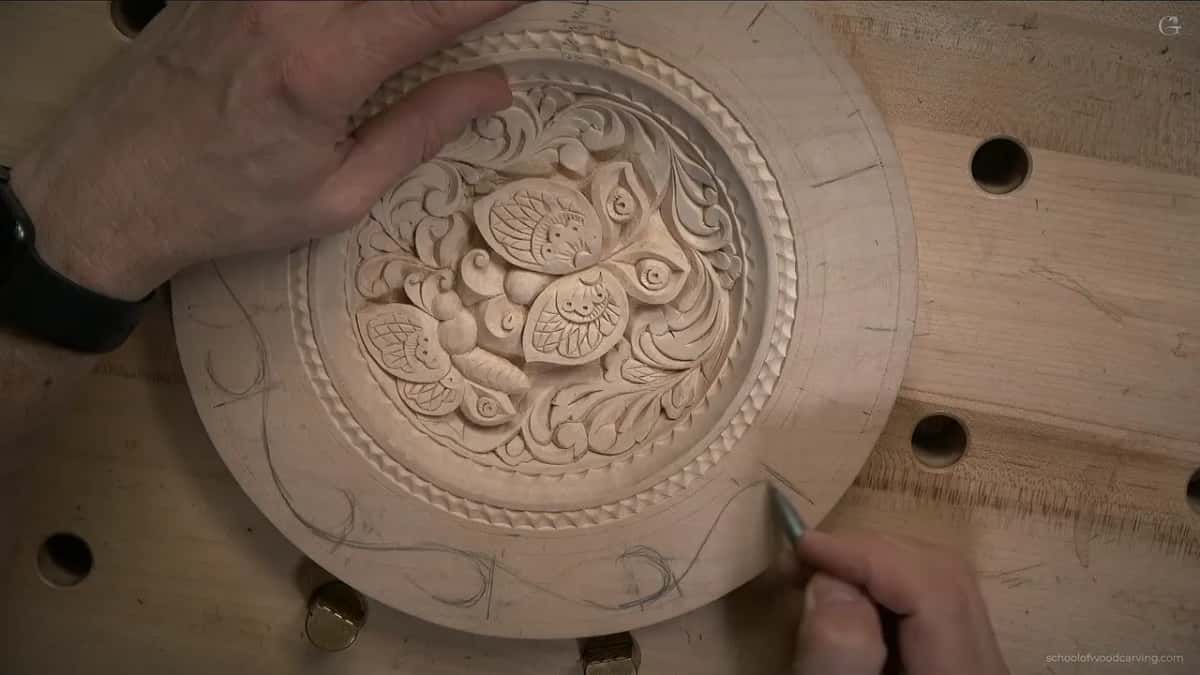
I could have repeated the volutes I already had inside the plate. I thought about it right there on camera, maybe yes, maybe no, maybe not, and went with something plainer. It was going to be a simple design, I said, and it would still look awesome. A border should not take the eye away from the main design, and on this plate that means the two butterflies in the middle. For the second shape I didn't split anything into smaller parts, since I didn't think that would look nice. Inside a shape there was room for a small cutout too.

Two spots were still empty after the main shapes went in. I filled them with the same triple movement I had drawn inside the plate, because, as I put it on camera, it's still the same plate. I ran the whole border against the direction of the middle on purpose, and then admitted on camera that if I don't like it, that's okay. I even worked out the room each direction takes, sixty against forty, then said it wasn't really necessary here.
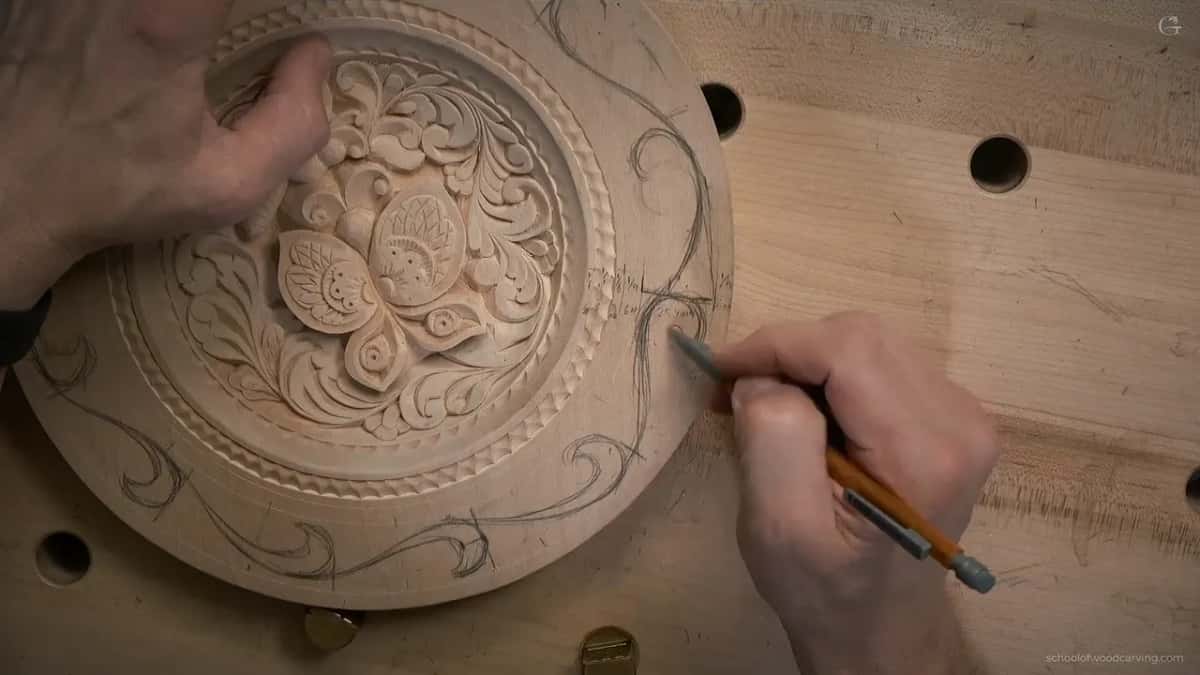
When the drawing was done I looked it over and asked myself if I wanted to change anything. I didn't. There was plenty of movement already.
Everything I drew goes into the pattern you can download, so you can follow whatever I do. All thirteen lessons of the plate come with full access to the school.
How the knife outlines each shape
The carving starts with two long knife lines, one along the outer edge of the band and one along the inner edge, facing each other almost like a V. How I hold and lean the knife for those two is on the lesson 3 page, so I'll skip it here.
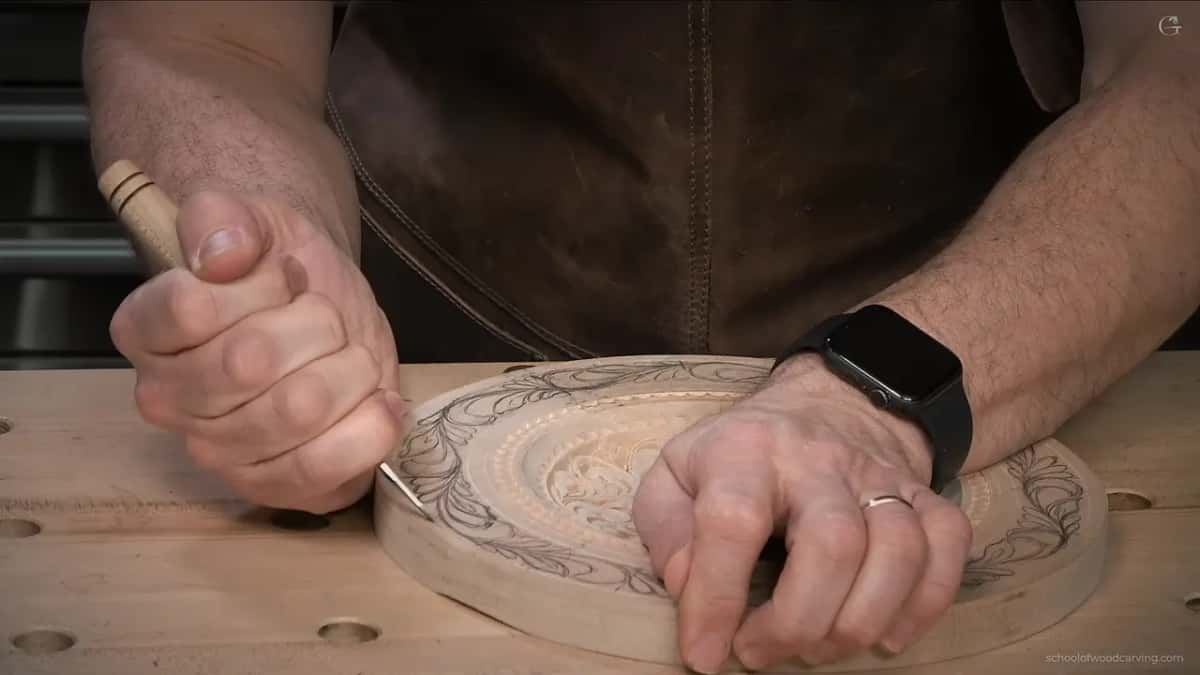
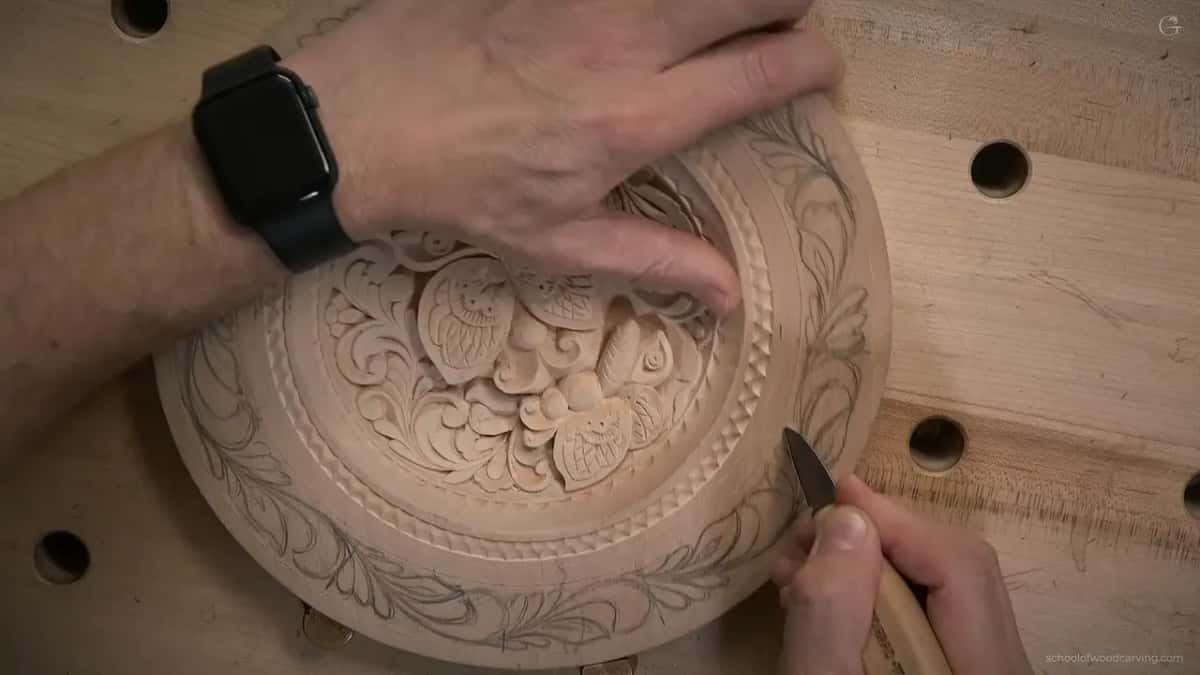
After those two lines I start on the inside and take the knife around the outline of every shape I drew. Coming up to a point, the knife changes direction, since that little triangle has to come out. Right before the point I stand the knife a little straighter, and then I just raise it out of the wood. You don't have to think about it every second. Keep it in mind anyway.
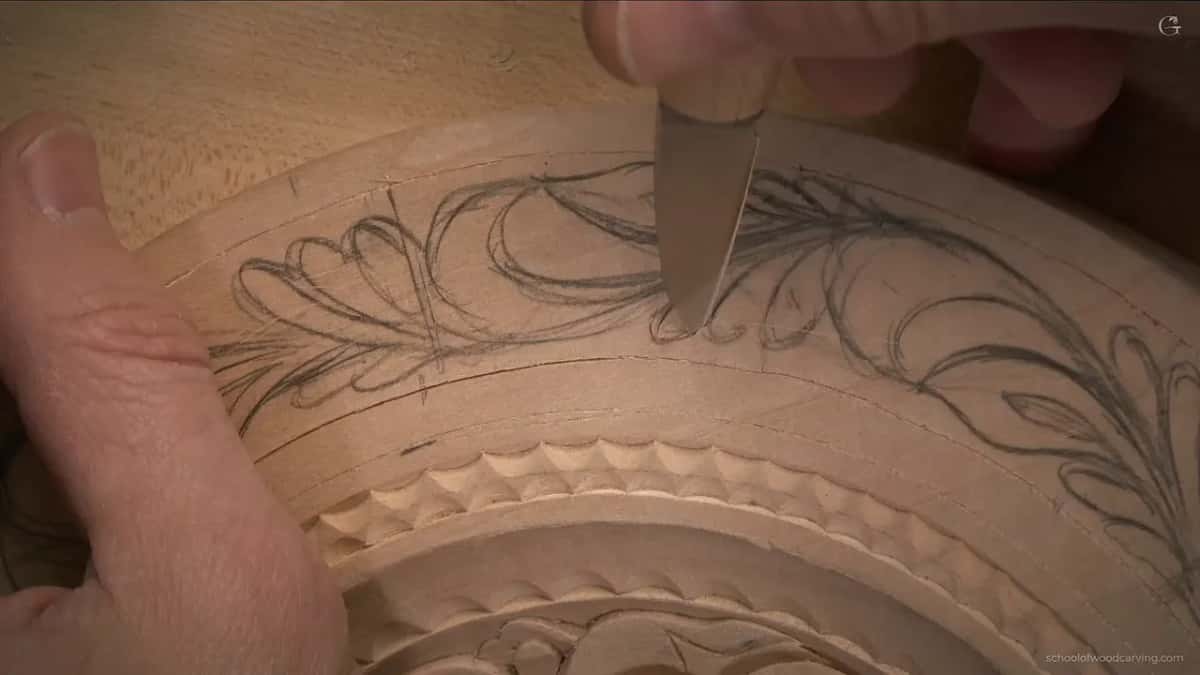
Where the line lets me, I keep going in one long pass, and the chip just pops out. That is exactly what I'm looking for. After that it's the same movement all the way around, and I don't explain every one, because the next pass holds nothing new. At one point I switched cameras, not sure you could see the knife from the first one.

The inner side of the band comes first. Once that's done, I turn to the outer side and do the same thing there. I hope you can see the result I'm after, because that's roughly how it's supposed to look. Some chips stay behind. Don't pay attention to them, since they come out when the band gets cleaned up, and most of them fly out on their own anyway.
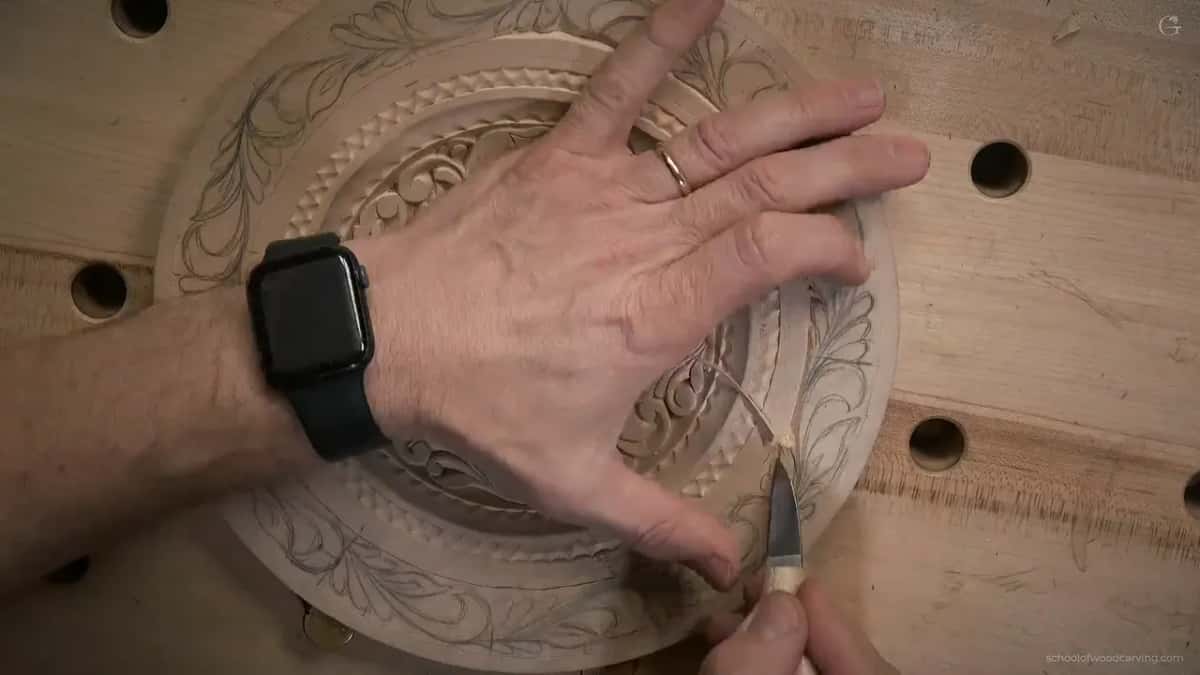
The narrow band beside it is carved with a gouge instead, and that is lesson 11. While drawing I said we could dress those shapes up later. By the end of this lesson my band was outlined and nothing more, and I promised my students that once the details went in, in lesson 13, it would look absolutely gorgeous.
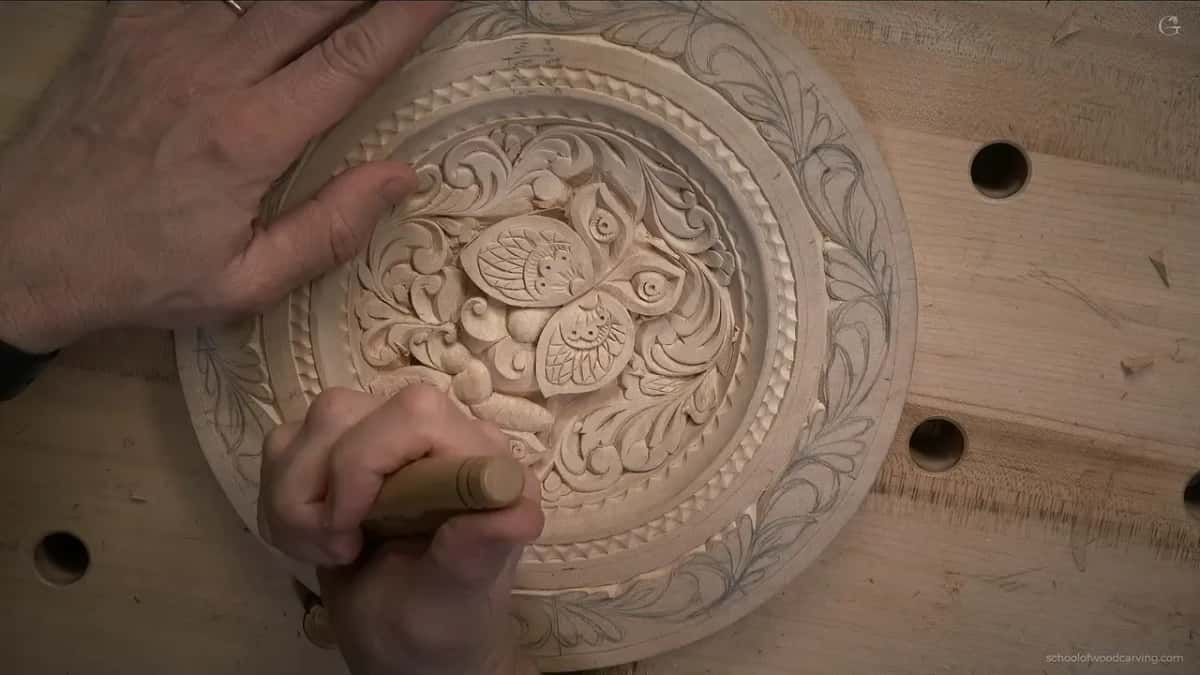
The whole band fits in six rows.
| Stage | Plate | Why |
|---|---|---|
| Step the band | Calipers walk the band in six, and each step is halved. | Six flows much better, I think. |
| Place the shapes | Every shape sits 1.5 mm (1/16 in) inside both lines. | That room is for the V. |
| Keep them plain | A borrowed triple movement fills the gaps instead of volutes. | Butterflies keep the eye. |
| Outline each shape | The knife travels around every shape, inner side first. | Same movement, all the way round. |
| Take the points | Near each point the knife stands straighter, then lifts out. | A triangle has to come out. |
| Leave the chips | Loose bits stay put until the details go in. | Most fly out anyway. |
What I carved with one knife in prison
I told this story in the Greek Acroterion course, with a knife in my hand. An acroterion is the ornament set on the peak or the corners of a pediment on a classical building, and the biggest part of that project is knife work.
In a prison in Russia I did some projects with one knife, and mirror frames were among them. I couldn't get carving tools in there, least of all a lot of them, because nobody would allow it. A knife I could have. A small one, even smaller than the knife in my hand in that video, since they wouldn't let you keep a blade longer than that, so nobody could turn it into a weapon. As if you couldn't make a weapon out of anything.
I'm telling you this for one reason. A frame doesn't need a wall of gouges, and neither does the band in this lesson.
Who carved frames and casings in the old days?
House carvers did, and I talked about them in the Dining Table Apron course. Today we'd call them architectural wood carvers. Back then they were called house carvers, really detailed carvers who worked inside the houses and carved picture frames, egg-and-dart, rosettes, architectural details and every other ornament you can name.
The other trade I described was the coach carvers, who carved for the buggies and coaches of their day. Their work was nice but less detailed, because they knew a coach goes out on the road and takes dirt and abuse.
Above both sits the artistic level, carvers like Grinling Gibbons, and I talked about them in the Venice Room course. Somebody would carve a frame for a piece of fine art, and a carver like Gibbons would build something around that frame that was already there. They didn't have pictures to frame back then, only fine art, so I should really call it an art frame. The old argument was art against craft, and I said I would add a third word, trade.

Does a bare frame need any carving?
A frame made as a project on its own needs some movement carved into it, or it won't look classical. I said so in the Venetian Flowers Rosette course, for those of you who want to make moldings or a picture frame for a piece of art.
Two woodworkers, George R. Walker and Jim Tolpin, wrote a design book called By Hand & Eye. One line in it asks the right question.
The question to ask is not whether the ornament or moulding adds to the design, but whether the design lacks something without it.
The same page counts making a visual border among the jobs ornament does, along with setting one thing apart from another. My own answer for this plate came in the first lesson, when I said I like a plate like this to have a border.
Other places a carved band fits
In my First Cuts course for beginners there is a knife exercise where I repeat one cut until it meets an invisible line in the middle, and I called it a V cut or a V groove. That kind of carving, I said, makes ornament for the sides of a jewelry box, and you can use it as a casing on your windows if you wish.
In Floral and Molding for the Panel I told the furniture makers something close to it. Any door, raised panel or not, can take small carved details in different arrangements, and the same carving works for mirrors and picture frames too. In that course the molding meets itself at a miter and keeps running down, the way a frame turns its corners. Later in that lesson I said a mirror frame in that Venetian style would look really nice, a style Northern Europe took about another hundred years to reach.
A bead molding fits a frame too. I've done a lot of beading, and in one of the Venice Room lessons I called it a really nice thing to add to picture frames. One style is the skip, where you carve a bead and then skip a couple before the next.
Rosettes work at the corners. In the antique style rosette course I said you can use rosettes like that as corner blocks for your casing around the doors and the windows, or as corner blocks on furniture. Or carve one just for fun and keep it as a decorative piece.
And in Chamomile and Bow Rosette I pointed at the leaves on both sides of the rosette. Leaves like that go on frames, picture frames and furniture. They can hang down, or they can run out to the sides.
Can you hold a pencil steady? And pull a knife along a line you drew? Then you can carve this band, and a frame after it. My plate sat on the bench that day with the band outlined, a few chips still hanging on, and the details still ahead.
How it's done
- Divide the ring. Walk the calipers around the band in six equal steps, then halve each step so you end up with twelve.
- Sketch plain shapes. Work in pencil and keep every shape a sixteenth of an inch clear of both edges. Borrow a motif from the center for any empty spot.
- Set the two long lines. One knife line runs along the outer edge of the band and another along the inner edge.
- Go around every shape. Begin inside the band. As the blade nears a point, stand it up a bit and lift out, so the small triangle breaks free.
- Repeat on the outer side. Same moves on the outer side. Ignore stray chips.
Frequently asked questions
What wood is the butterfly plate carved from?
Basswood, a round about 10 in (254 mm) across and roughly 3/4 in (19 mm) thick, air dried if you can find it. Basswood is the best carving wood I know, for your first month of carving or your thirtieth year.
Do all the shapes in a carved band have to match?
Mine don't. While I was drawing them I said they don't have to be exactly the same size, as long as they look fine side by side. On camera the band already looked fine to me before a single knife line went in, so I left the sizes alone and moved on.
What is a door casing?
A casing is the trim that frames a door or a window opening. Many builders also call that molded frame an architrave, a word from classical buildings, where the architrave is the beam resting across the tops of the columns.
What to carve next