
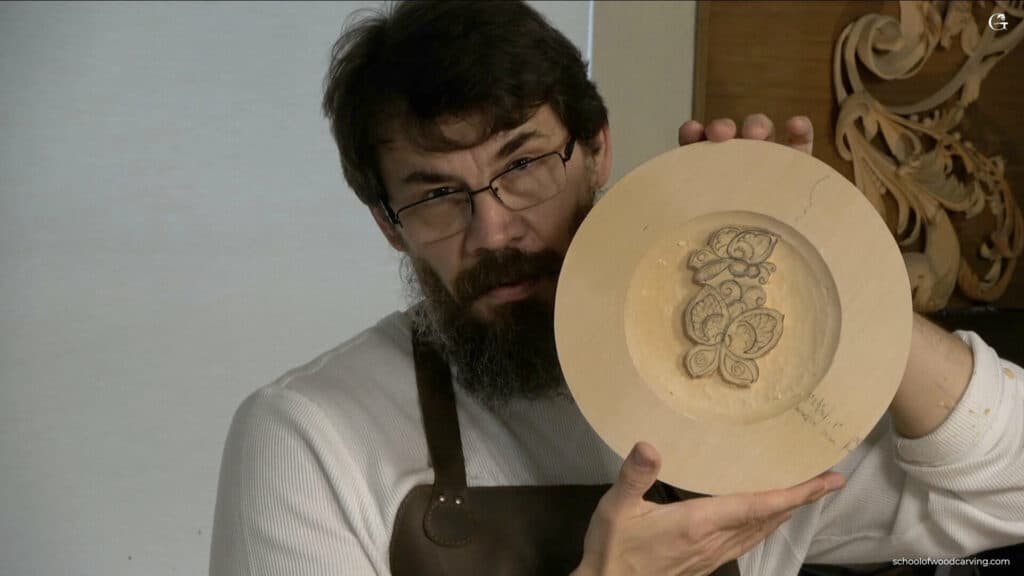
Alexander Grabovetskiy, woodcarver, School of Woodcarving · Published 2022
What angle do you hold a carving knife at to undercut?
Quick answer: An undercutting knife angle is a lean of the blade in toward the shape, so the wall slopes away beneath its edge and throws shade. Mine carries no measured number. I find a tilt my wrist holds without strain, then repeat it around both wings and on each recut.
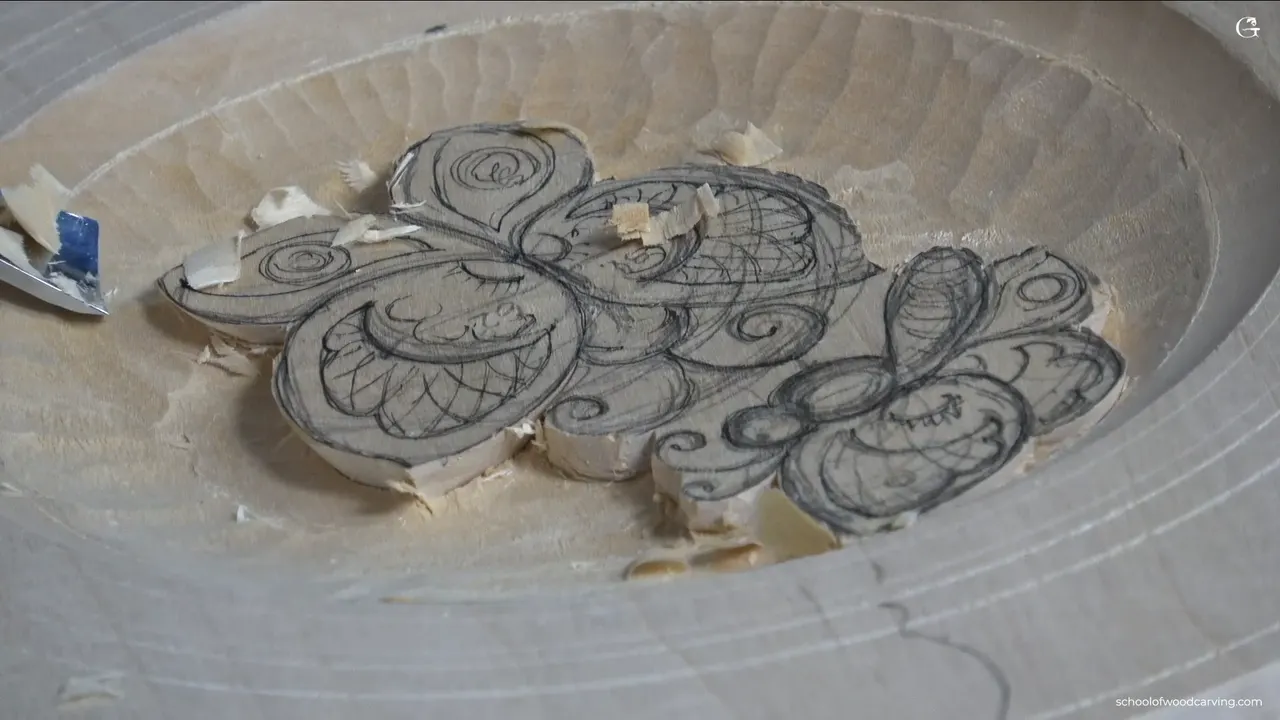
The right knife angle for an undercut is the lean your own hand finds comfortable, tipped in under the wing and never allowed to drift. I can't give you a figure in degrees for mine. Hold that one tilt around the whole outline, and send each second pass back into the slot the first one made.
Do you want the wings on your plate to lift off the wood, with a dark line of shadow under each one? And would you like the wall below them to come out as one clean line? Then this page is about one thing, the tilt of your knife.
This is lesson 3 of the butterflies plate. The plate is a relief carved into one board, both butterflies get their walls in this lesson, and I lean the knife in under every wing. That lean is not something I measure, and you don't really have to either.
Most of what follows comes from the three videos of lesson 3. Some of it comes from later lessons in this course, 5, 8, 9, 12 and 13, where the same rule keeps coming back, and wherever I borrow from one of those I name it.

What the knife has to do on every wing
- There is no number to hit. The lean is whatever your hand holds easily, pointed in under the drawn line.
- Once you find it, it stays put around both butterflies and on every recut.
- Each antenna and the body drop straight down. Only the wings lean.
- A big number 7, worked on one corner, carves in against the knife wall and frees the waste about 6 mm down, a quarter inch.
- When the knife fights you, clear more wood and come back to it.
- The lean is my choice for these wings. A furniture panel asks for the opposite.

How many degrees should the knife lean for an undercut?
I have no number for you, and I'm not keeping one back. On camera I put the knife against the wing line, tip it in, and say it plainly: I can't tell you how many degrees I've got, it's just what is naturally comfortable for me. You can see it approximately on camera, and that is as close to a number as I get. At sixteen I became an apprentice the old European way, the only student my teacher had, and he told me to think like a wood carver, like a tool.
Five lessons later I undercut a wing again and show you the angle one more time. I'm not going to measure it, I say, it's just eyeballing. Same answer, five lessons apart.
Two things set the lean, and you can check both by feel. The blade points inward instead of straight up, so the wall slides in under the line you drew. And the tilt sits easy in your wrist, which matters, because you are about to do it again around two butterflies and every recut after that.
All the wings share that one tilt. The wall along the line we scratched with the calipers is a case of its own. It still goes inward, only somewhat shallow, and I ask you to be really careful there and try to stay on the line.

Why keep exactly the same angle all the way round?
A second pass has to land in the slot the first one made, and only the same tilt puts it there. My words in lesson 3 are plain. It's a final cut, do not recreate the cuts, and if you need to go a second time, make sure you go in the same spot.
Close to the final line, where you want to be careful, you still do the same angle you did on the wing. Before I attack a new side, I get the plate to the right position, the one more comfortable for my hand. Finding that position is really important, I say, and I stop to find it again before the antennae.

You will hear the rule in lesson after lesson of this course. On the border in lesson 12 I call it probably the most important thing to remember: same angle, exactly the same angle, keep that angle the same. Lesson 5 asks you to try to maintain the same angle. In lesson 13 I recut a line just in case it isn't deep enough, and the second pass goes in at the same angle, starting inside a little triangle.
The border shows why it matters. I pull the first line toward myself with the knife leaned slightly my way, and I follow it carefully, carefully, carefully. The second line comes from the inside and faces it, held at the angle the outside one had, so the pair meet almost like a V.

Where does the knife stop leaning and stand straight up?
At the body and at every antenna, where the blade goes straight down at 90 degrees. My rule in the video is short. Whatever you see antenna, ninety degrees; whatever you see wing, undercut.
You touch the antennae, of course, but you never go underneath them. Please, please. Near an antenna I don't want to attempt that in one cut, so I make multiple cuts. Further along, pretty much the whole line gets undercut, while its antenna stays at 90 degrees.
The body works the same way. I hold the knife at about 90 degrees to the surface and make my preliminary pass around it. The spot to watch is the inside corner where a wing meets the body. Two rules meet there. I make one inward cut into that corner first, and only then does the wing line get its undercut. The far side of the body gets the same treatment.

The little triangles between shapes are the last case. There the final wall can come from the knife or from a gouge held straight down, and the gouge works especially well inside those triangles.

Put side by side, the plate looks like this.
| Place | Blade | Result |
|---|---|---|
| Every wing outline | Leaned in, at a tilt your hand holds easily | Shadow under the edge |
| Along the scratched calipers line | Inward, shallow | A wall that stays on the line |
| Corner of wing and body | An inward pass, ahead of the wing undercut | Wing line ready to undercut |
| Along the body | Upright, about 90 degrees to the surface | Vertical |
| Each antenna | Straight down, a little at a time | Nothing hollowed beneath them |
| Beneath the knife walls | Gouge corner working in against the wall | The chip frees about a quarter inch (6 mm) down |

What does the gouge do after the knife has set the wall?
A number 7 comes in on its corner and carves toward the knife wall until the chip lets go. Mine is a bigger one. Only its corner goes in, and I make sure I'm not forcing it. You could try to present the full body of the tool, but I doubt you will be able to.
Where the two meet, the space between that point and the surface is about 6 mm, a quarter inch. That is the depth I'm after, and on a basswood board 19 mm thick, three quarters of an inch, I keep an eye on it the whole way, because mine already has some carving on the back.

If the big tool feels clumsy, grab a smaller number 7. A spoon gouge gets you a little closer to the wall. The spoon I use is a number 7, 10 mm or 3/8 of an inch, and a front bent gouge does it too, if that is easier for you to understand and attack with. You don't have to own either one.

For a tight area in lesson 5 I reach for a tiny spoon, just 1/8 of an inch (about 3 mm). The last tidy up can be a number 5. That part is only cleaning.
A chip like that should come out easily. If it does not fly out, go back in with the blade, recreate the cut, and it should.

What if the knife fights you?
Take more wood out before you make the final cut. Be careful if it fights you, I say, and make sure you remove some more material first. The knife can lift a chip out early too, as long as you stay above the final surface, and then the number 7 has an easier job. Don't dig too deep into the wing while you do it, or it won't look as nice.
The bulk comes out first anyway. Most of that mess goes with the same 10 mm number 9, three eighths of an inch, that outlined the butterflies in lesson 2, or with the knife.
Mistakes happen on camera as well. In the last video of lesson 3 I found a little chip, and I called it what it was, no bueno. I moved that line a little bit inward and kept going.

Which knife do I use to undercut the wings?
Mine is a Russian Petrograd, similar to a Pfeil number 12 but a different brand. I kind of like the steel. Getting one now is impossible, and whatever knife you choose, nothing on this page changes.
I could reach for a number 11 veiner and open the undercut with that before the knife goes in. This is a knife carving project, though, so I use the knife.

Is leaning the knife inward a rule for every carving?
Only for these wings, on this plate. On the furniture panel I tell you the opposite: make sure the tool is not pointing inward, because that would be a big mistake, and I want to stay right on the line.
A Roman acanthus leaf does not get undercut right away, and its major undercutting waits for later. The Venice Room panels have me reading the flute of a gouge like a clock face, and twelve o'clock is where I hold it when I'm trying not to undercut.
The butterflies get the lean because of what it gives back. Look how deep a shadow it casts, I say, and how it separates from the background. Even once the design goes in on the inside, the butterfly stays above the surface.

How do you pick the angle up again on an old wall?
Catch it before you carve anything new. Trying to catch the same angle is how I put it in lesson 8, when I recreate a cut. Lesson 13 has me hunting for whatever angle an element already had, and I carry the cut on from there until it blends nicely.
Going back under a wing in lesson 8, I start with the angle first and find the same spot. The pull comes toward myself, really carefully and without forcing it, and then I go back for a secondary cut.
What does the angle cost you later in the course?
A wing's direction is settled once it is undercut. Lesson 8 brings me back to one and I say it plainly: we did the undercutting toward the inside under this wing, and I cannot change that to the opposite direction. So I place the knife right inside my previous cut and look for a connection somewhere deep.
The same lesson carries a warning worth keeping. Don't be too crazy with the undercut there, because it's a hard area to clean, and a little undercut works really nicely. Then in lesson 9 I carry an earlier undercut on to a new point, same angle, only not as deep.
Lesson 5 turns the direction around where two lines meet in a small triangle, and there I undercut slightly the opposite way, not much, just a little.

You can follow all 13 lessons, three videos in each, with School of Woodcarving access. The whole plate is there, lesson by lesson.
What should the plate look like when lesson 3 is done?
Both butterflies stand up out of the field, with a dark line under every wing and nothing carved inside them yet. At this stage I leave the design alone. What I'm after is outlining my main movement, and the inside work starts in lesson 4.
In my opinion it already looks really good. Somewhat simple, but still beautiful, and three dimensional. Don't go deeper than a quarter of an inch getting there, or you lose the overall movement. The back waits until the plate gets flipped upside down later, when the edge gets its shape, and most of what is carved on that side now will be removed anyway.

Late in the last video I grabbed the wrong knife, said so, and went for the right one. Then I cleaned a messy spot underneath until it just flew out, and I could do that because I was holding the same angle.
Do you have a knife that sits easy in your hand, and a number 7 you can tip up onto its corner? Then bring a board of basswood to the bench.
How it's done
- Clear the bulk first. Take most of the waste away with a 10 mm number 9, three eighths of an inch, or with the blade, staying above where the floor will end up.
- Find a lean you can hold. Tip the knife in under the wing line until the grip feels natural in your hand.
- Carry that tilt round both butterflies. Give it to each wing. A second pass goes back into the first slot rather than beside it.
- Stand it up at body and antennae. Hold the blade upright there. Make the inward pass into the corner where wing meets body before you undercut the wing, and give each antenna several light passes.
- Let a 7 meet the wall. Turn the gouge onto one corner and work it toward the wall the knife made. Expect the waste to break loose near a quarter inch, 6 mm, and recut if it holds on.
- Tidy up to the line. Use a smaller 7, a spoon gouge or a 5. Keep checking the depth, and keep the carving on the back of your board in mind.
Frequently asked questions
Do carvers measure the knife angle for an undercut?
Not for this plate. Mine comes by eye, from how the handle settles in my grip, and the thing I watch is whether each pass repeats it. Lesson 8 shows the tilt once more, and I still call it plain eyeballing.
Which parts of a carved butterfly go straight down?
The body and every antenna. The blade enters square to the surface there, and near an antenna I make several passes rather than one. Only the wings lean, and the corner where a wing joins the body gets an inward pass before its wing line is undercut.
What finishes the undercut once the knife is done?
A 7 sweep tipped up on one corner, carving toward the wall the blade left, until the waste breaks free roughly a quarter inch below the top, 6 mm. A smaller sweep, a spoon gouge or a front bent can take over wherever the big tool feels awkward.
What to carve next