
Alexander Grabovetskiy, woodcarver, School of Woodcarving · Published 2022
How do you carve right on the line with a knife?
Quick answer: Knife work on a scratched line is mostly a matter of order. Trace the whole design first with a pass that leans outward, then seat the blade in the ring you scratched and slice back toward the earlier pass. The chip lifts out where they meet.
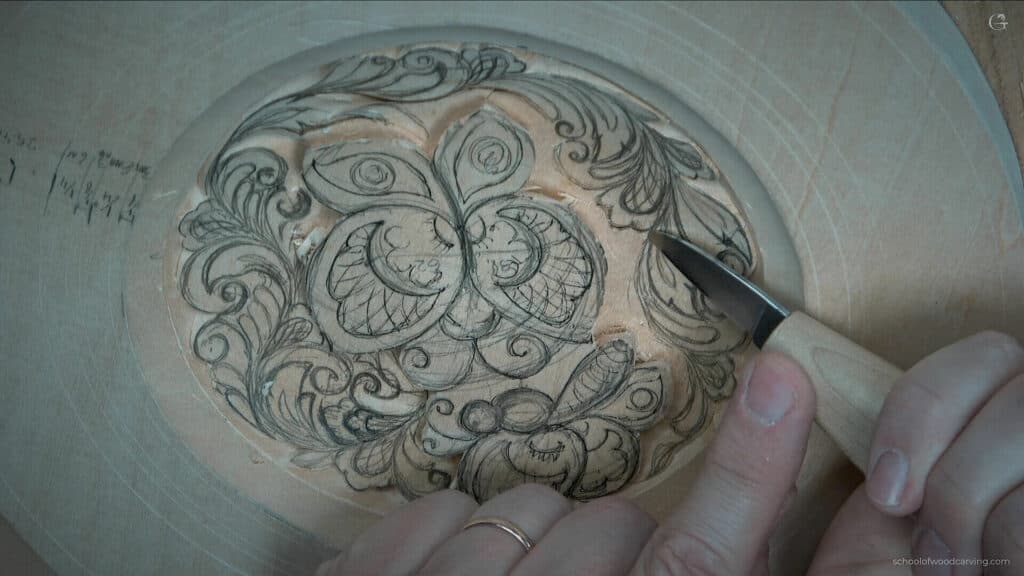
Carving on a scratched line with a knife is a job for two passes, and the pass that sits in the line comes second. First the blade travels around the whole design, leaning out toward the rim of the plate. Then I set the edge in the scratched ring and slice back toward that first pass, so the chip breaks loose where the two meet.
Would you like the edge of your design to land exactly on the ring you scratched, not a hair past it? Do you want each chip to lift out clean instead of tearing into the border? Then start with the order of your passes.
This is lesson 5 of the butterflies plate, a ten inch (254 mm) plate of basswood carved as a relief, with two butterflies near the middle and the small curls and flowers I drew around them in lesson 4. I will show you where each pass goes and what I do when the blade slips, because it slipped on me twice in this lesson.

What it takes to carve on the line
- Carve around the whole design before the blade touches the scratched ring.
- Lean the opening pass out, away from the design.
- Set the second pass in the ring and aim it back at the first one on a slope, so they meet under the chip and it pops free.
- Clamp the work so it cannot move, and leave it unturned until the first round is closed.
- When the line fades, move until its shadow comes back.
- Grain running against you calls for a sharper knife or a new angle of attack.
- A slip gets blended, sometimes at once and sometimes later.

What is the perimeter on a carved plate?
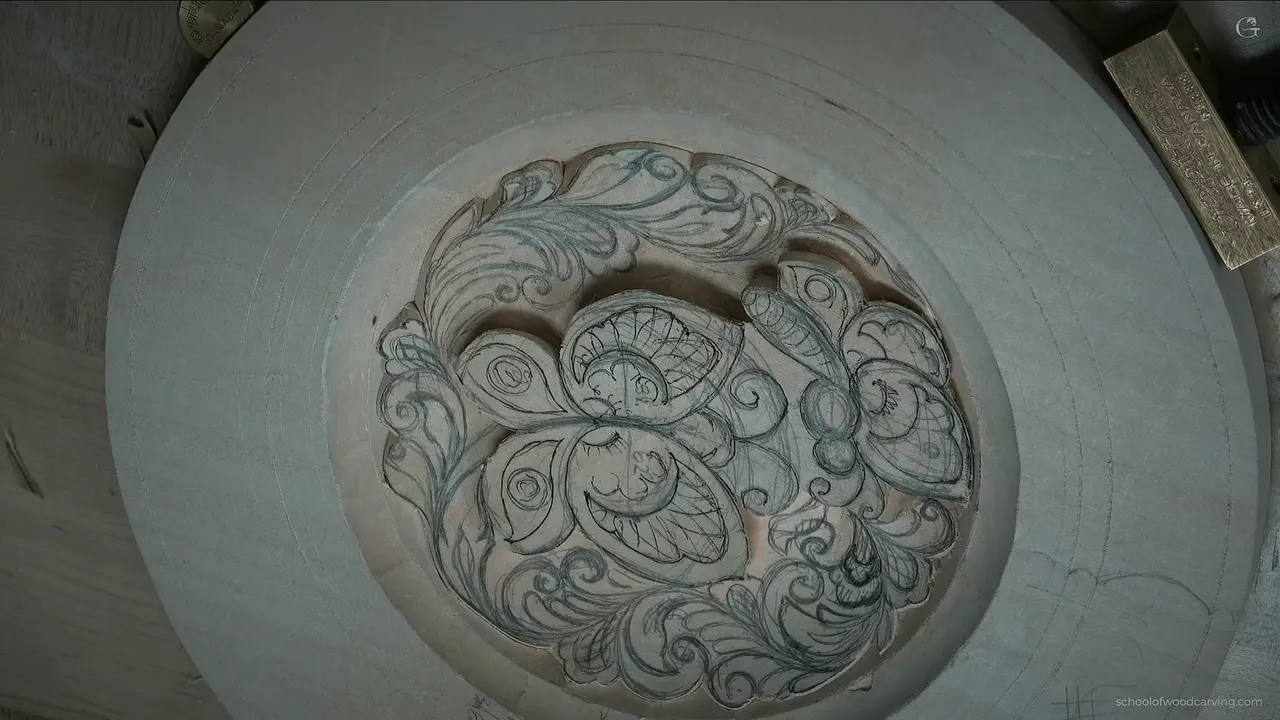
The perimeter is the outline where the design meets the scratched ring, and on this plate it gets carved before any detail. Perimeter is my own word for it on camera. When lesson 5 starts, both butterflies already stand clear of the plate, while the curls and flowers around them exist only as pencil lines.
The ring was scratched with calipers back in lesson 1, and its groove is where the edge sits later. Inside it lives the design. The border outside it waits for the last three lessons of the course.
Lesson 6 opens with me saying that we outlined everything, from both sides, and only then do the details start.

Which pass goes on the scratched line?
The second one. The line waits while the first pass goes around whatever design I have, on the design's own edge, and only when that round is closed do I put the knife into the scratched ring to carve back from the opposite direction. Setting the edge on the line, I remove the material between the two passes.
My reason on camera is short. I just want that pass all around first, and then the secondary one.
Some of the curls wind back in on themselves. I skip their insides, run the first pass along the outside of the curl, and carry it straight to the line, since for now it is more logical to stay outside without going in. Later on I'll fix that, I say in the video, and then I correct myself. Not fix. Attack.
There is a flower in that design too, or some type of flower, I should say.

Where does the first pass go?
Along the outer edge of the design, with the blade tipped toward the outside of the plate. I set the knife somewhat on an angle and pull it toward myself. On camera I was not sure you would be able to see that angle at all. Both directions work, but pulling is much easier.
On the curly parts I do not go deep right away. Even if the first pass does not look really nice at the beginning, you will be able to fix it later. Still, try to stay right on the line.
Where two shapes meet in a small triangle, I tip the blade slightly the other way, not much, and the lean itself belongs to lesson 3. At a butterfly, the new pass runs into the outline that butterfly got back in lesson 2. That spot is really interesting to carve, because the earlier outline and the pass I just made have to blend together.
One stretch gave me pause before I began. The angle there has to stay really shallow, and it runs toward a pass that already went deeper, so that part of the line comes out somewhat deeper than the rest. Everything else, I said on camera, was not going to be a problem.

How should the knife sit in your hand?
Two ways, and both are legit. For deeper excavation I wrap a full hand around the handle, and for the smaller areas where I do not have to dig deep, I hold it like a pencil or a pen.

Try both and see which one works better in each spot. It is the same knife I used on the bird of paradise board, and the perimeter needs nothing more than that one blade. If holding a knife at all is new to you, first cuts for beginners is the place to start.
When one side of a shape is done and the knife is still in my hand, I do the other side right away.

Should you turn the plate as you go?
Leave it where it is for the first round. Early in the video I stop to fasten the plate a little better so it stops moving, and once, when I need a new angle, I change my own position a little instead of rotating the piece.
During the second round I turn the plate often, and I reposition whenever I need to see better. Let me again rotate, I say in the second video, and around goes the plate.

Which way does the second pass lean?
Toward the first one. Before I start it, I stop and tell you this is the really important step, the one where I can mess up, because the knife really, really, really has to be on that line.
Go toward your previous pass, and make sure you do not come straight down at 90 degrees into the plate. On this outline the second pass keeps some angle toward the first, and I try to hold that angle the same the whole way.
Get it right and the two lines meet together under the chip. It just flies out. That is the effect we are after. If it does not, do not really worry about it. Go back, find the spot that is still holding, and carve that out, and do not rush any of it.
That lean is for this outline, on this plate. In lesson 6 the separations inside the design begin with a straight down pass, and chip carving stands its first line upright as well. Different job, same knife.

What if you lose sight of the line?
Move until the shadows show it again. A scratched line is a real groove, and a groove reads best when its own shadow fills it, so partway through the second pass I reposition until I can see the shadows much better. That way I do not mess up the line.
Light coming in low from one side does this best. That light has a name, raking light, and it turns any shallow groove into a dark thread you can follow with the edge.
On the first stroke of the second pass I want to make sure I am not missing that line. In the video I also try not to cover it with my hands, so you can see what the knife is doing.

What does the grain do to a knife on a curve?
It keeps changing under the blade. At one point in the video I am carving across the grain, and I warn you that other parts of the same line will run with it, and some against it.
Against it you have two choices. Get your knife super sharp, or change the angle you attack from. A ring on a flat board of basswood meets the grain from every side as it goes around, so keep one eye on the fibers the whole time.
My teacher in Russia taught me to think like a tool when I was 16. In this lesson that sounds like one plain warning, keep an eye on what the grain of the wood does.
A viewer's question opens the lesson, before a single pass, and it puts the knife on a strop. I load about a quarter inch (6 mm) of paste on the tip of the blade, never with my fingers, and even that small bit is more than enough. The leather can sit on your workbench edge, or on a dining table, and it works the same way.
Titebond on your fingers is fine. This paste is not. Keep paper towels close and wipe the blade before it goes into the wood, because that stuff is really hard to clean out afterward. Sharpening has a course of its own, and halfway through this strop I lost my count anyway.

What happens when the knife slips past the line?
You blend it and keep going. After more than forty years of carving I still slipped past this line twice in one lesson. The first time I saw it at once, said I had missed my line slightly, and fixed it right away.
My second slip came near the end of the round. I was doing my best to keep the line, and it looked like I messed it up anyway, so I blended that spot, said it was not a big deal, and told myself I still have to be more careful.

Earlier there was a small area I kind of did not like. I left it for later. If you do not like something during the first round, you can change it on the fly when you come back.
Where you can, shave a little more toward the line instead of jumping to it. I want that line sharp and nice, as much as I can, and there are some limitations, obviously. Once a chip flew out of a corner and the corner still did not look clean, so I stayed on it until it did. Then I changed the direction of my pass and cleaned a little more. I really want to see that super clean.

Where the line fights back
These are the spots in lesson 5 where the line gave me trouble, with the words I used on camera. Viewer questions like the stropping one fill my tips and questions course.
| Trouble | Fix | Words |
|---|---|---|
| Chip stays put | Go back in, find what holds it | "something holding" |
| Grain against you | Sharpen more, or change the attack angle | "super sharp" |
| Slipped past it | Blend the spot, then slow right down | "more careful" |
| A ragged corner | Come at it from the other direction | "super clean" |
| The deepest spot | Take it down in several shallow passes | "little by little" |
| Line gone faint | Reposition until the shadows show the groove | "see much better" |
The deepest spot deserves a word. I meant to keep that one shallow, and it still ended up one of the deepest places on the plate. I said on camera that maybe I could attack it right away, why not, and I did, carefully, taking it down little by little so it came out a lot easier. Watch the back of the plate there, because you do not want to go all the way through unless you want a hole.
Earlier in the same pass another deep spot had something holding, and I told you I probably needed to go deeper.

What should the outline look like when you stop?
Crisp along the line, with loose chips still lying around. From above, the outline reads clean even though nothing has been swept, and that look is what I am after at this stage.
When my perimeter was done, I said that is how it is supposed to look, and that I kind of like it. It's not bad for that step.
When the first round closed, I called it the first step and then corrected myself, because the pattern on the wood was really the first step. Details come next. The last part of this lesson starts an inner border near the butterflies, where the knife lies almost flat on the plate, and even there I outline first, all around, and clean afterward.
All thirteen lessons of this plate sit behind one school plan, and the start page shows where to begin. Every lesson on the site is on the lessons map, too.

Would you like your next line to land exactly where you scratched it, with the chips lifting out clean? Can you hold a knife? Then you have what lesson 5 asks for. Start by tightening the clamp.
How it's done
- Strop the blade. Load roughly a quarter inch (6 mm) of paste onto the tip, work the leather, then wipe the steel on a shop towel.
- Clamp the plate. Lock it down on the bench so it cannot creep while you circle the design.
- Trace the design's edge. Tip the knife outward, toward the plate's edge, and draw it toward your body along the outer contour, skipping curl interiors.
- Close the loop. Keep working until that first trace meets itself, work unrotated.
- Carve back from the ring. Seat the edge in the scratched groove and angle it at the earlier trace, so waste pops out between them.
- Check it in shadow. Shift your position or the plate until the groove shows dark, and shave any wander back toward it.
Frequently asked questions
Does a carving knife strop the same way as a gouge?
A viewer asked me exactly that in this lesson, and the idea is the same. You need a scrap of leather and a little paste. Put the paste on with the blade, never your fingers, since it eats into the leather itself.
Should I sweep the chips away as I carve the outline?
Leave them. Near the end of lesson 5 the plate is covered in loose chips, and I do not spend much time cleaning them yet. What I check is the look of the outline underneath, and the cleaning comes later.
Is a gouge allowed on a knife-carved plate?
Sure, and a small spoon gouge comes out later in this same lesson. Nothing is wrong with that, since a gouge already dug out the dish. For one spot I still went back to the knife, because I did not like the finish the gouge left.
What to carve next