
Alexander Grabovetskiy, woodcarver, School of Woodcarving · Published 2023
How do you carve a gouge cut border on a wood plate?
Quick answer: Carving a band of gouge cuts is knife work first and gouge work second. Two shallow knife lines, about 1 mm (1/32 in) deep, go in on my plate, then a number 9 gouge enters 2 mm (5/64 in) away and slices toward them, so each chip breaks off right at the line.
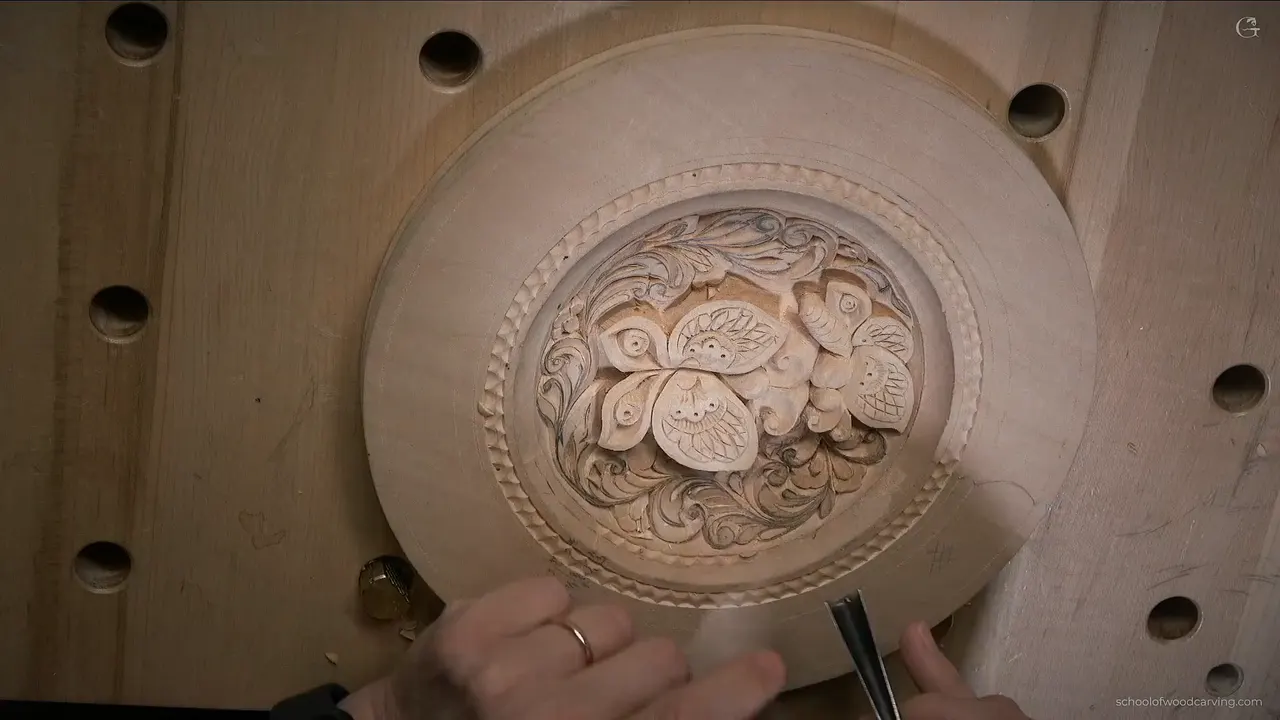
A border of gouge cuts is a ring of small dished cuts, each one sliced toward a shallow knife line, so the chip lets go right at that line. On my butterflies plate it sits in a narrow band along the rim's inner edge, around the dish, 6 mm (1/4 in) wide. My knife goes around first, twice, about a millimeter deep. After that a gouge works toward those lines, a number 9, one round from each side.

Would you like the rim of your plate to wear the same marks as its middle? Do you want every chip to pop out clean? Then cut the knife line before the gouge touches the wood, and keep it shallow.
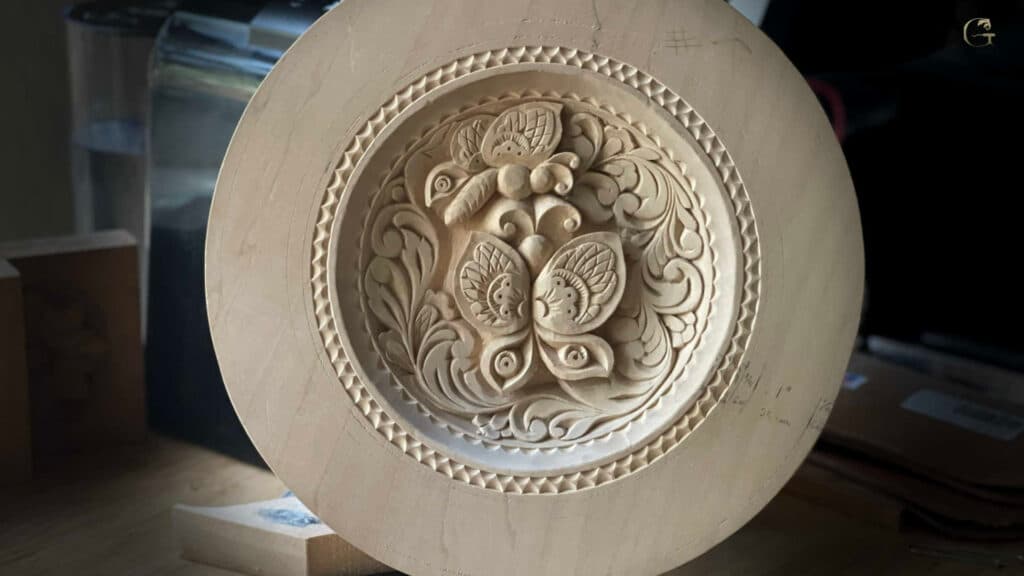
This is lesson 11 of my butterflies plate, a ten inch (254 mm) plate of basswood, the American linden, with two butterflies carved in relief at the center. When the lesson opens, the middle is almost done and the rim is still plain, with its scratched rings and a few pencil notes. I had a plan for the narrow band, and partway through I changed it. I will show you why, how deep each cut goes, and the damage on the inside edge that this same cut helped me fix.
What goes into a gouge cut border
- Carve the middle first.
- A pair of shallow knife lines goes inside the narrow band, pulled toward you with the blade leaned a little.
- My gouge was a number 9, though a number 8 works.
- Every cut stops at the knife line.
- Round two comes from the other side of the band, and each of its cuts lands in a gap the first round left.
- A smaller third round is optional.
- The same cut, on one side only, can cover a damaged spot near the dish.
The rim waited until every separation inside the plate was closed. The last few little elements took the first five minutes of the lesson. I used a move chip carvers will know: one cut almost straight down, then a flatter cut coming back to meet it from the opposite side, shallow, in several passes. When a spot is not clean on the first try, cut it again, and let your hand feel which way the grain wants to go. The bent pair of Drake knives from lesson 7 helped near the butterflies. Their blades curve and ride right above the work, which helps where the floor sits deep and the butterfly is easy to damage.

Why did I drop the convex I had planned?
A gouge had already made a couple of cuts inside the plate, so I brought the gouge out to the border as well. My first idea for the narrow band was different. Early in the lesson I said it would be a convex, a small rounded strip, and I was not sure yet whether any ornament would go there.
Then my knife went all the way around the ring once. Looking at it, I could see several ways to dress up that border, and how it looks at the end is really important.
So I changed it on camera. In the next part I even started calling the band concave, caught myself, apologized, and said we were changing it. In my opinion a gouge looks really nice on a rim, and that opinion decided it.

Where do the two knife lines go?
The first knife line runs on the ring I scratched back in lesson 1, and the second runs inside the same band, so the two cuts face each other. How exact those rings must be is a question lesson 1 already answers, so I will leave it there.

You could stand the blade straight up at 90 degrees on the line. That is one approach. I tipped it slightly inward, toward the dish, and leaned it back toward myself, because at that moment I still meant to carve a convex there, and a small angle makes a convex easier to shape later.
Then I pull. I do not have to rush it, because I want this line accurate and I want to follow it exactly. My knife line goes on the pull, toward my body, the way a Japanese saw cuts, and carving toward yourself has a page of its own. There was no lathe in this lesson, so every one of these round shapes gets carved the old way, by hand.
It is slow work. I turned the lights on to see the line better, and on camera it did not help much. I kept shifting until the angle felt right, then began where the line looked easiest. My own shadow fell across the second line later, so I had to find a better position before I could go on.

This knife line is a leaned pull cut. It stays shallow on purpose, because its only job here is to tell the gouge exactly where to stop. Opening a line with a V tool first is a different story, about fibers crushed under a gouge in standing wood, and it belongs to another course.
How deep does each gouge cut go?
About as deep as the knife line under it, which on my plate means about 1 mm (1/32 in). The knife line was no more than a millimeter, so I set the gouge at an angle that will not dig deeper than that, 1.5 mm (1/16 in) at the very most. The cut starts out on the flat and slides down toward the line.
When the edge reaches the bottom of the knife line, nothing is left holding the chip, and it flies away. That is what you want to see.

If a chip stays put, the knife line was too shallow in that spot. Back on the cutting board I put it this way: the cut was not that deep, so you can always come back and recut it. I told you the same inside this plate, while closing the last separations. Do not worry if it is not clean the first time. Attack it one more time.
Which gouge carves the band?
A number 9 or a number 8, and either one will do it. I did not want to overdo it, so I stopped to think for a moment, then took a slightly bigger number 9 of about 12 mm (15/32 in). There is no mark on it anywhere. It is an antique, and I like it.
A gouge is a chisel with a curved edge, and before this one touched the rim I gave it a few passes on the strop, the inside of the curve first, then a couple of times on the outside. Then I needed some napkins.

Each cut starts about 2 mm (5/64 in) away from the knife line. Please do not calculate it. I found the middle of the band and offset a little, roughly six parts out of ten, a rough golden ratio, and that became the starting line for every cut. I doubt the carvers of Viking age northern Europe worried about it much. They went by feel.
For the cut itself, one pinkie goes down on the board so the gouge cannot slide, and the other pinkie goes down too, both hands planted on the plate. The whole middle is carved by now. I do not want to slip.

Why does the second round come from the other side?
Round two fills the spaces that round one leaves between its cuts. Round one cuts toward one knife line. When it was done the band already looked good to me. My opinion only, and it was not the end.

For round two I switched direction and cut toward the other knife line, placing each new cut in the space between two old ones. I started those cuts from about the same line as before, that rough golden ratio mark, and rotated the plate before cutting. I took them from a slightly different position, too.

Keep one angle all the way around. Do not raise the gouge and do not lower it. That rule has a page of its own in lesson 3, where the knife leans under a wing. From the side you may not see much. From above you will.

This is the band as I carved it, stage by stage.
| Stage | Action | Reason |
|---|---|---|
| First knife line | Pulled along the scratched ring, leaned inward | It decides how deep gouges go |
| Second knife line | Inside the same narrow band, same lean | The two lines face each other |
| Gouge, round one | Starts away, then ends on the line | The chip lets go right there |
| Gouge, round two | Plate turned, cuts aimed into the gaps | It fills what round one skipped |
| Optional third round | Smaller gouge, secondary cut, saved for later | You can add it any time |
| Covering damage | Same cut, one side, a little shallower | It fixed a spot I disliked |
Should you cut a third round with a smaller gouge?
I could have, and I chose to wait. The next step would be even smaller cuts with a 3 mm (1/8 in) gouge, a secondary cut on the inside. I held that little gouge up for the camera. I said I probably would not do it, because it can always be done later, and for now the band looked good. Earlier in the same lesson I said this style has no end, and that I would try to develop more designs for you to follow.

Five years earlier, on the curly cutting board, I said there is absolutely no limit to what you could do, and then I left that board the way it was.
Can the same cut hide damage on the inside edge?
It hid one on my plate, at the very end of lesson 11. Looking inside, near the edge of the dish, I was not too happy with one area. You could see the damage there.
So I used the band's idea once more, on one side only, going toward that line. The knife went in first, just inside the concave, slightly, not too much, at the same angle as before and not as deep, about a millimeter or a millimeter and a half. Take your time there, and find the position of the line before the knife moves. Then the gouge cuts came toward it, no deeper than a millimeter.

You have to be careful at this stage. I eyeballed the gouge position, but a pencil held against the plate's edge will give you a guide line if your eye is not sure yet. I like the effect. At the end I turned the plate a few ways for the camera, not sure you could see it at all. Adopting a mistake is a bigger subject, and here it only took one row of the same cuts.

How is the border on the cutting board different?
The cutting board in my beginner course got a gouge border too, in January 2018, five years before this plate. It was a knife and a gouge again, and three things changed.
The board's border is straight, and two of its sides are end grain. There I made one initial knife cut, and on the end grain I kept it shallower, because you can snap the grain and break it. Along the grain I could go a little deeper. Press too hard on end grain and that part breaks and chips away, so there I rotated the board a little when I needed to and did not force the gouge.

The gouge was a number 8, about 10 mm (3/8 in). I placed it, cut toward the line, set the second cut right next to it, and kept the angle the same all around. My rule for holding it there was to get your hand as close to the end of the blade as you can, while you can still see the edge. You can see how nicely that border gives the feel of the whole carving, I said on camera, and it was not the end yet.
And the order ran the other way. The board got its border first, and then I repeated its gouge cuts inside the design, because the wing was already in that style. The plate reversed it, with the gouge inside first and the rim second. On that board I was making my decisions on the fly, starting a row of cuts straight and then changing the flow to an angle partway along.

Where does the rim go after this band?
The narrow band is only the start. I left one more side to dress up next time. The wider band gets its ornament in lesson 12, and the detailing carries on into lesson 13. The middle was carved over the lessons up to lesson 10.
Would you like to try a ring of these cuts? Then pick up the knife first, keep the line shallow, and let the gouge find it. Every lesson of this plate, and of the cutting board too, is open to you with tuition at the school, whenever you are ready.
How it's done
- Close the middle. Close each separation in the plate before the rim gets a single cut.
- Pull the knife lines. One goes on the scratched ring and one inside the narrow band, both shallow, with the blade leaned a touch.
- Strop the gouge. Inside of the curve first, then a few strokes outside. Mine was an old number 9.
- Find the start. A couple of millimeters off the line, about six tenths across the band, with both little fingers planted on the plate.
- Cut toward one line. Each chip should pop free when the edge arrives.
- Turn the plate for the second pass. Aim every new cut into the space between two old ones, toward the other knife line.
- Leave round three. A smaller gouge can wait for another day.
Frequently asked questions
What is a scalloped edge on a carved plate?
The narrow ring at the inner edge of my plate's rim is where those cuts live, a quarter inch wide. Knife lines come first, then my gouge takes out small dishes toward them in two rounds, one from each side. You see the effect best looking down from above.
Can I use a number 8 gouge?
Either sweep will do the job, and I say so in the lesson. On this plate I chose a slightly bigger number 9, an old unmarked one I like. For the cutting board border five years earlier, I used a number 8 of about 10 mm.
How deep should the knife lines be?
One millimeter, give or take, on my plate. The gouge only has to reach the bottom of that line, a millimeter and a half at the most. On end grain, as on two sides of my cutting board, keep the first cut lighter still, so the grain does not snap.
What to carve next