
Alexander Grabovetskiy, woodcarver, School of Woodcarving · Published 2023
How hard should you press when carving with a knife?
Quick answer: Knife pressure in wood carving is the force your hand puts behind the edge, and on fine work it should stay gentle. Depth comes from repeating one cut, never from leaning on it. Push too much and control slips away, and details barely a millimeter (under 1/16 in) deep can snap off.
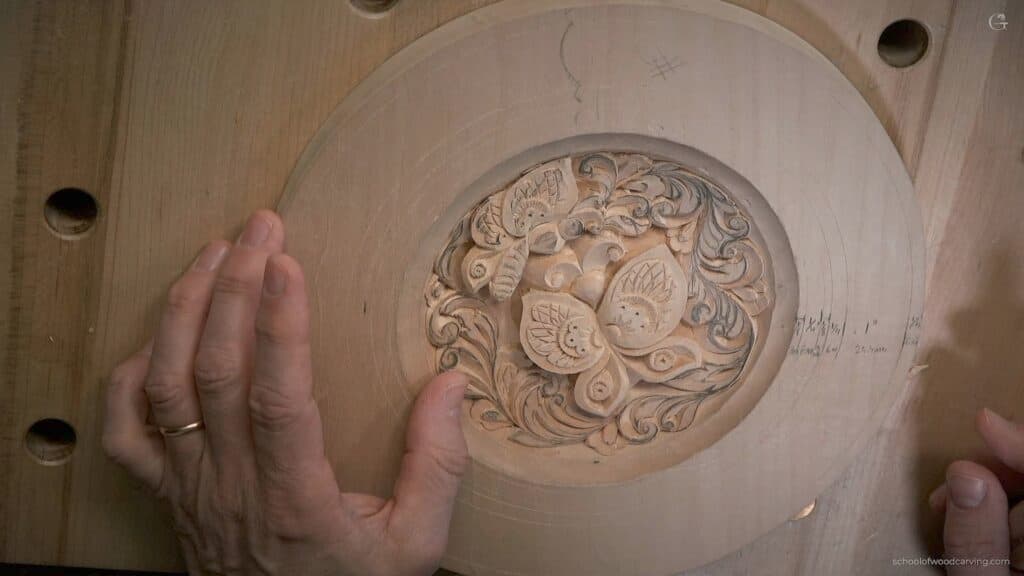
Pressure on a carving knife is the push you put behind the edge, and for fine detail it stays light. When a cut needs more depth, I make the same cut again instead of leaning on it, since the harder you push, the less control you keep. Across the second butterfly of my basswood plate, the wing detail sits about 1 mm (0.04 in) deep. Lesson 10 is three videos long, and I come back to that warning in all three.
Have you ever pressed a pencil so hard that the point snapped off? Have you ever pushed a dull kitchen knife into a ripe tomato and watched the whole thing squash flat instead of slicing? A carving knife punishes a heavy hand the same way, and the fix starts with your fingers.
What my hands did on the second butterfly
Keep the push light.
Detail cuts stay very shallow, and shallower still is better.
More depth comes from cutting the same line again, slowly, as many times as it takes.
One finger stays planted on the board.
When the wood starts grabbing under the edge, I change knives or come in from the other side instead of pushing through.
My tiniest gouge got a couple of sharpening strokes before it went anywhere near the wing.

How hard should you press a carving knife?
Less than your hand wants to. While I outlined the second wing, I said it straight into the camera. Try not to create too much pressure, because the moment you press, you start losing control, and you really don't want to lose that control.
The cuts I was making there are about a millimeter deep, a hair over 1/32 in. At one point I told you that half a millimeter would be even better, about 1/50 in, if you can pull it. There is no room in a cut that small for a blade that jumps.

My grip is just like a pencil, with my pinkie down on the board for support, because I really want to make sure I'm not attacking the wood with the airbrush. Watch my hands in the video and you still won't see how little force goes into these cuts. A camera can't show pressure, so I keep saying it out loud.
If you think it's easy, it's actually not that easy. You really have to control the pressure of the knife, and I said that while cutting a grid of lines across the wing, each one about as wide as it is deep.

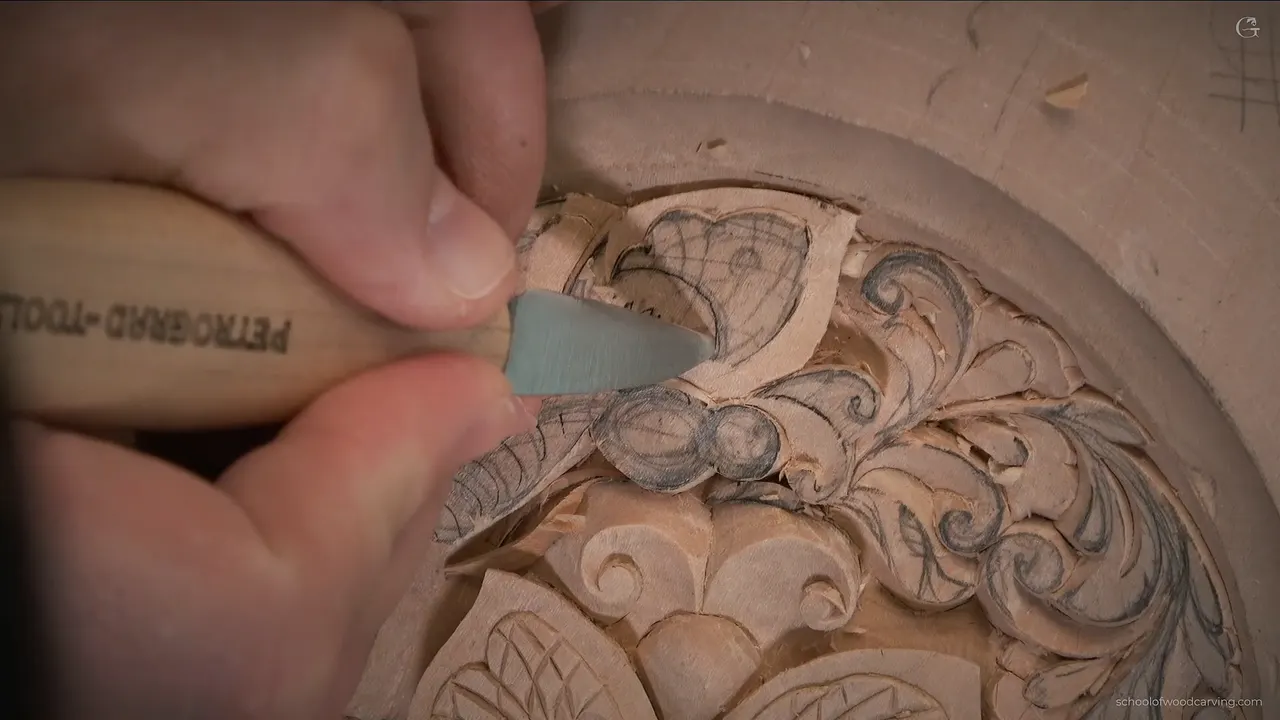
The straight knife in my hand for much of the first video is my old Petrograd, and its name is on the handle in one of the pictures below. It's Russian, and you can't buy one anymore.
Where does the second butterfly test your hand first?
First, right after the body outline. The first butterfly was done in lesson 9, and pretty much exactly the same idea goes onto the second one, with the same knife. Before any detail, I separate one wing from the other where they meet, with a cut of about 3 mm (1/8 in), maybe less, and for that cut my knife lies really low.

With the knife that low, I place my hand and look for support before I cut, because support is how I know I won't slip. My middle finger lies right underneath the handle, and my hand stays far back from the blade, since this cut doesn't need me close. A finger of my other hand helps a little too.

Every one of those fingers is there for support. The knife sits at about 45 degrees for it, somewhere between low and high. Next I move closer to the spot where the second wing meets the first and make the cut again from there.
After that I blend the separation, gripping the knife from above, because the move from one wing to the other should not be a sharp step. A small separation line keeps the two shapes from melting together. The shaping of those wings is the subject of lesson 9, so I won't repeat it here.

More than once in this lesson I apologized for moving away from the camera.
Can you shave a detail without digging in?
Outline it first. Every detail inside these wings starts with a straight-down cut, the knife at about 90 degrees, and that cut stays shallow, because it's the detail of the wing and you really don't want too deep a cut there. Then I come in from the outside toward that line, the knife almost lying on the wood.

I hold it from above, with nothing below my handle, and shave off a little at a time. At one point I turned the plate for you, so you could see it better. You're going to feel the grain change under the edge while you do this, and I'll come back to that.
What breaks when you lean on a detail?
The little ridges between your cuts go first. Inside each wing I draw a small grid, a lattice, with every line heading toward a center point that nobody will ever see, and about 3 mm, an eighth of an inch, between the lines at the far end. I think it's a good lattice.

Then the knife goes in at barely any angle, many cuts in one direction first, because that way I control the whole movement much better. I stay maybe 0.5 mm (0.02 in) off the line. Then the other direction, same angle. Right there I stopped to warn you. Don't press too hard, or you can break those details, and keep the cut under one millimeter, which is less than a sixteenth of an inch.

Lean on a grid like that and the ridges between the lines are the first thing you lose. Even the tiny V cuts on this plate are knife work, each one about a millimeter wide, under 1/16 in, because a knife leaves a really sharp line at the bottom of the groove. Get that operation right, and as I said on camera, you can carve sunflowers the same way.
The whole lesson, cut by cut, looks like this.
| Cut | Hand | Depth |
|---|---|---|
| Splitting the wings | Held really low, a finger under it | 3 mm (1/8 in), maybe less |
| Outlining each detail | Straight down at 90 degrees, pressing lightly | About 1 mm (1/25 in) deep |
| Shaving it inward | Knife almost lying flat, held from above | Still one millimeter, about 1/25 in |
| Cutting the lattice | Many light cuts, all in one direction | Never past one millimeter, 0.04 in |
| Deepening an eye | Repeat the same cut, going slightly deeper | Recut it, again and again, slowly |
| The final touches | Almost 90 degrees, then blended nearly flat | Roughly 0.5 mm, about 1/50 in |
What tells you that you're pressing a knife too hard?
You won't find a number for the force in lesson 10. What the videos do show are the signs that you're pushing, and each one comes up in them somewhere. First comes a knife that wants to slip, which is exactly why I look for support before a low cut. A ridge that gives way is another, and I warned you about it on the lattice.

Then there's the edge that starts to grab partway along a line. Rushing is a sign too, and that's why I kept telling you to take your time. When one of them shows up, I ease off and cut again.
How do you go deeper without pushing harder?
Cut it again. Near the end of the lesson, one eye on the wing needed more depth right where it meets the body. I didn't want to rush it, so I made the very same cut once more and went a little deeper.

A few minutes later, on another small detail, I poked in little by little, almost like slicing bread, and told you to recut it as often as you need. Take your time, I said, twice. The tight spaces of lesson 8 were carved the same patient way.
The body I left early on purpose. I can always refine it later and round it then, and for now it was good. Even on the wings I went back to earlier cuts more than once, one time for a slightly deeper cut and another time to bring a line I didn't like back to where it belonged, which is carving right on the line all over again.

Back on the first butterfly, one cut even changed pressure along its length, a lot more at the start, a lot less toward the round part, then more again. Pressure is something you steer, the same as the edge.
Stroke length is a separate question, and I answer it on an acanthus over a molding, where short strokes come first. Here the stroke stays the same, and only the number of passes grows.
Does the knife itself change how hard you push?
A little, and I corrected myself on camera about it. I started lesson 10 saying it really doesn't matter which knife you use, then took that back, because some knives are not flexible enough and you will have some trouble with them.

For the tight spots in these wings I switched to a pair of curved knives by Drake, and the name is stamped right on the handle. One of them works wonders here, since I can hold it comfortably close to the work and take off exactly as much as I want. Its curve helps me get in without damaging the edge, where a straight blade would be in the way. I talk about those knives more in lesson 7.
Some tools you simply have to have, and for this kind of carving those two are a must for me. Gouge work on pierced grapes is another case, and there I explain why a mallet can give more control than your hand.
Why does the wood suddenly fight the blade?
You feel it partway along a cut, a spot where the edge starts to grab. It feels as if the grain has changed direction. I used to say exactly that. The grain itself still runs the same way, and what changes is the way you attack it.

I know the rule says to carve with the grain. Sometimes you have to break that rule, because following it is just impossible in a spot like this. With sharp tools, that shouldn't be a problem. When it does grab, I change the knife and come at it from the opposite side.
What does a sharp edge have to do with pressure?
A really tiny gouge came out in the middle video, for small cuts and plug cuts on the wing. Before it touched the wood, I gave it a couple of strokes to make it a little sharper. Then, making the holes, I tried not to push it too hard. A plug cut lifts out a little plug of wood, and I explain it fully on a furniture panel.

Sharpening is its own subject. My sharpening course has a whole lesson on stropping, and on a curly kitchen board I show how I keep a knife sharp in the middle of a project.
Is a light hand slower?
It is slower, and I won't pretend it isn't. The three videos of lesson 10 run about forty minutes for one butterfly, and I still skipped most of the scraping, because I didn't want to spend air time on it. You can spend a lot longer on the chamfering too, as I said near the end.

It doesn't look clean at first. You can always scrape it. When I do, it's a utility blade drawn lightly with the grain, and the pencil marks come off with it. There's no end to the detail you could add. You don't need to, though maybe you want to have some fun.
The very last cuts on this butterfly went almost straight down, about a half millimeter (0.02 in) deep, and I blended them while the blade lay nearly flat. Don't make those too deep, because it won't look nice. Last, I showed you the whole plate. Two butterflies, and the rest of it waiting.

Where do you start if a knife is new to you?
A flat board first. My bird of paradise board is where I send people before this plate, because the undercuts and shadow work here ask for a steadier hand than a first project. Every lesson of the plate, all thirteen, sits behind the same tuition, and you can see what it costs before you decide. The rim comes next, in lesson 11.
Do you have a knife in a drawer somewhere? Could you keep one finger resting on a board for ten minutes? Then try one shallow line on a scrap, and when it needs more, cut it again instead of pushing.
How it's done
- Plant a finger. Rest your pinkie or another finger on the board before the blade moves, so there is always a stop under your hand.
- Outline straight down. Stand the knife upright and trace the detail shallow.
- Shave toward the line. Lay the knife nearly flat, hold it from above with nothing beneath the handle, and take thin shavings from the outside in until you meet the outline.
- Cut a grid one way first. Every pass goes in one direction, then the other direction at the same angle, a hair off each line.
- Deepen by repeating. Go back into the cut you already have whenever a spot needs more.
- Switch sides when it grabs. Change knives or approach the spot from its other side, and touch up the edge before the smallest tool goes in.
Frequently asked questions
Is it bad to push hard on a carving knife?
On fine detail it works against you. Force is where the steering goes, and a grid of shallow cuts can lose its little ridges to one heavy pass. Light passes, repeated as often as the spot asks, reach the same depth while your fingers still decide where the edge travels.
Why do small carved details break off?
Thin ridges between shallow cuts give way under a leaning blade. I stop to warn about exactly this while cutting the lattice on a butterfly wing, since all of those lines run together toward one center point and the wood left between them keeps getting thinner. Keep each pass shallow and come back for more instead of bearing down.
Does a flexible carving knife help?
A blade that is too stiff can give you some trouble, which is why I took back my own line that any knife will do. For the very tightest spots on this plate I used two knives with curved blades.
What to carve next