
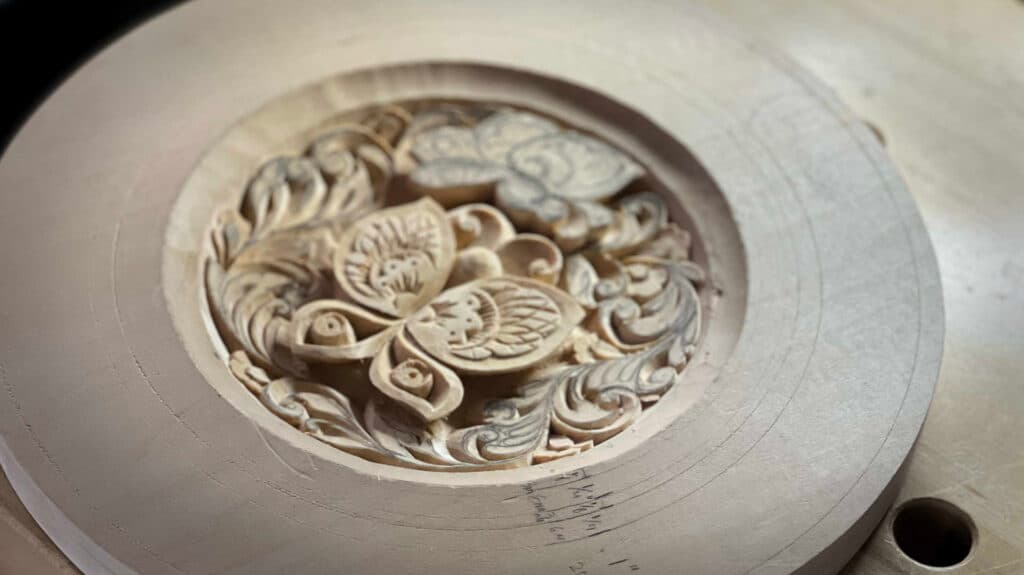
Alexander Grabovetskiy, woodcarver, School of Woodcarving · Published 2023
How do you carve a tight space between two carved shapes?
Quick answer: A narrow gap between two carved shapes is work for a small knife. You hold the blade almost flat with your hand resting on the work, and slice the waste away thin, like cutting bread. Stop when that floor matches the main background, and never cut through to the back of the board.
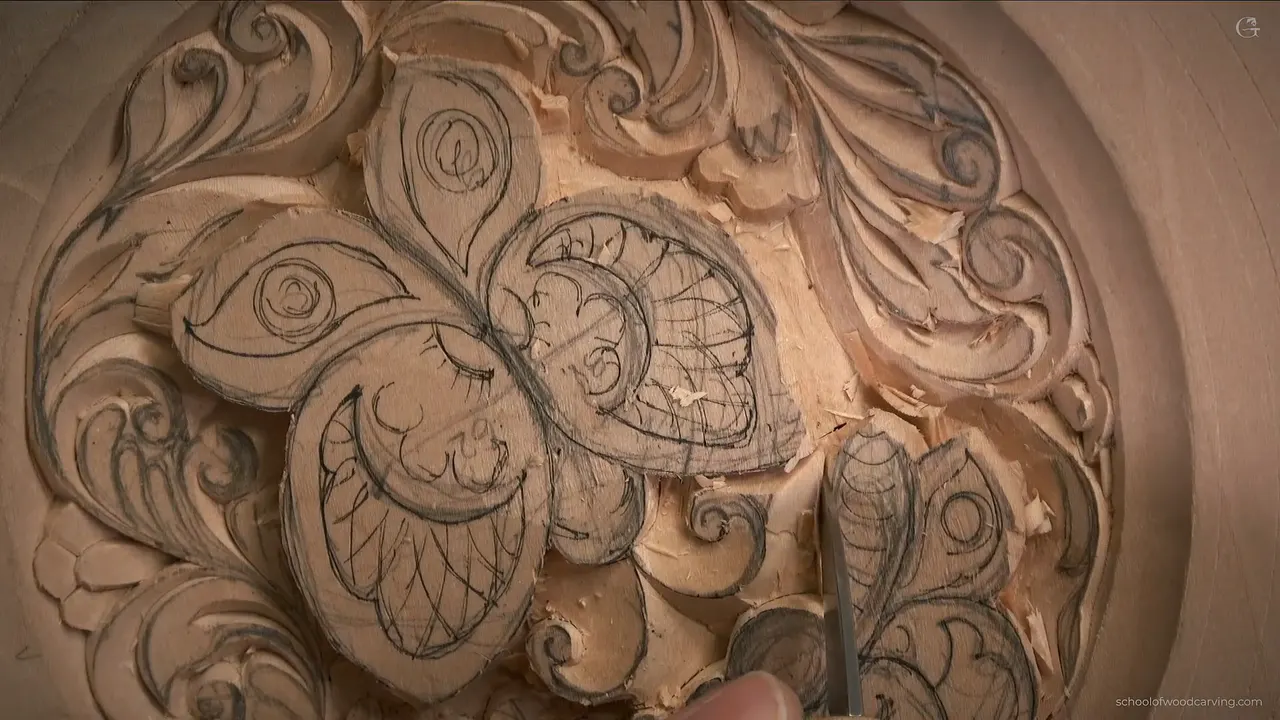
Carving a tight space between two shapes is slow work for a small knife. You lay the blade almost flat, rest your hand low on the wood, and take the waste out in thin slices until that floor sits level with the rest of the background. On my butterfly plate it's the pocket between the two butterflies, and all of lesson 8 goes into it.
Have you ever looked at a finished carving and wondered how anybody got a tool into the narrow places? Would you like those places on your own board to come out clean and deep? Then take the smallest sharp knife you own and slow your hands down.
I'm going to be honest with you. Before I started digging that pocket out, I said on camera that this would be hard. Both butterflies were already outlined around it, and every slice I made in there had to reach the undercut under a wing. I left only about 3 mm (1/8 in) between shapes when I drew this plate. The plate is a relief carving, so a rough pocket shows. By the end of this page you'll know how I got the knife into that corner, and how I knew when to stop.
What the knife does in a narrow pocket
Lay the blade close to flat, and keep your hand low on the plate.
Thin slices do the digging.
Begin at the pencil line and work toward the undercut.
The floor stops level with the main background, well short of the back of the board.
The knife goes somewhat straight along the body, though a slight angle works too.
Choppy is fine for now.

Why is the gap between two shapes the hard part?
The two butterflies go back to lesson 2, and the drawing that fills the space around them to lesson 4. One wall of the pocket already leans the wrong way for your knife. Under each wing the undercut runs inward. I set that lean in lesson 3, and in this corner I can't turn it around, so the knife goes back into the old slot and reaches underneath as far as it will go. That's the only spot in this pocket I'd call somewhat difficult. It's really, really sharp, and it goes right in. Round the head I stand the blade up, almost at 90 degrees to the plate. Don't go crazy with the undercut in there, because it's a hard area to clean.
Then the real digging starts, and it's a really interesting area. The pocket has to be excavated, and every slice has to connect with that undercut, right back to my pencil line. A little curl sits in the gap, and it looks exactly like a volute. It isn't one. The idea is the same, though. That whole gap is negative space, and empty space is doing a job on this plate too.

Why outline the curl before you clear the floor?
Outlining it first keeps the knife off the part you mean to keep. I go round the curl with small, really small cuts, then do the same on the other side right away. Only after that do I start removing the section beside it, a little at a time, with the same knife.
I kept excavating and blending like that, without rushing. You'll see me stop more than once and look before the next pass goes in.

Which knife fits into a gap that small?
Any sharp knife you trust will fit. For most of the pocket I used the tiny one, a small knife made by Drake. Late in the lesson I put it down and picked up a Petrograd knife, just to prove the point. A bigger knife works too, and so does the Pfeil number 12 I used in another beginner class. There's no limitation here. The old carvers of northern Europe did whole houses with a knife and maybe one simple gouge.

A gouge would be really nice in this spot, I'll admit. Without one it's still possible to make every pass the pocket needs, and you could do the whole thing with the same knife. On the course page I say a small spoon gouge helps in tight spots, and it does, but it isn't required. It's all about taking your time.

How flat should the blade lie?
Almost flat, with your hand held so low that it touches the plate. Watch my hands in the video and you'll see the knife nearly lying down, while my fingers stay pretty much on the wood itself. Held that way, the blade can slip into a space too small for your fingers to follow.
In lesson 7 I explained why the knife sits so low. Raise it and a straight line gets hard to make. Lower it as much as you can and a beautiful, flowing line comes much easier. A blade that small and tiny lets you get really low. By lesson 9 I'm still saying the same thing about a knife laying almost flat.
I showed my grip in lesson 7 as well. I hold the knife like a pencil, with my middle finger down as a support and my hand placed solidly, while the other hand guides the pass. Pinching it that way gives me a lot of control and a really clean cut. It isn't airbrush work, with the tool floating in the air.

I pull toward myself, carefully, and try not to force it. On the second side I took one pass right to the center of the butterfly's head.

Why take the wood out in thin slices?
Thin slices let you stop before you've gone too far. I know some people like to see one single cut that takes everything at once. I don't think it's a wise idea in a spot like this, and I don't need to do it all in one go.
Carefully, carefully, carefully, and without forcing anything. What I do looks more like cutting bread. The knife walks down into the wood in many small passes, one after another, and it takes me a lot of them to reach a result I like.
Don't go too deep right away, because that's not going to be good. It's easier to take the excess off little by little and get to the result in small steps. When each slice is thin, a wrong move costs you very little, and you can see where the floor is after every pass.
How long each stroke should run is a separate question, and I answer it in an acanthus lesson. Here the worry is depth, one thin layer at a time. Short or long, a stroke in this pocket stays shallow.

Lesson 7 had a tight spot of its own, right beside a thin stem, and the lesson 7 page has that story.

Where do you start, and which way do you work?
Start at a pencil line, and work toward the undercut that's already there. Partway through, I stopped and drew that line very close to the edge, no more than about 1 mm (0.04 in) away, to make sure I'd carve the right line. Then I attack from the line toward that cut, a little from each side. A line that close gives the knife something exact to aim at.
The swirl gets more detail later in the course. For now, it's good the way it is.
| Spot | Blade | Depth | Watch |
|---|---|---|---|
| Under each wing | Back in the old slot, turned under | Very deep | The lean from lesson 3 stays |
| Round the head | Nearly upright, close to 90 degrees there | Somewhere deep | It has to meet the undercut |
| Along the body | Somewhat straight, or a slight angle instead | Background level | Each pass starts at one spot |
| The open floor | Almost flat, walking down in thin slices | Main background | Nothing goes through to the back |
| The little curl | Carved round, then left alone for now | Left high | More detail comes in later lessons |
| The second side | The same idea, with the plate turned | Same depth | Done right after the first side |

How deep should the floor of the pocket go?
About as deep as the main background, which was already down from the lessons before this one, and I kept checking that as I went. At one point I had to take off more of the mass and make a slightly deeper pass. Once one side matched, I did exactly the same on the other side. When the pocket floor sits at the same level as the rest, the butterflies read as standing on one ground.
The first part of the lesson ends with me asking about one more patch, working it for a bit, and saying that is good.
Near the end I said it looked like I was almost there. Soon after, I was where I wanted to be, about the same level as the background, though I'm not sure the camera caught that spot. All I had left was one small section.
Watch the back of your board. On a plate only 19 mm (3/4 in) thick, with the dish hollowed and the background dropped about 6 mm (1/4 in) more, there's little wood left under that pocket. If 6 mm (1/4 in) feels like too much for your board, take 3 mm (1/8 in) instead, and the plate still works. My board also had old practice carving on the back, so I wasn't going to go through. On camera I called it carving, then took the word back. Not carving exactly, but you know what I mean. I said the same in lesson 7, where I had to be mindful and couldn't go too deep either, because some carving sat on the other side, waiting to be removed later.
A big open background on a furniture panel is a different job, and it has its own lesson.

Does the knife stand straight around the body?
Straight is my default there, somewhat like a 90 degree cut. Although, I don't really have to. I think a little angled cut works there with no problem, so on this plate I gave it a slight angle, tipped toward the intersection, and started each pass from the same spot.
Pay attention to how the knife sits in my hand there. It comes naturally, just a slight angle.

Why keep turning the plate?
Turning it makes the next pass a lot easier. Early in the last part of the lesson I stopped, rotated the plate, and went on slicing. It's a tiny pocket, but still. I say the same thing in lesson 9, that it's better for me to rotate the plate. Your wrist has a direction it likes.
If a chip won't fly out, I always have a chance to recreate the pass. Then I can feel it's loose, and it comes right out, so never pry it with the blade. Don't worry about the loose chips lying around, either.

What matters most while you clear it?
Your angle matters most, and I said so twice in a row on camera. If it wanders, you won't train your hand, and some spots end up much deeper than others. That doesn't look nice. So take your time, remove the material little by little, and keep checking the knife is at the right angle.

How do you blend the floor in under the wing?
Keep working each area until the floor runs in underneath the wing, smooth and nice. Around one part I had to go a little deeper before it would blend. When everything blends in nicely, that's what we're after, and if you take your time you can blend it even better than I did.
A little choppy is okay at this stage. You can always refine it later with a second pass and make it look smooth and nice.
When I stopped to show you how it looks, the light was hitting the pocket straight on, and it came out lighter on camera than it will be. Once everything's done, the shadow in there will read a little darker. Don't judge the pocket by the video.

By then the second side was getting done as well. At the end I said it plainly. That part is done, the part right between them, and some cleaning still needs to be done.

What do you need before you try a pocket like this?
A small sharp knife, a scrap of basswood, and no hurry at all. If you've never carved a flat board with a knife, start with the bird of paradise board and come back to this plate after. The whole plate runs across thirteen lessons, and the rim alone takes three of them. The videos for every lesson sit behind the same access, and you can see what it costs before you decide.
Do you have a small knife with a good edge? Then clear one pocket on a scrap board this week.
How it's done
- Draw the line close. Put a pencil line within about 1 mm (0.04 in) of the edge, so you create the right line when you carve.
- Pick a small blade. Any knife that holds a good edge will do. Mine was a tiny Drake.
- Lay it nearly flat. Keep the handle low, with your fingers touching the plate, and pull toward yourself without forcing.
- Walk down in thin slices. Take many shallow passes, like slicing a loaf, and stop when the floor matches the background around it. Mind the back of a thin board.
- Turn the plate. Rotate the work whenever the next pass feels awkward.
- Refine it later. Leave the floor a little choppy for now, then smooth it with a second pass and blend it in under the wing.
Frequently asked questions
Can you carve a narrow gap with only a knife?
Knives did all of it in lesson 8 on my plate. A gouge would have been nice in that pocket, and I still did without one. Pick the smallest sharp blade you own, since a small blade can be held really low, and keep your hand resting on the wood while you slice.
How deep does the floor between two motifs go?
As deep as the main background around it, and I check that often while I work. Watch the back of a thin board, too. My plate had old practice work on its back, so going through was simply not an option.
Why hold the knife almost flat in a narrow spot?
A raised knife makes a straight line hard to get. Held as low as you can manage, it gives a flowing line far more easily, and your fingers stay on the plate for support. My tiny Drake helps a lot with that, too.
What to carve next