
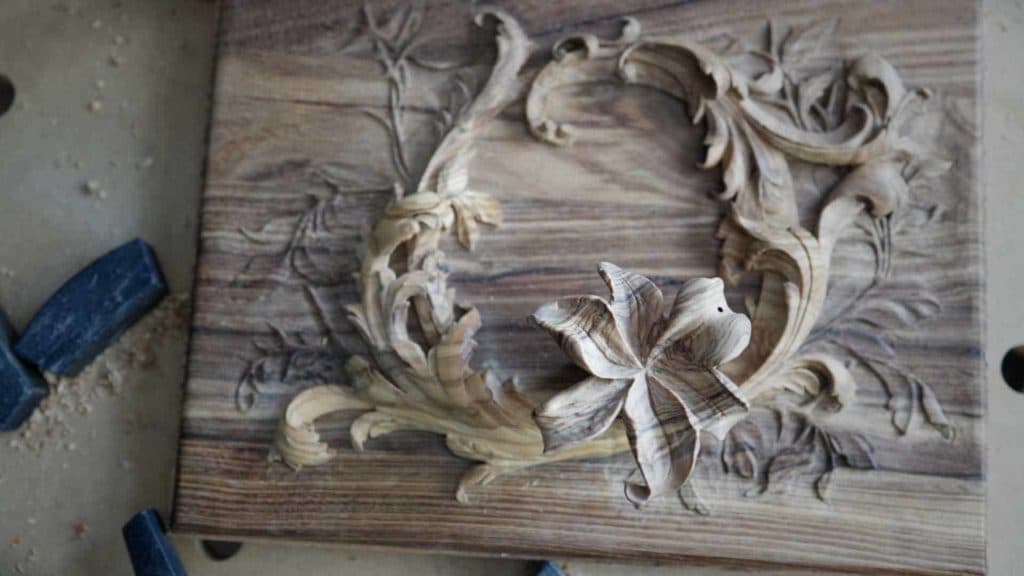
Alexander Grabovetskiy, woodcarver, School of Woodcarving · Published 2019
How do you carve the stamens of a lily in wood?
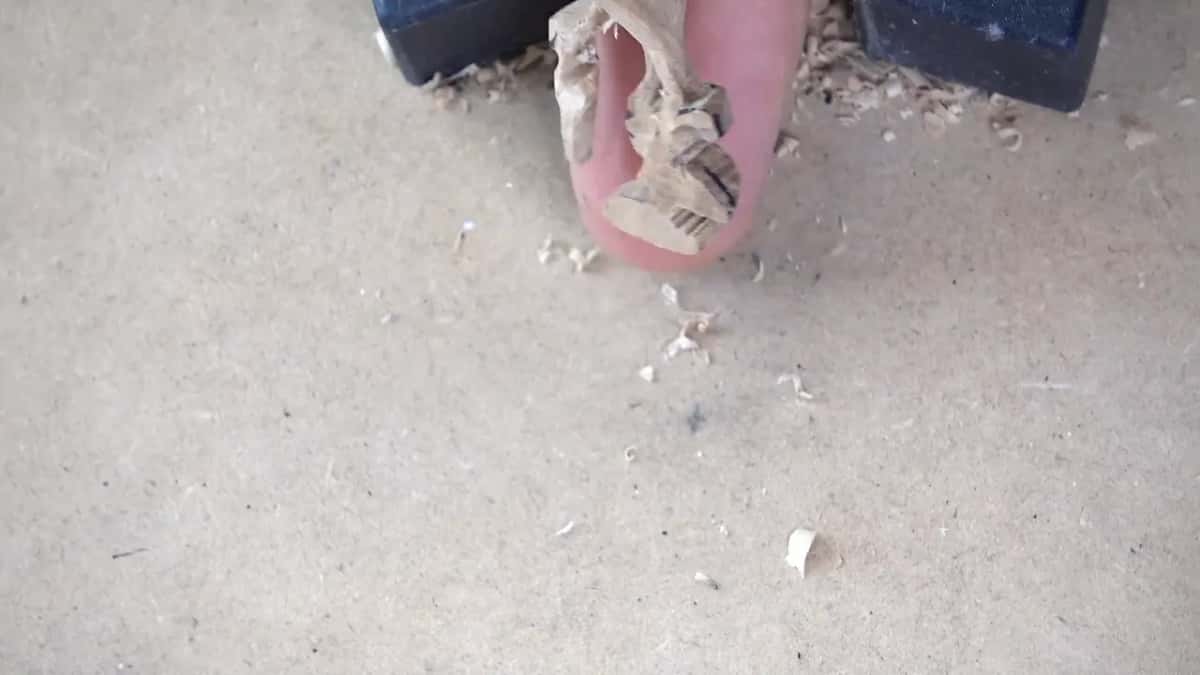
Quick answer: Carving lily stamens is jewelry-scale work done on a separate piece. I sawed mine from a plain olive wood offcut, left a spare tab on it for the clamp, and shaped the tiny heads and legs with veiners and a small knife while one fingertip supported the part from underneath.
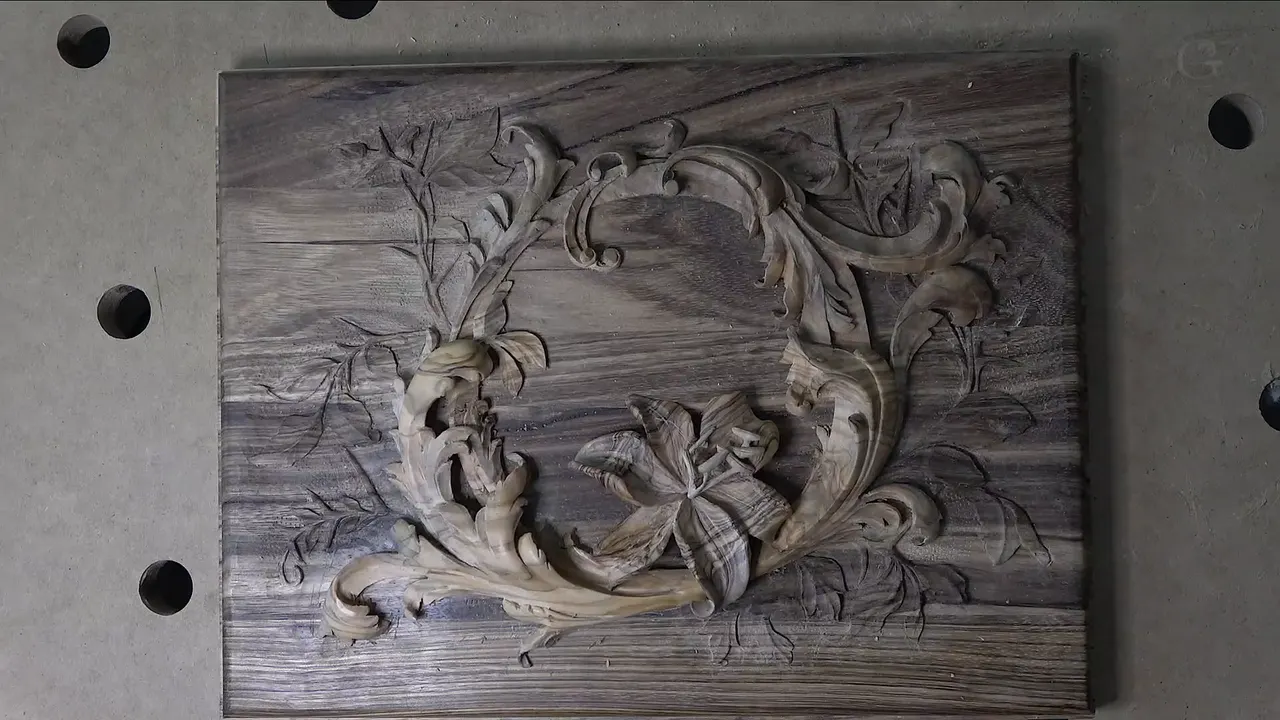
The center of a carved lily is a small carving of its own, made on a separate blank and set into the flower last. On this olive wood Bible box the whole cluster sits on the tip of my finger. A handle left on the wood gave the clamp something to grip, and a finger underneath did the rest.
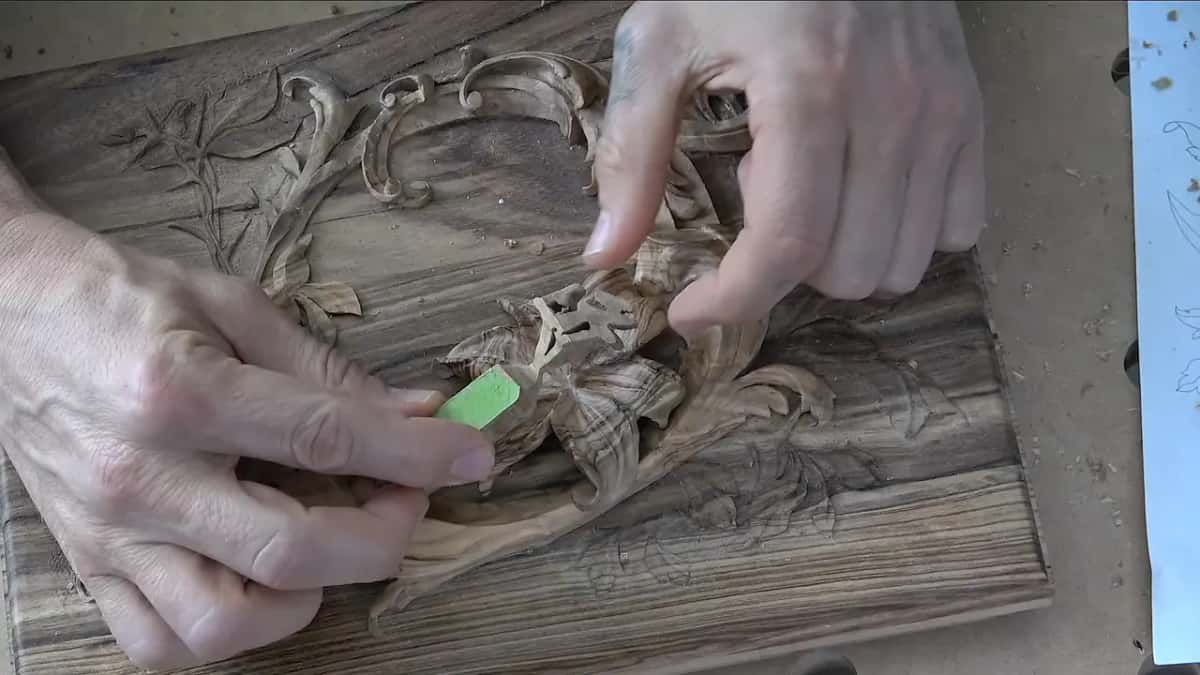
Have you ever tried to hold a part too small for any clamp? Has a tiny piece ever moved under your gouge, just a hair, one second before it snapped? Nine of the thirteen videos in this lesson go to exactly that problem, a cluster of stamens for a lily, and most of the work in them is keeping it whole.
The lesson belongs to the olive wood lily box course, and it opens with the flower itself. Lesson 10 is where the lily takes shape, and the first four videos here finish it and fit it to the lid. Along the way a mistake left a hole in the flower. A pre-colored epoxy putty stick filled it, and the color matches so well that it looks like I never made that mistake. The cracked face of the lid got a different answer in lesson 9. Everything after that, parts five through thirteen, is this cluster.

Six habits that kept this cluster whole
- Saw the blank from the calmest, least figured scrap you own, with a tab left on for the clamp.
- Square walls first, and no rounding until the whole movement looks right.
- A fingertip goes under the spot being carved, and never pushes up too hard.
- Taper the heads, but stop short of a point.
- Keep the back thicker than the front.
- Tack the lily down with a spot of glue before anybody drills for the dowel.
Which piece of wood makes the stamens?
A leftover from the main cutout, and the plainest corner of it. Olive is loved for the movement of its grain and the play of its colors. In something this small I wanted as little figure as I could find, because a piece with a lot of grain would have been really hard to carve.
I did not show the first pass on the scroll saw. Sawing a shape like this is not complicated, and lesson 1 covers the saw. Then the back went through the saw too, so the cluster would come close to the curve it sits on inside the flower. Getting close is plenty. The top of it stays semi-flat, since it has to sit down inside the lily.

Why leave a handle on a blank this small?
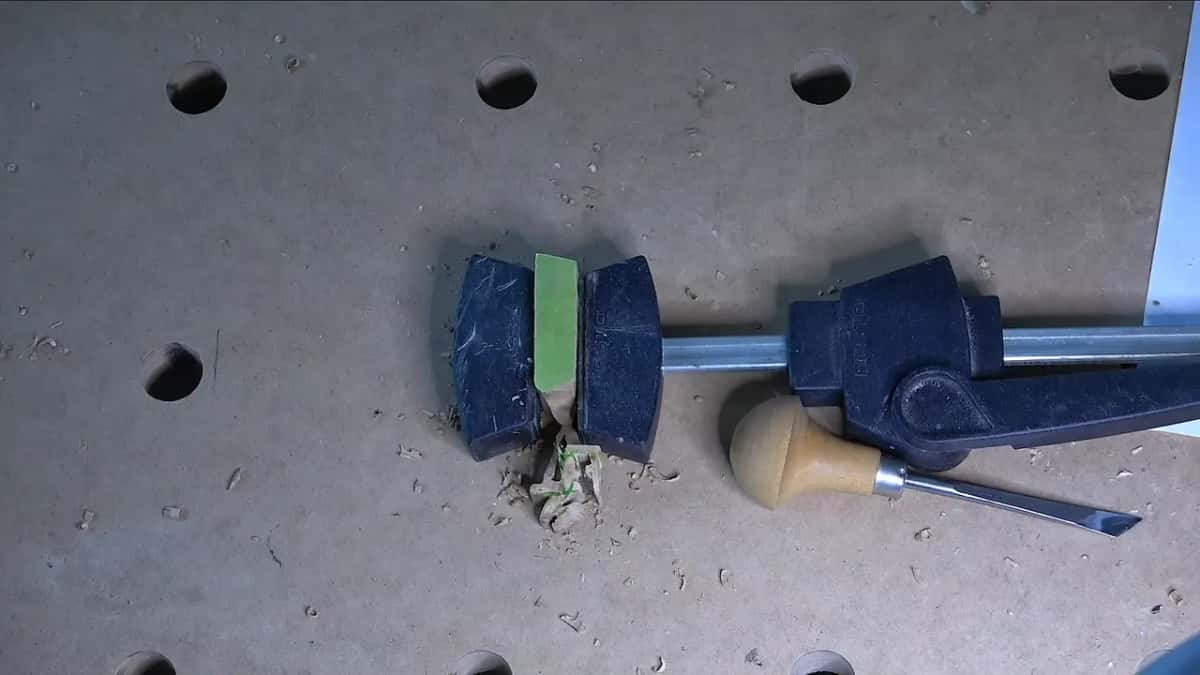
A part this size gives a clamp nothing to grip, so the blank keeps a tab of spare wood until the very end. The obvious shortcut is to saw around the whole outline and keep only the middle. Without the tab it would have been hard to hold at all.
With it, the piece went into the clamp, and I could turn it and come at it from any position. The parts stay just as fragile, but now your tools can get to them. I planned the same trick for the olives in lesson 13. Here the tab came off last, on the scroll saw, once I decided to stop carving.
What is the plan for carving something this small?
One section at a time, between lines you promise yourself you will leave alone. My drawing had already let me down. I got too excited when I drew it, drilled a hole too big and too close to the edge, and lost part of the design that way.
So I redrew it by eye, just looking at the layout. At this size, close enough is fine. A darker marker went on the lines I meant to keep, and between two of them nothing gets touched.

Seen from above the cluster is an oval, with a semi-oval below it, and from the side every part should move over the center. Each piece also tucks a little under its neighbor.
Roughing comes first, even at this size. I roughed each part in with a number 11 veiner at 3 mm, about 1/8 inch, then went down to 2 mm, about 5/64 inch, and did not worry yet about clean surfaces. The walls went in square, at 90 degrees, and I call them my canvas. Nothing gets rounded until I am 100 percent happy with the overall movement.
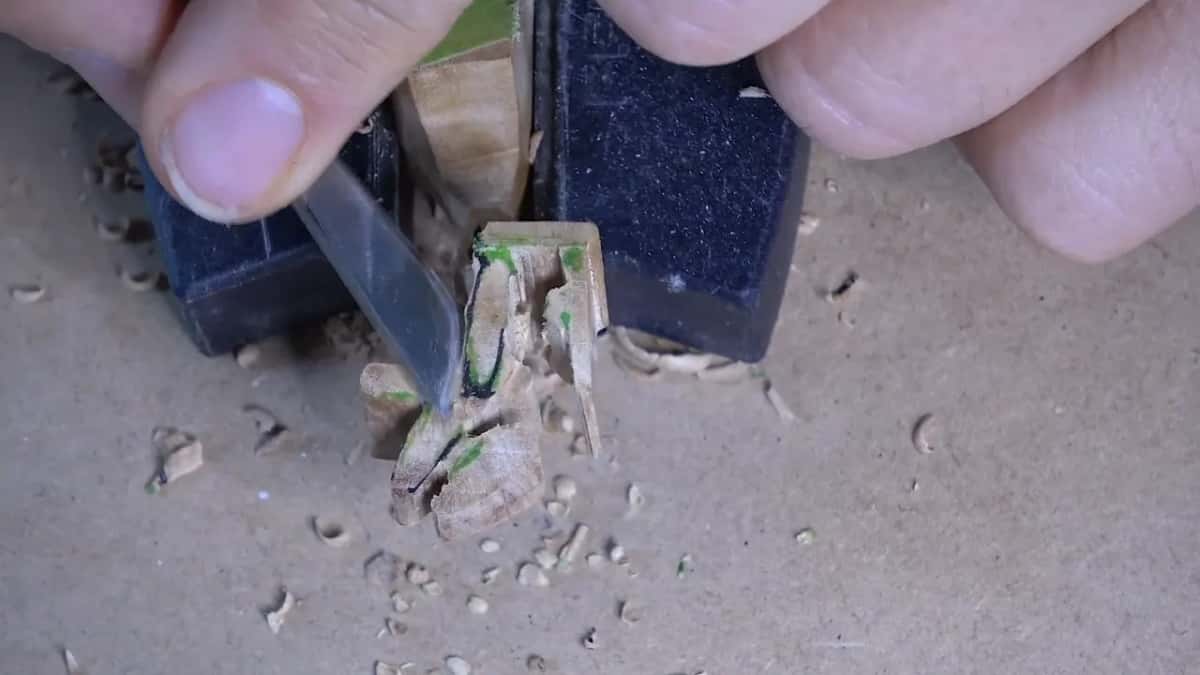
Some decisions only show up in the wood. On paper a shape can look right, and then the carving shows you a better one, so I make those calls as I carve.
What holds something that tiny while you carve?
A single finger, pressed under the spot the tool is pushing on. It gives the wood counter-stress. Every push leaves a little stress behind, and a piece this thin always wants to break under it.
The same finger can do the damage. Push up too hard from below and you break the piece the other way, with two points of pressure working against each other.

By part seven the wood moved every time the tool touched it. So the pushing stopped. I slid a sharp edge through with almost no pressure. If you feel a lot of resistance, resharpen, because a slight dullness is enough to give you trouble. Once the tool was fine and one area inside the wood was simply tougher. If I need to wiggle, I will, and if you want to judge me for it, I am okay with that.
I have made the pushing mistake many times, and every time I was rushing. Rushing, not Russian, although I was born in Russia.
No pressure, just super sharp tools. That is the only way to do it, and if your tools are dull, do not even try, because you will cut yourself.
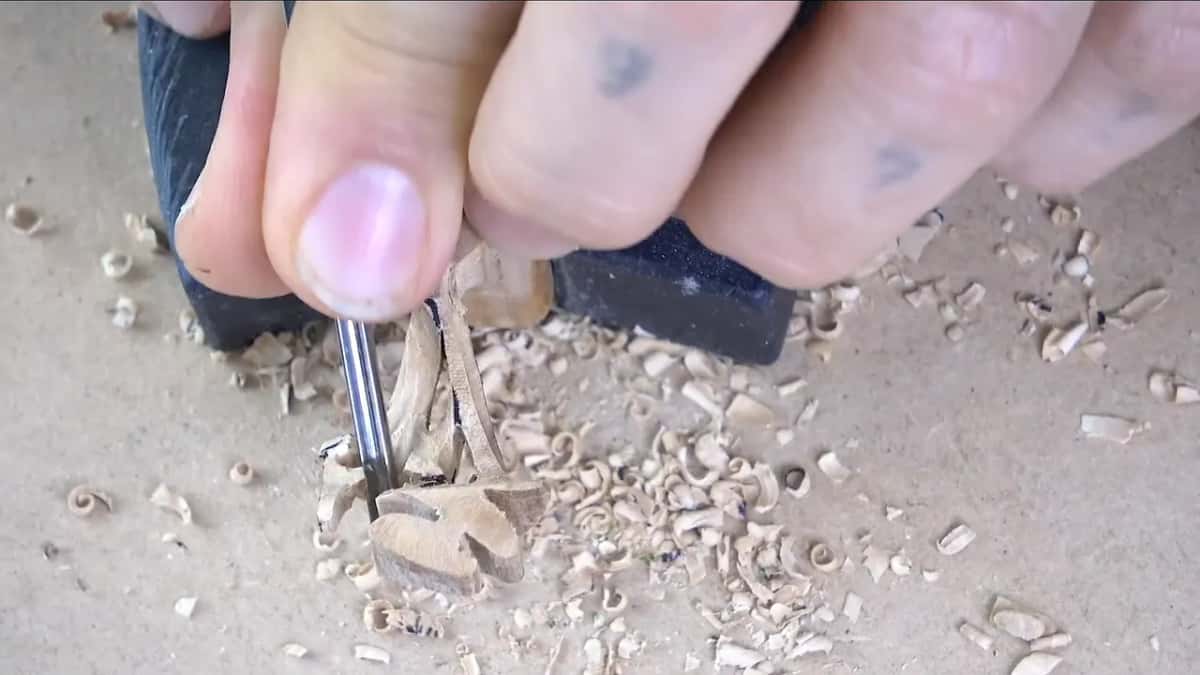
That finger is easier to watch than to read about, and the whole lesson is open once you have access to the school.
What goes wrong on a piece this fragile?
Almost everything in this table happened on this one cluster, or came close enough to make me stop and look twice.
| What went wrong, or nearly did | My fix at the bench, right then | Why it helps |
|---|---|---|
| The part moves under the tool | Finger under it | It pushes back against the tool |
| Overdoing the support | Ease off | Two pressures fight each other |
| Catching grain | Touch up the edge | Either the tool is dull or the wood is tough there |
| Part of it very nearly snaps | A drop of clear super glue | It holds |
| Too thin to last | Leave it thicker, especially at the back | People will probably touch it |
| Splitting grain | Look closer | Everyone will look at that spot from above |
The worst moment came in part seven, when I almost broke it. I ran a little clear super glue into the spot, the same kind of fix lesson 7 uses on hairline cracks, and kept going, because the final detail would be carved right over it.
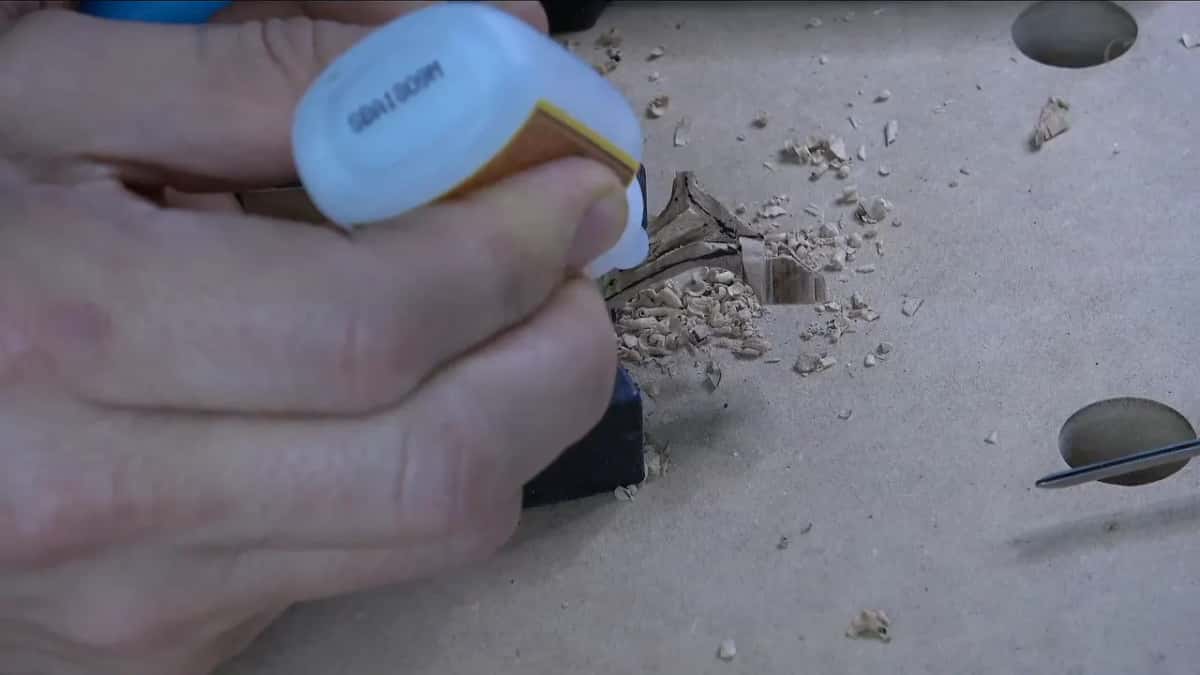
How are the little heads and legs shaped?
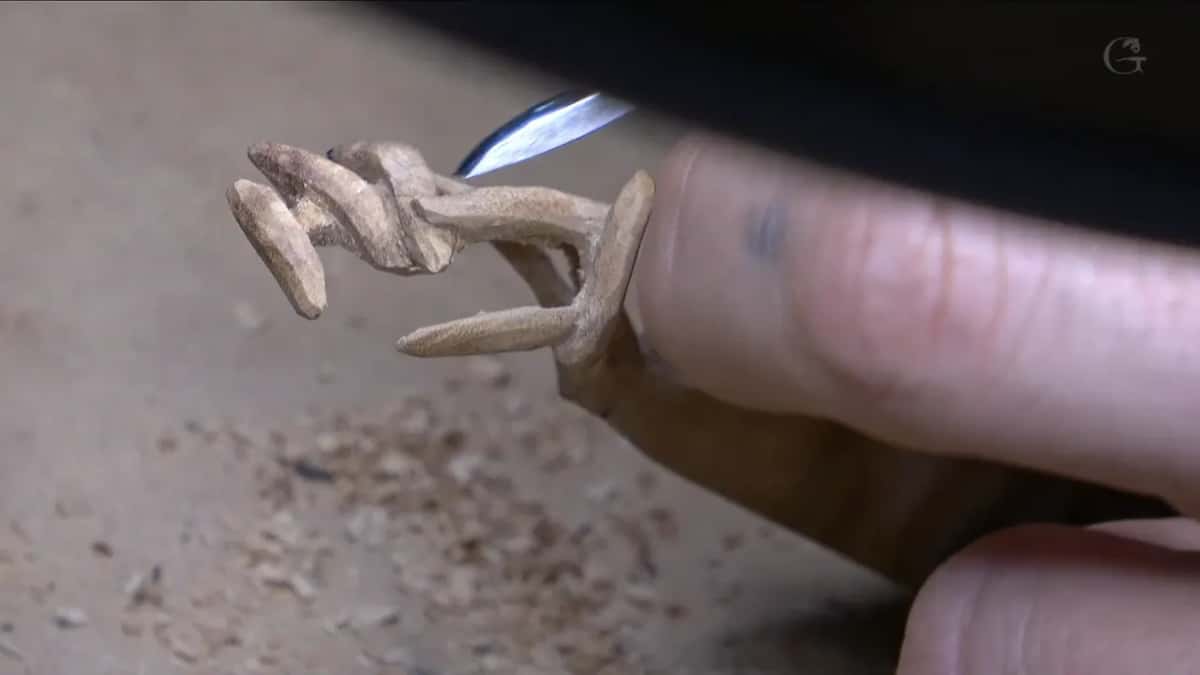
Every head gets a taper, and none of them is a true oval. I never took one all the way to a point. A botanist would call the heads anthers and the legs filaments. I call them legs, and I am not even sure you can call them stems.
The legs came down to about 1 mm, roughly 1/25 inch, in places. At that size the tool is scratching more than carving.
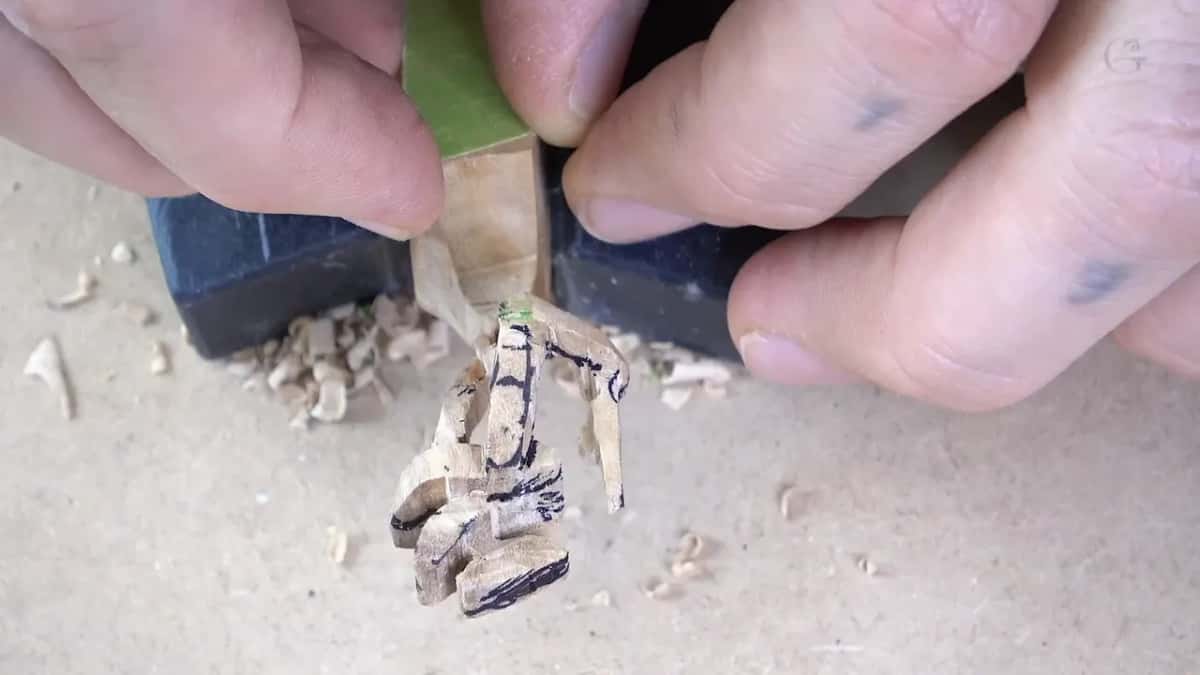
Where each leg meets the main part I carved a really tiny undercut, and it still gives some shadow and some separation. Most people will never understand why those tiny undercuts are there. Shadow is the reason.
Real stamens are a little smaller than mine, and I know it. Carved true to size they would break for sure, so I found a compromise between the real flower and one that survives a box people will handle every day. Of course, I am not going to tell anybody that.
Spare thickness goes to the back. On the backside I really do not worry about a part being too thick, and anywhere I can keep a spot thicker, I keep it, so nothing gets too weak. Near the end I carved a few small concave cuts right in the middle, and they gave the whole cluster a little twisting look.
And for anybody who knows flowers well, I left one of the main elements out on purpose. I thought about adding it and decided the lily was fine without it.
What rounds the corners on parts that tiny?
Several chamfers in a row, each one at a new angle, until the corners read as a fillet. Like a diamond, the result keeps ridges that catch light and cast shadow.
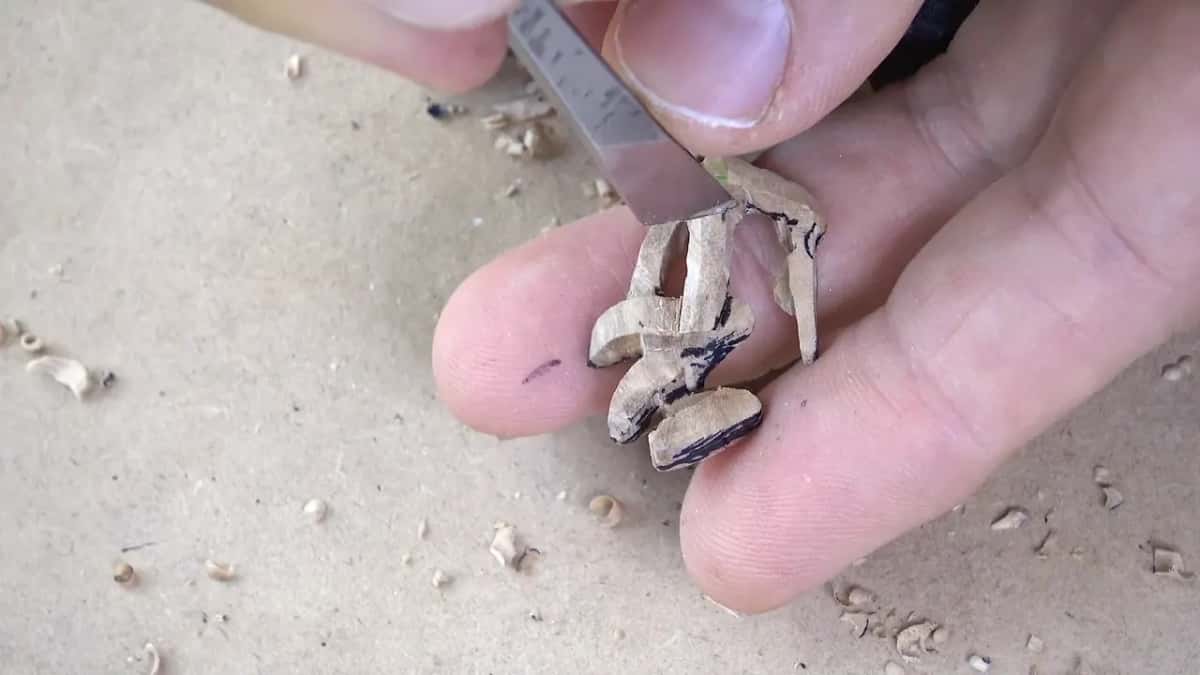
While I chamfer I roll the tool slightly and slice, instead of pushing straight in. A back bent gouge, for instance a number 5 at 3 mm or 1/8 inch, is the safer tool to me, because these parts are like goose necks that rise above their neighbors. Nothing is wrong with a regular gouge, either. The last high spots got shaved with a number 8 back bent, and the surface came out really smooth. A straight number 8 does the same if you do not own one.
Much of the leg work went to a micro knife from the Peter Benson collection by Ashley Iles, and a Pfeil number 1 skew in a palm handle parted the pieces early on. Some people would not call this kind of knife work carving at all. I do.

A number 1 by Dockyard, 1/16 inch or 1.5 mm and beveled on both sides, took the saw marks off a wall so small I called it a micro wall. If sizes like these are new to you, All About Tools for Wood Carving walks through them.
What makes micro carving different from ordinary carving?
Micro carving works at the scale of jewelry, and at that level the only tools that really work are micro tools. Nothing at that level can take any force.
Most micro carving stays a solid piece. You can carve a small turtle or a bug and it remains one lump. This cluster has three-dimensional movement all around it, and that makes it harder. On almost every pass I held my breath, because breathing felt like enough to break it.

In part ten I switched to a magnifier lamp, because I really needed to see closer. Some carvers go further and use a jewelry makers' microscope on adjustable arms.
On the screen a 2 mm tool, about 5/64 inch, looks huge. It is not. The whole bunch fits on one fingertip. Carving on camera has its own trouble, too, and I kept covering the camera, yet I still think it is a blessing that I could film all of it.
Is a rotary tool faster for details this small?
A Foredom or any other rotary carver would not have made this cluster easier. It catches a lot more wood than a blade, and parts this thin break from exactly that. Very small diamond cutters can manage it, and even then I think you would spend about the same time.
How does the cluster hide the dowel?
The plan puts a dowel through the middle of the lily, with the stamens sitting right on top of it. Keeping the center separate is what lets it cover the fixing.
Before any glue, I sawed the tab away and set the cluster in place. It stands a little above the petals, at about the same height as the highest spots on the lid.
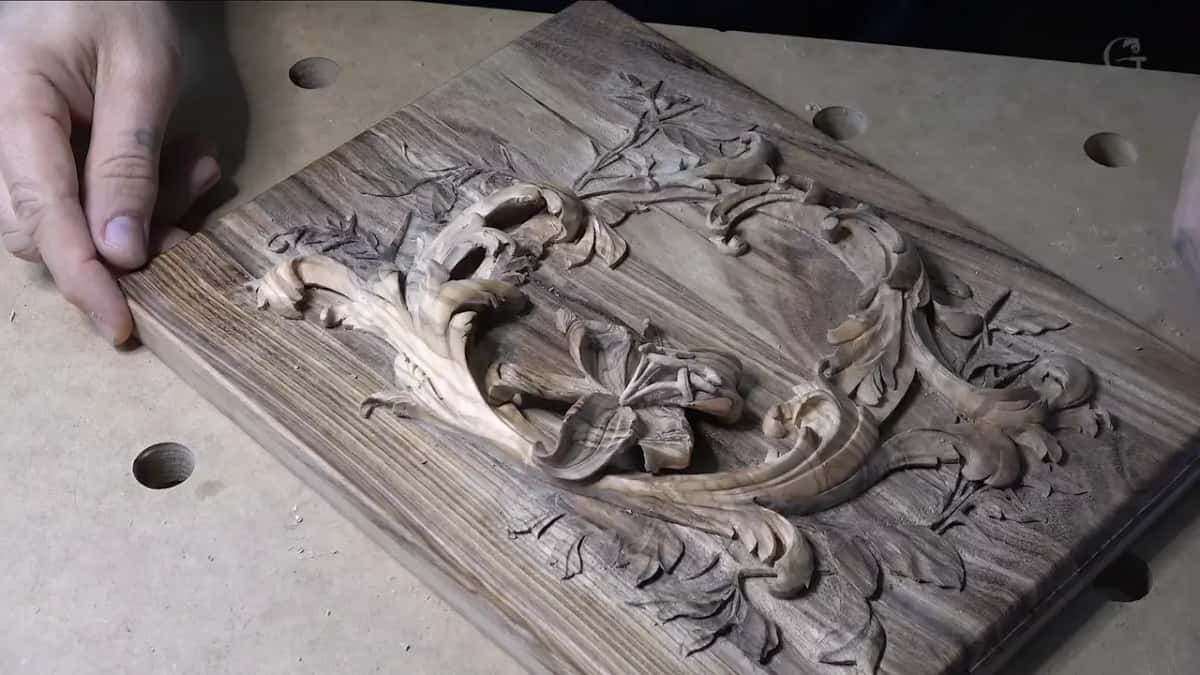
Then the lily went onto the lid with a spot of Gorilla wood glue where the two touch. That spot only holds the position. The real joint comes later. Once it dries, the plan is to drill through the middle for the dowel and set the stamens over it.
Looking down on the whole lid, even the low relief blends with the lily into one movement. I really, really like it. A couple of small flowers and the olives are all that is left.
How much patience does a cluster like this take?
More than the sawn blank suggests. When I sawed that small shape out, it looked like it was not that complicated. It still takes a lot of patience, and if you do not believe me, try it. Your fingers hold it up the whole time, and before every pass you think about the angle and about not breaking what you already have.
Carving trains you, too. It makes you more patient, kind of. I wish I could say always.
My granddaughter was in the shop the day I filmed part nine, so you will hear her in the background, and I was not about to stop recording for that. Having children and grandchildren around is one of the biggest blessings in my life.
This school is not just a set of instructional videos. You are watching pretty much my daily life at the bench, mistakes included. I respect the people who run other schools, and in my opinion there are not enough of them, because not many people in the world still carve this way.
If you have never carved a flower at all, start on something kinder than olive wood. A basswood flower rosette teaches the petal moves first, and First Cuts for Beginners comes before even that. The start page sorts the courses by where you are.
What is the smallest part you have ever carved, and did you leave anything on it to hold? Take the plainest scrap on your bench, leave a tab on it, and keep one fingertip ready underneath.
How it's done
- Saw a blank with a tab. Pick the plainest leftover you have and saw the outline with a spare extension still attached, then saw the back to roughly match the curve it will sit on.
- Mark what stays. Redraw anything the drawing lost, then ink the lines you plan to leave untouched.
- Rough in with square walls. Work one part at a time with a small veiner, walls upright. Round nothing yet.
- Carve over a fingertip. Keep one finger beneath the spot you are working, slice lightly, and sharpen as soon as the tool drags.
- Chamfer toward a fillet. Take each corner off in several small chamfers at changing angles. Taper every head, and undercut lightly where a leg meets the body.
- Saw off the tab and set it. Remove the extension on the saw, then set the cluster in the flower and check its height against the lid's high spots.
Frequently asked questions
Why carve the stamens separately from the lily?
Mine had a second job besides looking right. A dowel was planned through the lily's middle into the lid, and a separate cluster could sit over that hole and hide it. Carving it apart also let me clamp a spare tab and turn the piece whichever way the next pass needed.
Which wood should tiny carved parts come from?
From the calmest grain you have. I sawed this cluster out of a leftover from the main cutout, olive wood, and chose the least figured part of it on purpose. Wild figure looks wonderful on a lid, yet in a piece this small it makes every pass harder.
What keeps a tiny carving from snapping while you work on it?
A fingertip under the part and a very sharp edge on top. Press up only enough to meet the tool, since too much support from below breaks it the other way. After that, slice with almost no pressure, and stop to sharpen the moment the steel starts to drag.
What to carve next