

Alexander Grabovetskiy, woodcarver, School of Woodcarving · Published 2019
How do you make low relief carving look three dimensional?
Quick answer: Low relief carving is given its depth by form and by shadow, since the stock itself offers almost none. Break a surface into small convex and concave sections, stack flats where a curve is wanted, and lean an edge so it throws a dark line. The eye supplies the rest.
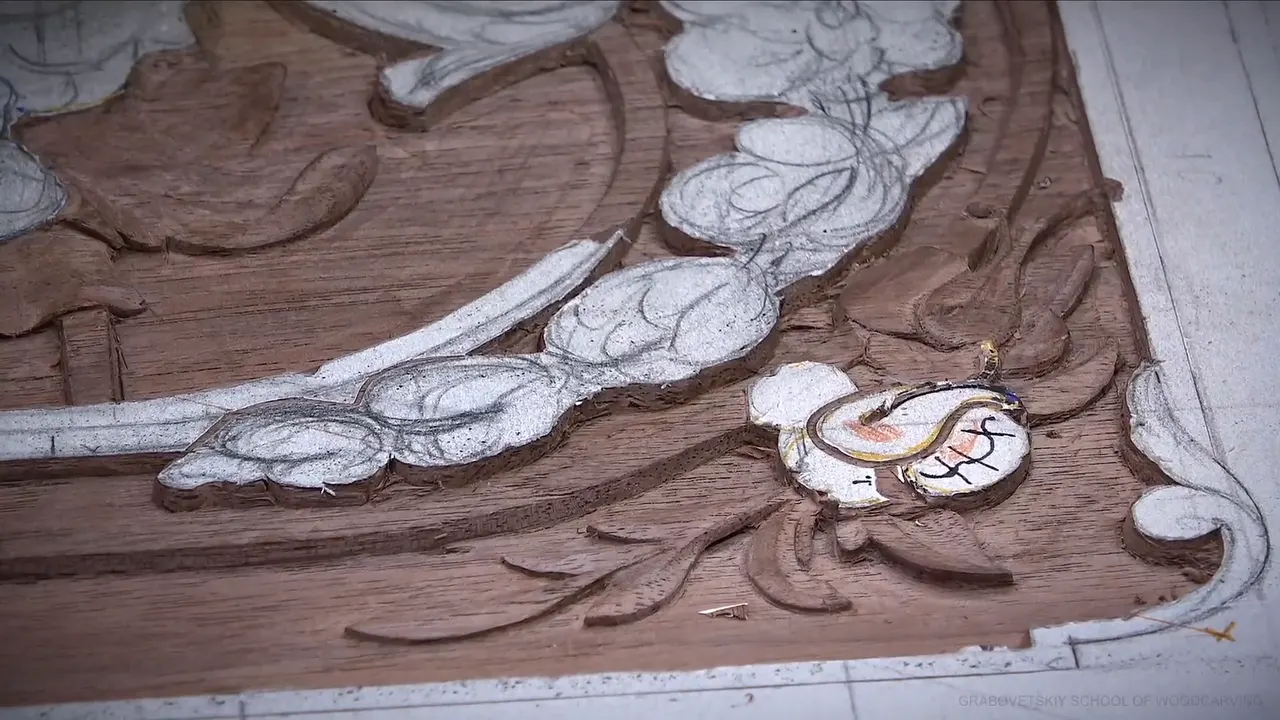
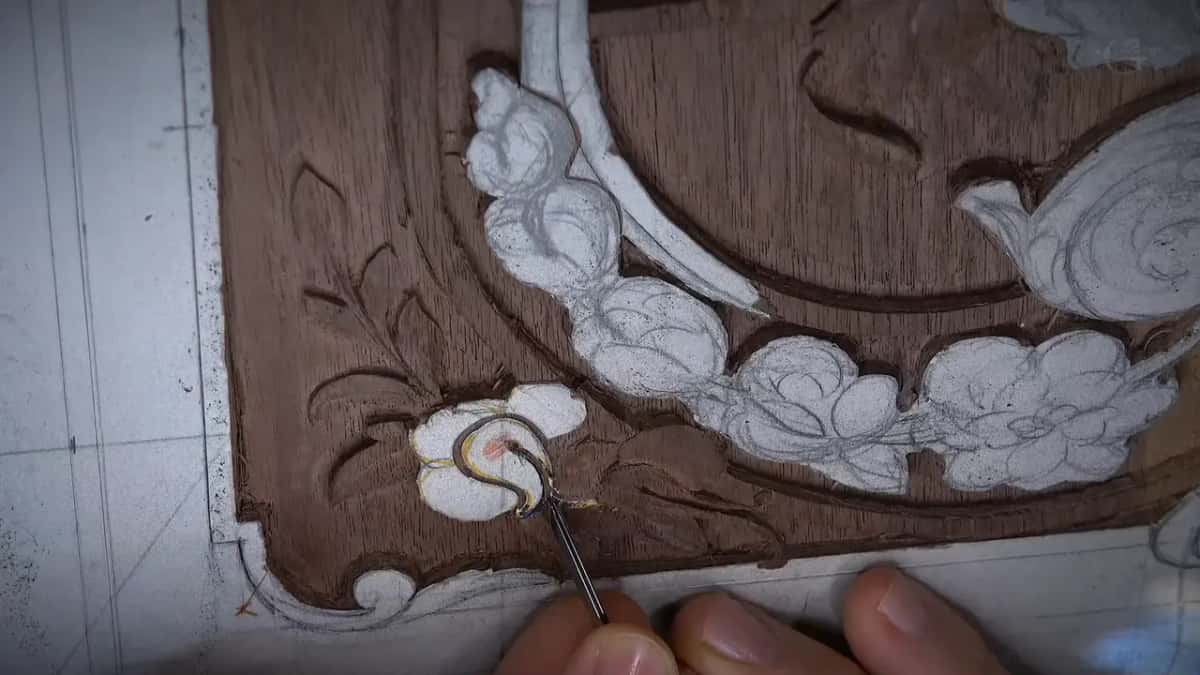
Carving this shallow is made to look deep by shape and by shadow, never by digging. On this corner of the panel the whole flower lives inside 1/16 in, and some of its walls are thinner than 1/32. The roundness you think you see is a stack of small flats and a leaned edge throwing a dark line.
Beginners meet this problem the same way every time. The petal is outlined, the shape is right, the drawing was good, and the thing still sits on the board like a sticker. My own answer took years and it is not more depth. Watch what happens to a petal when I break it into sections, and watch what the grain does once the surface stops being flat.
What decides whether a thin flower reads as round
- Flat kills it.
- Alternate convex and concave across one petal, and the eye follows shadow instead of grain.
- Round a body with a stack of chamfers, never with one sweeping cut.
- Leave the paper pattern glued on until the very end. That paper is your height gauge and nothing else measures it as well.
- Block the tool with your pinky.
- Three millimetres of undercut is a lot on a panel this thin, and half a millimetre already throws a line.
Why does a flat petal look wrong even when the outline is perfect?
Grain takes over. Look close at a petal you have left flat and the stripes in the wood run straight across your shape, and the eye follows those stripes instead of the form you carved. The movement stops reading. Put hollows and domes into the same petal and the eye starts following your shadow.

That is the whole reason I section a petal at all. Not decoration.
What does sectioning a petal mean in practice?
Convex, then concave, then a smaller convex, then a hollow again. I travel across the petal with a 7 sweep, turning the tool each time, so the surface never stays parallel to the grain for long. On a petal this size there is about 1/8 in of stock, three millimetres, to play with.

Before any of it I decide which petal passes under which, because that single decision fixes where the high ridge goes. Get it backwards and the overlap reads as a smudge.
Rounding a body without a single round cut
Stack chamfers. I put a flat on the edge, then another flat below it, then another, walking down and inward until those flats together read as a curve. Cabinet makers and carvers have rounded things this way for centuries, and on shallow work it beats a single sweep by a mile.
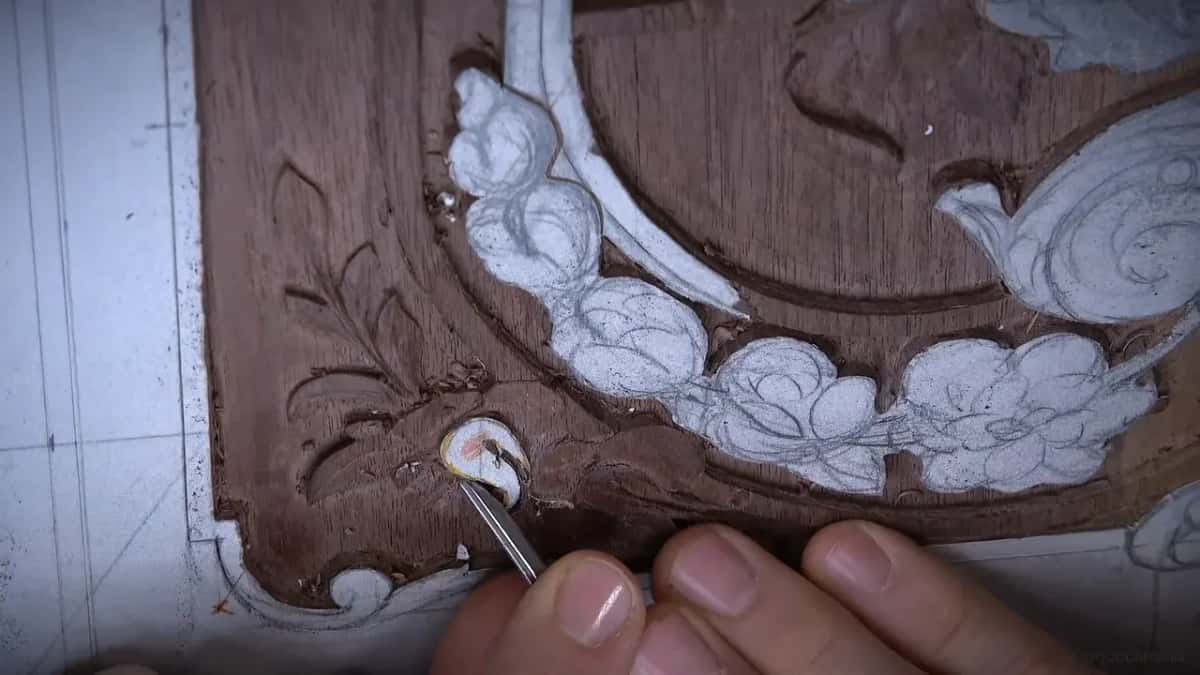
I will say the awkward part out loud. Every carver who wants a quick result tries to do it in one cut. Maybe I am not that good, but a single cut has never given me results I was happy with.
Why is the paper pattern still glued on?
Height. The paper left on the top of a petal marks the highest spot of the flower, so as long as a scrap of it survives I know I have not gone below my own ceiling anywhere. It comes off at the end, and it comes off without sandpaper.
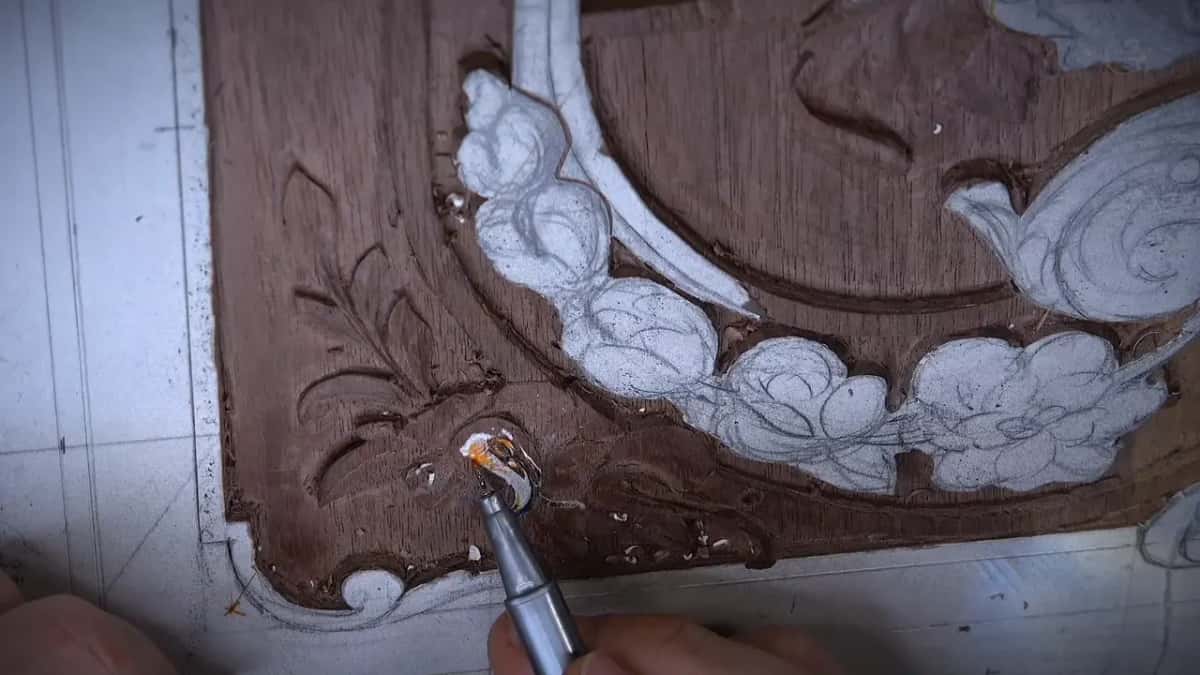
Keeping it there to the last minute is what lets me refine every movement late in the game and still hold one consistent high point across the corner.
Can you get paper off a carving without sanding it?
Reed rush does it, and so does the back of a knife. Dutch reed runs at roughly 400 grit, maybe a little finer, and I rub it in rotation rather than along the grain, which dulls the surface just enough that a low ridge becomes readable under my filming lights.

Scraping with the knife works too. It takes the edge down a little, and it does not ruin the tool.
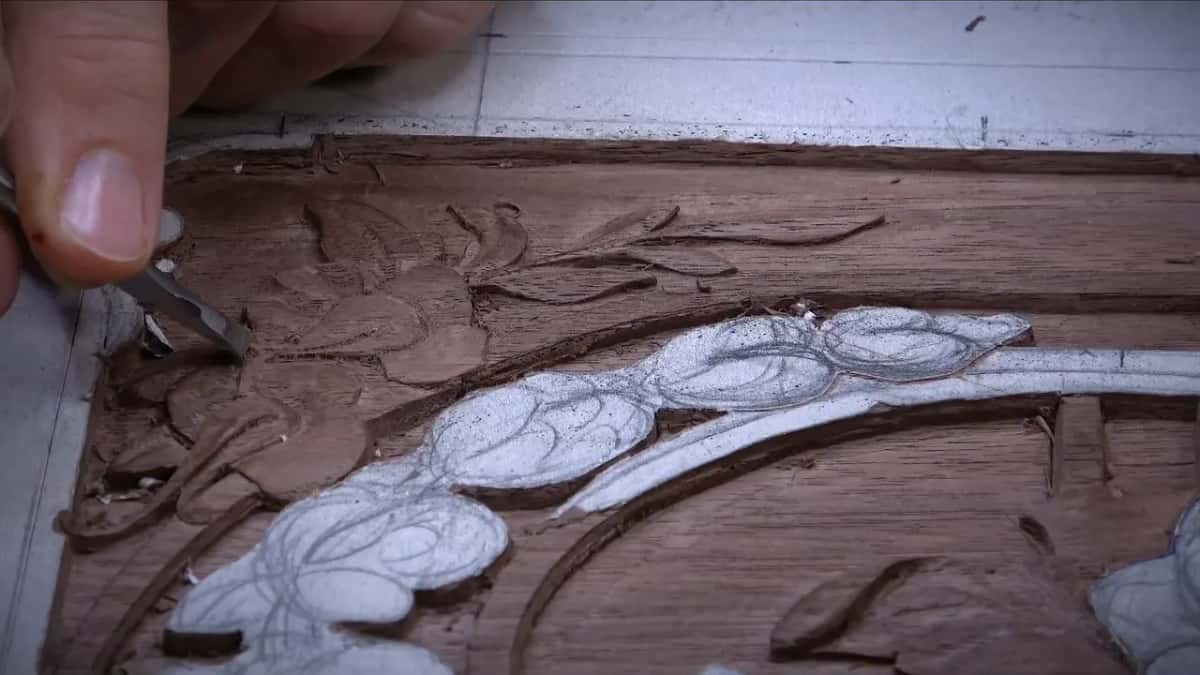
Better than sandpaper either way. Nothing abrasive stays in the fibres, and the cut keeps its crispness where a sanded edge goes soft. We are still authentic here, and no sandpaper has touched this panel.
| Colour on the map | How deep the ground goes at that spot | Metric | What sits at that level |
|---|---|---|---|
| Light blue | a sixteenth, the shallowest ground anywhere on this board | 1.5 mm | thin ground behind most petals |
| Yellow | an eighth | 3 mm deep, and that is where the triangles of open background sit | triangles |
| Bright red | three sixteenths of an inch, which is as deep as this panel ever goes | 5 mm | a few pockets, no more |
That map is a colour drawing of the whole panel, and it sits in the downloads at the start of the course rather than in this lesson. Print it, keep it beside the bench, and you will stop guessing.
How do you stop a small tool slipping into a detail?
Block yourself mechanically. My pinky goes down on the wood and stays there, dead still, and only the finger holding the tool moves, so the tool physically cannot travel further than I allowed it.

Pressure comes out of the body, not the arm, and I am not pushing the tool so much as leaning behind it. For a deep undercut I bring in a mallet, and it is there for control rather than force.
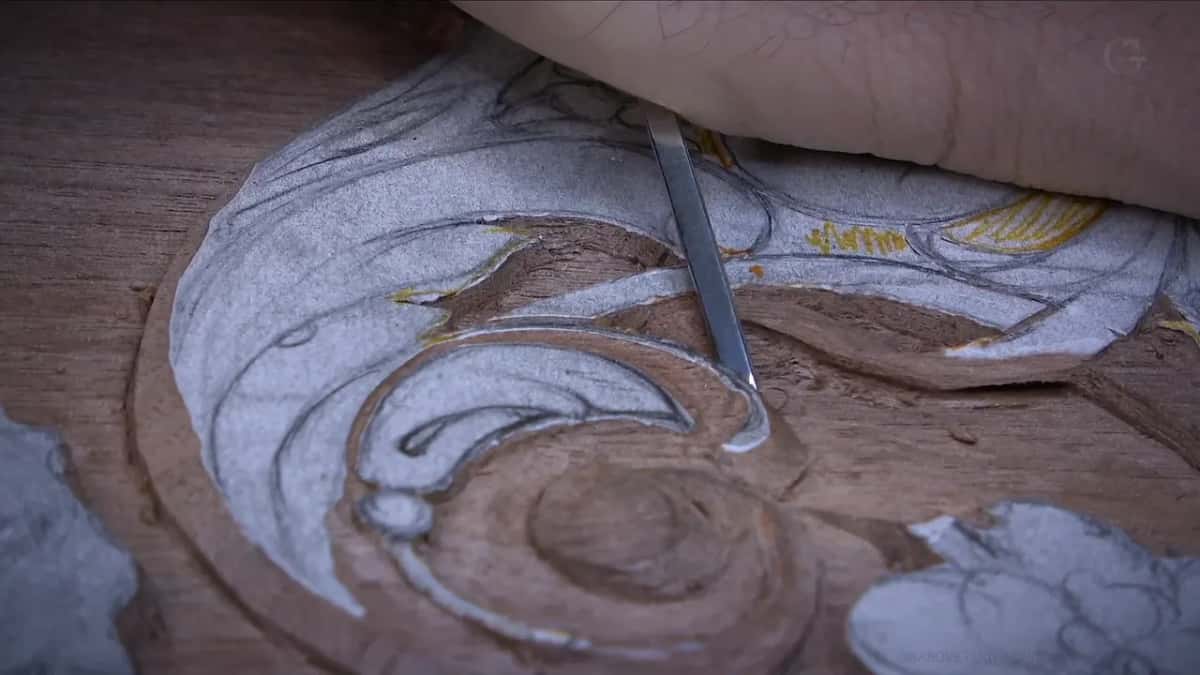
Even so, I slipped during this lesson, and I hooked out a little chunk in another spot and tore the fibres. Both are on the video. The repair is always the same: blend it, move on, and stop pretending it did not happen.

Which way should a volute lean?
Pick from five, then justify your pick. A volute can stay flat on top, or it can lean in any of four directions, and the choice is not a matter of taste alone. This corner sits high on the finished panel, so a viewer looks straight at it rather than up at it, and leaning the movement toward the viewer buys back the depth that the thin stock cannot give.
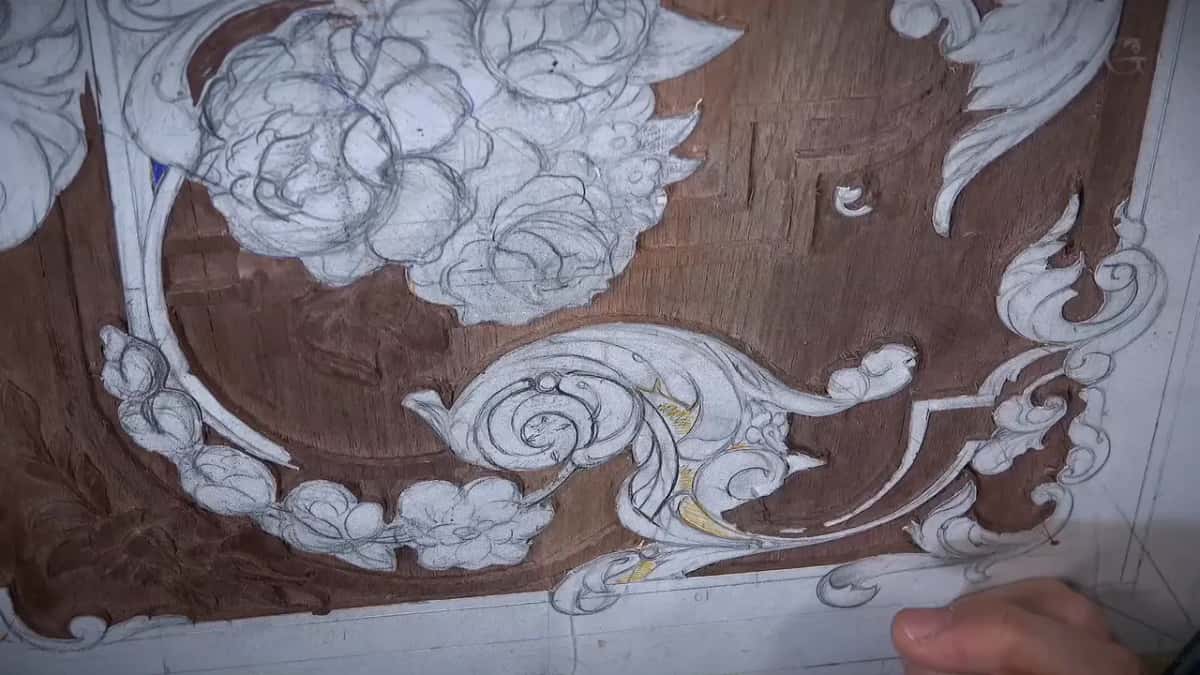
Volutes in shallow work behave differently from the ones in a fully modelled carving. What you are cutting is an indication of a concave and an indication of a convex. We just create the illusion.
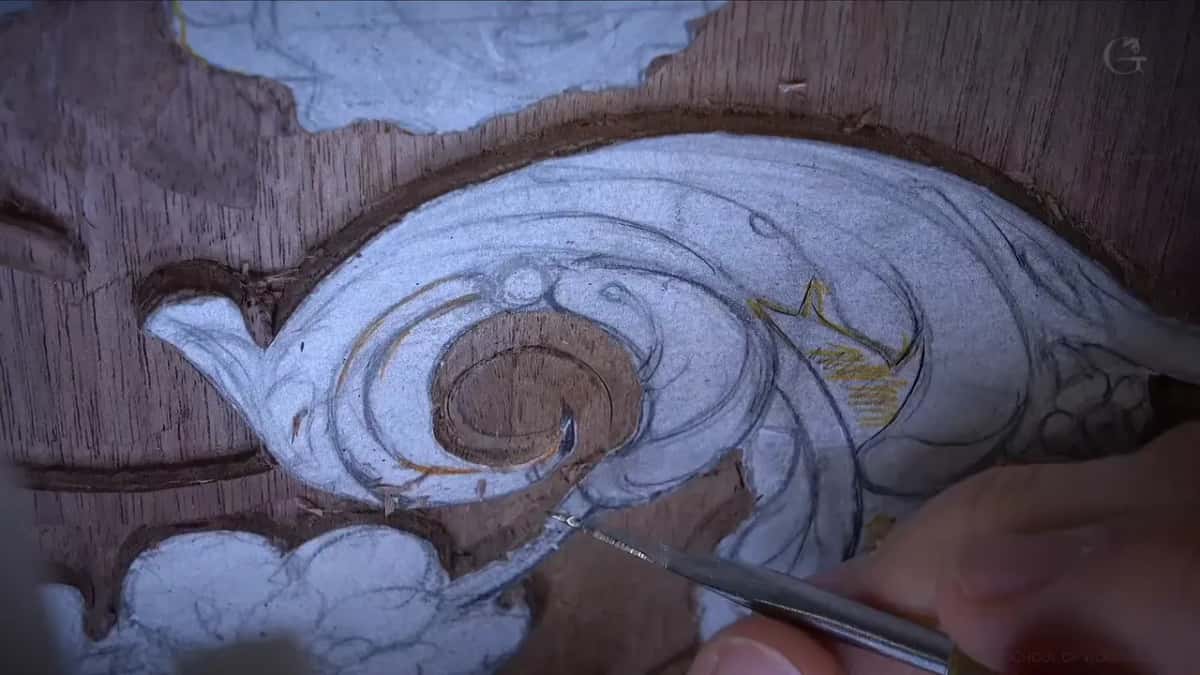
There is a trick from the 18th and 19th centuries that belongs here. On the slope of a volute they would cut a micro concave inside the slope itself, which throws far more shadow than the slope alone. Tiny cut. Large effect.
How deep can you undercut before you break something?
About three millimetres under a petal, and that is already brave. Push past that on stock this shallow and the element snaps, especially where the grain runs the wrong way. The good news runs the other direction: half a millimetre of undercut already casts a line you can see.
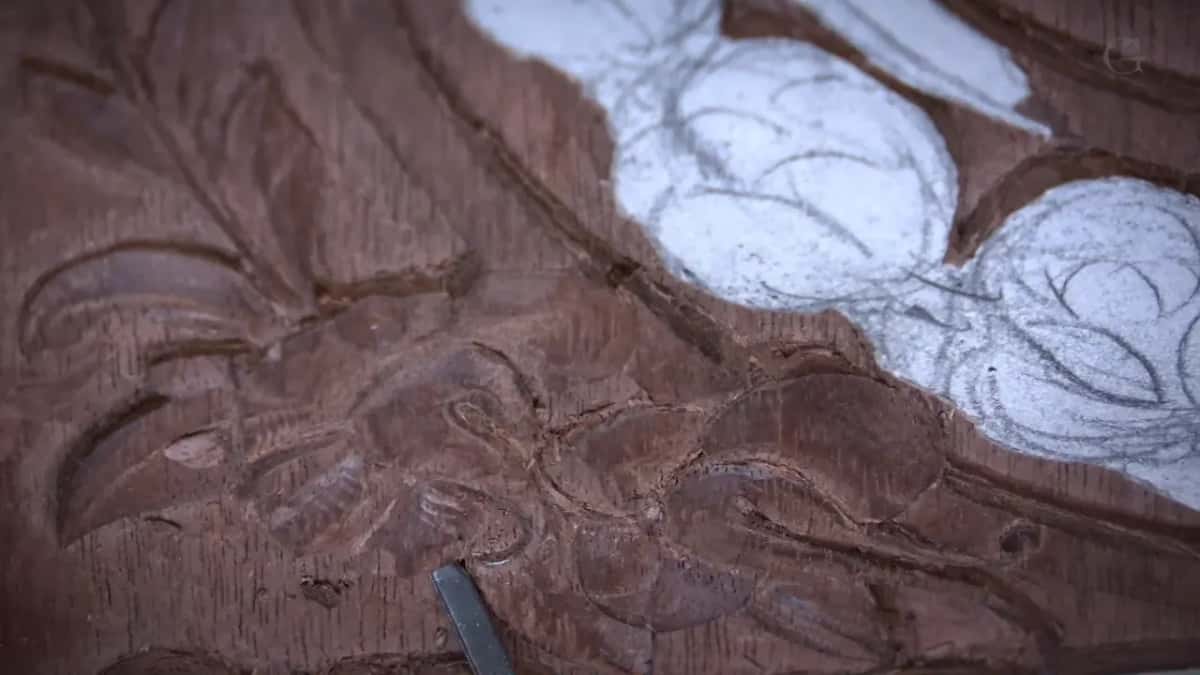
The rule I will not break is this one. Two undercuts coming at each other from opposite sides must never meet, because the moment they do the element has nothing holding it and you have made a hole instead of a shadow.
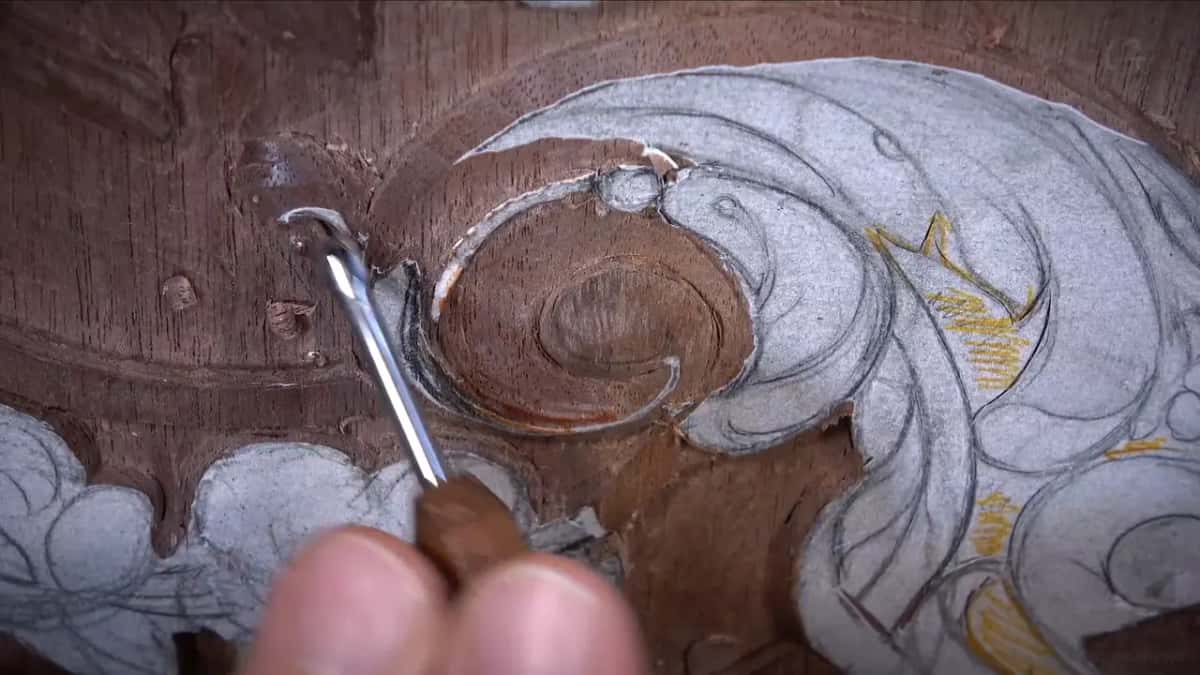
Place the tool straight down first, then rotate it. The rotation is what travels underneath, and the waste lifts out in one piece.

The fastest way to clear a small background
Plugs. A number 8 goes straight down into the waste, then rotates, cranks and lifts, and each one of those comes out as a small plug about a sixteenth deep. Repeat across the triangle and the ground drops fast without a single long stroke.
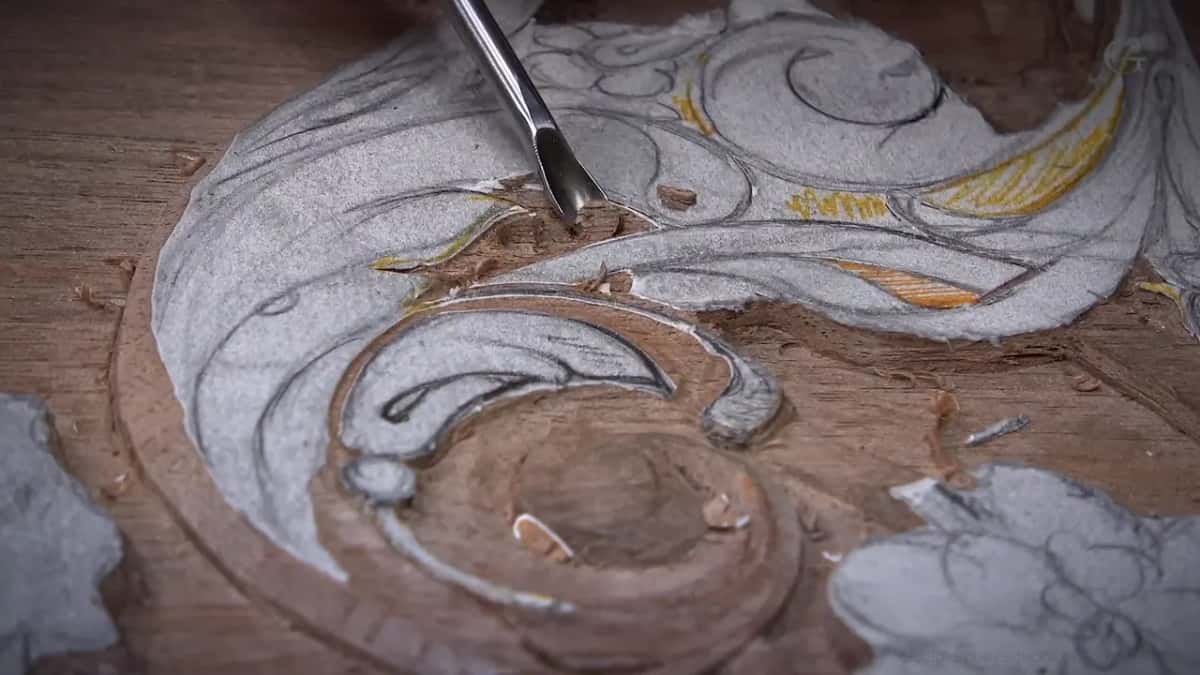
Overdo it and you will go too deep, so work the point of a triangle first and open it out from there. I removed a background too early in this lesson and very nearly lost a detail I needed. Saw the movement at the last second and kept it.
Can you measure depth with the gouge in your hand?
Use the gouge you are already holding. An eighth inch number 8 measures roughly 3 mm corner to corner, so laying it into the ground tells me instantly whether I am at the level I wanted.

Walls come clean under a double bevel number 1, driven straight down, riding a line the knife already left. The chip comes away clean and the wall stands square.


Why does every line have to flow?
Law of flow, and I mean it literally. A movement should run like a river, never turning sharply, and when a line comes out too straight I would rather recut the whole element than nurse it. That happened here. The line repeated the wrong movement, so I redrew it and started again on a fresh surface.
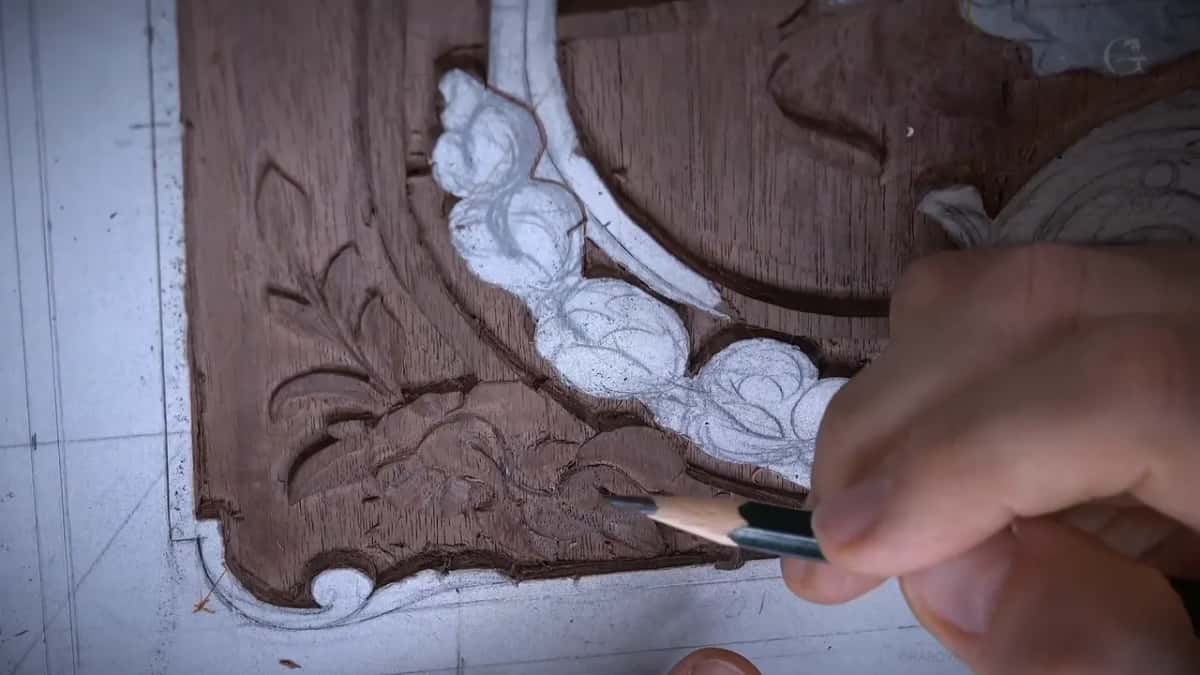
What I wanted was an S. Once the S is there, everything around it settles.
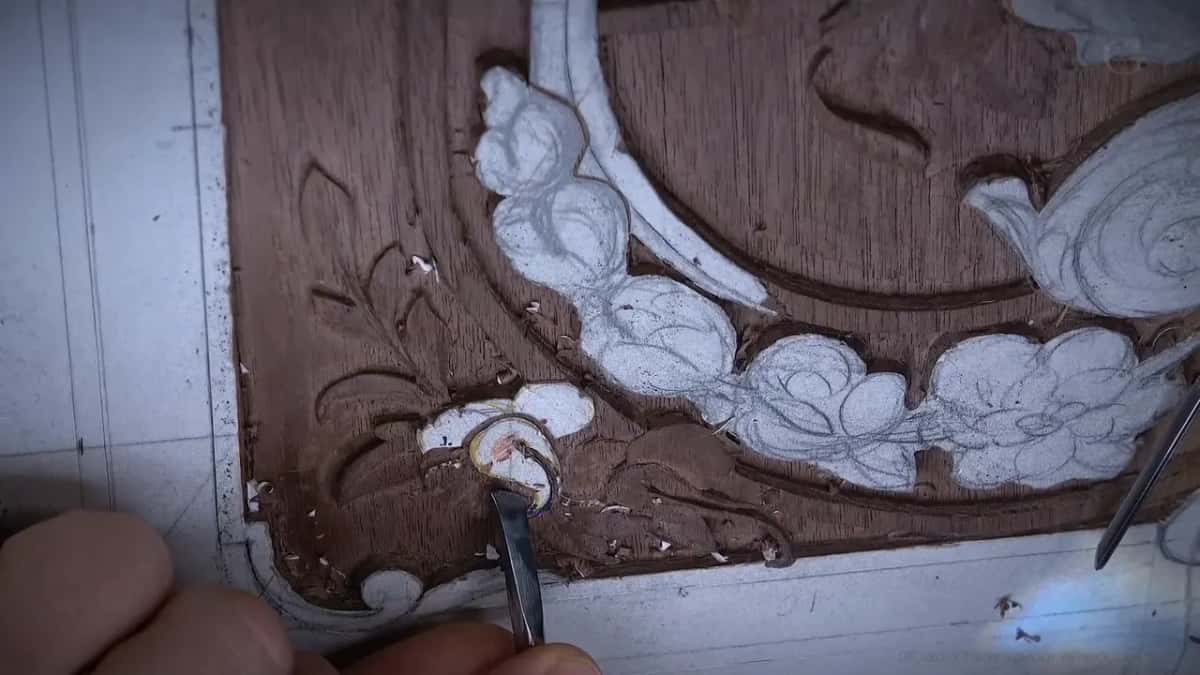
I do a lot of this with the heel of a knife rather than the tip. I reshaped that knife myself for exactly this, and I slice with it rather than push, even on cuts a millimetre long. And yes, I like knives. I like them a lot.
Why not just use a V tool for the walls?
Michael asked me that one, so here it is properly. I clean those walls with a number 23, a specialty tool most of you will not own, and yes, a 90 degree V tool would do the same job. My reason for avoiding it is authenticity. V tools were not invented for a very long time, and in most countries they were not in an 18th century shop at all.
Brands number their V tools anywhere from 12 to 18, all with different angles, so the number on the handle tells you less than you would hope. Sizes lie as well. A gouge stamped six millimetres and sold as a quarter inch is often neither.
Somebody will ask why I reach for knives at all when a gouge would serve. Nothing is wrong with gouges and I use them constantly. Some days you get tired of the same tool and you want to reach the same result by another road.

Changing my mind is part of the same habit. I had planned a shallow background under this volute, and halfway through I said my bad out loud and cut it deeper, because the leaning movement above it needed the depth. The plan was wrong and the wood told me so.
What is the camera not showing you?
Scale, and the truth about the shadows. Filming needs a great deal of light, which washes out the very shadows this lesson exists to create, so what you see on screen is flatter than what sits on my bench. In a normal room, lit from one side, the same corner looks entirely different.
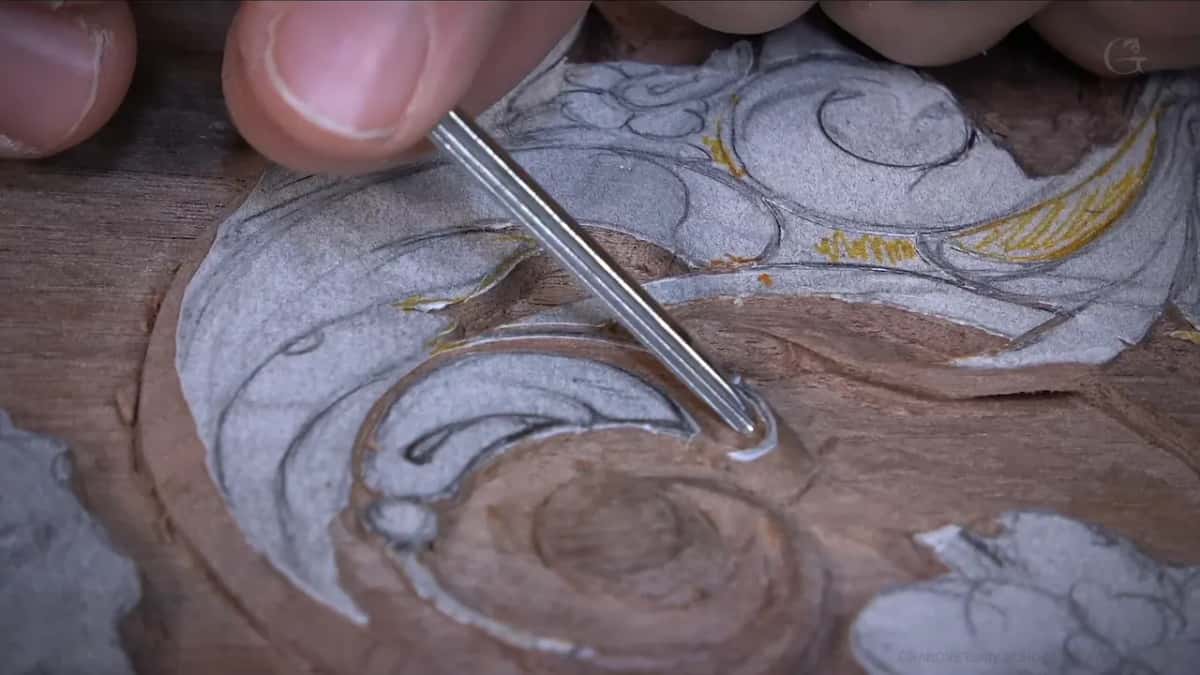
The other lie is size. This flower looks enormous on a screen. In life I have almost nothing here, and a detail near its tail finishes barely a millimetre across.

Work at this scale is not harder because the pattern is harder. It is harder because everything is small, and small punishes a slip that a big panel would forgive.
Who else worked this way?
Two names. Grinling Gibbons I admire enormously. His late work is far more complicated than his early work, and that tells me his tool collection kept growing as he aged, because some of what you see on those late carvings is close to impossible with common tools. David Esterly wrote about it. Worth your evening.
The other is Tilman Riemenschneider, the German carver working just before the Reformation. More specialty tools let you do more sophisticated work, no argument from me there. Real art is still possible with the basic ones.
Everything on this corner grew out of decisions taken in the design course, and the ground it sits in was levelled back in lesson 16 and lesson 17. The shadow work here follows straight on from lesson 19, and the acanthus that comes next is opened in lesson 21. If you want the tools themselves explained, there is a whole course on them, and the same leaf movements are built from nothing in Acanthus over Moldings and again in the modern acanthus course. The last stage of this board, where the whole bouquet gets finished, is Part 3.
Carving furniture takes this long because it took previous generations this long. They concentrated on the quality of the cut, and the furniture they left is still standing in museums. Wood carving is all about the shadows. I have said that many times, and this corner is where I would ask you to test it.
If you want somebody beside you while you learn to read them, that is what the school is for.
How it's done
- Settle the overlaps before any tool touches wood. Decide which petal passes beneath which neighbour. That single choice fixes where your high ridge sits, and an overlap decided halfway through a cut reads as a smudge rather than as a form.
- Outline shallow with a 1 mm veiner. The 1 mm number 11 is the tool this whole corner runs on. Keep your first pass starved, no deeper than a thirty-second, because an overcut on a detail this fine can never be taken back.
- Break the petal into alternating sections. Cut a dome, then a hollow, then a smaller dome, turning the tool between each one. Your surface stops lying parallel to the grain, and a viewer starts following your shadow rather than the stripes in the board.
- Stack chamfers where you want a dome. Lay one flat along the edge, a second below it, then a third, each stepping down and in. Their faces together give you the dome. One sweeping pass almost never lands as well when the stock is this shallow and the light this flat.
- Lean the edge to buy a shadow you have no room to carve. Drop to the 0.5 mm veiner and tip it toward the wall. Not a true undercut, and it still darkens the join enough to read from across a room.
- Undercut last, all the way round. Place the tool straight down first, then rotate it so the rotation travels underneath and lifts the waste out whole. Three millimetres is brave on stock this thin, and two undercuts must never meet.
Frequently asked questions
Does shallow work really need shadow more than depth?
Depth is the one thing a thin board cannot give you. Nothing on this corner rises more than 1.5 mm off its ground, so the impression of roundness gets manufactured from leaned edges and dark lines. Form and light take over the job that thickness would normally do.
What is the multi chamfer technique?
Several flat cuts stacked down an edge, each a little lower and further in, so their combined faces read as a dome. Carvers have rounded shapes this way for centuries, and on very shallow work the result beats one sweeping pass.
Is there a way to finish a carved panel without sandpaper?
Reed rush and the back of a knife will do it. Dutch reed sits near 400 grit and takes paper and fuzz off without leaving abrasive in the fibres, while scraping with a knife keeps the cut crisp. Sanded edges go soft and woolly.
What to carve next