
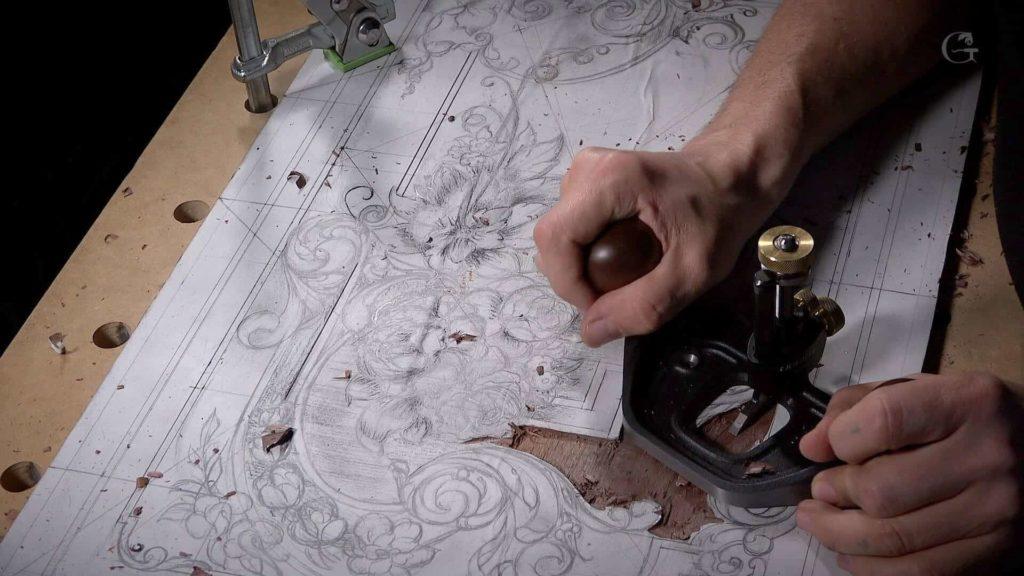
Alexander Grabovetskiy, woodcarver, School of Woodcarving · Published 2018
How do you carve a relief panel for furniture?
Quick answer: A furniture panel is carved background first. You mark the straight lines with a gauge, carve the curves down with a knife at 90 degrees, then drop the ground to a set depth of 1/16, 1/8 or 3/16 of an inch and hold it flat. Only after that do the flowers get shaped.
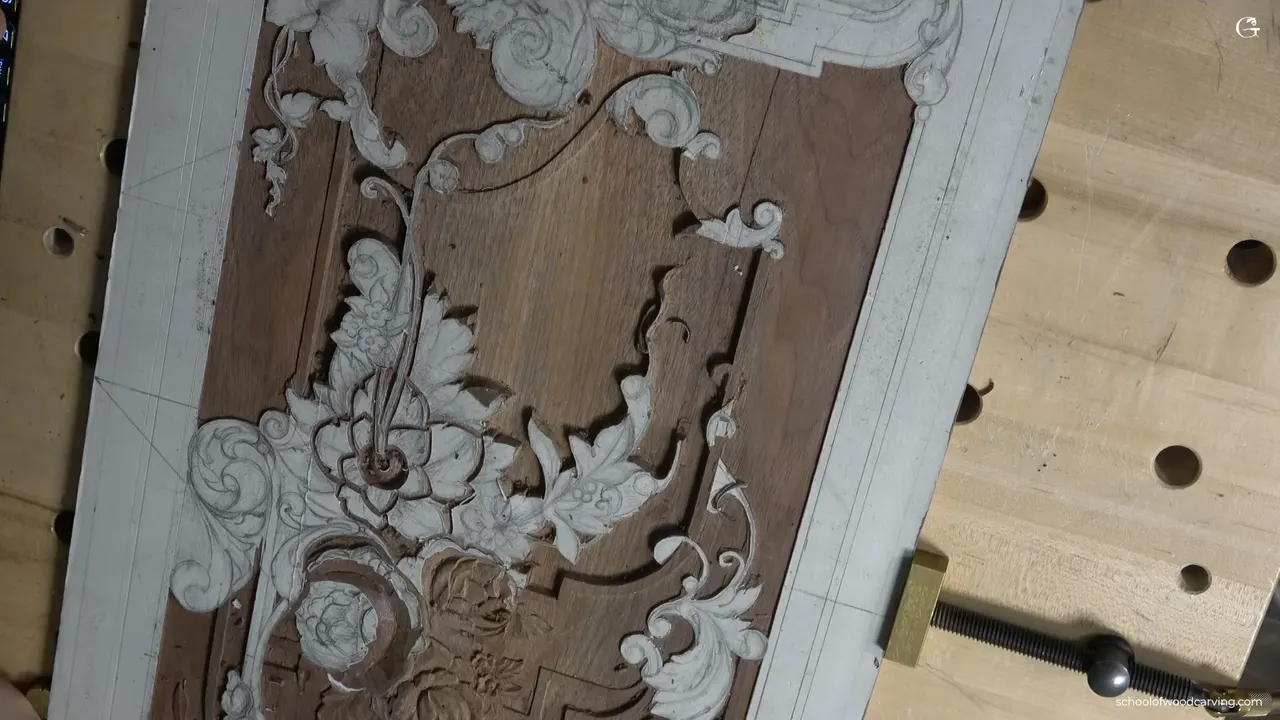
Same panel, second stage. The drawing already sits on the board from the design course, so here the wood starts coming off, background first, then the acanthus and the flowers above it. Shaping and shadow finish in the course after this one.
What depth does the ground sit at under a carved flower? Which side of a leaf goes over the top, and which one grows from underneath? Where does shadow come from when the carving stands a millimeter and a half above the background? Those three questions are most of the work on a furniture panel, and I answered them on this one in walnut.
What wood do you use for a carved furniture panel?
Walnut is what this panel is carved from, and walnut runs harder than basswood or limewood, which turns out to help me rather than fight me. The wood pushes back when I pull a knife along a line. So even when I press harder, the knife does not dig too deep, and I know I will not overcut.
Look at the color of this board. Purple, in places. Normal walnut does not do that.

Cracks run through it too. I knew about them before I drew a single line on the surface, and I used the board anyway. People building furniture in the 19th century were nowhere near as picky. A little sap and today somebody cuts it out and throws it away. Back then they used it.
Where do you begin on a relief panel?
Start with a marking gauge on the straight molding lines, then carve the curved lines straight down with a knife at 90 degrees, before the background around them comes out. That gauge is tool number one here. Mine is not expensive. The screw sits proud of the blade where a better one hides it, but for my use it is enough.

Check the whole edge first. The gauge fence follows that edge, so one bump of dried glue sends your line wandering. I found glue on this board and cleaned it off.
Then the knife, and any knife will do. Mine is a number 3, or my favorite Pfeil number 12, pulled toward myself with both hands on the tool. Straight down, square to the face. Never lean the bevel in under the line. Repairing a bad line costs far more time than carving a good one the first time.
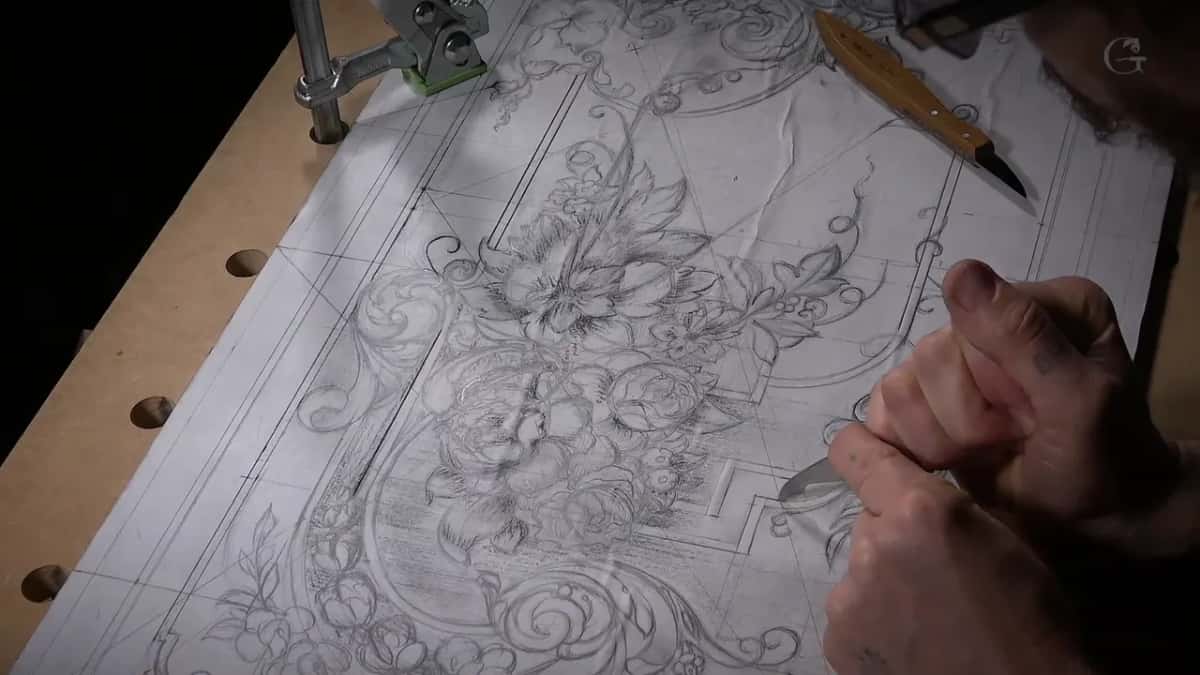
Those knife lines are not there to remove wood. What they do is give a gouge somewhere to land when its turn comes.
How deep should the background of a relief carving be?
The background on this panel sits at three set depths, 1/16 of an inch near the moldings, 1/8 above the main design, and 3/16 where the main bouquet needs room, which is 1.5, 3 and 5 millimeters. A depth map in three colors stops the guessing. Light blue is the shallow ground, yellow the middle, red the deep.
An invisible line runs along the molding and I cannot cross it. Above that line my carving stands only 1.5 mm proud, so a leaf up there says everything inside that. Below it I can drop away and let a leaf go downhill and wrap around.
Take the ground down to about 1/8 of an inch and stop. Leave a hair, call it 1/32 of an inch, for the cleaning pass. And keep those molding lines high until the very last, because the router plane needs high ground to ride on.
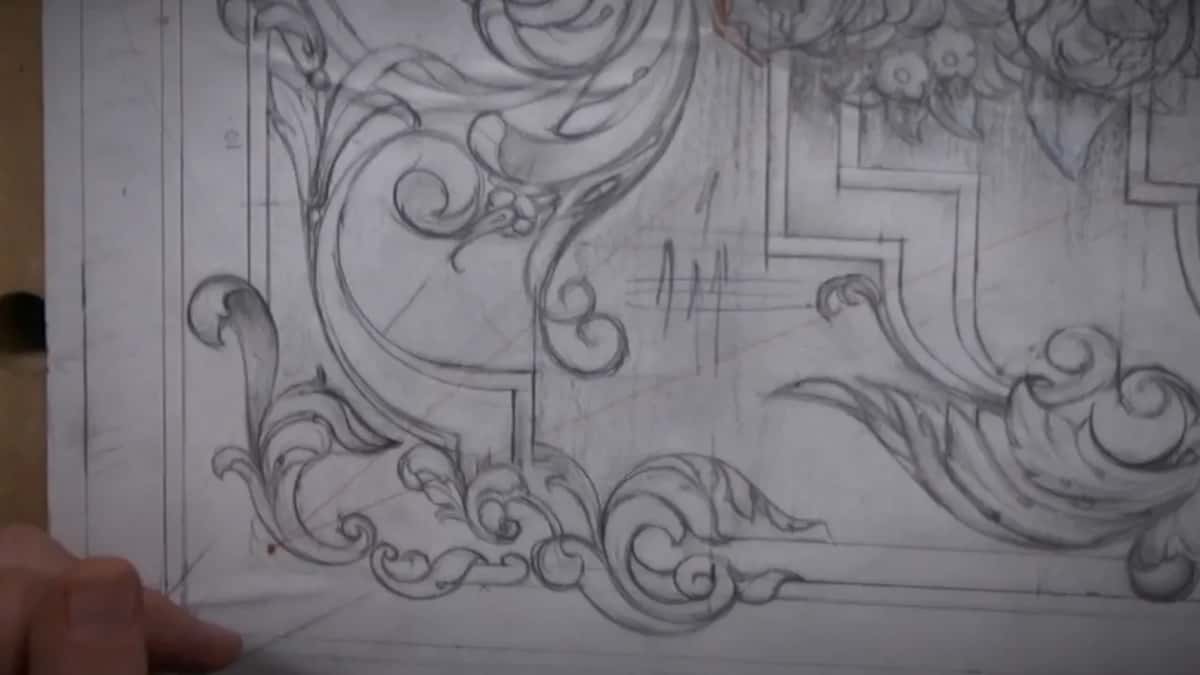
Work across the grain whenever the bench position allows it. Along the grain the wood decides how far your chip runs, and it will split a detail clean off the panel for you.
Zone of ground | How deep it goes in both systems | Map color | What I use that depth for |
|---|---|---|---|
Next to moldings | A sixteenth of an inch, 1.5 mm | Light blue | A leaf says everything within it |
Above the main design | An eighth of an inch, three millimeters | Yellow there | Where a leaf can roll over |
Under the bouquet | Three sixteenths of an inch, five millimeters | Bright red | The hero gets the deepest ground |
The cleaning allowance | A thirty second for the last pass | Not mapped | Stop there and clean it later |
Do you need a router plane for relief carving?
A router plane is not required, and a number 2 gouge or a grounding tool gives you the same flat floor, but the plane holds one true depth across a whole panel and in my opinion it is much easier. Furniture makers had wood ones in the 18th century, so the idea is period correct as well as useful. Veritas sells blades as narrow as a sixteenth and as wide as 19 millimeters, three quarters of an inch, so it gets into the tiniest spots. I like my Lie-Nielsen more for its quality and classic look, but I am limited on its blades.

I will be honest with you. Using a router plane is just so satisfying. It makes no dust, and the sound of a hand tool is so nice.
The other tool worth its money is a number 23, the macaroni. It carries a true 90 degree corner on each side, so it walks a molding line and leaves the wall dead upright without digging in underneath. Furniture makers use one, most carvers do not. I have several sizes. Buy one if you plan to build furniture carved in an honest 18th century manner. Otherwise a 3 mm eleven, worked on one side of its edge, does exactly the same job. Around the point where depths stop being guesswork, most people would rather watch the panel worked in order, and that is when they come and carve this panel with me.

What stops a carving gouge from slipping?
Planted hands stop a gouge from slipping. Both hands stay solidly on the board, the tool rides across the middle finger of one hand, and the two hands pinch it between them. My middle finger is the controlling finger.
Never carve with your hands in the air. Wave a gouge at the wood the way somebody airbrushes a car and you have no control. When one hand has to come up for reach, my pinky goes flat on the board and carries the weight. One finger is enough. Two, if I can't use my pinky.

The second half of control is how the edge travels. I try not to press a gouge straight down and shove it. The corner goes in at a slight angle and the tool moves sideways as it drops, so it slices rather than pushes. Step carving, I call it. Even with an almost flat number 3 I am slicing.

Wiggling helps as well. I wiggle a little, and sometimes it lets me control the tool better. Sharpen well enough, because a dull blade tears the wood. A brass mallet, tapped lightly, steadies a cut better than hand pressure ever does.
How do you carve acanthus leaves on a furniture panel?
An acanthus movement on this panel begins with an eye, a pipe runs out of that eye, and once those two sit right the rest of the leaf is only deciding which lobe passes over and which one grows from underneath. The style here is North European, French, late 18th century. I stay honest to my drawing.
Before a gouge goes near the line, I carve a relief line with a 3 millimeter number 11. A gouge is thick steel. Press it into walnut with nothing relieved and it shoves the fibers sideways. The line looks clean when you stand up, and next morning that side has gone rugged.

The volutes are where I made my mistake, and I would rather show it than hide it. I carved into the second one before deciding which way it should slope. Worse, it came out nearly the same size as the volute beside it, and a repeated ornament that repeats at the same size has no rhythm left. So I made it smaller, repeated the slope of the first one on it, and design-wise it looks a lot more appealing. Nobody except you will ever know.

A volute can lean five ways, flat on top or tipped toward any of four sides. High on a panel, where a person looks straight at it, leaning the scroll one way gives it a more three dimensional look.
How can a shallow relief carving look three dimensional?
Shallow relief reads as deep when every element wraps, which means the surface runs downhill, comes back up, and drops again instead of sitting on one flat plane. Red marker for the high spots, a second color for the low ones, before a single gouge goes in. Then protect the red.
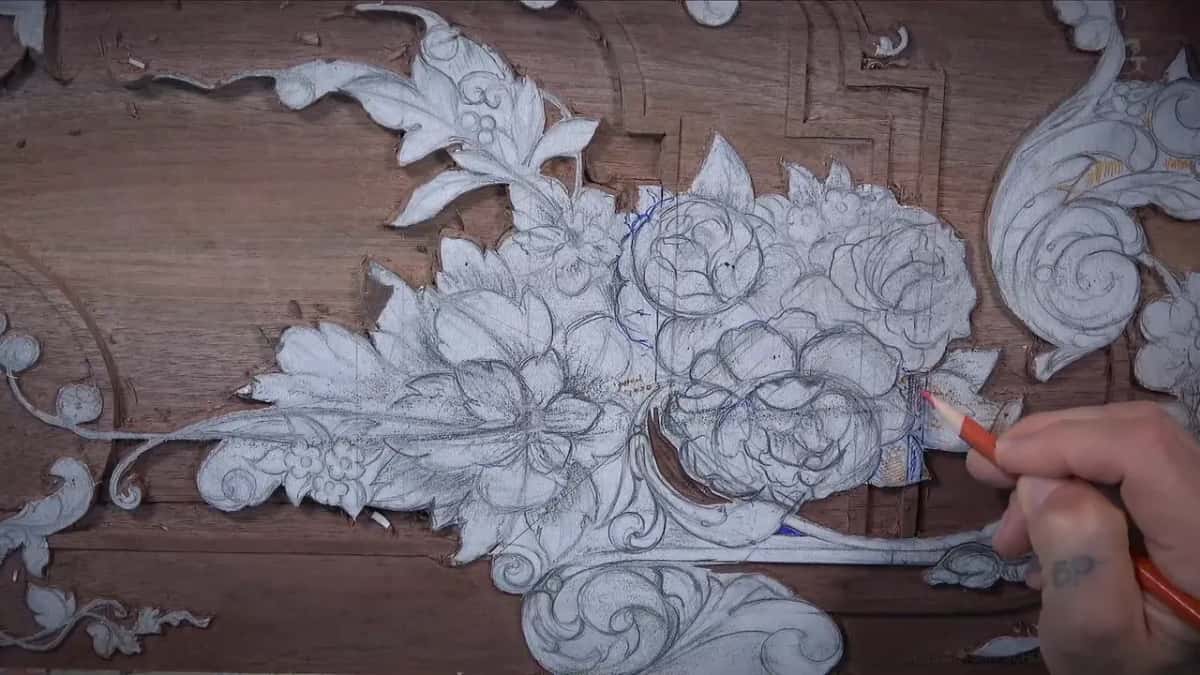
Keep the movement organic. I don't want to see sharp lines or a big valley or dip, because it still has to look natural.
What we are doing on a panel this shallow is a trick played on the human eye. There are only a few millimeters of depth here, and we give the eye a dimension that is not there at all.
Design carries the other half. A line that dies under an element has to come back out the far side going the same way, tangent to itself, because the human eye can catch it if it is not. Brad asked me once why I ended a movement exactly where I did, and the honest answer was that I had none. I thought it looked better there.
What makes a carved flower petal look real?
Petals come alive when you run convex into concave and back again across the face of each one, keeping a single ridge as the high spot and letting every other surface fall away from it. Convex, concave, convex, concave. Then blend the ridges until no transition anywhere reads as sharp.

Do not make them perfect. Carve the petals too perfect and they look artificial instead of natural.
The main bouquet is the hero of the design, so it gets the deepest ground, five millimeters. I round its middle into most of a half sphere, then take a Dockyard number 8 at one sixteenth and excavate the hole inside, so the tangles look like they grow out from the center. Cheap tools. Very good at that one job.

Why do wood carvers undercut a relief carving?
Undercutting carves the shadow, and that shadow gives extra dimension to a spot only 1/8 of an inch deep. Not every furniture maker undercuts a panel. I do, and I love what it gives back.
A 1 millimeter number 11 goes over on its side and runs in under the edge, then a half millimeter one takes the deepest bite. While the tool is under there I roll it a little, so the underside comes out round instead of flat.

One warning about furniture. People are going to touch it by hand, and an edge left too sharp can catch them. A little chamfer takes care of it.
Because I undercut, I never chop straight down to final depth in one go. Chop all the way and you stamp a tool mark into the background, then the undercutting opens it right up where everyone can see.
Do you sand a wood carving?
Sandpaper is not how I clean a background, a scraper is, because an abrasive leaves grit buried in the surface and a scraper leaves the wood itself. Push a router plane too hard and the blade chatters. Jump marks, I call them, and they sit in the background floor where no camera will show them.
I scrape them out with a number 9 Swiss chip carving knife. Thick steel, a chip carving tool doing work nobody sold it for, and I really like it. Do not overdo it, because a scraper still takes wood off.

I am not against sandpaper. But look at how furniture actually got finished. Most makers used scrapers, and some in the 17th and 18th century used Dutch reeds, a plant growing along a river, about the same bite as 400 grit. Wrapped around a paper tube, a length of reed lasts longer. Nothing abrasive stays behind in the grain.
Some carvers hit hard, ignore every tool mark and finish in much less time. A few of you go hunting for those marks and really like the whole idea of a tool mark. Some of you are picky about a background, and I would rather you did not pick on me.
The board I clamped under this panel while I marked it was a scrap from a weekend class I taught at the Marc Adams School of Woodworking in May 2019, Viking style carving. Still on my bench. Walnut forgave me plenty here. If you want the real depths and the order the work happened in, mistakes and all, get Access to the whole panel course and carve it beside me. Shall we carve?
You can draw a panel beautifully and still lose it at the bench. Miss a molding line at the start and there is no way to fix it later. I carved this one in walnut and filmed every depth, every wrong slope and every repair. What follows is how the ground gets set, and where the shadow on a carved flower actually comes from.
How it's done
- Gauge the straight molding lines. Check the whole edge first, because one lump of dried glue steers the fence and your line wanders. Then set the gauge and mark every straight molding before anything else happens.
- Knife the curved lines vertically. Both hands on the blade and pull it toward yourself, dead upright at ninety degrees. These marks lift no wood at all. What they do is give a gouge an edge to land against later.
- Relieve beside the line. A 3 mm eleven, an eighth of an inch, run alongside the line before thick steel arrives. Skip it and the crushed fibers stand up overnight and the edge you liked is furry by morning.
- Bring the ground to three millimeters and halt. Stop there rather than at final depth, and keep a thirty second back for the cleaning pass. Keep the molding lines standing tall the whole time, because the plane needs high ground to ride.
- Plant both hands before you cut. The tool rides over the middle finger of one hand and both hands pinch it. Nothing waves in the air. When reach forces one hand up, the little finger goes flat and carries it.
- Slice sideways, rather than shove down. The corner enters at a slight angle and the tool travels across as it drops. Step carving is my word for it, and even a nearly flat three is slicing rather than pushing.
- Start the acanthus at the eye. Eye first, then the pipe leaving it, and the rest is only choosing which lobe crosses over the top and which grows from beneath. Stay honest to the drawing you already made.
- Map the highs and lows in color. Red on the highs, another color on the lows, before a single cut. Then guard the red. Everything else runs downhill, back up, and away again so the surface never lies flat.
- Roll each petal convex into concave. One ridge stays as the high point and every other surface falls off it. Convex, concave, convex again, then blend until nothing reads as a sharp transition. Petals carved too perfect look fake.
- Undercut for the shadow. A 1 mm eleven goes over on its side and travels in under the edge, then the half millimeter takes the deepest bite. Roll it while it is under there so the underside comes out round.
- Scrape the floor, do not sand it. A chip carving knife pulls the plane's chatter marks out and leaves wood rather than buried grit. Go gently, because a scraper still removes material, and give any sharp edge a little chamfer.
Frequently asked questions
Can a beginner carve a furniture panel?
Yes, provided your tools are really sharp and you do not rush it. Patience is the entry price here. A whole day on one square inch happens, and if that prospect irritates you the craft will too.
How long does a panel like this take at the bench?
Twelve lessons and 123 filmed parts of bench time, and the first five are mostly the ground.
What gouges do you need for furniture carving?
Mostly gouges. A 9 and a 7 clear the ground, and the flatter ones down to a flat 1 do the rest. Three number 11 veiners, at 3 mm, 1 mm and half a millimeter, do the fine work, and a number 23 gives the straight walls.
What to carve next