

Alexander Grabovetskiy, woodcarver, School of Woodcarving · Published 2019
What is undercutting in wood carving?
Quick answer: Undercutting is cutting in beneath the edge of a carved element so light cannot reach the ground behind it. The gap is tiny and the point is optical. A dark line appears where leaf meets background, and the eye reads that line as real depth rather than as a tool mark.
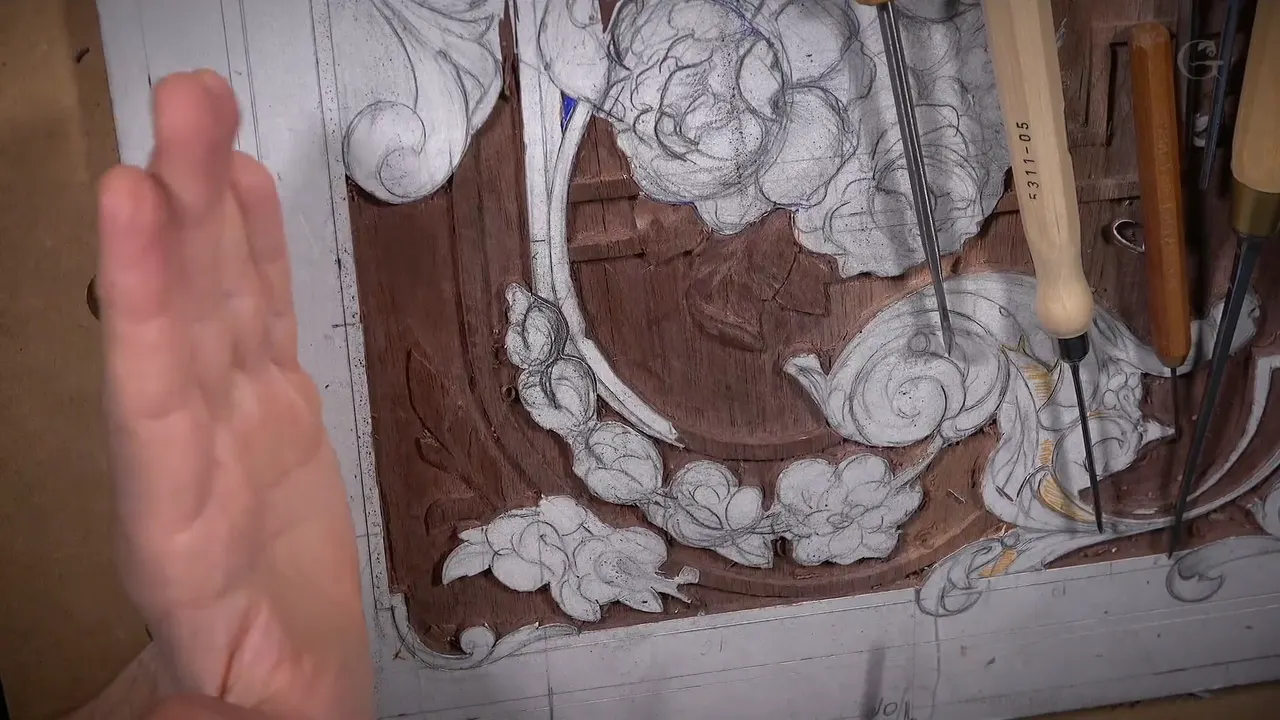
Undercutting means carving in under the edge of a leaf so the wood above it throws a shadow onto the ground. Almost no material leaves the board. On this walnut panel one ridge stands 0.5 mm, a sixty-fourth of an inch, above its background, and I go under it anyway. That thin black line is what lifts a carving off a flat board.
Your panel is carved. The ground is level, every leaf sits where the drawing put it, and the whole thing still photographs flat. I have been there and it is maddening. What fixes it is not more detail. Light fixes it, and the decision about where you let that light fall. This lesson is the one where I stop cutting shapes and start cutting shadows, and it is also where the router plane finally comes off the moldings.
What decides whether a leaf lifts off the board
- Shadow beats detail.
- A ridge standing thinner than a pencil line above its background still earns an undercut, and the light proves it.
- Drop a molding about 1/32 in where an element crosses over it.
- Rush the router plane and it hops, and the marks it leaves turn up under a fingertip before your eye finds them.
- Scrape, or use reed.
- No sanding means every facet your gouge leaves is now design, so aim each stroke.
What does undercutting actually do to a carving?
Light stops dead at the edge and drops into the gap you made. You get a black line where the leaf meets the ground, and the eye reads that line as depth, not as a cut. I show students by holding my hand over the panel and moving it, since on camera the shadow only appears once something changes the light.

Plenty of carvers never think about this. They carve the shape, clean the background, and call the work done. I care about the shadows more than almost anything else on this board. Switch off one of my two lamps, leave the other low and off to the side, and the panel tells me which edges I earned and which I did not.
How deep does an undercut have to be?
Less than you would guess. Between one ridge on this panel and the ground behind it the gap measures 0.5 mm, and the undercut still pays. I take the narrowest number 11 in my drawer, lean it in beneath the lip, and run it along the boundary rather than digging toward the ground. Go at the background instead and you will tear it.

When an undercut frightens you, use a chisel instead. A number 1 chisel, 1/16 in, a Dockyard micro tool, gets beneath a tiny leaf with far less drama than a veiner does. I reach for a magnifier lamp at that size. On dark walnut you genuinely cannot see the edge you are working to.

Can you make a tool narrower than the smallest veiner sold?
Make one yourself. A sewing machine needle already carries a groove finer than anything in a catalog, and once you sharpen the end it will reach under a leaf where nothing else fits. I mentioned this in another workshop.
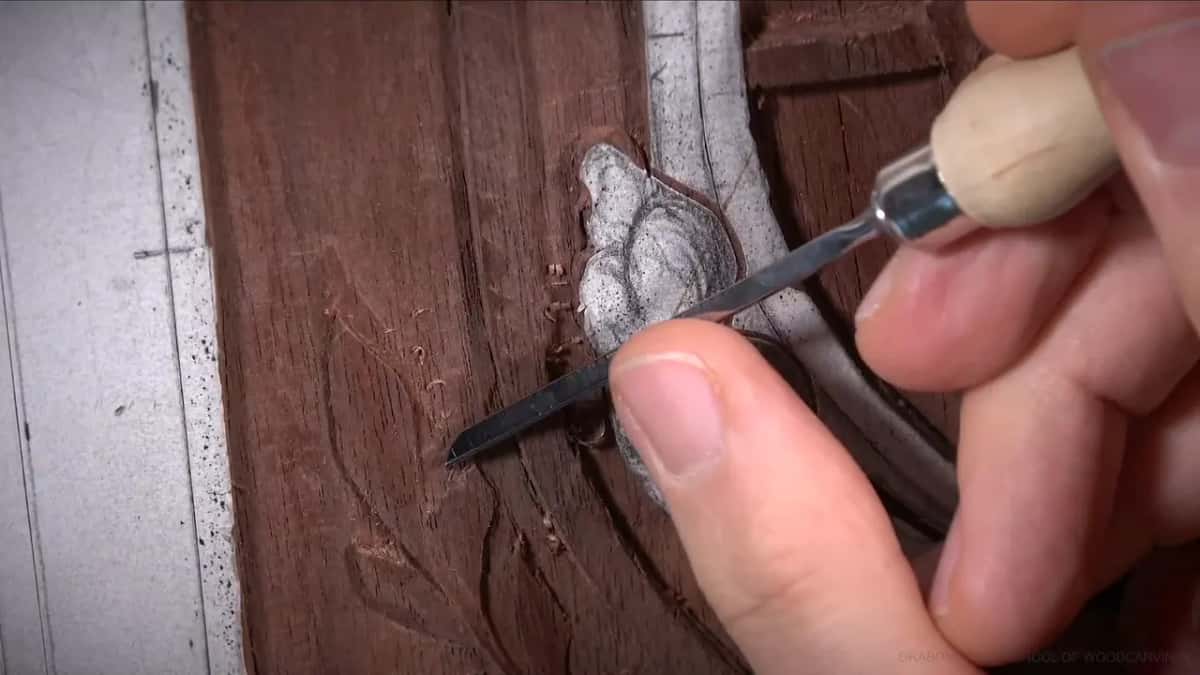
That width is not the floor of the trade. Only the catalog stops there.
Why lower a molding where an element crosses it?
An element that flips over a molding has to sit above it, which means the molding has to sit below the element. On this board the crossings are everywhere, and the difference I need is roughly eight tenths of a millimetre. Two ways get you there and both are correct.
The first is a gouge. Outline shallow with the number 11, nothing deeper than that, then take something flat, a number 1 or a number 2, hold it at about 45 degrees and walk the wood down gradually toward your outline, leaving the middle of the molding untouched.
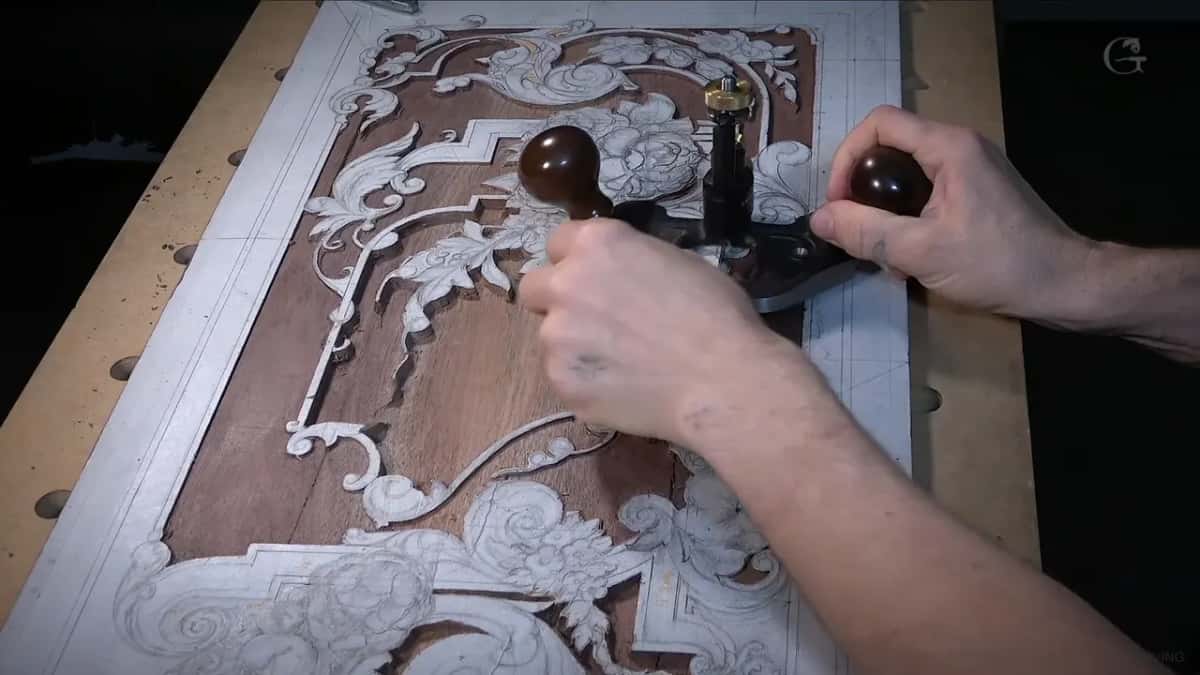
The second is the router plane, set to 1/32 in with a quarter inch blade, which shaves everything evenly and leaves the high spots alone. Mine is the second way. Some of you are picky, and I need to make sure you are not picking on me.
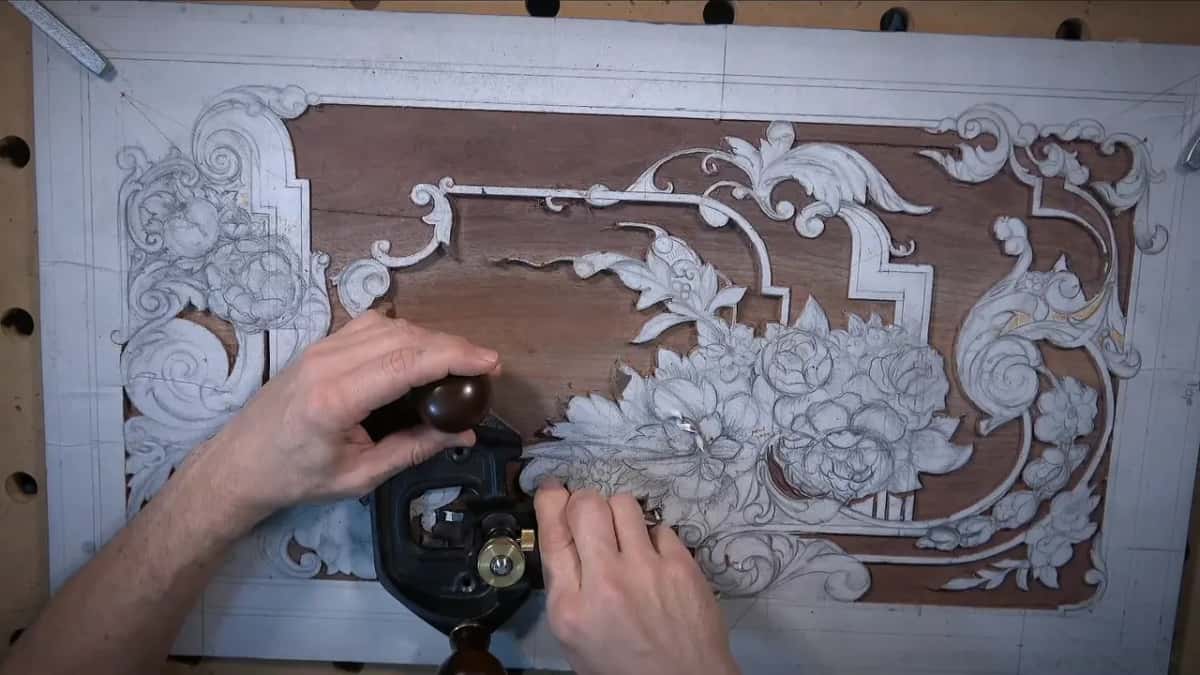
Do not take it all in one pass if the wood fights you. Come in at 45 degrees, or split it into two or three passes. Nothing about this job rewards hurry.
What are those marks the router plane leaves?
Jump marks. Push the plane too hard, the blade meets resistance, the whole tool vibrates, and it hops. You will not see it on camera and you may not see it on the board either, but run a finger across and the surface tells you.
My repair is a scraper. Small ones are good. What I actually grab is a chip carving knife, a number 9, Swiss made and thick in the blade, and I scrape the marks flat with it. Those little knives reach inside a background where a real scraper never will.

Go carefully with it. Even a scraper is still taking wood off your background, and none of it goes back.
Did old furniture makers really not sand?
Most of them scraped. I am not against sandpaper and I want to be straight with you about that, but if you look back through the history of the trade, the furniture makers reached for scrapers to level a surface. Some of them in the seventeenth and eighteenth centuries used reed, the plant that grows down by the river.

Mine is Dutch reed, and it works out roughly equal to 400 grit. I put a section of it onto a paper tube, which makes that piece last a great deal longer. It beats sandpaper for one reason that matters: no abrasive stays behind in the wood, so the next tool I put on that surface does not get dulled. The finish underneath comes out perfect.
| The tool | The size, given in both systems | Its job | What it leaves behind on the wood |
|---|---|---|---|
| Number 11 veiner | half a millimetre, which is about a sixty-fourth inch | the undercut | a shadow line, no mark on the wall |
| The old router plane | a quarter inch blade dropped to one thirty-second of an inch | even molding height | jump marks when you hurry it |
| Chip knife | a thick number 9 chip carving blade | taking those marks off | a flat surface, with none of the hopping left in it |
| Dutch reed | glued along a paper tube | softening a crisp edge, and smoothing the wood at about 400 grit level | no grit behind |
Where does the spine of a leaf belong?
Six parts out of ten across the leaf, never dead centre, and the difference shows. I take the width, divide it in my head into ten, and put the middle line at six, which is the golden ratio doing its quiet work on a detail three millimetres wide. No measuring. Train the eye and it lands there by itself.

The neighbouring leaf gets its spine shifted the same way, so the two lines run parallel to the eye. Law of repetition. The same rule runs a whole panel design, and here it decides a line you could cover with a fingernail.
I broke that rule myself in this lesson, with the camera running. Cut a spine, stepped back, and the movement had stopped repeating its neighbour. No bueno. So I cleaned the line off and shifted it until the two agreed again. Around the same hour three of my leaf movements came out almost the same size as each other, which is worse than a bad cut, and I went back and destroyed work I had just finished in order to break them apart. They still look a little too equal to me. I left them that way.
That is the part nobody puts in a course video on purpose.
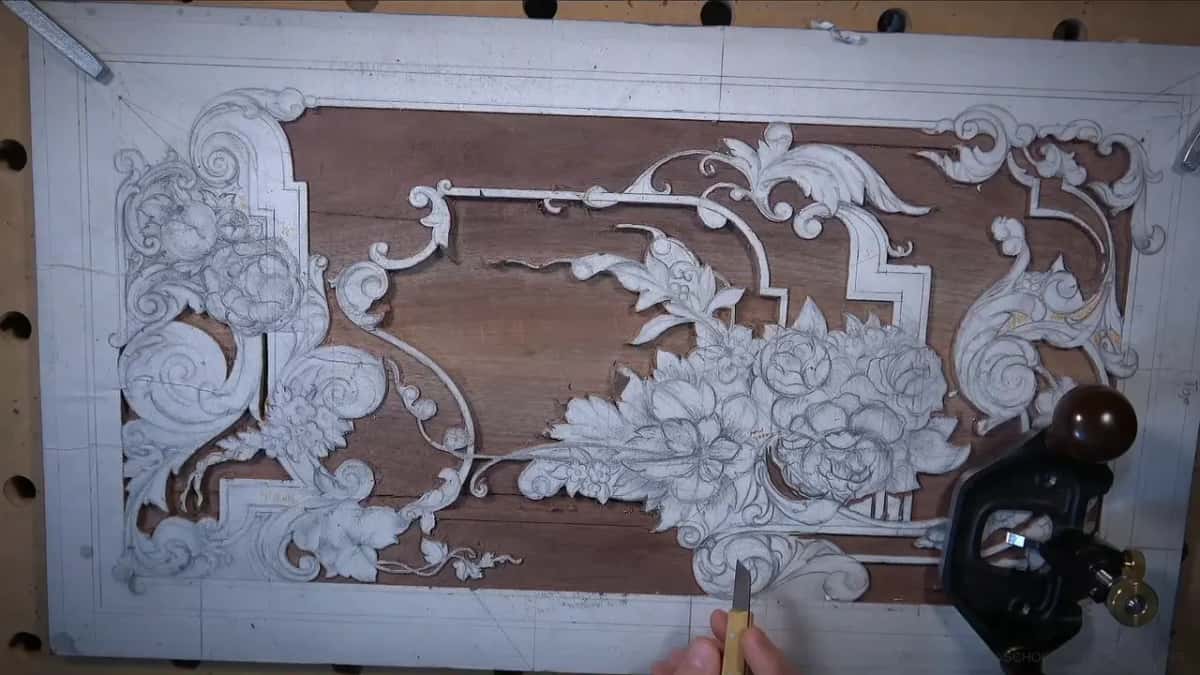
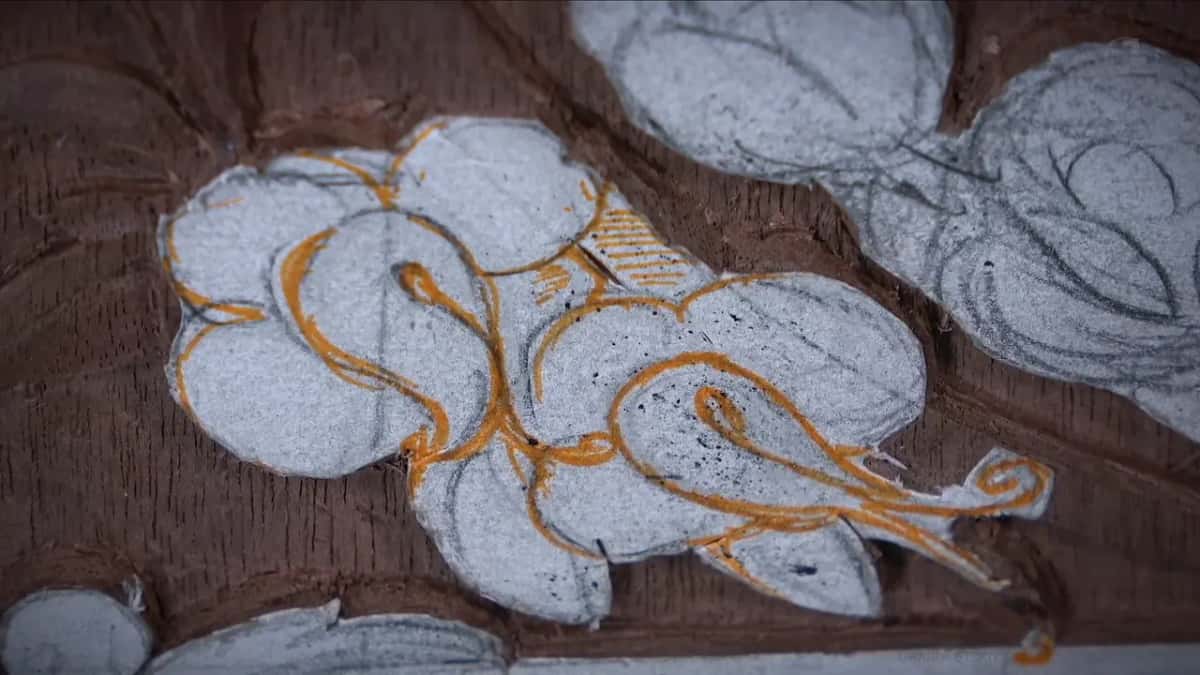
Before any of that I mark high spots and low spots with a pencil, because once the chips start flying it is too late to be deciding. This petal goes under the molding. That one lifts over it. The leaf behind them stays lower than both.
How hard should you hit the mallet on an outline?
Barely. A mallet gives you more control than your shoulder does, not less, so I use one for outlining even when the cut is tiny, and the taps are so light you can hardly hear them.

Deep cuts leave marks, and I am planning to undercut this whole area later. Any mark I chop in now will still be sitting there when the undercut exposes it. So I barely touch. Twice if I have to.
What do you do when there is no room to go through?
Send the element downhill and back up instead of piercing it. My background here is an eighth of an inch deep, about three millimetres, and a leaf that crosses open space would be too weak if I cut all the way through. Instead I run it down from its high spot to roughly 0.8 mm above the ground, then lift it again to meet the next high spot.
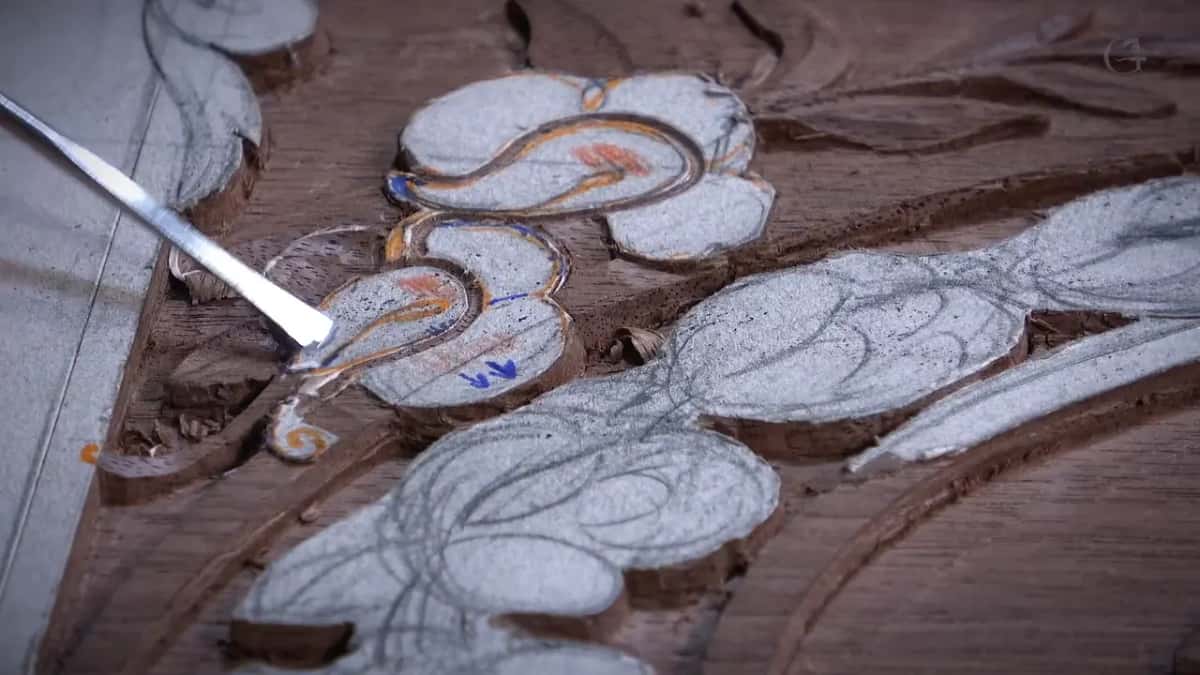
The run has to be gradual. I left a small bump in mine on the first pass, felt it, and took it out before going further, because a bump reads as a mistake while a smooth fall reads as a stem growing. It is easier to clean, too.
Why does a separation cut matter so much?
Done right, the leaf stops looking carved into the board and starts looking laid onto it. I outline close to the petal, hook the waste out with a number 1, then turn a number 3 upside down and lift a little more from underneath.

For the waste right underneath I switch to a grounding tool, 1/16 in, from Ashley Iles, and I use only the corner of it at about 45 degrees rather than driving the whole edge in.
Once the shadow sits in that channel the two elements stop being one piece of wood. Richer, and it costs a minute.

The zipper cut earns its keep the same way. I put one in between two elements early, before I need it, so that later on when I am tired and working fast I cannot run a tool across a detail I meant to keep. You forget things. I forget things.
My edges came out too sharp. Now what?
Two repairs, and one of them is four hundred years old. Take a knife and cut a micro bevel along the edge, which works perfectly well but asks for real accuracy on a leaf this size. Or take the reed brush and run it along the edge, which softens it in a second and leaves nothing abrasive in the grain.
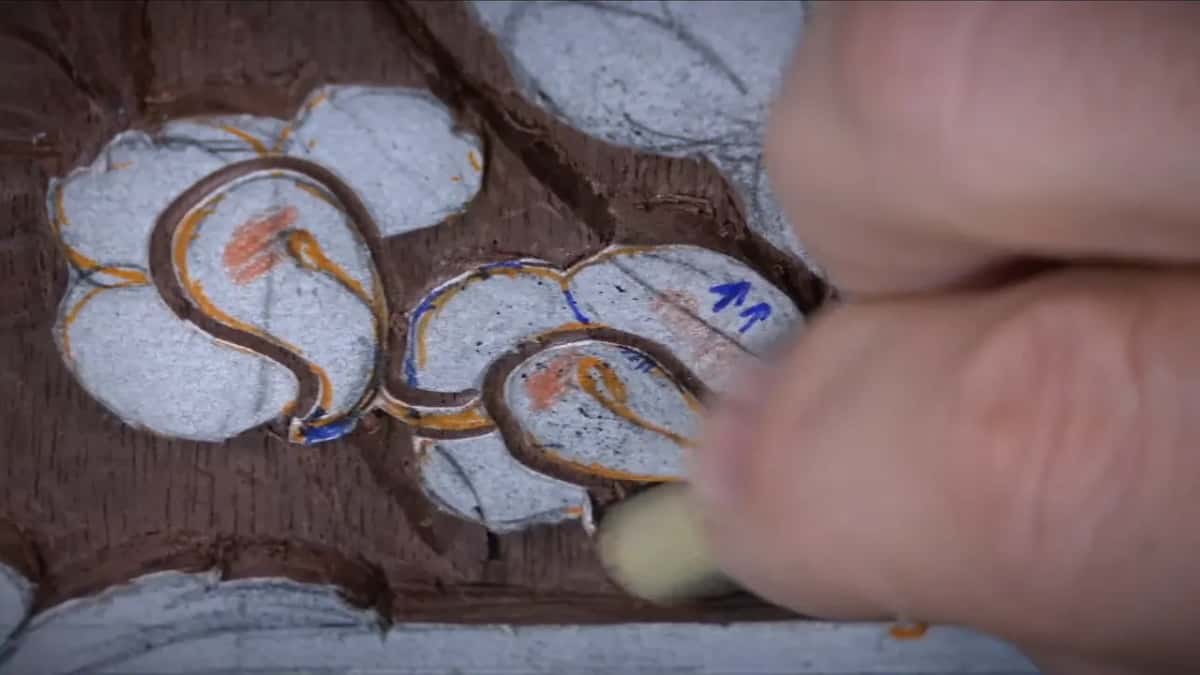
The second one is how they did it. I like doing what they did.
Why do all the cuts run toward the centre?
Every facet my gouge leaves becomes part of the design here, since none of this panel will ever be sanded. The logic then is simple: the middle of the flower is where everything grows from, so every stroke runs toward that middle and the facets fan out the way the petals do.
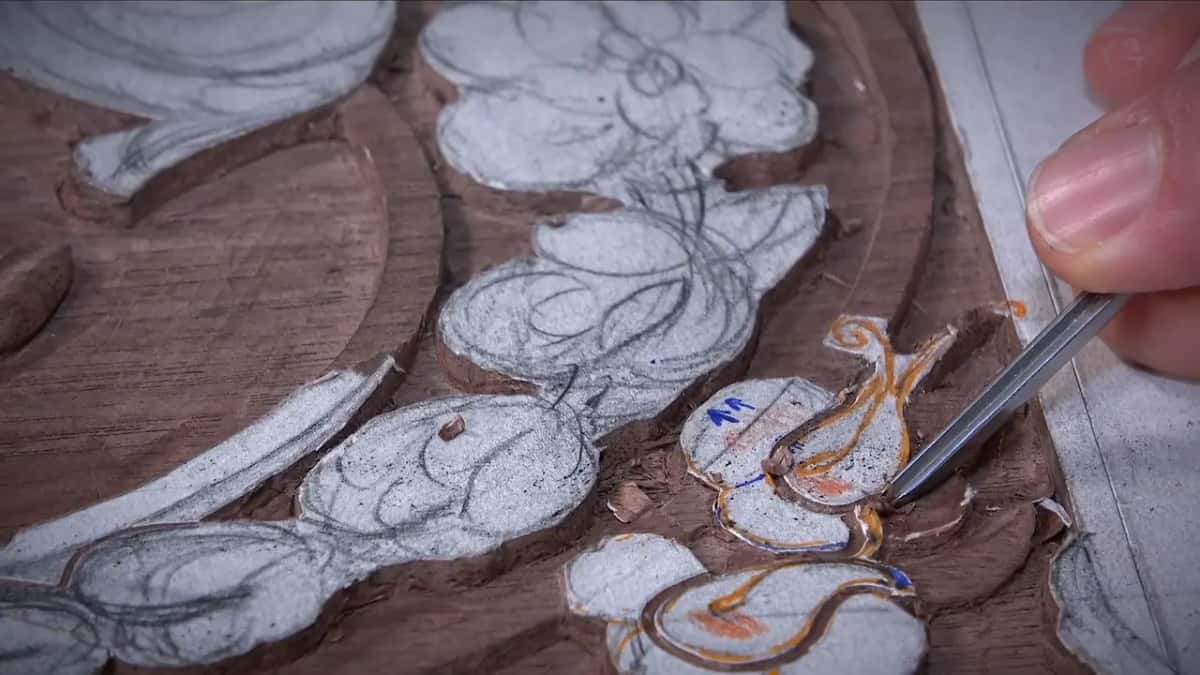
On raw walnut you can barely see it. Put shellac or wax on the same panel and every single cut shows up, and the direction you chose months earlier is suddenly the thing people notice. Which is why I will not let a careless stroke stand, even in a spot the size of a grain of rice.
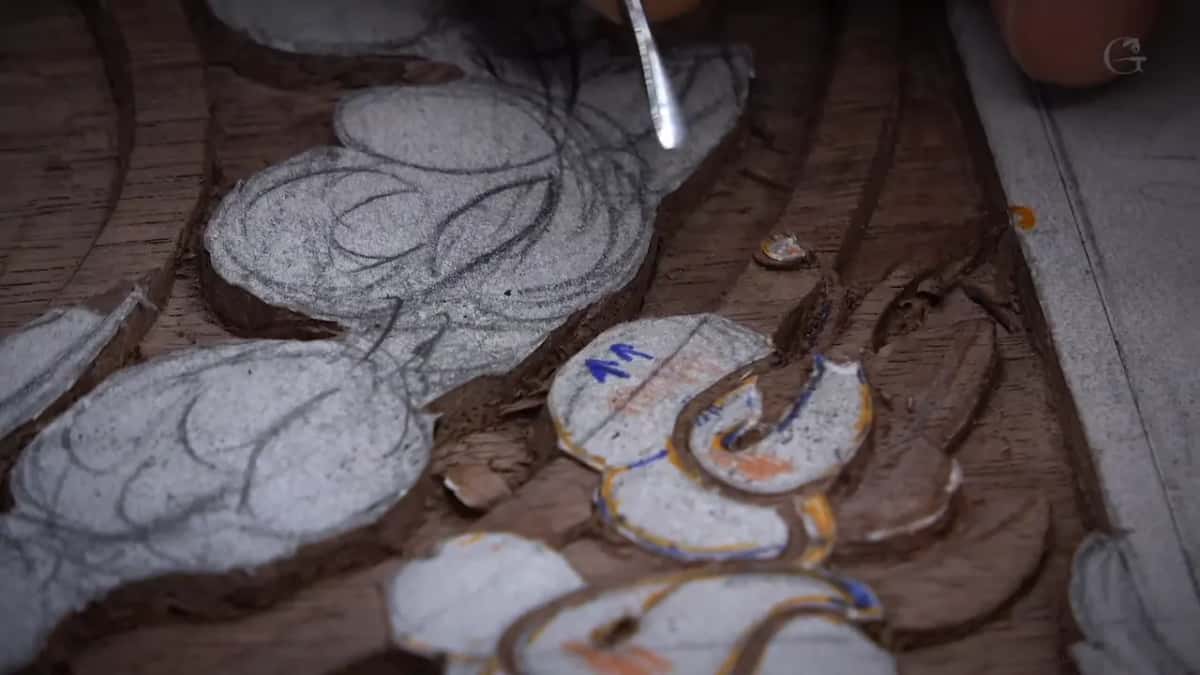
The volute at the end of that curl is about a millimetre wide. I hold the number 1 in my fingers with no mallet, no pressure, and shave rather than cut. Work like that is slow and I am not going to pretend otherwise. It is also the difference people feel when they pick the piece up and cannot say why.
What does the plane do when nothing is under it?
The plane rocks, and your molding pays for it. One side of my router plane has no support at this stage, so pressing down there tips the whole tool and the blade bites into a molding I spent an hour on.

Keep your pressure over the flat part, always. If the cut fights back, rotate the plane the way I did when I was clearing the background and take it in small bites. Getting close is enough. A gouge finishes the last bit better than a plane ever will.
Everything in this lesson sits on decisions made much earlier, in the drawing and in the first stage of the carving. If you want to see where the crossings came from, they were designed in Part 1, and the background under all of it was levelled across lesson 16, lesson 17 and lesson 18. The same acanthus movements are built from nothing in Acanthus over Moldings, the 1903 leaves get the same handling in the modern acanthus course, and a different panel gets the same treatment in the floral and molding course.
Shadow is the oldest trick in ornament and the least discussed. Go and look at Grinling Gibbons in a good light, or at almost any Baroque carving in a museum collection, and watch how much of the drama is coming from dark lines rather than from depth. You do not need better tools to do this. You need to decide that the shadow matters.
If you want somebody beside you the first time you put a veiner under an edge that thin, that is what the school is for.
How it's done
- Decide which edge is going to throw the shadow. Look along the panel with one lamp low and to the side. The edges that already darken the ground are working. The flat ones are the list of what to do next.
- Lean the veiner in, do not dig down. Set the narrowest number 11 you own against the underside of a lip and walk it down the boundary. Aim the tool down at the background instead and it will tear the ground you spent hours levelling.
- Swap to a chisel where the element is fragile. A number 1 chisel near 1.5 mm wide goes under a small leaf with far less risk. Bring a magnifier lamp over dark walnut, where the line you are working to is genuinely hard to see.
- Take the waste out from underneath. Turn a number 3 upside down and lift, or use the corner of a narrow grounding tool at roughly 45 degrees. The waste hooks out and the element starts looking laid on rather than carved in.
- Check it against moving light, not against the wood. Pass a hand over the panel, or switch one lamp off. An undercut you cannot see in flat light will still read across a room once the piece is hung and lit from one side.
- Soften the sharp edges last. Run a reed brush along an edge that came out too crisp, or cut a micro bevel with a knife if your hand is steady. Neither one leaves grit behind in the grain.
Frequently asked questions
How much wood does an undercut actually remove?
Hardly any. A veiner half a millimetre wide, tipped in beneath a lip and travelled along the line, takes a shaving you could lose in your palm. The change shows up in how light behaves there, never in the pile of chips on the bench.
Should a beginner undercut with a veiner or a chisel?
A chisel, at the start. Reach for a number 1 close to 1.5 mm, which slides beneath a fragile element with much less risk of digging down into the background and tearing it. Veiners get faster once your hands know the angle, and considerably worse before they do.
Why do carvers scrape rather than sand?
Grit stays in the wood. Sandpaper leaves abrasive particles among the fibres, and every edge you put on that surface afterwards goes dull faster for it. Reed and a scraper both level the same surface and leave nothing behind except wood.
What to carve next