

Alexander Grabovetskiy, woodcarver, School of Woodcarving · Published 2022
How do you carve the center of a flower in relief?
Quick answer: The center of a relief flower is built in two moves. You round the middle into half a sphere, then you dig a hole down inside that sphere so the small stems appear to climb out of it. One sixteenth deep outlines the shape and five millimetres carries the dome.
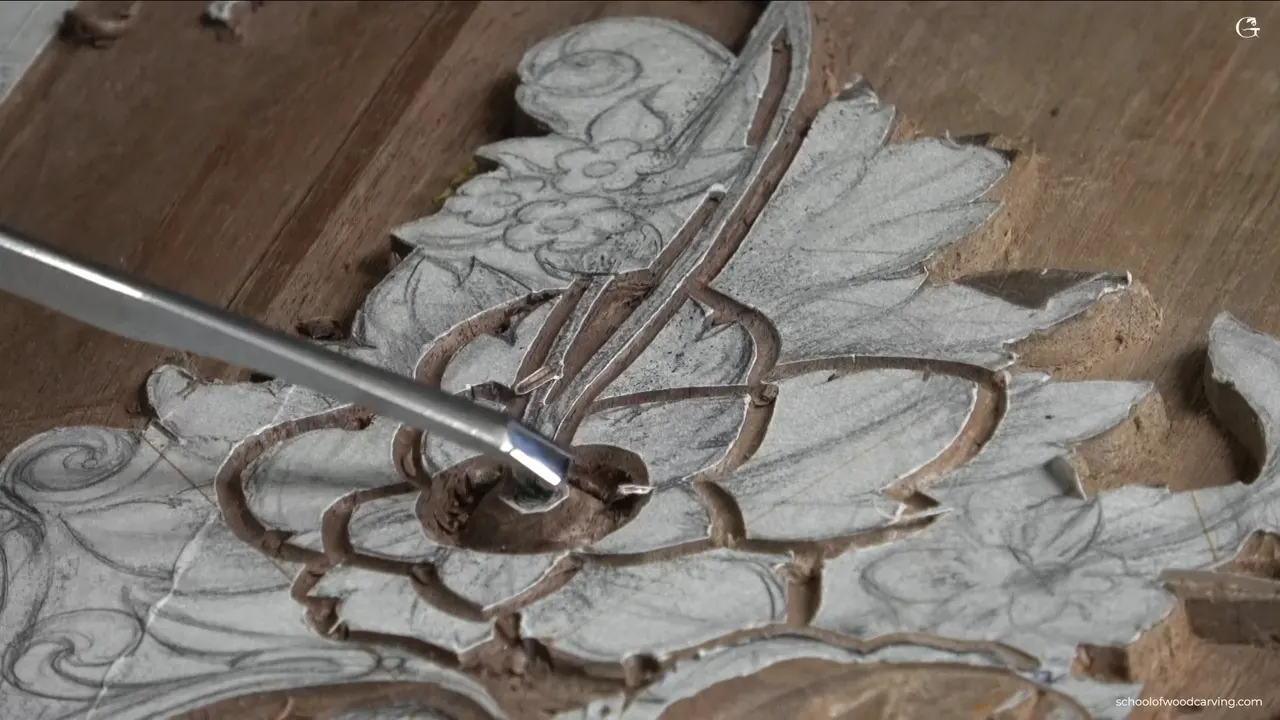
A relief flower gets its middle in two moves. You round the center into half a sphere first, then you dig a hole straight down inside that sphere, and the small stems are carved so they look like they are climbing out of it. What sells it is the shadow sitting in there.
This flower is the hero of the whole panel. I designed the cluster around it, every movement in the ornament points at it, and if I carve it flat the panel has no middle. So I gave it a full day and I did almost nothing else.
Key takeaways
- The middle gets rounded before anything is dug from inside.
- The outline goes no deeper than a sixteenth of an inch, whatever depth you want later.
- A bronze mallet resting in your palm gives you more control than pushing the gouge by hand, which is the opposite of what beginners expect.
- Mark five parts in the dome, none lined up with a petal outside.
- Each division bulges in the center, so you carve a small concave on both sides of it.
- Walnut forgives a wrong direction. Most other wood does not.
What makes one flower the hero of a panel?
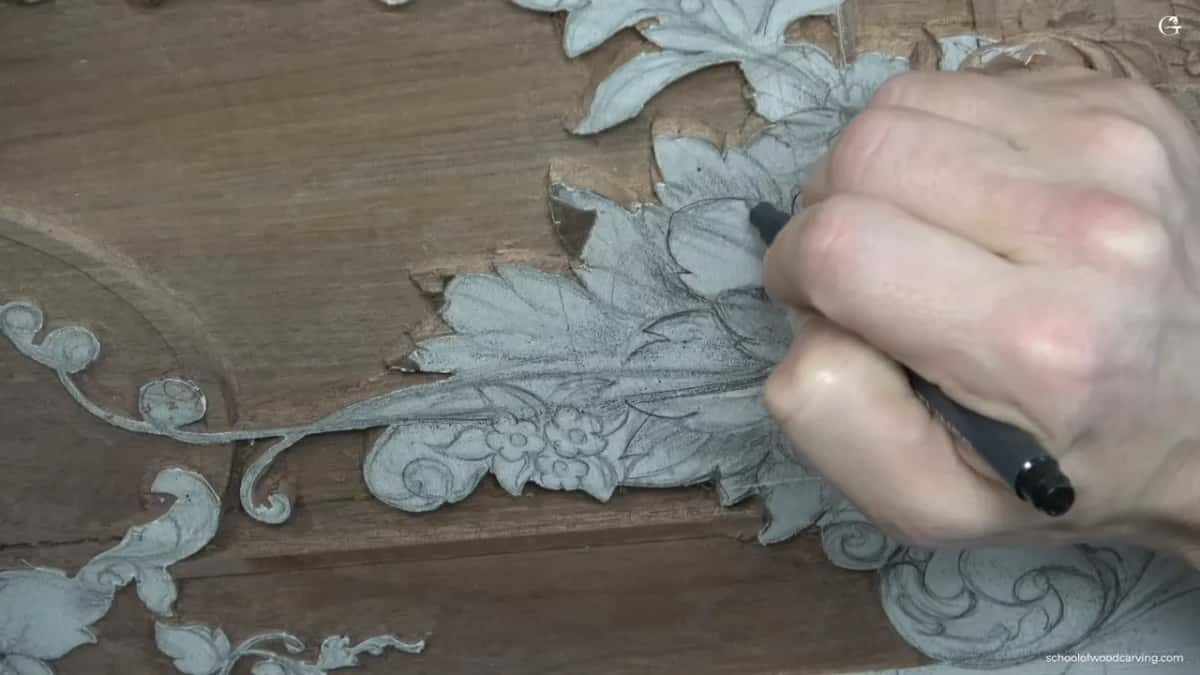
The design decides it long before any gouge touches the board. In the design part of this course we built a cluster and everything else in the ornament grew around it, so this bloom carries the main movement of the piece. Look at it now and you see long stems leaving the center and travelling across the design. I have never seen a real flower do that. Stylized, the way the old carvers stylized theirs, and I drew it that way to stay honest to the period instead of to botany.
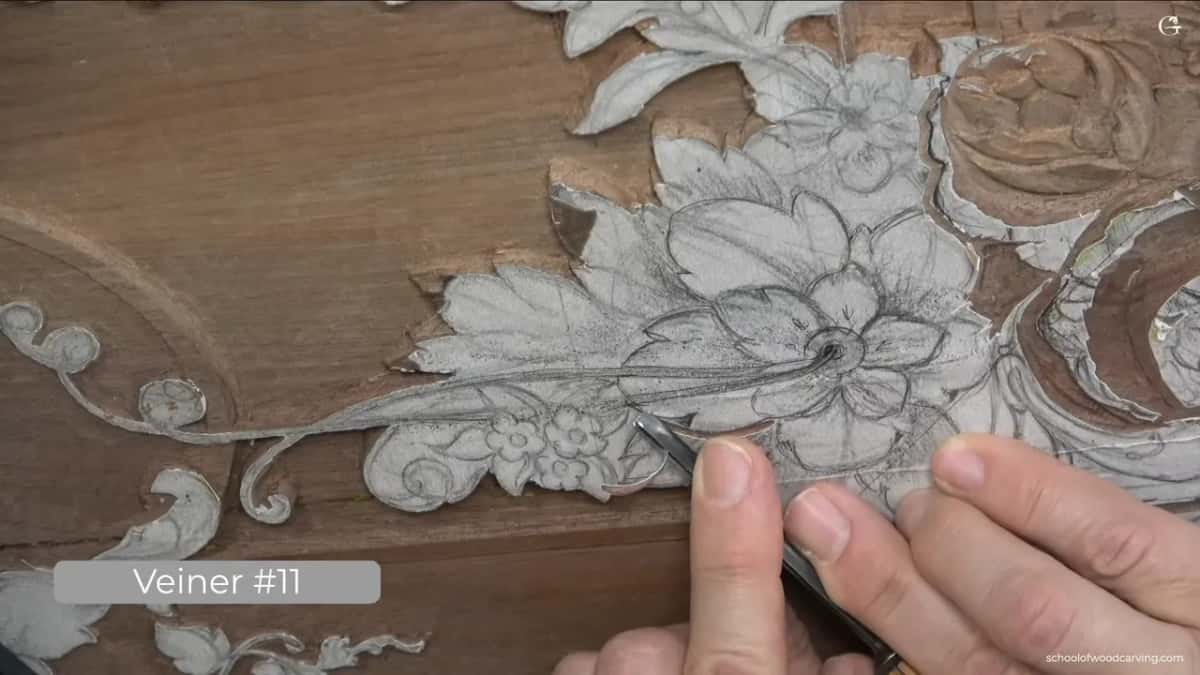
I am not even a big fan of those long stems. I keep them anyway. When you copy a period, you copy what they did and not what you would have preferred.
I have no good name for them either. Tendrils, maybe. They crawl like tentacles, except an octopus has nothing to do with a panel of walnut, so that word is wrong too. Forty years in and I am still asking students what to call this shape. If you know the proper term, tell me.
Before any of it I lay a marker line over the drawing. I do not have to. Pencil would hold. A marker gives a stronger line, and on a shape I will be staring at for a full day I want the line to still be there at four in the afternoon.
How deep should the center of the flower go?
Deeper than anything around it, and you earn that depth in stages. My outline goes in at a sixteenth of an inch with a number 11 gouge, an eighth of an inch wide, about three millimetres. That first pass is only a boundary. After that I go back and take the middle down toward five millimetres, near three sixteenths, which I can only do here because the background under this section was already carved low.

Go straight to five millimetres on the first pass and you lose the line. Sneak up on that depth and the line survives.
What are the three parts you outline?
Outer petals, inner petals, and the middle, and every one of them gets its own line before I take a single chip off the board. Order matters less than making sure all three exist before any shaping starts. The small triangles between the movements can wait. I set those later, once the larger shapes have told me where they want to sit.
I also stop short. My gouge runs to roughly the point where the two long stems cross the perimeter, never all the way through, because carving through them at this stage would cost me the shape I came here for.
And I carve with the grain. Always the rule, and one that a beginner breaks about forty times before it sticks.
Why use a mallet on such a small flower?
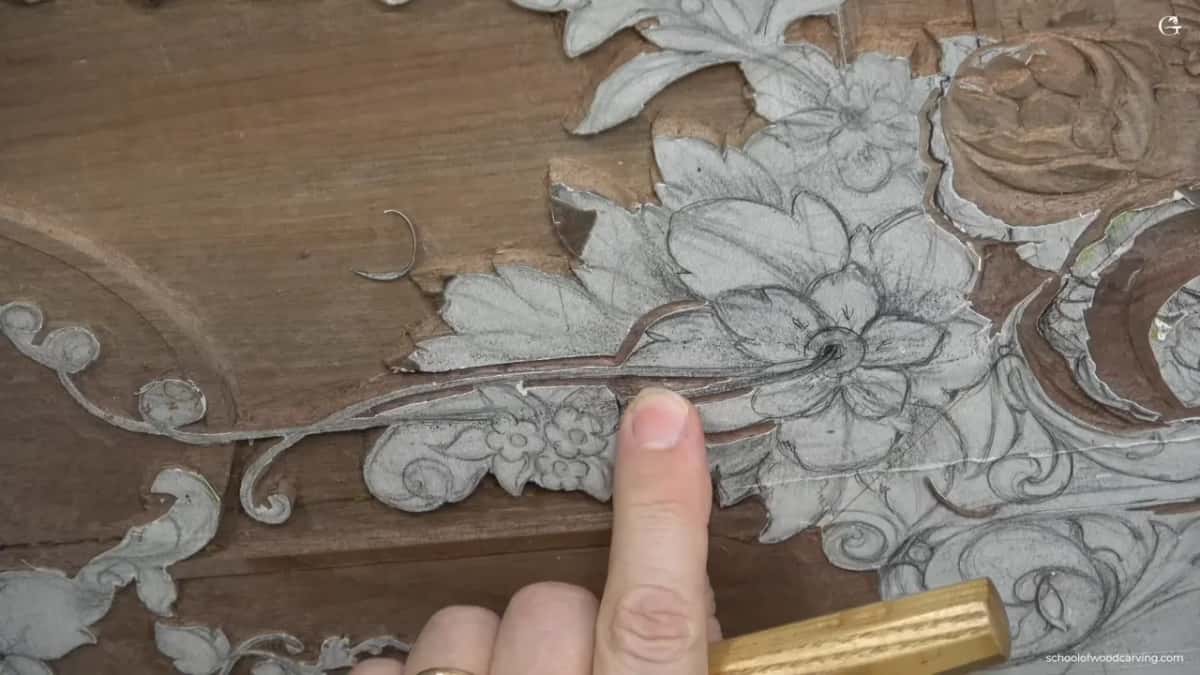
Control. I know it sounds backwards, and I have said it in this course more times than anybody wants to hear, but a small bronze mallet lying flat in your palm beats hand pressure every time. You are not swinging it. You rest it against the handle and tap, and each tap moves the edge a known amount instead of whatever your shoulder decides to give it.
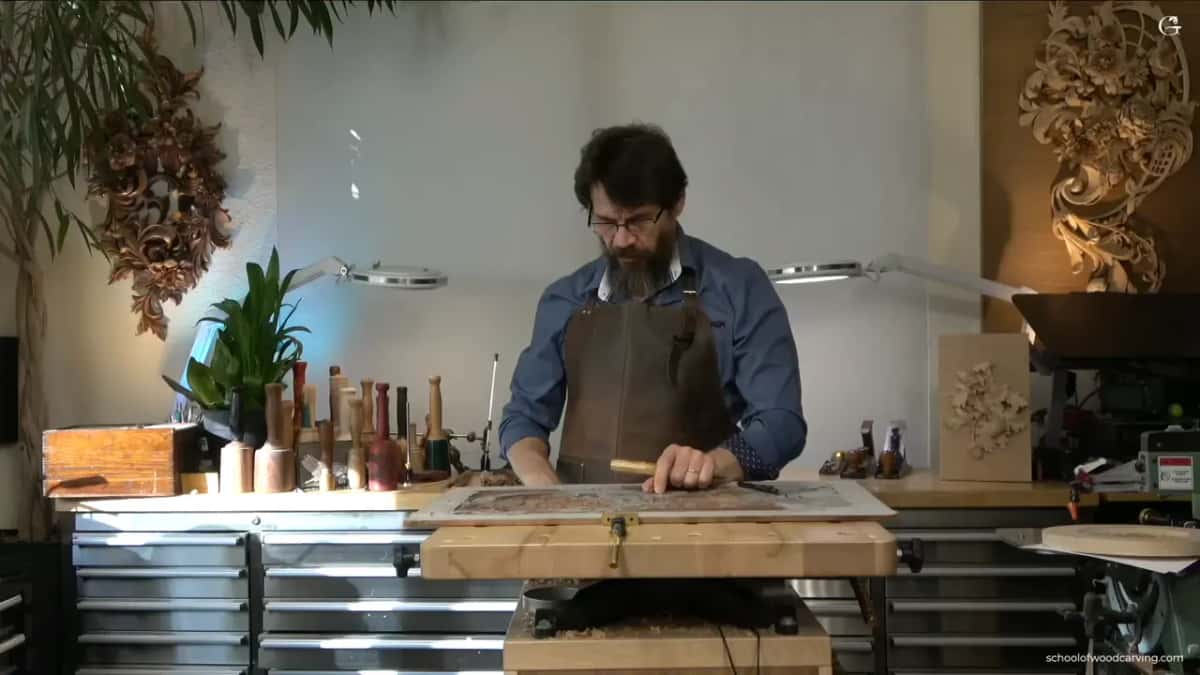
The tool I am tapping is an antique by Herring Brothers. I like the steel, and I like the story attached to it more than I probably should.

Where did these gouge shapes come from?
One family of toolmakers, and a piece of gossip from two hundred years ago. A young Herring served his apprenticeship in the Addis shop, married one of the Addis daughters, worked there as family, and eventually left to start his own brand with his brother. He took the sweeps and the profiles with him. Those two firms kept their secrets from each other and made nearly the same tools.
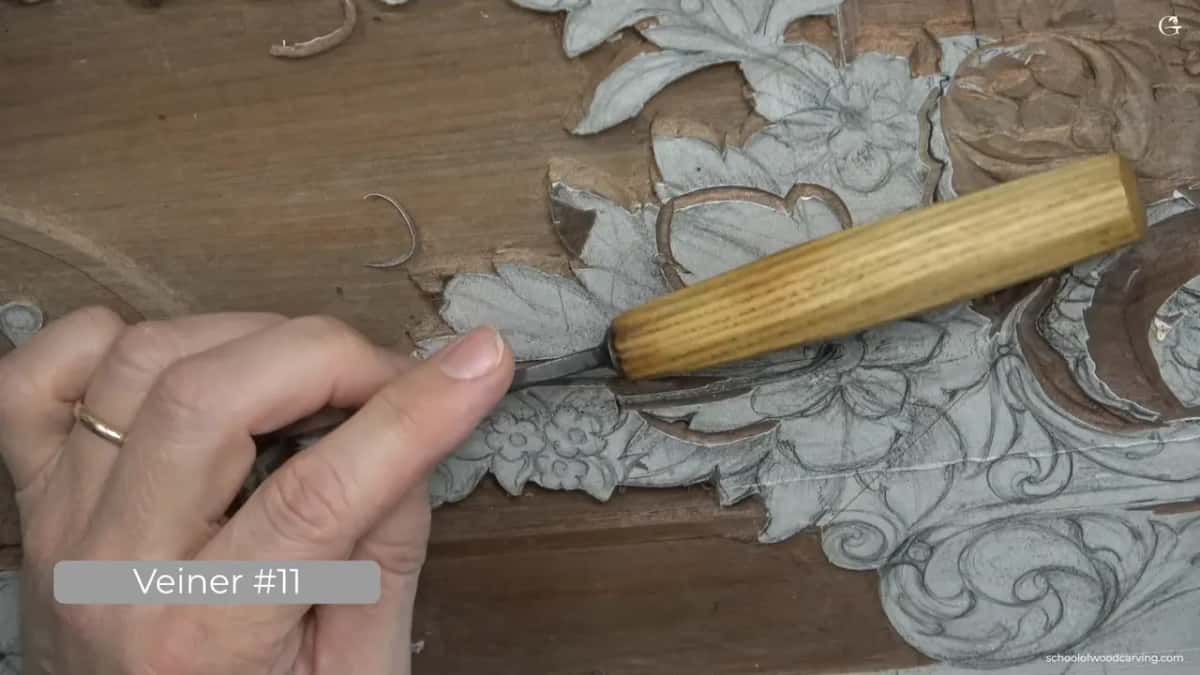
Here is the part I cannot prove. Grinling Gibbons died in August 1721, and for his last five years he lived on the same street as Addis. Addis was apprenticed to a toolmaker, and the master toolmaker on that street was most likely the man supplying Gibbons. So the sweeps we buy today may be the sweeps Gibbons held. It is a suspicion, not a hundred percent proof. I still think about it every time I pick one up.
What is certain is sadder. Some of those profiles were only made until the beginning of the nineteenth century, and the ones that stopped were the tools built for carving flowers. Gibbons is the reason anybody carved flowers in the first place.
What actually happens inside the middle
| Stage | Tool | Depth | Result |
|---|---|---|---|
| Outline all three parts first | Number 11 at three millimetres or an eighth inch | A sixteenth deep | A boundary line you are still free to move |
| Clear waste | Number 5, about six millimetres wide | Five millimetres, or close to three sixteenths of an inch | Room for a dome |
| Shape the middle until it reads as a sphere | Same number 5 | No deeper than the level already reached | Half sphere |
| Open the hollow inside | Dockyard number 8, a millimetre and a half | Whatever suits | A dark opening that the small stems appear to climb out of |
| Divide the dome into five parts | Number 3 | Shallow, and offset from the petals on the outside | Five separate parts |
| Lean the separations so that one part sits over its neighbour | Number 16, 35 degrees | Barely anything | Depth the eye reads instantly |

What turns a flat board into a dome?
You go around it, not at it. Once the ground beside the middle is low enough, I take a number 5 at six millimetres, turn the flute down, and slice around the shape the way you would peel something round. Black walnut lets me get away with a little of this the wrong way, which is a mercy. Try the same on some other species and the whole face tears.


Keep an eye on what the grain is doing anyway. Forgiving is not the same as free.

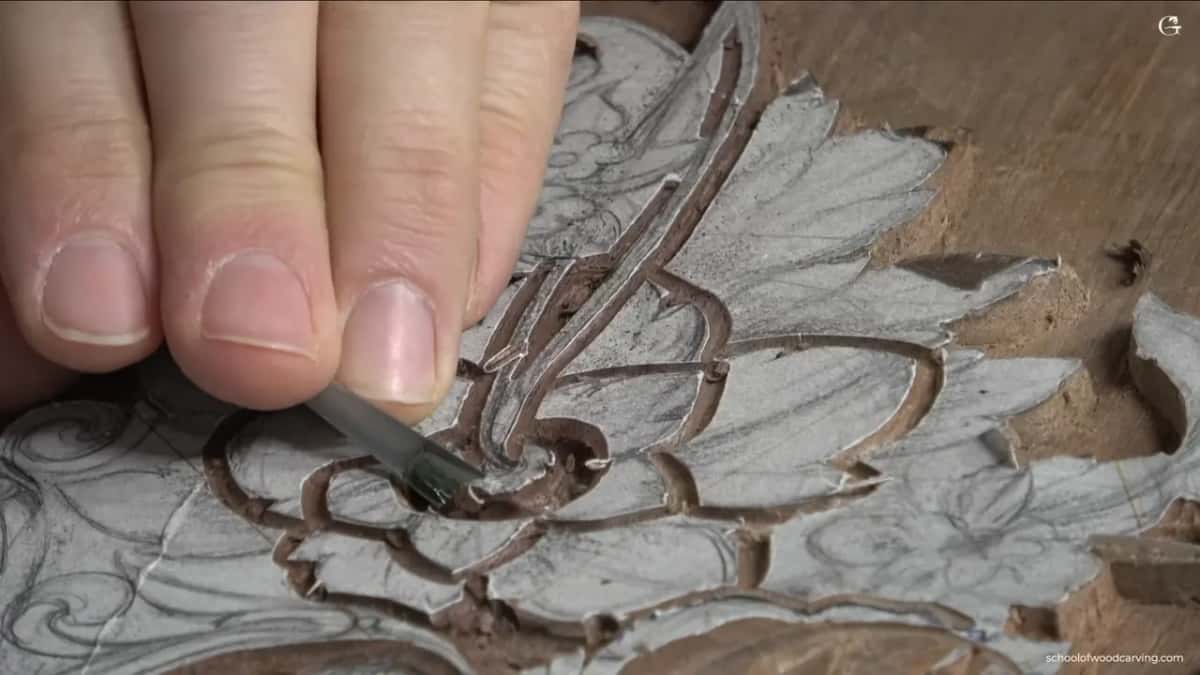
When it is right, the middle reads as a sphere from every angle, even though there is only about five millimetres of wood in play. Making low relief look round comes down to exactly this.

Which tool opens the hollow?
The smallest one on the bench. I reach for a Dockyard number 8, one and a half millimetres wide. They are cheap tools and they are excellent for this. When that is too fat I go down again to something around a millimetre, and honestly I stop being sure whether it is a number 8 or a number 9. By the profile I would say 8. Makes no difference. Either one pulls the job.

The rule while you are in there is simple. Do not damage the rim. I want the hole deep and the border crisp, because the border is what throws the shadow that makes the opening read as an opening.
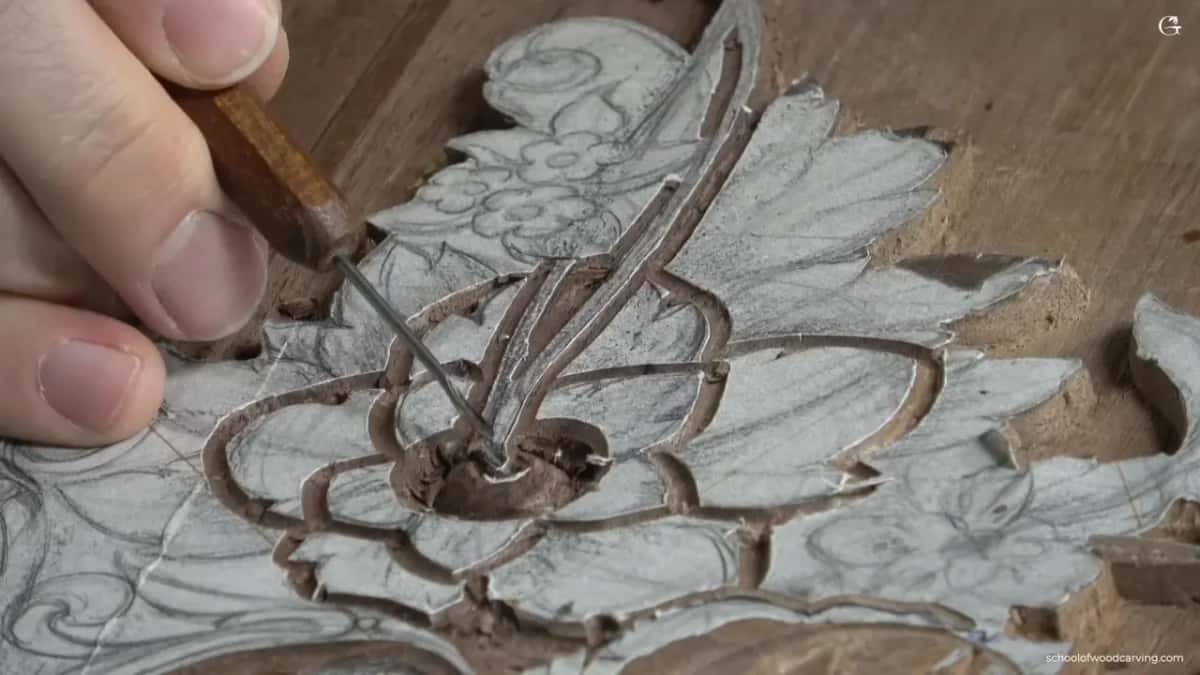
Then the small stems. I lower them slightly on both sides using a one millimetre number 3 by Peter Benson, made by Ashley Iles, and it is a beautiful thin tool for detail like this. Working both sides is what makes each stem look like it is growing out of the middle rather than lying on top of it.
Patience. That is all I tell myself here. Wood carving builds character, or maybe you are just becoming patient with me.
One stem goes deeper than its neighbour. Not by much. Two things at the same depth read as one thing, and this bloom needs the two stems to read as two.

Go a little deeper and the shadow arrives on its own. I go slightly underneath the edge as well. Not a full undercut, just enough to darken the line.

Why five parts in the dome?
The outer petals already come in fives, and repeating that count in the same positions would flatten the whole bloom. I take a pencil and set five marks across the dome, and I deliberately start them from the middle of a petal outside instead of lining them up. Same idea we used on the filler flowers, only smaller.
A few triangles come out next, so the shapes start to curl. Rough is fine at this stage. Nobody is grading the middle of the work.

Each of those five wants its center raised, which means it has to be convex, which means I carve a small concave on each side of it. A number 8 around two and a half millimetres does that. A smaller one, nearer to a millimetre, then goes along the edge to add the curl. Not every part needs it. Some interest beats total consistency.
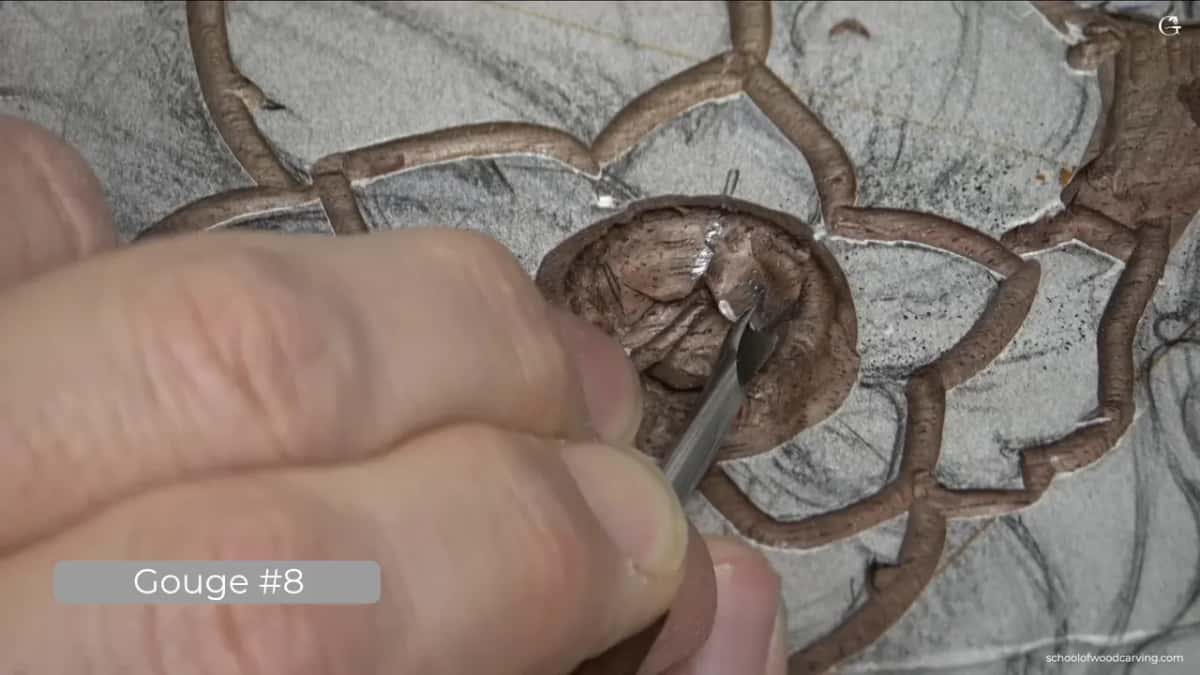
For the separations I use half a millimetre of number 11 by Two Cherries, or a number 16 at 35 degrees. Either works. I like the antique because somebody used it before me and it has history attached.

The separation is never straight down. I point the flute toward one o'clock so the left petal lies over the right one, and I repeat that lean all the way round. Straight down would give me a groove. Leaning gives me an overlap, and overlap is what the eye reads as depth.

How do you finish it without losing the form?
Facets first, then the rim. The number 3 by Peter Benson goes back in upside down and takes the facets off the dome until the surface is smooth. It does not have to be perfect. Then I roll the edge backward and start undercutting, carefully, because a one millimetre tool snaps if you lean on it.

Seen from above the outside is not a clean circle. There are notches between the petals, small triangles removed, and those notches are what stop the bloom looking turned on a lathe. The same thinking runs through the petals of the neighbouring flower, and through the rule about sharp edges in furniture work.

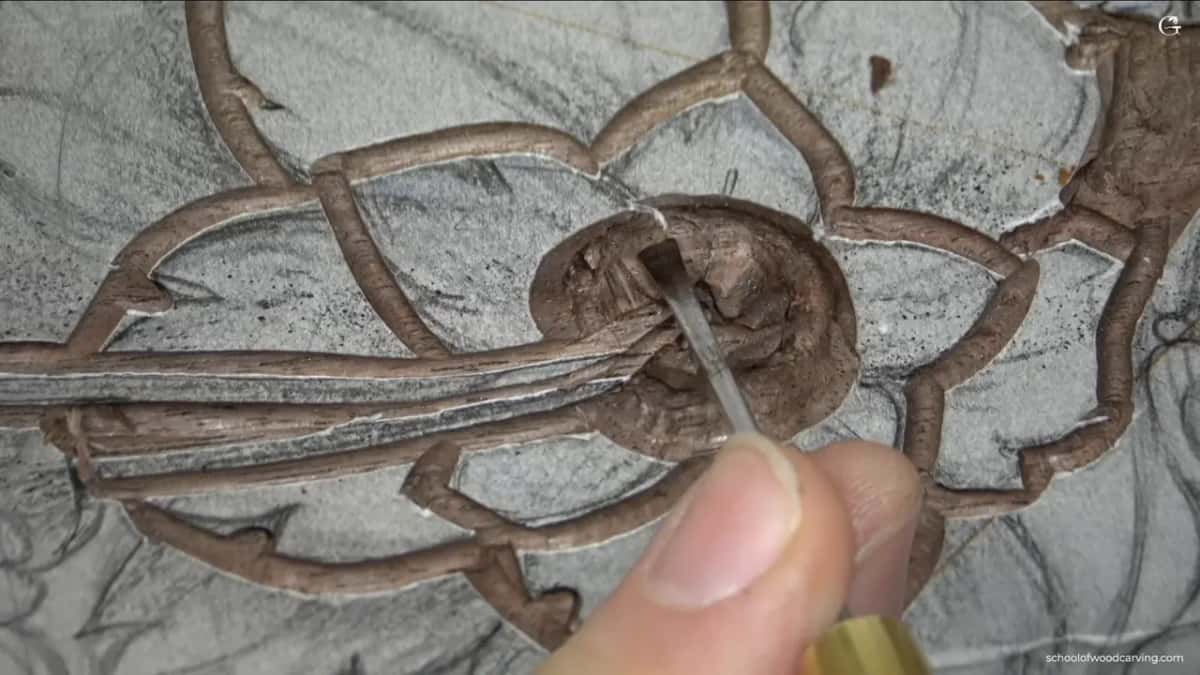
There is no limit to how far I can excavate under that rim, because the ground beside it was already carved low in an earlier session and the wood underneath is sound. Doing the background properly the first time pays for itself right here. Every shape you build on top of it later gets to be as deep as it wants to be.
Take your time and go deeper than feels safe under that rim. Nothing structural is at risk.
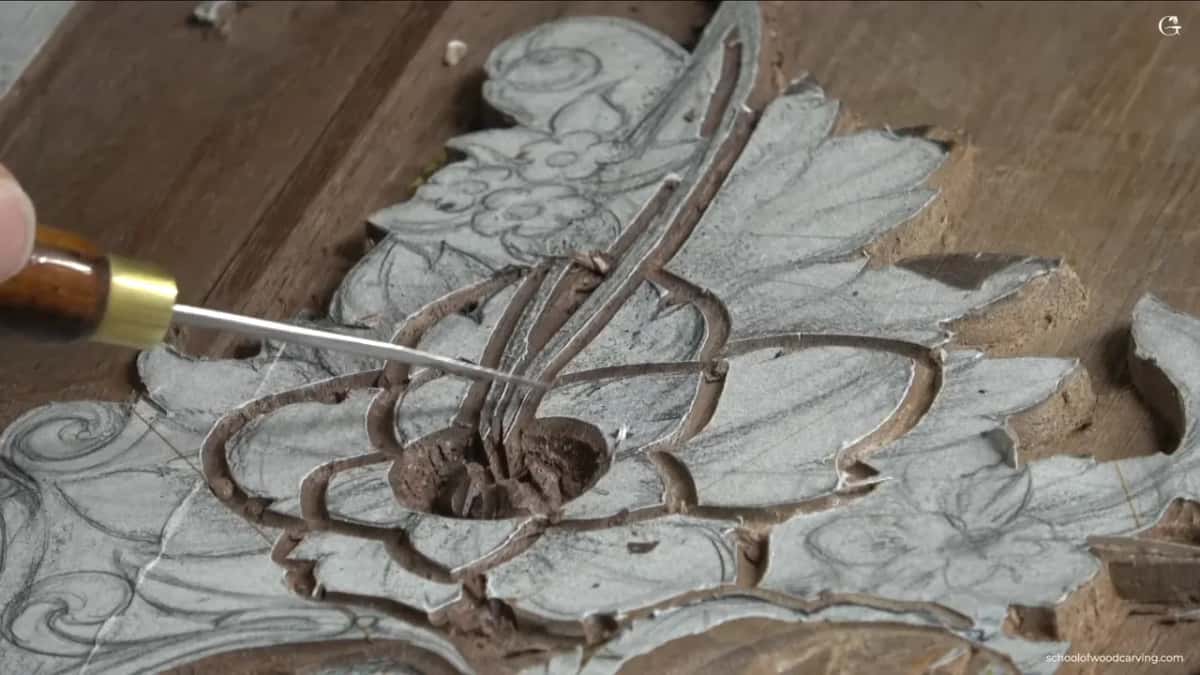

That is the middle done, and the rest of the bouquet is waiting. It has taken me a long time to get this far, and I will say plainly why. This panel is not a customer job with a deadline attached. It belongs to the school, so it waits whenever a real commission walks in.
Next time I jump on the rest of the bouquet. The other blooms are outlined and waiting, and now that the hero has its shape the ones around it have something to answer to. Which is why I gave this one a whole day instead of spreading the effort evenly across the panel.
Do you want to carve ornament that still holds up when somebody leans in close? Shall we carve?
The full lesson runs in three parts inside Carving Furniture Panel, Part 2, and the work continues in Part 3. If you want the tools before the technique, start with All About Tools, or come and stand at a bench with me at an in person class. Access to every course is on the tuition page.
How it's done
- Outline the three parts. Run a number 11 gouge, three millimetres wide, around the perimeter, around the inner movements and around the middle. Keep that pass at one sixteenth. Nothing more than a boundary, so resist going deep.
- Take the middle down. Switch to a number 5, six millimetres across, and clear the waste beside the middle, then go back to the number 11 and work the middle down near five millimetres. Only do this where the background under the section is already low.
- Shape the dome. Turn the number 5 flute down and slice around the shape until it reads as round from every angle. Walnut tolerates a little work the wrong way here.
- Open the hole. Take a number 8 at a millimetre and a half and excavate the middle. Protect the rim while you do it. The rim throws the shadow that makes the opening look like an opening.
- Lower the stems on both sides. A number 3 at one millimetre lowers each small stem along both edges so it appears to grow from inside. Go slightly under the edge for a darker line.
- Divide the dome into five. Pencil five divisions that do not line up with the petals outside. Raise the middle of each one by carving a shallow concave on either side, then lean a separation so one part overlaps its neighbour.
- Smooth and undercut. Take the facets off with a number 3 held upside down, notch the outer edge with small triangles, and undercut the rim as deep as you dare with a tool that will not snap.
Frequently asked questions
What depth does the middle of a relief flower sit at
On this panel the middle sits about five millimetres below the top surface, close to three sixteenths, while the first outline goes in at only a sixteenth. The depth is available because the background under that section was carved low in an earlier lesson.
Which gouge opens the hole inside a flower
A Dockyard 8, one and a half millimetres. When that is too wide, drop to something near a millimetre. The profile matters more than the catalogue number, and a number 9 of the same width does the same job.
Is a mallet really better than pushing the gouge
For work this small, yes. A small mallet resting in the palm moves the edge a measured amount with each tap, and hand pressure does not. Noise is the only cost.
What to carve next