

Alexander Grabovetskiy, woodcarver, School of Woodcarving · Published 2019
What is an island in wood carving?
Quick answer: An island in wood carving is a piece of the untouched surface left standing on purpose. A router plane rides on whatever surrounds it, so when a whole area drops at once there is nothing left to reference. Leave one island in the middle, level everything against it, then carve it away last.
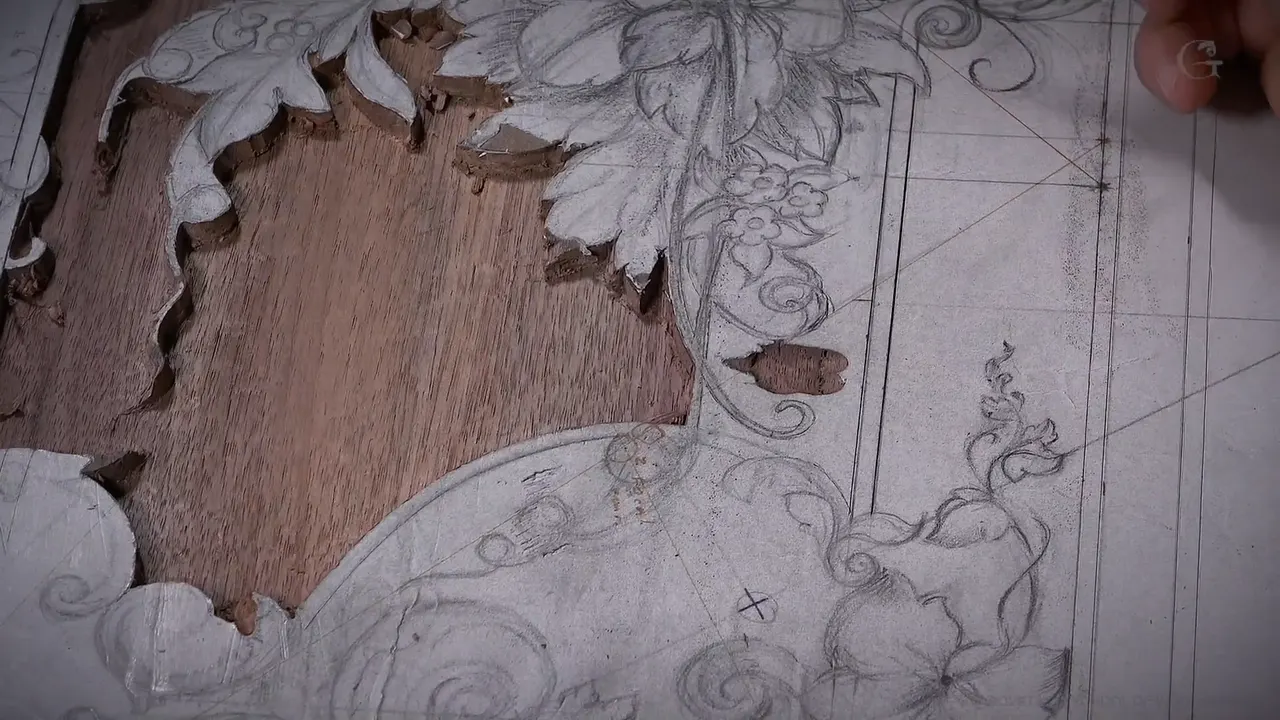
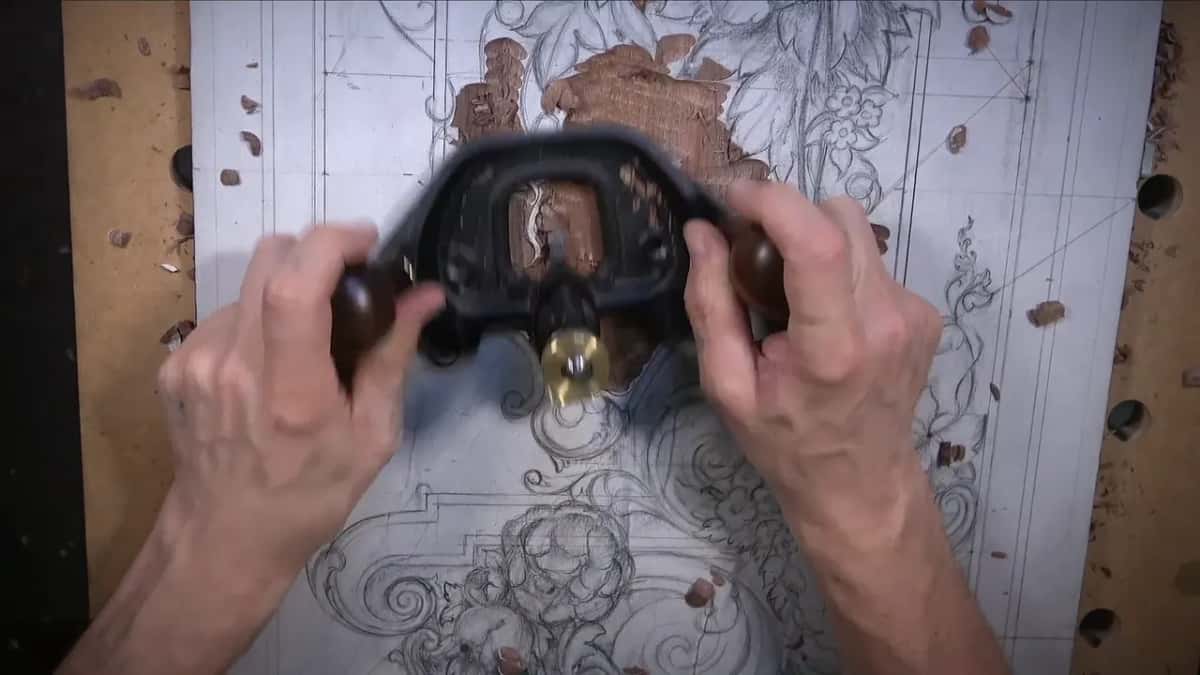
A router plane has to stand on something. The moment a whole area of background drops away at once, the tool has no reference left and every pass reads a different depth. My answer is an island. I leave a patch of the old surface standing in the middle, level everything against it, and carve the island away at the very end.
Most people meet this problem halfway through their first panel. Your ground looks fine, then the plane tips into the hollow it just made and the whole area goes out by a millimeter. Nobody warns you, because on a small rosette you may never meet it. On a panel this wide it happens on the first pass.
What this session settles about the ground
- Leave an island of the old surface wherever a wide area is dropping.
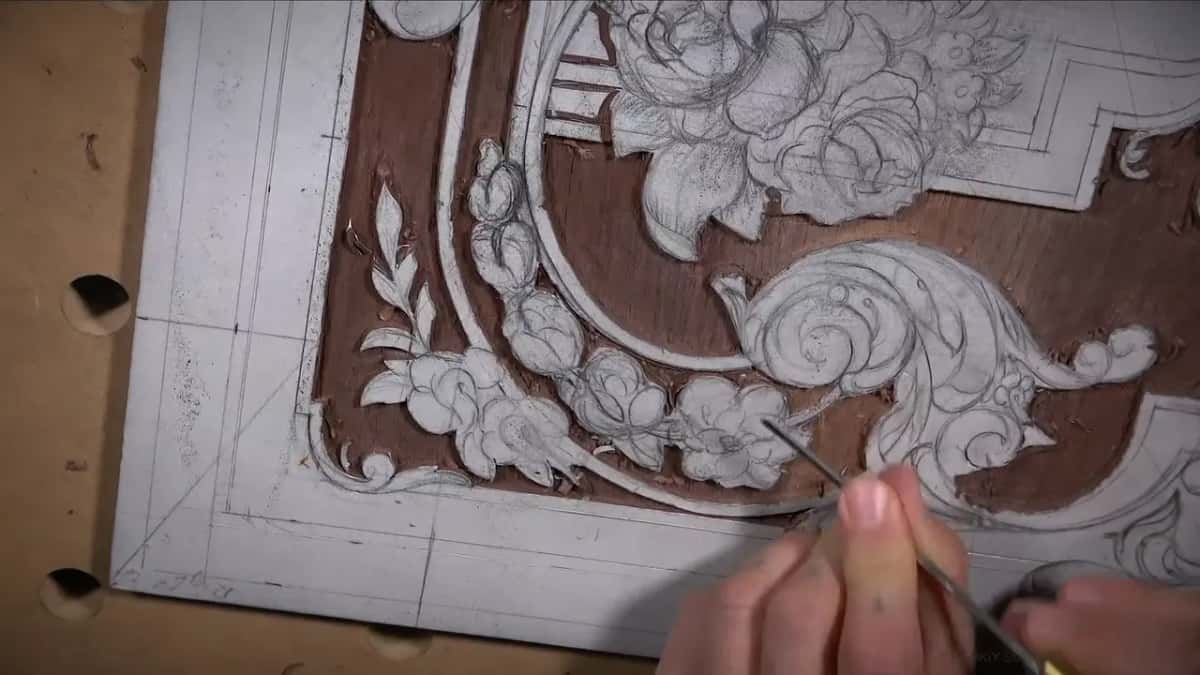
- Knife the outline before anything else. That mark survives when the paper goes.
- Two depths, not one. The middle section drops to half the panel thickness.
- Tools shrink as the spaces do, and the narrowest one here is well under a millimeter.
- A blade too wide lifts a shaving you never asked for. The cure is a narrower one.
- Leave extra wood beside every line, because taking more off later is easy and putting it back is impossible.
What is an island, and why leave one?
An island is a piece of the untouched surface, left standing on purpose in the middle of an area you are lowering. The router plane rides on whatever surrounds it, which works fine until that surrounding wood is gone.
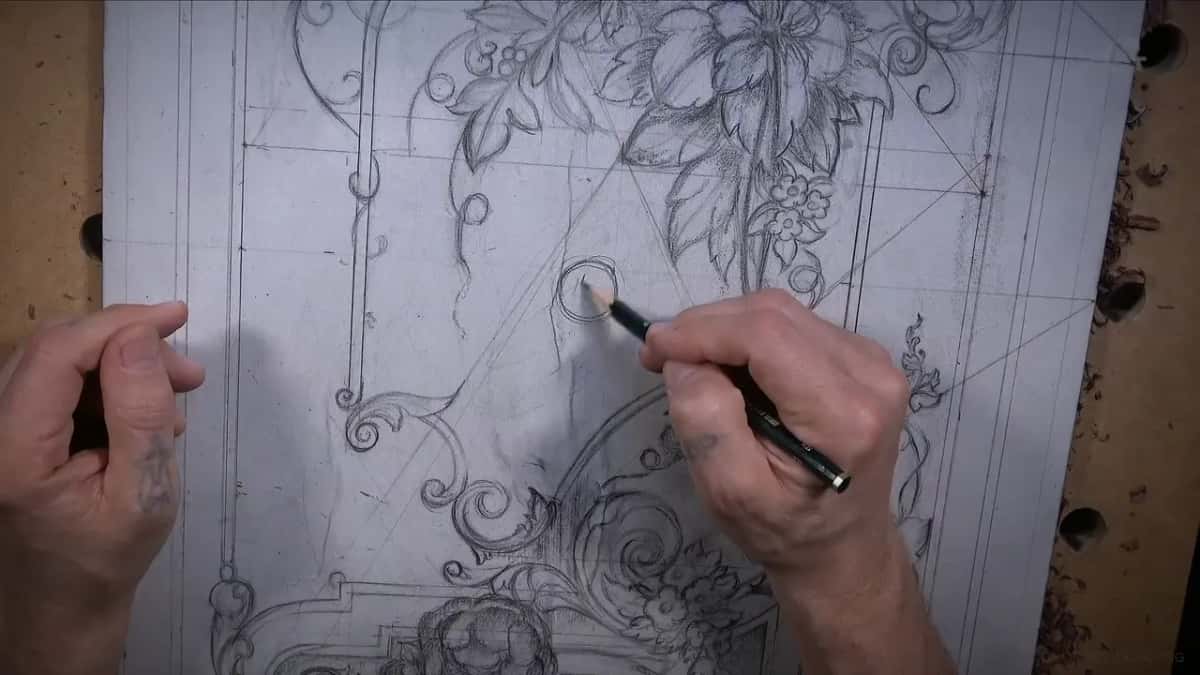
So before I take that section down, I mark a spot and leave it high. Everything around it comes to depth against that island. When the whole area is level and the plane has done its work, the island is the last thing to go, and by then the ground either side of it tells me exactly where its floor belongs.

Watch what it buys you. A plane with one foot in a hollow tilts, and a tilted plane takes a wedge instead of a shaving. With the island under it the tool stays flat across the whole section, and flat is the entire point of using it.

Why does the knife line matter more than the pencil line?
The pencil line is printed on paper that is about to come off. My design is glued to the panel. As the ground goes down, the paper goes with it, and the first time an area clears you are looking at bare walnut with no drawing on it at all.

A knife line is different, and it sits in the wood itself. Even where the paper has gone, that mark is still sitting there telling me where to stop, which is why I outline the whole design before I remove anything.

Any knife does this. I reached for a cheap carving knife here, a small one, and it worked as well as anything on the bench. I hold it very low against the board, almost lying down, and that makes it far easier to pull toward myself with control. When the second line goes in on the other side of an element, I watch the first one the whole time, so the element keeps an even width down its length.

I slipped twice on this section. One area of the board is denser than the rest for some reason, and the blade skated off the line, and I said so on the camera rather than editing it out. Nothing is damaged at this stage, though the same slip on a finished element later would be a real problem.
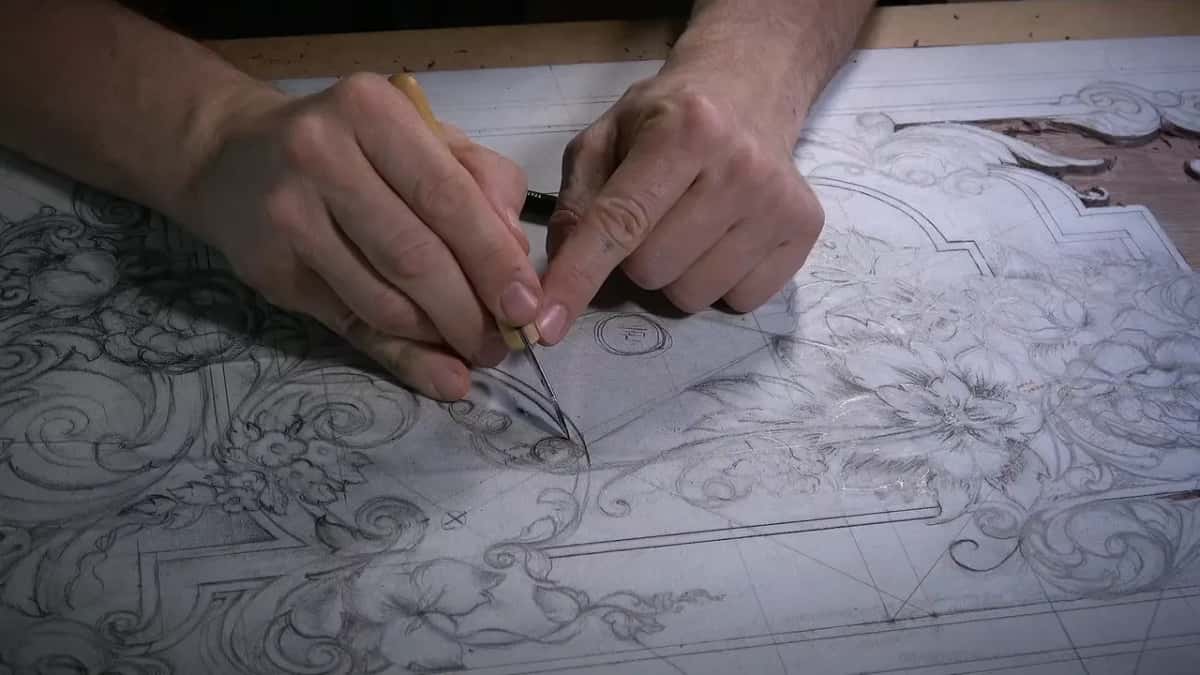
Why outline a flower you have not carved yet?
The outline is not the flower, just a boundary telling the background where to stop, and the shape inside it will change when I get there, so I use whichever gouge fits the curve rather than hunting for the perfect sweep. A number 5 at a quarter inch dropped into one of these curves and sat there perfectly. Not much of a selection process.

Which is also why I refuse to spend an hour polishing the ground beside a flower today. Once that flower is carved there will be room to get a tool in properly, and the same corner that fights me now will give in easily. Work that has to be done twice is work you did too early.
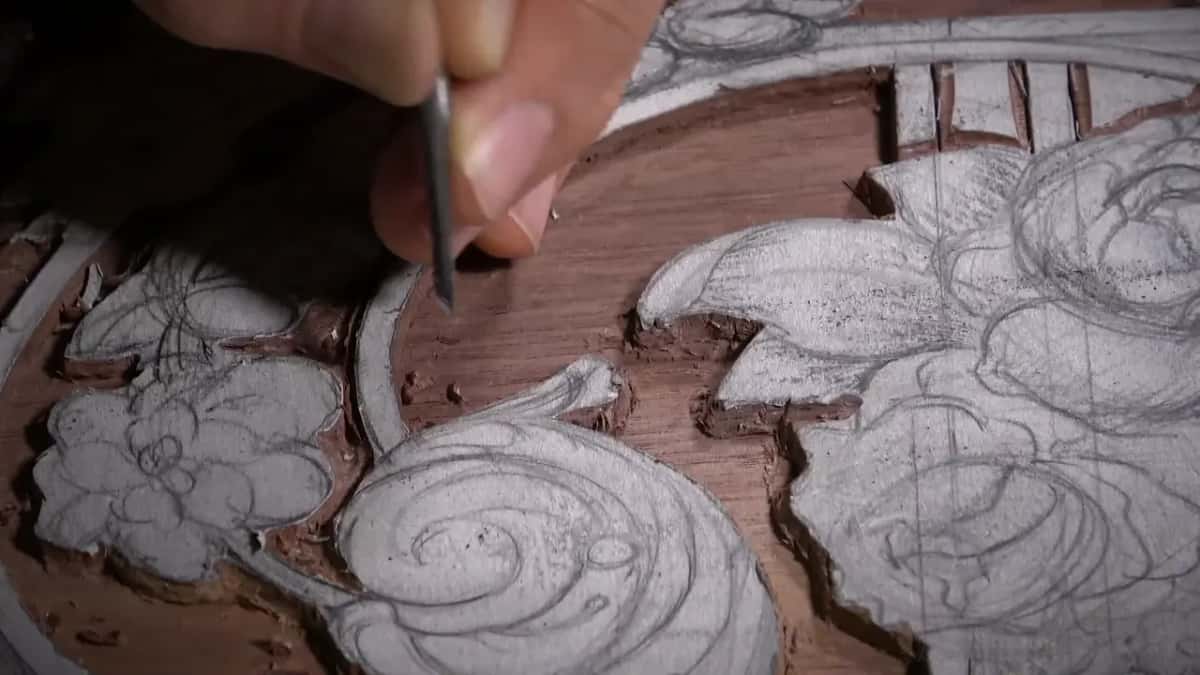
One element on this side is a piece of molding that has to run underneath another. I could have carried it straight through, and it would have looked wrong, so it starts from nothing instead and grows into itself. That single decision means the section under it sits slightly lower than its neighbor, and I marked that before touching either. Volutes get similar treatment, since a Baroque spiral begins differently from the run of ornament feeding it, and driving the outline straight in would kill that start.

Why should a background sit at two different depths?
Flat everywhere is boring, and it is also less authentic. This middle section is going down to 5 millimeters, which is half the thickness of the panel, while the rest of the ground stays at an eighth of an inch. The board is 10 millimeters thick, so I am carving away half of it in that one area and nothing close to that anywhere else.

The reason is what happens to shadow. A deeper pocket throws a darker shadow, so the design standing over it reads as further forward without being any taller. On a panel only 10 millimeters thick that is the only lever I have, and the old cabinet makers used it constantly.

A danger comes with it too, worth naming plainly. Taking a section deeper means the middle of that section is the easiest place on the whole panel to overshoot. Keep checking. A ruler laid across the ground tells you as much as any gauge.

| Tool | Where it goes | Size | What happens when the space runs out |
|---|---|---|---|
| Number 9 | Open ground, moving material fast | 16 mm | Too wide to bring near a line |
| Number 11 veiner | Outlining | 3 mm, and narrower | Keeps going where nothing else on the bench will fit |
| Number 3 | Cleaning the floor of a section | Quarter inch | Swap to a grounding tool |
| Number 47 | The corners nothing else enters | A sixteenth | A bent chisel, reshaped narrower by hand on the wheel |
How small do the tools actually get?
Down to half a millimeter here. The pattern is always the same: start with whatever moves material quickly, then step down as the space closes. A number 11 at 3 millimeters handles most of the outlining, then 2 millimeters, then 1, and in one or two passes here I went down to half of that, because there was simply nowhere else to go.


Where the plane cannot reach at all, a grounding tool takes over. Mine here is an Ashley Iles marked 47, a sixteenth of an inch wide. They make the whole set, up to about an inch, and I also keep the eighth inch version beside it. Handy is an understatement in a cavity that narrow.
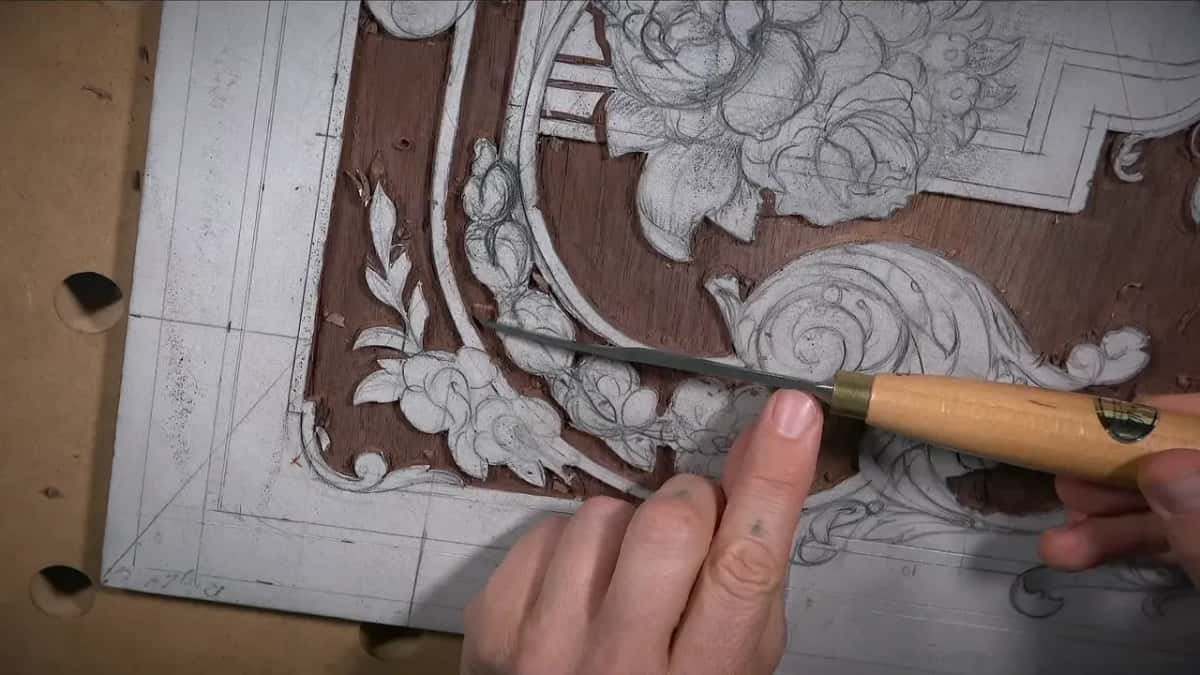
Beside those sits a long bent number 1, a Lamp tool from Germany. Marked 1.5 millimeters, and it does not feel like 1.5, since I reshaped it myself and made it smaller. Bent like that, it reaches into a pocket no straight tool can enter.
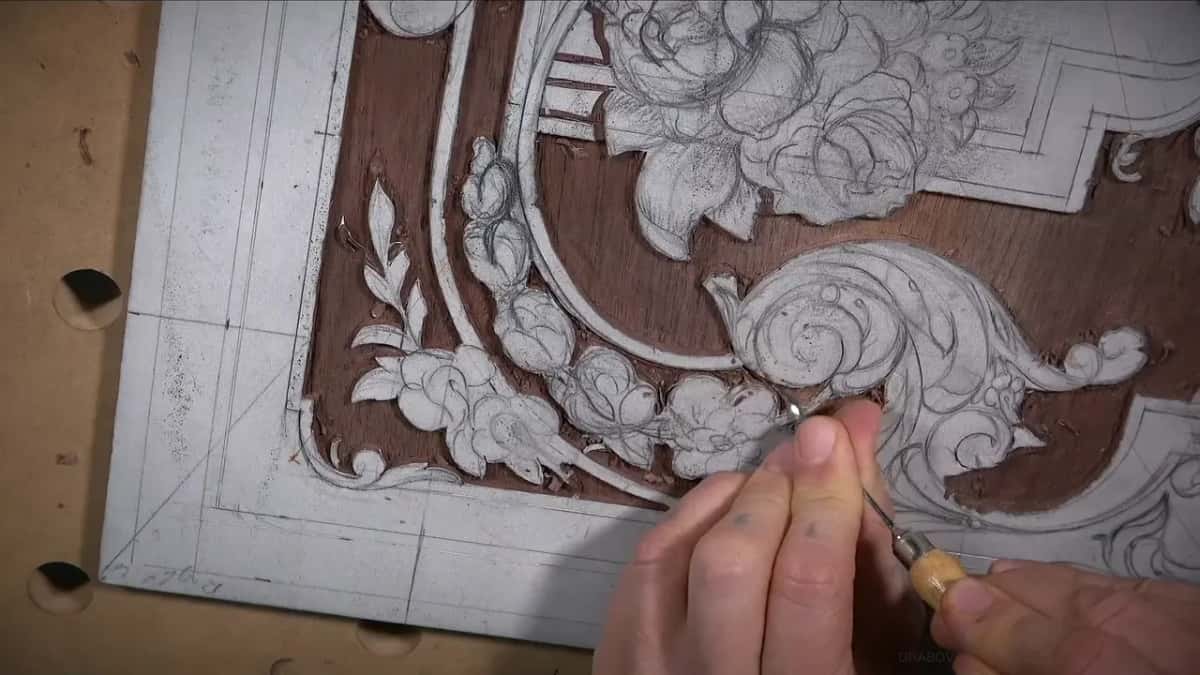
None of this is fussiness. In a narrow pass beside a flower the choice is that tool or none at all, and I will not force a wide one and split something I cannot repair. Plenty of it gets easier later anyway, once the flower itself is carved and there is room to get in.

How aggressive can the router plane be?
Less than you want it to be. I fitted a half inch blade to start this section, made one pass, and the tool took far more than I intended. No detail was lost. Still, I could see exactly how that kind of bite ends, so I stopped and put in something narrower.
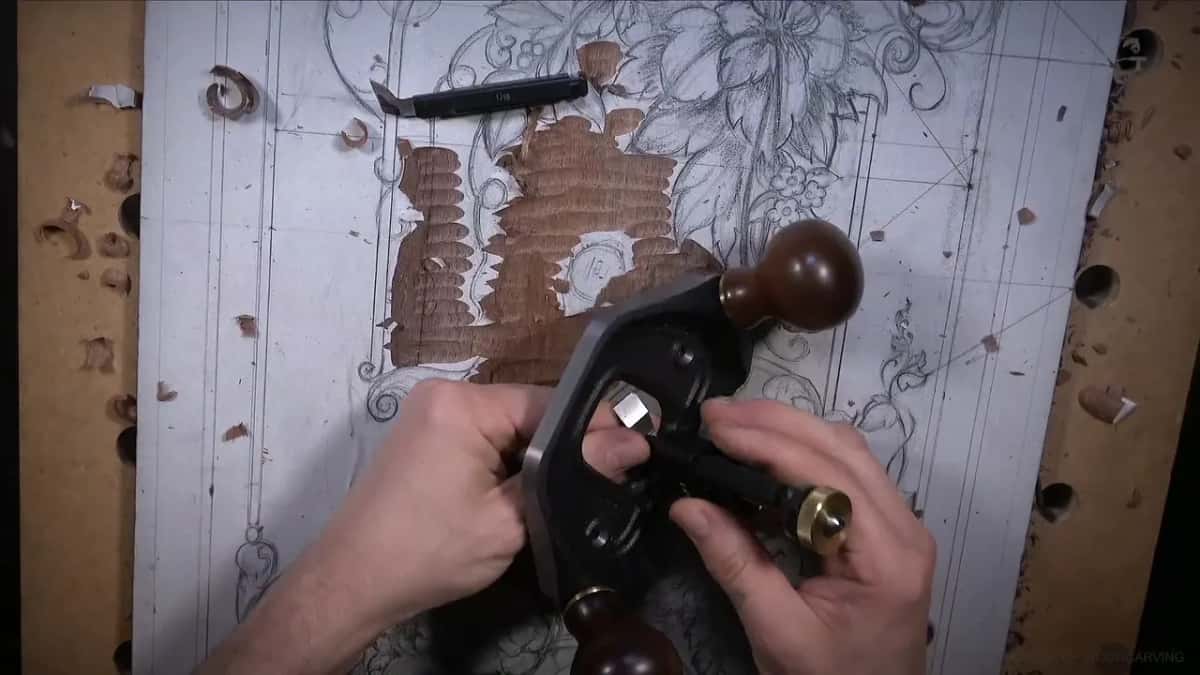
The fix for a plane that bites too hard is a narrower blade, not a lighter hand. A narrow iron simply cannot lift a wedge that size. Raise the depth setting as well and work down in stages, and if an area is genuinely too much for the plane, go back to a gouge and take the bulk off first.

Grain direction still rules everything. Working across the grain is safest, and even then I rotate the tool through the pass rather than pushing it straight, which slices rather than shoves. Where the fibers want to lift away from me I turn the whole operation around and pull instead.
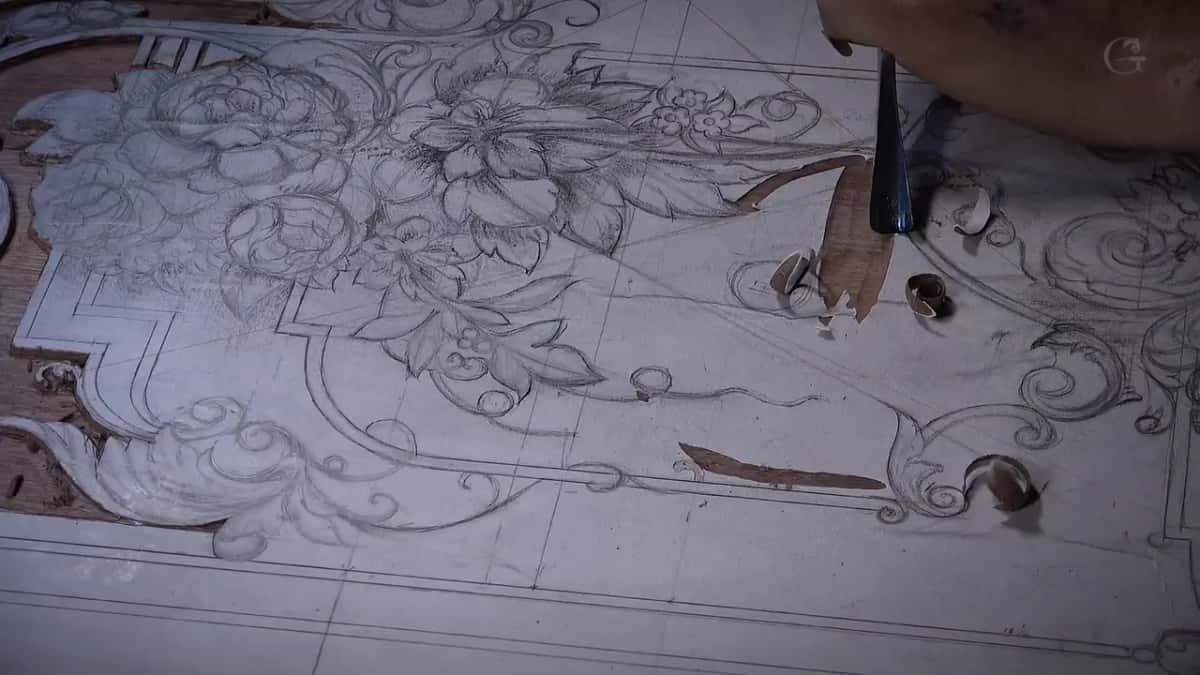

The mallet earns its place here. Hand pressure alone gives you a cut of whatever length the wood decides; a tap gives you the cut you asked for, which is why I can bring a tool closer to a line with a mallet than without one. Straight down taps near the boundary relieve the waste between them so it pops out on its own rather than tearing.
A crack runs into the edge of this board, and I found it during this session. Nothing to do about it now. A board with a flaw at the rim is still a board, and part of working in real material is deciding what you can live with rather than starting again every time the tree disagrees with you.

Walnut helps, being harder than basswood, so the knife will not sink too deep even when a hand slips, and the shallow work in low relief punishes deep accidents more than any other kind of carving does. A softer board would have turned both of my slips into repairs.
My bench moves while I plane, and I know it, and I said so. It is not a planing bench. I have worked on it for years and stopped noticing, though I understand it looks rough on camera. That is how my shop is.
Which takes longer, the design or the carving?
The most complicated part of a panel in this style is not the carving. It is the designing. That is why I spent fourteen sessions drawing this one and said almost nothing about tools until the pencil went down, and it is the single thing I would tell a beginner that nobody believes at first.
Get the laws of design right, follow the principles, and the result is genuinely pleasing before a single shaving comes off. The carving that follows is not complicated work. Stay consistent about depth, resist overdoing anything, and the panel more or less carves itself. That whole argument lives in the design course, and it ends in lesson 14, where the drawing was finally finished.

Depth checking is worth doing more often than feels necessary. On this section I still had a thirty second of an inch left to take when I thought I was finished, and only a straightedge across the ground told me so. Eyeballing is fine for the rough work and useless for the last pass.
One more habit worth copying. Everywhere I outline, I leave extra material, roughly three thirty seconds of an inch, two millimeters or so, and in some spots a sixteenth. Later I can always make an element narrower. Making it wider is not a thing that exists.

Extra material is insurance against a slip, and it is also insurance against a change of mind, which on ornament this dense happens constantly. An element left a shade thick can become a thin one in ten minutes. A thin one is finished forever.
And look at the color coming up as the paper clears. Gorgeous. I say it every session and it is still true.

This whole side is close to level now, and the next session carries it into the shallow band at three different depths, which is lesson 17, followed by the corner with a knot in it in lesson 18. The first pass with the knife and the marking gauge was lesson 15, and the whole carving stage sits in this course. Stuck on the tools? There is a course on those. The 1903 acanthus course shows the same tools on a different design, and the shapes waiting on this panel get built from scratch in Acanthus over Moldings and the floral and molding course.
If you want someone beside you the first time a background goes wrong, that is what the school is for.
How it's done
- Knife the whole outline before anything moves. Trace every line of the design with a knife. The paper drawing comes off with the ground, and a knife mark stays in the wood long after the printed line has gone.
- Mark an island before you lower the area. Pick a spot near the middle of whatever section is dropping and leave it at full height. The router plane will sit on it once the wood around it is gone.
- Take the bulk off across the grain. Work a number 9 sideways to the grain, rotating the tool through each pass rather than pushing it. Stay well off your lines and leave a couple of millimeters of wood beside them.
- Level against the island. Rest one side of the router plane on the island and the other on ground you have already done. Narrow the blade rather than lightening your hand when the tool digs in.
- Step down through the tool sizes. Move from 3 millimeters to 2, and to 1, and smaller again as the spaces close. A grounding tool and a bent number 1 reach corners the plane cannot enter.
- Carve the island away last. Once everything around it sits at one level, take the island down to meet it. The ground either side tells you exactly where its floor belongs.
Frequently asked questions
Why does a router plane need something to stand on?
A plane with one foot in a hollow tilts, and a tilted sole takes a wedge rather than a shaving. Leaving a patch of the old surface gives the tool two feet on solid wood until the area around it is finished.
Should the whole background be one depth?
Varying it looks better and matches the old work. On this panel the middle drops to 5 millimeters, half the board thickness, while the rest of the ground stays at an eighth of an inch, and the deeper pocket throws a darker shadow.
How much wood should you leave beside a line?
Roughly three thirty seconds of an inch, a couple of millimeters, and a sixteenth in tight spots. Narrowing an element later takes minutes. Widening one is not possible at all.
What to carve next