
Alexander Grabovetskiy, woodcarver, School of Woodcarving · Published 2018
How do you draw flowers for a carved wood panel?
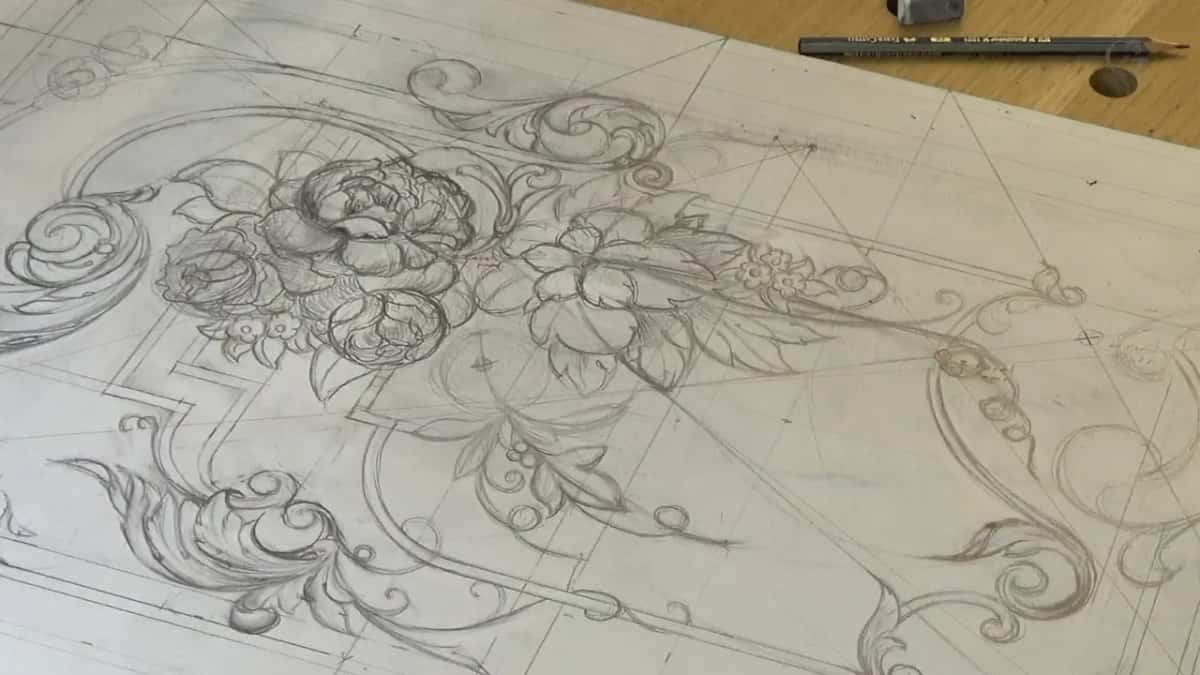
Quick answer: Drawing flowers for a carved panel is half line work and half shadow work. Pencil marks the edges. Charcoal shows which petal rides over its neighbor and how dark the ground behind it must go. Shade the paper first and the relief is settled before any steel arrives.
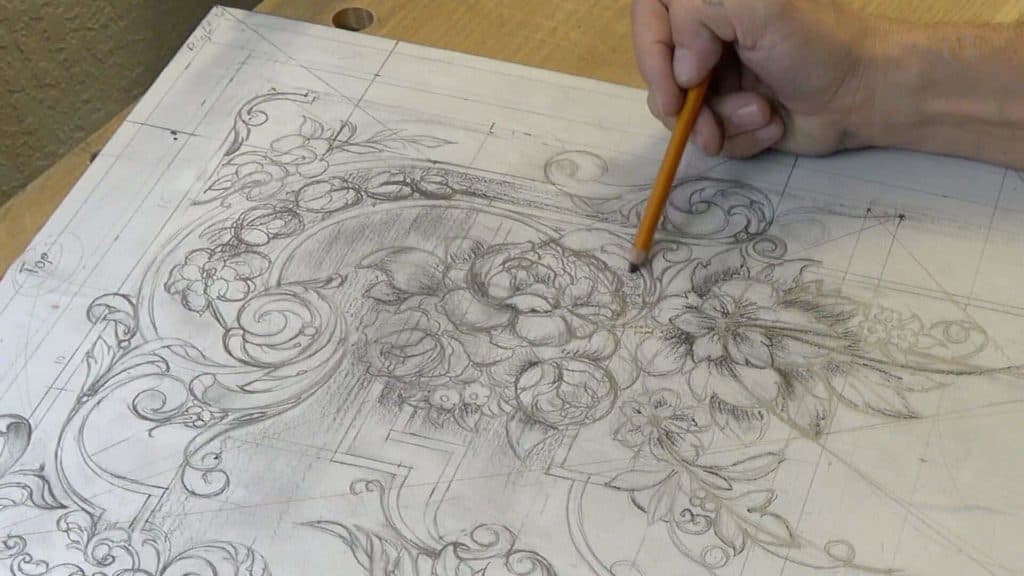
A flower drawn for carving is finished when the shadows are in, not when the outline is closed. I can draw a clean petal all day and still have no idea what it will look like once the wood is cut away underneath it. So I reach for charcoal. Charcoal is how the paper starts behaving like a carved panel.
You have drawn a flower, it looks fine on paper, and then you carve it and the whole thing goes flat. I know that feeling. The problem is almost never your drawing skill. An outline carries nothing at all about depth, and depth is the entire job in relief carving. In this part of the panel I put in petals, then I put in shadow, and only then can I tell whether the flower is going to read from across a room.
What the shading settles before any steel arrives
- Every flower has an outer ring, and that lower layer usually runs downhill even when everything above it climbs.
- Charcoal, not pencil, separates the layers on paper.
- Your drawing does not have to be exact. The gouge fixes the line.
- Three white chalk marks show where the light lands.
- Fill an empty space with small flowers rather than one big lonely shape.
- To lose a detail you regret, grow the flower beside it until the detail is gone.
What does charcoal show that a pencil line cannot?
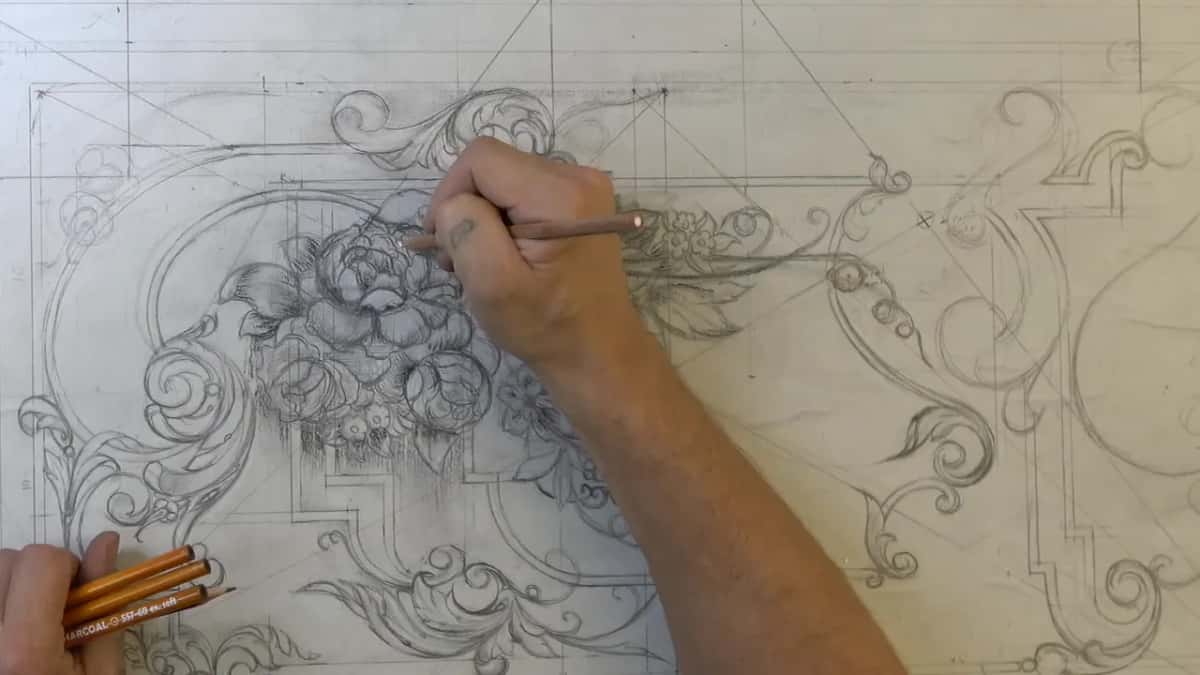
Charcoal shows the order of the layers. A pencil edge is a boundary and nothing more, so two petals crossing each other look identical whether the left one is on top or the right one is. Rub charcoal under one of them and the argument is over. That is the same trick painters have used for four hundred years, and they call it chiaroscuro.
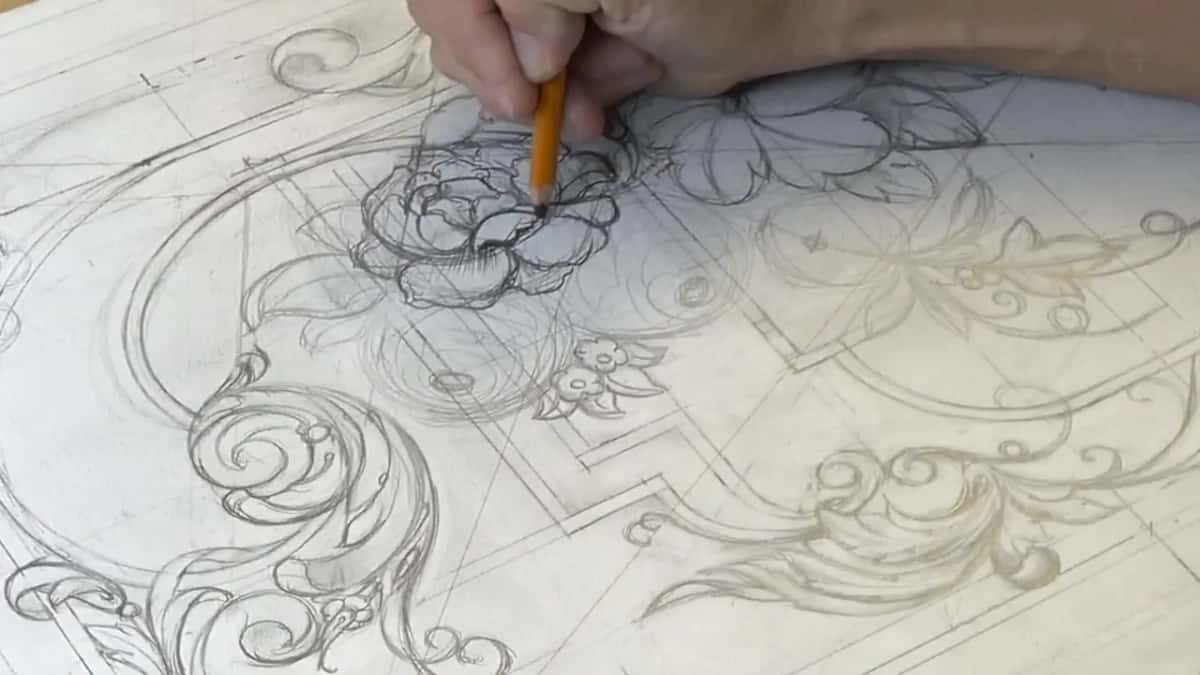
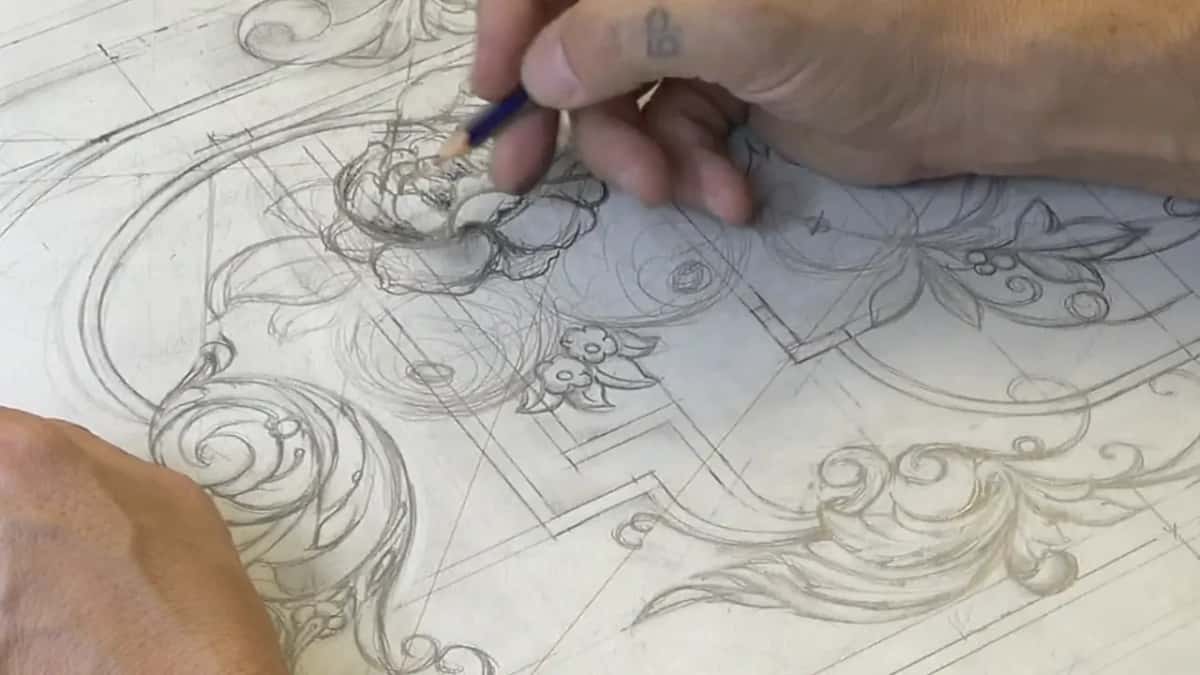
I work with two charcoals, a hard one and a soft one. The hard one gives me a thin grey that holds an edge. The soft one goes almost black in a single pass, and I save it for the deepest ground. Both of them are just burnt wood, which is worth knowing, because artist charcoal and the stuff in your grill are cousins.
Do not overdo it with the charcoal. Enough shadow to read the movement, and then leave the thing alone.
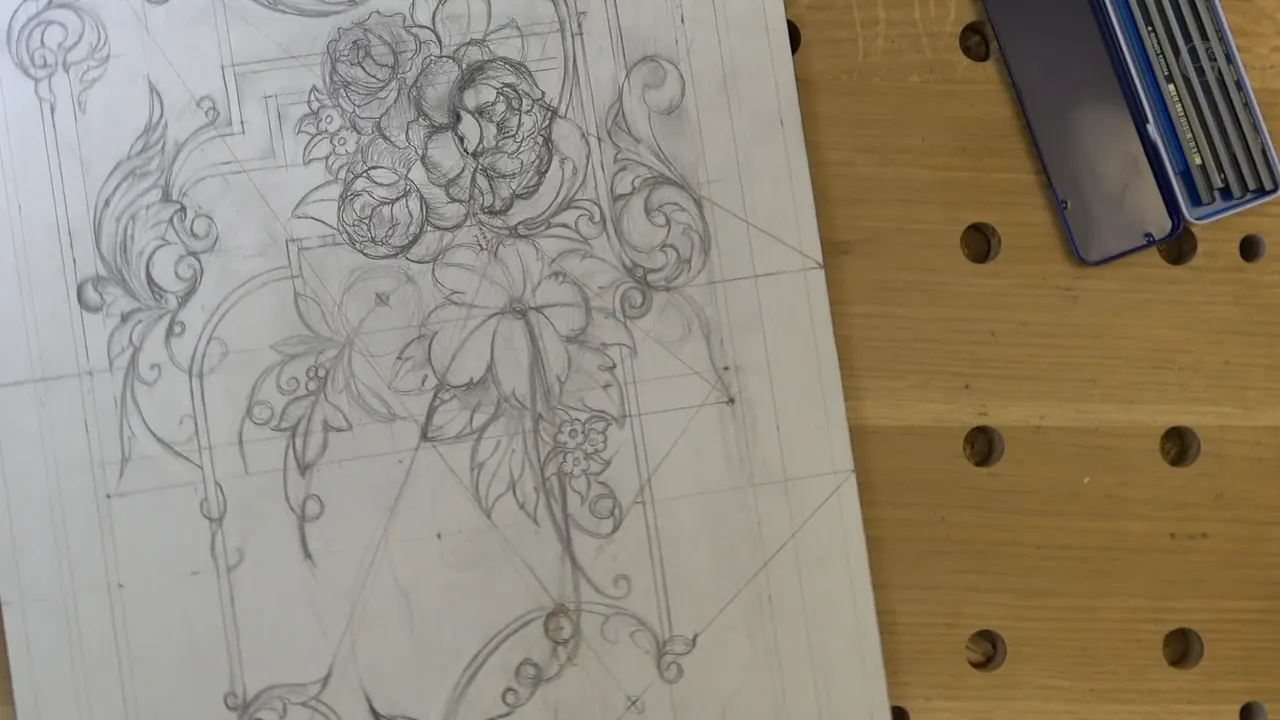
Shading buys me something else as well. Once the ground behind a group of leaves goes dark, the leaves stop being lines and become shapes, and shapes are what I carve. I can look at the panel and see a bouquet instead of a plate of spaghetti. That sounds small. On a panel carrying this many separate elements it decides whether you walk up to the bench knowing what to do.
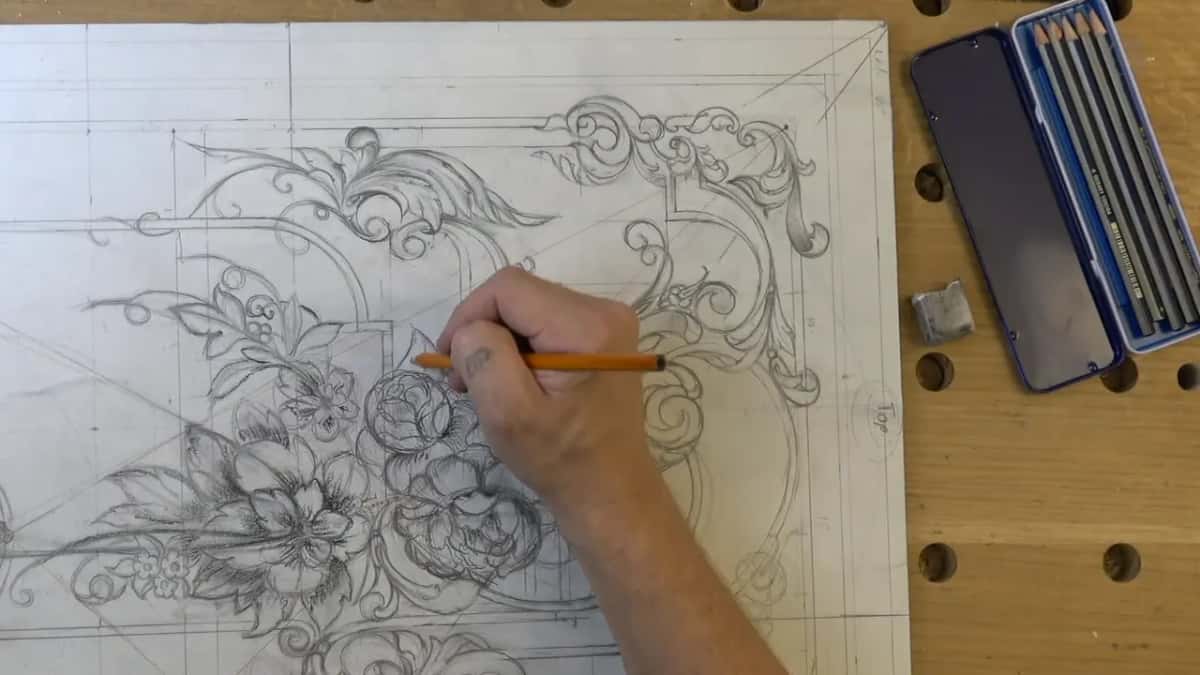
One more thing the dark catches for you. Two lines in this group were running near each other and they were not parallel, which is invisible while both are bare pencil and impossible to miss once the ground behind them turns grey. I moved the line. The charcoal did not fix anything, it just told me which line was wrong, and that is really all I ask of it.
Which way do the petals on a carved flower grow?
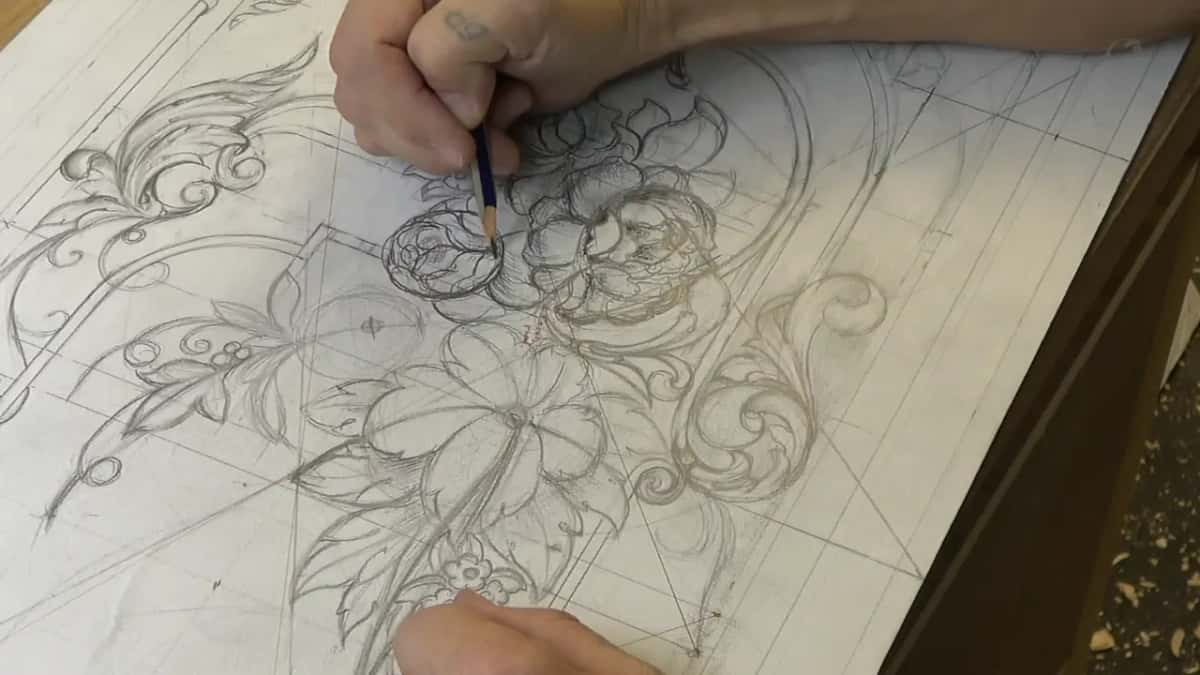
Petals grow both ways at once, and the outer ring is the part people get wrong. On almost every flower, the bottom ring, the lowest layer of petals, runs downhill. Everything above can climb hard and still do it. So on my panel I mark one group growing up and the group under it growing down, and already the flower has a front and a back.
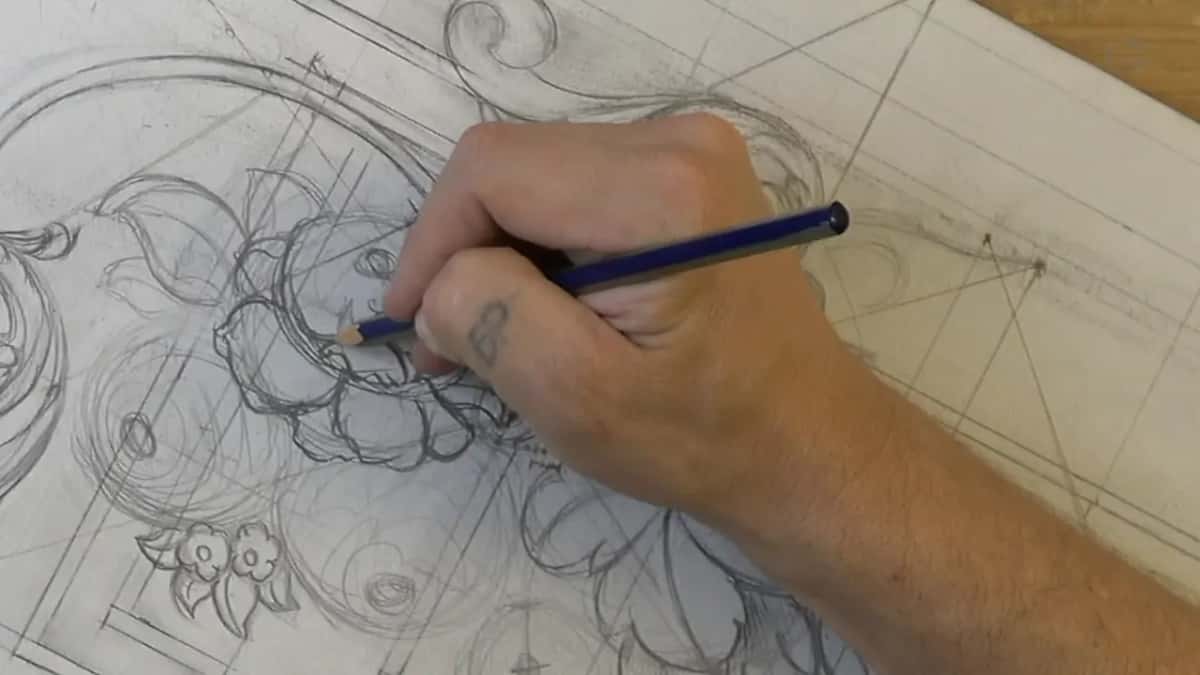
That rule is worth more than it sounds. A carved flower where every petal radiates evenly is a wheel, not a flower. Give it a lower ring that falls away and an upper ring that lifts, and it starts to sit in the panel instead of on it. You can check this against any real bloom on your windowsill, and you can check it against the carved furniture in a collection like the Victoria and Albert, where the eighteenth century men were working to the same idea.
Everything wavy. No petal on this panel is a straight line, and no edge is a perfect arc. I draw one petal underneath another, let it wander, and then I cover part of the detail below it, because that overlap is what tells your eye which one is closer.
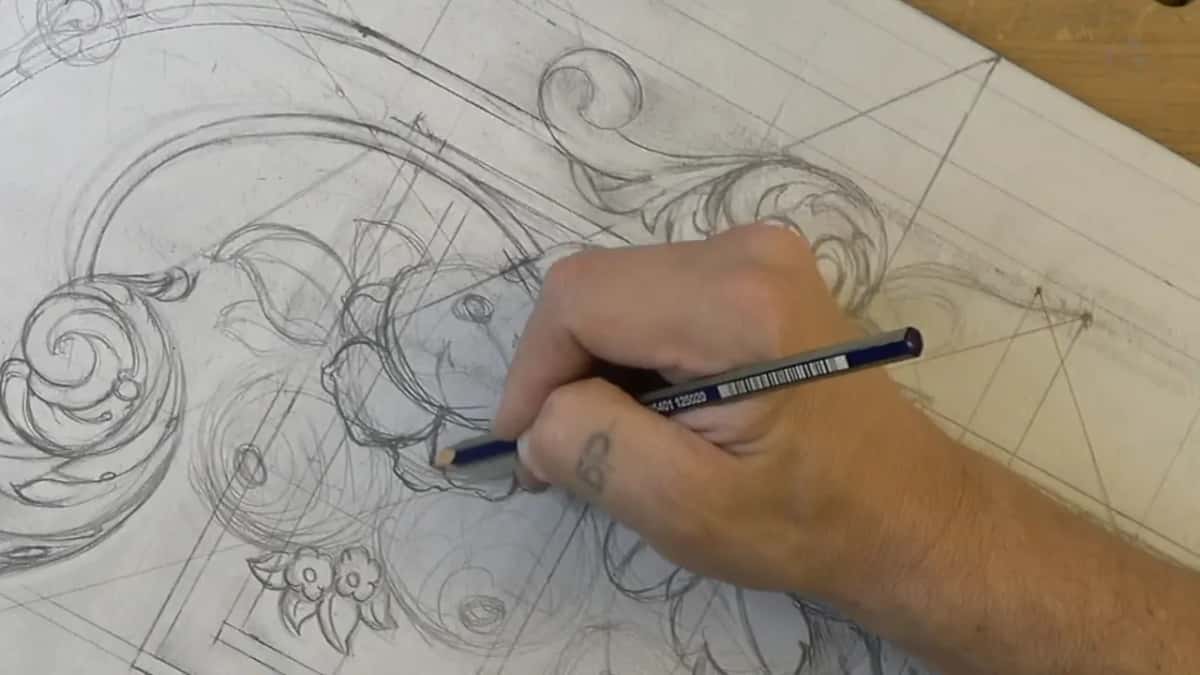
The smaller flowers get the same treatment at a smaller size, growing from inside with their own subdivisions. A volute nearby does the same thing in a different language, spiralling instead of opening, and the two sit together because both of them turn. Carvers have been mixing those two families since long before Grinling Gibbons was hanging limewood swags in English houses.
When a flower comes out too plain next to its neighbors, I develop more petals from inside it rather than adding more around the outside. Same footprint, more life. I did that twice in this section, and the second time I also pulled in the gap beside it, because the distance between two shapes was reading wider than every other gap on the panel. We looked at that kind of spacing back in the lesson on the T stop.
How exact does a drawing for carving have to be?
Less exact than you think. Here is what I tell every student who freezes over a drawing: do not be afraid if your line is not perfect, because you are going to get that to the exact line when you carve it. The gouge is a better draftsman than the pencil. One pass with a curved sweep lays down a truer arc than an hour of rubbing out ever will.
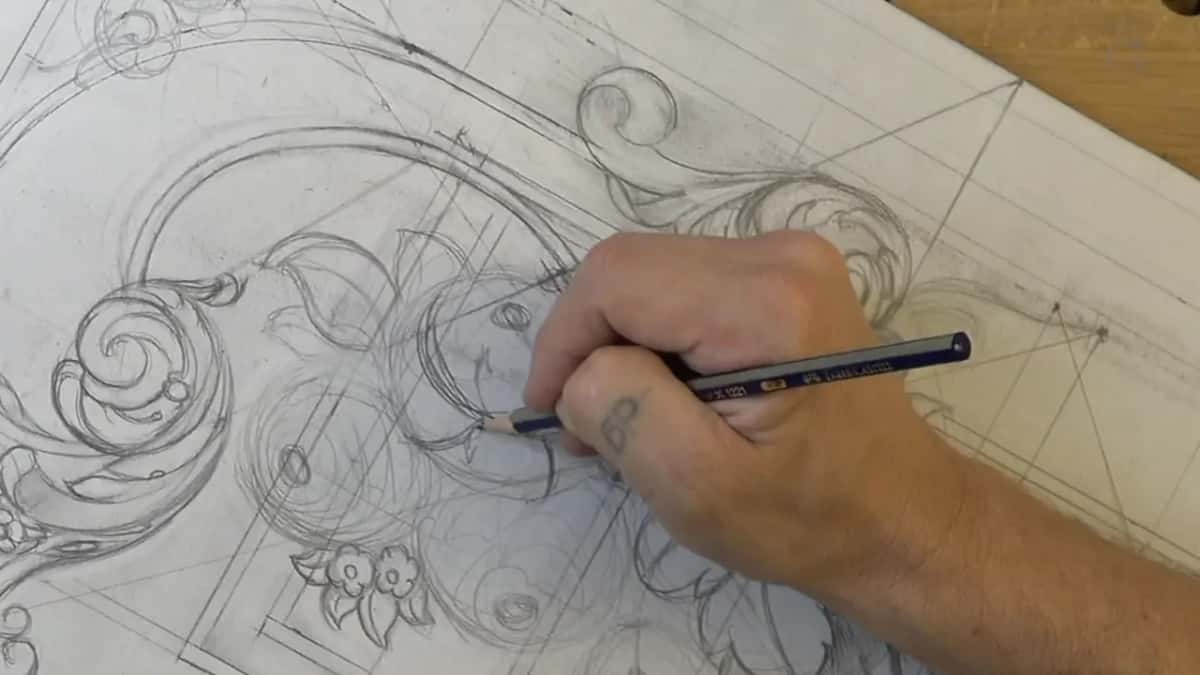
A soft pencil helps more than a hard one here, because it lays down a fat line you can smudge into a shadow without switching tools. I change pencils mid flower all the time. Nobody is grading the paper.
So the drawing has one job, which is to hold the idea steady long enough to carve it. I do not render. Chasing a beautiful picture is a different craft with different rules, and it eats the hours I need at the bench. Look at what I am doing on this panel and half of it is scribble.
I will tell you honestly, at this stage it does not make much sense even to me. Even I cannot fully picture what is in my head yet. Once we carve it, it makes a lot more sense, and that is not me being mysterious, it is just how the work goes.
| Tool | What it does on the paper | Erase? | When I reach for it |
|---|---|---|---|
| Soft pencil | Wavy petal edges, plus every small thing | Yes | All day, from the very first line |
| Hard charcoal | Grey, and it holds a clean edge | Hardly | Separating a leaf from its neighbor |
| Soft charcoal | Near black in one pass | Barely | The ground, once the shape is settled and I am sure |
| White chalk | Lifts a spot forward | Yes | Three high points at the very most |
Chalk is the one people skip. Two spots, maybe three, and that is all I use, placed where the highest part of a petal will be after carving. Now the drawing has a top and a bottom, and I can judge whether my deepest ground is deep enough. Ordinary chalk, nothing special.
How do you fill a space when you do not know what goes there?
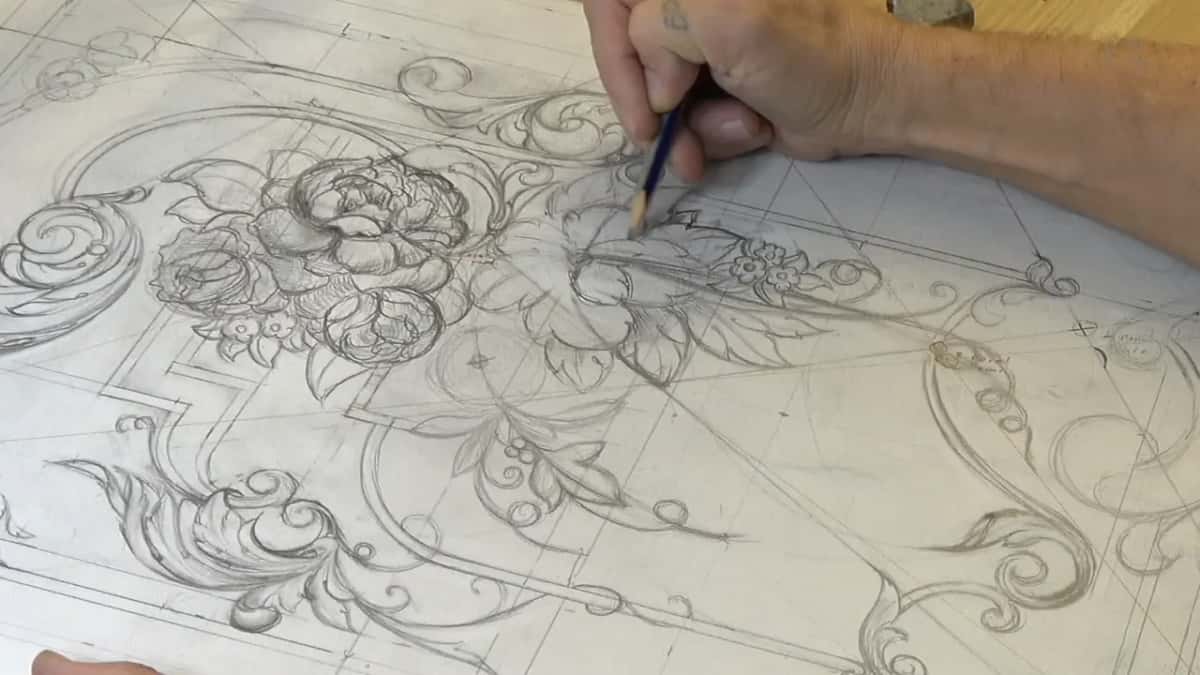
Fill it with small flowers and stop worrying about the botany. There was an area on this panel I wanted to put flowers into and I had no idea what type. I still do not. What I knew was the size: smaller than the main bouquet, with a few different movements so the group does not read as wallpaper.
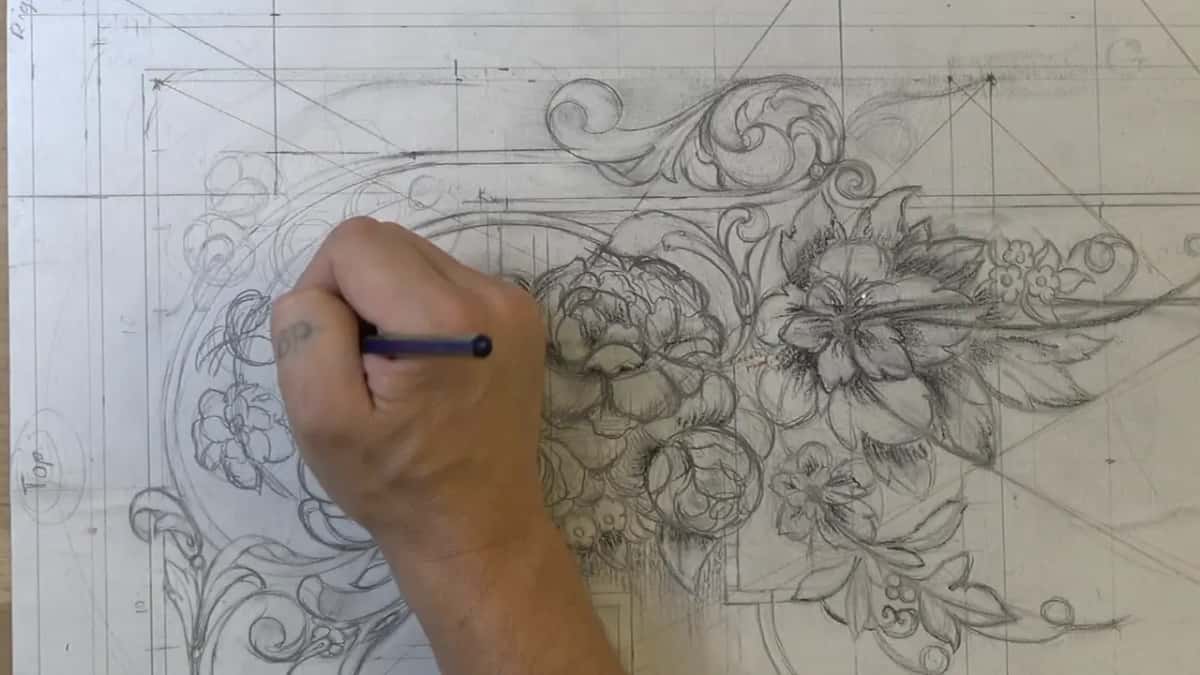
Old furniture is full of these. They are there because the man had a space, no strong idea for it, and a design that had to keep breathing across the whole panel. Nobody looking at a Baroque cabinet asks which species is in the corner. They see movement.
I also changed my mind twice in about a minute there. I liked one flower, said so, started working on it, then went straight to a different one instead, which happens more often than I would like to admit. The bottom is not the main event anyway. That argument got its own lesson earlier in the course.
The rest of that area I left as background and smudged it dark, which is a decision, not a leftover. A panel where every square inch carries ornament is exhausting to look at. Give the eye somewhere to rest.
What do you do when a corner looks too square?
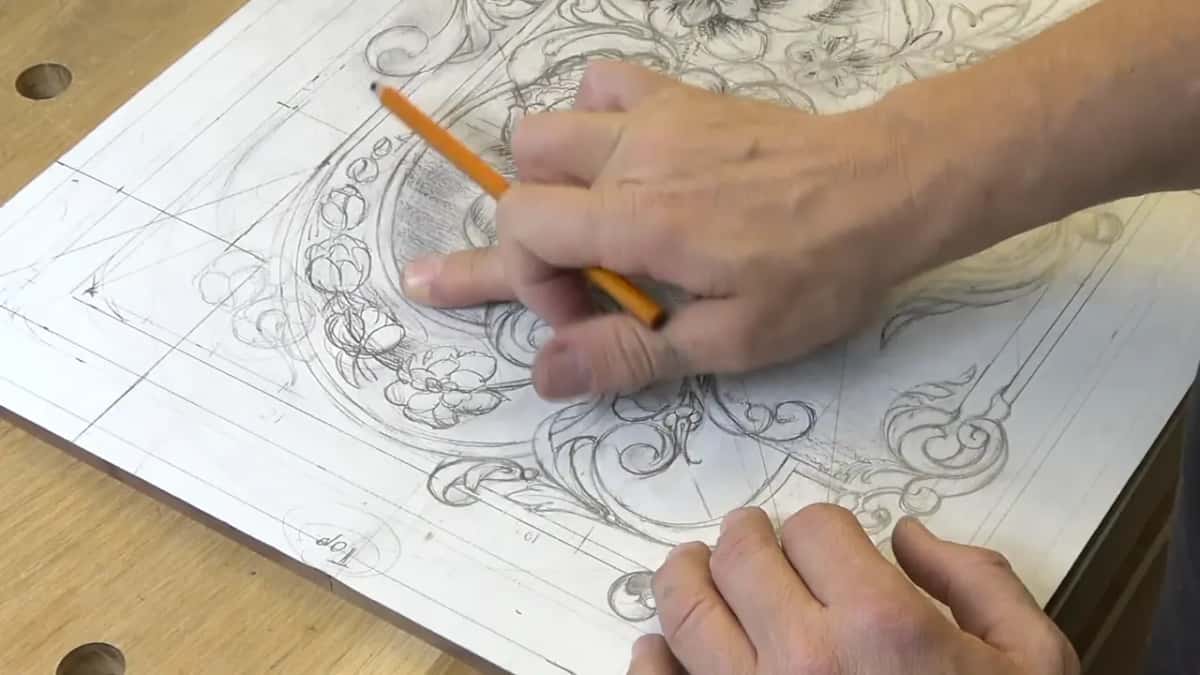
Put in one movement and leave the rest alone. I did not like how square the outside border was sitting, and my first instinct was to leave it alone entirely. Sometimes that is right. This time I put in a small movement, looked at it, and did not like that either.
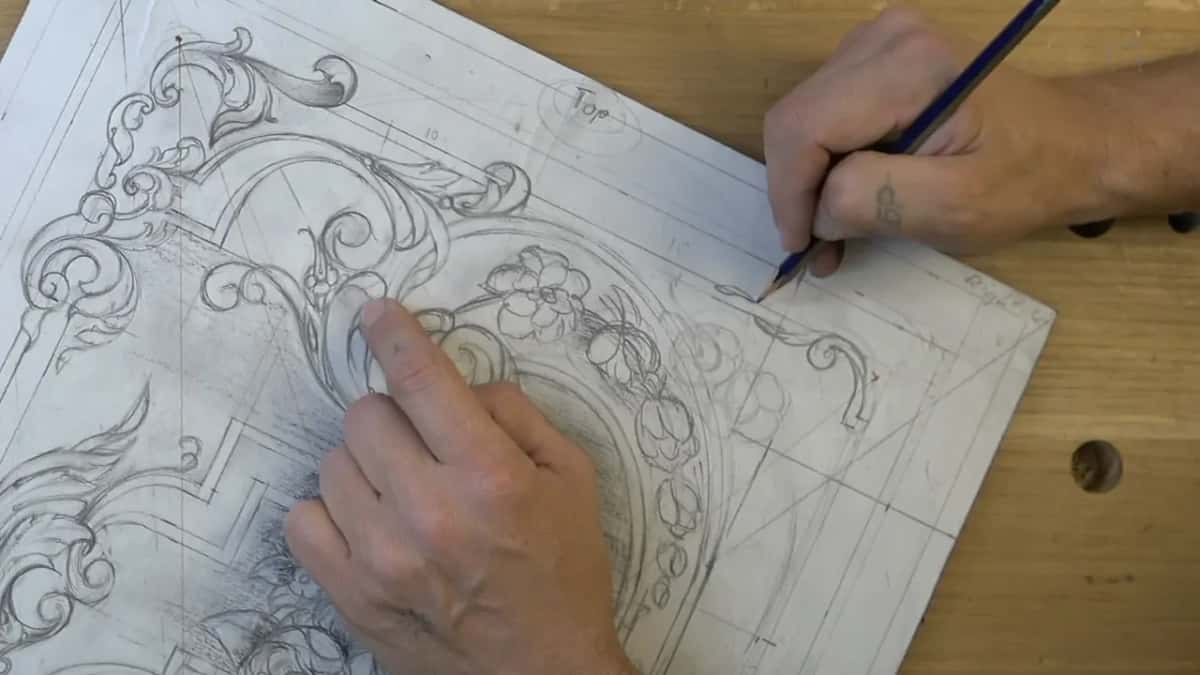
What worked was taking an acanthus and flipping it inside out at that corner. Then I nearly ruined it by adding more, caught myself, and cut it back. That should be enough. A sentence I say to myself constantly while a panel is coming together. We build these shapes from the ground up in Acanthus over Moldings, and the older Byzantine version behaves differently again, which is its own course.
Then small leaves running downhill along the line, to tie that corner back into the main movement. One element on its own is a decoration. Repeat it along the main flow and it becomes design.
What if you stop liking a detail?
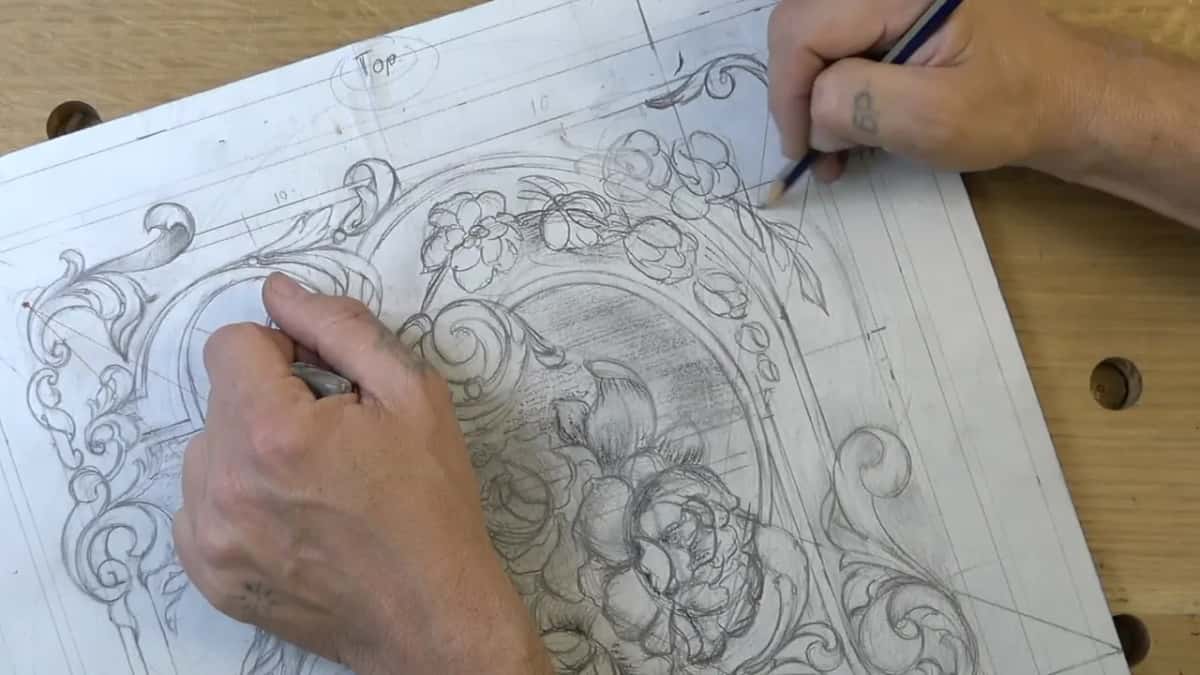
Grow the shape next to it until the detail disappears underneath. I had something on this panel I needed to hide, and rubbing it out would have cost me a line I liked. So I made the flower beside it bigger. Then the next one bigger. Then a third.
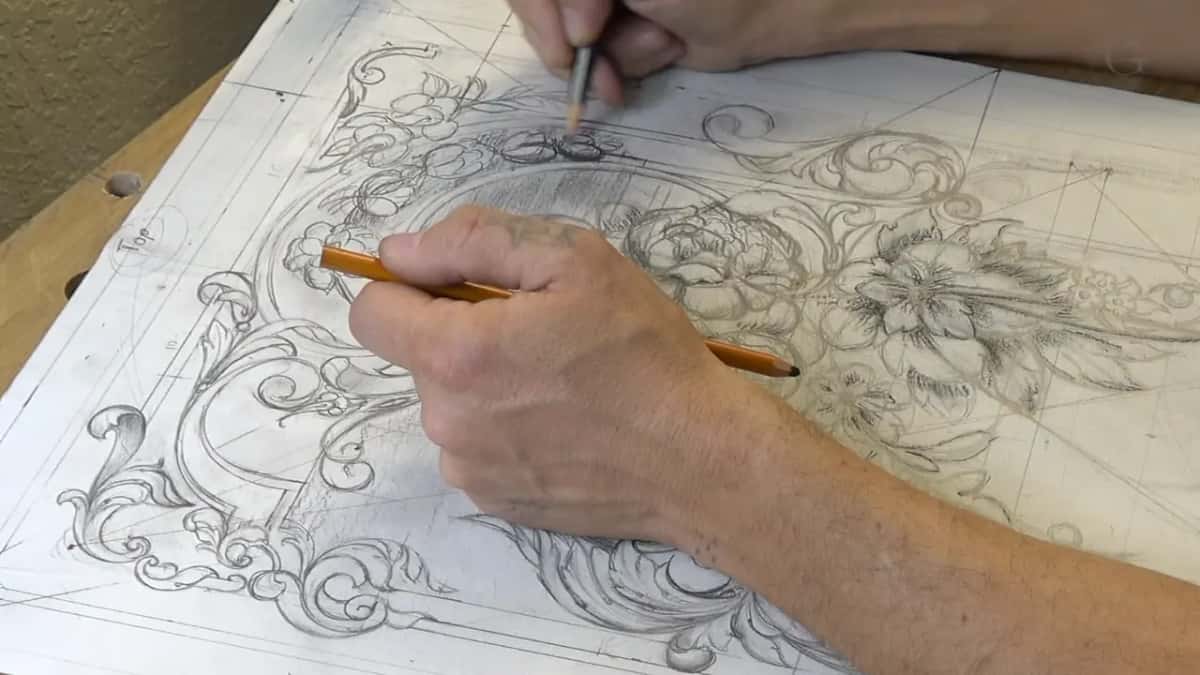
Now the unwanted piece sits underneath a petal, where it becomes a shadow line instead of a mistake. In the carving it will be undercut and nobody will ever know it was there. This is one of the quiet advantages of working in layers, and it is why I draw the whole panel before I carve any of it, the way we set the borders back in lesson 2 and found the center in lesson 3.
Could I add more? Of course I could. This kind of ornament has no natural end, and I have watched students find that out and then spend a month adding leaves. At some point you look at the panel and say out loud that this is plenty of detail, and then you put the pencil down and mean it.
It does look good to me. If you do not agree with me, I am okay with that. It is my design and my approach, and yours can be different, and that is the honest answer rather than a rule.
Why shade at all if carving changes everything anyway?
Small things survive this stage too. A detail I liked was going to be swallowed by the shape above it, so I kept it running out from underneath instead of losing it. When the whole side finally sat right I said out loud that I was happy with it, one hundred percent, and I meant it.
Shading is cheap and mistakes in wood are not. Twenty minutes with a charcoal stick tells me whether the bottom of the panel is competing with the bouquet, whether two leaves are fighting, whether a gap is too wide. Fixing any of that on paper costs a rubbing with my thumb. Fixing it in black walnut costs the panel.
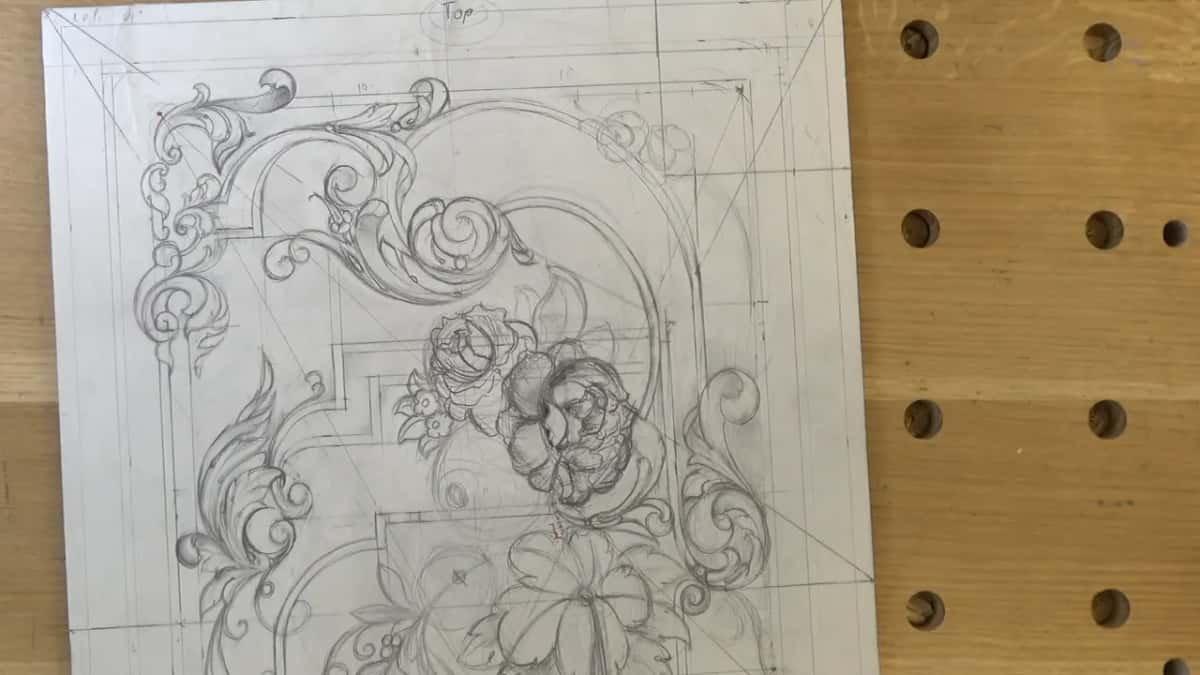
Then the part nobody talks about. When I finish shading a section and I look at it and I am happy with this side, that confidence carries into the carving. I stop second guessing and start removing wood. A carver who is unsure of the design carves timidly, and timid work shows on the finished panel.
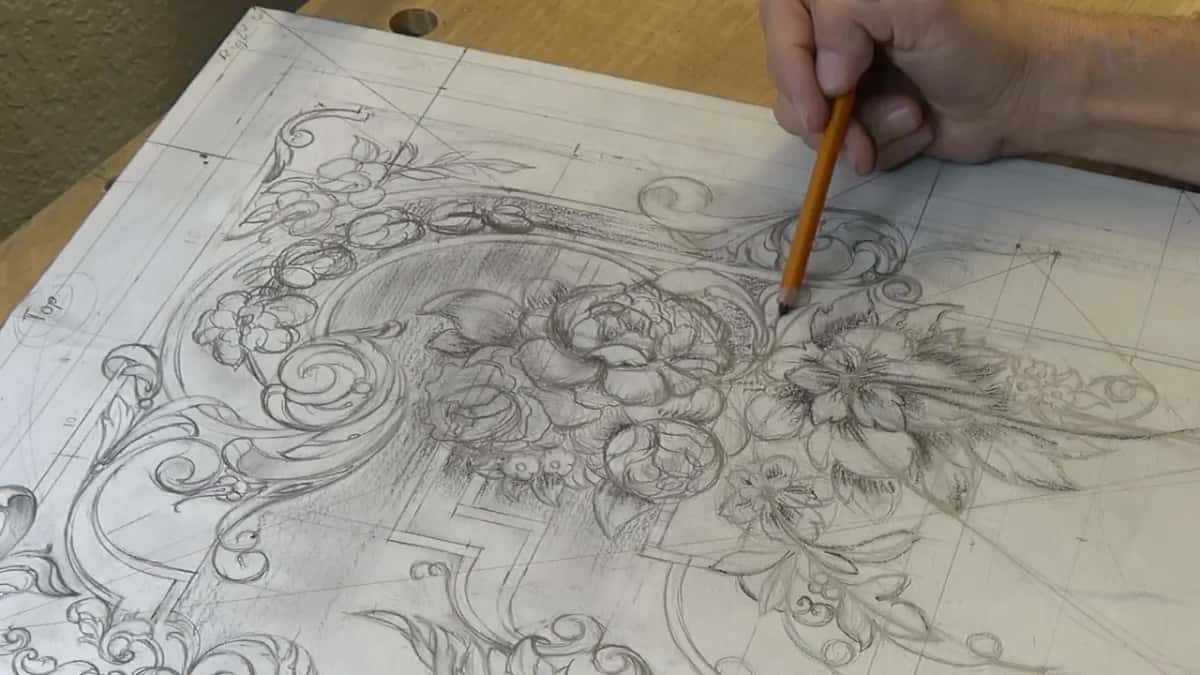
Soon, very soon, we start carving this panel. One more design lesson and the gouges come out, which you can follow through lesson 14 and back through lesson 12, where these flowers first went in. The whole design course runs the panel from a blank board to a finished drawing, and the floral and molding course takes the same ideas onto a different panel.
If you want somebody beside you while you learn to see depth on paper, that is what the school is for.
How it's done
- Draw the flower in soft pencil. Put in the upper petals and the lower ring separately. The lower ring falls away downhill on almost every flower, so draw it that way even when the rest of the bloom climbs.
- Overlap, do not butt. Let each petal cover part of whatever sits under it. An overlap is the only thing on paper that tells your eye which shape is closer, and the gouge will follow it.
- Lay in the hard charcoal. Work a thin grey under every overlap and along each leaf edge. Stop as soon as the layers separate. Grey that can still be lifted is worth more here than a rich black.
- Go dark only where the ground goes deepest. Switch to the soft charcoal for the background alone. That stick will not erase, so commit only where you already know the wood is coming out.
- Mark the high points in white chalk. Touch white onto the places that will stand highest after carving. Now you can judge whether your darkest ground is dark enough to make those points read.
- Smudge the background and stop. Rub the ground flat with a thumb so it reads as one level. Then put the charcoal down, because past this point you are rendering a picture rather than planning a carving.
Frequently asked questions
Can you use an ordinary pencil instead of charcoal?
A soft graphite pencil handles most of the work. Charcoal wins only where you need a dark that graphite cannot reach. Graphite also shines under a lamp, which reads wrong when you are trying to show a hole rather than a ridge.
Do you shade the whole panel before carving?
Only the sections I have settled. Shading commits a decision, and charcoal barely erases, so one area gets shaded while the parts I am still arguing with stay in bare pencil.
What is the outer ring on a carved flower?
The lowest layer of petals, the ones sitting under everything else. On most blooms that ring falls away downhill while the upper petals climb, and copying that on paper is what keeps a carved flower from looking like a wheel.
What to carve next