
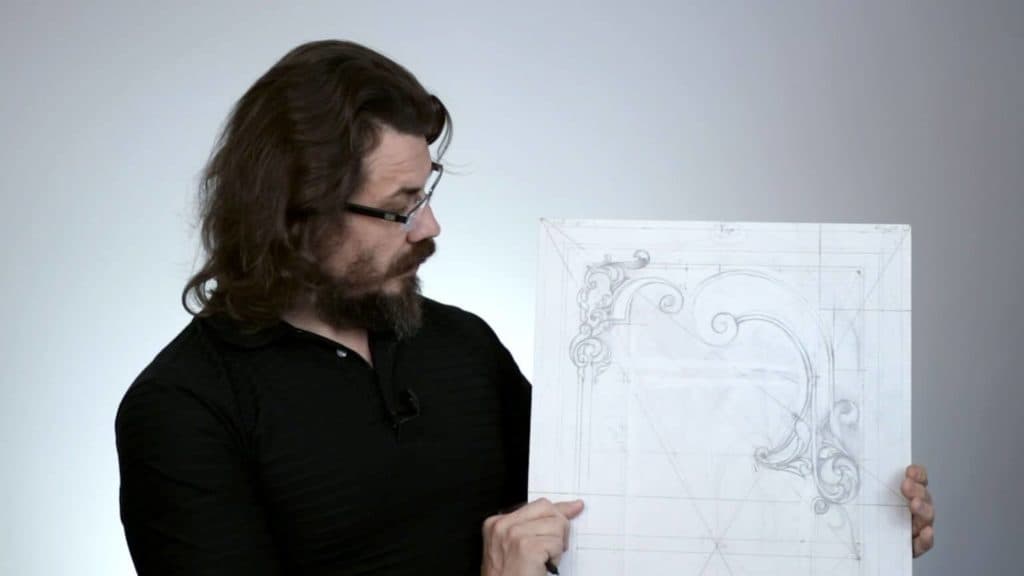
Alexander Grabovetskiy, woodcarver, School of Woodcarving · Published 2018
What is a root rectangle in ornament design?
Quick answer: A root rectangle is a shape built by swinging the diagonal of a square outward with a compass, so its long side measures the square root of two, three, four or five against its short side. Golden rectangles are a separate family. Knowing which one your panel is changes where the focal point belongs.
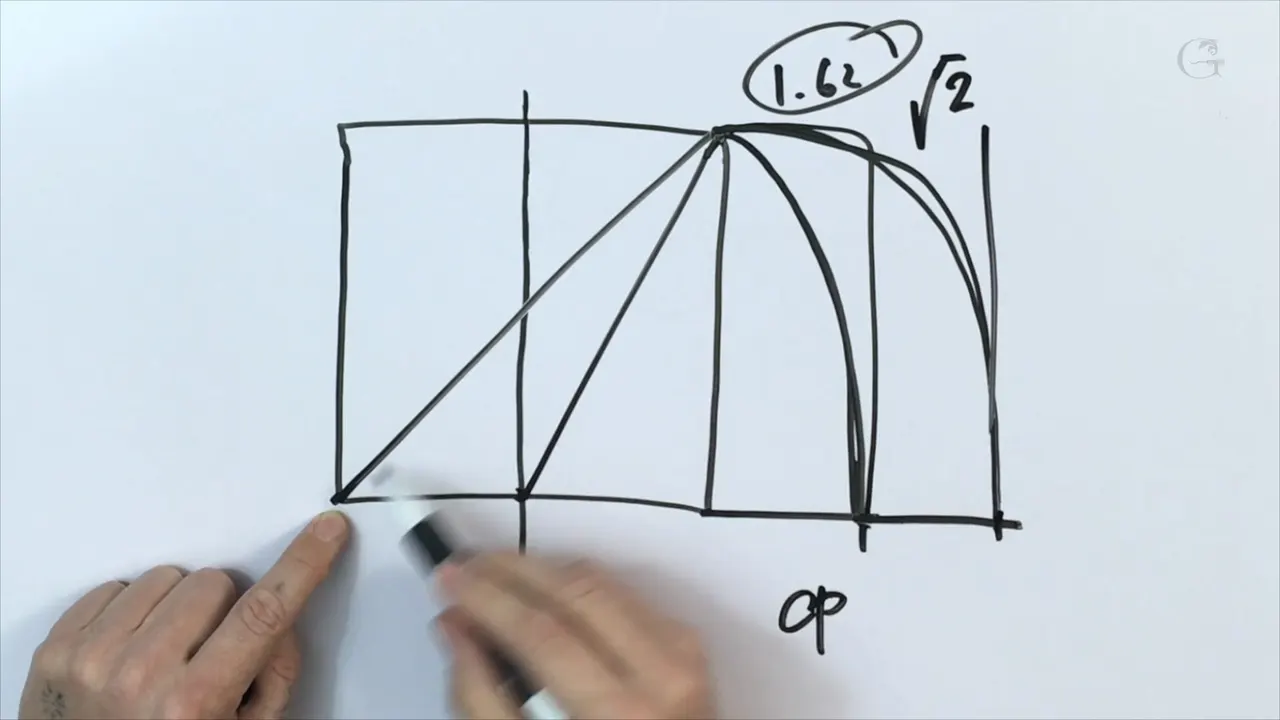
Not every rectangle is a golden rectangle. Swing the diagonal of a square outward with a compass and the shape you land on is root two. Take its diagonal, swing again, and root three appears. Two more swings give you the rest. The board on my bench measures close to root four, and that one fact moved my focal point.
Have you ever set a panel out by eye, put the main flower dead in the middle, and watched the whole thing go flat? Or measured a golden section carefully, drawn it, and still disliked what came back at you? The proportion of the board itself is doing half the work here, and most of us never stop to check which proportion we actually have.
On this drawing I go through the root rectangles and the compass swings that make them. Then the two diagonals and the old names they carry. Then the perpendicular that finds the real golden point, and my reason for walking away from it.

What is doing the work here
- A square is the parent of every root rectangle, and one compass swing makes the rest.
- Golden and root are different families. One is about 1.618, the others are square roots.
- Naming a diagonal lets you hang a movement parallel to it later and have the corner agree with itself.
- Drop a perpendicular from one corner onto the long diagonal. Where they meet is the golden point.
- You are allowed to refuse that point. I refused it here.
- Five millimetres, 3/16 of an inch, is the width I carry all the way round this molding.
- Most of the lines I am drawing today will be rubbed out before a gouge ever touches the wood.
How do you build a root rectangle from a square?
Draw a square first, because every one of these shapes is a square that has been stretched. Halve it. Set your compass point on the half way mark of the base, open it to the far top corner, and swing that radius down to the baseline. Extend the square out to where the arc lands and you have the true phi rectangle, one to roughly 1.618.

My square on camera was freehand. I said so at the time, because a wobbly square still shows the method perfectly well, and the method is the thing worth having here. Move the compass point and one swing hands you a different family.
Put the point at a bottom corner, open to the opposite top corner, swing, and the base extends to root two. Take the diagonal of that new rectangle and swing again for root three. Two more swings and you are at root four, then root five. Most people stop there. Nothing physical prevents you carrying on, and I have never once needed to.

None of this is my invention. The golden ratio has been argued over since Euclid, and the root family was pulled back into working practice a century ago by Jay Hambidge, whose system of proportion is still taught. What I do with it on a furniture panel is ordinary shop geometry, and the compass in my hand is the same instrument a drafting shop used four hundred years ago.
Which rectangle is sitting on my bench?
Mine comes out close to root four, and root four is a pair of equal squares. Two equal spaces, in other words. A shape like that wants to split down the middle, which is exactly the thing I am trying to avoid, so the central point still has to feel as though it belongs in the golden section even though the board does not.

Knowing the family tells you what the board will fight you about. Here is how the five behave once there is ornament in them.
| The rectangle | Long side against the short side | Compass move | What it does under ornament |
|---|---|---|---|
| The plain square | One to one, and nowhere at all to travel | No swing | Calm, very hard to move |
| The golden one, also called phi | About 1.618 | Half the base swung out to the far top corner | Restless, and it never really settles |
| Root two | 1.414, known as the paper ratio | Its own diagonal | Upright, without shouting about it |
| Root three | Close to 1.732 | Diagonal of the root two, swung down again | Long, and it wants a strong middle |
| Root four | Exactly two | Two squares, one beside the other | Splits down the middle unless you stop it |
Size is a separate question from family, and I want to settle it early. This board of mine is awkward, the dimensions make it a complicated panel, and none of that should stop you drawing the same ideas at whatever size suits your own piece of wood. Ratios travel. Inches do not.
What are the baroque and the sinister diagonal?
Baroque is the diagonal that climbs toward the upper right on a panel standing vertically. Its partner, running the other way, is the sinister. Baroque here has nothing to do with the style. The word carries its older sense of strange or irregular, and sinister is plain Latin for left, so the pair are really just a right-hand line and a left-hand line with good coats on.

Why bother naming them? Two lessons from now I set a volute parallel to the baroque line and the whole corner falls into agreement at once. A diagonal with a name is a diagonal you can aim at, and the golden centre found from two diagonals earlier in this workshop is the same habit at a smaller scale.
Both lines run through Baroque ceilings and through the furniture that came after. Look at a carved panel in a museum collection and you can usually work out which of the two the carver was leaning on. Direction is never accidental in good ornament, which is the whole argument of the lesson on how a panel gets read.
Where is the true golden section of a rectangle?
Take a square, set its corner against the panel corner, and run a line from the opposite corner so that it meets the long diagonal at exactly 90 degrees. Where that perpendicular lands is the golden point of the whole composition. Old drawing manuals call the move a reciprocal, and it works on any rectangle, golden or otherwise.

I drew it. I looked at it. I did not like how it was going to sit, so I left it.
Why did I refuse my own construction?
Never let a construction beat your eye. What I used instead was six parts out of ten, measured twice: once from the main outline or border, and a second time for the inner part. That is a rougher number than the geometry gives, and on this particular board it looks better, which ends the argument.

People get this backwards. They read about thirds or about phi, they lay it out, and then they defend a point they do not actually like because a book told them to. Geometry is a servant. It gets you to a short list of good places fast, and then your eye picks one of them.
This kind of carving works the same way the whole way through. You draw something, you change something, and that is the normal process rather than a sign you are doing it wrong. If you want the ordered version of that argument with a board in front of you, the school runs on it.
How wide is the molding line?
Five millimetres, 3/16 of an inch, and it never varies once chosen. I carry that width the full height of the panel and mirror it on the far side, so the molding reads as one continuous piece of timber even where new movements grow out of it later.

Eyeballing is fine for the first pass. You could measure every one and that would be absolutely fine too. I put the ruler down on camera to prove the line really was 3/16, because a width that drifts by a millimetre here and there stops looking like a molding and starts looking like a mistake.

There is a second line 5 mm inside the first, and the gap between them is the molding itself. Carry both, mirror both, and the border closes on itself at the top without any fudging. Miss one of the pair and you will find out about it three hours into the carving, when the border has to change width to meet its own corner.

Where those carried lines cross the diagonals is where my inner panel comes from. I did not pick its corners. The lines picked them, which is the whole point of putting the geometry down first. That habit shows up again in how Fibonacci sets the border widths a few lessons back, and again in the lesson on T-stops.
Will most of these lines survive?
Almost none of them. Nearly everything I am drawing today gets rubbed out, and knowing that changes how freely you work. A preliminary line costs nothing. A line you are frightened of erasing will quietly bully the rest of the design into agreeing with it.

When a sweep refuses to come right by hand, I reach for a circle template, one of those plastic sheets full of graded holes. Run the pencil round the hole that fits and the movement is true. Nobody looking at the finished carving can tell whether an arc came off a template or a steady wrist, and the wood certainly cannot.

What did carvers use before printing?
Old shops carried far more instruments than we now give them credit for. Calipers, sectors, proportional dividers, and plenty of things that are simply gone. One method survives and it is beautifully simple: plant the compass in the focal point and draw circles.

I set one in the middle of the panel and a second in the main focal point, then swing. Those arcs are not decoration. They become the skeleton that the swirls and the volutes ride on, and a sweep sitting on a real arc looks calm in a way a freehand sweep almost never does.

Sixteenth, seventeenth and eighteenth century draughtsmen worked exactly like this. That logic runs underneath every Roman acanthus leaf you have ever admired, and underneath the Corinthian version too.
Is a ruler full of holes cheating?
Pick up whatever gets the line true. Mine is an Incra rule, a steel strip drilled with a row of holes that take a 0.5 mm pencil. Find the hole nearest the offset you want, run the pencil along, and the line comes out parallel and accurate with no measurement taken at all.

Mine came out at 5 3/16 as the closest hole, which is not a number I chose or needed. I have a long one too, out to 18 inches or about 460 mm, for a full edge. They did not have these in the eighteenth century and I am not pretending otherwise. I use them in furniture work. They belong here for exactly that reason.
For a space rather than an offset I use a scrap of paper. Mark the gap on its edge, carry it where it has to go, and 5/8 of an inch, about 16 mm, has moved across the board with no arithmetic. Between the rule and the paper I get a square corner every time.

When should you stop drawing and just look?
Walk the board away from yourself and stare at it for a few minutes. Faults that hide at arm's length are loud from across the room. Better still, leave the thing alone for a few days and come back, because you will see what you want to change.

I was not happy with that corner while I was filming and I said so out loud. Then I fixed it, looked again, and it was better. My first volute landed on the golden line in line with the minor focal point rather than on the centre, and the reason is that the acanthus movement wants to travel that way later on.
I could have drawn all of this beforehand and handed you the file. The download exists. Watching the changes happen is worth more than the finished sheet, and that is why the camera stays running while I erase things. Once the drawing settles, the work moves on to the carving stage of this panel, and the next design lesson takes up the invisible T-stop. The whole sequence sits inside this design workshop.

One more habit before the drawing goes away. Every time I add a movement I check it against the two diagonals and against the six-out-of-ten marks, not against the last thing I drew. Judging a new line by its neighbour is how a panel drifts: each step looks reasonable, and forty steps later the composition has quietly walked off its own geometry. The marks are the referee. Your neighbour line is not.
So: would you rather keep guessing where the middle of your panel is, or know? Shall we carve?
How it's done
- Draw the square. Start with a real square, as close to true as your hand will make it. Every root rectangle and the golden one both come out of this single shape, so an inaccurate square costs you twice over.
- Find the half point. Mark the base at its half way point. Set the compass there and open the other leg to the top corner on the far side. That distance is the radius that produces phi.
- Bring the arc down. Carry the arc round until it touches the baseline extended. Where it lands is the new corner, and the rectangle you now hold measures one to roughly 1.618.
- Now the other roots. Move the compass into a bottom corner and open it to the opposite top corner for root two. Root three comes off that new rectangle's own diagonal, then four and five follow.
- Name your diagonals. Rule both diagonals across the finished panel. The one climbing to the upper right is baroque, the other is sinister. Write the names on the sheet if you are likely to forget them.
- Test the true golden section. Run a perpendicular from one corner to the long diagonal. Where the two meet is the golden section of the whole rectangle. Look hard at it before committing anything to it.
- Carry the molding width. Choose one width for the molding, 5 mm or 3/16 inch on this board, and carry it the full height on both sides. Keep a second line 5 mm inside the first.
Frequently asked questions
How many root rectangles are there?
Four get used in practice, root two through root five. Nothing stops a draughtsman going further than that, and each one comes from swinging a diagonal of the shape before it. Root four turns out to be a pair of equal squares.
Is a golden rectangle the same as root five?
Different construction and a different number. Phi lands near 1.618 while root five lands near 2.236, though the two are related through the same half square diagonal. Keep them apart on paper or a layout will drift.
What does baroque mean in the name of a diagonal?
Strange or irregular, in the older sense of the word, with no reference to the style that shares the name. Sinister is Latin for left. Both are direction labels and nothing more than that.
What to carve next