
Alexander Grabovetskiy, woodcarver, School of Woodcarving · Published 2018
What is an invisible T-stop in carving design?
Quick answer: An invisible T-stop is a collision your eye completes for itself. No two lines actually touch, yet a leaf edge travels on until it runs into another element and halts there. The drawing looks clean and still feels jammed. Curve the arriving movement anyway, because the collision is real even when nothing visible meets.
A stop does not need two lines touching to ruin a panel. Your eye carries the edge of a leaf onward past where the pencil stops, and if that imagined continuation runs head on into something else, the corner jams. Nothing is touching. It still reads as a collision, and it still has to be fixed.
Ever drawn a corner where every element is correct on its own and the whole thing still refuses to breathe? Or filled an awkward gap with a leaf, stepped back, and felt the panel get worse instead of better? The trouble is usually not the leaf. It is the line your eye finishes for you, and the shape of the emptiness left beside it.
This lesson is three fixes and one old idea. The fixes are an invisible stop, negative space that has to obey the same law the ornament does, and shadows you must draw before they exist. The old idea is why nothing growing has a ruled edge, and what that means for the panel in front of you.

What actually holds this corner together
- An edge keeps travelling in the viewer's head after the pencil has lifted.
- Emptiness has a shape too, and it obeys the law of repetition exactly as a leaf does.
- Narrow first, wider after. The eye wants that direction in the ornament and in the gap beside it.
- Nature gives you dots and curves. Art adds three ruled lines, and those are the human contribution.
- Shadow is the only colour relief carving has.
- One leaf running under another is what makes a flat board read as depth.
How can a stop be invisible?
Your eye finishes lines. Give it the edge of an acanthus lobe sweeping upward and it will carry that sweep on for another inch whether you drew the inch or not. When the imagined part of the sweep arrives at a molding or another leaf and halts, you have built a T-stop out of thin air.

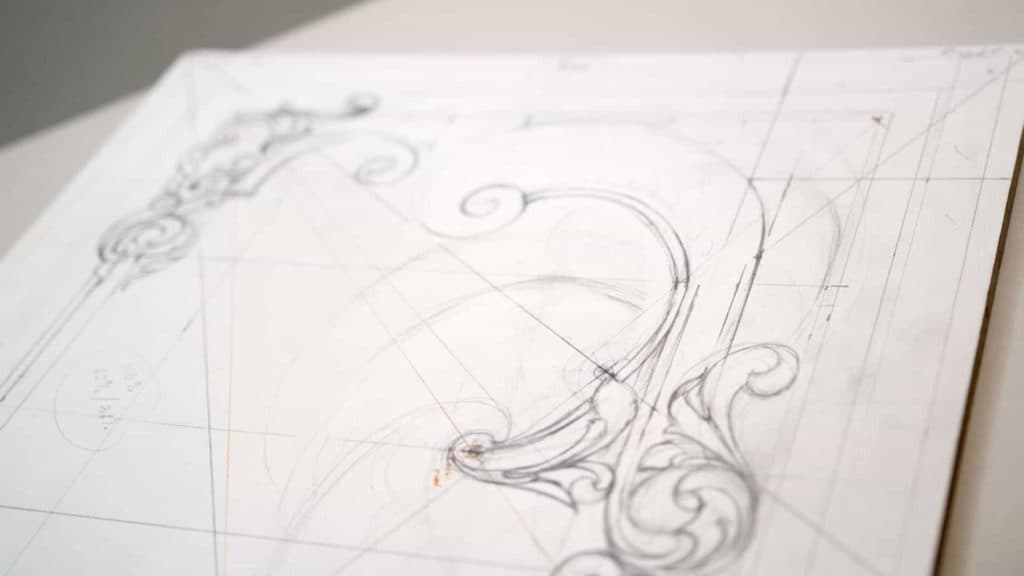
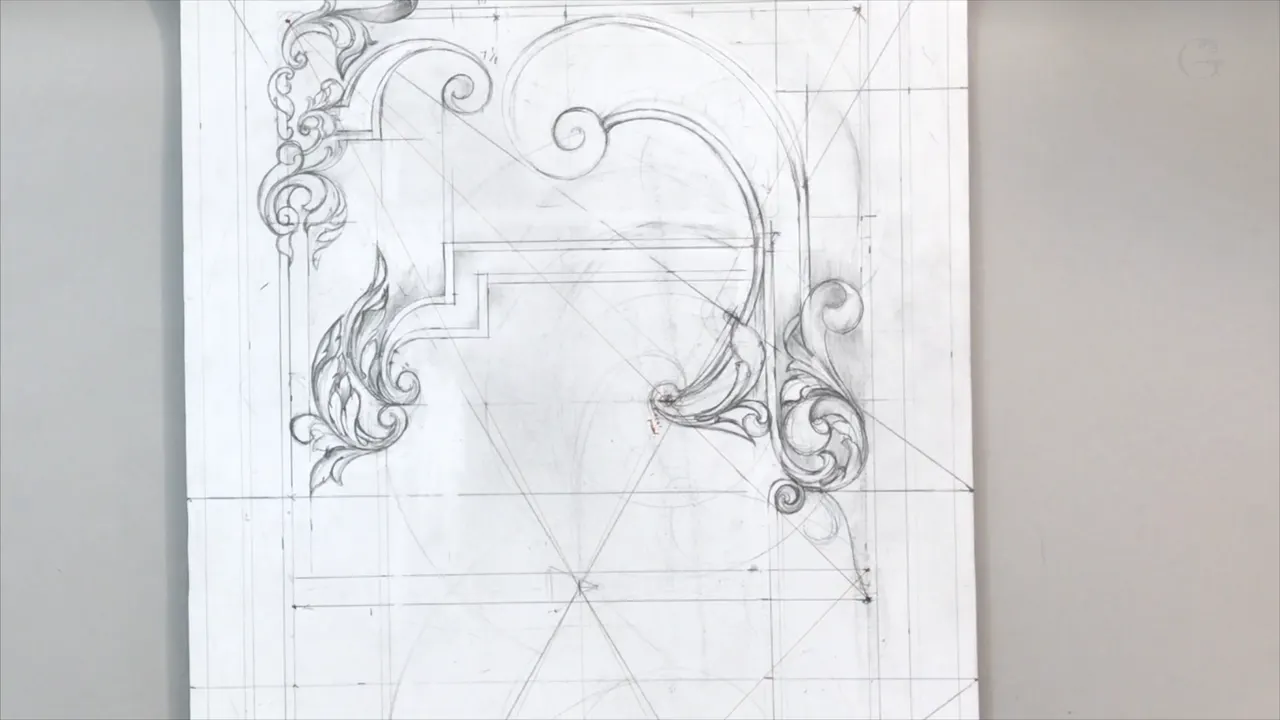
My own board had exactly that fault. My leaf was going to finish, and its edge was going to run all the way and hit a point, and it would not have looked good. I said so twice on camera because the fault is that hard to see and that easy to leave in.

The cure is the same as for the visible kind. Bend the arriving movement so it flows alongside rather than into, and let the leaf edge continue the neighbouring movement instead of opposing it. Now the corner is organic, and nothing about the pencil work changed except one curve.

Why does empty space need designing?
Emptiness carries a shape whether you treat it as one or not. In this corner every ornament element started narrow and opened out, while the gap beside them did nothing of the kind, so the whole area felt wrong even though each separate leaf was fine.

Fix the boundary and the gap fixes itself. I changed the leaf edge so the space it leaves opens out as it travels, and the two halves of the corner came together at once. Negative space is a painter's phrase, and carvers need it more than painters do, because in wood the background is a real depth that someone has to carve away. A Rococo cartouche and a plain ovolo border both live or die on the shape of the air around them.

Here is the checklist I run when a corner feels wrong and I cannot say why.
| What to test | The question I ask myself | The fault | What it usually takes to repair |
|---|---|---|---|
| The leaf edge itself | Where does it go if it keeps going? | A hidden stop | Bend it until it merges |
| The gap | Does the empty shape open out? | Dead air | Shift the boundary rather than fill |
| Repetition on the two sides | Narrow first and wider after, on both sides? | A mismatch | Redraw the thinner side up to match |
| Straight against curved | Which of the families dominates here? | Too rigid | Add foliage and soften the hard frame |
| The shadow | Which way is the light coming from? | Reads flat | Drop one plane and mark it |
Why are there no straight lines in nature?
Go outside and look at anything growing: you find two elements, never three. There are dots, and there are curves, arcs, curls, sweeps. A leaf has no straight edge. Water has none. Bone has none. Hunt for a ruled edge on a living thing and you will come home without one.

Art adds three more, and they are vertical, horizontal and diagonal. Those three are the human part of any composition, and the dots and arcs are the divine part. I know that sounds strange to some of you, and I said as much while I was filming, but it is how I see a panel and it has never once let me down.

Once you hold the idea, a panel stops being decoration and starts being a balance. Borders, molding and inner rectangle all come off the human side. Acanthus, volutes and the flowers still to come belong to the other one. On this board the divine side stays dominant, because foliage is going to cover most of it, and that is a decision rather than an accident.
The same balance is running through every ornament tradition worth copying. Growth patterns supplied the curves and the architecture supplied the frame, which is why a Greek acanthus sits so comfortably inside a square panel.
What do you mean by the energy of a corner?
Movement is the word I use out loud, and energy is what I mean by it. Before any leaf goes down I am working out where the corner wants to travel, and I draw two or three throwaway sweeps just to feel the direction, the way you swing a hammer once in the air before you use it.

A second volute placed on the right gave me a division line here, and that line then told me where the return had to go. None of it was planned in advance. I put a shape down, looked at what it demanded next, and the corner more or less designed the rest of itself.
People treat ornament as though it were a pattern to be filled in. It behaves far more like water. Give it a channel and it runs, block it and it pools, and the whole job of the pencil is deciding where the banks are. The direction it ends up running is the subject of the lesson on how a panel gets read.
Should you hit a line that will never be visible?
Always, and this one is worth arguing about. The corner of my inner panel is going to vanish under foliage. Nobody who sees the finished carving will know it was ever there. I brought a leaf tip to it anyway, deliberately, because the geometry underneath is what makes the surface feel inevitable.

Miss those hidden anchors and a panel goes soft in a way that is impossible to diagnose from the finished piece. Everything is roughly right. Nothing is exactly right. Viewers cannot name the problem and they do not come back for a second look, which for furniture is the only verdict that counts.
This is also why I erase so much on camera. A leaf that does not feel natural gets rubbed out even when it is well drawn, because natural is the test and pretty is not. Twice in this lesson I put something in, said plainly that I did not like it, and took it straight back out again.
How do you draw a shadow that is not there yet?
Relief carving has almost no colour to work with. What you have is light and shade, so while the pencil is still moving I am already deciding what drops, what rises, and where the light will catch. Inside this line goes lower. The part beside it comes up, and a shadow is going to sit between the two.

I will not tell you that you have to work this way, because that sounds arrogant, and plenty of good carvers think about depth later. What I will say is that a drawing made without shadows in mind produces a relief that reads flat from six feet away, and six feet is where furniture gets looked at.

Sometimes the answer is a whole new plane. I lowered one section on this corner, kept its upper line, and the area immediately settled. Two points ended up on the same line while I was doing it, which I noticed and kept, because alignments you find are usually better than alignments you force.

Which acanthus belongs in a tight corner?
French, late eighteenth century, and noticeably tighter than the Roman kind. Acanthus is not one leaf but a family, and the version you pick has to suit the space it is going into. This corner wanted discipline.

Compare it with a Roman acanthus and the difference is obvious once somebody points at it. The Corinthian leaf is looser again, and a modern acanthus throws most of the rules out on purpose. Louis XVI arrived as a reaction against Rococo, and the leaf carries that reaction.
Main subdivisions first, then the curl, then the eye near the centre of its pipe. Getting those three in the right order saves a lot of erasing, and if you want the whole family laid out properly rather than one leaf at a time, that is what the school is for.
How do you make one leaf sit under another?
Draw the top leaf whole, then let the lower one appear from behind it and stop. Nothing about the line says depth on its own. Depth arrives because one shape is interrupted and the other is not, and the brain reads the interruption as the near thing covering the far thing.

Here I have three levels doing that: one leaf in front, one from underneath, and a third lower again. Each overlap earns a shadow line, and I mark those while drawing so I know where the ground is going before a gouge arrives. It matters more in the carving stage than anywhere else.
Then the leaf curls. A curl going away from the viewer is the single most useful move in the volute vocabulary, because it hands you shadow, a bright edge and direction at once. Put the eye toward the centre of the pipe and the whole lobe starts to turn.

Did eighteenth century carvers really work with instruments?
Anyone who thinks those shops had nothing but chisels and a steady hand is wrong, and I am blunt about it because the myth does real damage. Seventeenth, eighteenth and nineteenth century artists, joiners and furniture makers owned devices we no longer have names for. Plenty of them are lost.

Calipers survive, and so does the sector, a hinged rule that solved proportion problems long before anybody had a calculator. Look in a museum drawing cabinet and the tools are lying right there in the drawer.
So the guilt about using a rule is misplaced. What they cared about was whether the line was true, and that is still the only thing the finished piece will tell anybody.
Does the drawing tell you how it will carve?
Only partly, and that gap is worth understanding before you start. A drawn panel and a carved panel never look the same, because carving brings chisel marks and real ridges, and those ridges end up creating the main movement all by themselves.
Which means a drawing that looks slightly under-stated is usually right, and one that already looks finished on paper will come out fussy in the wood. I am not claiming this corner is finished. It is not 100% how I want to see it, and I will look again later with a fresh eye and probably add something.
Stepping back is the whole method. Seen from a little distance it is not bad at all, which is the most I will say today. The next lesson opens by deciding that a different part of this same corner came out too crowded, and it goes back in. Everything before today sits in this design workshop, starting with the root rectangles.
One last thing about the divine and human business, since it decides more than it looks like it does. Count the straight elements and the curved ones on any panel you admire and the ratio will tell you what period it belongs to. Heavy on the frame and you are looking at something architectural. Tip it the other way, toward foliage, and you land somewhere later and softer. My board leans soft on purpose.
So: do you want a panel that is merely correct, or one that moves? Shall we carve?
How it's done
- Trace every edge onward. Run your eye along each leaf edge and carry it forward in your head past the place the pencil stopped. Note wherever that imagined line arrives at something and halts.
- Curve the arriving movement. Bend the edge so it flows alongside its neighbour instead of into it. The pencil work barely changes and the corner starts breathing again.
- Look at the gap, not the leaf. Check whether the empty shape beside your ornament starts narrow and opens out. When it refuses to, move the boundary of the leaf rather than filling the space up.
- Count the ruled lines. Borders, moldings and the inner rectangle make up the straight family. Leaves, volutes and flowers are the curved one. Decide which should dominate before drawing anything more.
- Decide the planes. Mark the side of each line that falls and the side that rises, so you already know where shadow will gather. In relief that shadow is the only colour available to you.
- Choose the leaf type. Pick the acanthus that suits the space. A Louis XVI leaf runs tighter than a Roman one and suits a corner that needs discipline.
- Overlap to build depth. Draw the near leaf whole and let the far one appear from behind it, interrupted. Add a shadow line at every overlap so the ground depth is settled.
Frequently asked questions
Can two lines create a stop without touching?
Easily, and that is the common case. A viewer completes the edge inside their own head, and the completed part collides with something even though the pencil never reached that far.
How does negative space work on a carved panel?
Whatever the ornament leaves behind, which on a relief is real ground somebody has to carve away. Give the empty shapes the same taper the leaves have and a corner settles at once.
Why does nature avoid ruled edges?
Growth works in curves and points, never in straight lines. Ruled edges arrive with human building, all three of them, and both families sitting on one panel make the balance I am after.
What to carve next