
Alexander Grabovetskiy, woodcarver, School of Woodcarving · Published 2018
How do you decide the width of each border on a carved panel?
Quick answer: Border width on a carved panel follows a sequence rather than taste. Take the thickness of your board as the first unit, then let each band equal the pair before it added together. Ten millimeters, twenty, thirty, fifty, and the spacing reads as correct to anyone who looks.
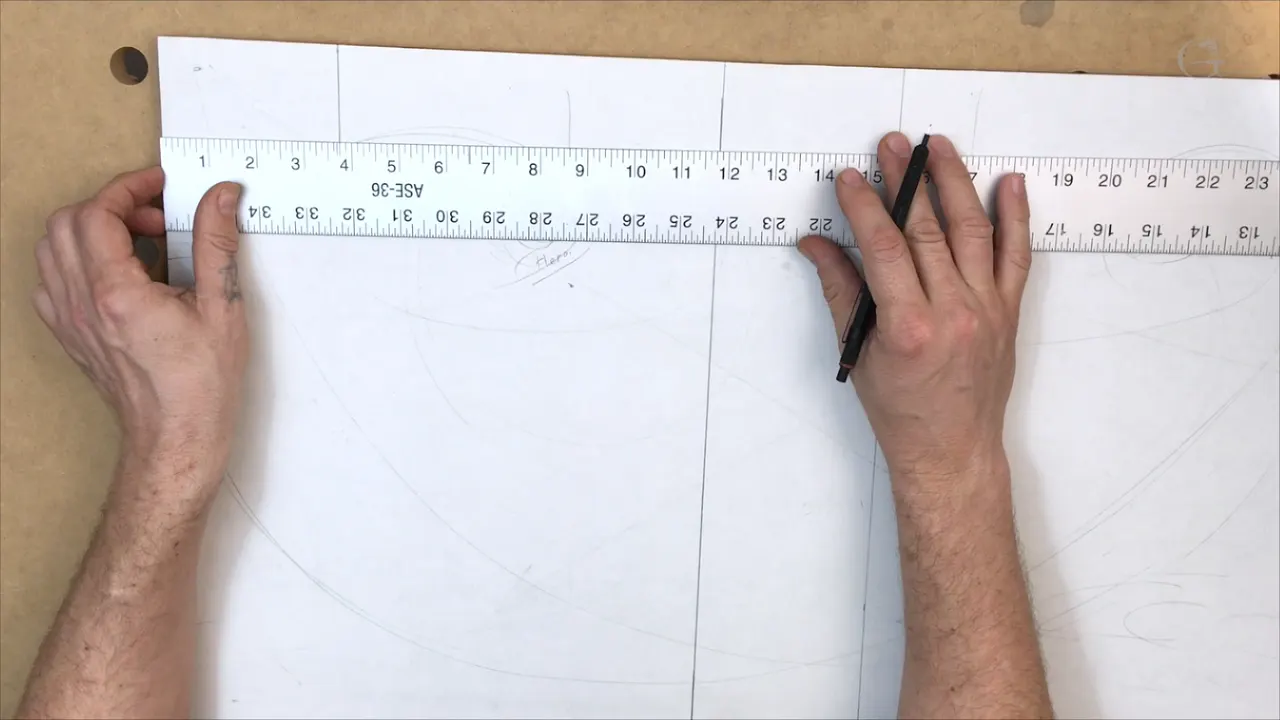
Border spacing on a carved panel is not a matter of taste, and on this one every band is built from the two bands before it. Ten millimeters, then twenty, then thirty, then fifty. Each step is the sum of the previous two, which is the Fibonacci chain, and your eye reads that as right without ever knowing why.
Ever drawn a frame round an ornament and felt the border was too fat, or too thin, without being able to say by how much? Ever moved a line three times and still not liked it? A number sequence that is older than any furniture shop will settle it for you in five minutes.
This whole lesson is straight lines. No curls yet, no leaves, nothing that looks like carving. My job right now is fixing where the moldings sit, and once they are right the ornament has somewhere to live.

What sets the width of every band on this panel
- The first ten millimeters, 3/8 in, is not design at all. The frame hides it.
- Board thickness picked that number for me. My panel runs ten millimeters through, so ten it is.
- Twenty millimeters comes next, since one unit added to itself is how the chain starts.
- Bands of five millimeters, three sixteenths, repeat on purpose. Repetition is a law, same as in music.
- At fifty millimeters inward the real design finally begins, and the numbers walk you out to it.
- An inner square of 286 mm, 11 1/4 in, carries the second focal point on this board.
Why does the first line sit 10 mm in from the edge?
A frame covers that strip, so nothing drawn there will ever be seen. Panels of this kind drop into rails and stiles, or into a door, and the lip of that frame eats roughly 10 mm, call it 3/8, all the way round.

So I draw the line and treat it as a wall. My boundary, and I do not cross it at all. Carve past that mark and the best work of your week vanishes under a piece of oak the day the door is hung.

Why 10 and not 8 or 12? My board is 10 mm thick. Using the thickness of the stock as the first unit means every later number stays in proportion to the panel you actually have in your hands, not to a panel in a book. Build furniture and you can make the main door of a cabinet exactly this way.

Where does the 20 mm border come from?
Straight out of the sequence. One plus one is two. Two plus one is three, three plus two is five, and on it goes. Put ten millimeters in as your first unit and the next step doubles it, landing on 20 mm, three quarters of an inch.

That 20 mm band is the main border, and I wanted plenty of room round the ornament before any carving starts. Authentic paneling has an inner design with air round it. Crowd the edge and the panel looks anxious. Authentic paneling keeps an inner design with room around it, and protecting that is the point of this band.

Inside that I mark 5 mm, 3/16 in, which is half of my first unit. A thin line, but a real one. I do not want a border so thick it fights the ornament, and I still want it to read as a separate thing from across the room.

What makes a carved border look like applied molding?
Ground on both sides of it, taken down and left alone. The band itself stays at the original surface, I lower the wood either side, and the strip is left standing proud. Anyone looking at the finished panel reads a molding that was made separately and glued on.

None of it is glued. All of it came out of one 10 mm board. That illusion is a lot of what shallow relief is for, and it is the same thinking behind an egg and dart run or a Baroque frame. If the idea of raising a form out of flat stock is new to you, our beginner course starts there.

Why take 5/8 in off the molding line?
Five eighths keeps the sequence running, and there is a second reason that has nothing to do with arithmetic. Inside a frame the lip covers about 10 mm, and there is usually design under it. You will not see that edge. Your brain will still find it and build the composition around a line it cannot look at.

So the chain keeps going and I let it. Ten, then twenty. Add those two and thirty appears, add twenty to thirty and fifty appears, and that 50 mm mark, near two inches in, is where I put the line the real design starts from. Lay a rule on it. The number comes out almost exactly.

Every one of those marks is preliminary, and I say so while I draw them. Some will move once the ornament arrives. What matters is that they start in the right family of numbers instead of wherever the pencil happened to stop.
How the bands stack up on the drawing
| The band | What it is actually doing on the drawing | Where the number came from in the first place |
|---|---|---|
| Outer strip, ten millimeters | Vanishes under the frame lip | Board thickness, which became unit one for the whole layout |
| Main border | Gives the ornament room to breathe on every side of the panel | One unit doubled |
| Thin inner band, five millimeters | Reads as a separate molding standing above its ground | Half of unit one |
| Five eighths of an inch off the molding, near sixteen millimeters | Sets the start | Carries the chain outward one more step, and the frame lip hides that edge anyway |
| Fifty millimeters, about two inches, measured inward | Where the real design is finally allowed to begin | Thirty added to twenty |
Why does one band get repeated on purpose?
Rhythm, and you already know exactly how it works from music. Something repeats, pam pam pam, pam pam pam, and the ear settles into it. Carving works on the same law. My 5 mm band appears once, then I repeat that same 5 mm further in, and the panel gains a beat.

Straight repetition is dull, though. Later on I make one volute large and answer it with a much smaller partner, which is repetition with the music left in it. Same idea, different size. Identical elements make a fence.
Do the same laws really run through music and carving?
Da Vinci thought so, and Bach built with it too. The true masters of art and of music were all using the same proportion, and it does not care whether you are making a form or making a sound. Leonardo used it. So did the men who raised the columns that every later carver copied.
I will be honest with you. I do not know how it works. Follow those laws and the artwork looks right; ignore them and something is off that nobody can name. Perhaps your brain is wired that way. Perhaps the whole creation is built on it, and you can find the same proportions in a shell, in a sunflower, in a hand. I lean toward the second.
What I am sure of is the practical half. The golden ratio and the Fibonacci sequence will not make you an artist, and they will stop you making the one mistake that ruins more panels than dull tools do. Ready to work this way on your own bench? Come and carve with us.
Where does the artistic focal point sit?
Scale is the difference. The centers I found in the first lesson belong to the whole board, edges included, and they decide where the two big clusters sit. Now that borders are drawn, a second kind of center exists inside them, and that one is the main artistic focal point.
Stand back from the panel as it is at this moment. Lines everywhere, the golden lines from before, the bands from today. The strongest point of the board is near the top, with its answer down toward the bottom. But between the border lines there is another spot, and it is the one a viewer's eye will actually rest on, because the borders are now framing it for me.
Order matters here, which is why I refuse to rush it. Find the outer centers, draw the bands, then find the inner center that the bands created. Do it the other way round and the ornament ends up centered on a board rather than on a composition. Same panel, and it will feel wrong to everyone and be explainable by nobody.
I like what I see at this stage, and it is not finished. Drawing and redrawing is the job here. An eraser is a design tool, and I use mine more than the pencil.

How do you find the inner square?
Same move as the outer one, run inside the borders instead of round them. I measure between the two lines and get eleven and a quarter inches, which the screen shows as 28.58 cm. Carry that measurement down, draw it, and a square appears inside the bands.
Then I do it again from the opposite side, so a second square sits at the far end. Those two inner squares are where the minor centers will be found, and the next lesson does nothing but locate them with diagonals.

By now the board carries the outer boundary, the main border, two thin bands, the molding start line, and two squares. A lot of pencil. Every line is load bearing, and I will lose none of them when the leaves arrive.
Is this a mathematical way to design?
Mathematical, yes, and I will not pretend otherwise. Measurements, a sequence, a rule laid on the paper twenty times in an afternoon. None of it looks like the way an artist is supposed to work, with a free hand and a feeling.
The free hand comes later, and it comes better for this. Every carver who has moved me was working inside a frame of rules they had made before the work began. Rococo looks wild and is not. A volute on an Ionic capital is a spiral somebody set out with a compass more than two thousand years ago.
So the numbers are not a cage. They are the part you can hand to a student, which is exactly why I teach them first and why a pile of good tools will not substitute. Taste takes years. Proportion takes an afternoon and a tape measure, and it is responsible for more of the result than anybody wants to admit.
One more thing about working this way. It is repeatable. Come back to a panel six months later, or start a different board at a different size, and the same sequence hands you a layout that belongs to that board. Compare that with trying to remember what felt right last spring.

Why spend a whole lesson on straight lines?
The ornament cannot be placed until the room it will live in exists. Look at any panel from the 1700s that still reads well after 300 years and the bones are underneath it, invisible, doing the work. Grinling Gibbons carved in that same century, and his surfaces still hold up.
A carver who skips this part ends up moving the design around the board with a gouge, which is expensive. Wood does not come back. A line moved on paper costs you a second with the eraser, and a leaf moved in walnut costs you the leaf. You can see the same discipline behind our rosette work, the Roman acanthus, and the Corinthian leaf, and it carries straight into the carving stage of this panel. The course pillar lays out the whole arc, and the first lesson covers the board itself. Choosing that board is its own skill, and our wood guide is there for it.
One last thing before the curls arrive. Every mark on this paper is still preliminary, and some of them will move once the ornament argues with them. Preliminary does not mean casual. A line that starts in the right family of numbers can be nudged and stay right, while a line that started nowhere has nothing to be nudged back toward. That is the whole reason I draw them at all. Anybody can rule a rectangle on a board. Knowing what each width is for, and why one is 20 mm and the next is 5, is the difference between a panel that reads and a panel that merely has a frame drawn on it.
How it's done
- Mark what the frame will hide. Run a line ten millimeters, 3/8 in, inside every edge of the board. The lip of a frame covers that strip, so treat the line as a wall you never cross.
- Set the first unit from the board. Use your own stock thickness as unit one. A ten millimeter panel gives ten, and every later number then stays in proportion to the board you are actually holding.
- Add the main border. Double unit one. Draw that 20 mm band, three quarters of an inch, and carry it the full length on both sides. Air round the ornament is what it buys.
- Drop in a thin band. Half a unit comes to 5 mm, or 3/16 of an inch. Mark it inside the main border. Thin enough not to fight the ornament, and still strong enough to read from across a room.
- Keep the chain running outward. Add the last two numbers together and thirty appears. Do it again for fifty. Measure that fifty inward, near two inches, and start the real design on it.
- Repeat one band on purpose. Mark the five millimeter width a second time further in. Repetition hands the panel a beat, the same way a phrase repeated hands music one.
- Square off the inside. Measure between the border lines. Here that came to 11 1/4 in, 286 mm. Carry it down from both ends and two inner squares appear, ready for the next lesson.
Frequently asked questions
What is the Fibonacci sequence doing in wood carving?
Each number equals the pair before it added together, so border widths built that way grow by the same proportion at every step. Carvers and architects reached for it long before anybody named it, and a panel laid out on that chain simply looks settled.
Should border width change with the size of the panel?
Always, and using board thickness as the starting unit does that for you automatically. A thin panel gets narrow bands, a heavy one gets broad bands, and the relationship between them holds either way. Copying inch measurements off a bigger panel is where proportion goes wrong.
How can carved wood look like applied molding?
Leave the band at the original surface and lower the ground on both sides of it. Nothing is glued anywhere. Once a shadow sits either side of that strip, an eye reads a separate piece of molding laid over the panel.
What to carve next