
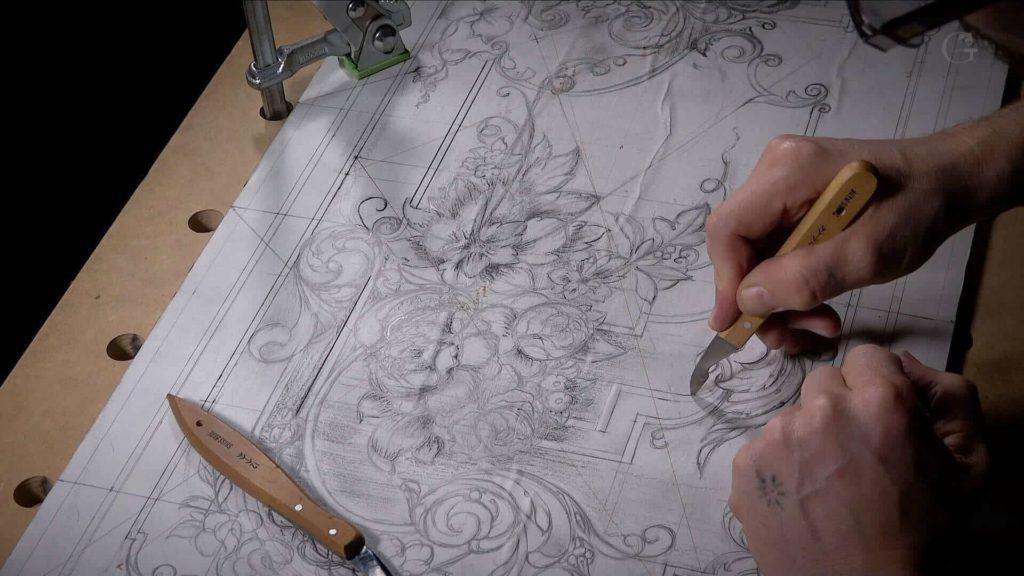
Alexander Grabovetskiy, woodcarver, School of Woodcarving · Published 2018
How do you design a wood carving panel before you start carving?
Quick answer: Designing a carved panel starts with lines, not leaves. You glue white paper over the board, find the golden centers at six parts out of ten, set the borders by the Fibonacci sequence, and only then draw acanthus and flowers. The drawing settles the main movements, and the final shapes come under the chisel.
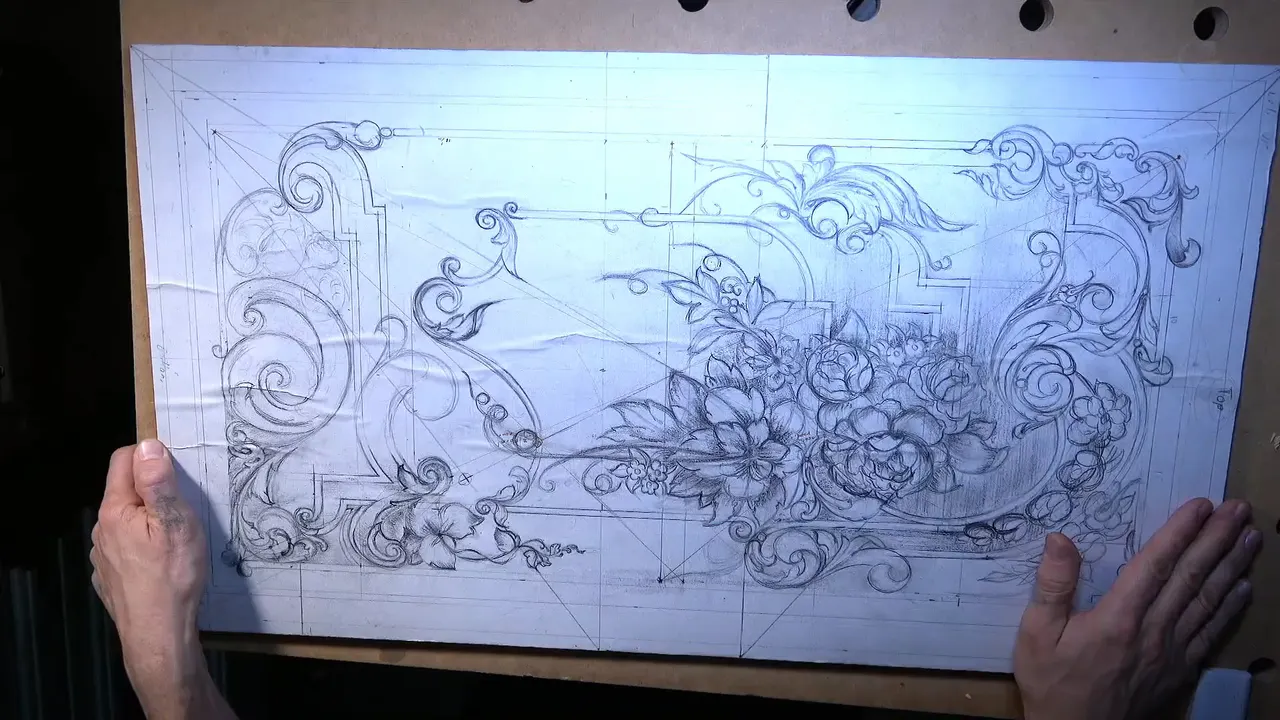
This is one panel carved across three courses, and you are at the beginning of it. No gouge yet. We draw first, and when the drawing is right the wood gets carved in the two courses that follow.
Do you draw the design on paper first, or straight on the wood?
Paper first, and the paper gets glued right onto the board. I cut a sheet about an inch bigger than the panel all the way around, spray photo mount on the wood and on the paper both, press them together and trim the edge. Now I have a perfectly white surface to draw on and design on.
Under that paper is walnut, and not the walnut you order from a yard. I did a whole house in this stuff once. Doors almost three inches thick, baseboards, casings, every piece of furniture, all out of the same purple stock. Purple walnut. Some of you have probably never seen it. What I had left had splits in it, so I resawed it and glued the two boards like a book, and now the cathedral grain on one half answers the cathedral on the other.

The panel is 27 1/4 by 15 1/2 inches (692 by 394 mm) and 10 mm thick, three eighths of an inch. Thin. Nothing in the whole design will go deeper than 5 mm, three sixteenths, so this stays low relief that still has to look like a three dimensional world.
The panel does not lie flat on a bench while I work, either. I screwed the plate off my carver's vice onto the back of a sheet of MDF and dropped that into the vice, so the whole thing tilts, rises and spins around to face me. The MDF carries 20 mm holes, three quarters of an inch, and clamps hold the work wherever I put it. You do not need my vice. You need a surface you can turn.

What pencil do you use to draw a wood carving pattern?
A soft pencil for the drawing, and charcoal only at the very end. Right now there is an 8B in my hand, about as soft as pencils come, though 2B or 4B or 6B does the same job and even a hard one will not stop you. You are going to need an eraser, too. I draw and redraw until I am happy with the design, so a line that will not lift off the paper is no use to me.
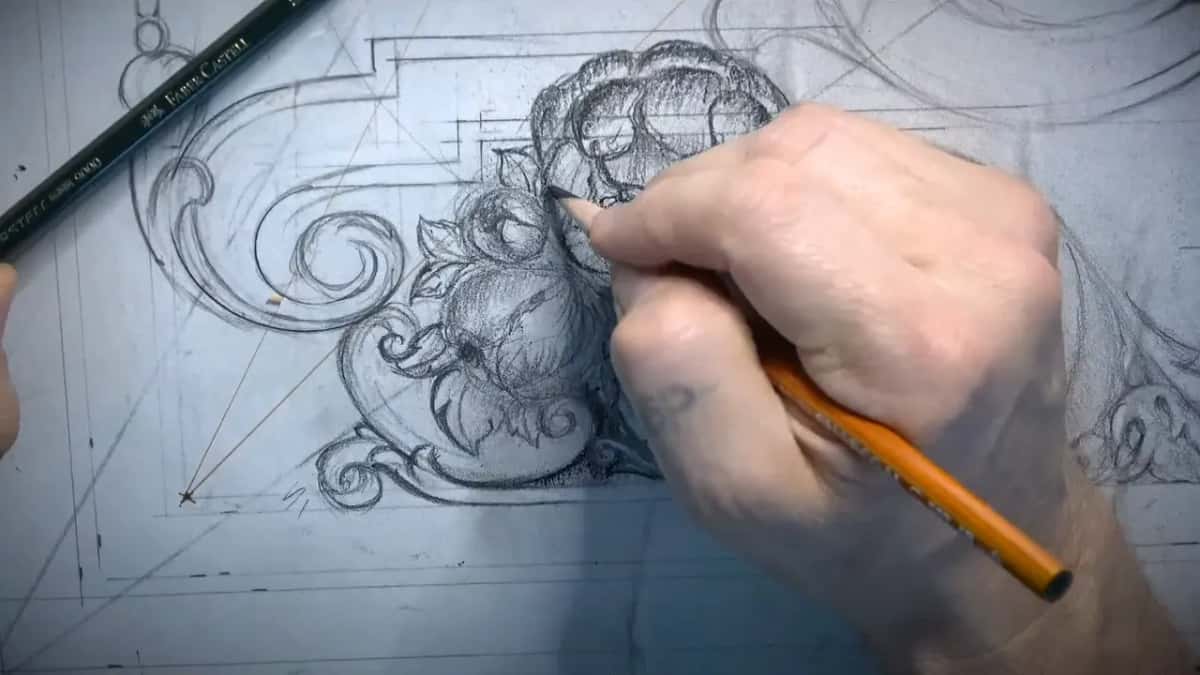
Charcoal comes last, and only where I want shadow. Rub a little into the background and the shadows get a lot easier to see, so I get the general idea of the movement. Charcoal is close to impossible to erase, though, so I keep it well away from any area I am still arguing with. A marker does the same job. Trace over the pencil once you have stopped arguing with the shape.
Where should the focal point go on a carved panel?
Put two focal points on the board and let one of them win. Every movie has a hero and somebody standing against the hero, and a panel gets built the same way. My strong cluster sits near the top, the quieter one near the bottom, and the eye travels between them.
Finding those two spots is geometry, not feeling. The simple road is the rule of thirds. Divide the board in three across and three down, and the four crossings hand you your candidates. Photographers and cinematographers live on that grid. I could have stopped right there. My goal was a piece of art, though, and the best pieces in art followed the golden ratio instead.
So I mark a plus for the hero and a minus for the antagonist. From that moment on, the main idea grows around those two marks, and some movements run from one center straight toward the other.

Method for it | What you actually draw on the board | My verdict | The reason I give for that |
|---|---|---|---|
Rule of thirds | Three equal parts each way, four crossings | Passed over | Photographers use it, masters used phi |
Six of ten | Divide any line in ten, take six | My choice | Close enough, and it looks right |
True golden section | Square corner against diagonal, then ninety degrees | Explained only | I don't like how it looks |
Golden ratio tool | Four armed divider splitting ten into six | For checking | Landed right on my eyeballed point |
What is the golden ratio in wood carving design?
The golden ratio splits a line about 62 to 38, and on a panel it marks where the eye wants to rest. The number is 0.618. Fibonacci tried to define it, Leonardo da Vinci used it, and so did Bach in his music, which should tell you the rule is older and bigger than woodwork.
You do not need the decimal. Divide any line into ten parts and go six. Six out of ten. To keep it simple you can call it the 60/40 rule, and on this board I often find the ten parts just by eyeballing.

My golden ratio tool works like a little caliper. It finds the six of ten for me, and I use it to check myself. In lesson twelve I put a point down by eye first, and the tool landed right on it.

Where is the golden section on a board that is not proportional?
Run one diagonal corner to corner, then run a second line off the corner of the true square inside the board, and the golden point sits where they cross. My board is nowhere near a golden rectangle. Measured long against short it lands close to a root four rectangle, which is two squares end to end, so the clean arithmetic goes nowhere useful.
So I put the numbers away and draw. One diagonal each way, corner to corner. Then I find the true square inside the panel, 15 1/2 inches on a side, mark its far corner, and run a line out to the outside corner of the board. Where those two lines meet is my major center. I repeat the whole business on the inner border, 11 1/4 inches (286 mm), and that gives me the minor. Four crosses on the paper, and I have not calculated a thing.
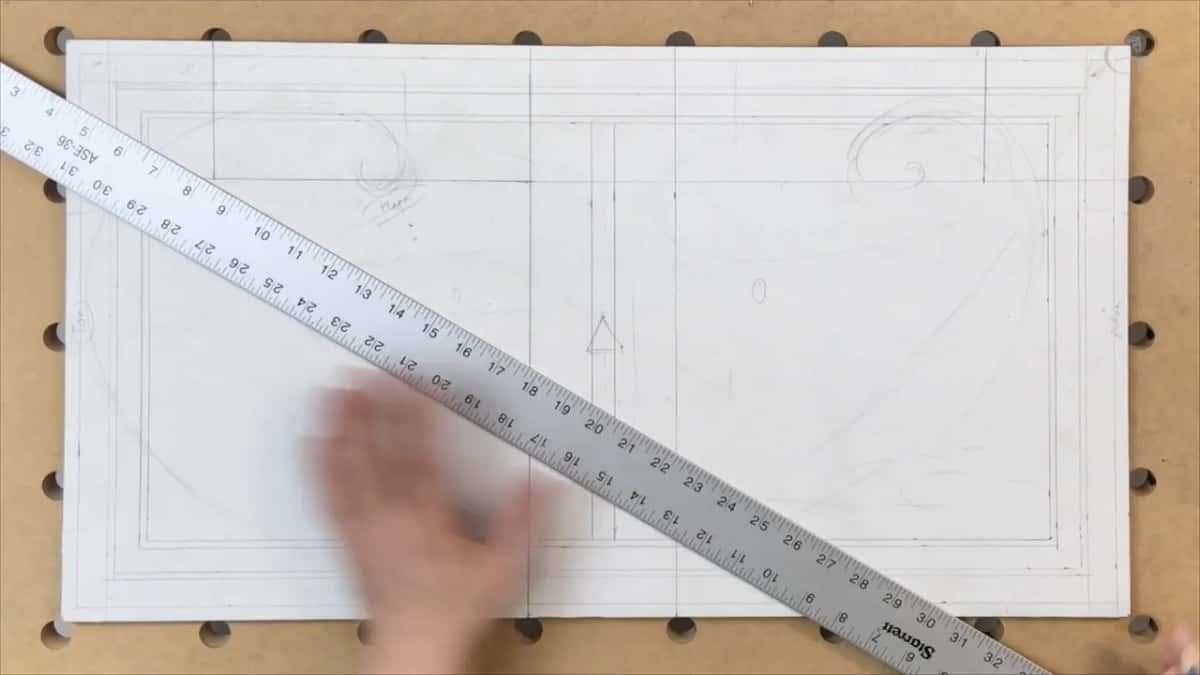
I know all of those lines look confusing at that stage. Fair enough. Most of them are going to be gone, and you will still feel them in the finished panel.
How wide should the border be around a carved furniture panel?
Let the Fibonacci sequence pick the widths rather than your mood on the day. My board is 10 mm thick, so ten is my number one. Add ten to ten and you get twenty, which is 3/4 of an inch, and that is the space I leave open before any carving begins. Keep going and the sequence hands you thirty, then fifty, and 50 mm off the edge is exactly where my last border line wanted to sit.
The outer 10 mm never gets touched at all. That strip vanishes into the rails and stiles the day the panel goes into a door, but your brain still sees the edge of the design where it used to be, so the number has to be right even when nobody will look at it. Inside of that I run a 5 mm band, three sixteenths, which reads as an applied molding although nothing is applied. The 10, 20 and 50 came off the same short list, and the 5 is half of my ten. The eye feels it long before the head can name it.

Repetition is doing the work here, and it is a real law with a name. Rhythm in music is the same animal. I ran one five millimetre band, then another one five eighths of an inch further in, and that is the same law at work on my board.
Which side of a panel does the eye start reading from?
Western eyes start at the top left and travel down to the right, while Eastern eyes start at the top right and go the other way. Sounds like nothing. Draw a line across a page, put a little car on it, and ask an American which way the car is going. He will tell you downhill, every time, because he began at the left. Flip the drawing and the same car is climbing.

I am Russian, and Russia has an Asian half and a European half. I wanted the panel to please both worlds. Most of my students read left to right, and the main movement starts in the upper left and runs down across the board. Later movements are built so your brain reads it both ways, from the left and from the right. I am trying to confuse brains on purpose, and I am not sure anybody has tried that before.
Both diagonals carry old names. The one climbing to the upper right is the baroque diagonal, and baroque there means strange, nothing to do with the style. Its opposite is called sinister, which only means left. Once you know the two lines are on your board you will keep landing the tips of your leaves on them, and the panel will hold together for reasons no visitor can see.

Fourteen lessons of this go by before I sharpen anything. If you want to watch the drawing come up line by line and then see the same panel carved, come and carve this one with me.
How do you draw acanthus leaves and flowers so they look natural?
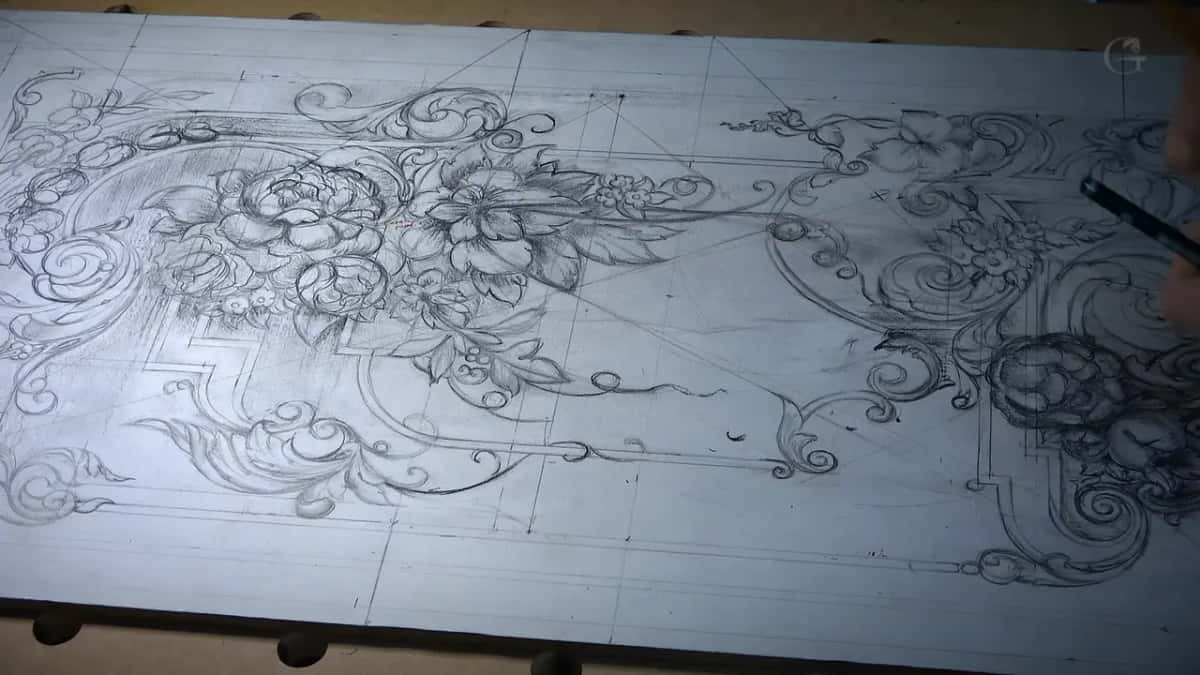
Repeat one movement at different sizes, and don't let two of them come out the same size. Three flowers grow in my main cluster. One is the biggest. Number two comes down a size, number three smaller again, because I don't want to repeat the same size. Leaves behave the same. A large acanthus sits on top, a second one hides underneath it, and the one underneath sits lower and gives me shadow.
There is a rule I come back to again and again on camera. A leaf that runs straight into another line and stops dead makes a T, and a T breaks the flow. The stop does not have to be visible either. If I finish a leaf so that its line, carried on, would hit a point, that still counts as a T. I erase that and let the edge of the leaf keep flowing instead.
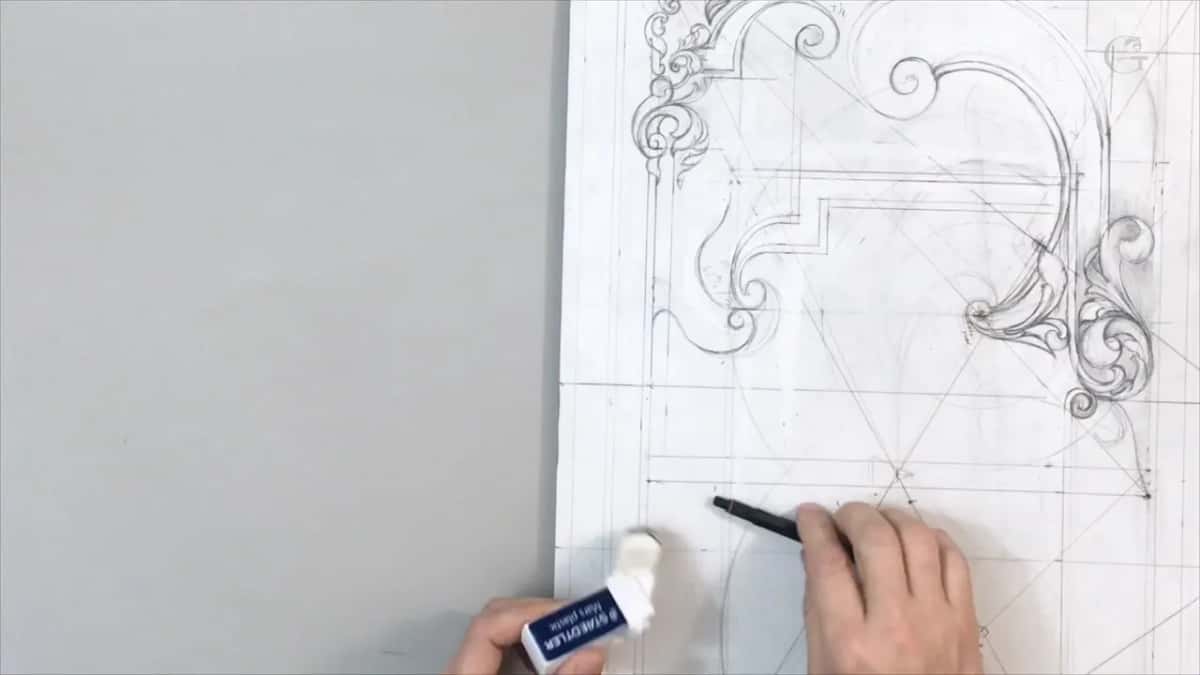
Everything has to interweave. A movement that will not flow into its neighbor gets erased, and on camera that happens over and over. Volutes carry much of that load. A tight spiral turning back on itself fills a corner and picks up a curve from somewhere else on the board, then hands the eye back to the main movement. Old carvers used a lot of volutes and so do I.

The acanthus sits highest. Behind it lies the background, and I mark the concave hollows and the convex humps as I go so that later I know where shadow has to live. On a 5 mm panel that decision is the whole illusion.
Petals have a habit worth knowing. The outer ring of a flower, the bottom layer, goes downhill most of the time, even while the rest of it climbs. I do not finish them at this stage. Movement goes in, a little charcoal for shadow, and the rest waits for the gouge, because in low relief a flower finds its shape under the tool.
How many flowers and leaves should be in an ornament?
Count them, and land the count on a Fibonacci number. My bottom cluster has three flowers. I drew four leaves around them, added a fifth, and five still did not fill the space, so I kept going until there were eight. One, two, three, five, eight. The same short list that gave me a 10 mm border gives me the head count.

Counting flowers sounds strange. I do it anyway, and when the carving starts I will count the petals the same way.
You are also going to erase a lot. Once in a while I step back from the bench and stare at it for a few minutes, and if it feels fine, I keep working. Around lesson nine I threw out a whole double acanthus because the area had gone crowded, kept the outline, and drew one bigger leaf with the second one hiding underneath. A roll of tape sits on my bench, and when a curve gives somebody trouble I tell them to trace around it. Between lesson eleven and lesson twelve there is a long gap, because I moved and had to set up a new shop, and this panel just sat there through all of it.
I would rather call this an apprenticeship than a school. You watch me work, take what you like, and leave the rest. Fourteen lessons later the pencil work is done and I like it, except for one element up near the top that I erased at the last minute because it just did not look right to me. Then the drawing goes out full size for the students to print and glue down. If you want this geometry in your hands instead of your notes, get Access to the whole panel course. Shall we carve?
Most carvers want a gouge in their hand on day one. I did too. But the design goes before the carving, and I would rather figure everything out now than too late, so I spend fourteen lessons on paper and pencil before I sharpen a thing. What follows is how I found the centers, the borders and the movement on one piece of purple walnut.
How it's done
- Read the board and choose its direction. Walnut with splits through it and two cathedrals that answer each other once it is resawed and book matched. I decided the panel stands upright rather than lying long, and since the cathedrals face each other, either end could be the top.
- Mount it so the whole thing turns. The plate off my carver's vice goes on the back of an MDF sheet drilled with 20 mm holes, and clamps hold the work at any angle I want. You need a surface that spins, not my vice.
- Glue white paper over the wood. Cut the sheet an inch oversize, photo mount on both faces, press it down and trim. Now you have a white surface to draw on, and any paper will work.
- Settle the top, the bottom and the entry side. Decide which way a stranger's eye walks in before one line goes down. Mine had to work from the left and from the right, because I wanted it to please both worlds, East and West.
- Mark the square that lives inside the rectangle. Carry the short dimension across, fifteen and a half on my panel, and pencil that square at either end. My golden centers hang off those two.
- Name a hero and an opponent. Two focal points, one at either end, and one of them is the hero. The main cluster and the main idea grow in those two spots.
- Step the borders in on the sequence. Ten millimetres for the rabbet, twenty for the open band, then a five millimetre line reading as molding although nothing was applied. My stock is ten, so ten begins the count.
- Cross two diagonals to find the centres. One line from corner to opposite corner, a second from the inner square's angle out to the board's angle, and the meeting point is what you want. Do it again on the inner border.
- Draw movements first, details later, and erase hard. Spiral, then the main sweeps, then volutes, and the main flowers wait until lesson twelve. Around lesson nine I threw away a finished double acanthus because the area had gone crowded.
- Count the flowers and the leaves. Count three flowers, then add leaves until the tally lands on the sequence. Four looked wrong. Five did not fill it, eight did, and around the filler flowers on that same side I ran all the way to thirteen.
Frequently asked questions
What size board do you need for a carved furniture panel?
Any size works. Mine is 27 1/4 by 15 and a half, and the same rules work on something smaller. Print the full size pattern only when you need my exact proportions.
How deep is low relief carving on furniture?
Shallow. Nothing on this panel goes past 5 mm, and the whole board is just 10 mm. I still want the effect of 3D out of it.
How much math goes into designing an ornament?
Enough to matter. Six parts of ten is the easy way to find a golden point, and I use it all over this board. True art is real math and real geometry, and drawing whatever you feel like just does not work.
What to carve next