
Alexander Grabovetskiy, woodcarver, School of Woodcarving · Published 2019
When is a wood carving design finished?
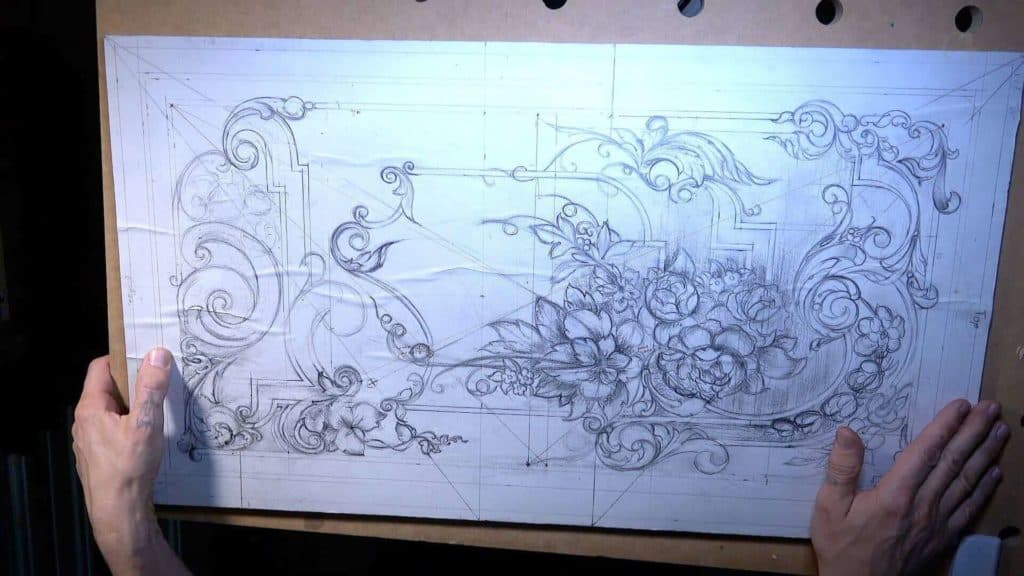
Quick answer: A wood carving design is finished once the counting agrees with the drawing. Every flower group and leaf group lands on a Fibonacci number, each important point sits at six parts of ten rather than halfway, and no movement on the board fights the main flow. Then the pencil goes down.
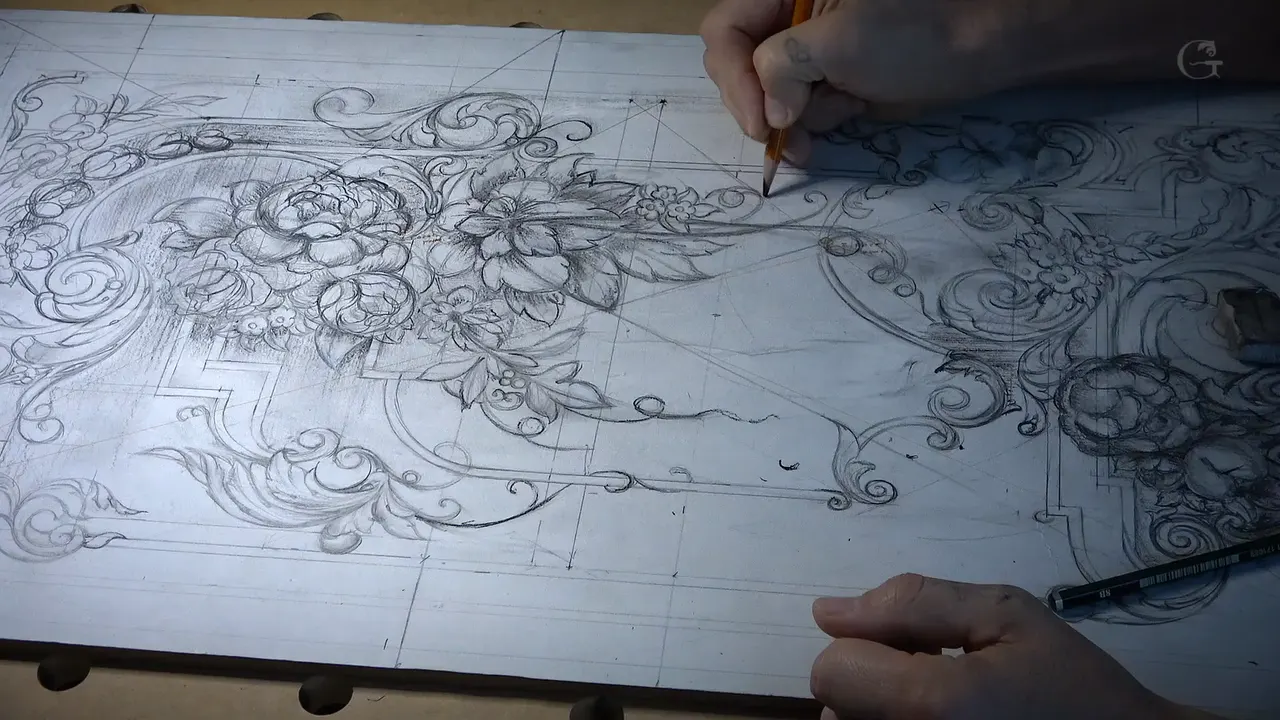
The drawing is done when the counting comes out right. Not when it looks pretty. I finish a panel design by checking three things: every movement ends on a line that was already there, the flowers and leaves land on Fibonacci numbers, and nothing on the board argues with the main flow. When all three hold, I put the pencil down.
Most people stop a design because they are tired of it. Then they carve for two months and spend the whole time fighting decisions they never actually made. I have been there. This lesson is the last drawing session on this panel, and I want to show you the checks I run at the end, because they are the reason the carving goes smoothly afterward instead of turning into an argument with the wood.
What I check before the gouges come out
- Every important point sits two thirds along, never at the middle.
- Flower and leaf counts land on a Fibonacci number.
- Filler flowers close a corner you cannot solve, and they have done that job on furniture for centuries.
- The main diagonal says where a movement ends.
- Pencil goes down first. Charcoal comes last, because it will not come off.
- Nothing is symmetrical anywhere on the board.
Where does the golden ratio actually sit on a carved panel?
Six parts out of ten, measured between whichever two points you care about. My whole method, right there. I take the line at one end and the line at the other, split that distance into tenths, and put my important thing on the sixth, not the fifth. The exact figure is 0.618, and you can call it 0.62 if you like, and the mathematics behind it is older than every panel I have carved put together.

Could I take a caliper and be more accurate? Sure. I could measure every one of these and be exact to the millimetre. I eyeball it instead, and I am usually close, and close is enough on a drawing that the gouge is going to refine anyway. What matters is that the point is off the middle in a deliberate direction.
There is a reason this ratio keeps turning up in old work, and it is not mysticism. A division at the halfway point gives the eye two equal choices and no reason to prefer either. Shift it so one side wins, and the eye follows the winner. Photographers arrived at almost the same place from a completely different direction.
Watch what happens when it is not. A division that lands in the middle of a span reads as an accident, and the eye slides off it. Move that same division off centre and the panel suddenly has a direction. I say this to students constantly and some of them stay unconvinced until they move one line and watch it happen.

The same figure decides my eyes. An eye, in this trade, is the tight little centre a separation spirals into, the same feature you see at the middle of a volute. I run the main baroque line across a section, find the same proportion along it, and that is where the eye goes. We laid the first of these out in the lesson on the golden centre.

How do Fibonacci numbers decide a carving design?
They decide how many of a thing you draw. The sequence runs 1, 2, 3, 5, 8, 13, and the counts on this panel sit on those numbers on purpose. Three flowers in the main group. Then I counted the leaves, got five, which is already on the sequence and would have been legal. I wanted eight.

So I drew number six and number seven, looked for somewhere to put number eight, tried a spot, hated it, tried another, hated that too, and finally made a small volute smaller still and stuck eight in beside it. That whole search took about a minute on camera and it is the most honest thing in the lesson. The number is a rule. Where the eighth leaf goes is taste.
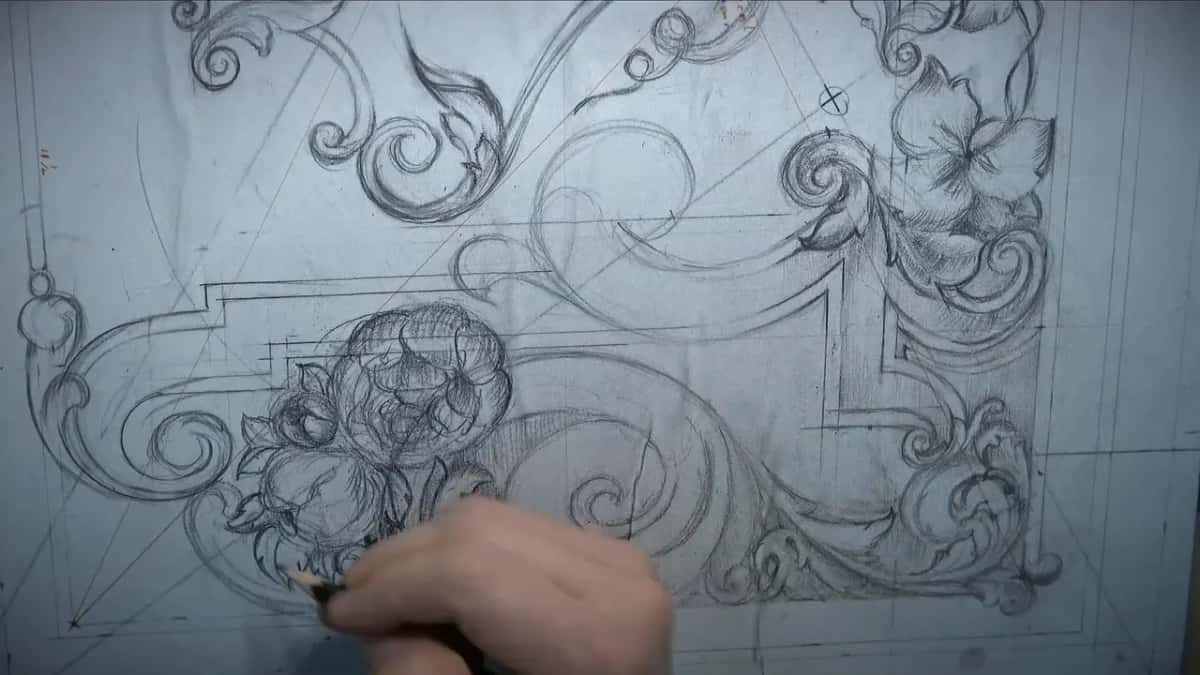
Later in the same session I did it again on the other side, with five filler flowers, and this time eight leaves was not enough for the space. Next number up is thirteen. So thirteen leaves went in, and I will say what I said on the video: if you are afraid of thirteen, this corner is where it lives. Do not believe in that. Just a number.

People hear Fibonacci and expect something mystical. Count the seeds on a sunflower head or the spiral rows on a pine cone and you land on the same numbers, and a carved group that follows them simply looks like it grew rather than like it was arranged. Nature got there first and I am copying.
Once the carving starts I will count petals too. Some of these ideas run through the sequence the same way a border does, and we used it to set the border widths in lesson 2 of this course.
What is a filler flower?
A filler flower is exactly what the name says. It fills a space. Makers used them wherever an area left them stuck, and I use them for exactly the same reason, and I say so out loud, since there is no shame in it. This panel has a stretch along the bottom where nothing obvious wanted to go.

One of them ended up tiny, poking out from underneath the fourth, purely because I had four and needed five. That is not a design principle. Just a man looking at his own board and counting on his fingers.
What makes them work is that they are small, they vary, and they carry the same movement as everything above them. Draw five identical ones in a row and you have made wallpaper. Lean each one a different way along the invisible line that runs down through the section, and the corner stays alive without fighting the main group.
I do not know what flower they are. I never have. No one looking at a carved cabinet in a museum asks which species sits in the corner. The honest answer would be that the thing is organic to the design, and that is its whole job.
| Element | Count on this panel | Why | What I did when it came up short |
|---|---|---|---|
| Main flowers | Three | Already sitting on the sequence, so nothing to argue about | Left alone |
| Leaves around them | Eight | Five looked thin against three big flowers | Shrank a volute and slid one more leaf in beside it |
| Filler flowers | Five | Three could not carry a span that wide | Added a tiny fifth poking out from underneath the fourth |
| Leaves in the filler group | Thirteen | Eight left holes | Kept counting up the sequence until the corner filled |
Which diagonal tells a movement where to stop?
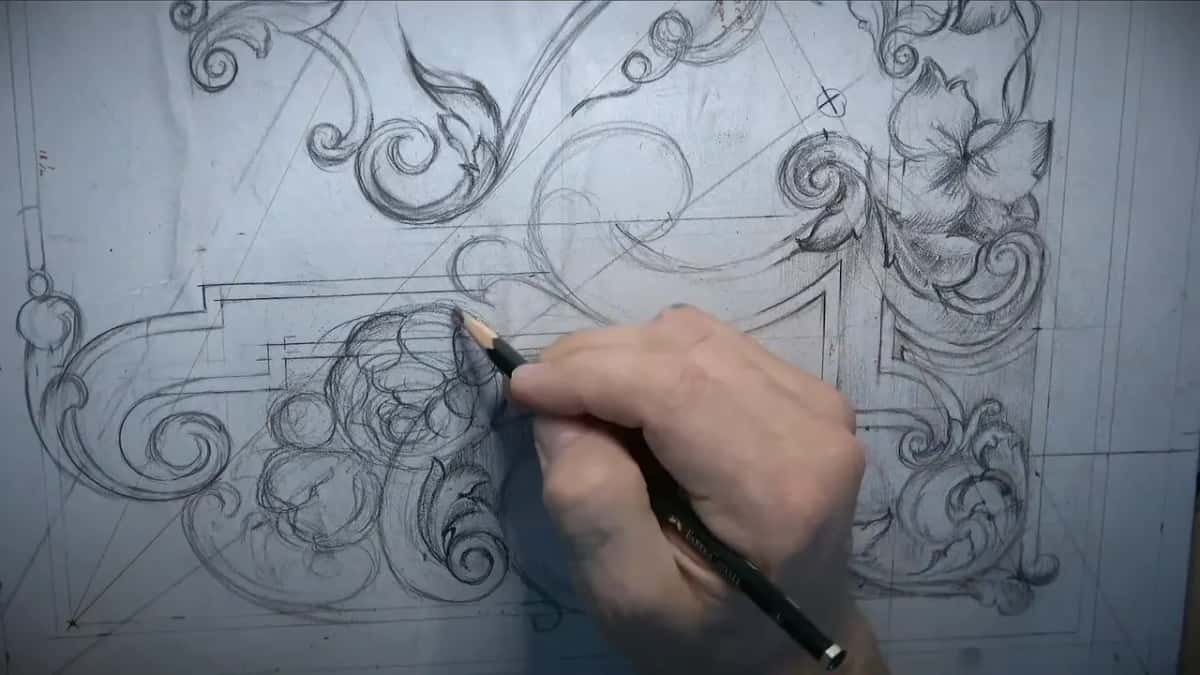
The main diagonal falling the other way across the board, and it tells a movement where it is allowed to stop. Every rectangle has two of them. One climbs, one falls. I had a flipping acanthus running out toward the corner with no reason to end anywhere in particular, so I repeated that falling diagonal at the corner and ended the movement on it.

You cannot see it on the board. An invisible line, and I am the only one who knows it is there, which does not matter at all, because what a viewer sees is a corner that resolves instead of trailing off. The same invisible geometry killed a T stop earlier in the session, where two movements met head on and I had to carry the stronger movement past the junction. That one has its own lesson in this course.

Both diagonals matter, and people who study composition give them names and arguments I will not repeat here, because on a bench what you need is simpler. Find the two diagonals. Pick the falling one and let it say where a run of ornament dies. Nothing else.
Repetition does the rest. If a curve appears once it is decoration. If the same curvature turns up three times across the panel at different scales, the whole thing reads as one organic piece, and that repetition is the single most useful law I know in ornament.
Which pencil, and when does the charcoal go on?
Pencil first, always, and charcoal only once a section is settled. I am using an 8B here, which is very soft, but a 2B or a 4B or a 6B will do the same work, and so will a hard pencil if that is what is on your bench. None of this is precious. If you would rather trace over the pencil with a dark marker, do that instead.
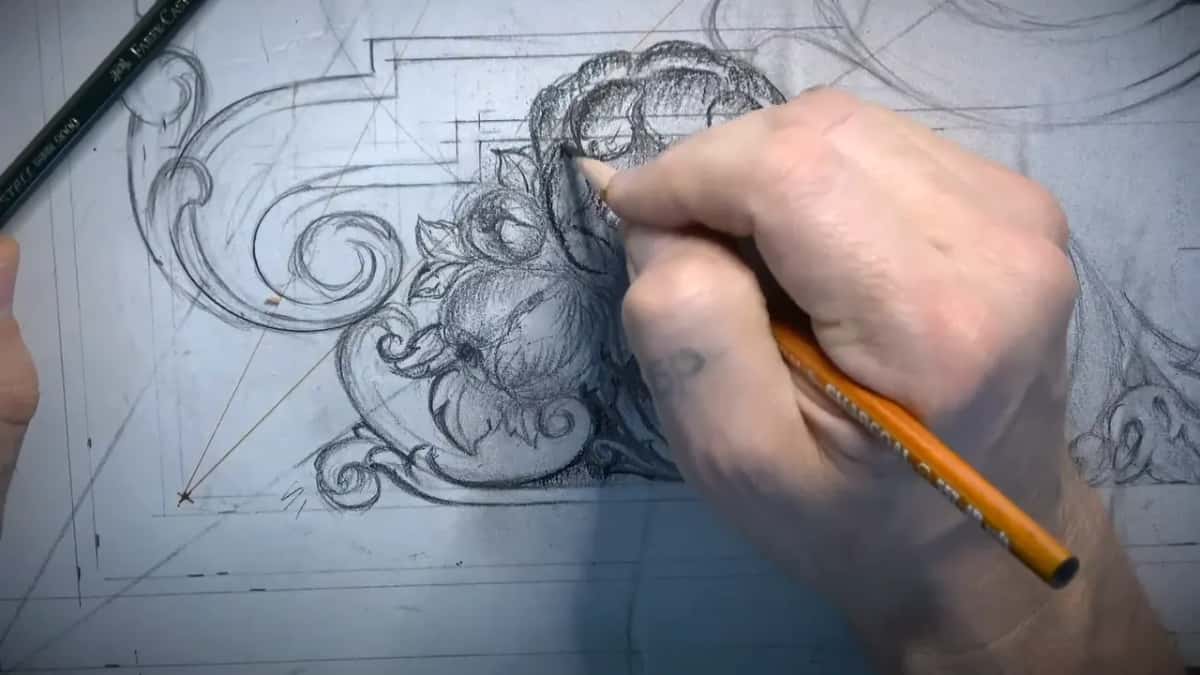
Charcoal is different, and here is the one warning worth remembering: it is almost impossible to erase. Once it goes onto that area, it stays. So I hold it back until I am sure of a shape, then use it to darken the ground and read the depth. Ordinary artist charcoal, and yes, my hands go black.

A soft grade smudges into shadow without a second tool, which is why I like the 8B. It also blunts fast. A fair trade, and I take it, since stopping to sharpen a pencil costs less than losing an idea.
There is a limit, though. Do not build up too much mass with pencil and charcoal together, because you still have to see and detect your lines when you start carving. Bury it in grey smudge and your own lines vanish.

Why does the bottom get less than the top?
Weight follows importance, and this bottom section is not the focal point. Starving it is just as wrong as flooding it. That section sits under the main bouquet. Overwhelming it would pull the eye down, and underdoing it is no better, since a dead zone at the bottom of a panel drags the whole composition with it.

A carved panel is read the way a page is read, roughly top down, and the top of this one carries the main bouquet. Everything below is support. The relief depth is the same everywhere, so the only lever I have for importance is size and density, and I spend both of those at the top. That decision got its own lesson earlier in the course.
So the bottom gets volutes, acanthus overlapping those volutes, and the filler flowers, all of it a size smaller than what is happening above. Overlapping a volute with an acanthus was a common technique on the originals, and I use it here the same way they did. We build that acanthus properly in Acanthus over Moldings.
One more thing about this panel that changes how it is drawn. The relief is very low, and the finished depth will be small, so every bit of the illusion has to come from concave and convex shaping rather than from actual height. True furniture carving, not a deep sculptural panel pretending to be furniture.

How do you know when to stop?
You stop when one more leaf changes nothing at all. No natural end exists for this kind of design. You can go on and on and on, creating movements forever, and the thing keeps looking good, which is exactly the trap. I removed a volute near the end of this session because it was too much, apologised to the camera, and moved on.
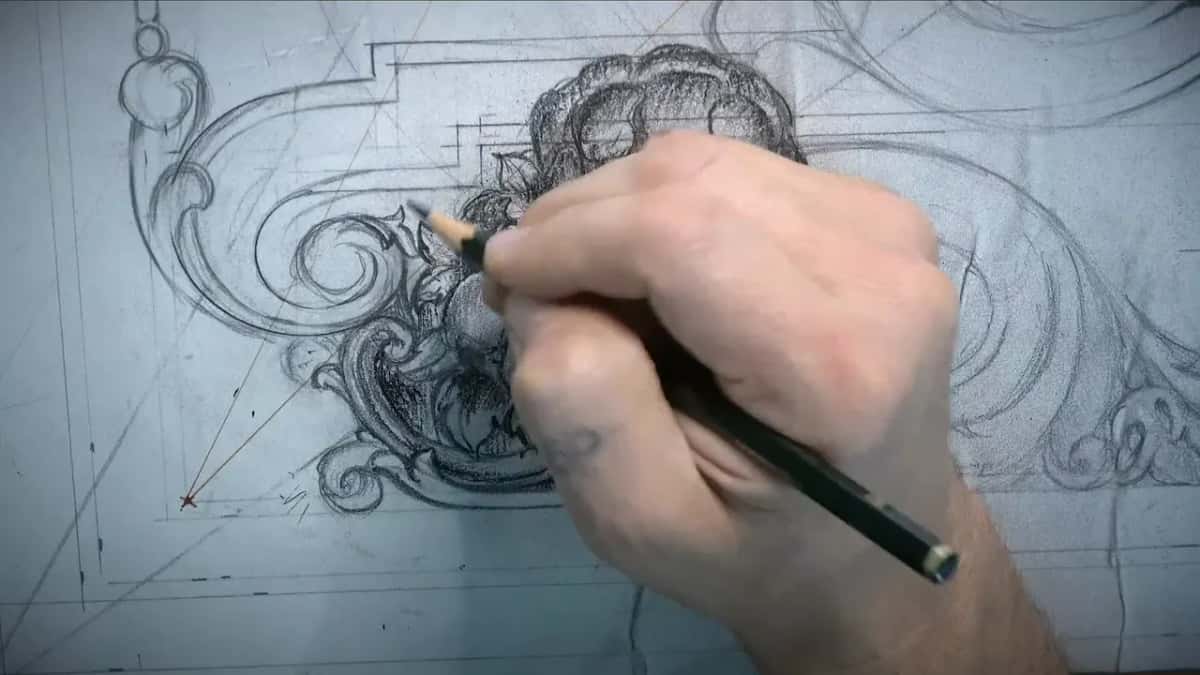
Then I went back up to the upper section, found an element I had drawn earlier and no longer liked, and got rid of it. Left that spot empty. Did the same on the opposite side, but differently, because I really do not want to see any symmetry in this panel, and two matching corners would hand it to me.

This panel is not a production project for me, which is why it has taken as long as it has, and I said so on the video rather than pretending otherwise. It got fourteen sessions, and all fourteen are on the site, starting with the first lesson.
It is still not set in stone. Things will change while I carve, and I said so on the video because it is true, and because a student who thinks the drawing is a contract will fight the wood when the wood is right. The full size drawing goes up for download so you can print it, glue it on, and carve along with me.
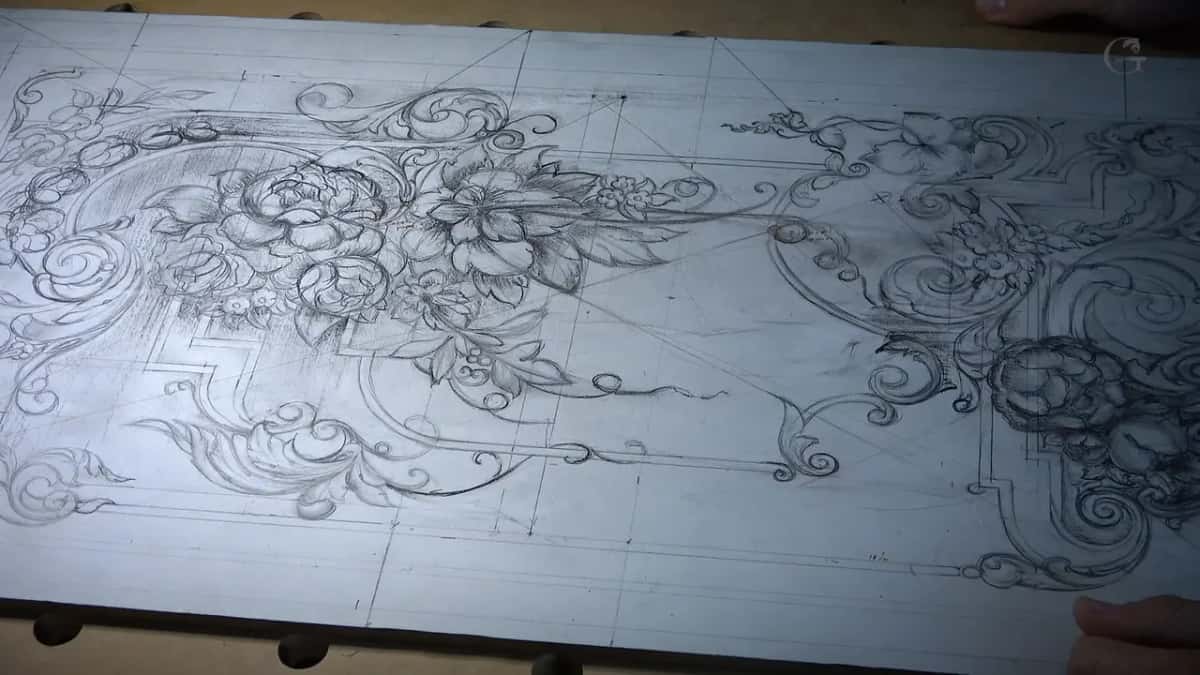
That is the design finished, after fourteen lessons on one board. Next time the knife comes out and the background starts coming away, which is the first carving lesson. The shading that got us here is in the lesson before this one, or start from the top of the design course. If the same ideas on a different panel would help, the floral and molding course covers them, and the 1903 acanthus course shows what the same geometry does at a different scale.
If you want someone beside you while you learn to see these lines, that is what the school is for.
How it's done
- Put in the main movements first. Sketch the flow lines across the section before anything else. Every leaf, volute and flower that follows has to repeat a flow line, and drawing ornament first gives you a pile of pretty shapes going nowhere.
- Find the point two thirds along. Take the two lines that bound a span, split the distance into ten equal parts, and place the important point on the sixth. Eyeball it. A caliper gives 0.618 exactly, and the gouge will move that line anyway.
- Count what you have drawn. Add up the flowers, then the leaves. Push each total to the nearest number on the Fibonacci sequence. Eight leaves beat seven for no reason you can prove and every reason your eye can see.
- Carry every movement past its junction. Find each place where two movements meet head on. Continue the stronger one through the meeting so the eye keeps travelling, and the dead stop disappears.
- Drop filler flowers into a dead space. Wherever a corner has defeated you, put in small flowers leaning different ways. Keep them under the size of the main group so they support it rather than compete.
- Darken the ground last. Only once a section is settled, shade the background. Charcoal will not come off, and a board buried under grey is a board you cannot read when the carving starts.
Frequently asked questions
Do you really count the leaves on a carving?
Every group gets counted, and the total is pushed to the nearest number on the sequence. Three flowers carry eight leaves here. Five smaller flowers carry thirteen. Counting takes a minute and settles an argument that would otherwise run all afternoon.
How does the golden ratio work in practice?
Divide the span between two points into ten equal parts and put the important thing on the sixth. The precise figure is 0.618. Nobody at a bench works to three decimals, and judging it by eye lands close enough on a drawing the gouge will refine anyway.
Why not put a division in the middle?
A middle division reads as an accident and the eye slides straight off it. Shift that line and the panel gains a direction. Old furniture does this everywhere, which is part of why it looks settled where a beginner's panel often does not.
What to carve next