
Alexander Grabovetskiy, woodcarver, School of Woodcarving · Published 2018
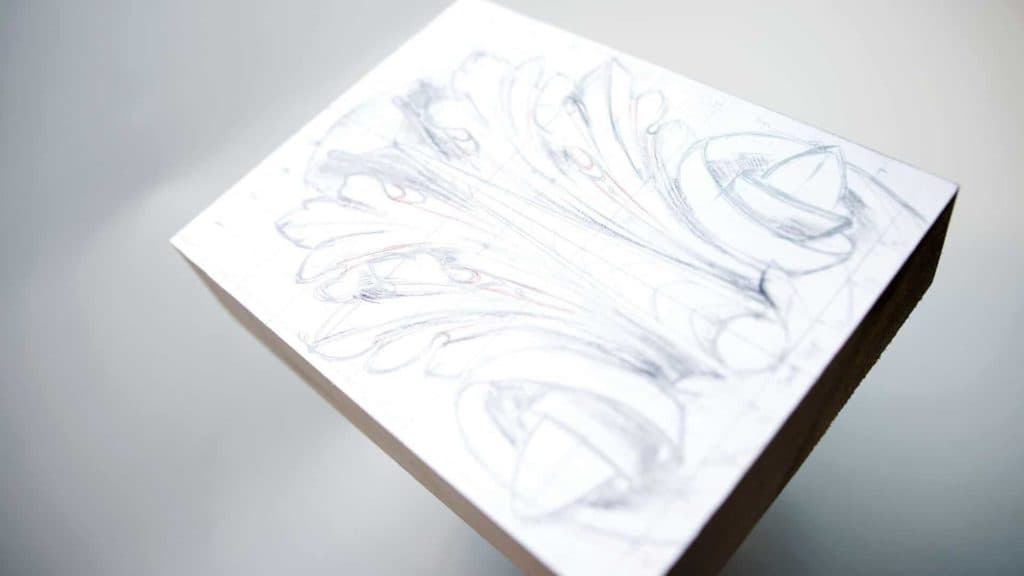
Where do you start when drawing a symmetrical acanthus?
Quick answer: Drawing a symmetrical carving starts on a ruled grid, never on a curve. Halve the block each way, divide both halves in five, and the hundred numbered squares that result hand every feature an address its mirror image can be checked against.
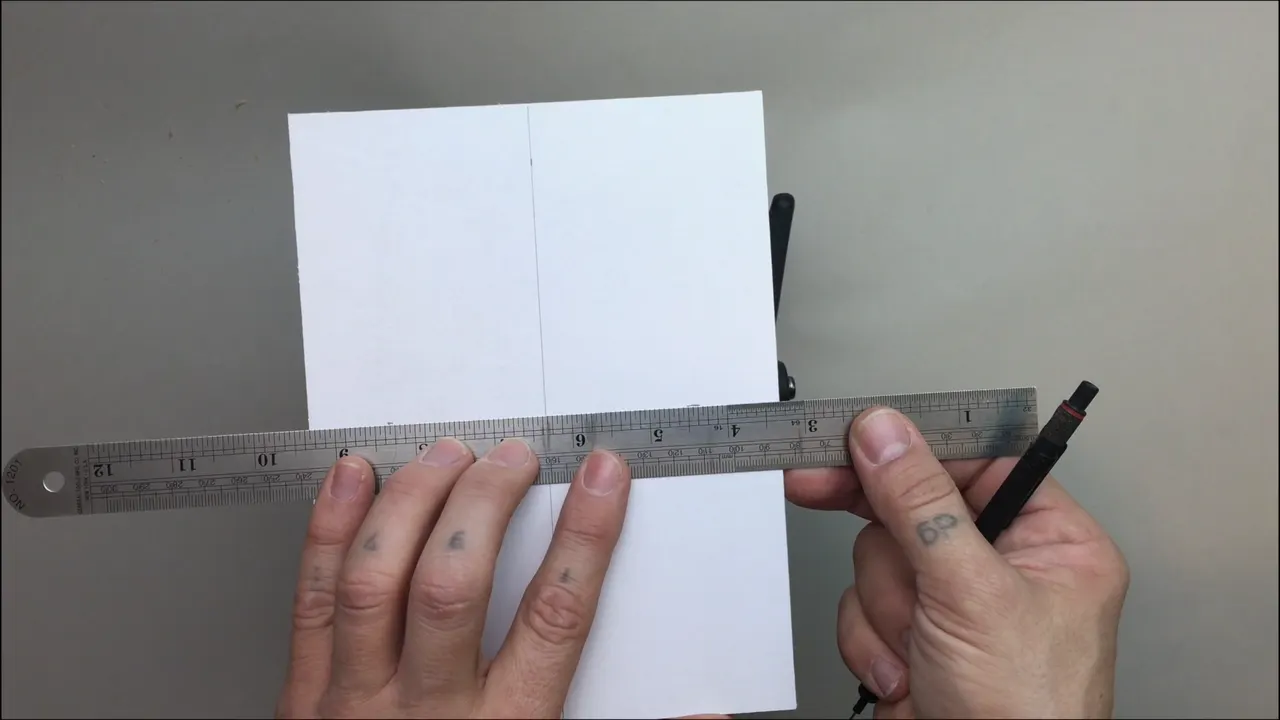
Ten parts across and ten parts down is the whole method. A grid that fine turns a symmetrical acanthus from a drawing problem into an arithmetic one, because every point you place on the left has a numbered square waiting for it on the right. My block was six inches by eight.
Stared at a photograph of a Roman capital and had no idea where to begin the drawing? Tried a symmetrical leaf freehand and ended up with one side fatter than the other? The pattern for this course is on this page, ready to print. Read the rest anyway, because tracing it teaches you almost nothing.

Key takeaways
- Basswood, six by eight, with paper glued across it.
- Halve it both ways first, then cut each half in five again. Ten by ten.
- Number the lines. You will be calling out squares for an hour.
- Leave 10 mm clear up top and about 3 mm at the sides.
- Eyes go down before outlines do.
- Print mine if you like, no shame in it. Drawing your own is the lesson.
How do you lay out a symmetrical carving design?
Divide the board before you draw a single curve. Paper goes over the face of the block first, and my block runs eight inches long and six across, a comfortable size for a leaf like this.

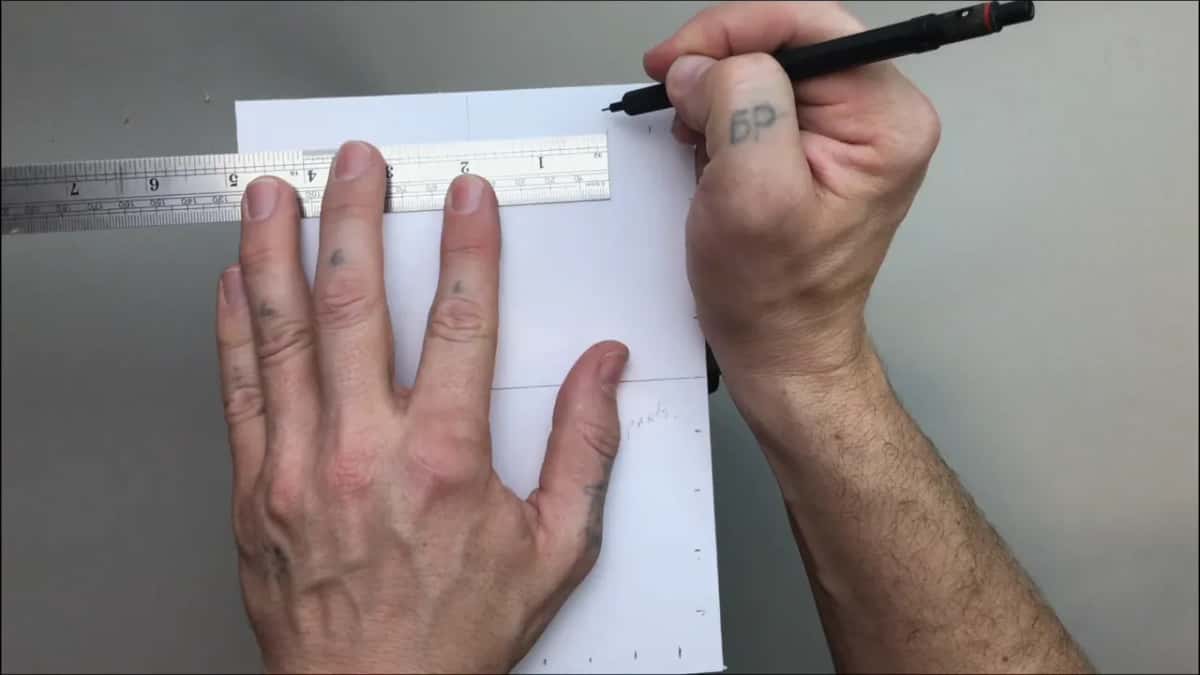
Find the middle both ways. Four and four on the long side, then mark ten equal divisions down the ruler and carry them across. Same again horizontally, and a grid of a hundred squares sits under the drawing.
I call it the ten parts division and it is close to mathematical. Every feature has an address. Place an eye three squares out and two up on the left, and the right hand eye goes three out and two up, and the two halves cannot argue.

Number those lines. It reads like fussiness until you are forty minutes into a drawing, hunting for the square you meant, and then it is the difference between working and guessing.

Then a border. Leave ten millimetres along the top, and about an eighth down either side. Nothing in the design crosses those lines. They are what stops a leaf growing off the edge of the board while you are enjoying yourself.
| The measurement | What it comes out at on a block this size | Why it is there | What goes wrong when you skip it and start drawing |
|---|---|---|---|
| The block | Eight long, six across, paper laid over it | Draw straight onto it | A design that fits the paper and not the wood you actually own |
| Halving it both ways | Four and four again | Everything on the leaf is measured from that centre, so it has to exist before anything else does | Lopsided |
| Ten divisions each direction, giving a hundred squares | That grid | Gives every point an address | One side of the leaf ends up fatter than the other and you cannot say where it started |
| Top border | Near enough three eighths, so ten millimetres | The design stops here | A volute running off the top edge of the panel with nowhere left to go |
| Side borders | About an eighth of an inch on each side | Room to breathe | Tips crowding the edge |

What do you draw first on an acanthus leaf?
Eyes, most days. Before any outline exists I work out how many eyes the leaf will carry and where each one sits, because the eyes are what the rest of the drawing hangs off.
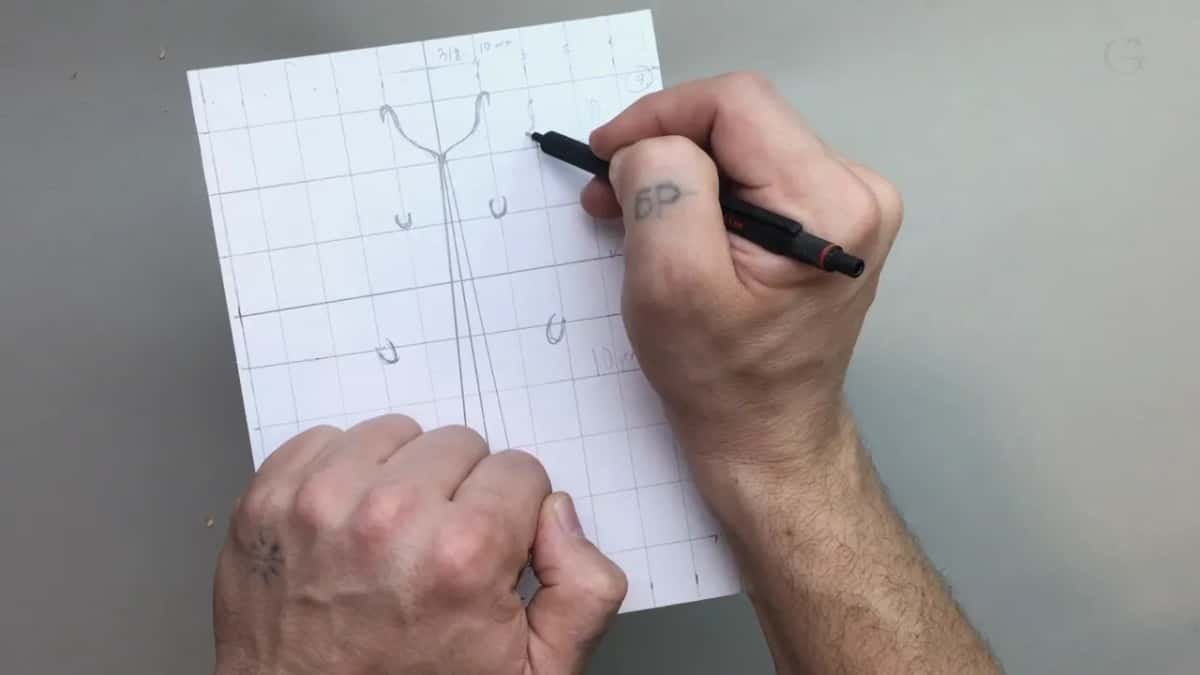
Some days I begin with the flow line instead and both work. What matters is that the skeleton goes down before the detail, and the skeleton of this leaf is made of eyes, flow lines, and a curl up top that folds forward and becomes the high point of the finished carving.
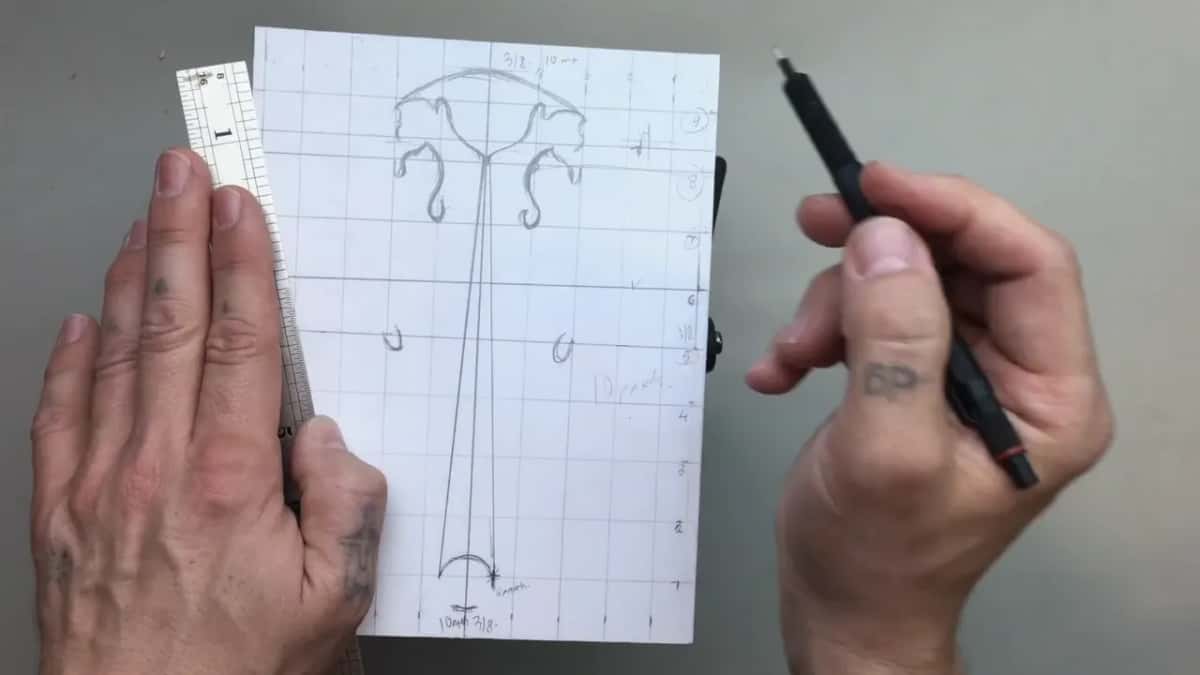
Every flow line runs to the centre. Not near it, to it. That single rule does more for a symmetrical design than any amount of careful outlining, because it keeps the whole leaf pointing at one place.

Pipes follow the same discipline. They travel to the centre as well, and the sections of leaf overlap each other on the way, one running under its neighbour. Those long raised ridges are called pipes, and this leaf is covered in them.

Accuracy here is not worth chasing. Most of this pencil work gets carved away within a week and every movement has to be redrawn on bare wood later, so I eyeball almost all of it and stay honest about that.
Subdivide within the squares as well. Each of the hundred spaces gets split into ten again by eye, and when I want a point six tenths along I count it off rather than measuring, which is quick and accurate enough for pencil.
Leaves overlap all the way down. One section passes under its neighbour, then that one passes under the next, and drawing those crossings properly now saves an argument with yourself when the carving starts.
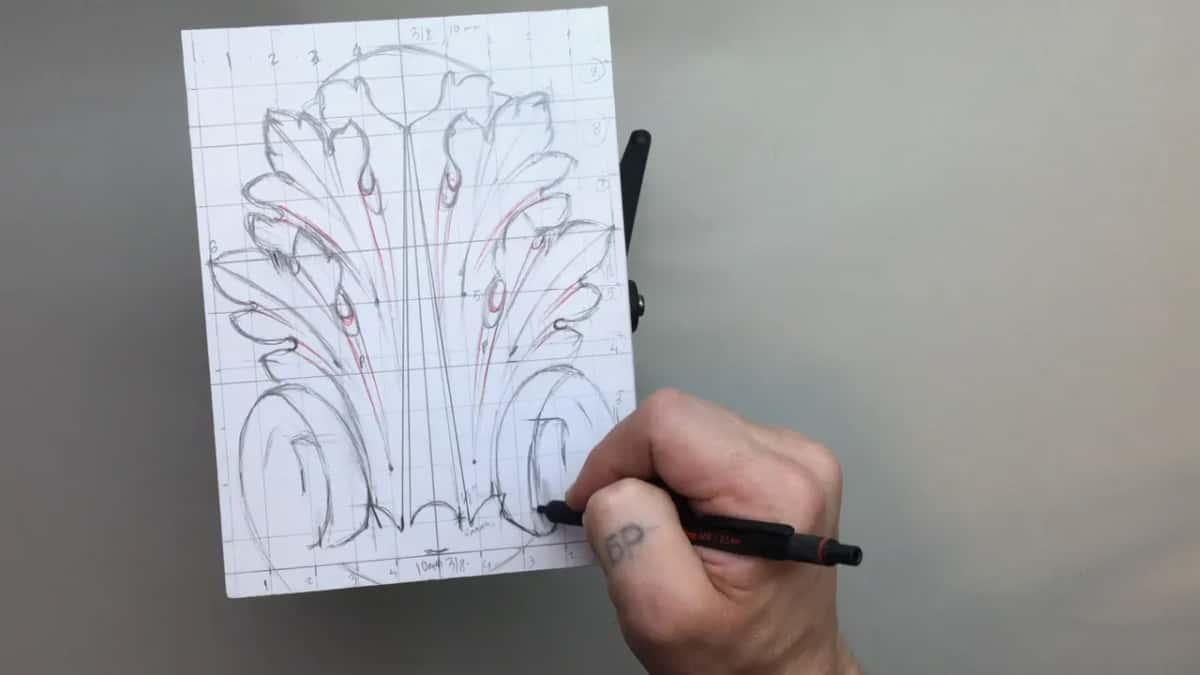
What makes a leaf Roman rather than Greek?
Elaboration, and nothing more fundamental than that. Rome ran for half a thousand years and developed its own art across that stretch, but most architectural detail arrived from Greece first.

Look at anything before the birth of Christ and you cannot tell the two apart. A Greek acanthus and a Roman acanthus of that date carry identical movements, because the Romans copied them exactly.

Later they began beautifying it. More movements, more subdivisions, a great many more pipes, and the leaf structure grows complicated while the underlying plant stays the same. Which is what we are drawing here.
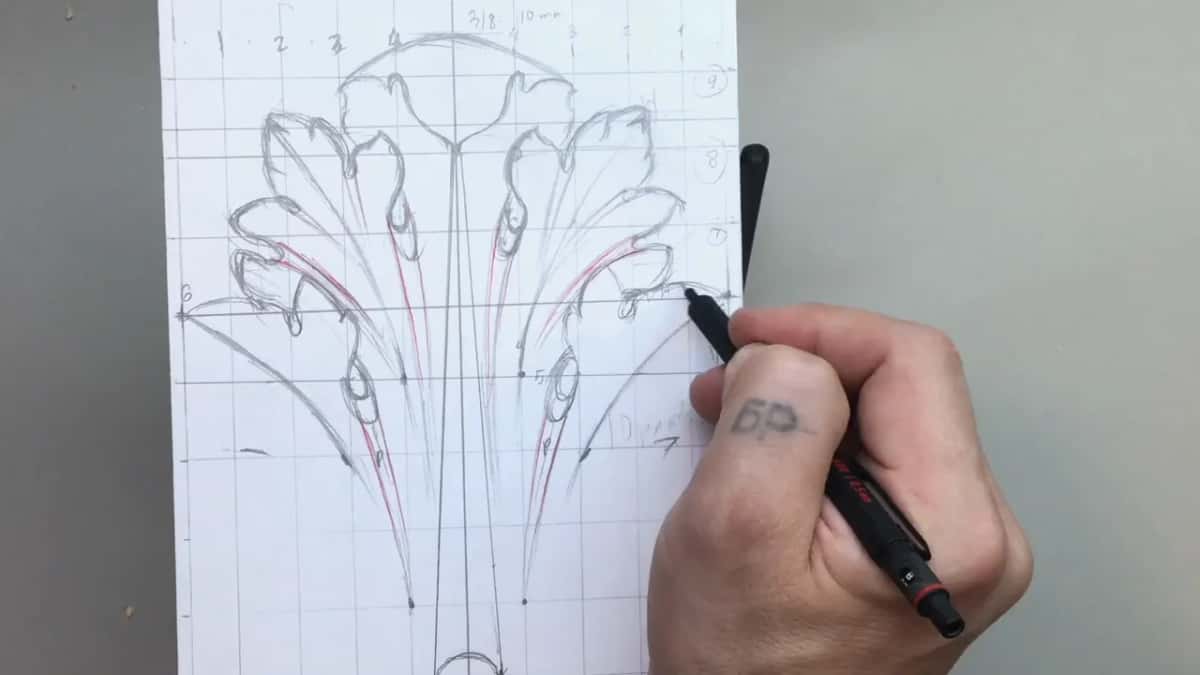
Divide the main leaf into three, then divide those small sections into threes again, and keep going. Romans had a habit of learning from everywhere they went and folding it into their own work, which is roughly how this ornament kept growing.
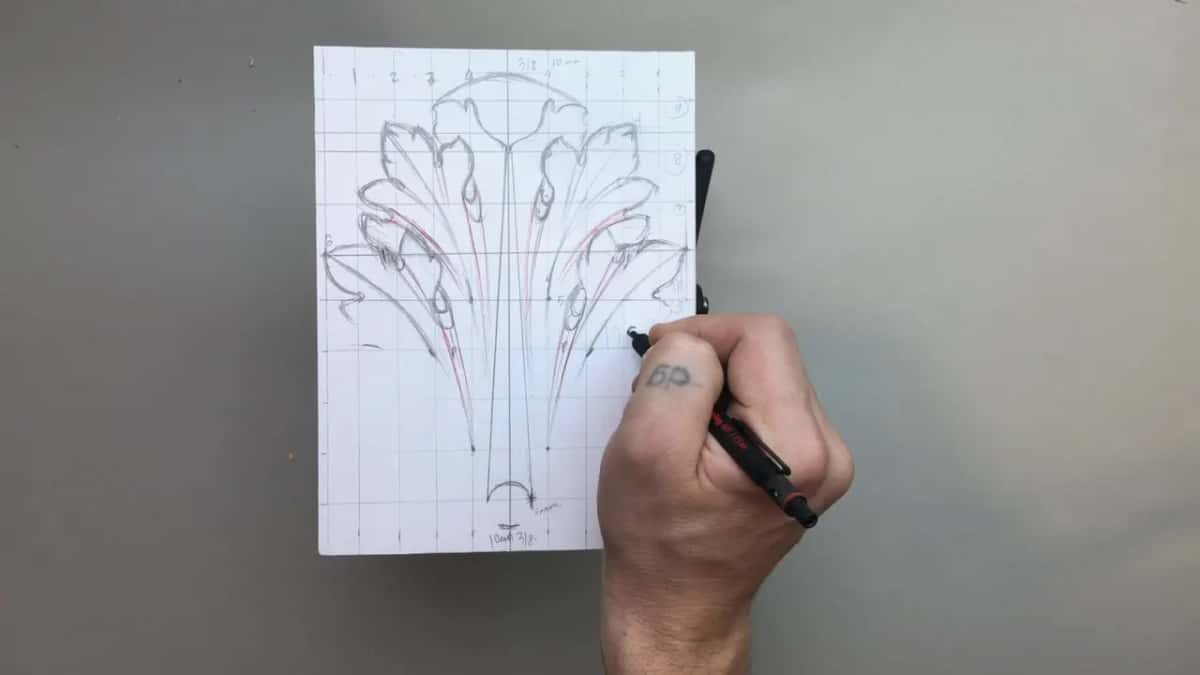
Later leaves go further still. Byzantine work elaborates past anything here, and the Byzantine leaf makes this Roman one look restrained, which is not a sentence I expected to write.
Sizes grow as they descend, too. That law of progression governs the ornament long before a tool arrives, and workshop thirteen carves it, but the drawing is where it gets decided.
The plant underneath all of it is a bear claw. Real, spiky, and nothing like as tidy as the carved version, and it decorated temples and public buildings for centuries because somebody once looked at a weed and saw architecture in it.
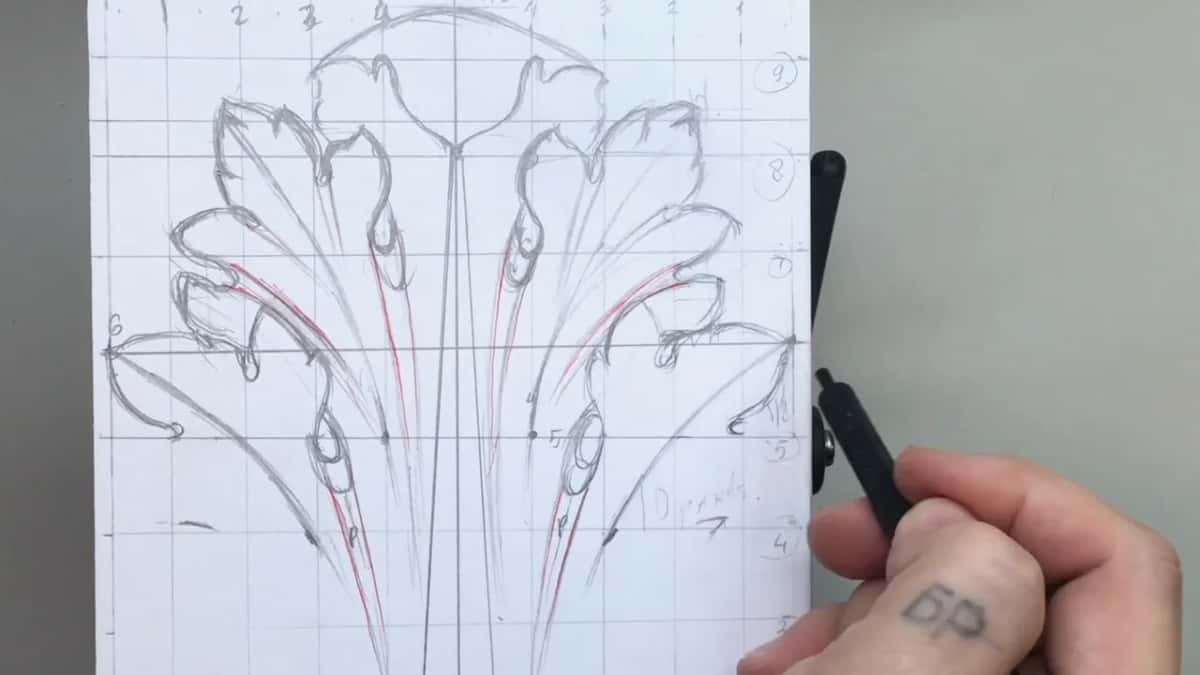
Why mark the pipes in red?
Count them. On a leaf this elaborate the pipes multiply until the drawing turns into a thicket of pencil lines, and a red pen separates the ridges from everything else at a glance.
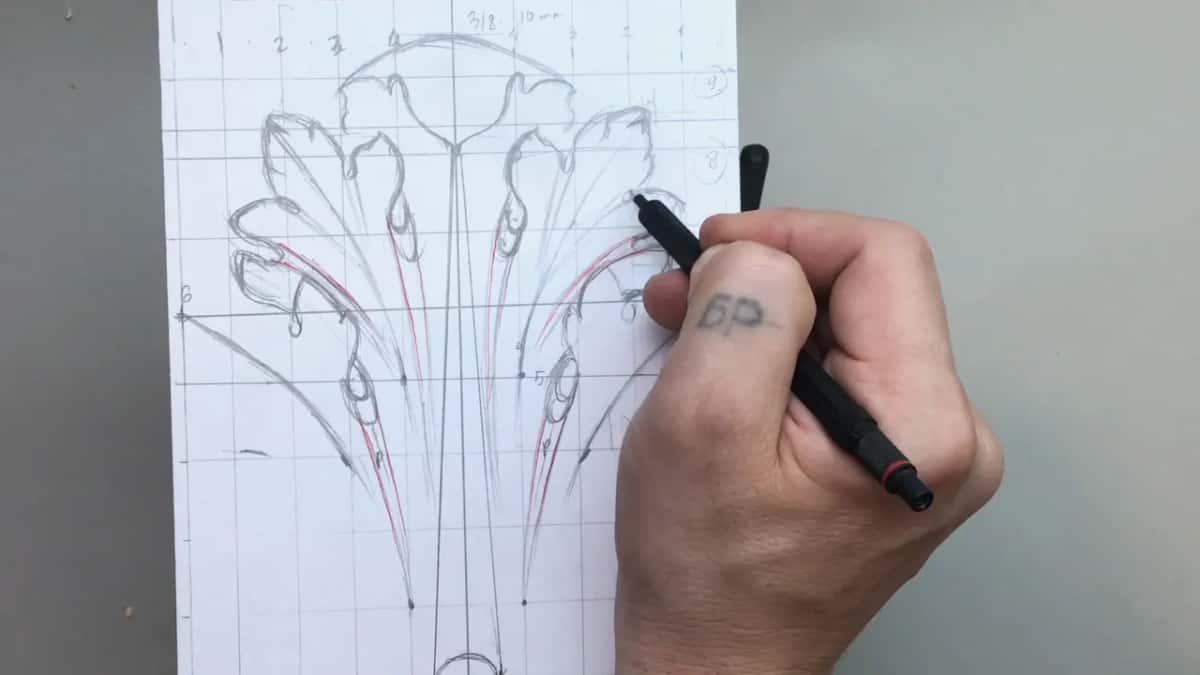
Charcoal does a related job later on. I keep a black and a white, and I shade the low places black and the high places white, which turns a flat drawing into something I can read as depth before a gouge touches it.

White does not mean the highest point on the panel, only higher than the black beside it. Where two leaves cross, the one running underneath goes dark and the one on top goes light, and suddenly you can see which is which.
Neither step is required. I do it for myself rather than to make a pretty drawing, and on a commission with a deadline I often skip it entirely.
Shading also forces a decision you would otherwise postpone. Deciding on paper which leaf passes over and which passes under is free, and deciding it halfway through the carving is not.
How do you draw a volute?
Angled, for this leaf. Greeks and Romans and half of Europe after them used volutes constantly, and there are many kinds. The older Greek version runs straight up and down when you look at it.

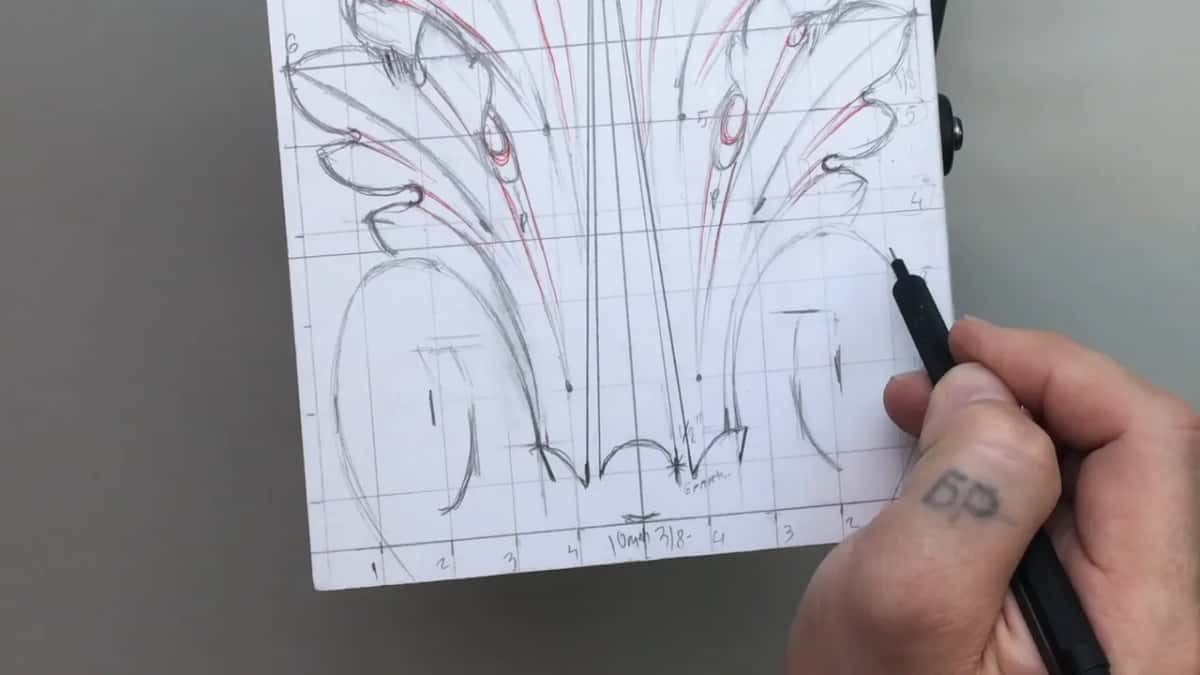
Mine tilts. It is harder to draw than it looks and worth the trouble, and the base of it gets the same ten millimetres the top border has, so the bottom of the panel repeats the top.
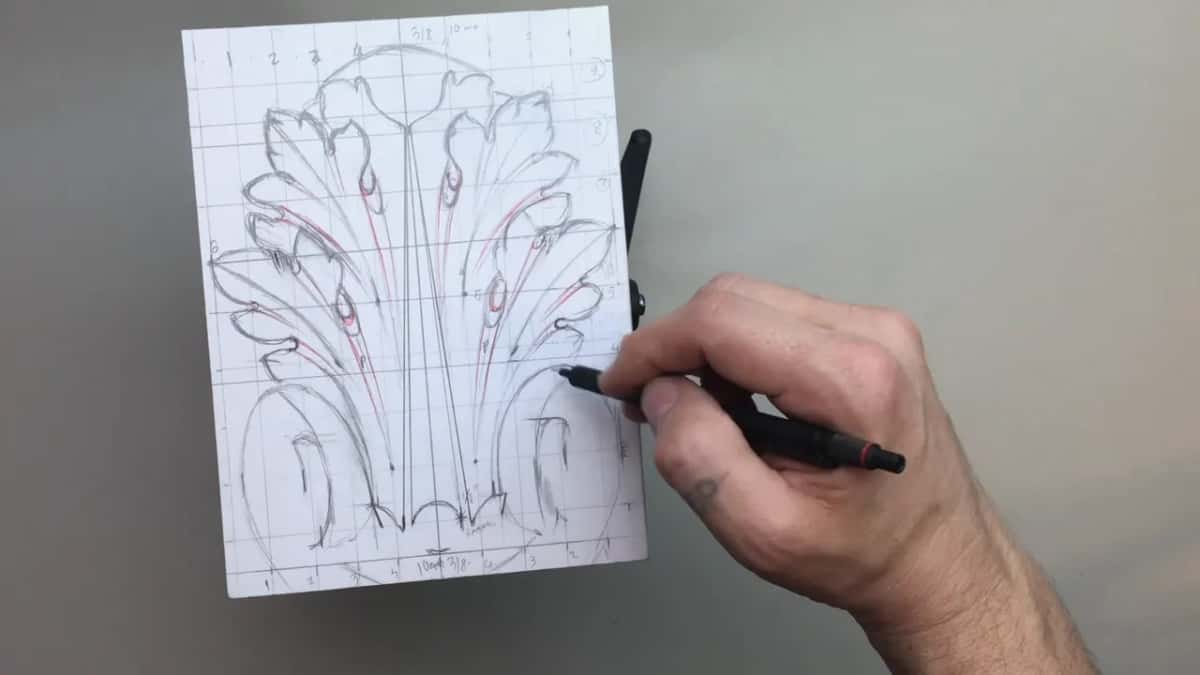
Remember what it actually is, though. This is not a full spiral standing off the wood, it is a relief volute, which means it reads correctly from directly in front and from nowhere else. Take the time to get it right head on, because that is the only view it has.
It still has to look three dimensional from there. Relief ornament lives on that trick generally, which is the point of relief ornament at all, since the drawing has to carry depth a flat spiral never needs to.
Centres that stick out are a choice I made rather than a rule. Thousands of carvers and stone cutters have drawn something similar across the centuries, and the Greeks and the Corinthians used this family of leaf first.
Archaeologists have turned up simpler, semi symmetrical versions in Egypt too, working on roughly the idea we are working on here, which tends to put a person in their place about originality.
What is the border actually protecting?
Space at the finish. Those ten millimetres up top sound like a detail you could argue with, and it is the reason a volute has somewhere to sit when the drawing reaches the bottom of the panel.
Base and top mirror each other here. The volutes at the foot get that same strip the top border has, so the composition closes the way it opened, which is the sort of thing a viewer never notices and always feels.
Sides get less, an eighth or so. Tips crowding a board edge look cramped in a way that no amount of good carving rescues, and the pencil is a far cheaper place to find that out than the gouge is.
Everything inside those lines is negotiable, and you can shift it about as much as you like while the drawing settles. Nothing crosses them. Rule them in properly rather than keeping them in your head, because it is the one hard rule in the whole layout.
Should you trace my drawing or make your own?
Print it and glue it down to start carving this weekend. Nothing is wrong with that and the file on this page exists for exactly that reason.
Scale it to your block, not to fill a sheet of paper. Mine was drawn at six by eight, and a pattern scaled to some other size will fight every measurement quoted in the workshops that follow.
Basswood is what I used and what I would suggest. A pattern glued to the wrong timber is still a pattern, and the first hour of carving will tell you whether the board was worth the drawing you put on it.
My suggestion is different. Rule your own ten by ten, work out your own eyes, and draw the thing yourself, even knowing it will not match mine. Getting close is enough. Catching the idea is the whole point.
Here is how I think about this school, and it explains the advice. Not entertainment. An apprentice stood beside a master three hundred years ago in a carving shop, watched what the man did, and then did it himself, and I would like the same thing to happen here.
Copying a pattern makes a carver who can carve that pattern. Drawing it first makes a carver who can draw the next one, and there is a whole course underneath that idea.
Sixteen workshops follow this sheet of paper. The grid becomes a drawing, the drawing gets its background cut away, then pipes, eyes, returns, undercutting, and eventually a finished leaf that would sit on a capital without apology.
None of that works if the layout was careless. A leaf drawn slightly lopsided stays slightly lopsided through every one of those sixteen sessions, and no amount of skill with a gouge corrects a drawing error underneath it.
Half an hour with a ruler, then. The whole layout costs that and no more, and it buys the only chance you will ever get to fix this leaf for nothing, before a single chip has come off the board.
Would you rather watch the grid go down and the first eyes land on it, drawn at full speed with the camera over my shoulder? Shall we carve?
The pattern here opens the Roman acanthus series, and tuition opens all sixteen workshops that follow it. Workshop one draws this leaf from the grid up, workshop sixteen finishes it, and the Greek leaf is the plainer parent worth drawing first. Tools come after the drawing, not before. Want me beside you? We teach in person, and a beginner starts here.
How it's done
- Paper down over the block. That was the size I worked on. Glue paper across it and draw straight onto the wood you will carve.
- Halve it both ways. The long side halves at four. Everything on a symmetrical leaf is measured off that centre line, so it goes down first.
- Split each half into five. Mark ten divisions along a ruler and carry them across, then repeat the other way. A hundred squares, and every point now has an address.
- Number the lines. It feels fussy for ten minutes and saves you an hour. You will be hunting for particular squares for the rest of the drawing.
- Rule the border. Ten millimetres up top, about three at the sides. The design stops at those lines and never crosses them.
- Place the eyes. Work out how many the leaf carries and where each sits before drawing any outline. Next come the flow lines, then the curl that folds forward up there.
- Run everything to the centre. Pipes travel to the middle exactly as the flow lines do, with the leaf sections overlapping one another as they go.
Frequently asked questions
What keeps the two halves of a carved leaf matching?
Grid it before you draw. Halving the block each way and dividing both halves in five gives a hundred squares, so a point set three across and two up on the left has an exact address on the right.
What size block does a Roman acanthus leaf need?
Mine was eight inches long and six wide, with paper stuck down across it so the drawing sits on the wood being carved. A 10 mm strip stays clear up top, and roughly three down either side.
What should you draw first on an acanthus?
Eyes, or the flow line on a different day. Either way the skeleton goes down before any outline, since the eyes and flow lines are what every other part of the leaf hangs from.
What to carve next