
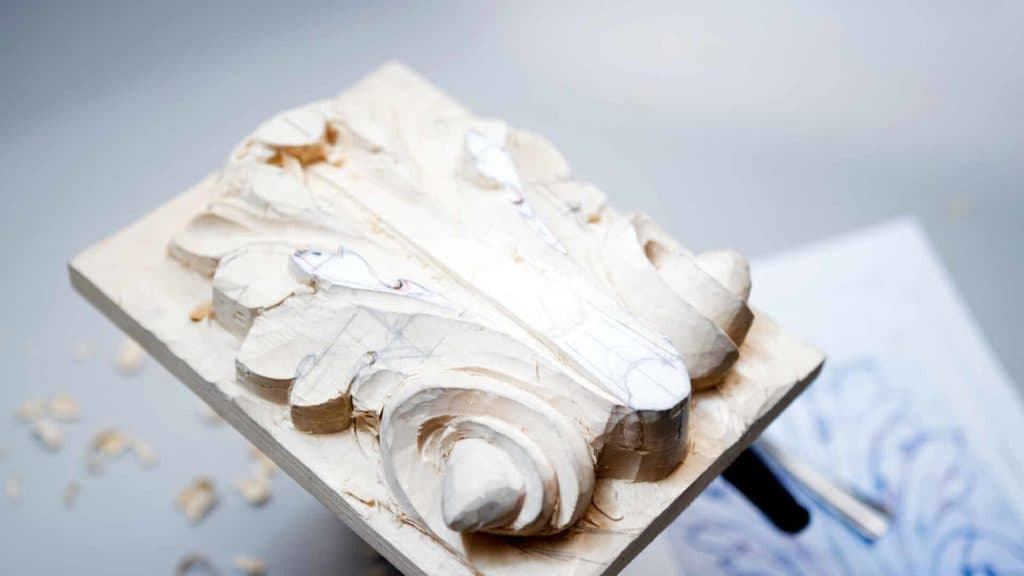
Alexander Grabovetskiy, woodcarver, School of Woodcarving · Published 2018
How do you recover a carving line you already cut away?
Quick answer: Recovering a lost carving line is a reference problem rather than a skill problem. Run off the drawing twice, glue one copy to the wood and keep the other within reach, then read a missing feature back onto the surface from whichever grid lines still survive.
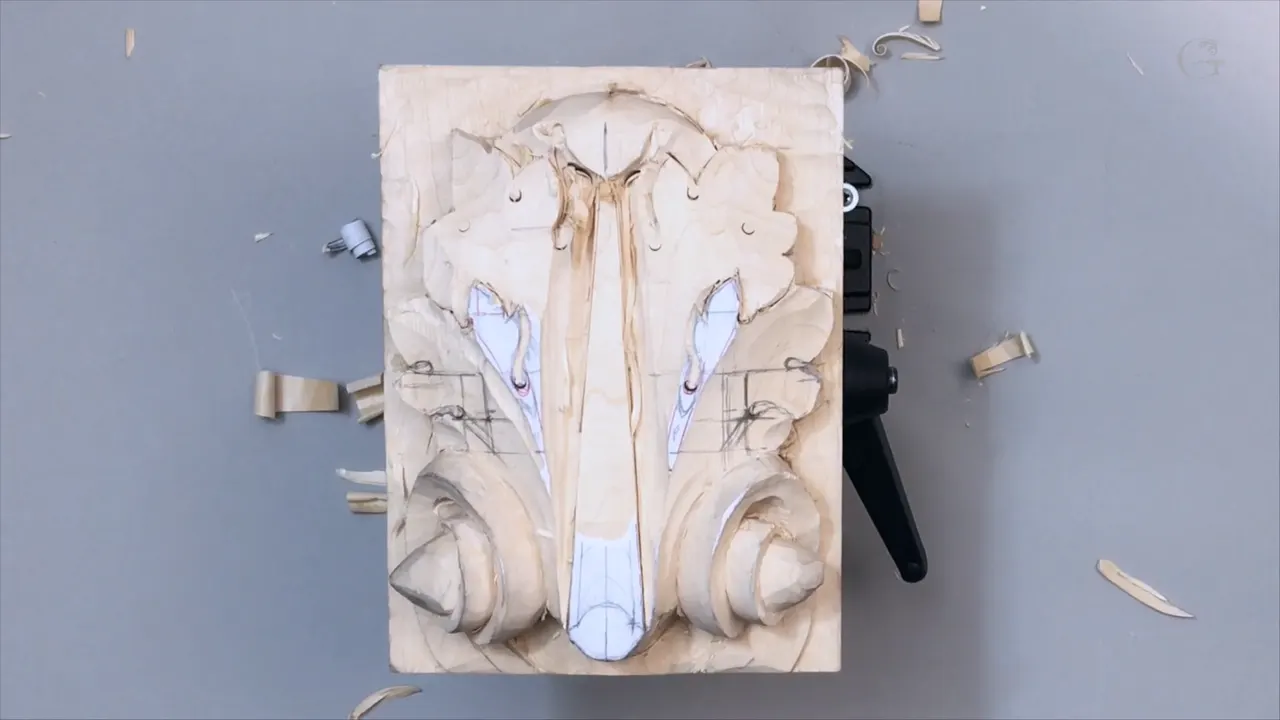
I lowered both sides of the leaf and lost a pipe doing it. On the left I can still see exactly where two pipes belong. On the right one of them has gone completely, and it has to be recreated before anything else happens on that half of the board.

Has a feature of yours disappeared while you were carving something next to it? Did you carry on anyway and hope? Do you know the feeling of finishing a panel and realising the two halves stopped matching hours ago?
Every three dimensional project brings this problem, and there are several honest ways out of it. None of them involve starting again.

Putting a lost line back, in six lines
- Print the drawing twice. One gets glued down, the other stays on the bench, clean.
- Leave paper on any part you have not reached. Its grid lines are still true.
- Split a distance into ten, count six down, and a surprising number of features land exactly there on this leaf.
- A flexible ruler sits where a rigid one only rocks.
- Accurate matters. Machine accurate does not, and it looks worse.
- Deeper usually looks better at the end, as long as what goes underneath still goes underneath.
Why do lines vanish on a curved surface?
The grid was drawn flat and the wood no longer is. A pencil line on a level board sits at a known distance from an edge. Carve a slope into the basswood beneath that line and the distance changes, so the surface stops agreeing with the flat drawing you made in workshop one.
Difficulty lives exactly there, and so does the reason this takes imagination rather than measurement. You have to picture where a line would run if it travelled over a hill instead of across a table. Nobody warns a beginner that this will be needed, and it arrives on the very first sloping surface.
Nothing about that is unique to acanthus. Every carver working in relief meets it on the first sloping surface they ever cut, and most of them meet it without being warned.

Why print the drawing twice?
Two copies of the same sheet, used differently. One sheet gets glued to the block and carved away with the wood. The other lies flat at my left hand for the whole project, untouched, and you glance at it every time something goes missing.
Better still, do not strip the paper off early. Parts of my carving still wear theirs, and on those the original grid lines are perfectly readable, so I can measure a real distance on a real surface instead of guessing.
That reference sheet answers questions the wood cannot. Where did this pipe start? How far below the point did the eye sit? Both are two seconds of looking, and neither is available to somebody who threw the drawing away on the first day.

| Method | When it works best | What it costs you |
|---|---|---|
| Eyeballing | almost always, once your eye has some practice behind it | nothing at all |
| The surviving paper grid | where a neighbouring section is still untouched and flat | you have to leave the paper on longer than feels tidy |
| A flexible ruler | on a slope, where a rigid rule simply rocks | a few seconds, and care not to press a line into soft wood |
| Ten parts, counted | placing an eye or the end of a pipe precisely | the arithmetic, which takes longer to explain than to do |
| The mirrored half | any symmetrical design whose opposite half came through it intact | the discipline of transferring rather than inventing |
Where exactly does a lost eye belong?
Count in tenths. Draw a parallel line from the point of the leaf on the side that survived, take the distance down to the feature, divide it into ten the way we divided the block, and count about six parts down.
An eye's outer edge sits at six. One neat demonstration of the golden rule, and once you notice it on one leaf you start seeing it on others.

Easier still, halve the distance and move down a little. Same answer, less arithmetic, and honest enough for wood. The gap between that point and the eye measures about 10 mm, and carrying the same distance over to the other half puts the eye back where it belongs.
Now the pipe. Referencing the original drawing, a point on the right hand side sits about five millimetres downhill from where the flat sheet says, so the grid is still doing the work even though the surface has moved.

What goes back first, the eye or the pipe?
The eye, every time. An eye is a single point, so it can be placed from two measurements and then trusted. A pipe is a line, and a line needs two known points before it can be drawn with any confidence at all.
So I dig the surviving eye deeper first, which makes its position unarguable, and only then carry the measurement across to the missing half. With both eyes fixed, the pipe between them almost draws itself.

Recreate the pipe movement roughly, not completely. Getting it started is enough for today, since the whole area will be lowered again and a fully finished line would only be carved away a second time.
Press the recovered design back in with a V tool so it survives. Mine is a number 12, Swiss made, marked Z12 over 8, and any V tool at all does the same job.

Should you measure or trust your eye?
Eyeball it, and I say that knowing a ruler is sitting right there. Eyeballing trains your ability to see in the three dimensional world, and that ability is the thing this whole school is trying to build in you.

Do not misunderstand me. You still have to be accurate. The most important thing is not how accurate you are, though, and there is a limit past which more precision makes the carving worse.
Past that limit it starts to look like something a computer generated. Make sure it still looks human, because a hand carved acanthus that could have come off a machine has given up the one advantage it had.

What does a three inch chisel do that a small one cannot?
It makes a genuinely straight line in one movement. For the middle section I take a straight chisel, number 1, three inches across, place it on the harder of my two lines and drive it straight down at ninety degrees.

Quick, and dead straight. A smaller chisel reaches the same result through four or five placements, and each join between them is a tiny wobble in what should be a single edge.

Big tools earn their place right there. The V tool clears waste beside the stop cut, which is far easier now, and the rule while you do it is simple: do not undercut, keep the V tool square to the edge, and never lean it under the shape you are keeping.

What should the middle section do?
Run downhill, gradually, from about three quarters of the way along. Before touching it I carry the centre line down onto the leaf itself, because losing the middle line on a symmetrical design is the one mistake there is no graceful recovery from.
After that the lowering starts. Divide the length into four, count three quarters or slightly more, and from there the surface falls away steadily rather than stepping down. A number 1 at seven eighths does it, and turning the tool upside down helps on the last part of the slope.

Small gouges finish the job. A quarter inch number 5 by Ashley Iles reaches the tight spots, and honestly any small gouge, a 3, a 4, a 6, makes no real difference at this stage.

What is the difference between a chisel, a gouge and a veiner?
Sweep. A blade with no sweep at all, flat across its width, is a chisel. Give it a curve and it becomes a gouge, and it stays a gouge all the way up to a number 9, a true half round.
Past half round the name changes again. Once the section is deeper than a half circle, more of a U shape than a bowl, the tool is a veiner, and it behaves differently because both walls are nearly vertical.
Knowing the vocabulary matters more than it sounds. Every instruction in every workshop names a tool by number and sweep, and a carver who cannot picture a number 9 has to guess at half of what a teacher says.

Ready to carve a Roman acanthus leaf rather than read about mine? Pick a course and start here, or take everything at once with Yearly Access and carve along at your own bench.
How much depth should the leaf lose now?
Ten millimetres at the very least, and I took it to 13 mm today. Deeper usually looks better at the end, so when I hesitated between 10 mm and 13 mm I took the deeper one.

One thing stops you going further. The original design has this section of the leaf passing underneath that section, and if the upper piece drops too far there is no room left for the movement to read. Depth serves the overlap, never the other way round.

None of it is measured. I eyeball the depth exactly as I eyeball the lines, and I check the result against the far side rather than against a rule.

When does the pencil go back on the wood?
Whenever the carving has caught up with the last drawing. Once a section has been lowered and shaped, the surface that carried the old lines is gone, so I stop and redraw the original design straight onto the new wood.
Three pipes go back on at once here, and every one of them travels to the centre. That rule has not changed since the first day: the pipe movement runs all the way to the middle, the next pipe runs somewhat to the middle, and the third heads in the same direction as both.
Redrawing is also a checking exercise. A pipe that will not sit comfortably on the new surface is telling you the surface is wrong rather than the pipe, and that is far cheaper to learn with a pencil than with a blade.

Keep the marks light. Heavy pencil on soft ornament presses a groove into the fibre that survives the next two cuts and shows up under a finish months later.
What makes half of a gouge cut cleaner?
The grain changes direction under the blade. Push a gouge through a curve and one wall of the groove goes with the fibre while the other goes against it, so one side comes out clean and the other comes out rough.
Work with that rather than against it. Notice which side is clean, finish that side first, then come back from the opposite direction and clean the other. Two approaches to one cut, and no forcing, a rule I learned the hard way over forty years.
Rotate while you carve, too. Sweeping the tool through the stroke rather than pushing it in a straight line is what keeps the surface even, and on a curved lobe it is the difference between a shaped surface and a series of flats.

Does a shaky workbench matter?
Mine shakes and I have stopped caring. People ask whether I could eliminate it, and yes, probably, with a solid unshakeable bench instead of the portable one my vice is bolted to.
When I started this school I promised to teach the way I actually work. Most of my carvings, large and small, get made exactly like this, on a portable bench that moves a little, and I would rather show you that than stage something.
There was a Russian film I saw once about a school for spies. They taught the students to write on a table that floated and shook, and to write accurately anyway. Treat yourself as somebody learning that same skill alongside this one.
A really stable bench is absolutely fine. I like my portable one, and this vice I really like, a tough thing and a beautiful one that rotates and comes out quickly. It does not bug me when the work shakes a little on its way to a finished piece. I know it is sometimes hard to watch on camera, with the panel moving a little under the gouge. That is the condition I carve in most of the time.

How it's done
- Run off two copies before you start. One gets glued down and carved away with the wood. The second lies flat at your left hand for the whole project, untouched, answering every question the carving can no longer answer.
- Leave the paper wherever you can. Anything still uncarved carries its original grid, and those lines are true. Peeling everything off on day one throws away the only accurate reference you own.
- Deepen the feature that survived. Before copying anything across, dig the surviving eye a little deeper so its position becomes unarguable. A measurement taken from a vague hollow is a vague measurement.
- Count the distance in tenths. Draw a parallel line from the leaf point, split the distance to the feature into ten, and count about six down. The edge of an eye lands exactly there. Halving the distance and nudging down reaches the same answer faster.
- Carry the measurement to the empty half. Roughly 10 mm between the point and the feature. Transfer it, mark it, then cut the eye in with a small gouge before anything distracts you.
- Start the pipe, do not finish it. Recreate the movement roughly. The whole area drops again later, so a fully modelled line here would only be carved off a second time.
- Press the recovered design back in. Press every recovered line back in with a V tool, so the recovery survives the next hour of roughing. Mine is a number 12, Swiss made, and any V tool does the same job.
Frequently asked questions
How do you get back a line you have carved away?
Reference beats memory. Keep the second printed drawing within reach, leave paper on whatever you have not reached, and read the missing feature back from whatever grid still exists. Eyeballing finishes it once one solid measurement is in hand, and no earlier.
Why do pencil lines stop matching a carved surface?
Grids get drawn flat and carved wood is not flat. A line sits a known distance from an edge until you cut a slope beneath it, and then surface and paper disagree. Picturing where a line would run over a hill is the skill this stage builds.
Should a carver measure everything or work by eye?
Eye, mostly, once there is some practice behind it. Accuracy still matters and there is a point past which more precision makes the carving worse. Push past it and the leaf starts to look computer generated, which throws away the only advantage hand work has.
What to carve next