
Alexander Grabovetskiy, woodcarver, School of Woodcarving · Published 2018
Why is the inside of a Roman acanthus leaf hollow?
Quick answer: A Roman acanthus is hollowed on its face because the ancients carved it that way and the shadow repays the trouble. Scooping the face gathers shade at the base of each lobe from any lighting angle, so the leaf reads as foliage rather than as a rounded bump.
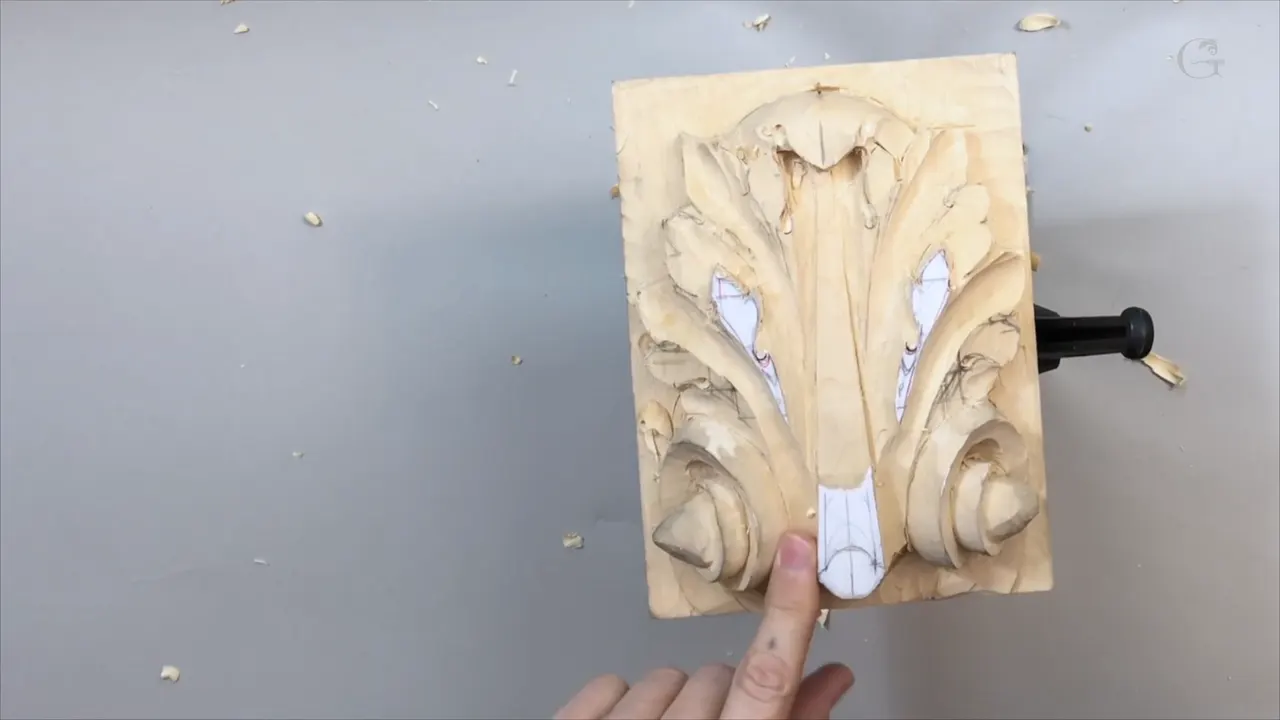
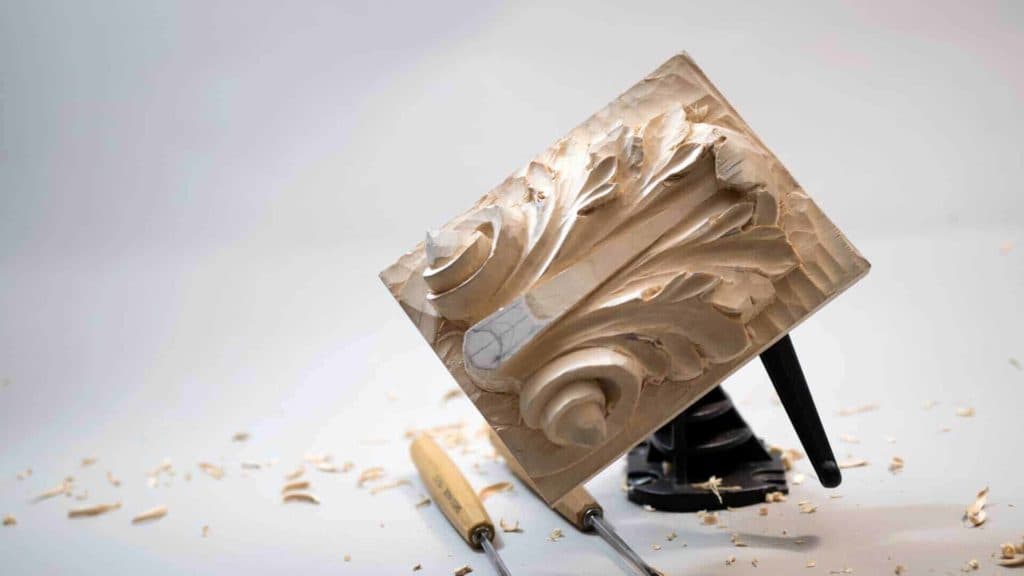
A Roman acanthus is hollowed out on its face, and that hollow is what makes it Roman. Every leaf in this design gets a concave scooped into it, the same way Greek carvers did it before Rome copied them, and the same way Byzantine carvers did it afterwards.

Have you carved a leaf that looked correct in outline and dead in the middle? Did you round the surface instead of hollowing it? Has anybody told you why the ancient ones look different from the modern ones?
This workshop is that difference. One deep gouge, ten millimetres across, and a shape that has been carved into acanthus leaves for well over two thousand years.

What the concave actually changes
- A hollowed leaf catches light along its bottom edge. A rounded one does not.
- A deep sweep works off either wall, so one tool does the job of three.
- Locking your hands makes cutting toward yourself safe, and a dentist taught me that.
- Give the inner face most of your strop time. Round the outer bevel and the wood fights back.
- Never take everything in one pass. Small chunks first, then the long clean stroke.
- Leave a whisker of paper at the edge and both halves stay equal without measuring.
What does hollowing the leaf actually buy you?
Darkness where you want it, from any direction. Scoop the face of a lobe and shade gathers at the bottom of that dish however the light falls, which is why a hollowed leaf carries across a room and a rounded one dies at four feet.

The habit is specific. Greek work owns it first, then Rome, then Byzantium, which is itself a kind of half Greek half Roman style. Later European acanthus went elsewhere, and we carve those in other courses.

Acanthus is not the only place it turns up. When those same carvers did grape leaves they used a very similar technique, hollowing the inside every time.

Nothing forces you to do it. I want this panel to stay honest to its history, and every ancient example I have found in books and in photographs online carries that concave.

What exactly is a concave cut here?
A shallow dish scooped along the inside of a leaf section, running from one pipe across to the next. Think of the leaf as a channel rather than a mound, and carve the channel with one continuous stroke wherever the length allows it.
Start by taking the section straight down to roughly the depth you want, then hollow it. Doing both at once is how a beginner ends up with a hole in the middle and two sharp edges either side of it.

Read the grain the whole way. One side of the sweep works with the fibre and comes out clean, the other works against it, which is why your tools must be sharp. Not should be. Must.

About ten millimetres of wood gets left standing at the edge of mine, and that margin is measured from the clean line rather than the preliminary one.

Which gouge cuts a concave best?
Any blade with a deep sweep. Mine was a 9 at 10 mm purely because it happened to be in my hand, an 8 does the identical work, and a 7 will manage at a push.

That kind of sweep earns its place for one reason. Both walls of the curve will cut. I can engage one wall of the sweep, the whole curve, or the other wall, which means a single gouge behaves like three narrower ones.
Size follows the space. Between two tight pipes the 10 mm version is too fat, so I drop to a 5/16 number 8, and where that still fights I go to a quarter inch 9, which fits perfectly.

For a genuinely clean surface a bigger one helps. My number 9 at 20 mm, three quarters of an inch, takes a broad hollow in one pass and leaves nothing to tidy.

| Tool | Where the concave needed it | Note |
|---|---|---|
| Deep 9 at 10 mm | the first big hollow, and most of the long continuous strokes | three eighths of an inch, and the workhorse of the whole day |
| The wider 9 | broad hollows that wanted one clean pass | bigger, so cleaner |
| An 8 at five sixteenths of an inch | between two pipes sitting close together | slightly narrower than the last one, which was all it needed |
| Quarter inch 9 | the small leaf sections either side of a pipe | a perfect fit in that one spot and nowhere else |
| Shallow 5 at 5/8 | gradual movement where a ridge had to come down | less sweep, so the transition stays soft |
| DockYard, eighth inch | every eye | wiggled straight in, no mallet anywhere near it |
Can a carver safely work toward the holding hand?
Only with the hands locked together. Cutting toward yourself is genuinely dangerous otherwise, and I have the history to prove it. There was a day, carving flowers so thin you could see light through the basswood, when I cut myself over a hundred times.
The fix came from a student. Teaching a class at the Marc Adams School of Woodworking, I had a man who had spent his working life as a dentist. Dentists know how to lock their hands, and that skill carries straight into classical carving as it does in a surgery.
He showed me what he does. The hands brace against each other, palm to palm, and the cut happens inside that locked frame. Nothing hangs in the air, so almost nothing can slip.
Grain counts for as much as the grip, and rotate the work if you can. My vice turns, which makes the whole question easy. Clamped flat to a dining table it is harder, and that is precisely when a locked hand matters most.
Where do the eyes go once the hollow exists?
Straight into it, with the smallest gouge on the bench. Pipes grow out of eyes, so the eye has to exist before the pipe running away from it makes any sense, and the concave between two eyes is carved after both are marked.

An eighth of an inch is plenty of blade. Press it straight down, give it a slight wiggle, and lift. That is one eye, and the same tool used on its twin guarantees the same radius on both halves.

Vary them if you want to. Some eyes could be smaller and some bigger, and using different sweeps in different places would look wonderful. I kept mine uniform on this panel, deliberately, because there is already plenty going on.
A chip carving knife tidies afterwards. Number 12 again, and the mess it leaves does not matter yet, since everything here is still a preliminary establishment of the form.

How do you keep both hollows the same depth?
Transfer, rather than measure. Take a plain piece of paper, mark the high point of the leaf on its edge, rotate the panel, and lay the same mark against the other side.

That tells you where your low point belongs.
The gouge itself is a gauge too. Hold a 10 mm blade against the edge, see how much room is left, then carry the same reading across to the opposite half.

Remember there are still two lines round this design. The clean line and the preliminary line are not in the same place, so measure from the clean one, or every depth you take will be out by the width of the margin.
Then stop measuring. You cannot spend the whole project with a rule in your hand, so develop the feel instead. If the two sides are not perfectly identical, that genuinely should not bother you.

Ready to hollow a Roman leaf of your own instead of watching mine? Pick a course and start here, or take everything at once with Yearly Access and work through all sixteen workshops.
Which face of a gouge takes the strop?
Leather rounds whatever you rub on it. A straight chisel has a big bevel on the outside and a small one inside, and stropping the outside face repeatedly turns that flat bevel into a curve.
A rounded outside bevel is much harder to push through wood. Believe me on that one. The edge stops entering cleanly and starts wedging, and you feel it in your shoulder within twenty minutes.
Round the inside all you like. Keeping the outside straight is what matters, so nearly all my stropping happens on the inner face of every gouge, with a couple of passes on the strop outside at most.

Keep a strop block on the bench where you can reach it. Mine is a commercial one by Boots with different profiles for gouges and V tools, and two seconds on it puts a tool back in play.
Test the edge on the work rather than on your thumb. A gouge that has just been stropped properly enters end grain without a sound, and the moment you hear it crunch the strop is calling you back.

How do you hold a tiny gouge for a micro cut?
Like a pencil. For the smallest work I take a one eighth inch DockYard, hold it the way I would hold something I was writing with, and make micro cuts rather than strokes.
Longer handled tools do the same job. I own an Ashley Iles number 9 that works exactly as well and simply has more handle, and plenty of carvers prefer that. My own opinion, and you do not have to share it, is that a smaller tool gives better control on cuts this size.
Long cuts still matter, even here. As the panel gets closer to finished I make every stroke as long as I can, because some of these cuts are nearly final and I will not be going back to them.
What does the law of flow mean in three dimensions?
Every line has to flow on both axes, not just the one you are looking at. Seen from the front a leaf can look perfect, and seen from the side the same leaf shows a long flat ridge that should never have survived.
My high point belongs at a couple of spots and nowhere else. Everything between those spots has to run downhill, so a ridge that stays high along its whole length gets worked down with the gouge held upside down until it moves.
Check both halves constantly while you do it. Symmetry is not something you confirm at the end, it is something you maintain every few strokes, and a pencil in hand is often the fastest way to see what has drifted.

How much should you take in one cut?
Less than you want to. My teacher, my master, told me never to take all the material in a single cut, and forty years later I still hear him say it.
Clear it in small bites first. A long clean stroke still arrives, and it comes more easily once the bulk has already gone, and the surface it leaves is cleaner and neater than anything a single greedy pass produces.
Depth deserves the same caution. Carving is an art of subtraction, so whatever you take is gone, and on an authentic piece like this you cannot glue it back. My cuts go deep, and I am telling you to be careful with that.
There is one small trick I use for symmetry here. A whisker of the original paper is still stuck at the very edge of some sections, and my goal is not to touch it, because if both halves stop at the paper then neither edge can drift past the other.

Do carvers from different countries carve differently?
Visibly so, and the strange part is that they all reach for identical tools. There are cultures inside wood carving. English carvers, German carvers, Swiss, Russian, all using the same numbered gouges, and all arriving somewhere different.
The design comes out the same and the handling does not. Tool movement and tool marks give it away, and you can look at two versions of one drawing and tell which hand belonged to which tradition.
I saw it at Marc Adams. A student of mine from South America carved exactly the same grape design as everybody else, and his Latino background brought a Romanesque habit with it, which for me shows up as concave cuts inside the leaves.
It looked beautiful. There is nothing wrong with building a style of your own. Your culture belongs in the work, and so does your accent, and I know some of you struggle with mine.
Here is the honest end of a workshop about authenticity. Copy the concave because the ancients used it and because the shadow it throws is genuinely better, then let your own hand put whatever it puts on top of that. A leaf carved by somebody in Bavaria and a leaf carved by somebody in Peru will never look the same, and neither of them is wrong.

How it's done
- Drop the section before hollowing it. Take the leaf down to roughly the depth you want with a number 9 around 10 mm, then scoop. Doing both in one go leaves a hole in the middle and two sharp walls either side.
- Read the grain before each pass. One wall of a deep sweep works with the fibre and the other against it. Which is exactly why sharpness is not a preference here. Turn the work rather than force a stroke.
- Hollow with one continuous stroke. Sweep the tool, which means rotating it through the cut rather than pushing it in a straight line. The surface comes out even and the facets disappear.
- Transfer the depth instead of measuring it. Mark the high point on the edge of a scrap of paper, turn the board, and lay the same mark against the far side. Your gouge works as a gauge too.
- Sink the eyes with the smallest blade. Three millimetres of edge, pressed straight in with a slight wiggle. No mallet. The same tool on both halves gives one radius and free symmetry.
- Clear the bulk before the long stroke. One rule from my old master covers it, and it has never let me down. Do not lift the whole waste in one pass. Clear the bulk in small bites, and the finishing stroke then arrives easily and leaves a neater surface.
- Stop at the paper. A whisker of the original sheet still clings to some edges. Do not touch it. Two edges that both stop where the paper stops have stopped level with each other.
Frequently asked questions
What makes a Roman acanthus leaf look Roman?
The hollow. Scooping each lobe gathers shade at its base from almost any lighting angle, so the carving carries across a room instead of dying at four feet. Greek carvers began the habit, Rome continued it, and Byzantium inherited it whole.
Which gouge carves a concave in a leaf?
Something with a deep sweep, usually a 9 or an 8. Deep sweeps work off either wall of the curve, so one blade behaves like three narrower ones. Ten millimetres suits a broad hollow and a quarter inch reaches between pipes sitting close together.
Is it safe to carve toward yourself?
Only with the hands locked together. A dentist in one of my classes showed me how his profession braces palm against palm so nothing hangs in the air, and almost nothing can slip. Grain matters as much as the grip, and turn the work whenever the vice allows.
What to carve next