

Alexander Grabovetskiy, woodcarver, School of Woodcarving · Published 2020
How do you carve a convex in the middle of an acanthus leaf?
Quick answer: A convex middle is the swell many Venetian acanthus leaves keep where other designs only hollow. On my Venice Room head I got it back by lowering everything around it with a bigger #5 and a #9, then carving small concaves inside it and leaving one pipe raised to throw a shadow.
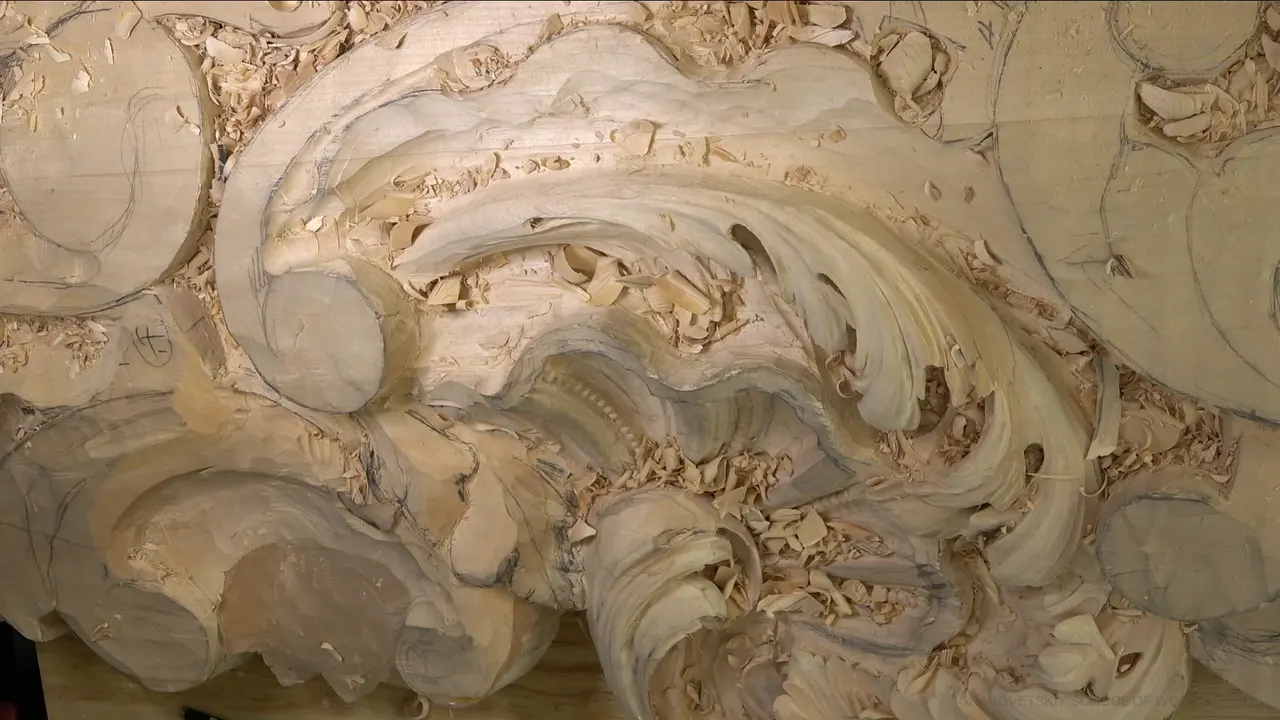
The convex middle of an acanthus leaf is a swell that rises toward you, running down the body of the movement with hollows on each side of it. A lot of Venetian carving has it. Many acanthus designs skip it, use concaves almost everywhere, and can still look right. In workshop 20 of the Venice Room I found a big concave sitting where my swell belonged, and the first half of the lesson went into bringing the convex back and shaping it. Carving acanthus leaves this way is slow, and on a Venetian room I want it authentic to the original.
You have seen acanthus leaves that are hollow almost everywhere, and plenty of them look fine. I will show you how I got the swell back after the wood beside it had gone low, which gouges did the work, and where the small concaves went inside it. And I will tell you straight when you can skip all of it.
Do you want the middle of your leaf to swell toward the light instead of sinking away from it? Would you like one pipe to throw a real shadow? Then take the wood around the middle down first, and let the convex come up out of what is left.

Six moves that bring a convex back
Look at the originals you follow before you let the middle of the leaf go hollow.
Lower the wood around the swell while there is still material under it.
Rough the convex on one side first, then change position and come back from the other.
Carve small concaves inside the big convex, and keep every change soft.
Raise one pipe where the light will show its shadow.
Judge it all from below, and take a bump out with a flatter gouge.
Why does a Venetian acanthus swell in the middle?
The originals had it, a lot of the time, and this room is meant to stay close to them. Near the end of part 1 I looked at the head and said I was not too happy with the big concave sitting right there. Venetian carving very often had a convex on those acanthus leaves. For some reason I did not see one on mine, so I had to excavate a lot more to create it.
Some of you will look at the hollow version and say it looks right. It does. A lot of acanthus designs use only concaves, pretty much everywhere, and almost no convex in the middle part of the movement. We want to be authentic to the original, though, to whatever the carver in that town did. City, I corrected myself on camera, because I did not want to hurt anybody. The city of Venice.

Does it matter if you carve only for yourself?
Maybe not, and I said so in part 2. For most people who do not know those small historical details, it does not really make any difference. It all depends on what you are carving. If you are carving just for yourself, you maybe even should not worry too much about convex and concave in the middle and so on.
I do worry about it, at least in this project, because every project is different. Near the end of the lesson I said the same about curliness. On this head it is exactly what I am after, not on every project, even though I really like curliness in wood carving and think it looks super cool.
So pick the style first. The shape follows it.

How do you get a convex back when the spot is already low?
You lower whatever surrounds it, so the middle is left standing. Nothing stopped me in part 2, because I still had material there, and I still thought I was able to. What I refused to make was a bigger pipe.
My options were to knock down one side, excavate a little deeper beside it, or take a little off my pipe, because it just did not look as nice. I went further in next, lowering that whole detail. A bigger #5, 5/8 of an inch (16 mm), chopped it down and brought the overall movement downhill.
Maybe I could start even farther, I thought. I did, all the way down, and it was much better.
After that I cleaned the transition and excavated the messy side with a #11. I did not go underneath yet. I was not rushing anything, because I still had to check how gradually the movement ran downhill, and everything up to that point was preliminary.
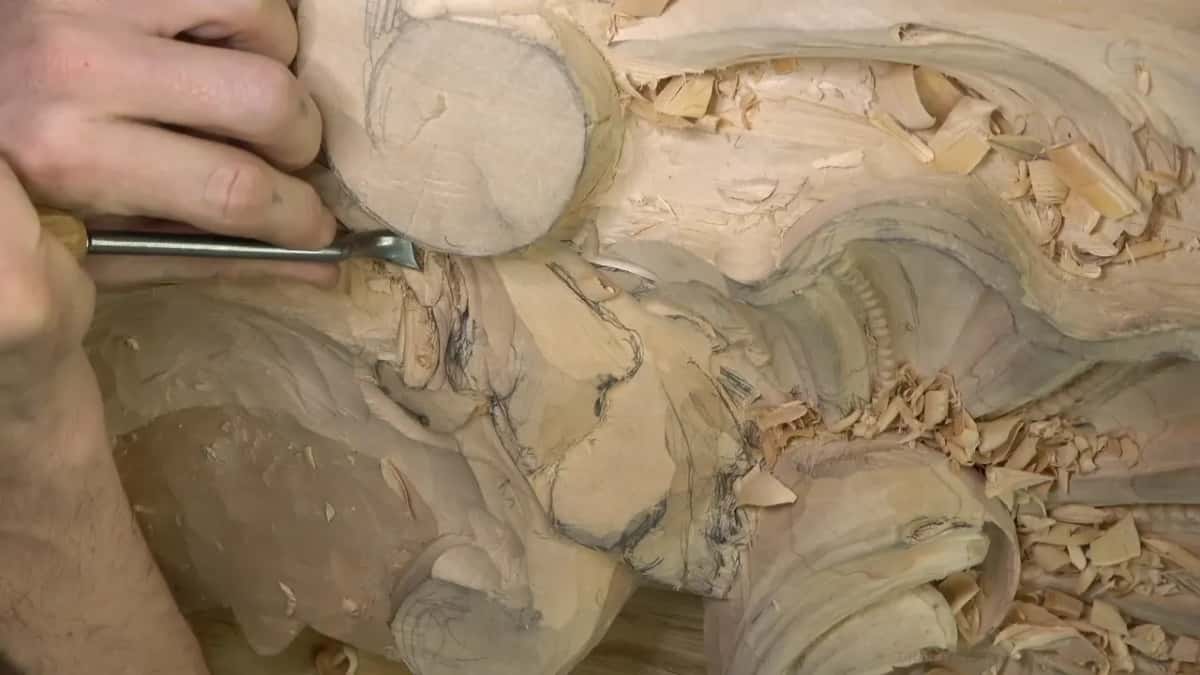
Then a #9, a quarter inch (6 mm), brought the whole section down, carefully, because I didn't want to lose one part of it. After a little chopping around, the #5 came back to recreate the movement. Now I've got my convex, I said, and I meant that one, right there.
Taking the wood around a problem down is also how I deal with a slip, and the page on carving mistakes shows it on a flower. Here the reason was the Venetian style.
Which gouges shape the swell when carving acanthus leaves?
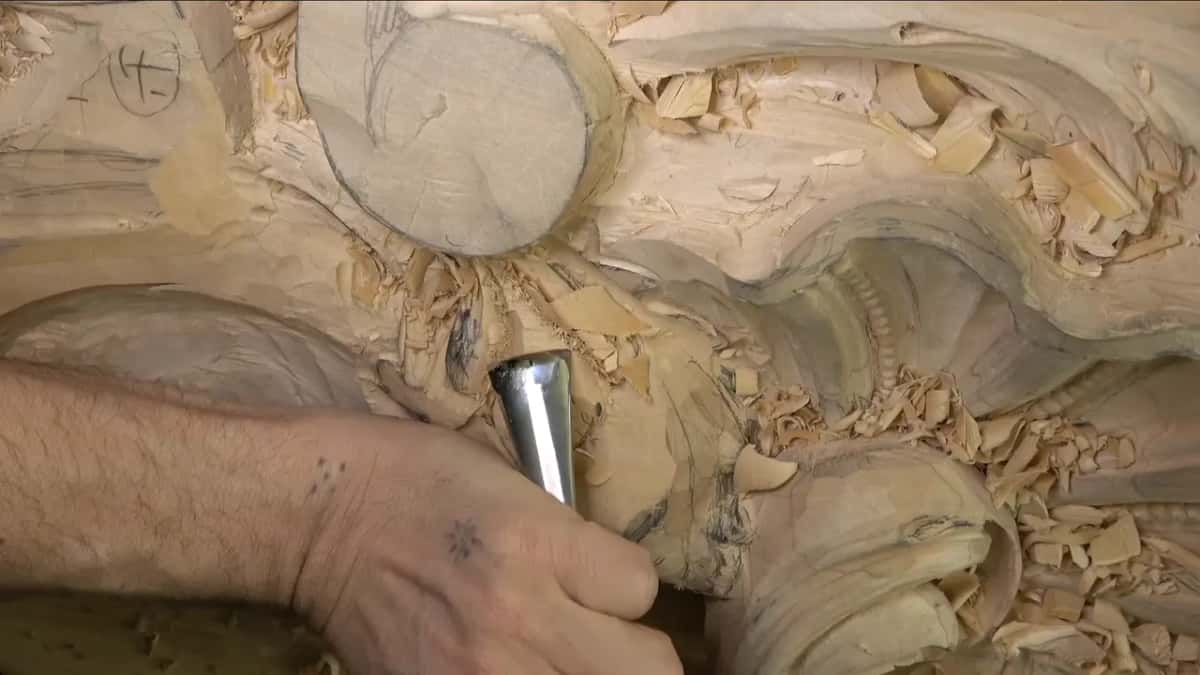
Mostly #5 gouges, with a #9, a #6 and a #7 turned upside down, and a flatter #3 for one last fix. During part 1 I had carved inside the pipe, which was not good enough, so a #11 spoon, 10 mm (3/8 in), came out for a smooth pass. I wanted to see the big movement without too many lines.
The first rough pass in part 3 was a big #5, carving a preliminary convex from one side, then exactly the same on the other. I could do that with a knife as well. With just a knife you can make a lot of quick passes, and I call that a really good technique.
Then I changed position and made another convex pass, the opposite direction, carefully. When one side sat a little too high, I tried a flatter gouge, found it too flat, and took a #6 instead, 14 mm, about 9/16 of an inch.
Back in part 2 a #5 back bend had done some of the excavating, little by little, and it needed sharpening, which I said out loud. The sharpening course is the place for that.
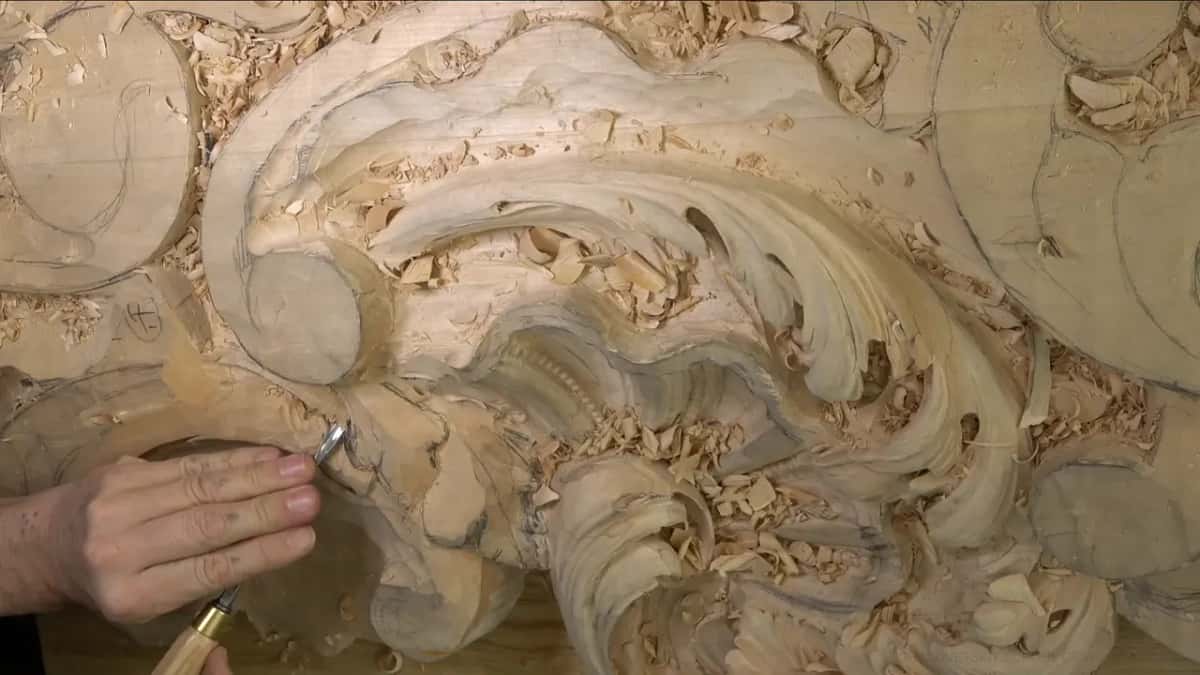
Six moments from parts 2 to 5, in the order they came.
| Moment | Reason | Tool | Result |
|---|---|---|---|
| Middle of movement | the originals had a convex right here | Bigger #5 | detail chopped lower, movement runs downhill |
| Section still high | the whole section still had to drop | #9 gouge | brought down carefully, that part kept |
| Subdividing the swell | the flatter gouge turned out too flat | Deeper #6 | subdivided it, every change kept soft |
| Pipe looked buried | the #7 pass had exaggerated that pipe | Small #8 | dug along both sides, pipe revealed |
| Knocking the ridge | I wanted the pipe to read rounder | #7 upside-down | top taken down slightly, now rounder |
| Bump on slope | the downhill run was not gradual enough | Flatter #3 | bump gone, the slope ran down |
Why the width changed each time is on the workshop 18 page, and buying gouges is a question for the tools course.

Why carve concaves inside the big convex?
A big plain convex was not what I wanted either. Right after I had the swell back, in part 3, I made the decision how it would go, and I was careful to call it a decision, not a fix. Concave, concave, convex, and maybe the last part convex as well.
What I wanted there, I said, was just a concave, convex, concave. The concave runs all the way through, another subdivision comes beside it, and overall it still looks like a convex, only with concave inside of the convex. I hoped that made sense on camera. I use the same order across one lobe on the furniture panel, built here into a whole movement.
Everything should be kind of soft. No really sharp movements. I planned subdivisions with the eyes as well, and in part 6 I said micro-separations in that element could wait, even though I think they will make it look alive.
Which pipe stays raised?
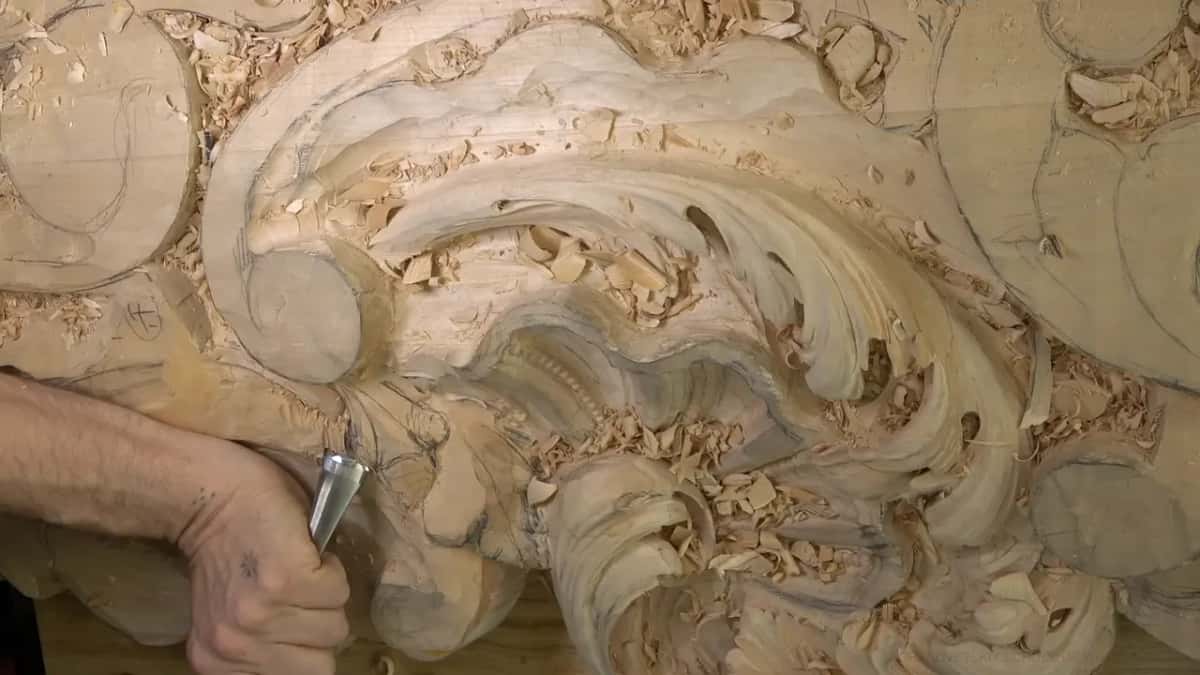
At least one pipe stays up, and the light decides which. In part 2 I carved one pipe the opposite way, a concave pipe instead of a convex one, because I did not like what I saw, and that is also a common technique. It does not make much sense at first, since usually you want to see a pipe as a convex.
For the opposite move, a concave carved where logic asks for a pipe, see the workshop 15 page.
By part 4 I had no wish to reverse pipes everywhere. One of them had to be raised, because I really wanted it to cast a shadow, and the light source is going to hit from one direction. I carved another concave on that side, which left that pipe a little raised, deeper but not too deep, because that movement had to stay.

Then a #7 made a convex pass along the pipe, and I exaggerated it. For a moment it looked buried. You'll see, I told the camera, and a 3 mm #8, about 1/8 inch, dug along both sides of it until it came back up. Last, the #7 went in upside down and knocked the ridge down a little, for an even more convex look. On this panel, then, one pipe went concave in part 2 and another stayed raised in part 4.

Where should you judge the swell from?
From where people will stand, and on this room that means from below. Whatever reads wrong from there gets knocked down. In part 6 I lowered one side a bit more, and the only reason, I said, was that it would be visible from the bottom. I have to really think about the point of view, how it will be viewed, from what point, and how people are going to see it.
I liked the movement, though maybe it had a little too much roundness. I kept it like that for now, to see later on. On a ceiling the worm's-eye view is the one that counts, and the workshop 12 page is about judging a detail from there.
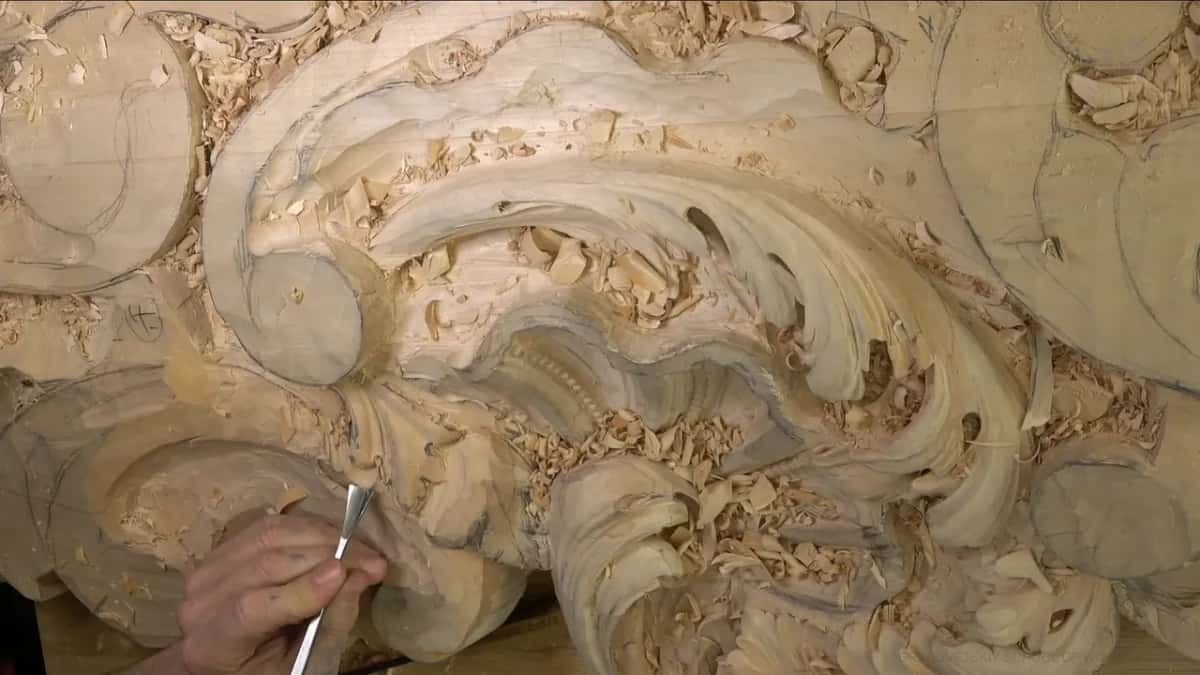
Part 5 had its own trouble. The downhill run came out less gradual than I wanted, with a little bump in it I did not like. A flatter gouge fixed the bump, in my case a #3, and after that the slope went down the way I liked.
Somewhere in there I stopped and asked you straight. Can you see what I'm seeing? Do you really see this acanthus coming alive? It was not the final form, but it was already showing some life.
The camera helps me here too. When I am editing and watching the screen, I can sometimes see that I made a mistake.

What about the eye beside the convex?
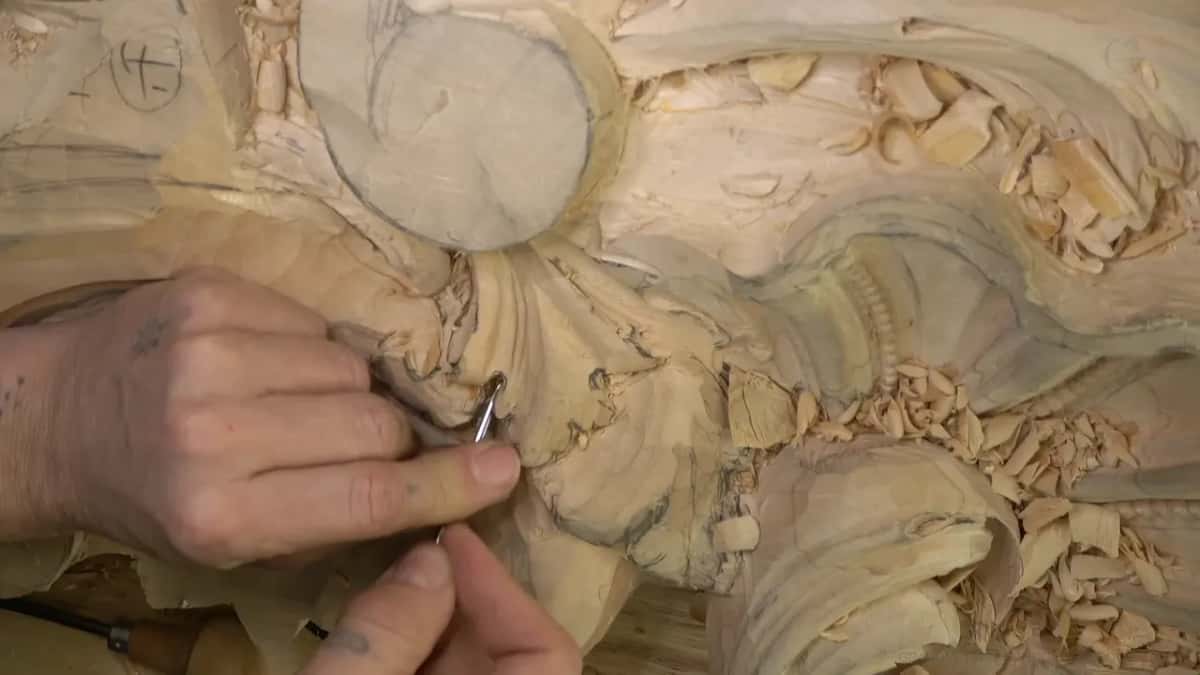
Close to an eye I switch to micro tools, because there is a line inside it I have to keep. During part 9 I still wanted to excavate deep there and make a really nice shadow. I took a Dockyard gouge, 3/32 of an inch, about 2.4 mm, which I called a number eight, and rotated it into the wood to make a plug, almost like drilling.
Dockyard is just a brand, and they make really good small tools. I really do not know how they mark them. All they call it is a gouge.
Next I separated that section from the line, attacking from one side and then from the other, rotating inside until the two passes connected. And how do I know they met? I can feel it, right where one pass ends.

A #2, 12 mm or about 1/2 inch, knocked the edge of that movement down, and after that I had the area pretty much under control. With a 2 mm (5/64 in) #11 I dug the mess out, and a 1 mm (1/32 in) one hooked the rest. That little #11 is one of my favorite tools.
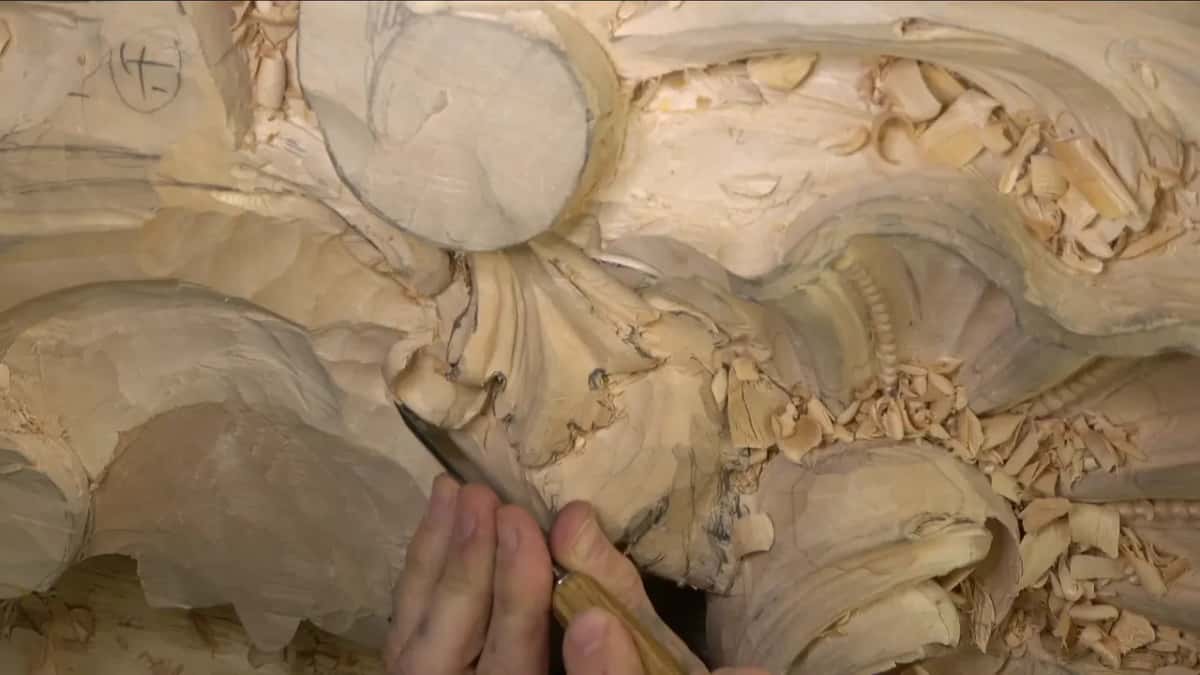
For the ridge beside it I took a skew chisel, after calling it a skew knife first and correcting myself. I sliced and then scraped, because a sharp transition there was the last thing I wanted. The part had to look like it lies on top of the one beside it, the kind of illusion workshop 13 builds with a leaf that grows from underneath.
The same care started in part 1. Near a line I wanted to keep, a #9 chopping from above was a little too big, and too big a tool there would have been a big mistake, so a #2 marked the line first.
What else is in workshop 20?
The twelve parts carry on past the swell. In parts 10 and 11 a big gouge, three quarters of an inch (19 mm), carves a pronounced concave with a rotation movement, and I stop to weigh a flipping motion under one edge, which workshop 16 covers.
Part 12 decides the end of the leaf, a point or something nicer, and I make it more round first. I was carving against the grain in part 11, and with really sharp tools that should not be a problem.
I tried a quicker way once, in part 3. There are much quicker ways to do all of this, and I have done quick. You lose a lot of details, and it is acceptable, but it is more of a trade than an art.
For a moment in part 5 I carved toward myself. Normally that is not the best idea, but if you lock the hand and do not air carve, raising your hands above the surface, you should not have a problem. And yes, I blow on the piece. Most carvers I have met blow the chips away too, and I apologize if it does not sound too good.

Workshop 20 is twelve parts, a little over an hour and a half, and it comes with the tuition along with the rest of the room. The lesson before it is workshop 19, workshop 21 comes next, and the panel starts back in workshops 1 to 12. All of it is wood carving in high relief for a room in the manner of 15th century Venice, the city of the Venetian Gothic and of the Ca' d'Oro.
Is there a hollow on your own leaf where a swell should be? Then take the wood around it down, slowly, and look at it from below before you call it done.
How it's done
- Find the originals first. Look for old work in the style you follow. If it keeps a swell down the center of the leaf, plan for one before any hollow goes in.
- Lower the detail beside it. Chop it down with a wide #5, about 5/8 inch (16 mm), so the movement runs downhill.
- Drop whole sections slowly. A #9 near a quarter inch (6 mm) does it.
- Rough the swell from both sides. Make a preliminary convex pass with a big #5, then change position and come back the opposite direction, carefully. A knife is fine for quick passes too.
- Hollow it out inside. Split the swell with small concaves and keep every change soft.
- Raise one pipe, then look up. Leave one pipe high on the side the light will show, judge the whole leaf from below, and take any bump out with a flatter #3.
Frequently asked questions
Is the convex the same thing as a pipe?
Not on this head. A pipe is one narrow ridge running through the leaf, and in workshop 20 I said plainly I didn't want a bigger pipe. The swell I was after is the whole middle of the movement rising up, with pipes and small hollows carved inside it.
Can a knife shape the convex instead of a gouge?
A knife works, and I called it a really good technique while roughing the swell with a big #5 in part 3. A blade makes a lot of quick passes. I kept to the gouge on this head, and the hollows inside the swell came next.
Do Venetian acanthus leaves always have a convex middle?
Often, not always. I call it a common thing in Venetian carving, and on this same head one pipe went the other way, as a concave, which is also a common technique. Check the originals you want to follow before you decide.
What to carve next