
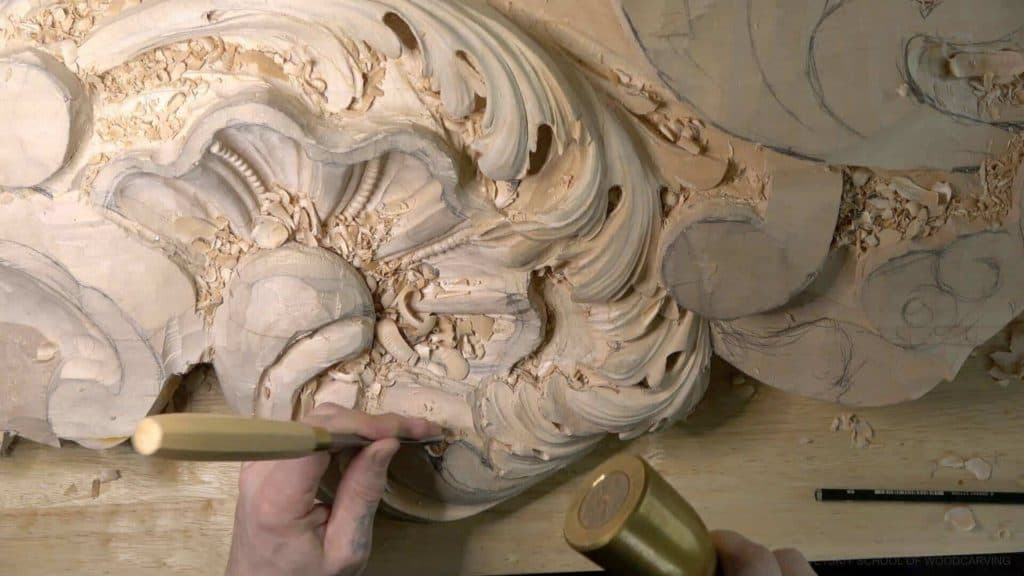
Alexander Grabovetskiy, woodcarver, School of Woodcarving · Published 2020
Why would you carve a concave where an acanthus leaf should have a pipe?
Quick answer: A pipe carved as a hollow is a concave the old carvers sometimes put into an acanthus lobe, in the very spot where logic calls for a convex ridge. I keep mine a little back from the separation and darken it with a 3 mm (1/8 in) eleven gouge run underneath.
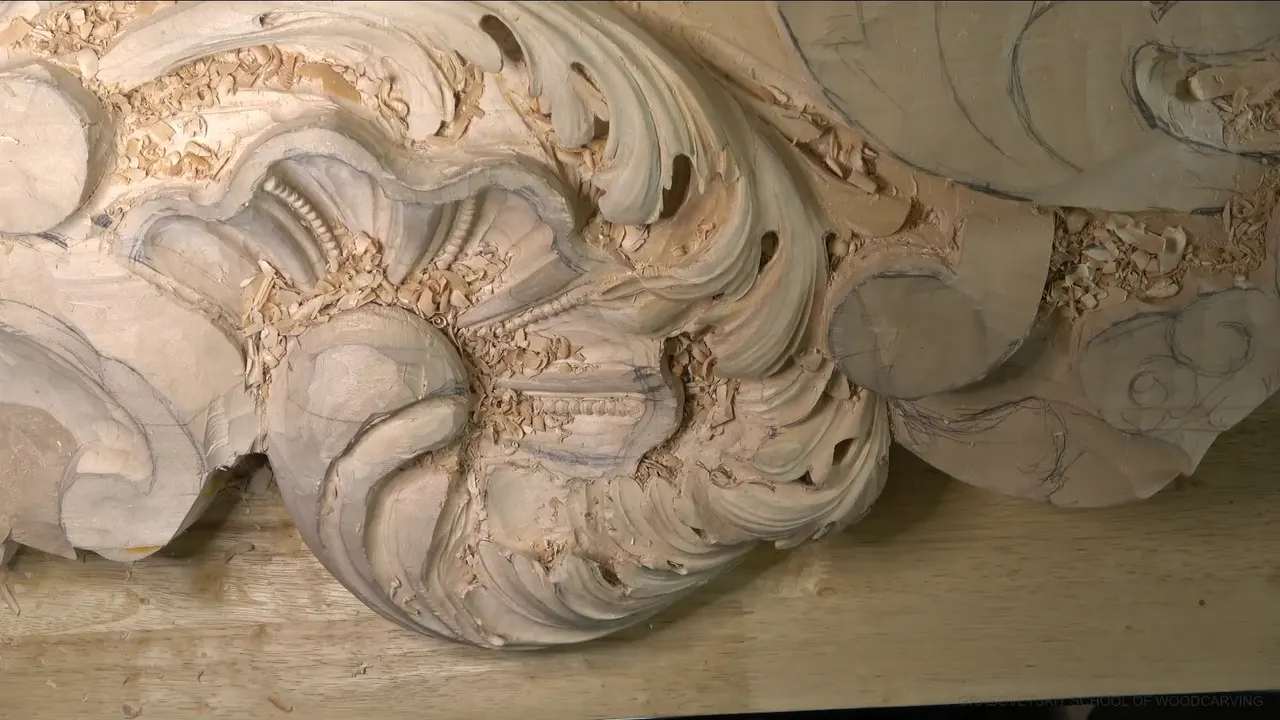
A concave in place of a pipe is a hollow cut into an acanthus lobe right where the logic of the leaf asks for a raised, rounded ridge. The old carvers did it on part of their work, and when I copy that work, I do it too. Workshop 15 of the Venice Room is twelve parts of carving acanthus leaves on a client's panel in lime, and this one odd cut keeps coming back.
Do you want your leaf to hold a dark pocket of shadow under the lamp? Would you like people to read depth there from across the room? Watch the one spot the pipe should fill.
I'll show you where I put the hollow on this panel, how deep the small gouge goes, and how I judge it against the light. Five uses, five reasons, all said out loud.
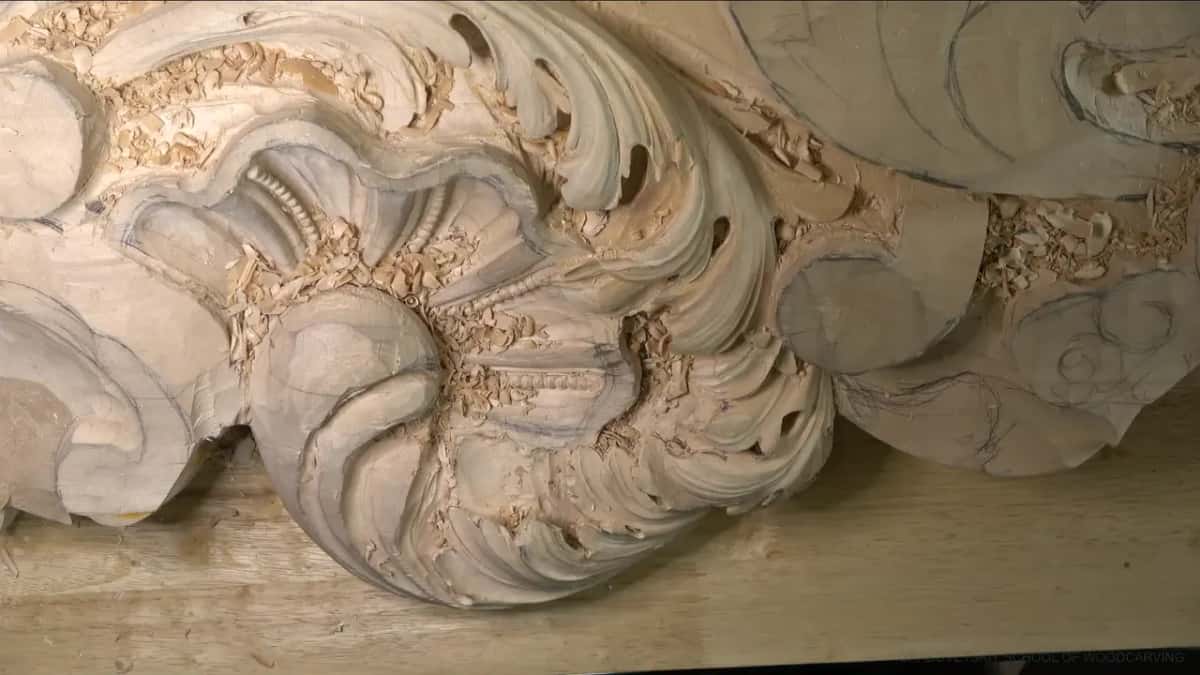
Carving acanthus leaves with a hollow where the pipe goes
Logic puts a pipe here.
On part of the original work, the old carvers cut a concave into that spot instead, and it made an interesting detail.
Mine sits just off the line.
A small eleven gouge runs beneath it, and the shade goes dark.
I use it five times over these twelve parts, and every time I'm chasing more shadow for a room I already know.
Why would a carver put a hollow in the pipe's place?
On some of the original work it's plain to see, and shadow is the reason for it. Even in part one, before any of this, I say they had a trick back then to create extra shadow.
Every pipe I carve gets a concave on its other side, otherwise it's not going to look good. I say that in part two, right after the pipe on this lobe appears. If the word pipe is new to you, my Corinthian leaf lesson and my Byzantine leaf lesson both explain it, and I won't repeat them here.
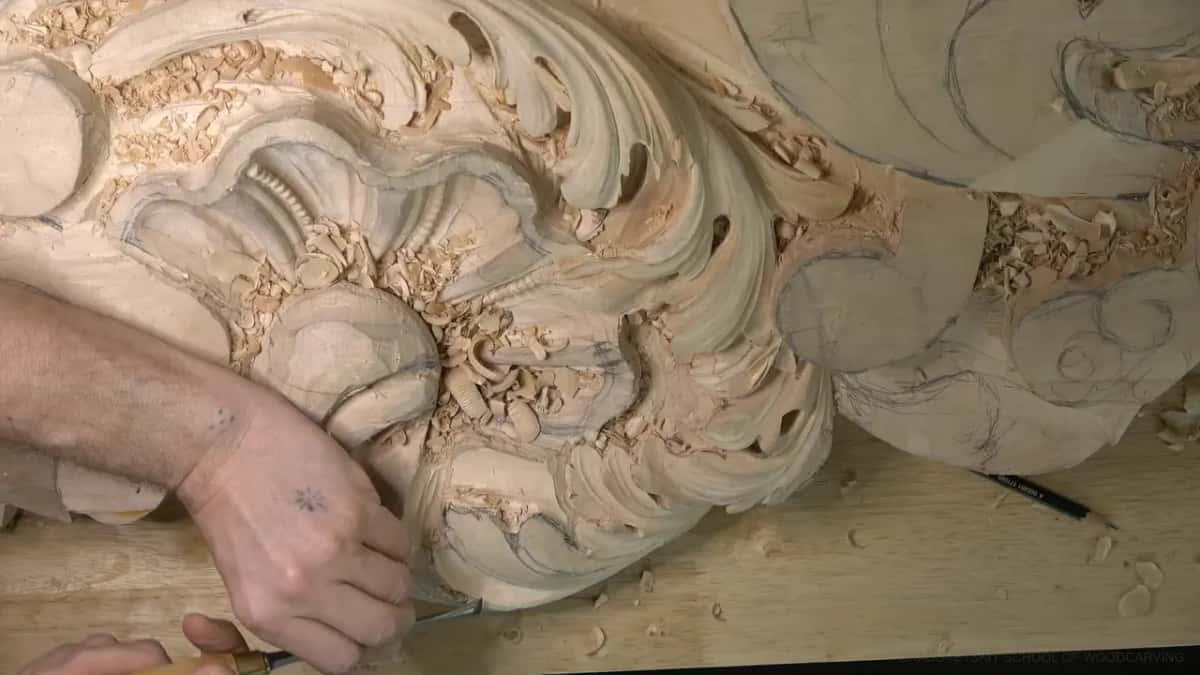
Then comes part four. A big chunk of leaf is shaped into an S by now. Logically there's supposed to be a pipe in it, a convex one. But I saw on the originals that they would give a concave cut on the inside right there, and it just created an interesting detail.
My reason is light and shadow, from what point the light is going to hit that detail, and how far you push it. Wood carving is pretty much all about exaggeration, I say at the end of that part. There's a whole page on how much to exaggerate a shape if you want that argument.

I'm going to be honest with you. Back in workshop 10, in part 1 of this room, I carved one pipe the opposite way, like a concave, and called it an old trick. That was one pipe. Here it turns into a move I lean on five times, so it earns a closer look. That would be really authentic detail, I tell you near the end of part four, because that's exactly what they did.
Which pipes on this leaf stay round?
The one near the bottom stays round, because people will see it a lot, and I make it rounder than I first planned. My first thought is a number five, a quarter inch (6 mm) wide. I change my mind and start it using a number eight for an almost half round look, knowing it may be too extreme. Maybe a little too bold, I admit.
Getting from the big eye into that pipe is the tricky part. The eye holds a good amount of concave, and it has to turn into a convex through one smooth transition, which is tricky but not impossible. And the far side of the pipe gets its concave, like always. So you see both kinds on one panel, the round one and the hollow one.
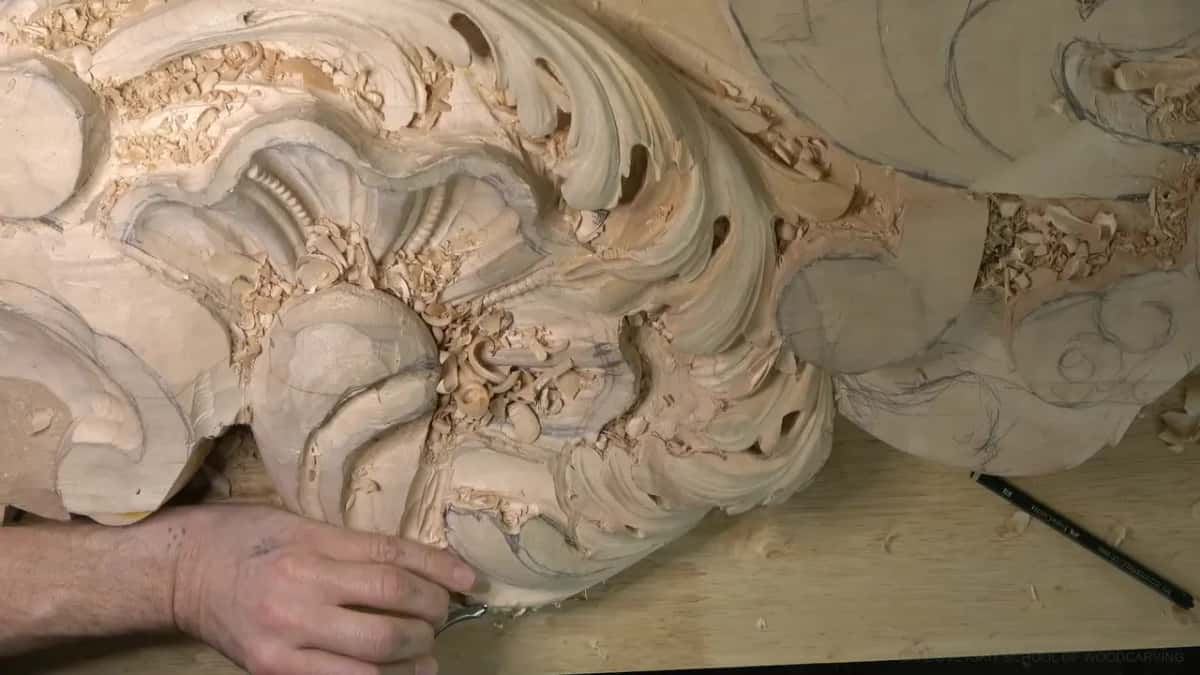
Even that eye got placed on purpose. Another detail was coming, so I put an extra eye where it would stay visible, a big one, huge, in the spot where the leaf moves inward, and I stopped short of going through because I was really close.
Where exactly does the concave go?
Inside the lobe, on the line a pipe would take, and a little back from the separation.
By then the chunk is the shape I want to see, and what it still lacks is shadow. The old carvers kept that cut a short way off the separation itself, now and then a little farther away still. Nothing in the lesson measures it. I judge the distance on the wood itself.

Before cutting, I say it straight out, let me try it, and if I don't like it, I can always shave it.
The first pass goes in. I still have that connection right here, I tell the camera, but I just created an extra cut, which I think makes sense. It needs to go a little farther, so I bring the concave on.
One small part of it distracts my eye, and I clean that. Next I stand there asking myself whether to blend this side, then blend it a little, without losing the overall shape of the ornament.

Part three has a smaller extra I treat the same way. At one spot I flip a short cut backward, the eye of the goddess, and say I don't have to do it but think it's a good idea. If I end up not liking it, I'll just take it out.
The side it goes on follows the light. On the next separation, in part seven, I put the same idea in because the light is going to hit from that side, and I know this room's light long before the panel gets there.
How deep should the hollow go?
A 3 mm (1/8 in) number 11 gives it the depth, cutting underneath the concave to exaggerate the shadow inside. That same little gouge already came out in part three, for a preliminary cut, and I said then that I'd need to go deeper later.
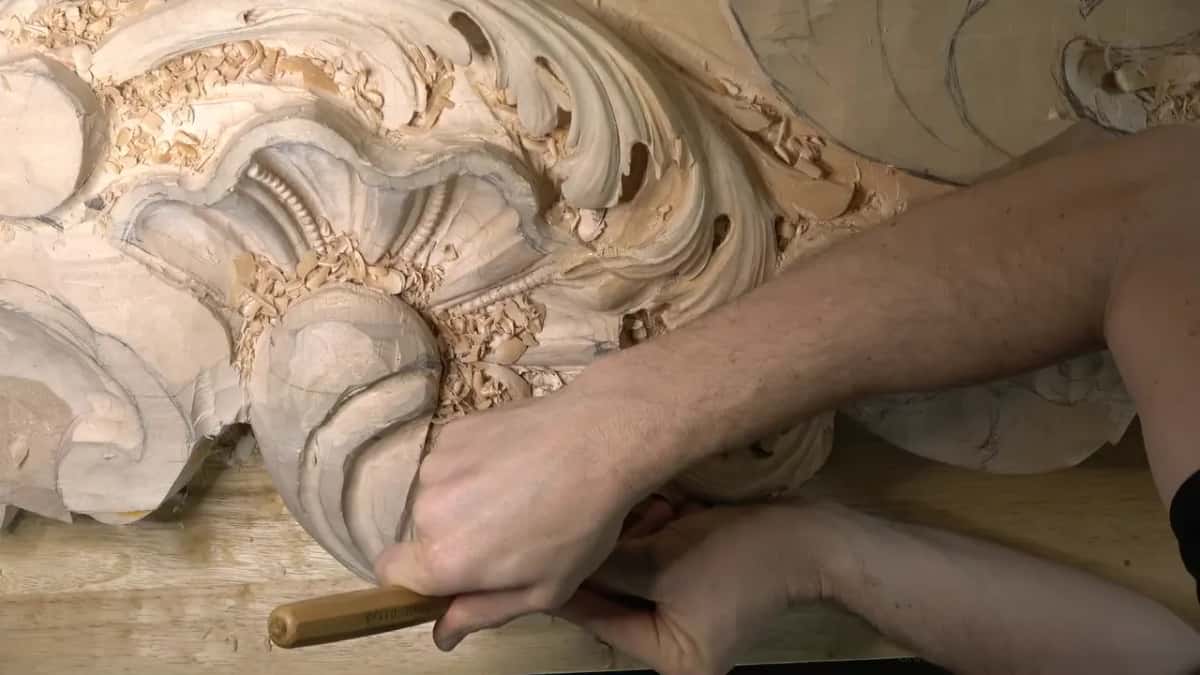
It's the one I name for the undercut in parts four, five, six and ten. Later in part four I go back with an even deeper cut on the inside, because I really want to see that shadow casting toward my direction.
On a different concave in part one I keep asking the same thing. Is it good, or should I do more? I go deeper with a smaller number eight, admit it's looking extreme, and go deeper again. Along the way I call one cut an undercut, then correct myself. It's really just some excavation.

Later on I put it plainly, create the shadow but not too deep, because I don't need too deep. Depth has a limit, though. When I raised a part in part two, I got beautiful movement and also a weak spot, and I said out loud that I didn't want to cut too deep underneath it. Before the trick in part four, I avoid digging too deep into the part below, so I don't put too much stress on the wood.
How far an undercut can go before a lobe turns weak is its own lesson, workshop 11 in part 1. And workshop 13 used this same little gouge for something else again, a cut curled in under an upper lobe.
What does it do to the shadow?
It sinks a pocket of shade into a spot where a round pipe would have stood, and it turns that shade toward the person looking.

Part ten shows it best. I make a really big concave using a number nine, after calling it a number eight first and correcting myself, and you can already see it cast some shadow when the light hits from this side. It's a soft shadow, but it's good.
The small eleven follows beneath it, and the movement gets really nice. Don't force it, I say. It has to be just blended in. The concave gives a soft shade, and the undercut underneath exaggerates it.
At the top of part eleven I look at the result and say I already have the shadow I'm after. It is good. Actually really good.
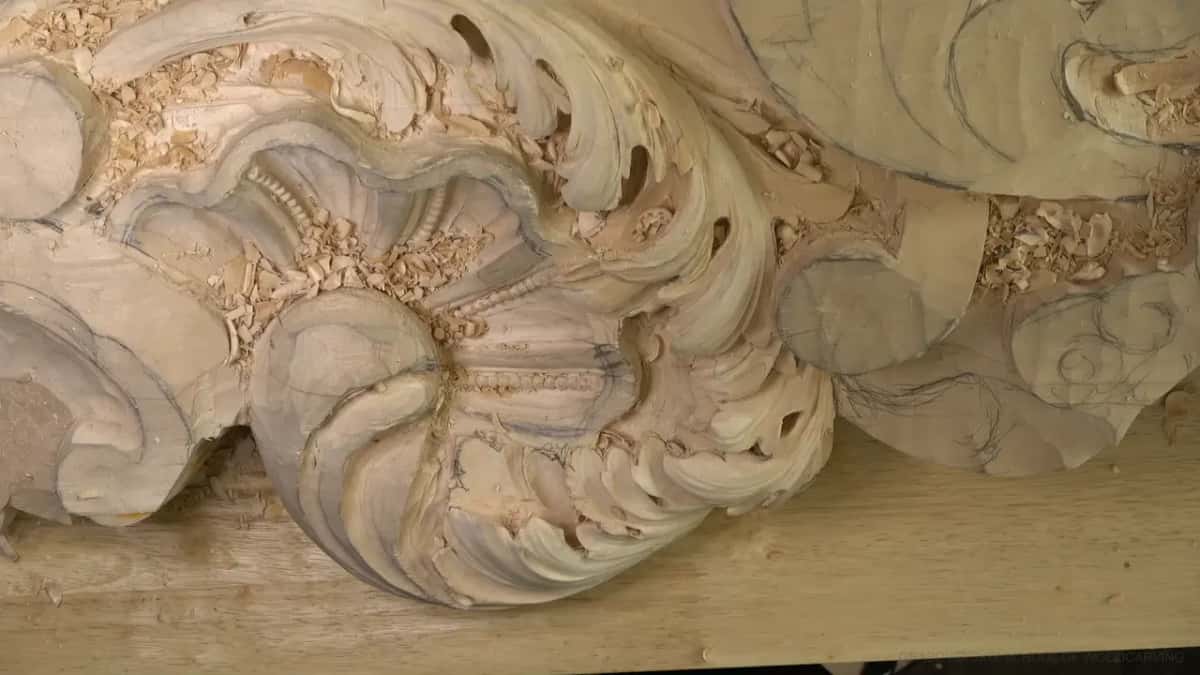
The camera doesn't always catch it the way I see it. Back in part two I tell you that you don't see what I see yet, but you will later, and that I won't stop the work just to show you before the right time. When that raised part throws its shadow, I just say it casts beautiful shadow, and I love it.
All of it is aimed at one room. This relief is going up high, lit from one side, and my lamp sits on that same side, so every concave is cut for the light it will really get. The room copies 15th century Venice, and the Venetian originals set the rules.
Five uses in one lesson, and why each time
I use it five times in these twelve parts, and I give a reason every time. The table puts them in order.
| Where | Move | Shade | Reason |
|---|---|---|---|
| Midway, part four | concave set where logic wants a pipe | exaggerated inside | exactly what the old carvers did |
| Late in five | after two shallow concaves, the same undercut | deeper here | wanted deeper shadow on that side |
| Part six, again | carried farther, blended with the previous cut | more underneath | unhappy with how the whole looked |
| Start of seven | the same idea on the next separation | extra detail | the light hits from that side |
| Opening of ten | big concave from a nine, then undercut | soft first | an extra concave gives beautiful movement |
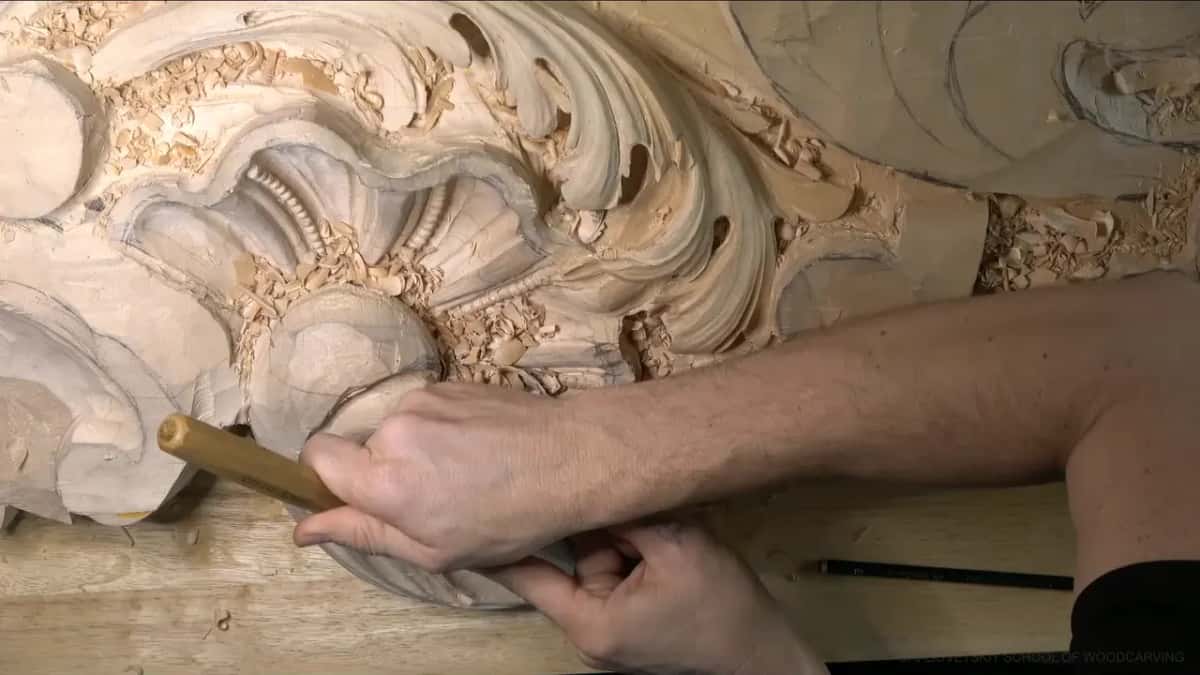
Part five starts gently, with two shallow concaves from a number five, the first only to exaggerate an edge. Shallow, but not too shallow, and I have to be really careful. Pencil marks keep distracting my eye, and I can't see the crispness. Late in the part I still want a deeper shadow on that side, and for it I go back to exactly what I did with the 3 mm eleven.
Part six opens with me holding back. Maybe I shouldn't do anything else, I say, or it gets too distracting, too many movements. A few separations later I'm still not happy with the overall look, and the fix is the same trick, shadow underneath, carried a little farther and blended in. One long pass of a number five then gives me the ridge I'm after.
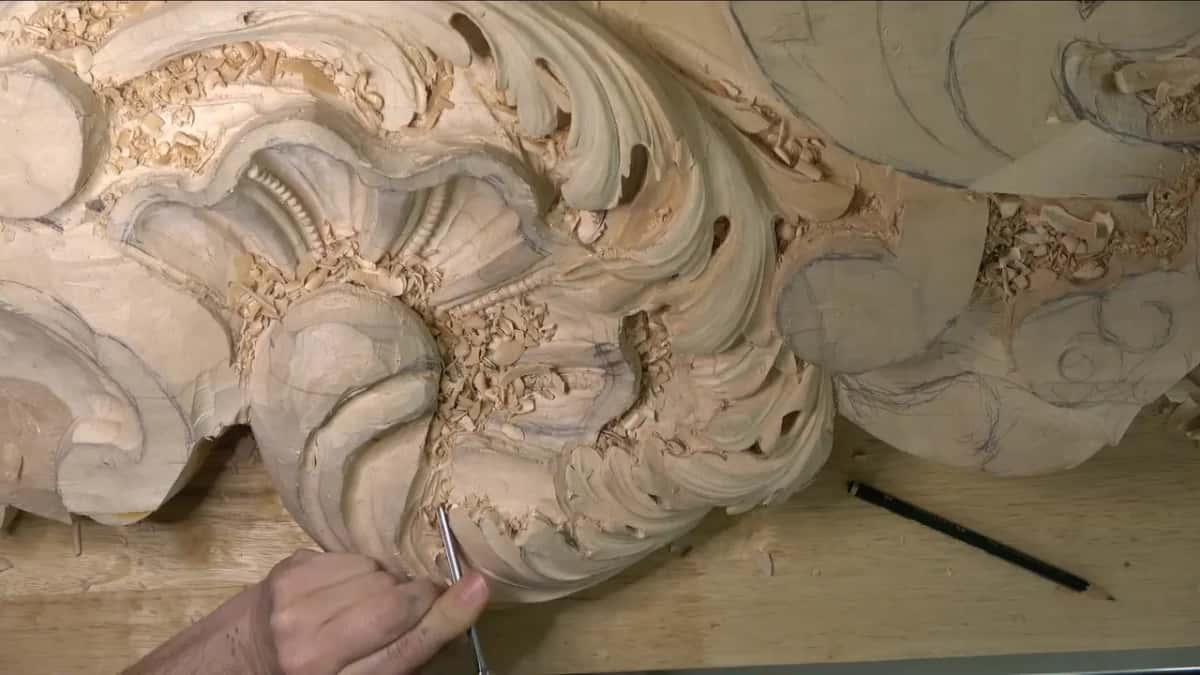
Part seven opens with it on the next separation, and right after, I still don't like the look. A small concave follows, not much, just a little bit. Lines from a number seven come next, and then I stop, because that is enough and there's no need to overdo it. The fifth one sits where the leaf turns into part of a shell.
Every reason in that table comes back to light or shade. Even the one that sounds like taste, not being happy with how the whole thing looks, gets fixed by putting shadow underneath.
If watching me make those calls is the part you want, the tuition opens the whole room, workshop by workshop.
When the trick goes wrong
The fifth one, in part ten, gave me a problem right away. I wanted a clean cut, and the gouge was already catching the side. Later in that part my undercut went through the edge of my previous cut and destroyed it.
That is okay, I say. I can always attack it again and fix it a little, but only with the right tool, and of course with a sharp tool. At the end of part six I say I need to sharpen mine.
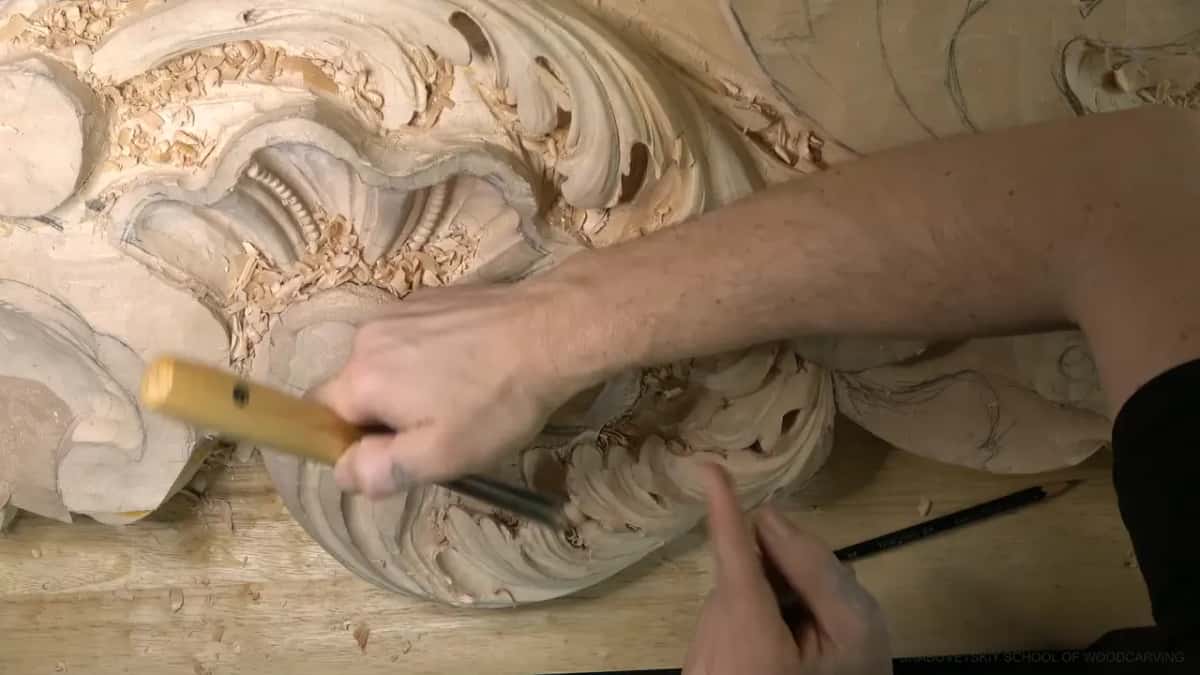
Getting all the way to an edge scares me a little too, as I admit in part three, because I don't want to lose the feel of the overall movement. Part five has a smaller lesson in honesty. Right after the second one I say I think it looks good, and twenty seconds later that I'm still not too happy with it. Both were true. I went on to the other separations, which still needed fixing.
Should the triangles around it be sharp?
On the big spots, they don't have to be.
I looked at the original work of those masters, and in places they used just a gouge and no sharp transition at all. It gives an extra curliness, the way I call it, though I'm not sure it's a proper word. Workshop 14 carries that same word for its extra separations.
In part five I round one transition on purpose, since too sharp there would not look nice.
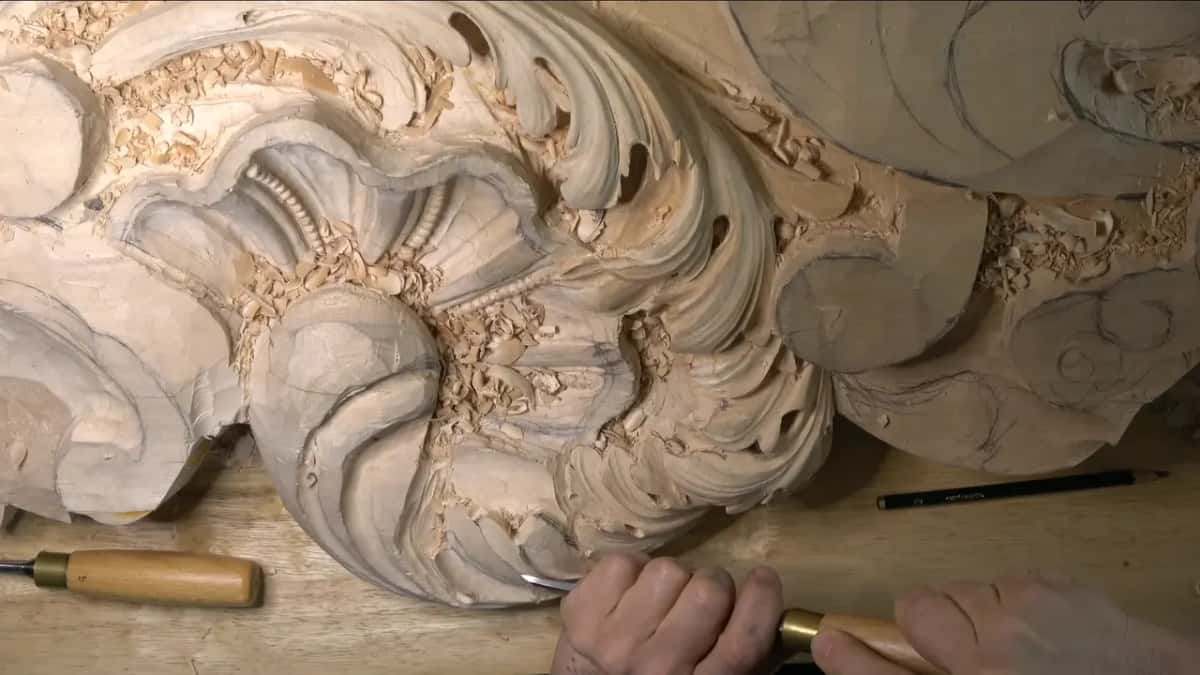
Do you have a leaf on your bench that looks flat under the lamp? Would a hollow in the pipe's place help it? Try one, look at it, and only after that send a small gouge underneath.
The reasoning is all on camera in workshop 15, with the first twelve workshops of this room in part 1 and workshop 16 right after it. Twelve parts, one client's panel, and one gouge I called by the wrong number.
How it's done
- Rough the lobe to its curve. Shape the big chunk first, S curve and all, and leave every ridge question for later.
- Find the pipe's natural line. Find the line a convex pipe would take through that chunk.
- Stand the cut off the line. Start the concave inside the lobe, clear of the separation.
- Try it before committing. Study the first pass before going deeper, since a hollow you dislike can still be shaved back.
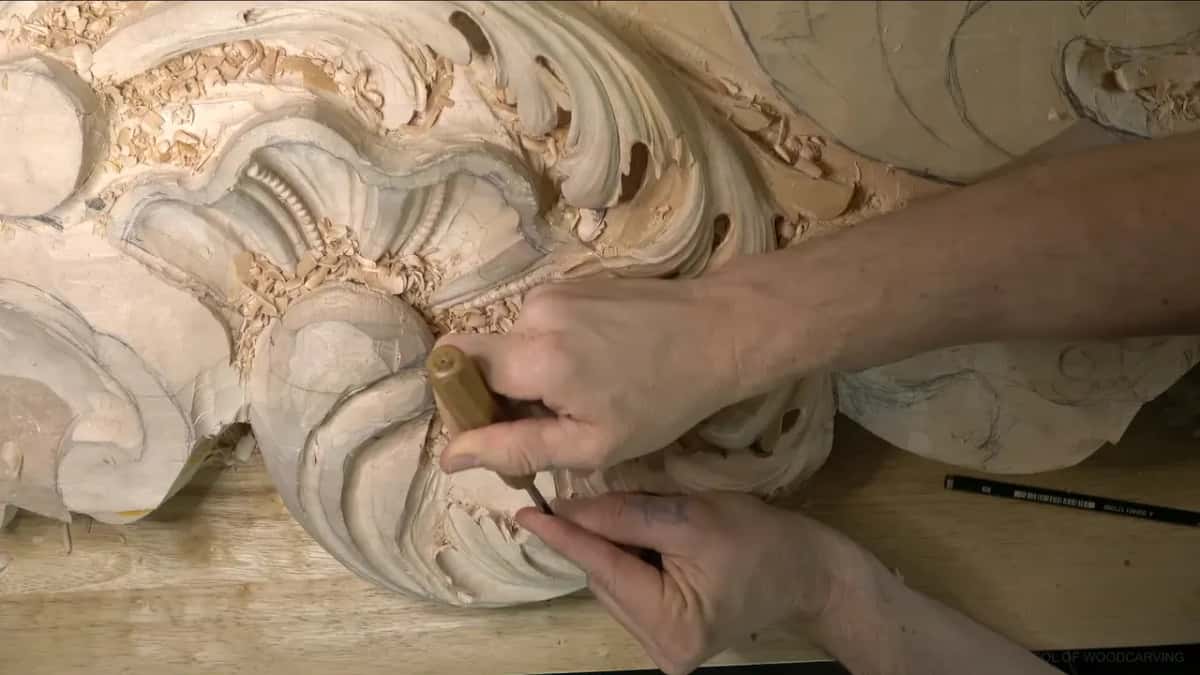
- Deepen with the small eleven. Send the small eleven underneath the concave until the shade looks dark enough to you.
- Blend into the earlier cut. Carry the hollow a little farther along the lobe, blend it into the previous cut, and keep the overall shape of the leaf whole while you do it.
- Clean what pulls the eye. Tidy anything that distracts.
Frequently asked questions
Is a hollow pipe a mistake in an old carving?
Old work used it, going by the originals I've looked at. Logic would put a rounded ridge there, yet the concave makes an interesting detail, and on this client's panel I call it authentic, the very thing those carvers did.
Which gouge makes the extra shadow?
A number 11 at 3 mm, roughly an eighth of an inch wide, cuts beneath the concave. In part ten a larger gouge shaped the hollow first, a number nine, after I called it an eight on camera and corrected myself.
Does every Venetian acanthus leaf have one?
Only some of the originals show it, and I call it a trick, not the rule. Most of the time a pipe stays a convex ridge with a concave beside it. Part two has one of those, started with a number eight.
What to carve next