

Alexander Grabovetskiy, woodcarver, School of Woodcarving · Published 2020
How do you carve the stem and ribs of a leaf in relief?
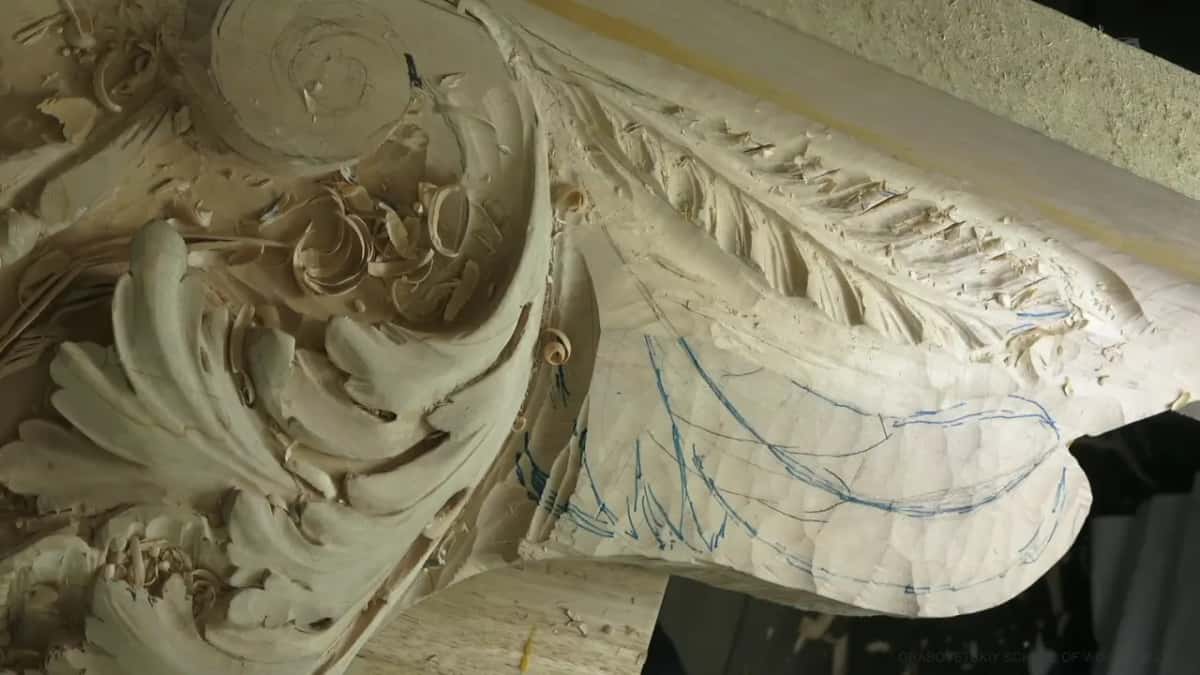
Quick answer: A ribbed relief leaf is built around its stem, and on this one the stem came first. I opened a shallow hollow each side of the middle line with a 10 mm (3/8 in) veiner, set ribs about an inch (25 mm) apart running into it, rounded them with a bent tool, then gave the stem a shadow line.
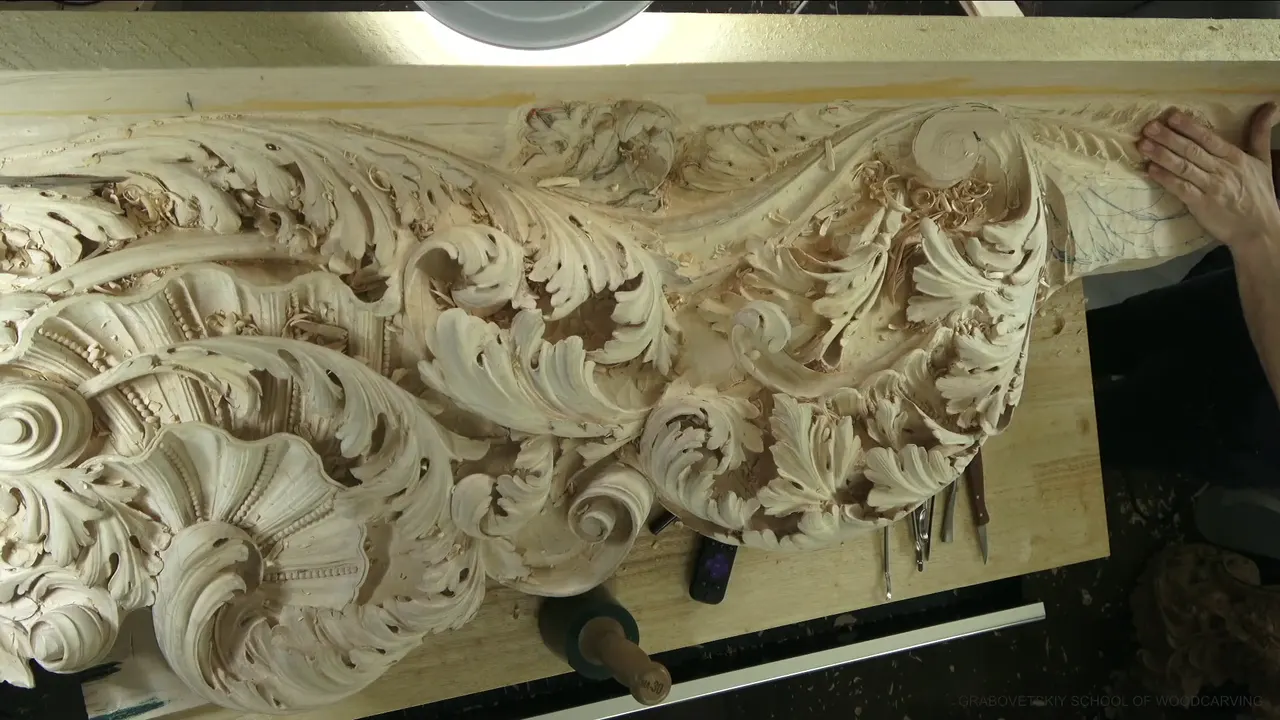
Carving the stem and ribs of a leaf in relief is a job done in a set order. The line down the middle comes first. Then the ribs go in, each one running toward that line, and then one narrow pass beside the stem lifts it off the ribs with a thin shadow. Relief carving leaves on a ceiling board goes slowly, and this one took most of workshop 61 of the Venice Room.
Have you ever turned a real leaf over in your hand? Did you see the thick line down its middle, with thinner ones running into it from both sides? Then you already know the plan. I'll give you my order on one real board, the tools and sizes I picked up, and the spots where I slipped.
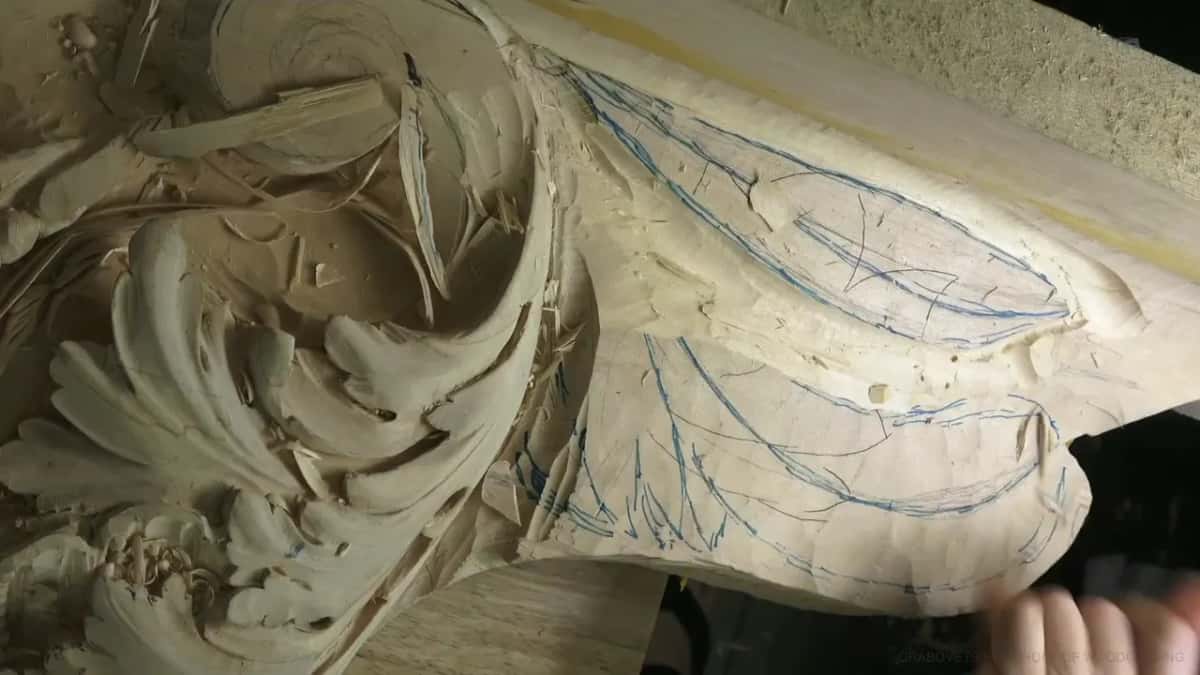
Five moves that set a stem and its ribs
The middle line comes first.
Ribs go in next, checked by hand at 25 to 27 mm apart, an inch or so, and every one runs toward the stem.
An Ashley Iles number 8 clears the wood in each gap, and a bent tool rounds the ribs.
The stem gets shaped from one spot.
A veiner run along the stem almost undercuts it, and that pass gives the leaf its shadow line.
What does the stem do on a carved leaf?
Every rib runs into it. I put this element in because I found it was original to the Venetian style. Before a single rib went in, I made sure the middle line would stand out, and a few minutes later I said everything on this leaf is supposed to go to the center.
The whole element is based on a central concave, with the movement going in and then out. My first pass was a concave on each side of that line, carved the way I would carve a pipe, with the same tool, a 10 mm number 11, three-eighths of an inch. That pass went about 3 mm (1/8 in) deep, and later I warned anyone repeating the leaf not to go too deep in one pass.

The right side of every stroke comes out clean for me, so I stayed a little away from the center. Just slightly. My middle line also had to sit at the same level as the first transition I carved around it, and toward the end it would not be as deep. When I wanted the middle line more pronounced, I had to blend the ridge beside it, and for a second I thought I couldn't. Then I found I could, from the right position. Sometimes that helps.

How far apart do the ribs go?
About an inch, which is 25 to 27 mm, a little more in some places and a little less in others. On this leaf the ribs are what I call pipes, and they give it its movement.
This element repeats the busyness of the shells around it, and it is spread at about the same distance. Put your hand on it and move it along, and it comes out about the same everywhere. That spacing is strategically designed.
I carved the hollows left and right of each rib with a 7 mm number 11, a little bigger than a quarter inch. A quarter inch works too, and so does 6 mm. They all run to the stem, the middle part, if you can call it a stem. One side of each rib came out clean and the other did not, so I stopped and gave the tool a strop.
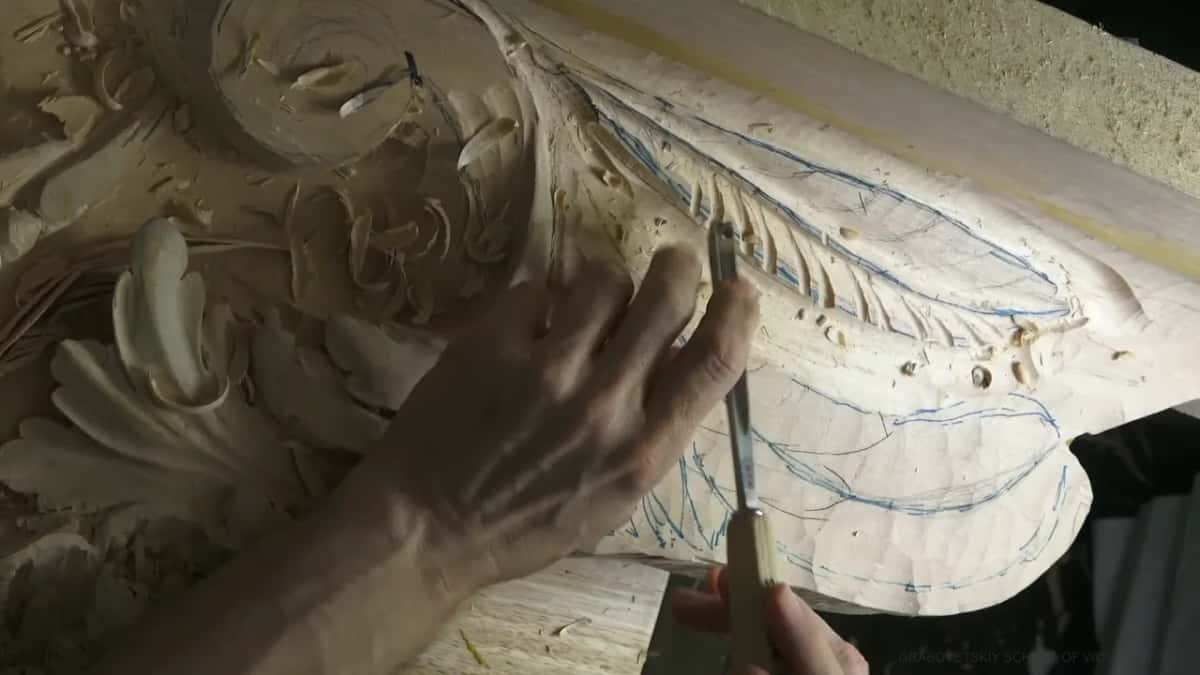
In one tight spot there was no way to use a straight tool. I pulled a 7 mm spoon veiner, a front bent one, did the upper part first, then turned and worked toward the stem wherever I could reach. And it is not a feather, by the way, even if it looks like one. It is some kind of leaf. Which way the veins of a leaf should point is its own question, and a Hashemi flowers lesson answers it.

Why did I take the stem down after carving it?
I caught it with my tool while working toward it, a mistake I shouldn't make, and it stood a little too high anyway. So I took some of the height off.
The marker came off at the same time. By then the marker lines were a distraction to my eyes. I could not see the true middle line, and I still needed to find it.
A little before that I had slipped outright. The tool ran and left a stroke right in the middle part that I never wanted there. No bueno. Later in the workshop I said what mattered most right then was to establish the true line in the middle of the stem, and then round it.
Which gouge goes between two ribs?
An Ashley Iles number 8 of about half an inch, maybe 14 mm, carved the concave between each pair. It was preliminary work, taking out most of the waste, and at one point I got too quick again, but it was okay.
Before I carved more, I checked which spots on the design were the right ones and which were the wrong ones, because I didn't want to do the wrong ones. Then I told the camera not to worry about losing the concave between the ribs. It gets deeper later and more three dimensional. All I needed right then was space for the tools to get in.
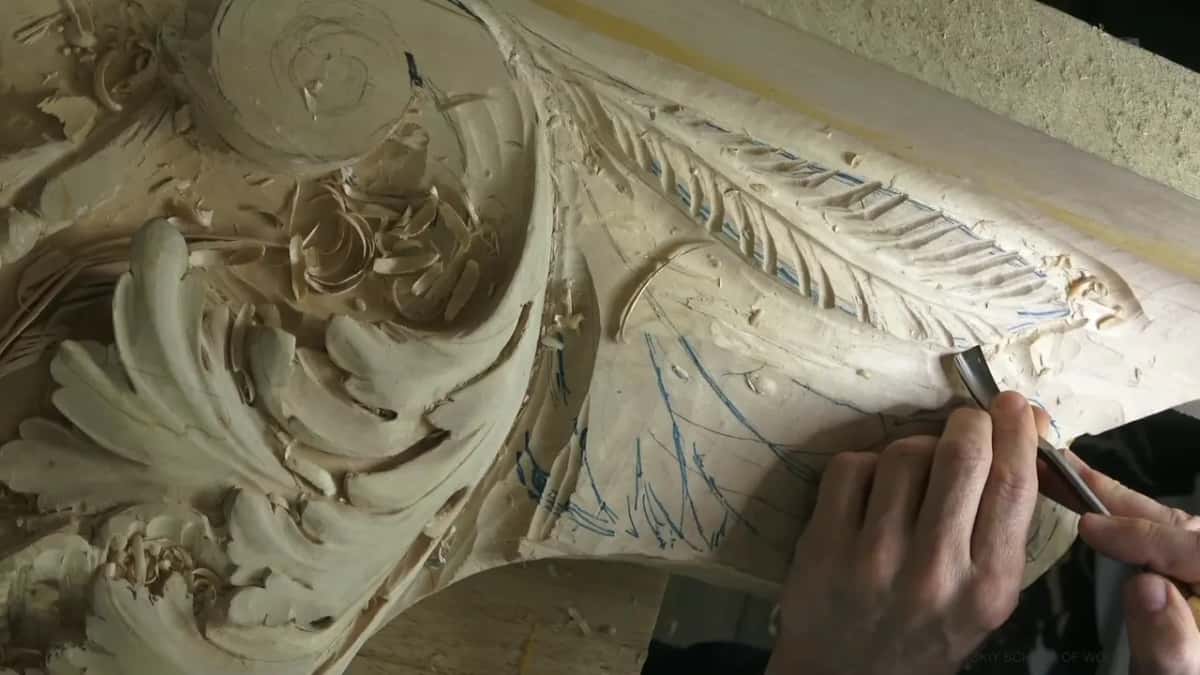
To clean the inside I tried a number 11 of about 5 mm, then a straight 7 mm one, to see whether I needed the spoon at all. On the other side I went a little deeper and did use the spoon, the same 7 mm. For more depth, all the way up, I took a number 9 of 13 mm, and where I almost lost the detail I dropped to a smaller number 9 of 10 mm, three-eighths of an inch.


How does a rib get its roundness?
Each rib needed half of a round shape, and for that I believe there's no better tool than a bent one, especially in a spot like this. I let it dig into the sides a little, and that is absolutely okay.
I told the camera how much dimension it gives, then added, not dementia, dimension. Later the ridges on top of the ribs came up too sharp, and a rib should not be sharp. I knocked them down. Even if I liked the shadow a sharp ridge threw, it had to be a little smoother.

Some of the inside I could have cleaned and didn't. I kind of like it when a gouge leaves marks. It gives some life, even inside a hollow, and I can always put marks back with no problem. This board will be paint grade anyway, so I did not worry too much about perfection.
Every tool that touched this leaf
The kit for all of Part 5 has its own page in workshop 50. These are only the tools this one leaf asked for, with the sizes I said out loud. I love English-made tools, German-made and Swiss-made ones too, and Austrian ones like Stubai.
| Tool | Job | Where |
|---|---|---|
| Veiner, 10 mm, three-eighths | A shallow hollow left and right of the middle line, the first pass of all | Along the stem |
| Smaller veiner, 7 mm | Hollows beside each rib, an inch or so (25 mm) from the next | Every rib |
| Spoon veiner, 7 mm | Spots by the stem that no straight tool could reach | Close in |
| Ashley Iles #8, 14 mm | Waste out of each gap, as preliminary work | Between ribs |
| Quarter inch back bend | The two sides of the stem, from a single spot | Stem sides |
| Knife, my number 12 | Every edge brought to one smooth transition at the end | All edges |
Can you carve both sides of a stem from one spot?
You can, if your tools are really sharp. There was no way for me to come at this stem from the opposite direction, so I worked both of its sides from one position, and that meant carving against the grain.
The tool was a number 5 back bend, a quarter inch. I weighed a number 3 against it, then picked the 5, and brought each side in closer to the center line, starting at one end and going all the way along. That line had to flow nicely, and from above you don't even see it.

Going that way I barely put any pressure on the tool. Hardly any. Where waste had to go, I came at it from the right position, which on that spot meant carving toward myself. I'm sorry my hands covered it on the video. What can I do?
What does the shadow line do in relief carving leaves?
It separates the stem from the ribs. Once the middle line was set I could have left it like that, but that was not what I was after. I wanted to see a shadow cast.
So I took a number 11 to the side of the stem, a pass I called almost undercutting. I left no more than an eighth of an inch, about 3 mm, between the center line and the end. Only for the shadow line. It made sense to me not to rush.
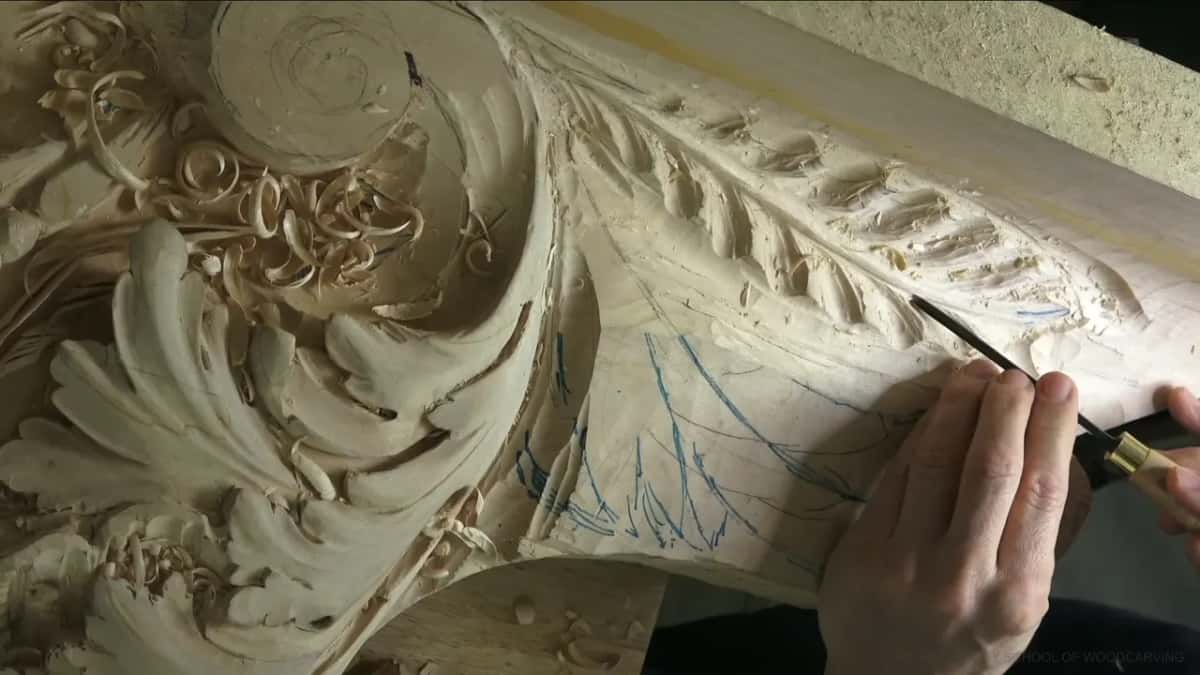
At a spot where I stopped, the shadow was already there. Then every rib came into that line. All of those strokes run to the center and flow together, and the shadow gets really narrow toward the end. I didn't want to overdo it, or underdo it either, because it's all about light and shadow.
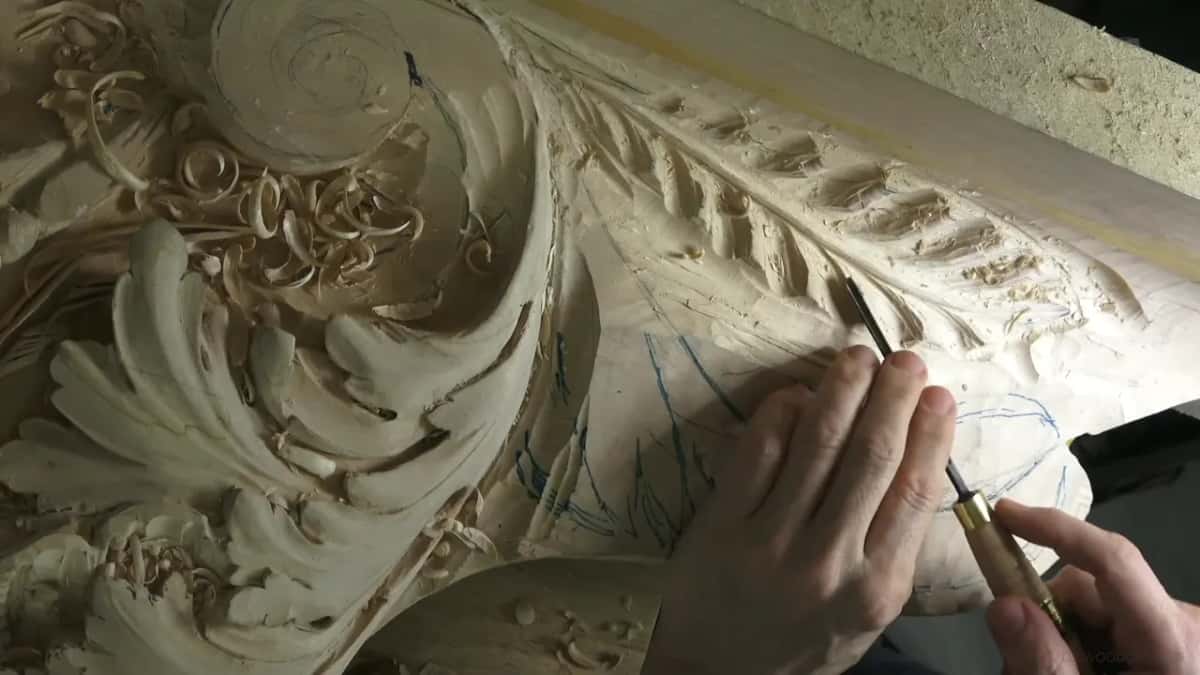
Then a back bend, a number 5 of 6 mm or a quarter inch, did the final shaving, or the semi-final one, and a veiner cleaned up at the vein. The other side of that stem I carved off camera, since my head and the light would both have been in the way.
What happens along the outside edge?
It gets a little waviness, set with a 14 mm number 9, a half inch, pushed straight down along the boundary. Then a small number 11 started the undercutting.
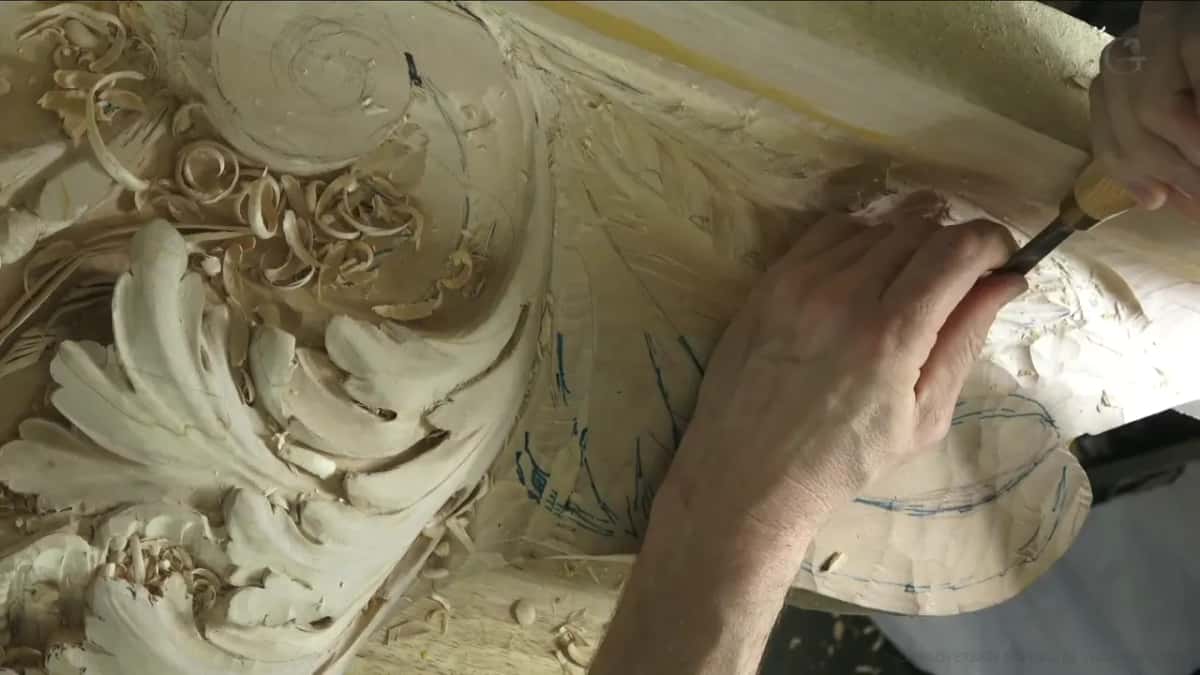
I had two ways to go from there. Excavate first with the veiner to set the boundary, or make the plug cuts first and follow with the number 11. Here I thought the second was the better idea, so a quarter inch gouge went in pointed toward the inside, a little at a time, and never too close to the edges.
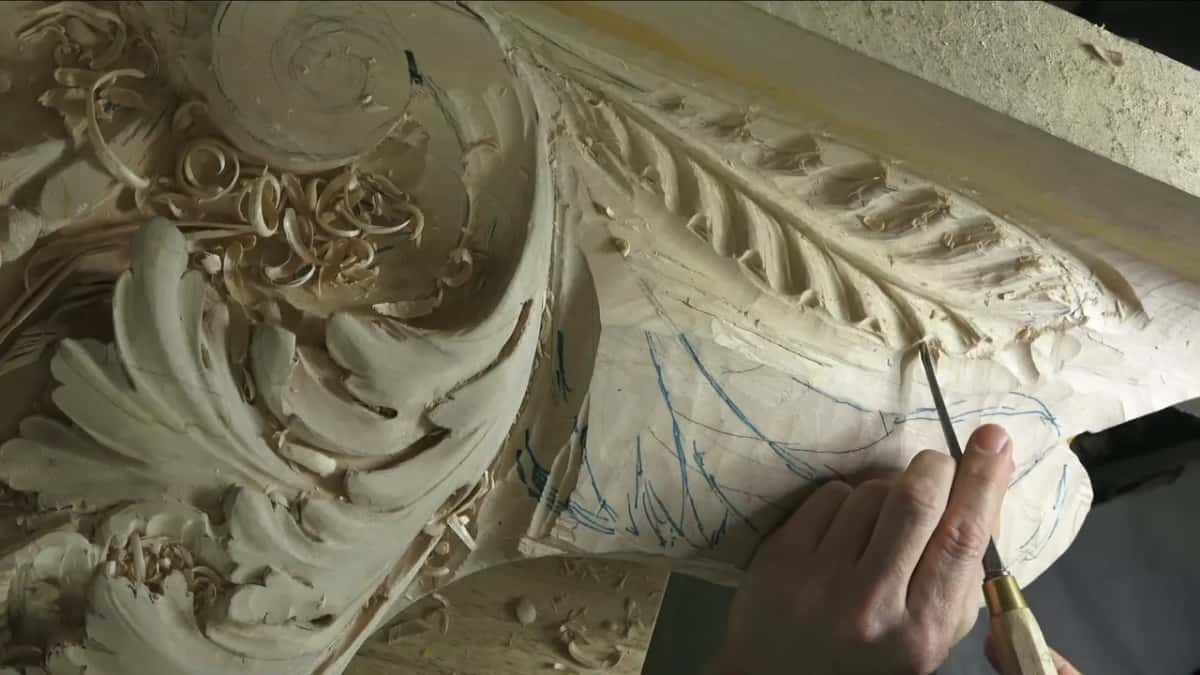
The goal was a hole clean enough to stay invisible to the human eye. A number 11 of 3 mm, an eighth of an inch, took everything down into that hole and under it. Later on an acanthus goes underneath and there will be a flower, so not all of this will be seen anyway.
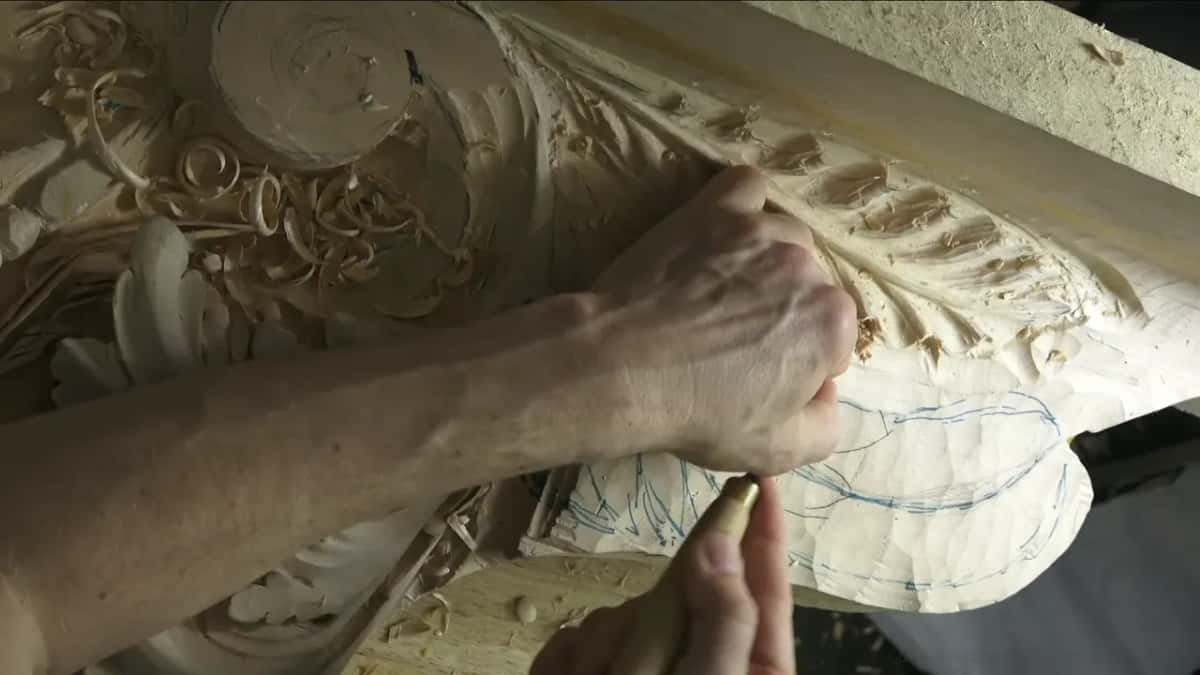
I kept away from the true ridge on purpose. When I'm ready to clean it one hundred percent, a number 5 takes everything to the edge. With so much excavation still to come around it, I was not going to risk that yet. Keep it strong.
Which knife takes a leaf to its edge?
Pretty much any carving knife will do it, though my favorite, as of now, is my number 12. Maybe there are better knives, and I have no doubt of that. That one has never failed me in many years.
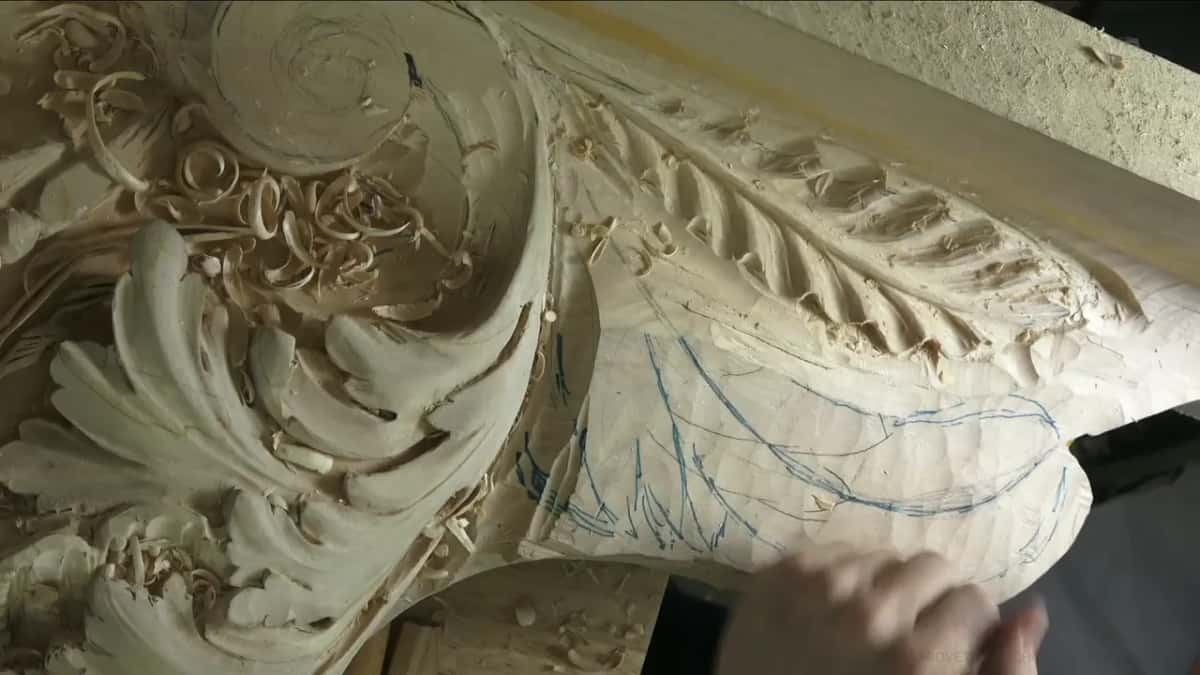
With it I brought everything to the edge in one smooth transition, because I did not want to see any sharp transitions. By the end I said that is probably how I should clean those walls, with just a knife. I had been filming and talking pretty much all day by then, and I was tired of talking, so most of the rest I did off camera.
What comes next on this board?
An acanthus that sticks out from a flower, which gets attached later, with a corbel joined below. The board there is 8/4 stock, about two inches, maybe an inch and 15/16 (about 49 mm), and I kept that mass for the joint, probably with the big Festool Domino tenons.
I lowered part of that section with a number 6, about 25 mm or one inch, carefully, because the grain runs along it. How an acanthus gets shaped in relief is its own lesson.
This leaf was first set in at the end of workshop 60, and all of Part 5 of the Venice Room is carved on this one ceiling board. The next stretch is Part 6.
Would you like to watch this leaf go in, rib by rib, with the slips left in? Do you want to see the shadow line up close? Your tuition opens every workshop in the school, and this room is one of them.
One more small thing. When I said my tool should be slicing freely through the fibers, I added that it sounds like a song, almost.
How it's done
- Open the middle line. Run a 10 mm (3/8 in) number 11 along the middle line, once on the left of it and once on the right, the way you would start a pipe, and stay a hair off the center.
- Space the ribs and hollow them. Set the ribs close to an inch (25 mm) apart and carve both sides of each with a 7 mm veiner. Where no straight tool fits near the stem, take a front bent one.
- Clear between the ribs. Take the waste between two ribs using a number 8 of about 14 mm (1/2 in). Leave it preliminary, because the concave gets deeper later.
- Round the ribs. Give each rib a half round shape with a bent tool, then knock down any ridge that comes up too sharp.
- Work the stem from one position. When the opposite direction is closed to you, shape the stem's two sides from where you stand with a quarter inch number 5 back bend, sharp, and with almost no pressure against the grain.
- Almost undercut the stem. Take a number 11 down the stem's side, leaving no more than 1/8 in (3 mm) between the center line and the end, and bring every rib into that line.
- Take the edges down with a knife. Once the digging around it is done, work each surface right up to its edge with a carving knife and keep the transitions smooth.
Frequently asked questions
Is the leaf in workshop 61 an acanthus?
Close, but I said on camera that it is not. I called it some kind of leaf from fifteenth or sixteenth century work, with a few acanthus traits, and admitted I have no idea what it is. Carvers who did acanthus every day saw its movement everywhere, which is how I understand the pipes on this one.
What if your hand has nothing to rest on?
You carve almost like airbrushing. Down by the stem, something on the board sat in my way, and I could not reference my hand on anything. In another spot that was almost impossible to carve, I kept building the shape up with a smaller tool.
Why does a carved leaf look flatter on video?
Camera position does most of it. Mine sat on a slope, part of it flat and part already turning onto the ceiling, so the lens saw it shrunk. On a screen you never quite get the true picture, and in real life a carving always looks better.
What to carve next