

Alexander Grabovetskiy, woodcarver, School of Woodcarving · Published 2020
How do you carve a half round molding by hand?
Quick answer: A carved half round is a strip left standing with a rounded top, almost like a pipe. On a Venetian ceiling shell I sank a narrow veiner groove beside mine, set a number 8 in that groove to round it, then smoothed the leftover ridge away with a number 6.
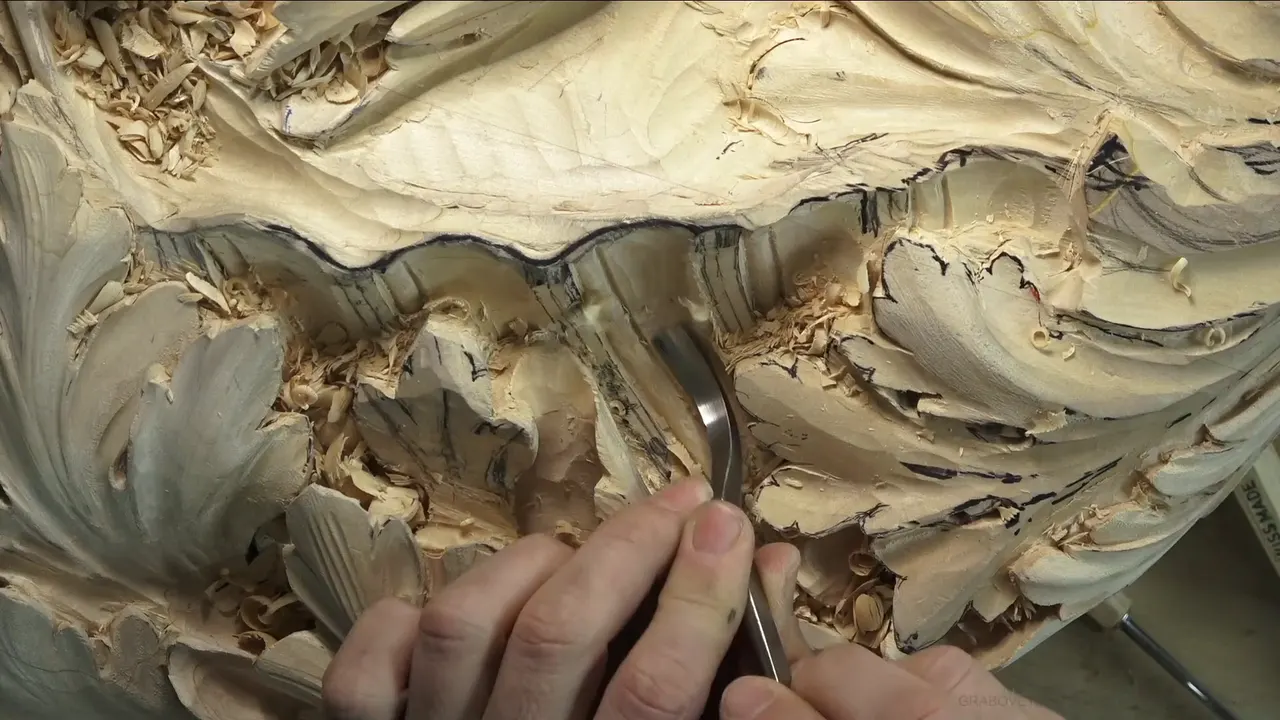
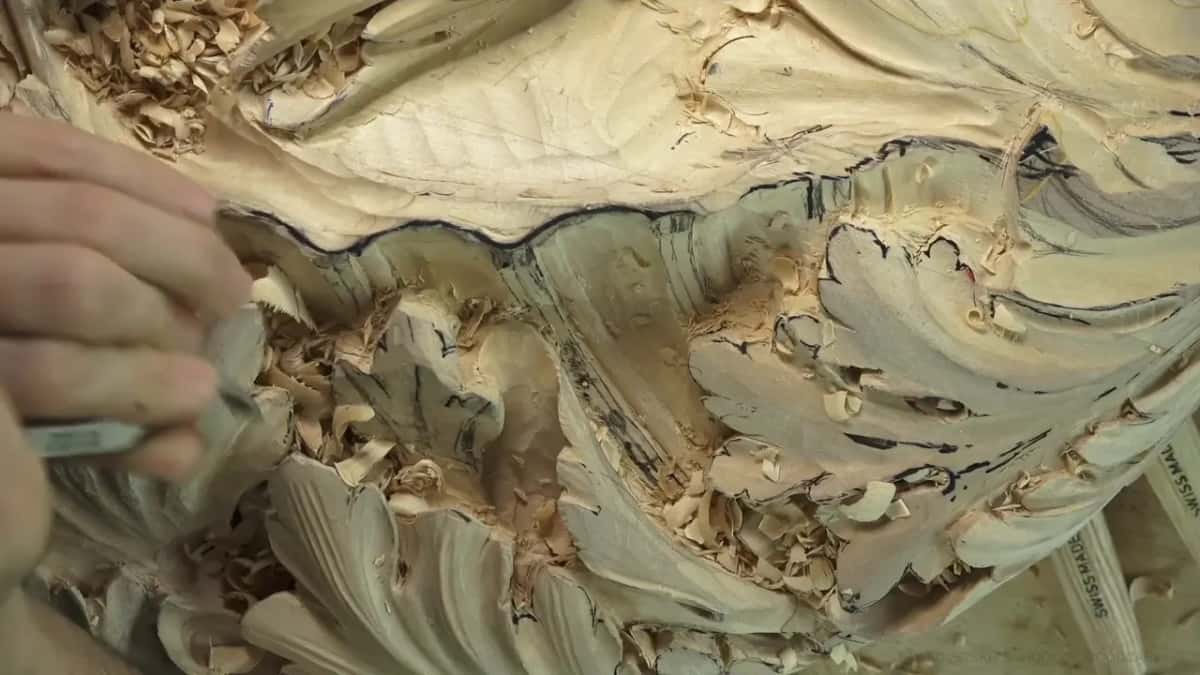
A half round molding is a strip of wood with a rounded top, carved in place with gouges. In workshop 57 of the Venice Room I carved one along a shell on a ceiling panel. A 2 mm (5/64 in) veiner sank a groove beside it, and a number 8 set in that groove rounded it from both sides. That 8 left an almost half round. With a number 9, a true half round gouge, I could have gone all the way, but I kept the 8, and a number 6 cleaned away the ridge it left along one side.
Have you ever run a finger along the rounded edge of a picture frame? Did it feel like one smooth curve the whole way? Carve the groove first, then round the strip from within that groove, and you can get the same curve by hand.
I'm going to be honest with you. I broke one of those thin ridges in this workshop, on camera, just after I'd warned you about it. You'll see that too, along with the tools I picked up in order and how deep the groove went before the wood told me to stop.
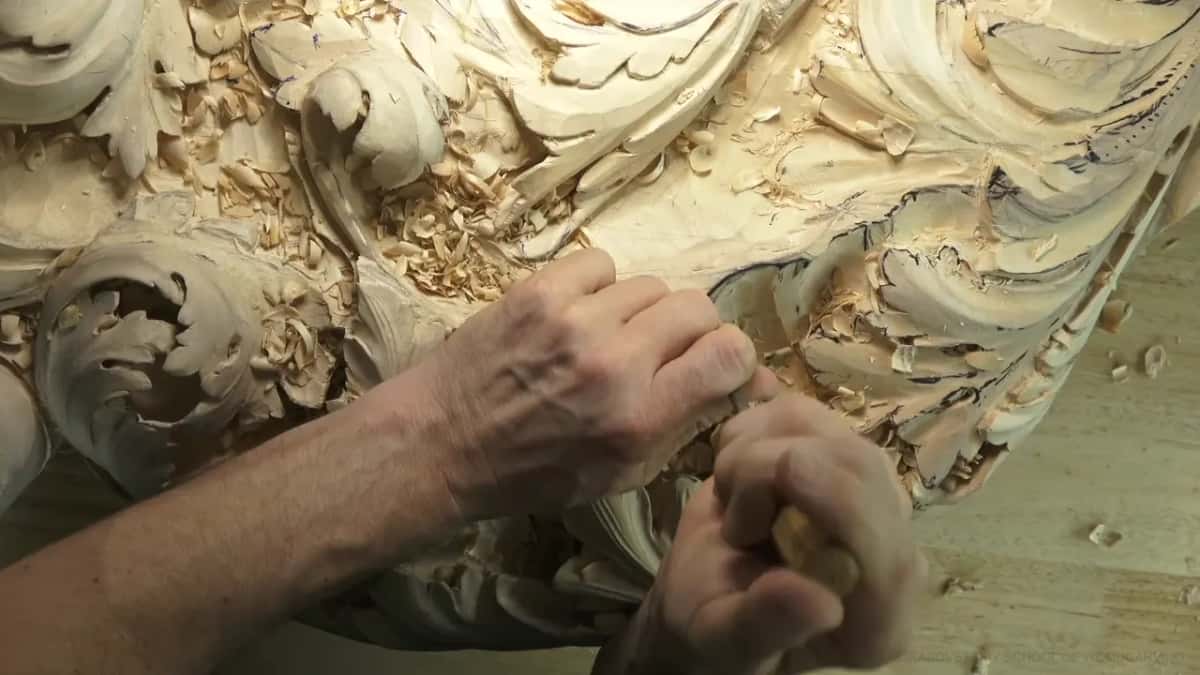
The design is Rococo, so shells go almost everywhere on this ceiling, and I have to add them all. This strip belongs to one of them. Later it turns into a row of beads, and before any of that it has to read as one clean round, from the floor and from anywhere else in the room.
Six things I watch on a half round strip
Before any rounding, the groove goes in, because the rounding works from inside it.
When the thin ridges on either side begin to crumble, a small veiner has gone as deep as it can.
Wider veiners open the groove, and the smaller ones follow inside it.
Set in that groove and worked from each side in turn, a number 8 does the rounding.
The leftover ridge comes down under a number 6, and the strip becomes one continuous convex.
The mess underneath stays for later.
What does the strip need, if not a half round gouge?
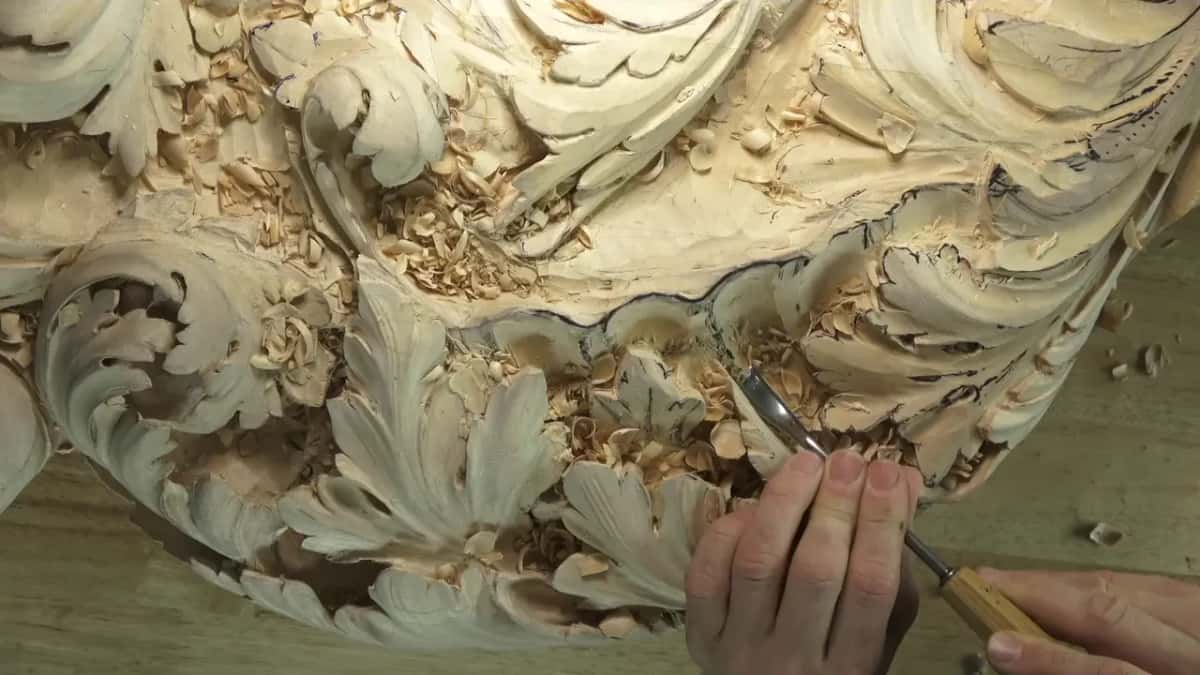
A groove to work from, before anything else. The veiner line marks where the strip stops, and the number 8 rides in it later. Before that groove went in, I roughed the convex beside it with a back bend, a number 3 of 13 mm, about half an inch, Swiss made by Pfeil. The first back bend I picked up was the wrong one, so I swapped it.
The convex doesn't have to be really round. I kept the movement gradual, tangent to the overall movement of the shell, and where one spot had gone a little too deep, I dug its twin a little deeper so the two would match in 3D. Otherwise it looks off. Got to be careful in there, and it's not a handy spot to reach.
How do you lay out the lines before the groove?
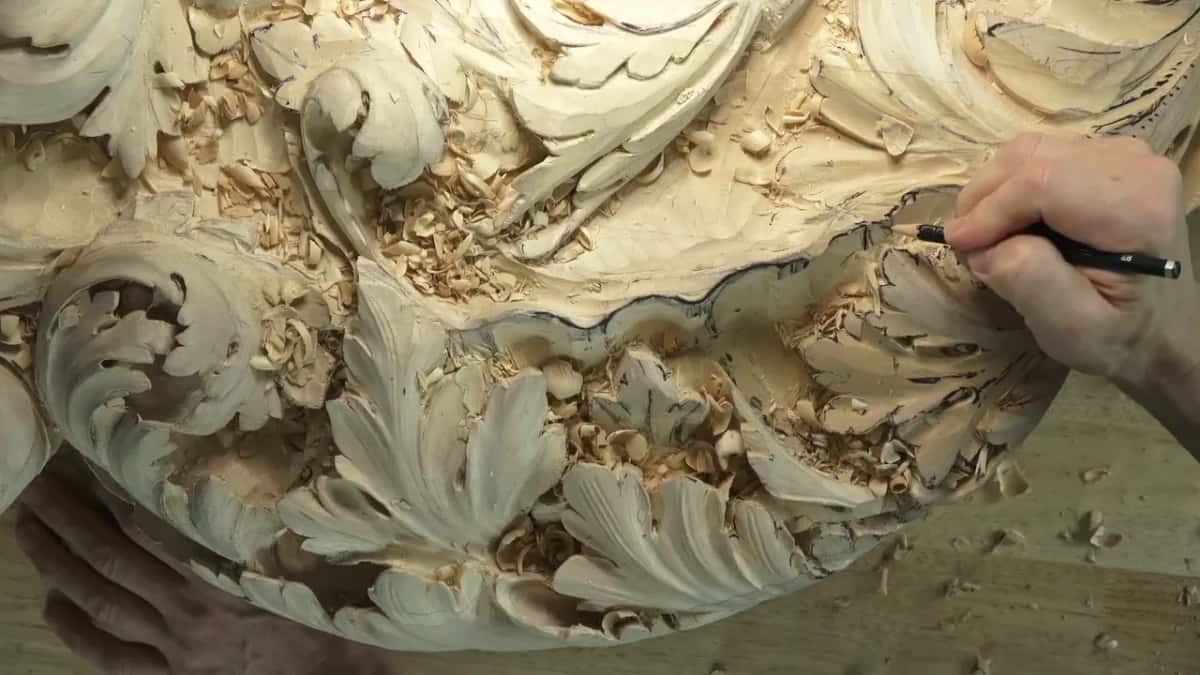
With a pen, one middle line for each convex spot. At one spot I left about 6 mm, a quarter inch, and drew the middle line there. Where the shell ends I widened it to about 10 mm, three-eighths of an inch, and at the far end it's no more than about 5 mm (3/16 in). It has to taper.
Wider, narrow, and even more narrow is how I say it. One of those middle lines matters most, and it has to be a really, really nice movement.
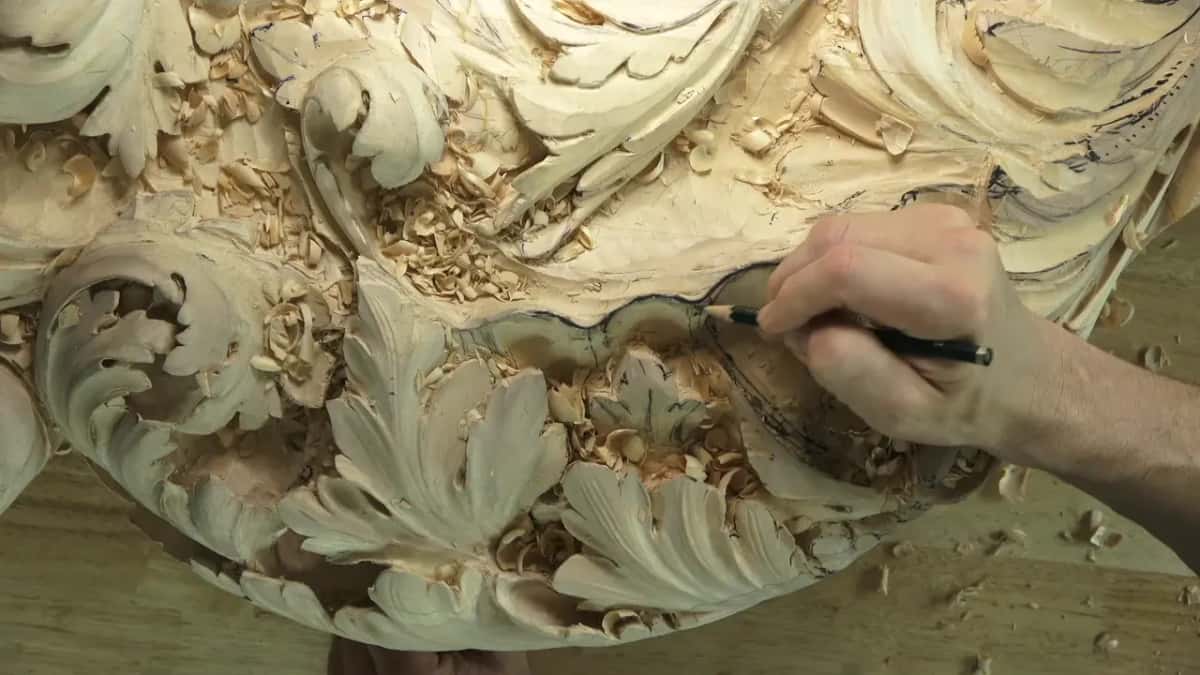
How deep can a 2 mm veiner go?
Until the thin ridges on either side start to crumble. I sank the groove using a 2 mm number 11 veiner, slowly and without rushing, because this line has to be really accurate and really continuous. A couple of millimeters deep is about right, a little more than 1/16 of an inch. You can go a bit deeper, to 3/32 of an inch or so, as long as the groove stays even. Keep an eye on the sides.
Once those ridges crumble, or you see the fibers breaking, that's the deepest this tool will go. That's my stop sign.
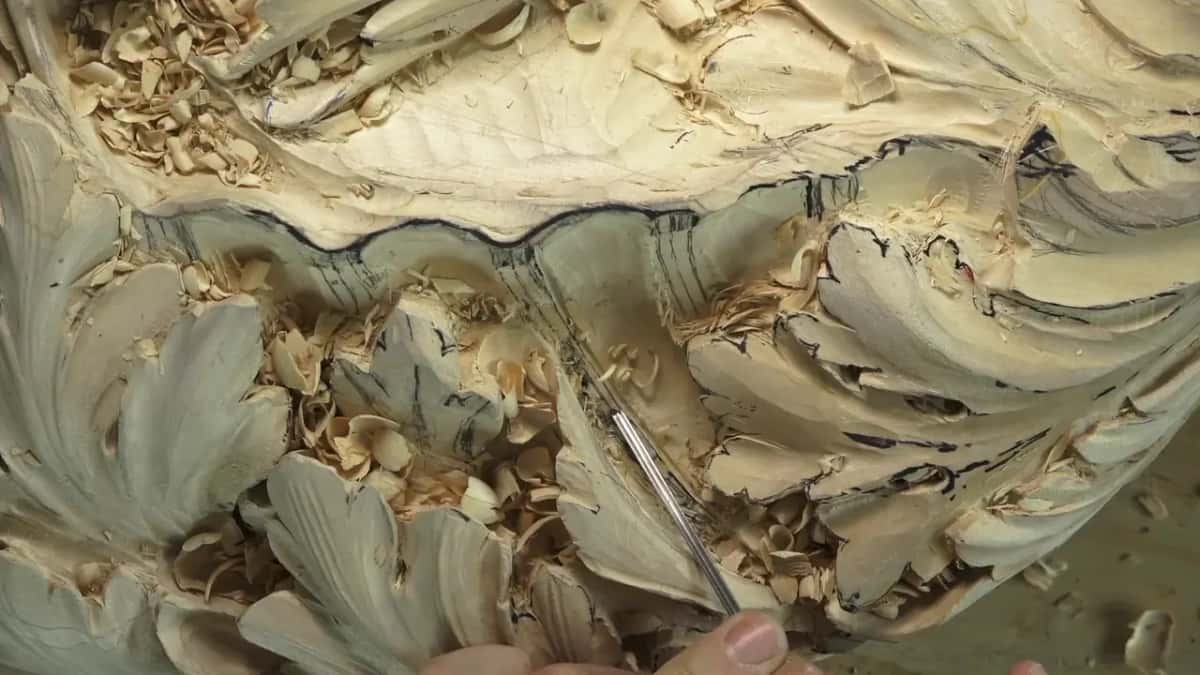
The smaller veiners have to wait their turn. There's a limit to how deep each tool can go, and a thin one breaks those edges easily, so I made a wider space first with the 2 mm. Inside that groove a 1.5 mm (1/16 in) went deeper, and a 1 mm (1/32 in) after it gave me more depth still. The wider space is what lets the small ones go deep without breaking the ridges. My plan was the 2 mm everywhere first, then the one and a half, then maybe the 1 mm later on. Maybe it's an extra step. I think it's a good extra step.
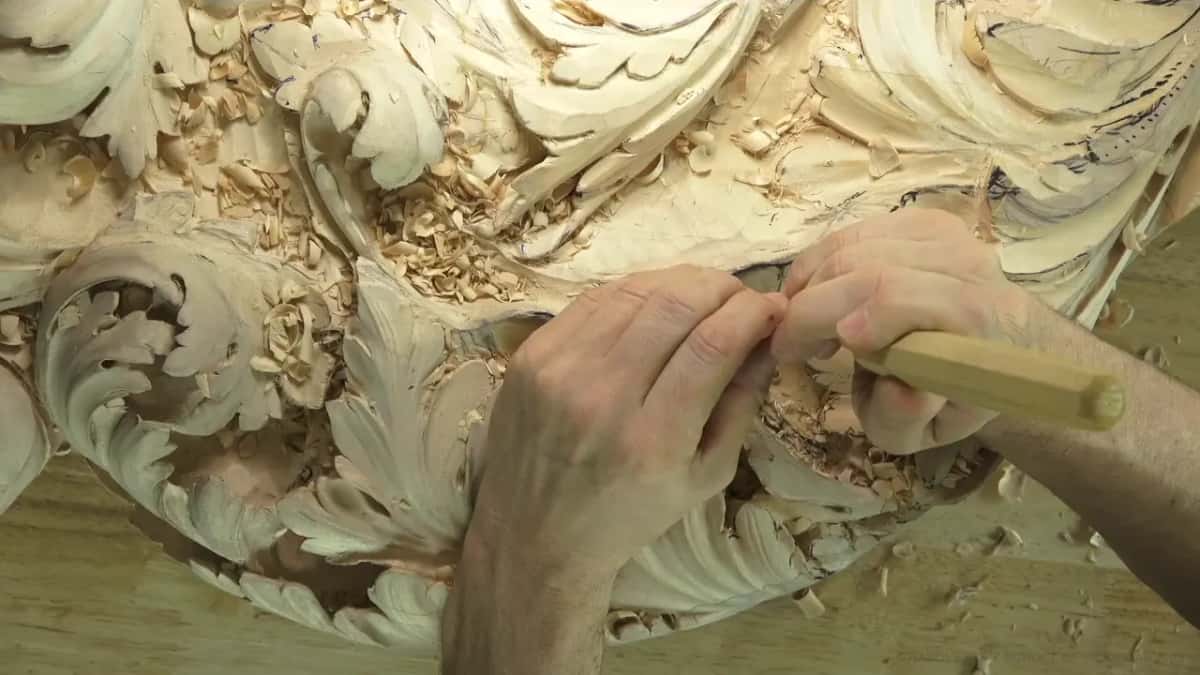
What happens if you push a small veiner too hard?
The ridge crumbles, and I did exactly that in this workshop. I'd just told you to watch the sides, and then I went back in with the smaller one and pushed too much. The groove got too deep in one spot and the edge crumbled, which is what I was afraid of. Not good. It matters most on the side where the beads will go, since a broken ridge there is hard to fix, so I went on a little more carefully.
My hands cover the work for much of this, and I say sorry for it more than once. There was no other way to hold the tool, and I didn't want to stop and move the camera.
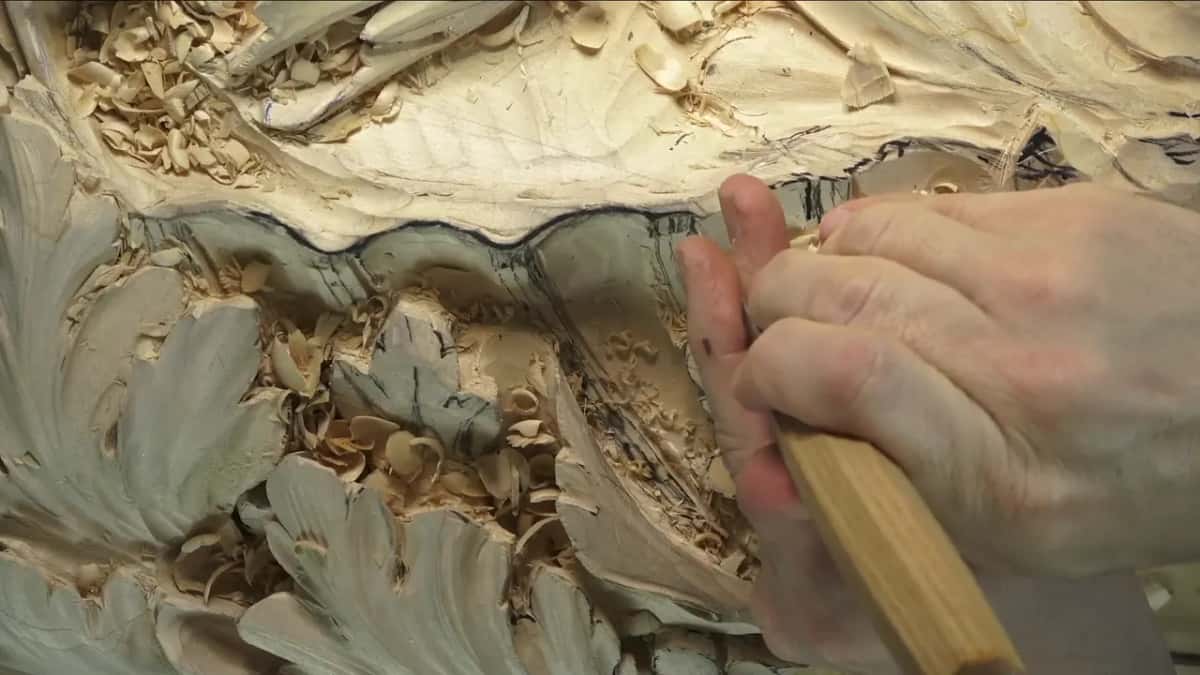
How does a number 8 round the strip?
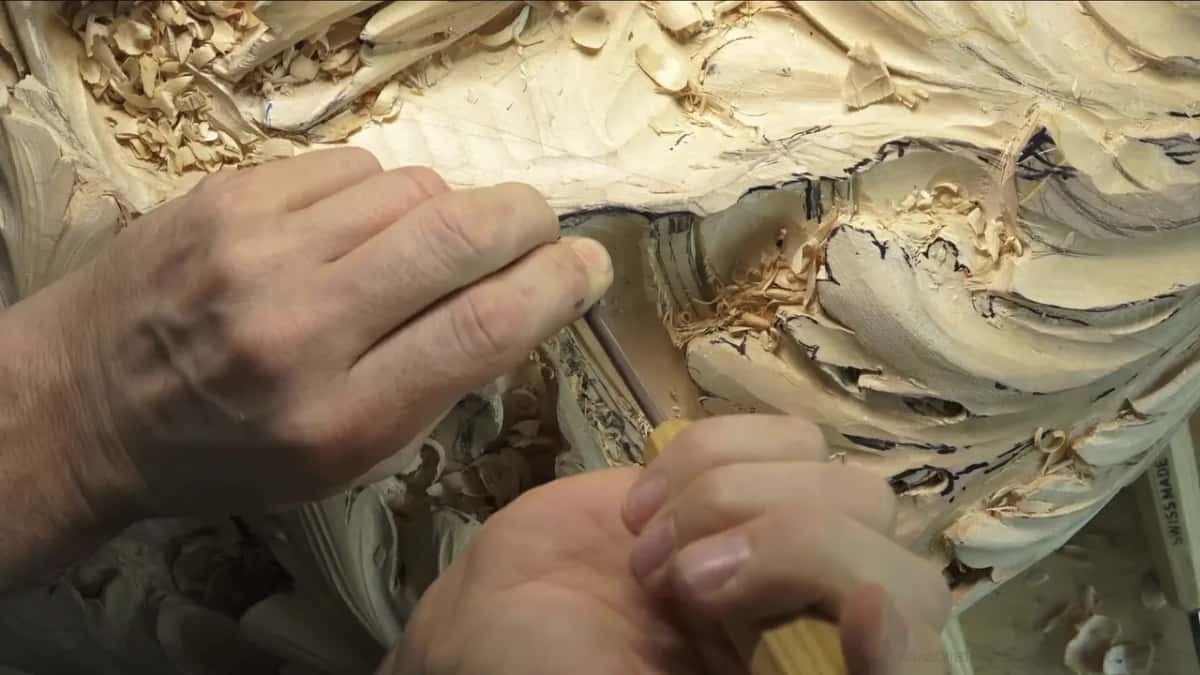
From inside the groove. I set a number 8, 6 mm or a quarter inch wide, right in the groove and just scratched along the opposite side, and I can drag it through instead if I want to. That scratch pre-sets the edge of the future beads. Then I worked it from the other side as well, until the strip came up as one unified line. Ignore the 2 stamped in front of the 8 on that tool; the 8 is the sweep, and the 6 after the slash is the width in millimeters.
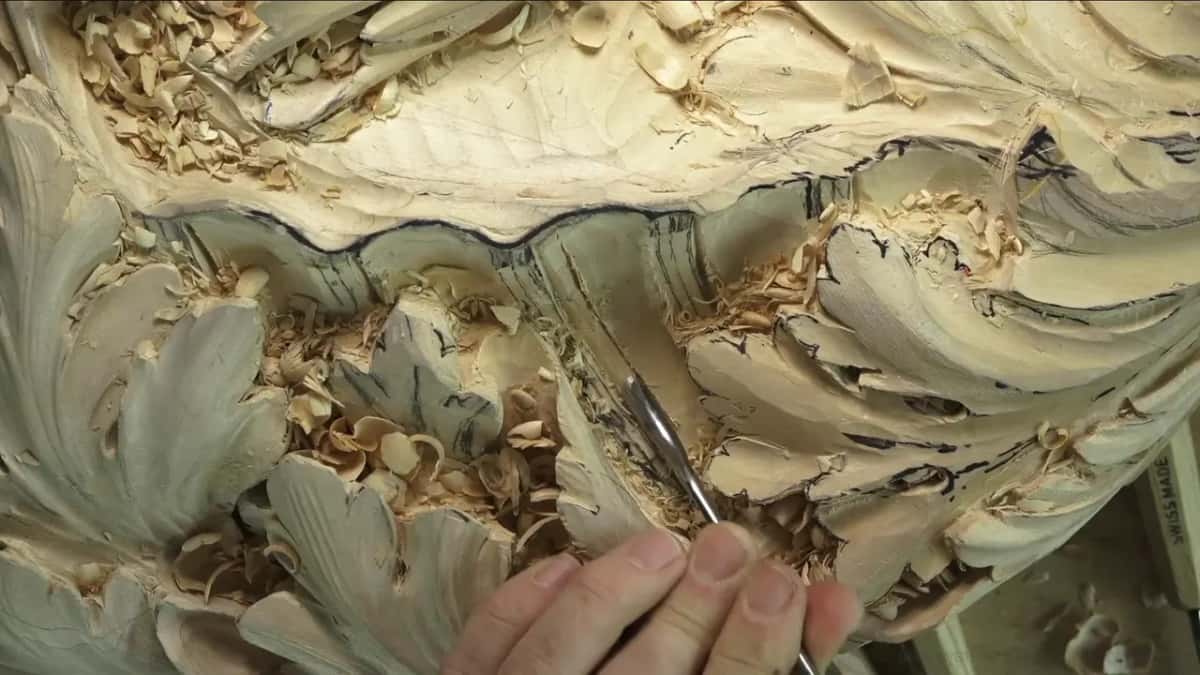
This way has one limit. It doesn't taper, and I like some of it to taper, so I do that later by hitting the sides to make them narrower. In return it gives a unified, really good-looking line for the beads to follow. Don't rush this part. You have to learn to control your hand, and that's really important.
Afterward the 2 mm went back in from both directions to clean up the mess I'd made, and then I used a hair dryer on it. Going deeper this way is risky too, so make sure the curve is really nice first. Once the first section looked right, I went along the whole row right away, section by section, down to the last one.
Which tools did the strip take?
Seven of them, if you count the back bend from the start, before any groove went in.
| Tool | Job | Stage |
|---|---|---|
| Back bend number 3, 13 mm (1/2 in) | Roughed the convex with a gradual, tangent movement | Before marking |
| The 2 mm (5/64 in) veiner | Sank the groove while I watched the ridges | First groove |
| A 1.5 mm (1/16 in) veiner | Went deeper inside the groove the wider one made | Second pass |
| Tiny 1 mm (1/32 in) veiner | Added depth once the wider groove had made room | Third pass |
| Number 8, 6 mm (1/4 in) | Rounded the strip, one side and then the other | Main rounding |
| Number 6 at 10 mm | Cleared the ridge the number 8 had left | Continuous convex |
| Small number 8, about 12 mm | Reached in under the strip where it fit | Partial cleanup |
Why does a round strip look straight on camera?
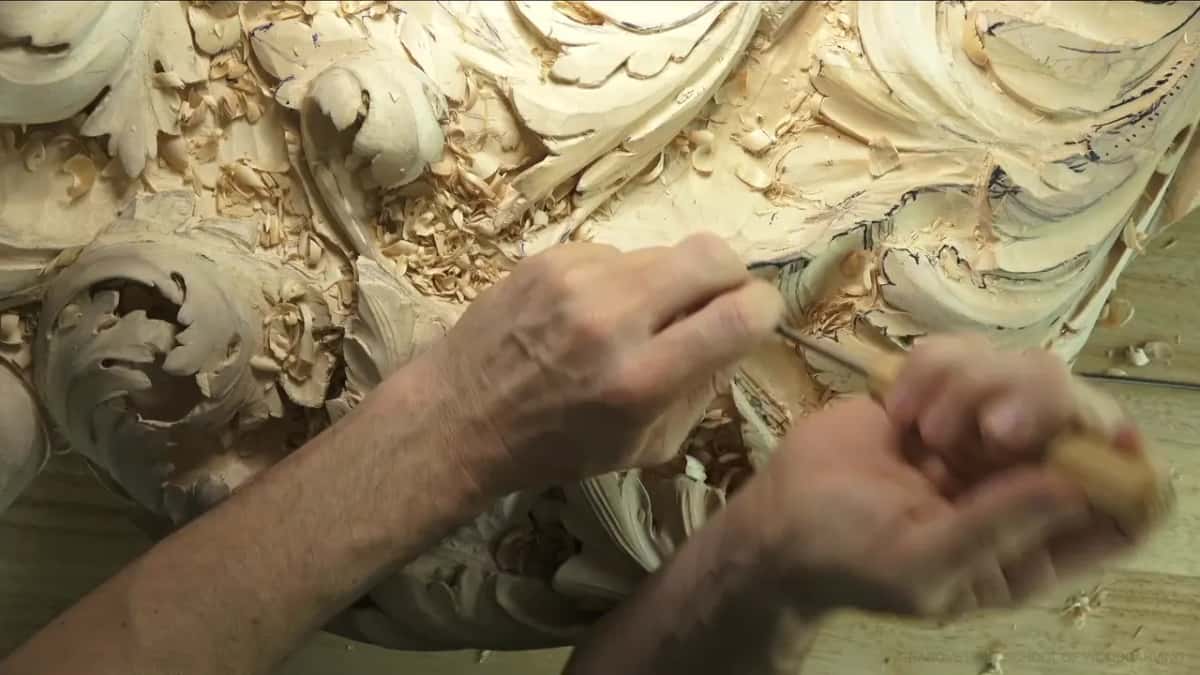
Blame the groove for that. After the number 8, parts of the strip looked almost straight on camera. They aren't. The curve runs on as one continuous line, and it only looks straight because I made the groove deeper in some spots than in others. Don't be fooled by it. I was pretty happy with the overall curve, and I could always check it again later and move it right or left.
The camera sits a little to one side of where I look from, too, so on screen you see spaces that I don't see from the bench. When I moved it, you saw the piece more or less the way I do, and still some space showed. It's also why I keep a big screen TV in front of me while I carve. Editing all those segments, I found spots I'd have loved to change after it was too late, so now I watch the camera's view as I go.

Which gouge clears the ridge beside the strip?
A number 6 of about 10 mm (3/8 in). After the number 8, the strip was a rough convex, like a tube, almost like a pipe, with a ridge still standing on one side. I call that step one, a beautiful convex, and the next job was to get rid of the ridge so the round would run continuous. Left alone, it wouldn't look as nice.
The right-hand side of the 6 left the cleaner surface here, because of the way the grain ran, and the rough side didn't worry me yet. One pipe on this shell matters most to me, since it's the most visible, so I looked it over until its curve was almost perfect, one continuous movement, tangent to the rest. It's got to be.

Where does the groove go once the strip is round?
Into the hollow next to it. With the 6 I carved all the way down to the bottom of the groove, so the concave beside the strip now reaches that far. In one spot I dug the groove a little deeper first, and that gives a lot more shadow. Later I'll undercut beneath the beads, and the rougher line on the left will disappear completely.
Why leave the mess underneath until later?
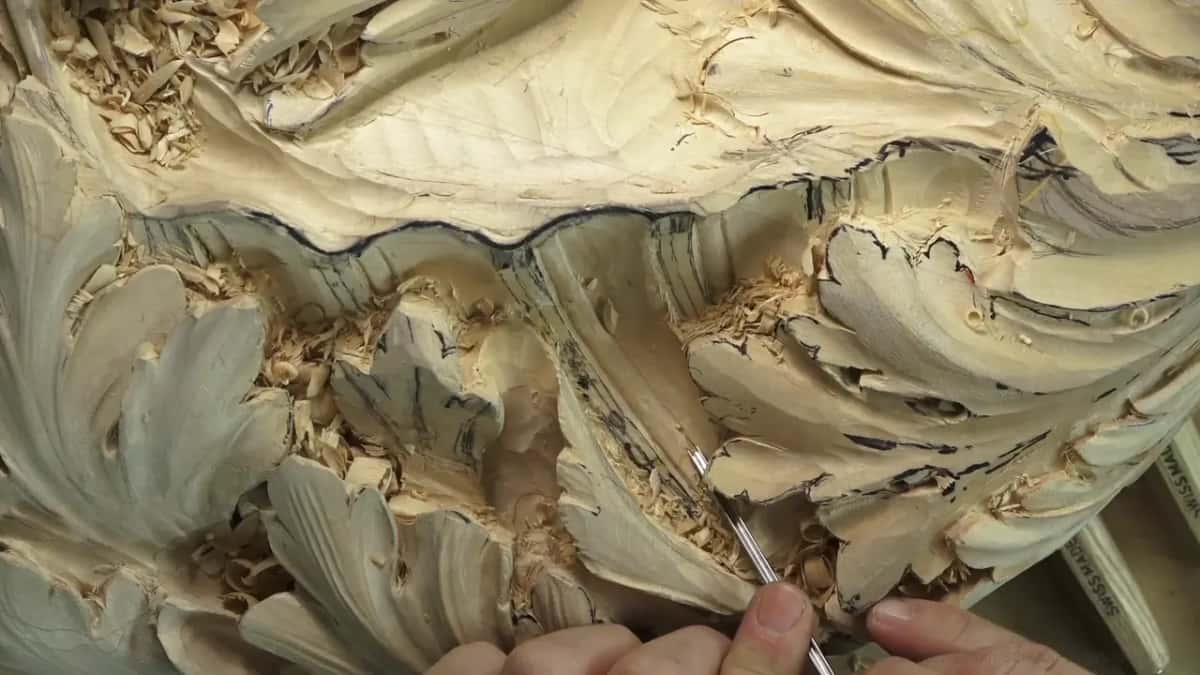
I need solid wood there to lever against. There's a lot of junk under the strip at this stage, and I don't like to look at it, but I don't go after that mess until the main movements are all in. Sometimes I have to crank the tool against an edge, and a spot like that is my leverage point. Finish everything underneath too soon, undercut and all, and I'd break it easily. That would be a big mistake.
Where it fit, I did go in with a small number 8, about 12 mm (1/2 in), and kept it small on purpose. All I wanted then was the main idea in place, and the cleaning could wait. For more on why a carving looks messy halfway through, see workshop 53.
What comes after the half round?
A row of beads. By then the strip was a really continuous pipe, about a quarter inch wide, and ready to be divided. I love that element; it's like jewelry almost, like small pearls set into the shell. Dividing and rounding them is its own job, and the bead molding along a curve from an earlier part of this room shows how I go about it.
Not all of you have as many tools as I do, and I know that. I could carve all those beads with just a knife, and I've done it many times. The workshop after this one turns to a concave molding, a hollow carved under an overhang instead of a round strip on top. If moldings are your thing, there's a whole course on acanthus over moldings, and a clover molding with three rounded faces in another one.

Would you like to carve along with this one?
You can, one short part at a time. The recording comes in twelve parts, each under ten minutes, so you can stop, carve, and start again. Would you like to see the whole strip come up, the broken ridge included? Would it help to watch each tool go in? Workshop 57 sits behind full access to the school, along with the rest of this room.
The lessons map shows where every workshop sits, with workshop 56 just before this one.
One more thing from that workshop, and it has nothing at all to do with the strip or the shell. Keep some first aid wherever you carve, at a kitchen table or in a garage, above all if you work alone. I had to keep Band-Aids in two spots in my shop, because when my children were young, my youngest daughter loved them and put them on without any need, and one day I came looking and they were all gone.
How it's done
- Rough the convex first. Use a back bend and keep the movement gradual. Where one spot goes a little too deep, dig its twin to match.
- Draw the middle lines. Mark each convex spot with a pen. Leave about 6 mm (1/4 in) at one place and near 10 mm where the shell ends.
- Open the groove with the 2 mm veiner. Go slowly and hold one steady depth, a little more than 1/16 of an inch. Stop the moment the ridges give way.
- Deepen it with smaller veiners. Go deeper inside it with the next size down, then the 1 mm, and go easy, because pushing too much is what breaks the edge.
- Set the number 8 in the groove. Scratch along the far side with it, then work it from the other side too.
- Take the ridge down. Work a number 6 along the strip until the rough round becomes one smooth convex.
- Leave the underside for later. Keep solid wood beneath it so you have something to lever against, and undercut the beads last.
Frequently asked questions
Can the groove start with a 3 mm veiner instead?
A 3 mm (1/8 in) works fine where your project has a wider spot, and there's nothing wrong with it; it gives you more room to work. I held to 2 mm on this shell only because the big concave beside the groove needed its space.
How deep should the groove beside a half round be?
About two millimeters, a bit more than a sixteenth of an inch, for the first pass. Stop sooner if the thin walls on either side start breaking up. After that the two smaller veiners can take it deeper, because the wider groove has made room for them.
Could another gouge clear the ridge beside a carved strip?
A number 7 would have done it, and on this spot even a number 5. Mine was a number 6, about three-eighths of an inch wide. I wanted the strip to read as a single convex, and the 6 got it there for me.
What to carve next