
Alexander Grabovetskiy, woodcarver, School of Woodcarving · Published 2018
What is the return on a Roman acanthus eye?
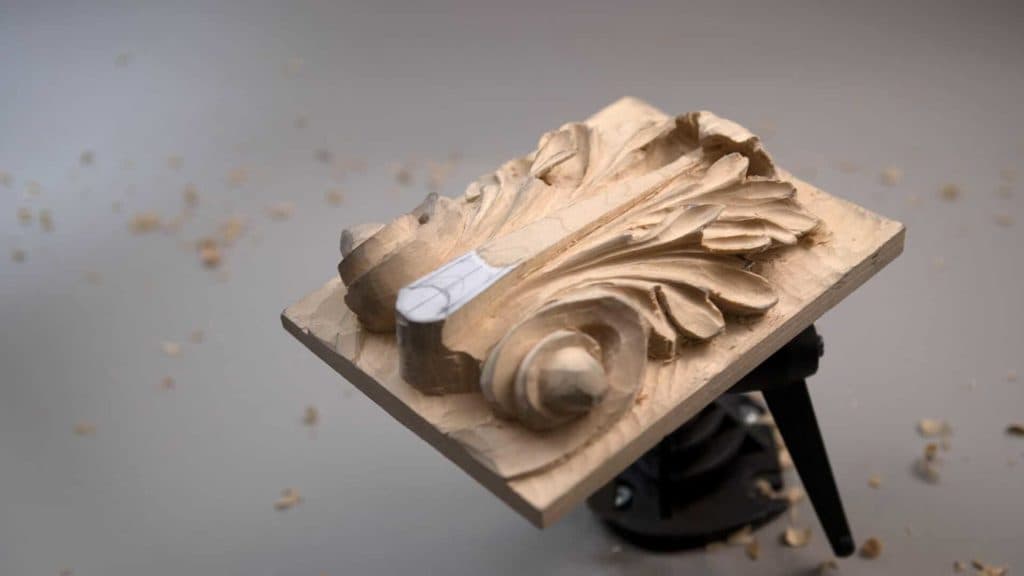
Quick answer: The return on an acanthus eye is a little Roman-style detail that makes the eye and its pipe look like they come out from inside. In lesson 12 I mark it by eye, split it in three, take the pipe down a little with a number 7, and then hollow each part.
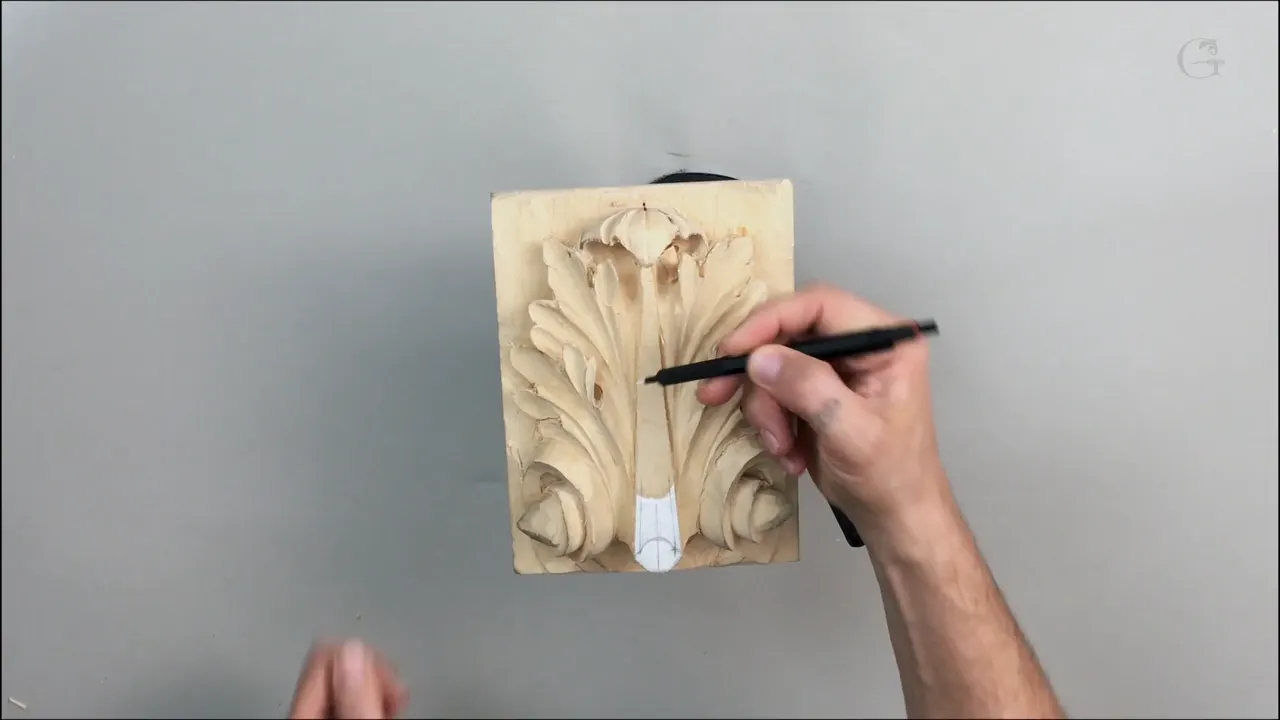
The return on a Roman acanthus eye is a small detail carved into the eyes and pipes, so the form looks like it's coming from inside out. In lesson 12 of my Roman acanthus course I had the overall form, and I said it was a good stage to work on those eyes and the pipes.
I had promised to show you something different, what the artists and sculptors in history have done. We were working on a Roman style, and they added some return on those eyes.
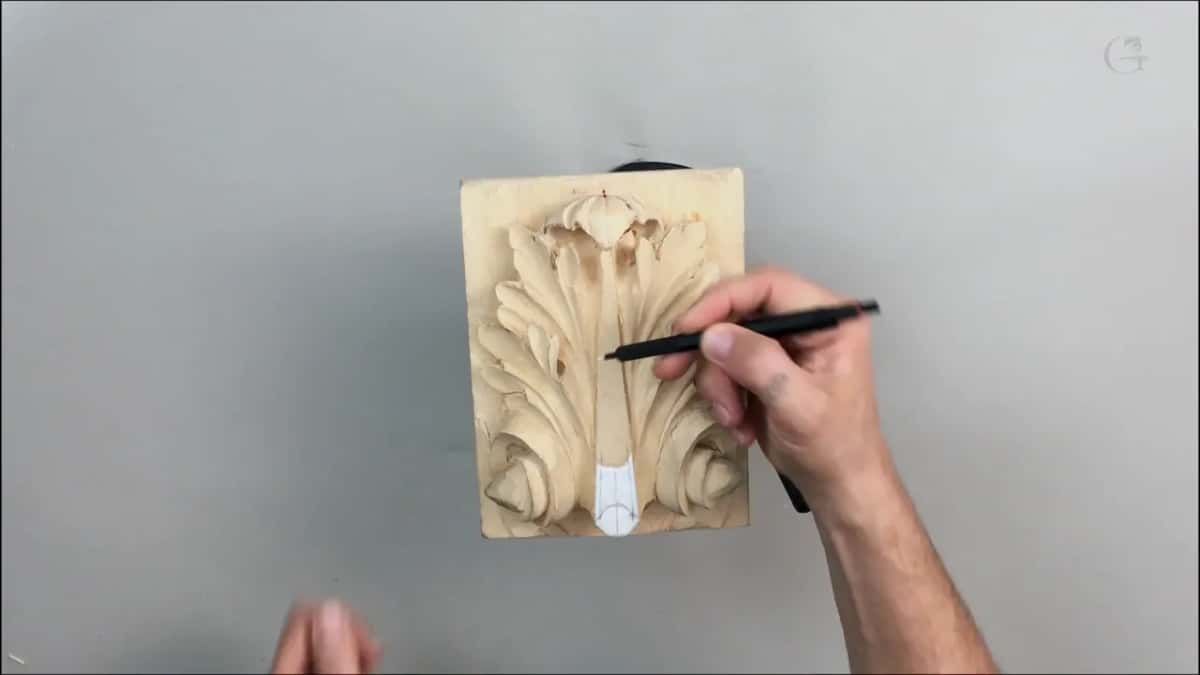
Have you ever looked closely at a carved leaf? Did the shadow under its edges catch your eye? Some people who see my work look closely at the details, so here I carve a small one on nearly every eye of this leaf.
You'll get each tool I picked up, its size, and where it went, down to a channel only 1 mm wide.
What carving the return takes
- Two marks go on by eye, about half an inch and about 3/8 in (10 mm).
- Split the return in three, and each part gets its own concave.
- Straight down with a 4 mm number 7, then lower the pipe about 3/32 in (2.4 mm).
- I used a number 8 at 1/8 in (3 mm) for the hollows, and a 1/16 in gouge can add a deeper one inside.
- Really deep undercuts want a back bend, though an angled straight tool gets part of the way.
- Underneath, a 1 mm veiner digs a channel you see only up close.
Where does the return on the eye come from?
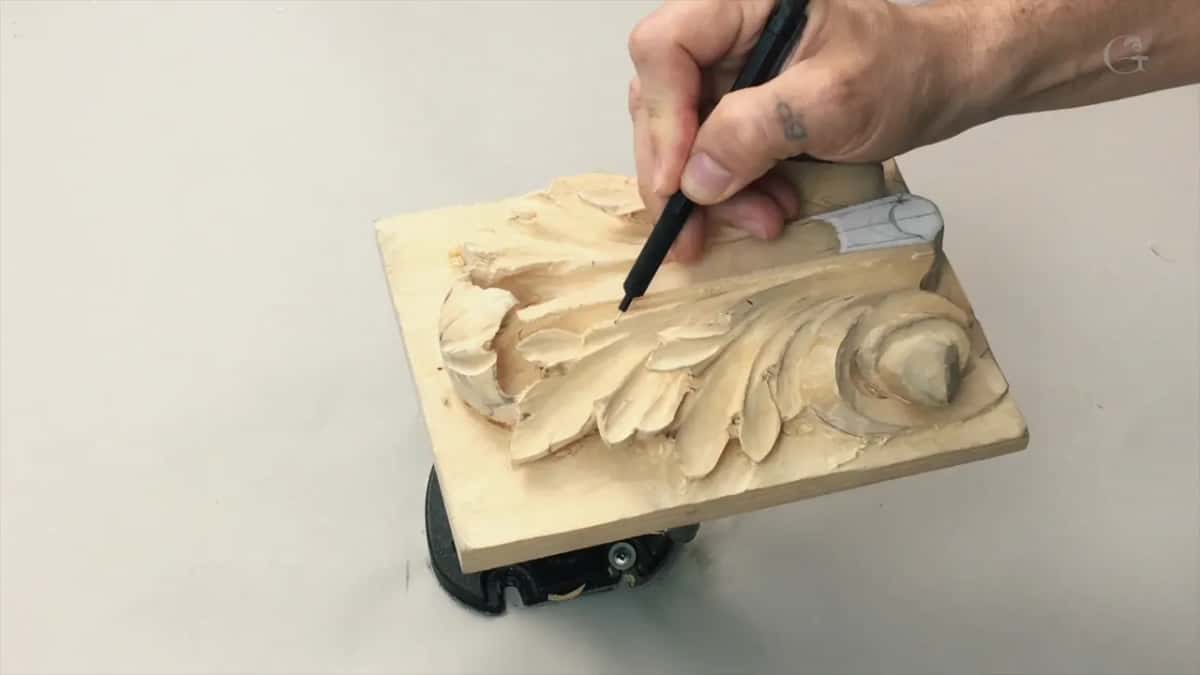
From history, the way I told it on camera. When I say they, I'm talking about the artists and sculptors in history, and the return is one of the things they did.
Back in lesson 7, I said that later on, maybe, we'd do something unique at those eyes and the pipes, which was introduced in the Roman era to the acanthus. But that was for the future workshops.
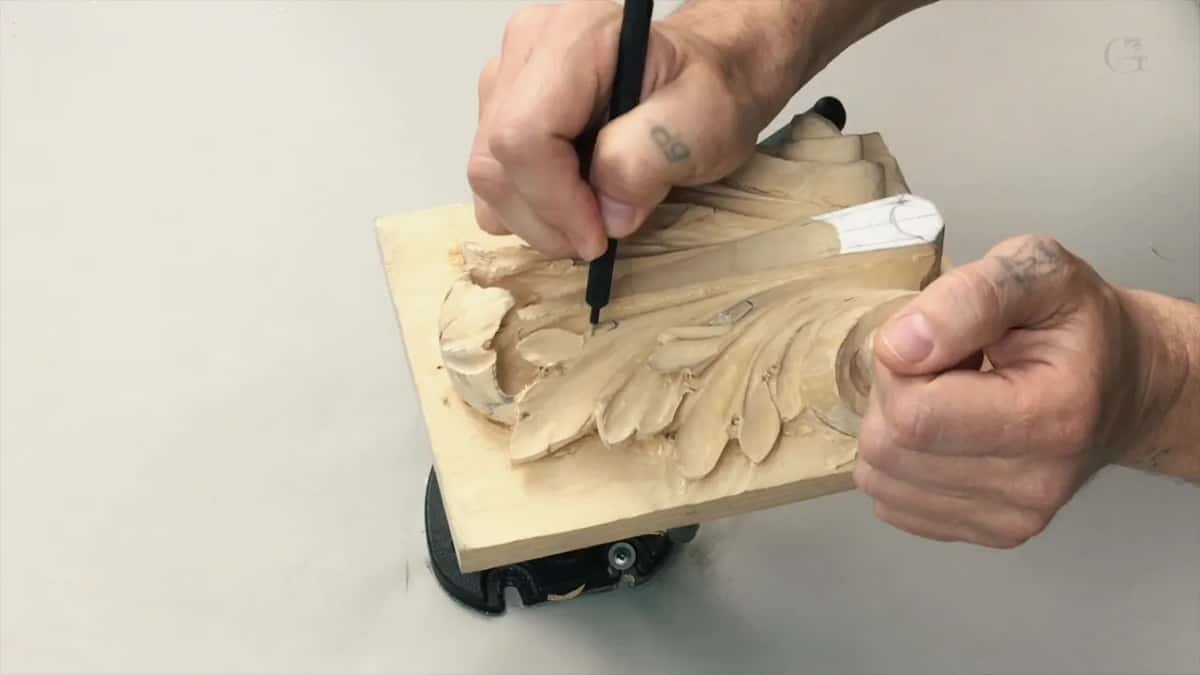
The idea is easy to say. It's going to look like it's coming from inside out, just from inside going this way.
Wikipedia calls the acanthus one of the most common plant forms used for foliage ornament in the building tradition that came from Greece and Rome. It says the leaf shows up all over the capitals of the Corinthian and Composite orders.
How are the marks for the return laid out?
By eye, with a couple of marks. I did approximately maybe half an inch, about 12, maybe 13 millimeters, and I was eyeballing. Then about 10 millimeters right here, three-eighths of an inch. I drew the line down and did exactly the same in the next spot.
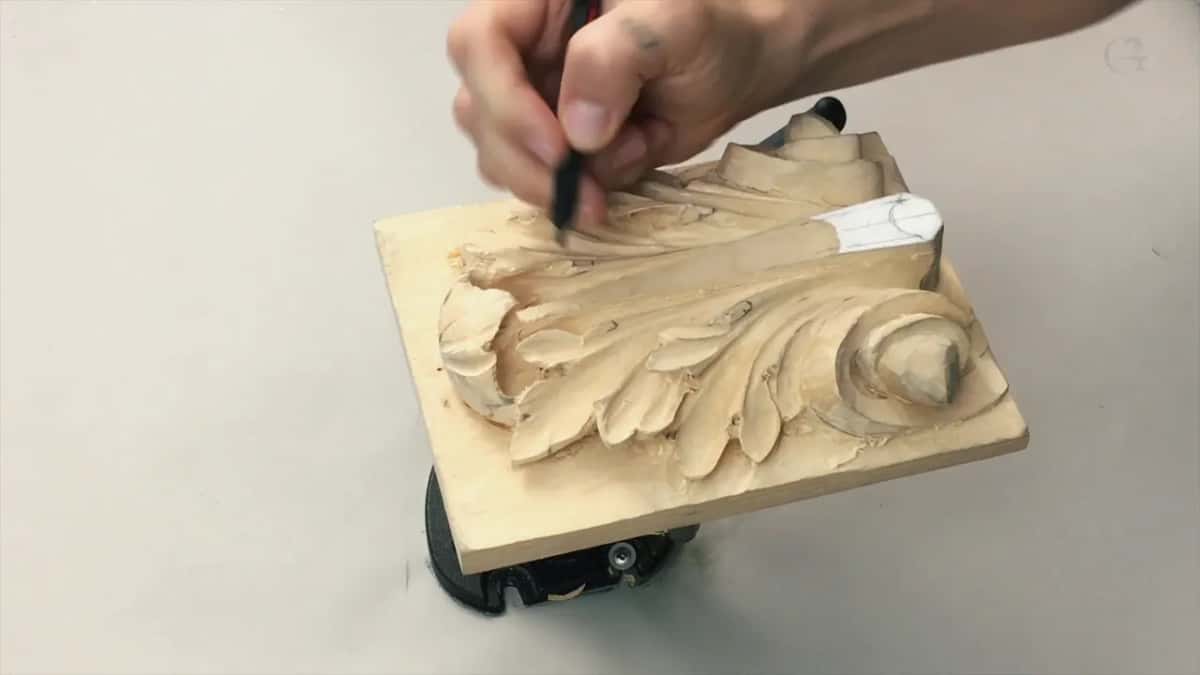
Then comes a choice. We could leave it just like that, or we could subdivide it and make three elements. I subdivided mine in three, because I think that looks nice.
I worked on those first and then moved on to the rest, and we do this almost on every pipe and almost on every eye. It creates beauty.
Should you eyeball the marks or measure them?
Eyeball them if you can. You don't have to if you don't feel comfortable. You can always take a piece of paper, put it at the end of the eye, make a mark, and transfer it to the other side. And I was pretty much accurate, right on the mark.
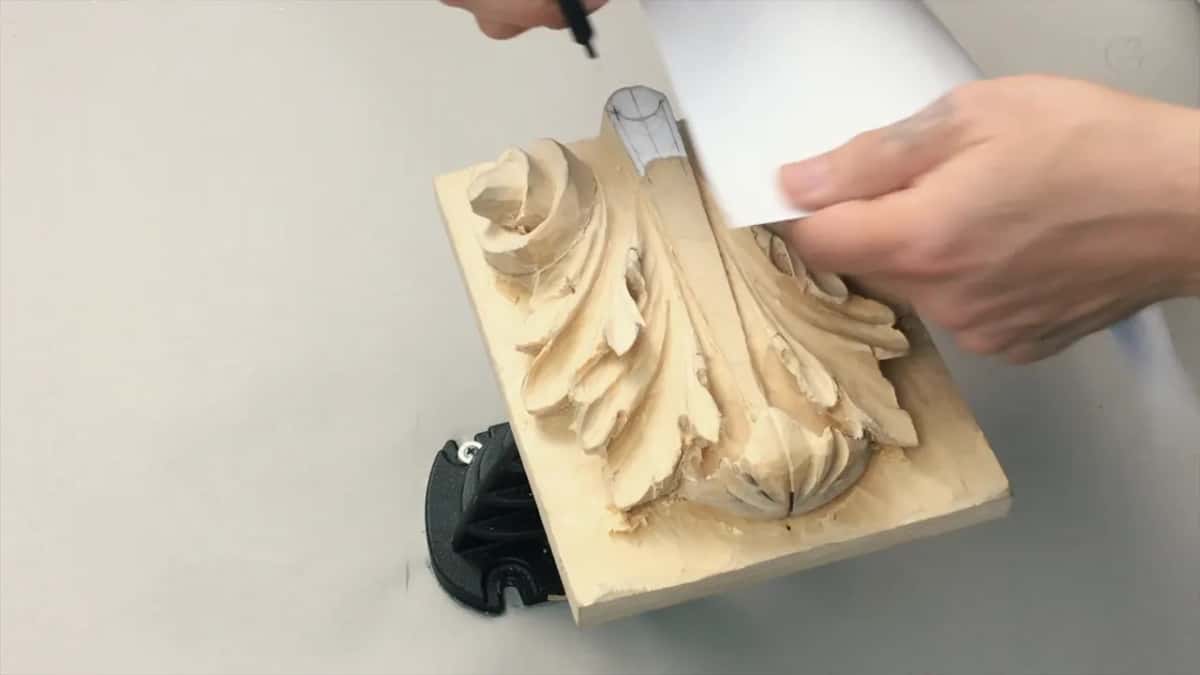
But I still suggest you train your eyes. You don't measure, you just do it by feel, and then you check whether it's accurate or not. Someday you'll work on more complicated pieces where there's absolutely no way you can measure, and then the eyeballing part of your brain will help you a lot.
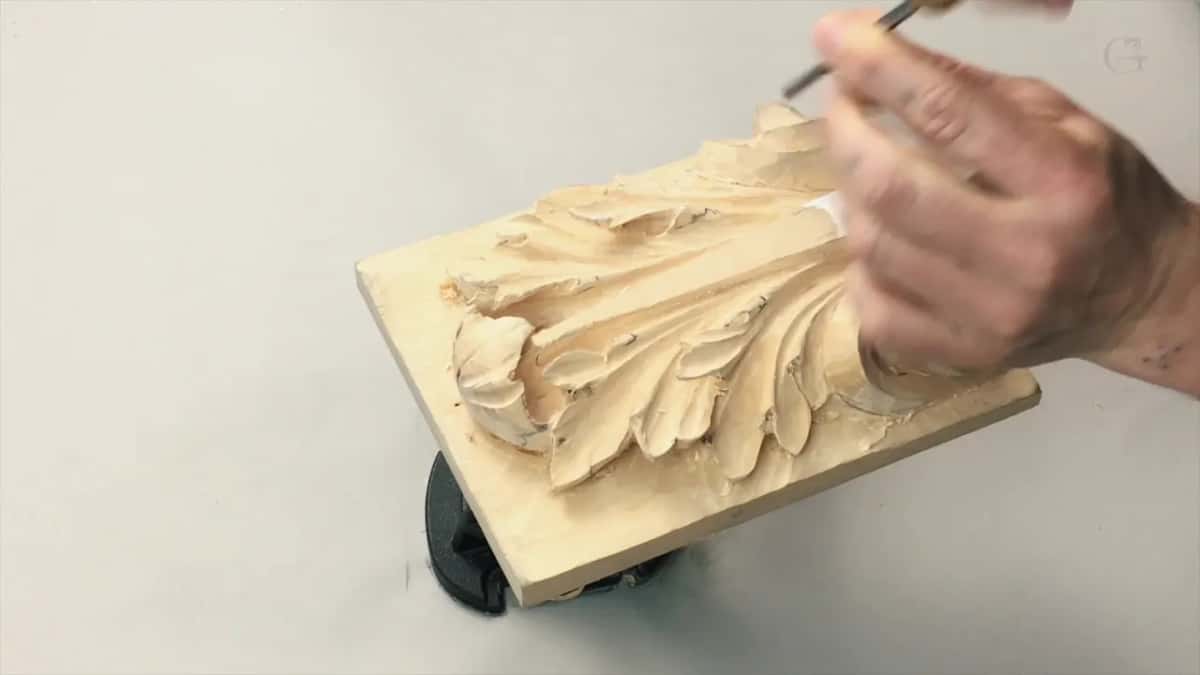
I said much the same in Venice Room 36, while drawing a line on the inside. It's a good practice to train your eye to just eyeball those lines, and once you practice, it comes natural. The more you do, the more you'll be able to see and catch if there's something off.
How deep do you lower the pipe for the return?
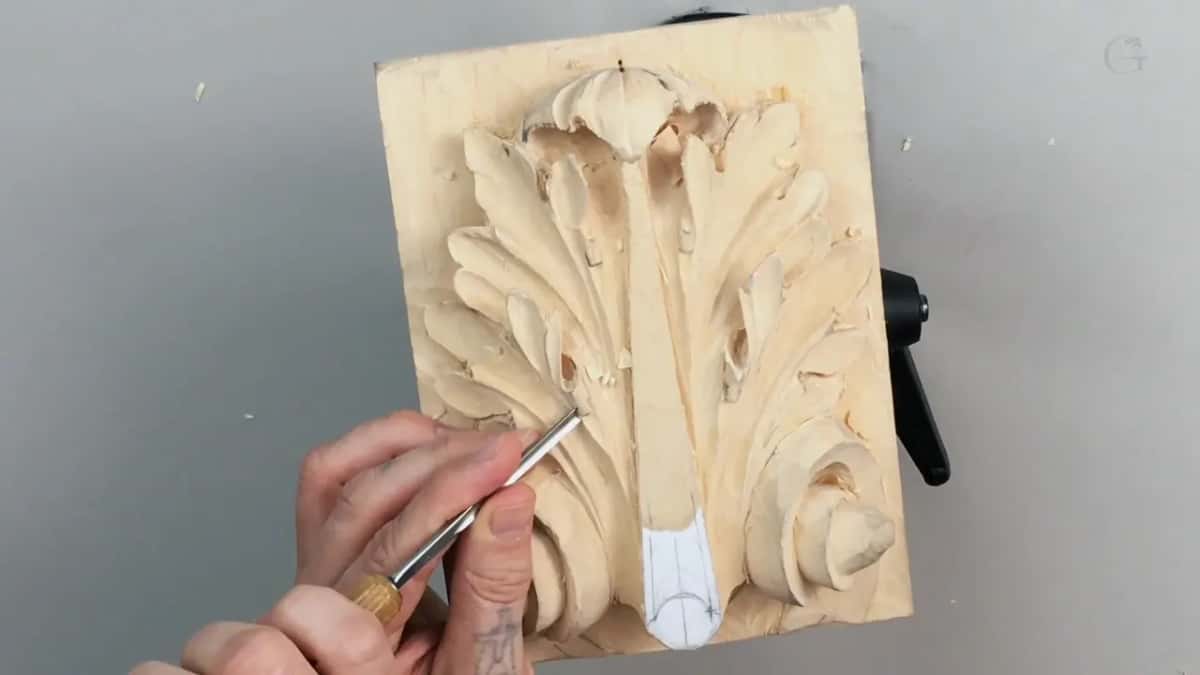
Only about three thirty-seconds of an inch. First I looked for a small gouge matching my profile. Maybe an 8 or a 9 would do, but I checked a number 7 at 4 mm (5/32 in) first, and I thought it would fit really nicely.
With it I made a straight-down cut on those marks, a preliminary one. Then the same tool lowered a section of the pipe.
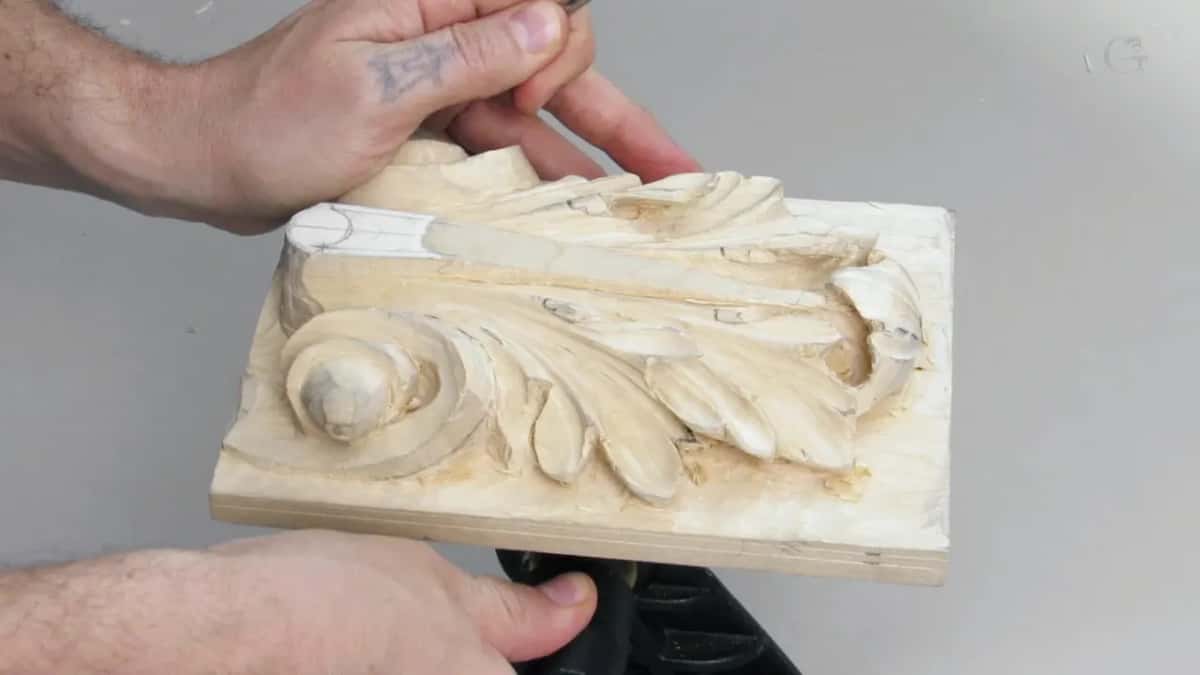
I started at about a 16th of an inch down. You could do a little more, so I did, about 3/32nds, and that depth gives you the ability to undercut and create extra shadow, which looks beautiful too.
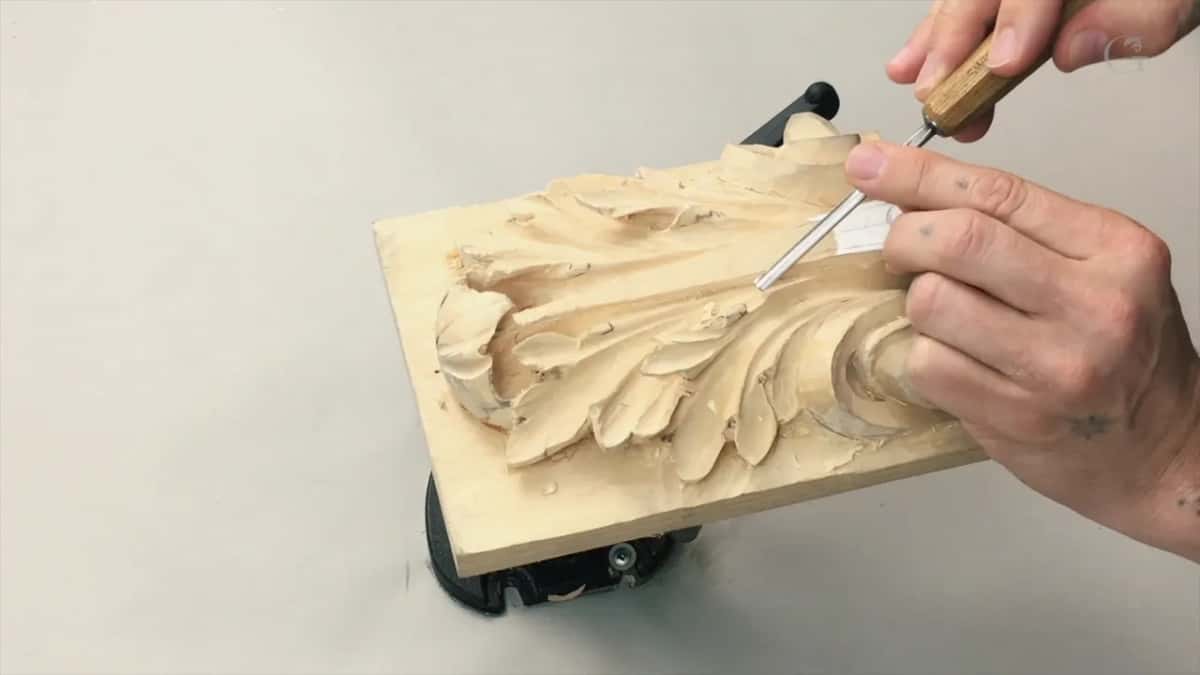
Later on I refine those ridges and make them round, because it's a pipe. It's supposed to look round. For now I was only setting how deep I wanted to go.
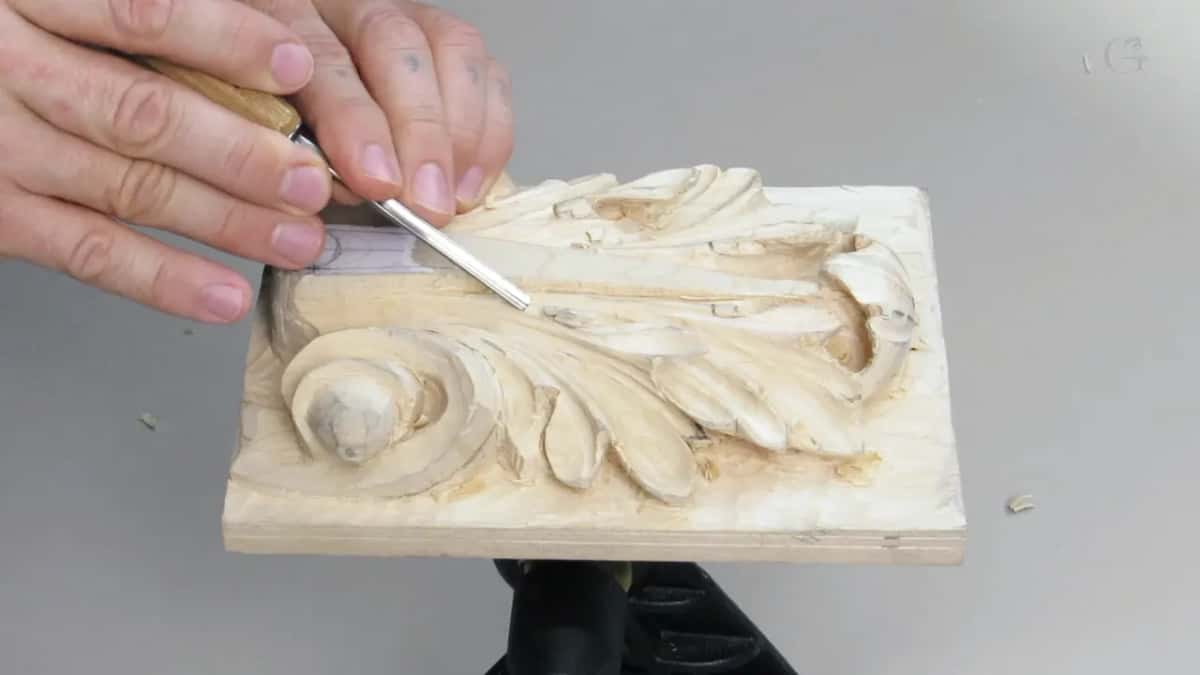
It doesn't have to be a number 7. Number 8 will work, and number 9 will work, as long as it's a small one.
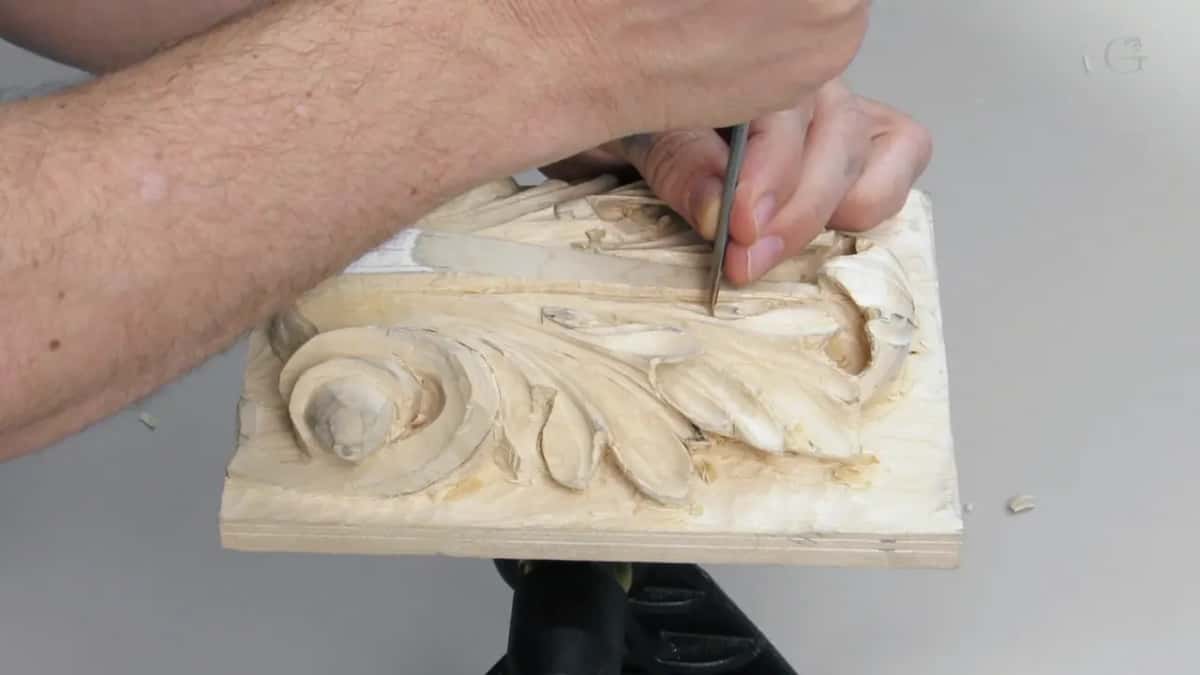
My goal here is a micro undercut. When I say micro, it's really barely noticeable, but you'll still be able to detect it by eye, and of course it creates a shadow. That shadow makes it look beautiful.
On a dining table apron I did something like this once. I'd still slightly undercut, I thought. Just slightly, because it would look better, and even though it's not going to be noticeable, that's going to create my shadow.
Can basswood hold a detail this small?
It can, if you're careful. I set the same tool right on the side and worked in from the sides, then the same on the other one.
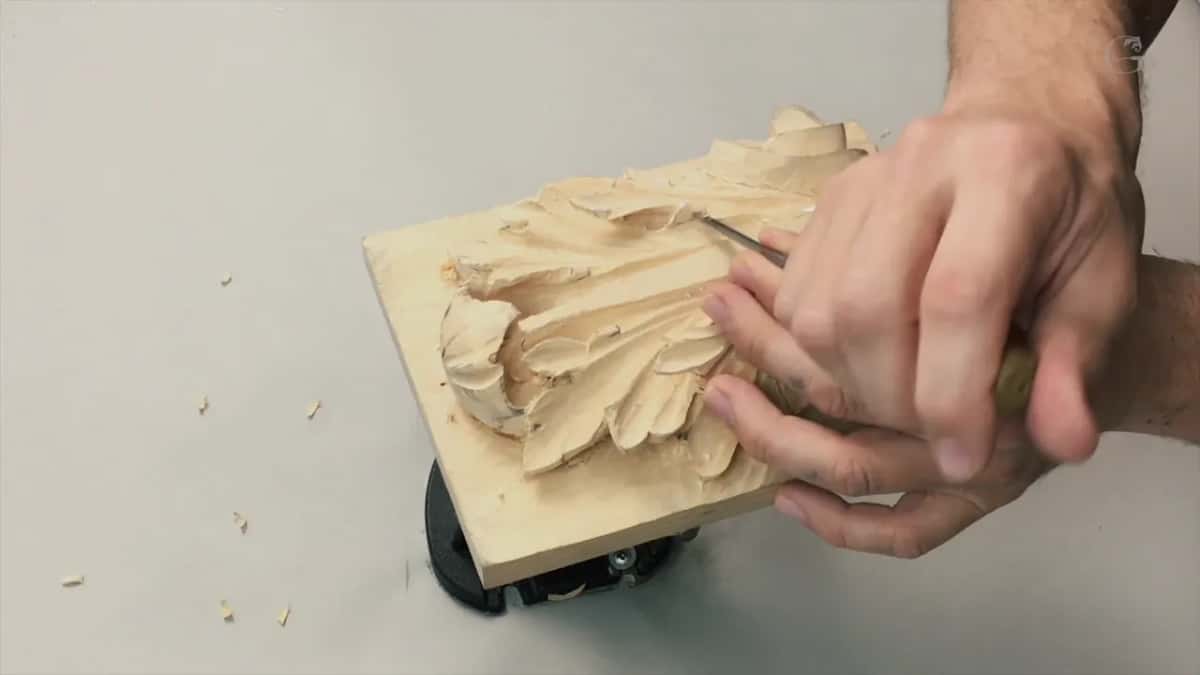
Be really careful when you're doing micro details like these, I said, especially on basswood. A harder wood, maybe walnut or cherry, holds the detail really nicely. Basswood can also hold the detail with no problem, as long as you don't press it too much and don't make unnecessary cuts. Just carefully.
What rounds the pipe after lowering it?
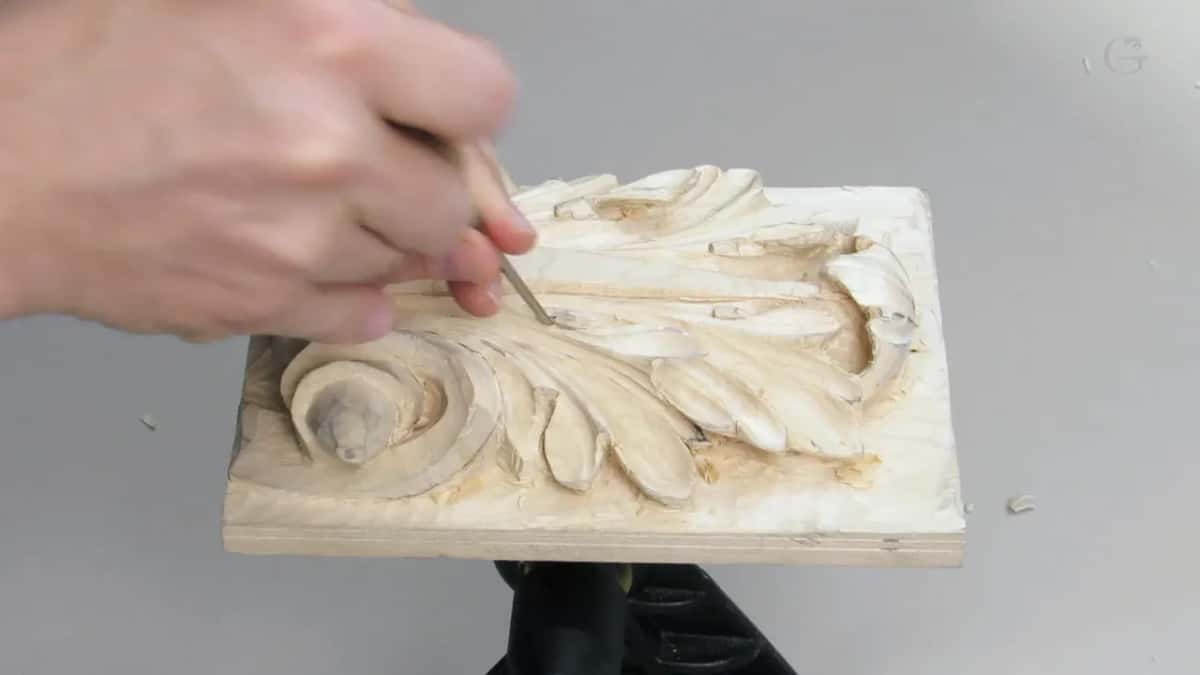
Start with a knife. I took those ridges and made them more round with just a knife. A gouge would do it, and even a back bend would work really nicely here, but I used the knife first, as a preliminary.
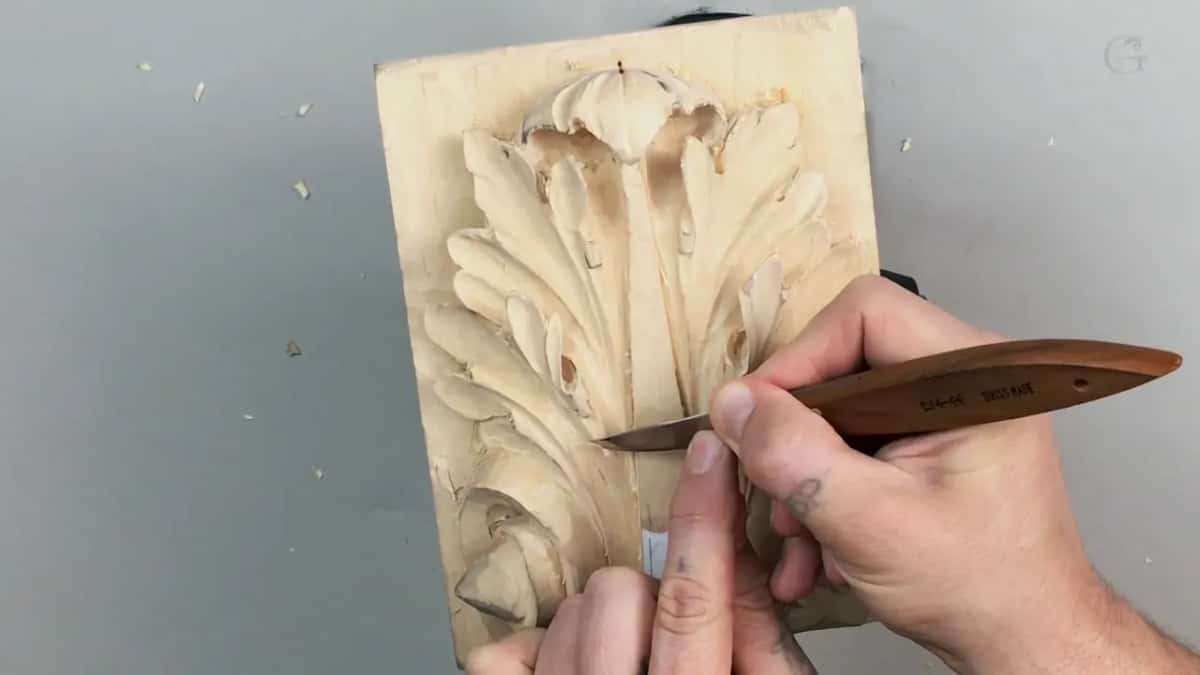
Probably the back bend works best for making it round, and in my case it's a number 25, 3 millimeters.
Lesson 10 is where I read that kind of stamp out loud. 25/3 means back bent, sweep number five, and 3 millimeters, an eighth of an inch. Lesson 8 goes through the numbers on Swiss tools in more detail.
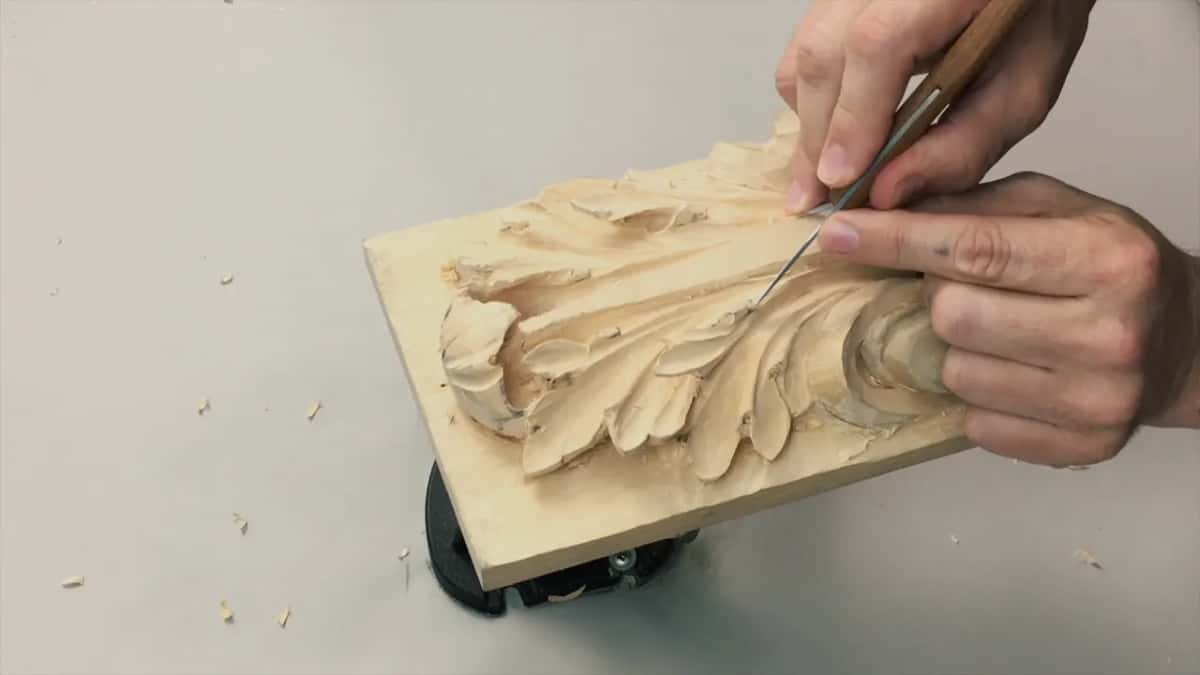
Maybe this back bend was a little too small for this pipe. I should probably have used a bigger one. Be careful with the grain, the direction of the grain, and make it smooth.
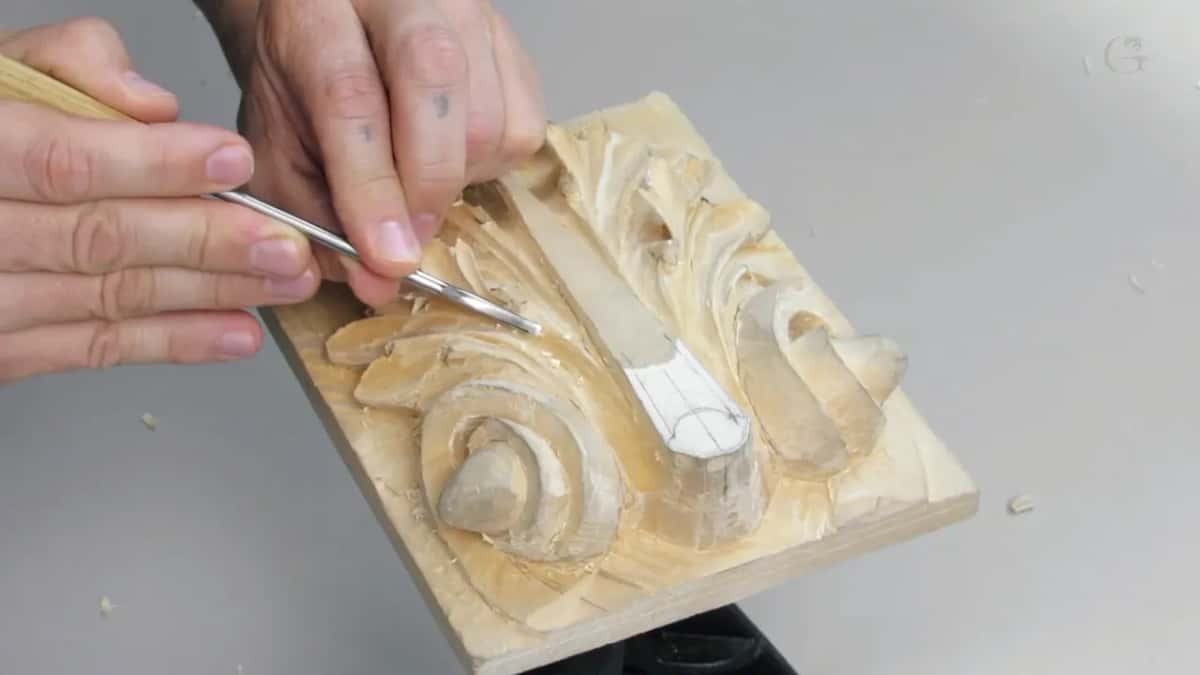
Which gouge carves the three hollows of the return?
The same small gouge I used for establishing those eyes, a number 8 at 1/8 of an inch (3 mm). The idea, like I said, is the one I started with, inside out. Then I removed some material to create the shape, an illusion that it's going up from underneath.
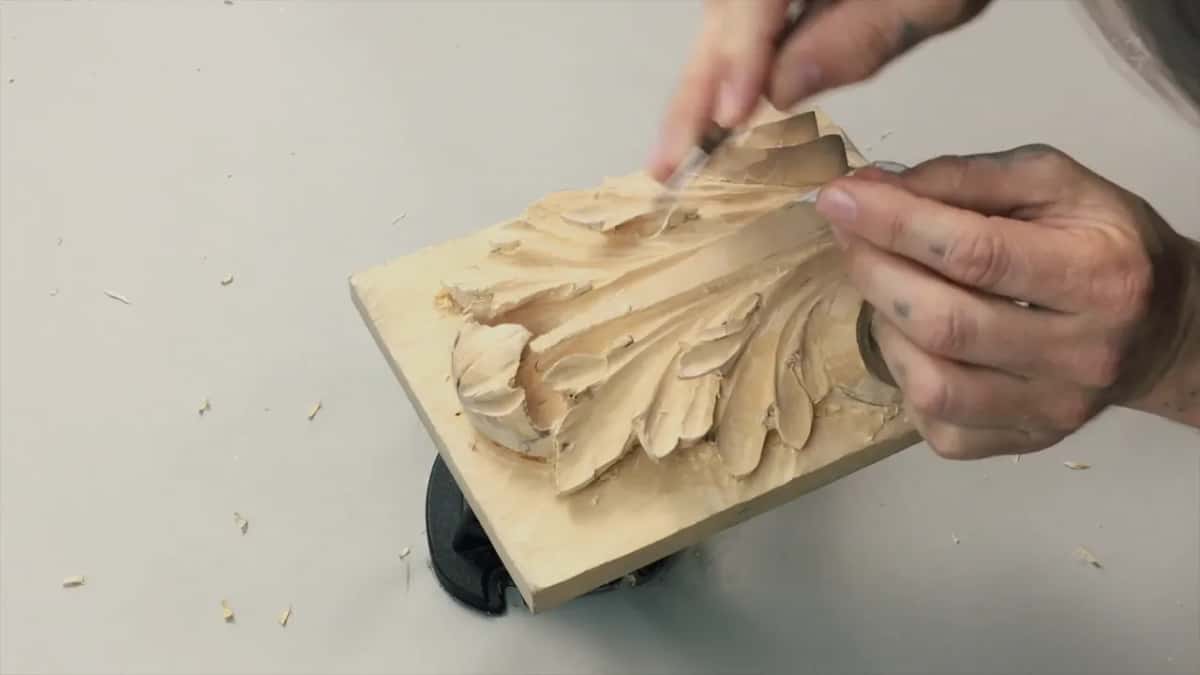
Same idea. A concave cut goes in the middle, and because we divided this in three, I made small micro-concaves on the sides also. Again, don't overdo it, because it's possible.
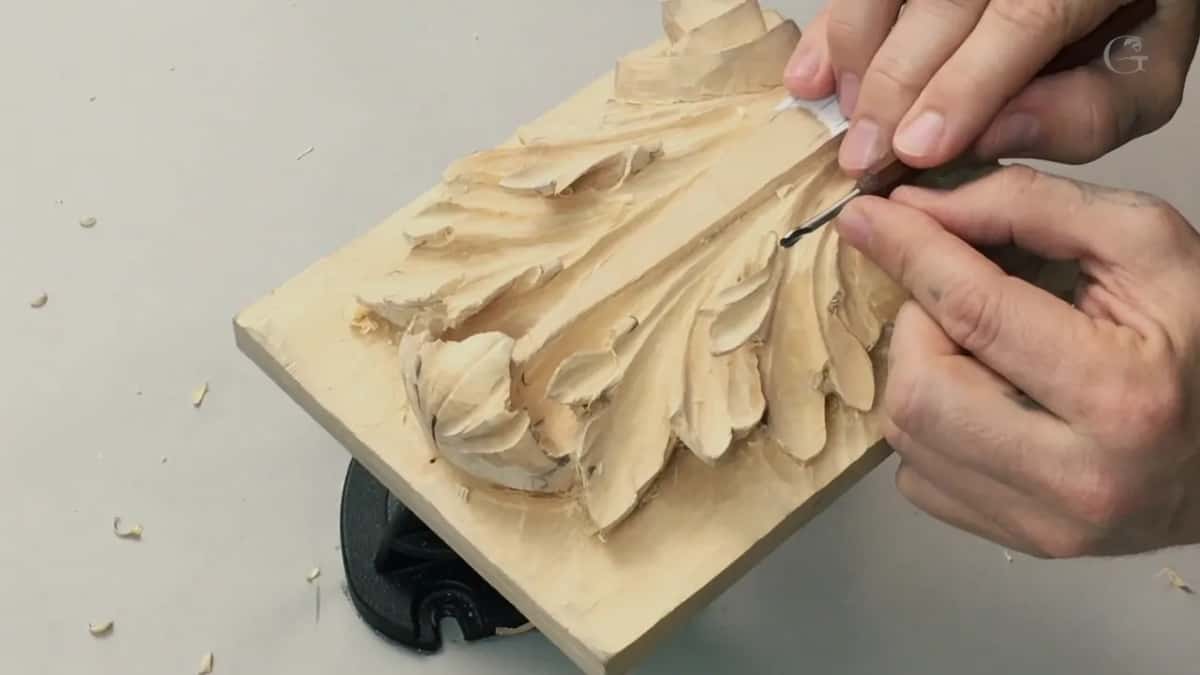
On most of the Romanesque leaves, I said, you'll find a concave on the side of those leaves, cut on the inside like this. Lesson 6 carves the concave on the inside of this leaf.
All of that was only preliminary. Later on, when I work on the inside, I make that return smoother, more of a transition on the inside. But you can already see it creates a beautiful form. Something unique.
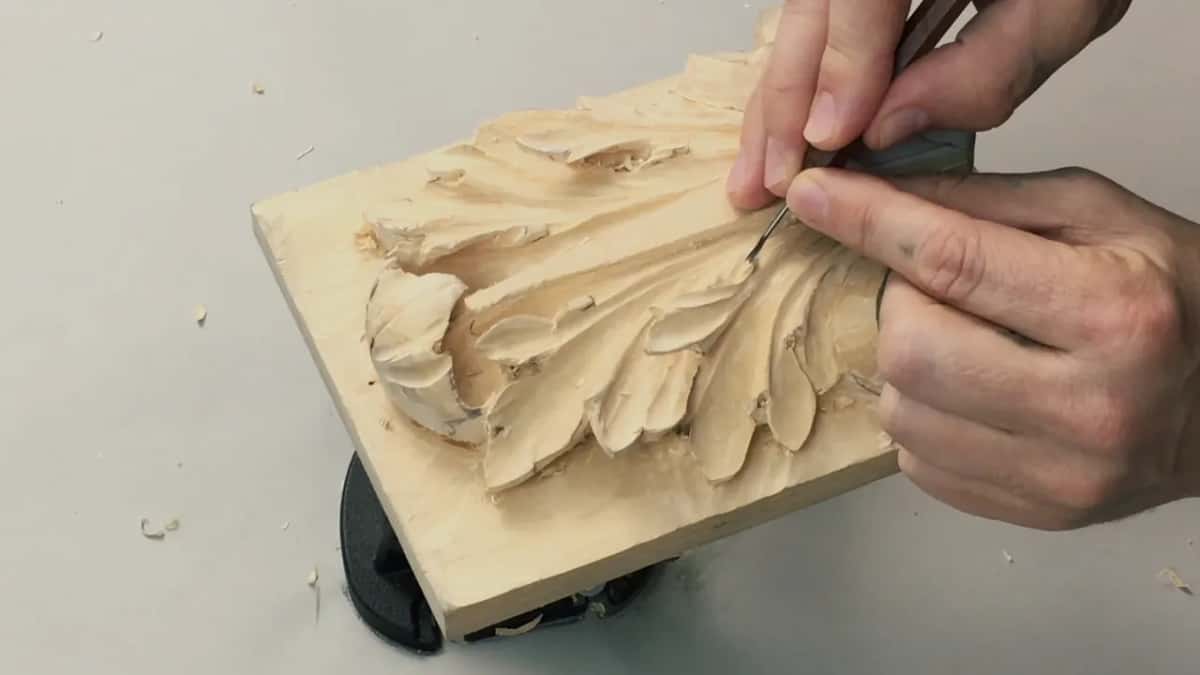
Sometimes you can make it even more beautiful, if you have a smaller gouge, maybe 1/16 of an inch (1.6 mm). Right in the middle of this concave you make an extra, deeper concave. It's barely noticeable, but it creates the shadow again.
What does a back bend add when you undercut the return?
Depth, because with a back bend, nothing at all is in your way while you dig. First came the same tool as before, as a preliminary, because I know some of you don't have back bends. It's almost impossible without one, although to a certain degree you're still able to. You angle your tool on the inside and make an undercut, just like that.
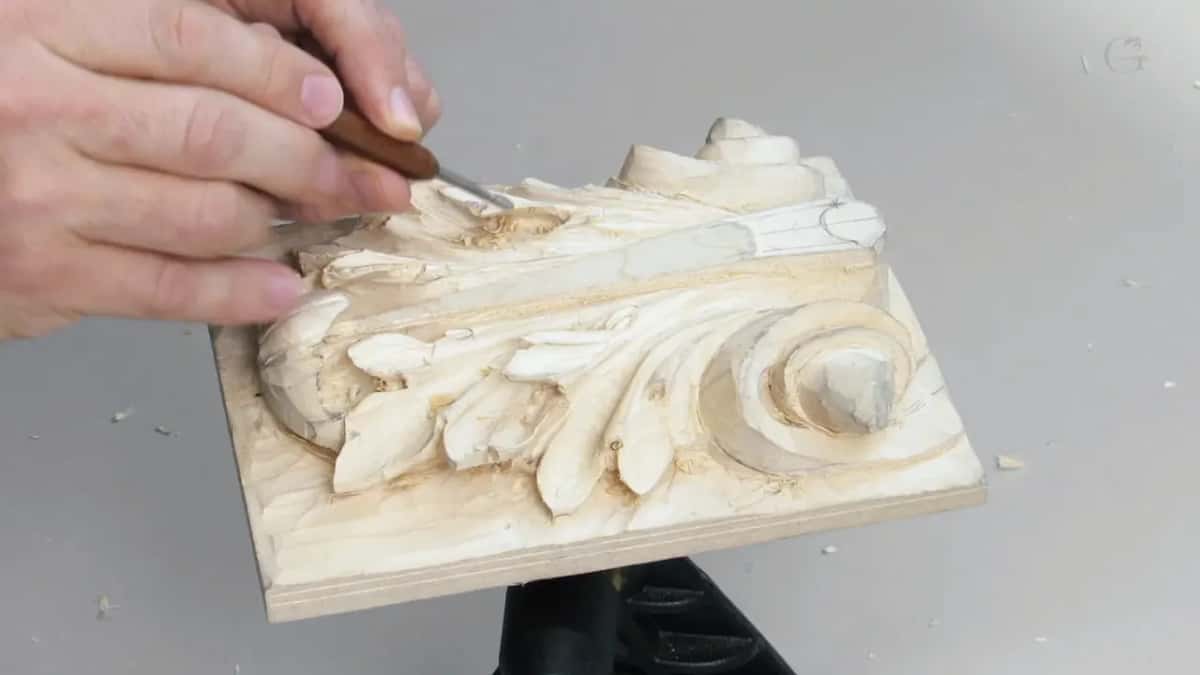
With a small back bend it's a different story. I have a number 7 back bend by Ashley Iles, marked 37, about 3/32 of an inch at the end. With this tool I can dig really, really deep. Nothing is in my way, and I can make a really deep shadow.
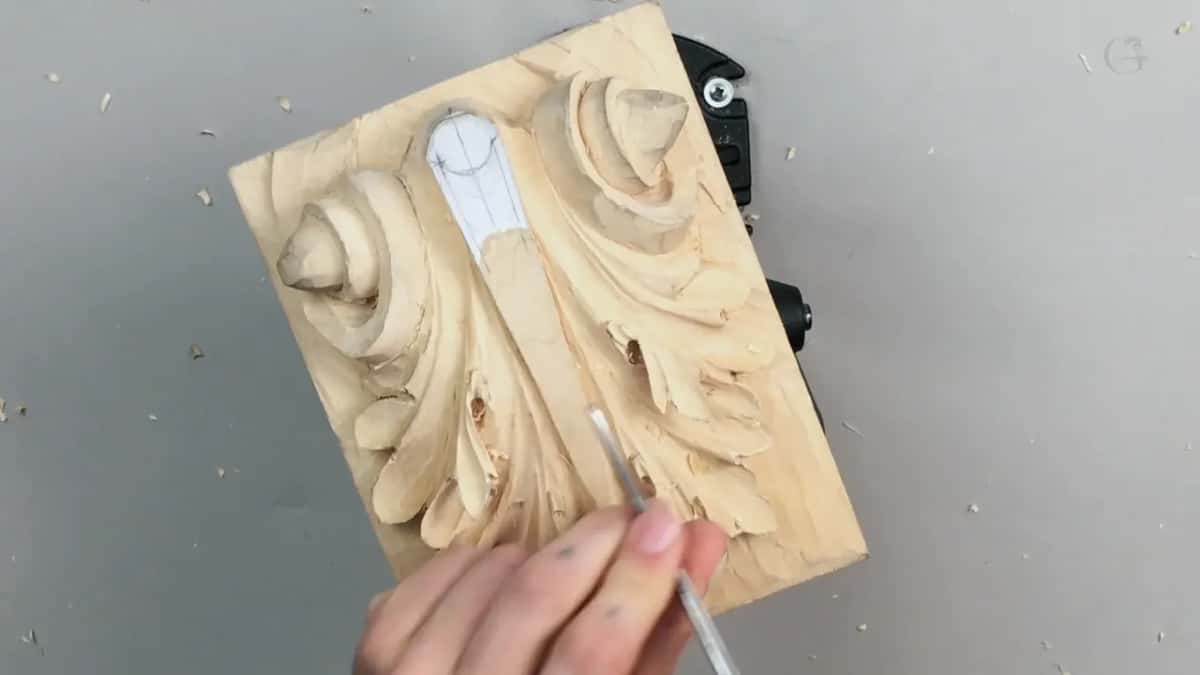
I'd suggest, if you're really serious about wood carving, that you get those back bends, in different sweeps. Mine goes as deep as you see here, and I can keep digging even deeper if I want to. That's already creating shadow.
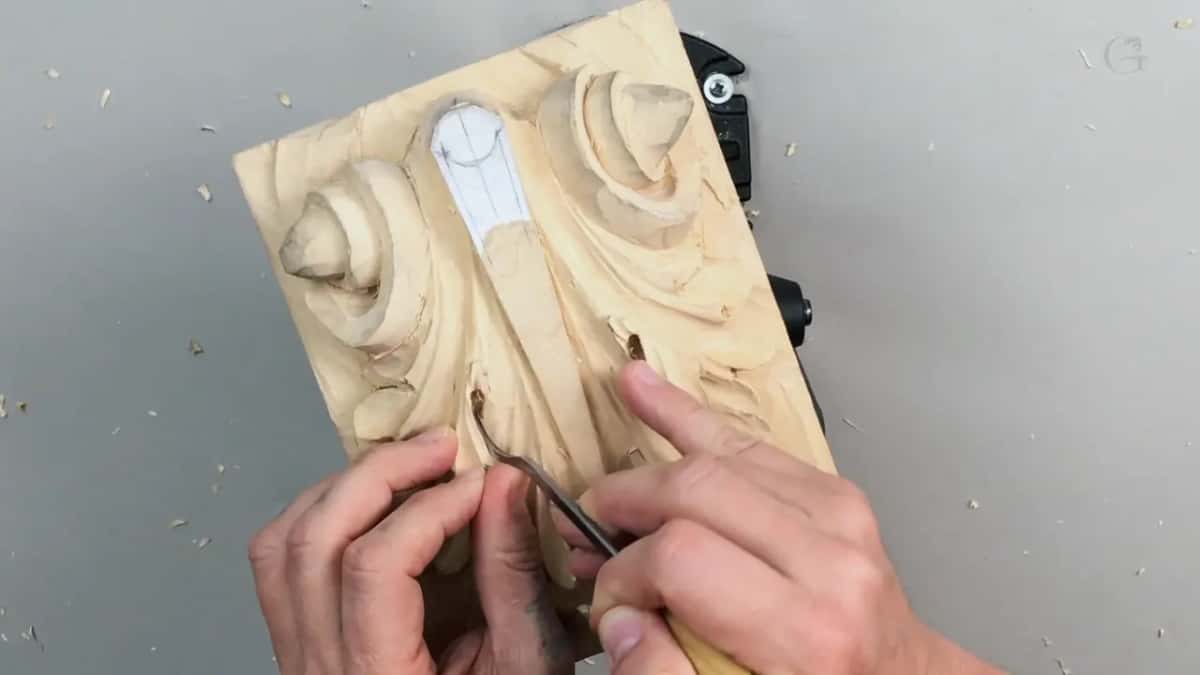
To clean the inside I tried a small spoon gouge, a number 9 at 2 millimeters (about 5/64 in), and it was excellent right there. Don't force it. I was working some areas against the grain, so it's better to make multiple passes for a deep excavation and later on just make cleaning cuts.
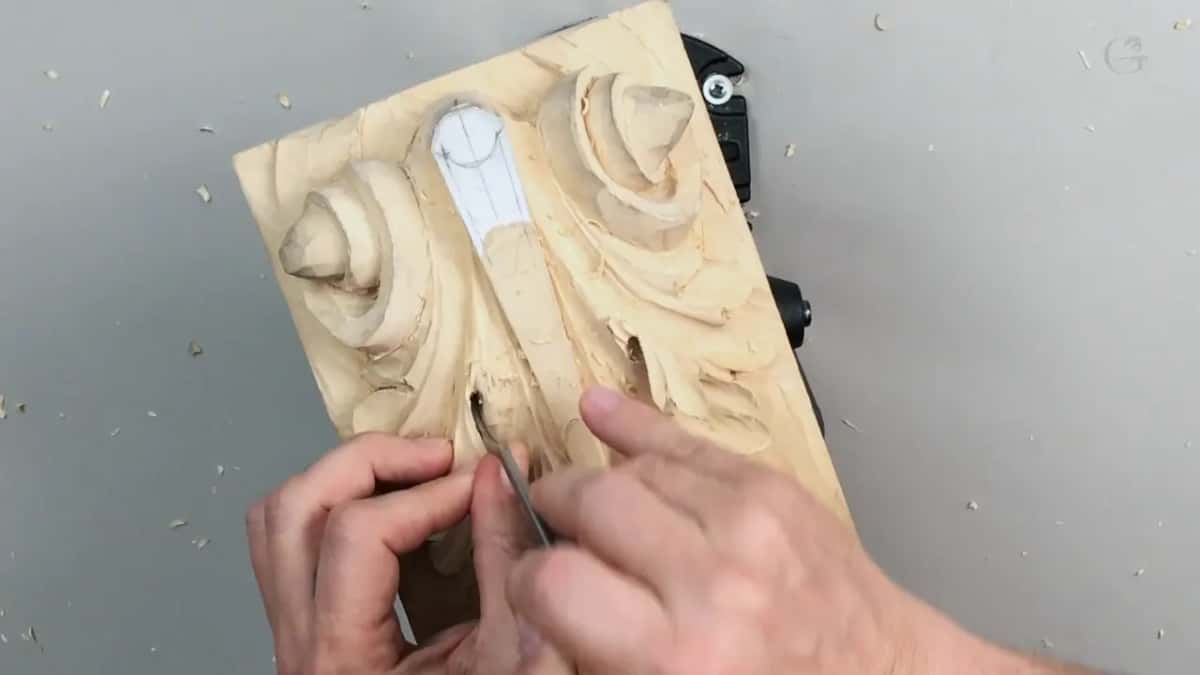
Why carve a channel you can only see up close?
People who look at my work really pay attention to the details, and every small detail makes a big difference. If you would ask me, do you really have to do that? No. I know lots of carvers who never do anything that won't be noticed much. I just really like to work my details.
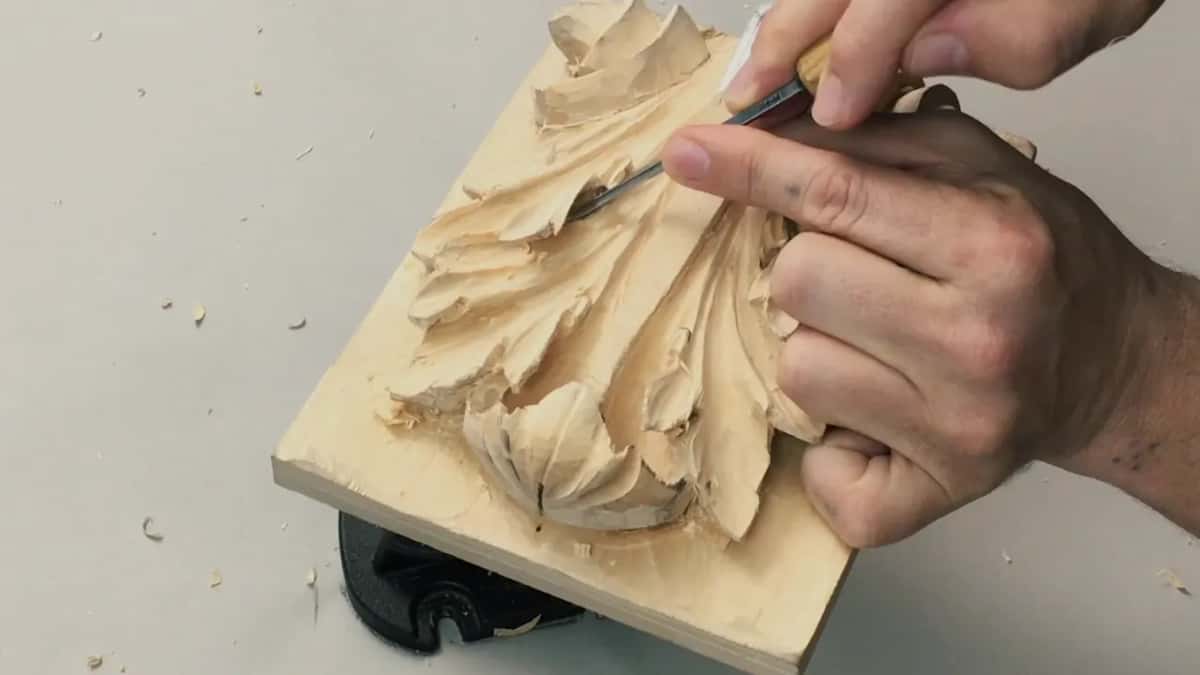
Here the area got fragile, because I didn't have too much material on that side. I really had to be careful with my direction. I couldn't undercut any more that way, or I'd just go through.
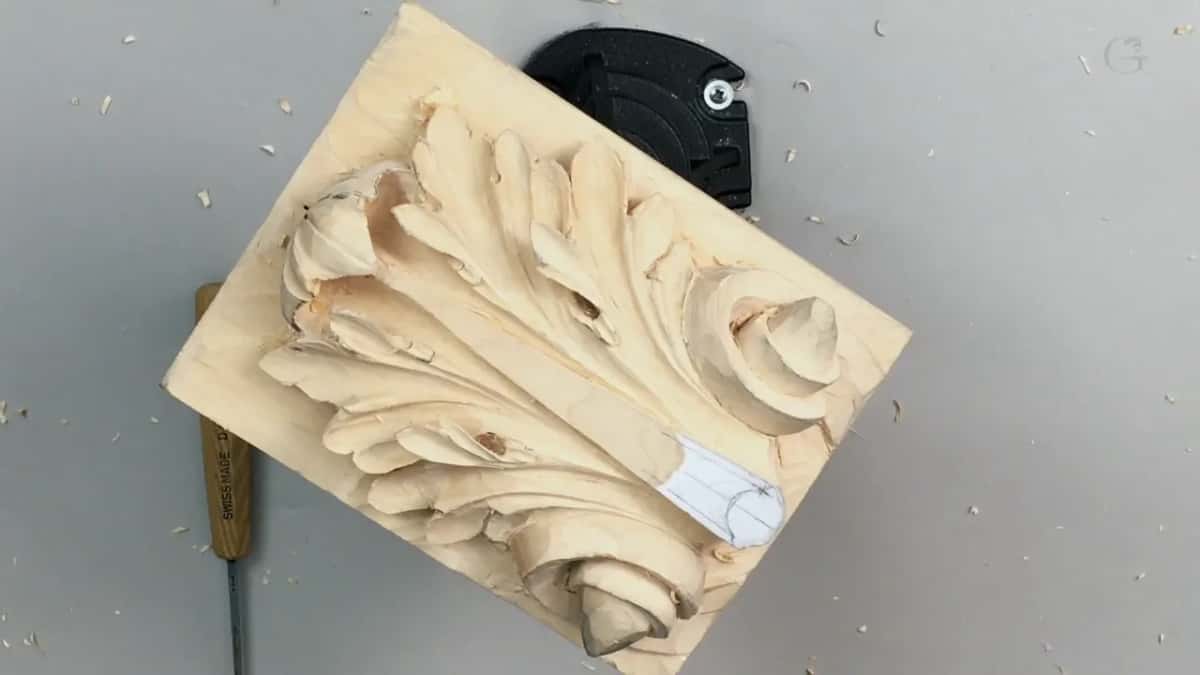
For that spot I needed a really tiny tool, so I took the veiner. My number 11 is a little more than half round. It has a U shape, and it's only one millimeter (1/32 in). It's not a true half round. The card on screen names it a Pfeil veiner, and I read its mark as 11/1.
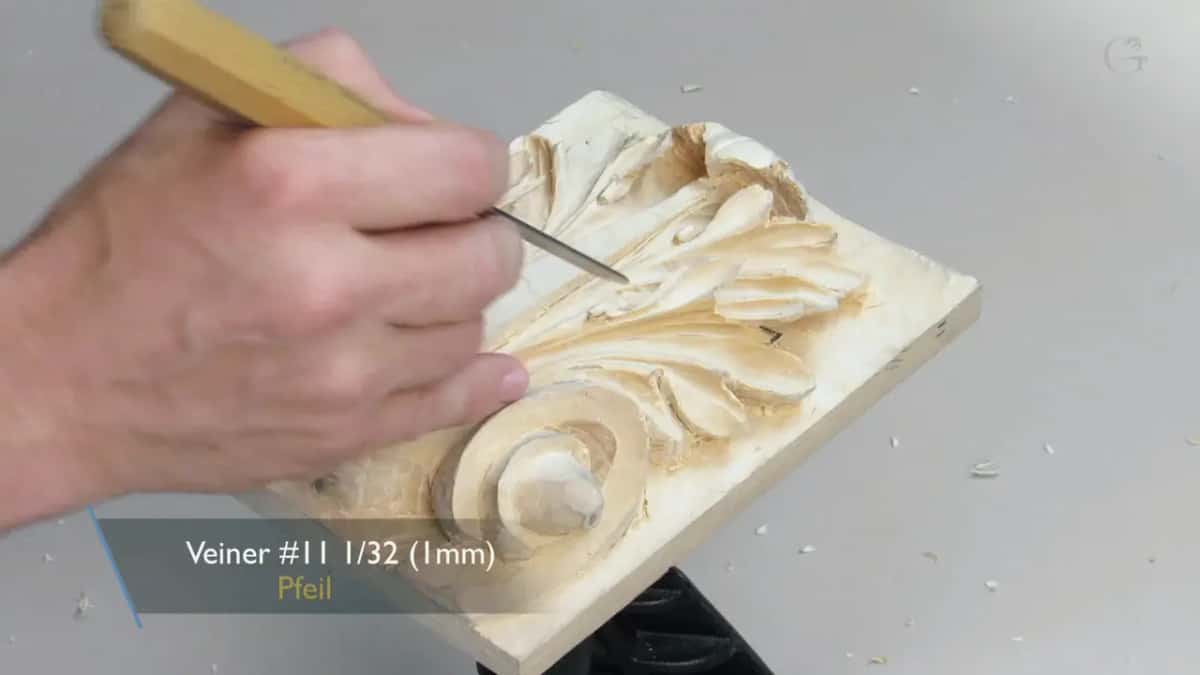
I would make a big mistake if I rushed it. What I was doing is digging a channel that you'll see only when you look really close, underneath. With that same veiner I can excavate as deep as I wish, even all the way to the background, which creates an even more beautiful shadow. Again, I don't have to do that, I just like to.
Then the 2 mm spoon gouge, number 9, went even deeper, and its stamp reads 9a/2, which means only 2 millimeters wide.
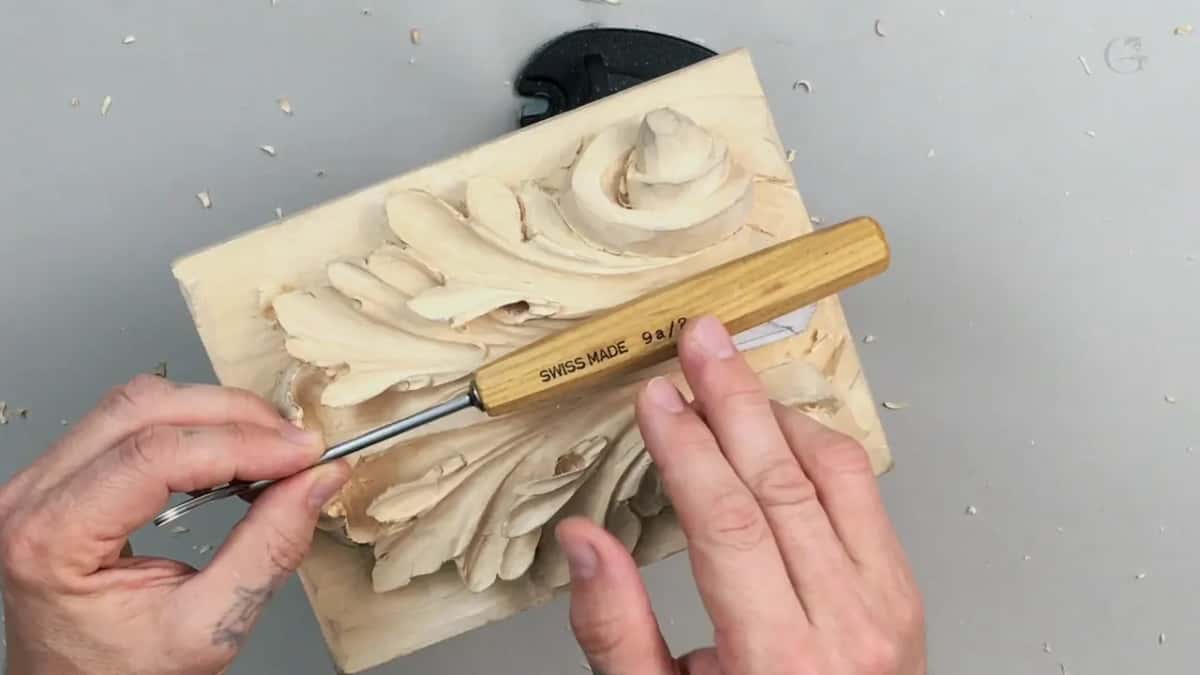
On the Floral and Molding panel I said nearly the same thing. You probably don't see that much, and that's not going to be noticeable as much. But I really like to bring that all the way to my undercut.
What keeps a tool under control here?
Your fingers, and very little pressure. Don't create a lot of pressure, because if you do, you can just mess up in a big way.
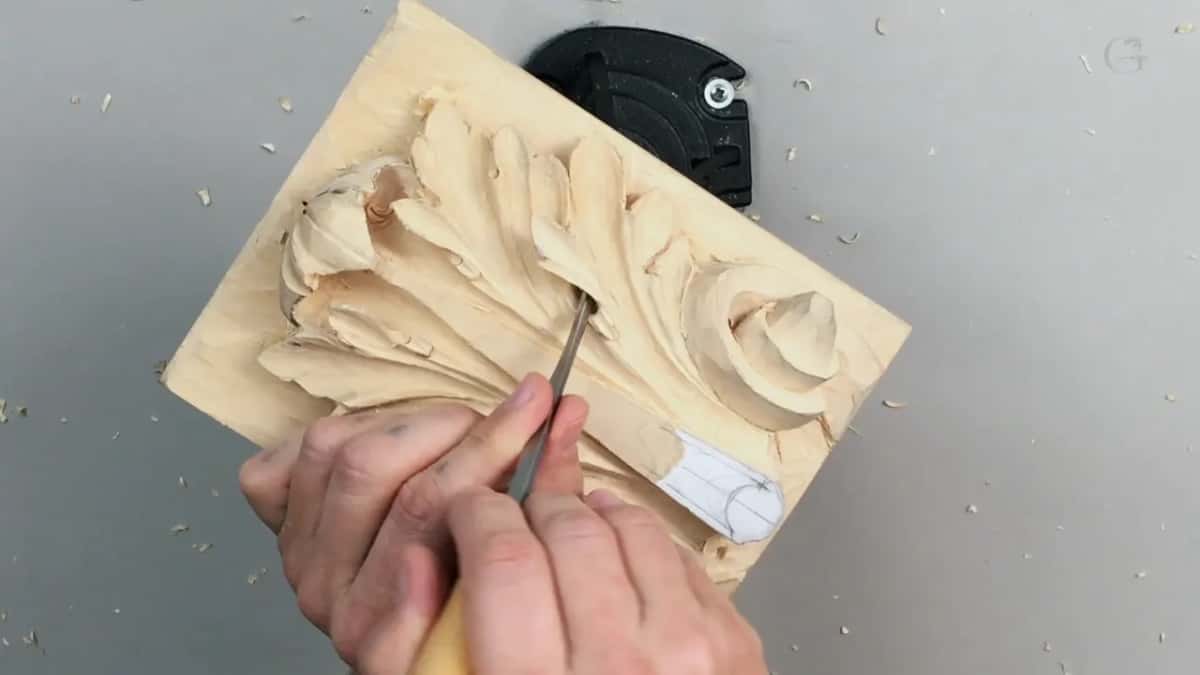
I cleaned my walls with the same number 5, a quarter inch (6 mm), really carefully, because by then it was really fragile. Then a small gouge dug out all the trash. I took the 1 mm number 11 again on the opposite side and made my channel.
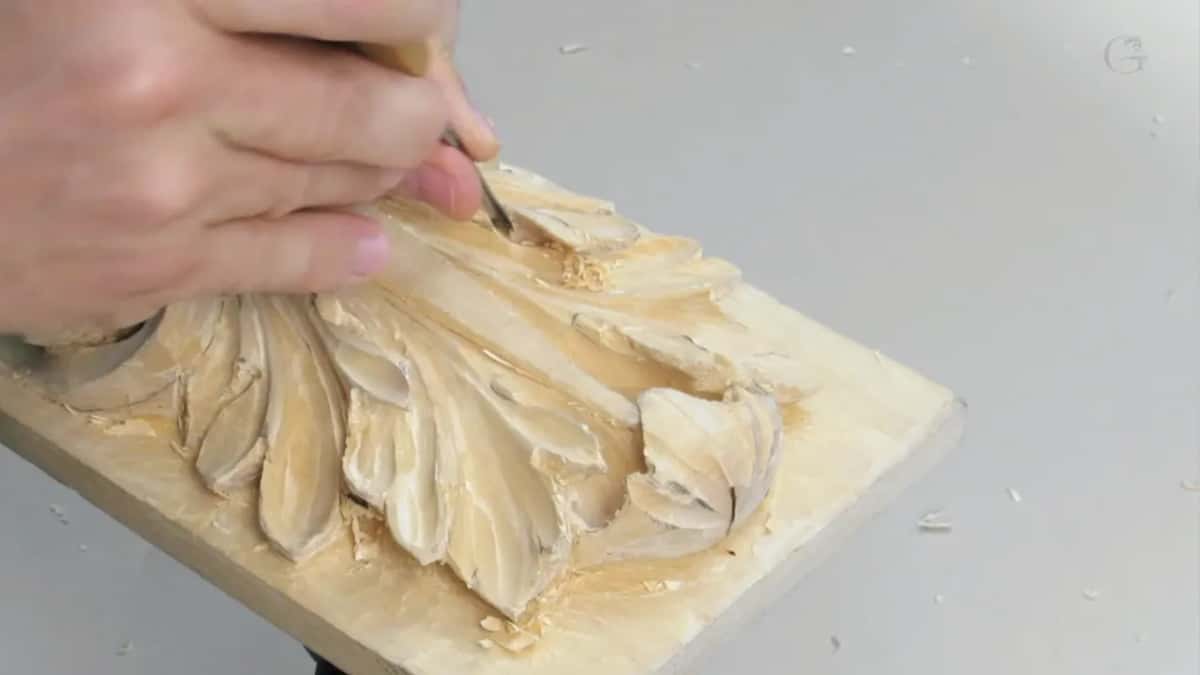
Again and again, don't overdo it. When your piece feels too fragile, just stop it and work on something else. You can always go back to the area. This one is not the easiest area to work, believe me. It's easy to break.
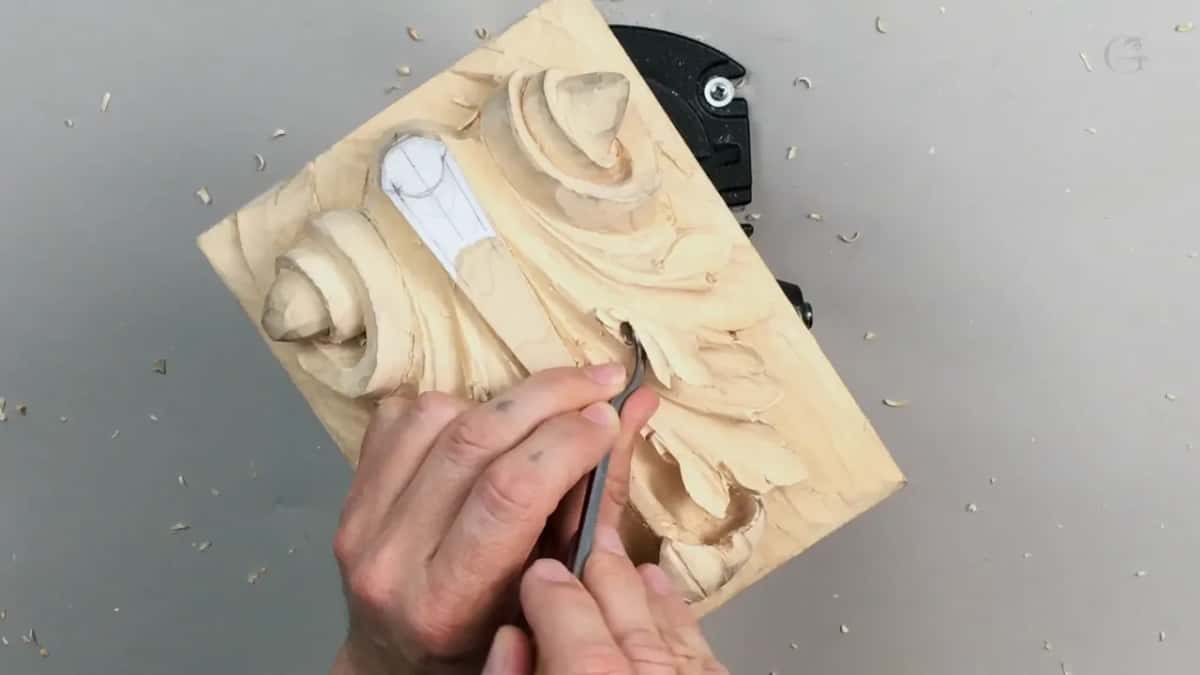
Then I worked against the grain with the spoon gouge, just controlling it with my fingers, and I left it like that, because I didn't want to overdo it.
For the next spot I went back to the number 8, an eighth of an inch, to remove some excess. Since I'd already used the smaller one there, I thought 3/32 of an inch would be safer. I rotated it in and used it as a drill bit. Don't force it. Like I said, that's really easy to break, and the deeper you go, the nicer it looks.
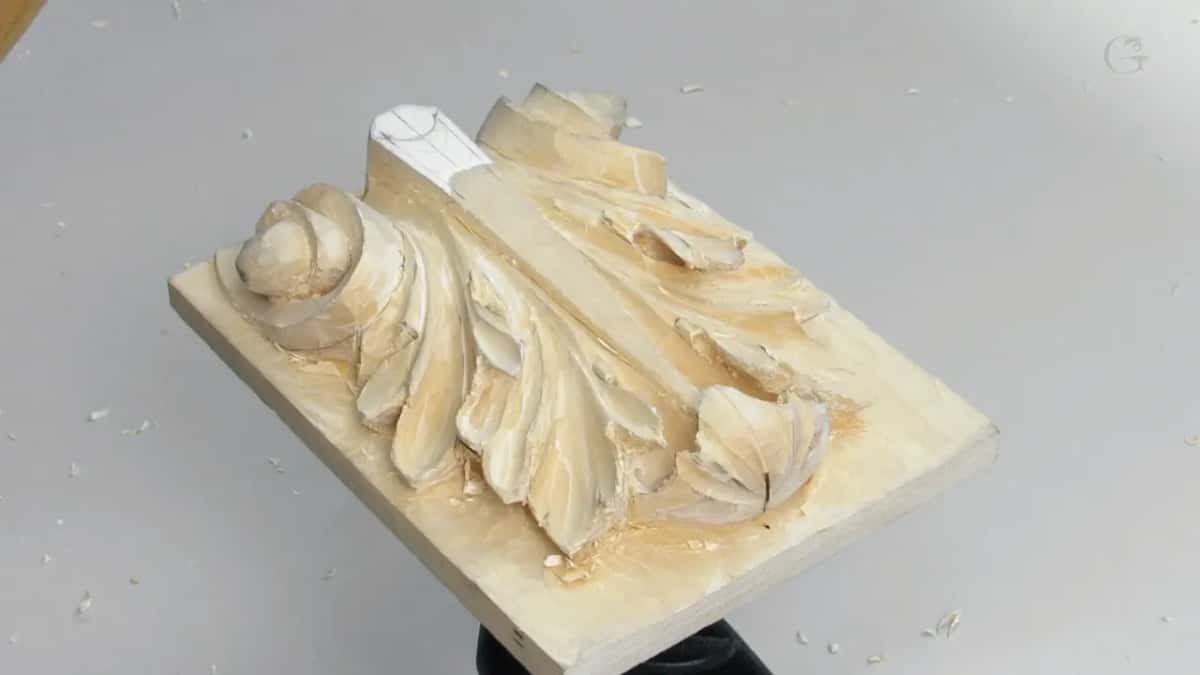
Then a number 1 made my clean cut. I'm controlling my tool just by my fingers, pinching it. One finger works as leverage, pressing on that part of the tool, while another finger holds really tight to the piece, just to give the first one some support. Look how much material came out that way.
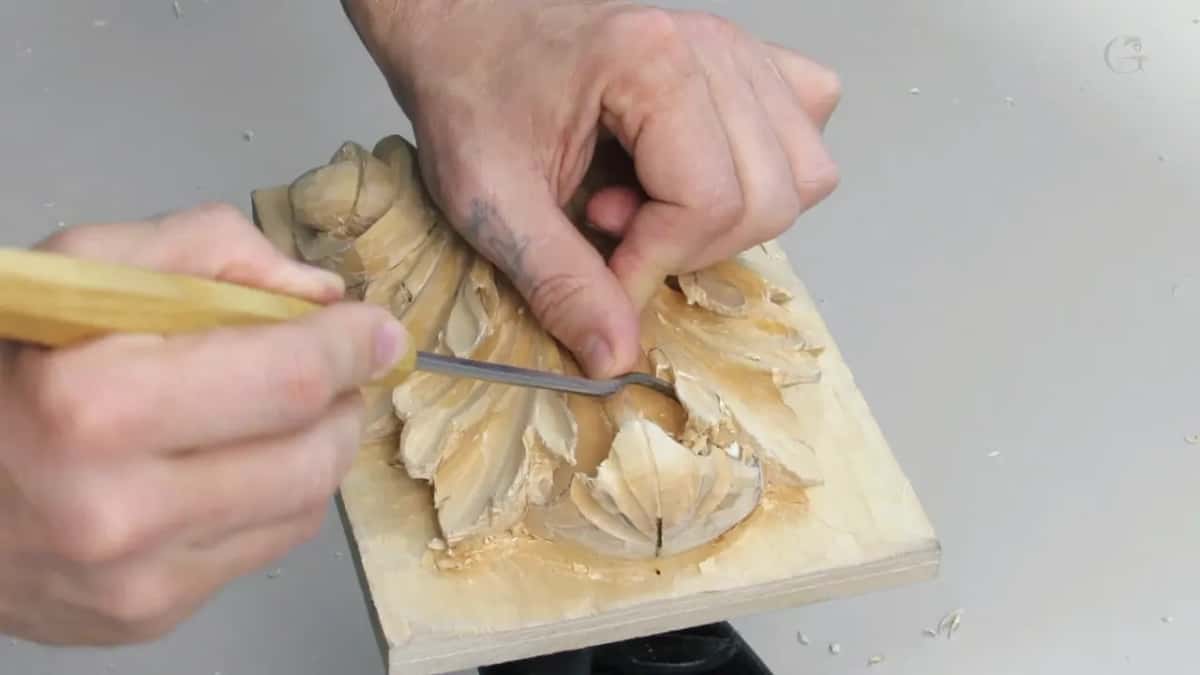
In that area a small spoon V tool would work, though a spoon gouge will work also. Over on the second side I tried a small 3/32 straight gouge instead, and it did the same task, no problem. So in that area I didn't have to use a spoon gouge.
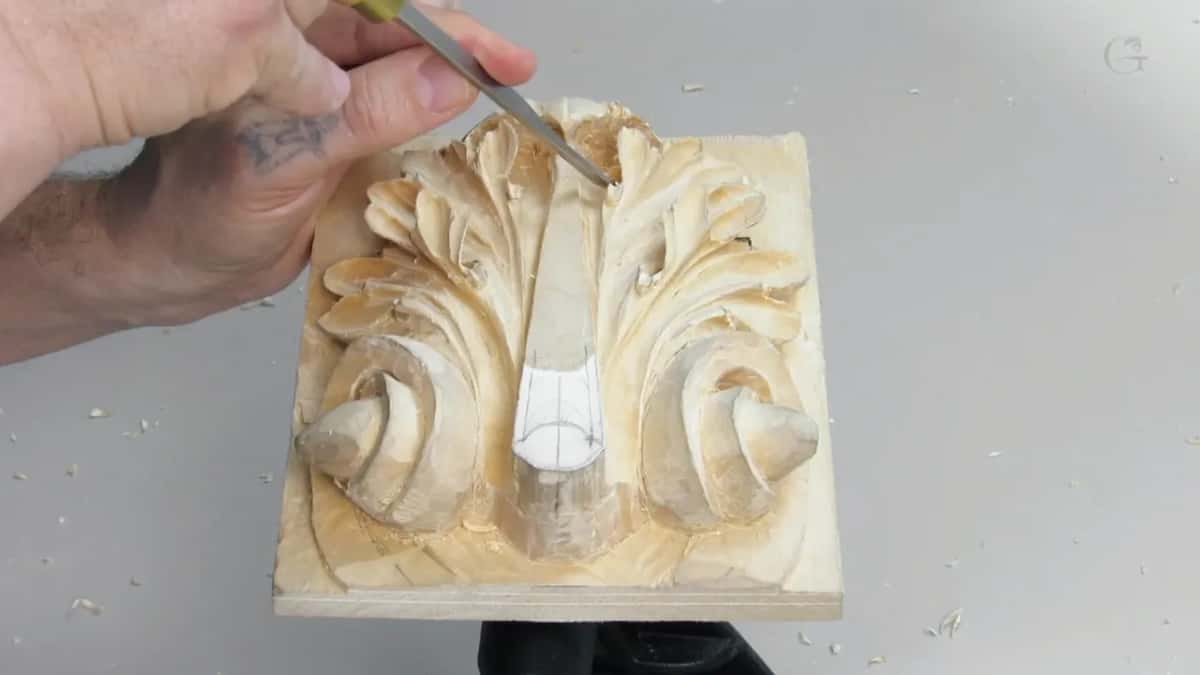
Last, the same number 5, a quarter inch, lowered those ridges down a little, to blend them. That was enough for now, although I'd probably still take a small gouge for another concave cut in that direction.
Which tools did lesson 12 use?
Small ones, nearly all a quarter inch (6 mm) or under. Here are the main ones, in the order they came out.
| Tool | What it did here | Note |
|---|---|---|
| Gouge number 7, 4 mm (5/32 in) | straight down on the marks, then lowering a section of the pipe | an 8 or 9 works too |
| Knife, then back bend 25, 3 mm | rounding the new ridges | a bigger back bend would suit this pipe better |
| Small number 8, 3 mm | the concave in the middle and the micro-concaves on the sides | easy to overdo |
| Back bend by Ashley Iles, marked 37 | undercutting really, really deep with nothing at all in its way | 3/32 in across its end |
| Spoon gouge 9a/2, only 2 mm | cleaning the inside | watch the grain, since some areas run against it |
| Veiner number 11, 1 mm | a channel you see only when you look close underneath | can go to the background |
| Quarter inch number 5 (6 mm) | cleaning the fragile walls, then blending the last ridges | really carefully |
| Straight gouge, 3/32 inch | doing the spoon gouge's task on the second side | no trouble at all |
Want to watch me carve the whole return on this leaf? Every lesson of this Roman acanthus course is open with tuition, and if you are new, you can start here. The lesson before this one is Carving Roman Acanthus 11, and the leaf goes on in Carving Roman Acanthus 13.
How it's done
- Mark by eye. Put two marks on by eye, roughly 12 and 10 mm, and draw the line down.
- Divide in three. Subdivide the return into three elements.
- Make the straight-down cut. Find a small gouge that matches your profile, a 4 mm number 7 in my case, and make a straight-down cut on the marks.
- Take the section down. Lower that section a little, about 3/32nds, with the same tool, so there's room for a micro undercut later.
- Round the ridges. Round them with a knife or a back bend, and mind the direction of the grain.
- Carve the concaves. A small number 8 (mine is 3 mm) makes a concave in the middle and little ones on the sides. Stop before you overdo them.
- Undercut and clean. Undercut with a back bend, or tilt a straight tool in, then clean out with a small spoon gouge in multiple passes, without forcing it.
Frequently asked questions
Do you have to split the return into three parts?
No, you could leave it whole. I subdivided mine into three elements because I think it looks nice, and then each part gets its own small concave. On this leaf I did it on nearly every pipe.
How deep should a micro undercut be?
Three thirty-seconds of an inch, about 2.4 mm, is how far I lowered the pipe sections in lesson 12. I started near a sixteenth and went a little more, to leave room to undercut and make extra shadow. Micro means barely noticeable, though you can still see it by eye.
Can you undercut without a back bend gouge?
To a certain degree, yes. I angled a straight tool on the inside and made an undercut that way, for anyone without back bends. A small back bend still goes much deeper, because nothing is in its way.
What to carve next