
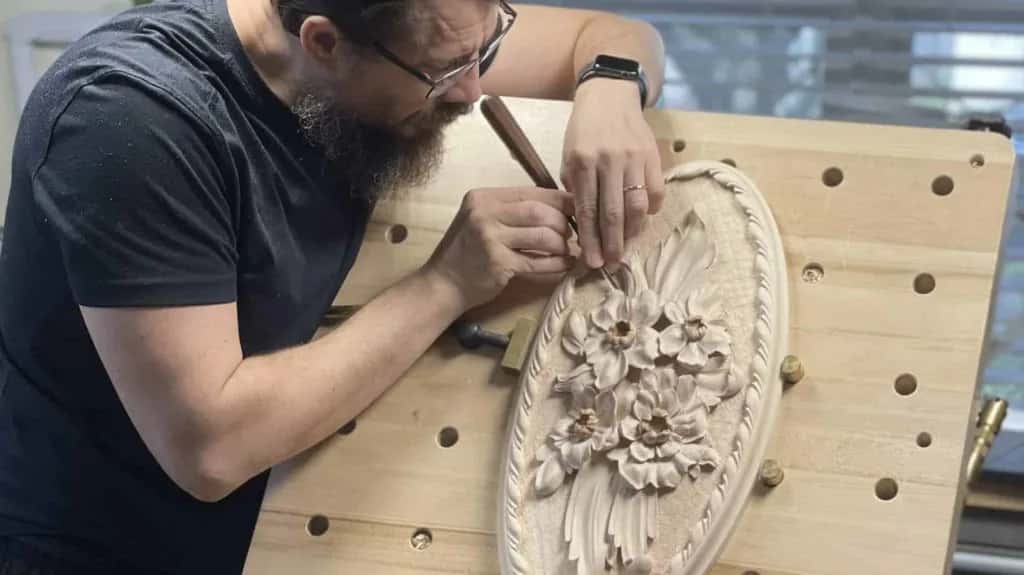
November 29, 2022 · Updated October 11, 2026
By Alexander Grabovetskiy — Master Woodcarver · Founder, School of Wood Carving · 23 min read
What should I carve as a beginner?
Key Takeaways
- Session one is three knife passes down a scrap plank, and no object at all. Vertical first, then in from either side.
- One good blade is the entire tool list. Mine is a Swiss number 12 that has outlasted two workshops.
- Ask for basswood, or limewood, or linden, and a keen edge will behave itself. Red oak only punishes a new hand.
- Fibres tear for exactly two reasons. Either your steel went dull an hour ago, or you are travelling uphill along the fibres.
- Ornament running along a strip beats a spoon for project one, since the identical pass comes round sixty times an hour.
- Reach for your first gouge the day a design asks for a scooped hollow. Honing is where most newcomers quietly lose.
Quick answer: A beginner's first carving is three knife cuts on a scrap of basswood: one straight down, one angled in from the right, one angled in from the left. Carve them before you go near a spoon or a bird, because every carving I have ever cut is built from them, and a hand that owns all three can go almost anywhere.
What should I carve as a beginner? That question usually arrives after the set of twelve tools is already bought. You picked something hard, maybe a face or a small animal, and you went at it. Now the wood looks chewed instead of cut, the lines wander, and you are wondering whether you have the hands for this at all.
You have the hands. What you skipped is the part nobody films, because it looks like nothing.
I am going to give you the exact order I put in front of a person who has never held a carving knife. One knife. One plank of pale basswood. Three cuts. After that a leaf, then a length of molding, and last a real object you can hand to someone. I have taught this order to students in Australia, Denmark, Argentina and Canada, and it has not failed yet.
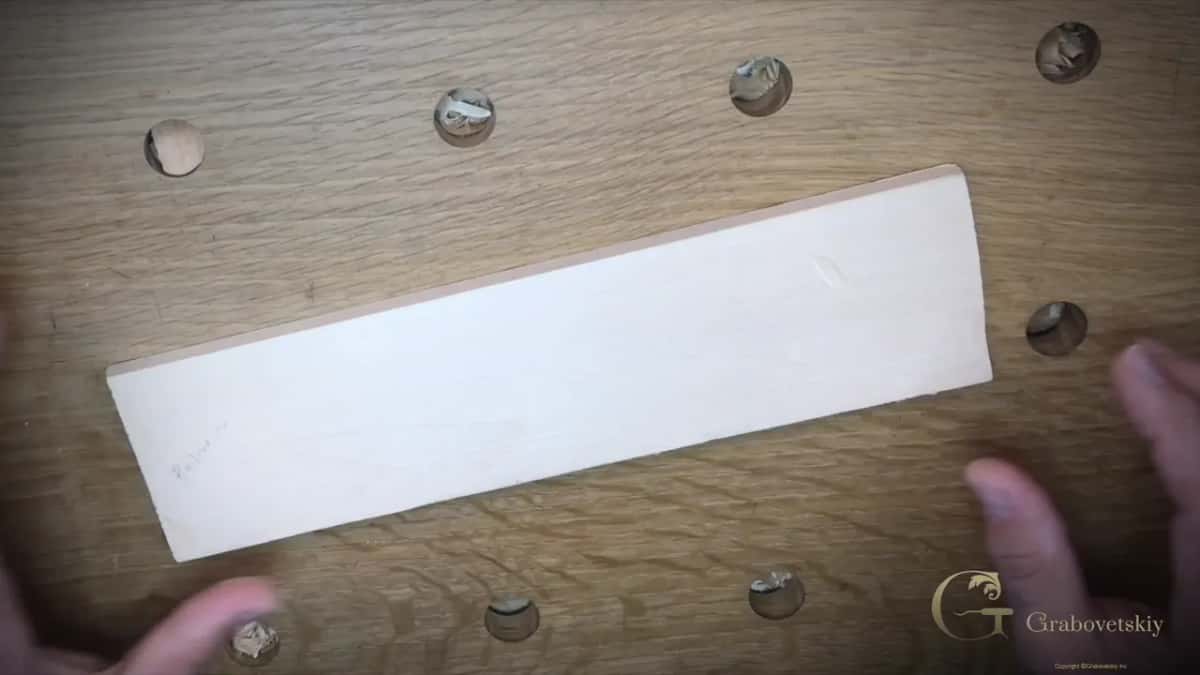
The first project. A plank, with nothing on it yet.
What should I carve as a beginner?
Carve three practice cuts on a flat piece of basswood before you carve any object at all. Draw a straight line across the grain. Cut straight down on it. Then come in from the right at an angle, then from the left, and lift a clean chip out of the middle.
That is the whole first session. It sounds like nothing. The gap between a carver and a person holding a knife sits exactly here.
There is a reason I am stubborn about this. Every leaf, every scroll, every lion's mane I have cut in forty years comes out of those three moves and their cousins. Change the angle and you get a different shape. Go deeper and the shadow changes with it. But the hand is doing the same thing it did on that first line.
Once the three cuts feel steady, you carve a stem with two leaves. After that comes a short run of molding. Last is a carved cutting board or a small plate, a real object with a real use, and people will ask you about it.
Most beginners want to skip to the board. I understand it. I skipped to a brick when I was six, and I have never regretted an hour of that either. But the students who give me one evening of straight lines are carving recognisable ornament inside a month, and the students who start with a bear are still fighting the bear in March.
What do you actually need on the first day?
You need one knife, one board, a pencil, a clamp and a table, and nothing else. The twelve piece set can wait. So can the bench, and so can the shop you keep meaning to build.
My knife is a Pfeil number 12, Swiss made, sold as a chip carving knife. It has been on my shelf for over twenty years and I still cut with it every day. That one knife paid my rent, my food and my bills for years before I taught anybody anything. Buy a good one and do not go looking for the cheap version, because cheap steel will not hold an edge and a dull knife is what makes a beginner quit.
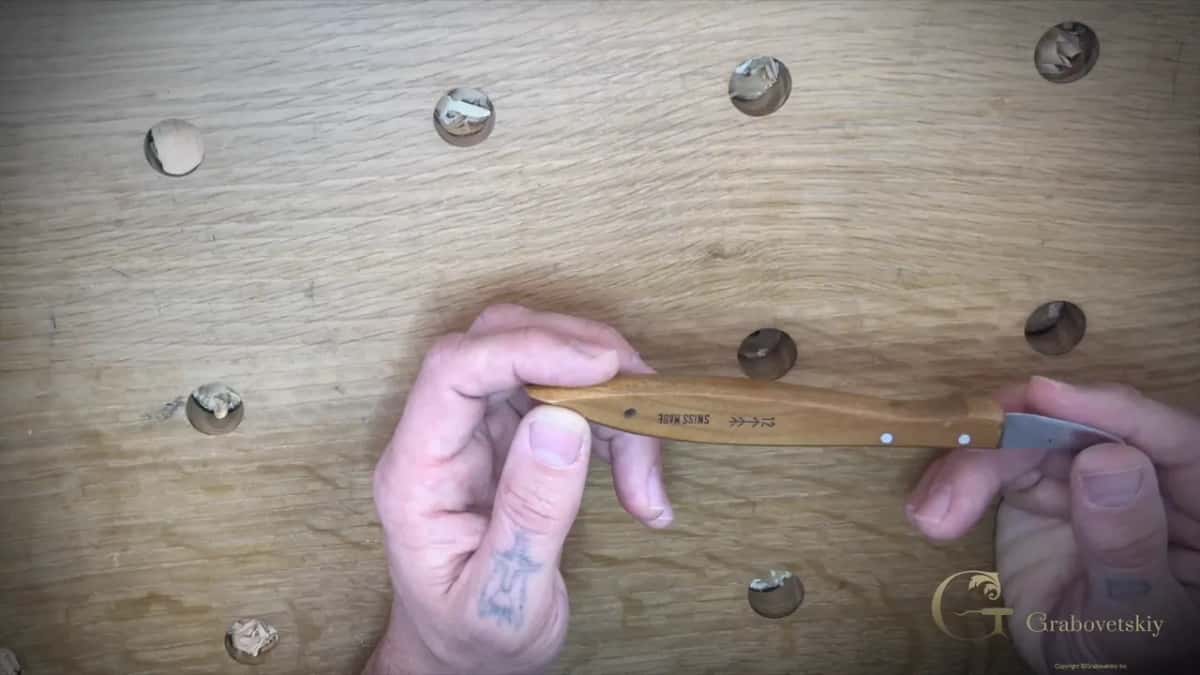
The number 12 Swiss made knife. Twenty years old, and still my first pick.
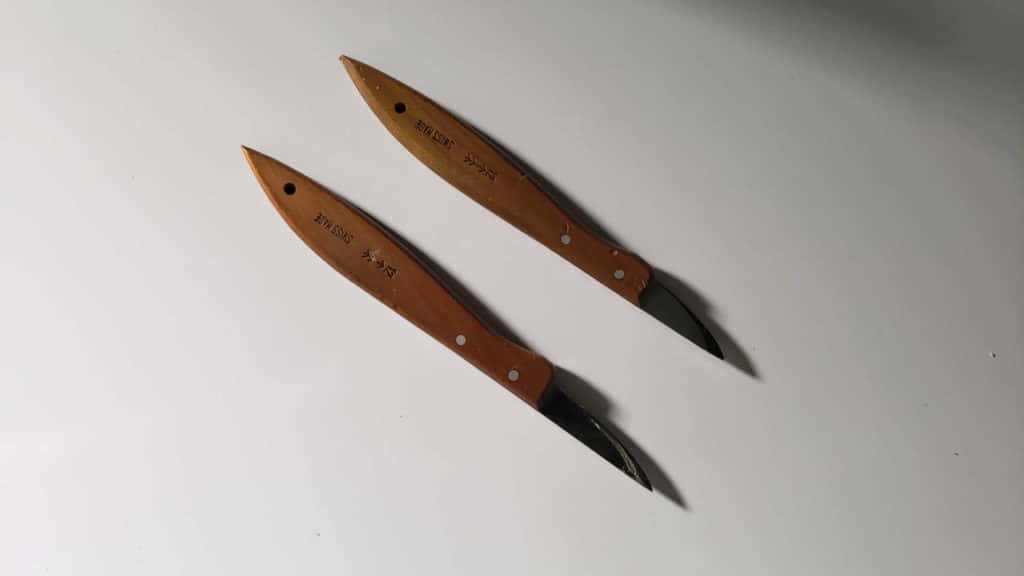
Two of mine. Honestly, one is enough to start.
The first kit | What I use, and why that one | Skip it? | What goes wrong if you skip |
|---|---|---|---|
One carving knife | Pfeil number 12, because the steel holds | Never skip | Cheap steel dulls and wood tears |
One basswood plank | Any offcut about 20mm thick will do | Not really | Oak fights back and hides mistakes |
A soft pencil | Draw the lines freehand, never with rulers | No chance | You never learn to see curves |
One small clamp | Anything at all that holds wood still | Sometimes yes | The board moves and knives slip |
A flat table | My kitchen table carried years of work | Not once | Nothing, if the top is solid |
A leather strop | Loaded with a smear of honing paste | Week two | Edges fade and cuts turn white |
Notice what is missing from that list. A workbench. A vise. A set of gouges in a canvas roll. A dust collector. I did lots of projects on a kitchen table, and the surface never once showed up in the carving.
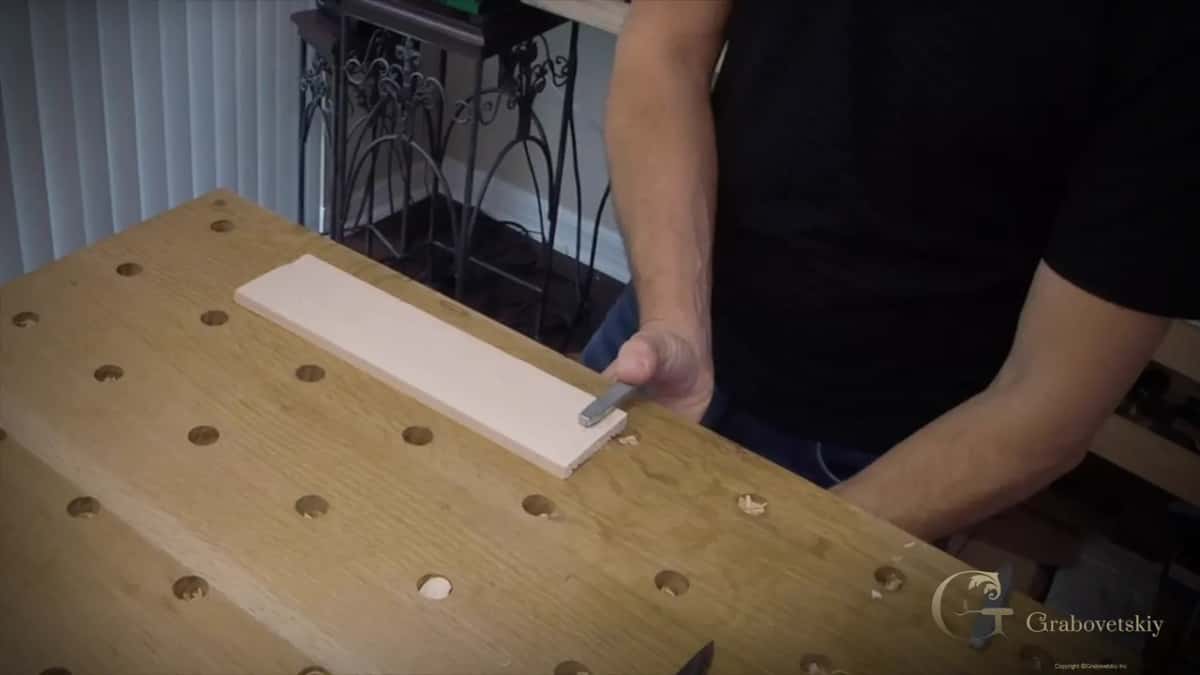
Any solid surface works. This does not have to be a workshop.
Which wood should take your first cut?
Cut into basswood, which is Tilia americana, and which the English call lime and the Dutch and Germans call linden. In Russia, where I grew up, we call it lipa. Same tree, four names, and it has been the carver's wood in Europe for six hundred years.
Basswood is soft enough that a sharp knife glides, and dense enough that it still holds a fine edge on a leaf. The grain is almost invisible, so the shape you cut is the shape people see, with no loud stripes arguing with it. Grinling Gibbons cut his great English limewood swags out of this same species. So did Tilman Riemenschneider, four hundred years ago, and his altarpieces still hold their detail.
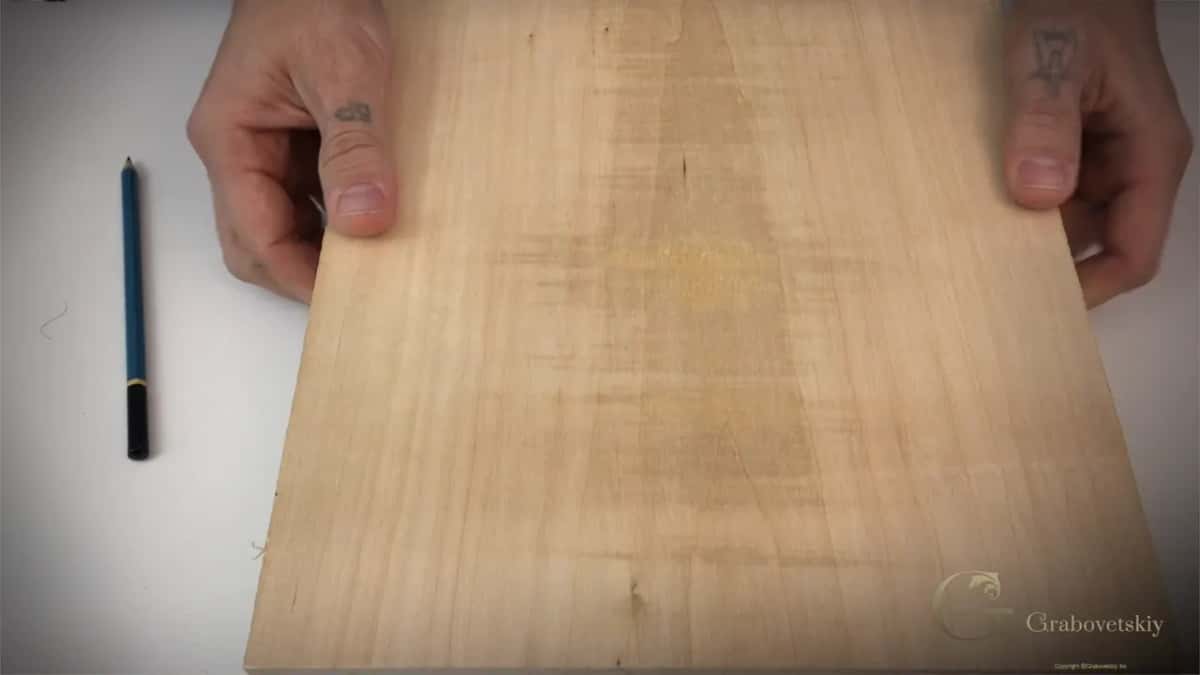
Basswood, also sold as limewood or linden. Pale, quiet, forgiving.
Where do you get it? In the United States, a craft store such as Michaels stocks small basswood planks, and Woodcraft carries larger stock. In England ask for lime timber. Anywhere else, look for a local hardwood supplier and say linden. If a sawmill near you cuts butternut, that works too, and it is a little warmer in colour.
Kind of wood | How it behaves under a carving knife | What that wood will teach you | |
|---|---|---|---|
Slices cleanly and still holds crisp detail | Yes, first | How a properly sharp edge feels | |
Soft, warm brown, with an open grain | Yes, gladly | How visible grain changes a design | |
Harder, but very even and quite predictable | Much later | Patience, and respect for the bevel | |
Cheap, though the hard growth rings tear | Be careful | How grain direction ruins a cut | |
Hard, coarse, and it splinters at edges | Not yet | Mostly frustration, honestly, at this stage | |
Dark, dense, and genuinely slow to cut | Later still | That dark wood swallows your shadows |
Full species numbers sit on the Wood Database entry for basswood when you want them, and I keep my own working notes in the basswood page of the wood guide.
Why does a beginner's first cut tear instead of slice?
Wood tears for two reasons only: the edge is dull, or you are cutting uphill against the grain. Fix those two and the chip lifts out clean and shiny, with a sound like a small zip.
Grain runs like the hairs on a dog's back. One way it lies flat. Stroke against the lay and everything lifts and roughs up like a startled cat. Wood behaves the same, and the fibres will tell you which way they run the moment you take a test cut.
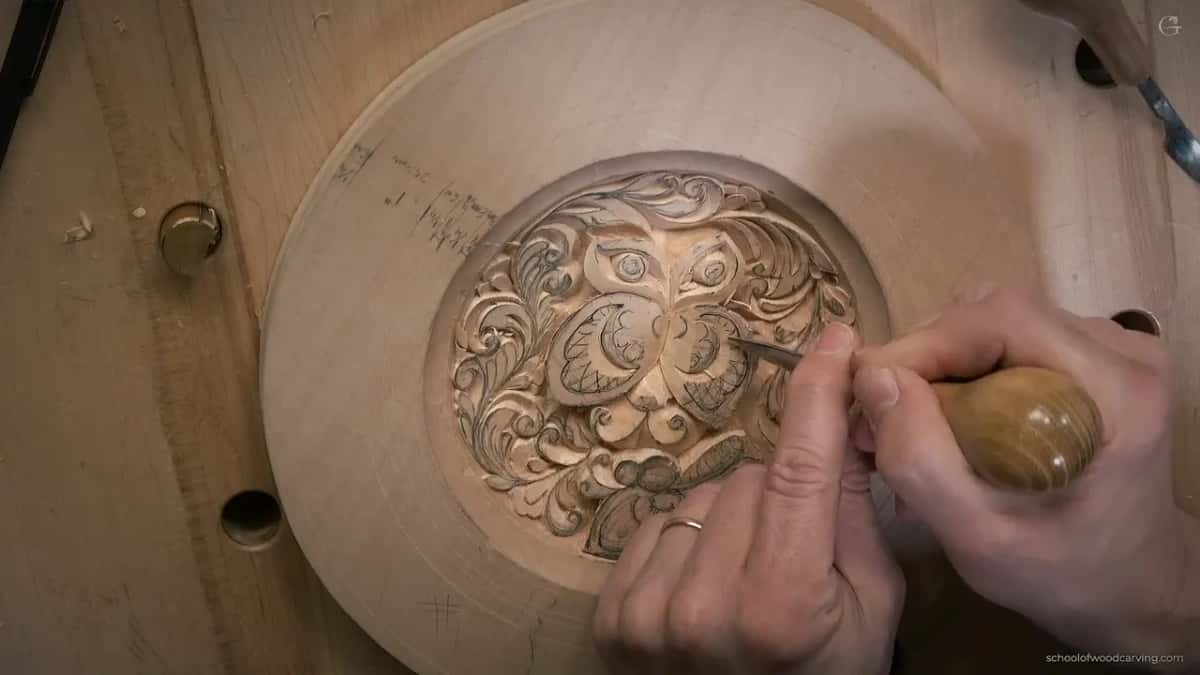
The grain reverses here. Come at it from the other side instead.
Take a small cut first. If the surface comes away bright and smooth, keep going that way. If it comes away furry, stop, turn the board around, and cut back down the hill the opposite way. On a curved line the grain will reverse two or three times inside one leaf, and you will change direction each time. Perfectly normal, and every carver alive does it.
The dull edge is the other half. A knife that has cut for an hour is not the knife you started with, and the difference shows as a chalky white line down the middle of your cut where the steel crushed the fibres instead of parting them. Six strokes on a strop bring it back.
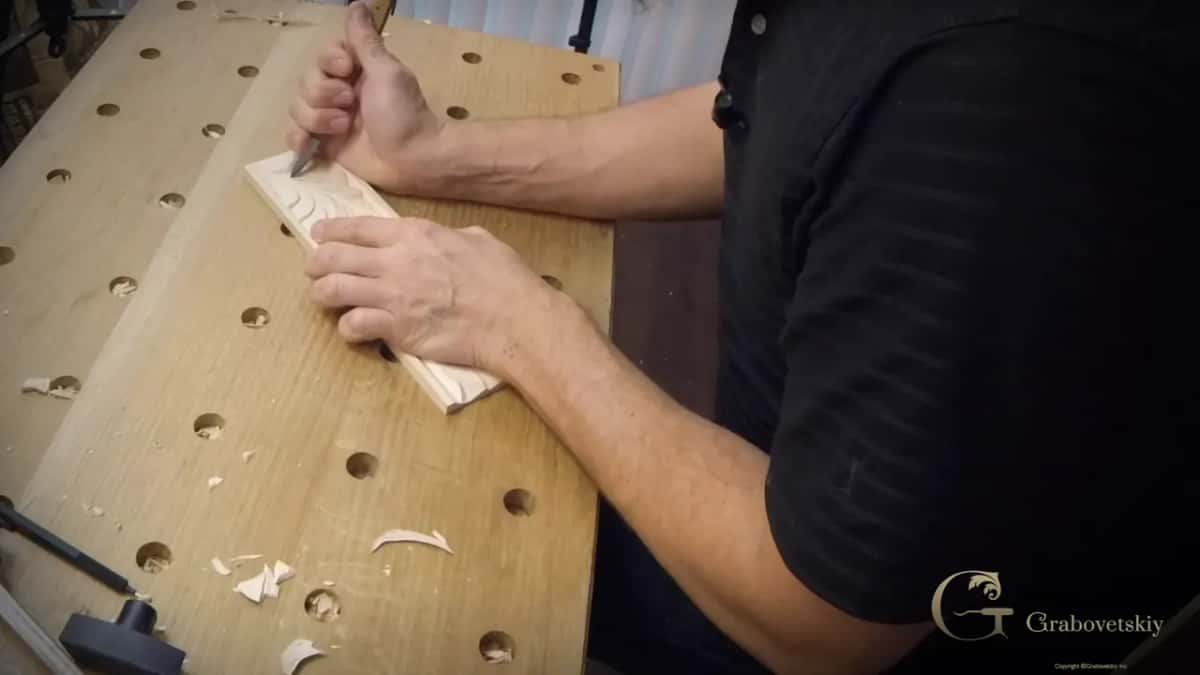
A sharp edge leaves chips, not dust.
How do you make the three cuts every carving is built from?
Clamp the board down, rule three straight lines at right angles to the fibres, and work each one in the order below. Give it one evening. Do it again the next evening on the other face of the same plank.
Step 1, set up and mark out
Clamp your basswood to the table so it cannot shift. Draw three straight lines across the grain, spaced a few inches apart. Draw them freehand, with no ruler. You are training an eye as well as a hand, and the ruler does the eye's job for it.
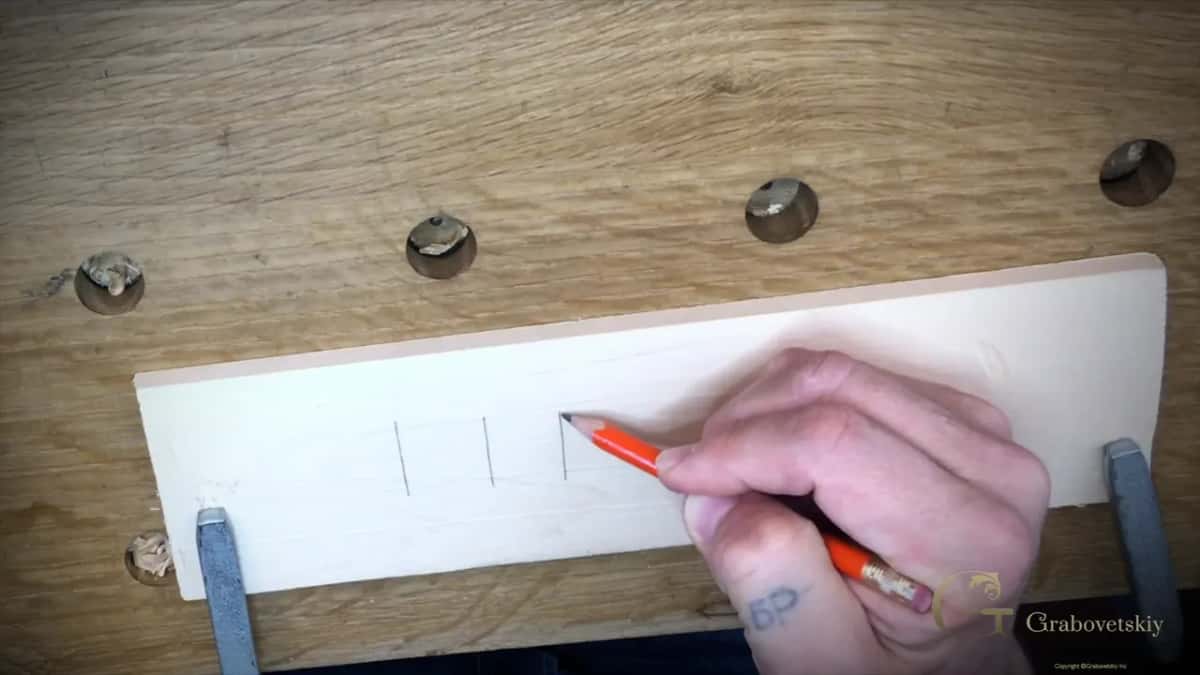
Freehand. The wobble is information, and it goes away.
Step 2, the straight down cut
Put the knife handle into your palm and close your fist around it, tight. Set the edge on the line, turn the blade so it faces your body, and pull it toward you. Ninety degrees to the surface. Not deep. That vertical wall is a stop, and it is what every later cut runs into.
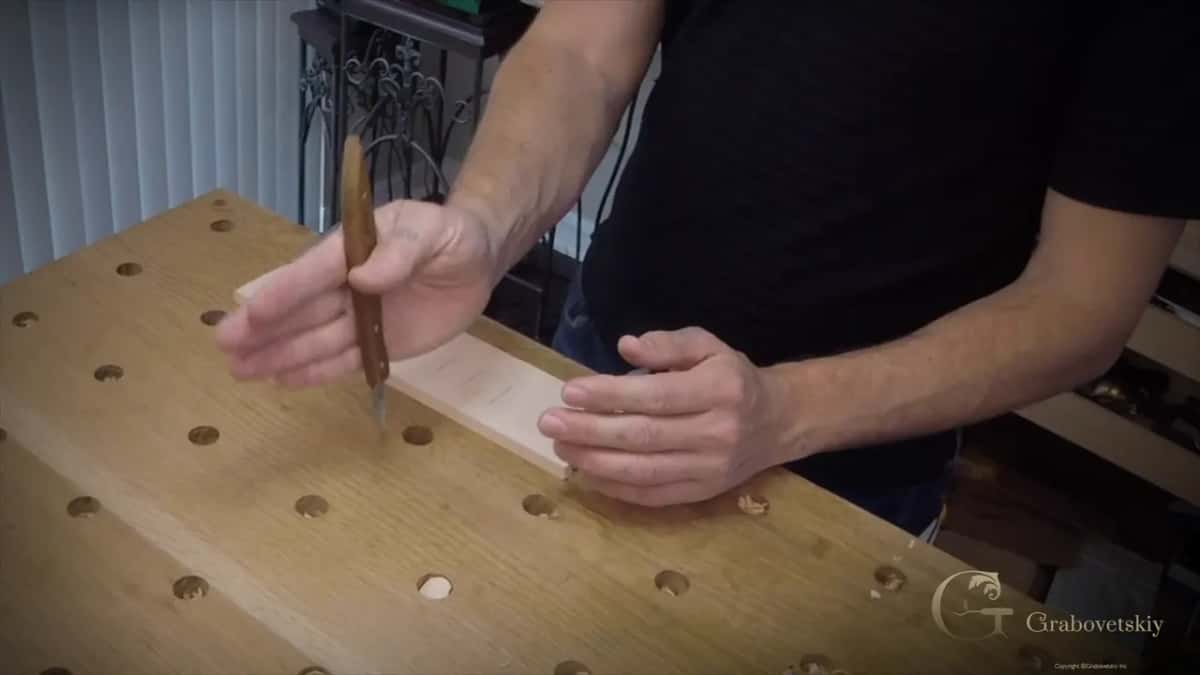
The palm grip. Tight fist, blade toward you, pull.
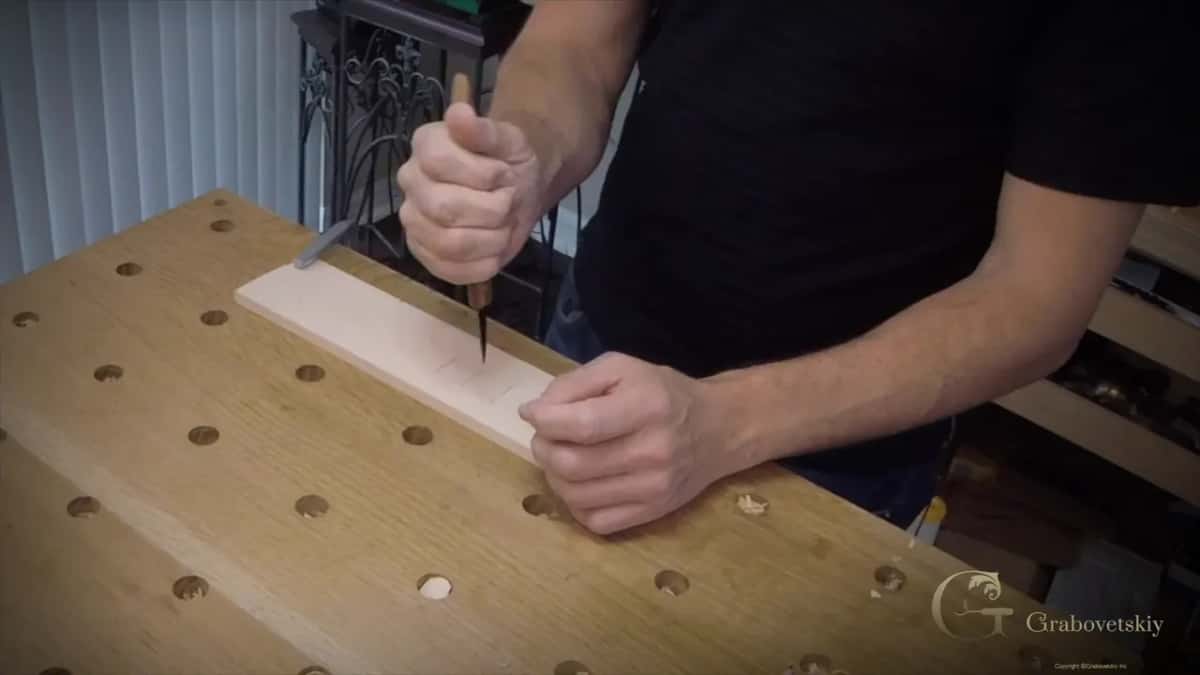
Straight down at ninety degrees, and that is cut number one.
Step 3, the right hand angle
Come back to the top of the line. Move out about five millimetres, which is three sixteenths of an inch, and that spot is where your angled cut starts. Tilt the knife to the right and run it toward the line you already cut, feeling for the bottom of that vertical wall. The chip should lift away by itself. If it does not, repeat the straight cut and try again, and never lever it out.
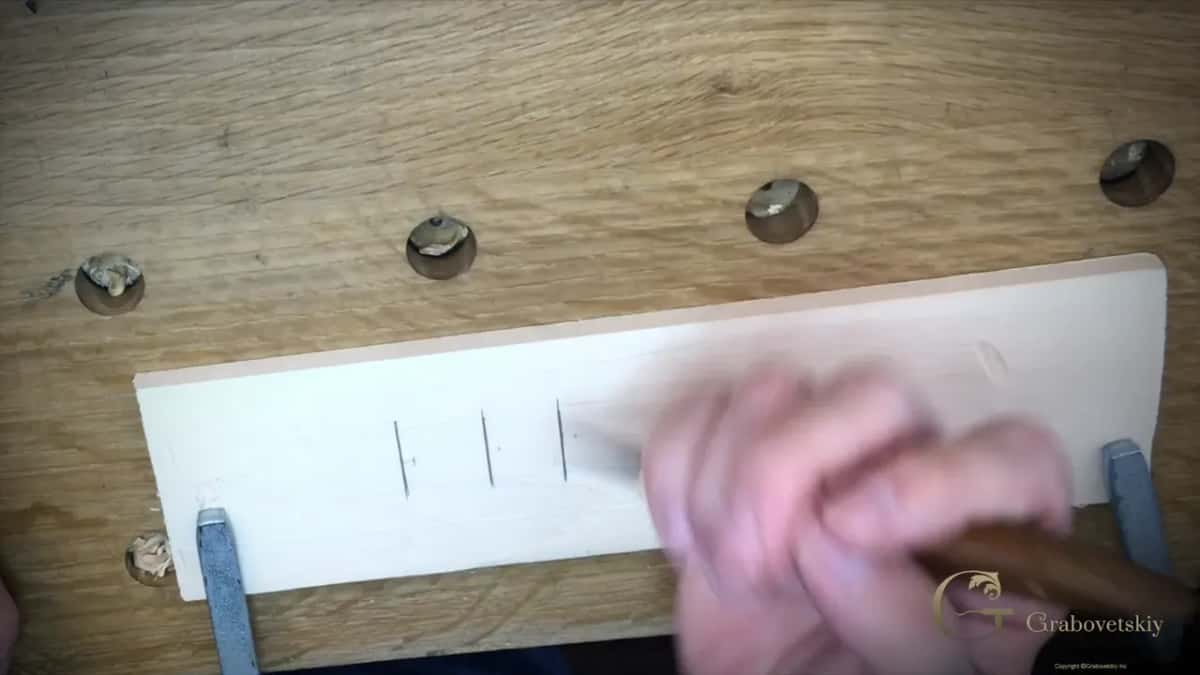
Five millimetres out, then in at an angle to meet the wall.
Step 4, the left hand angle and both sides meeting
Now flip everything. Same cut on the opposite side of the second line. On the third line, do both: right side, then left side, both angles running down into the same vertical wall. When those two angles meet exactly, you get a clean V groove with a crisp bottom, and you have just taught your hand how deep it is travelling. The real lesson of the whole exercise is hiding right there.
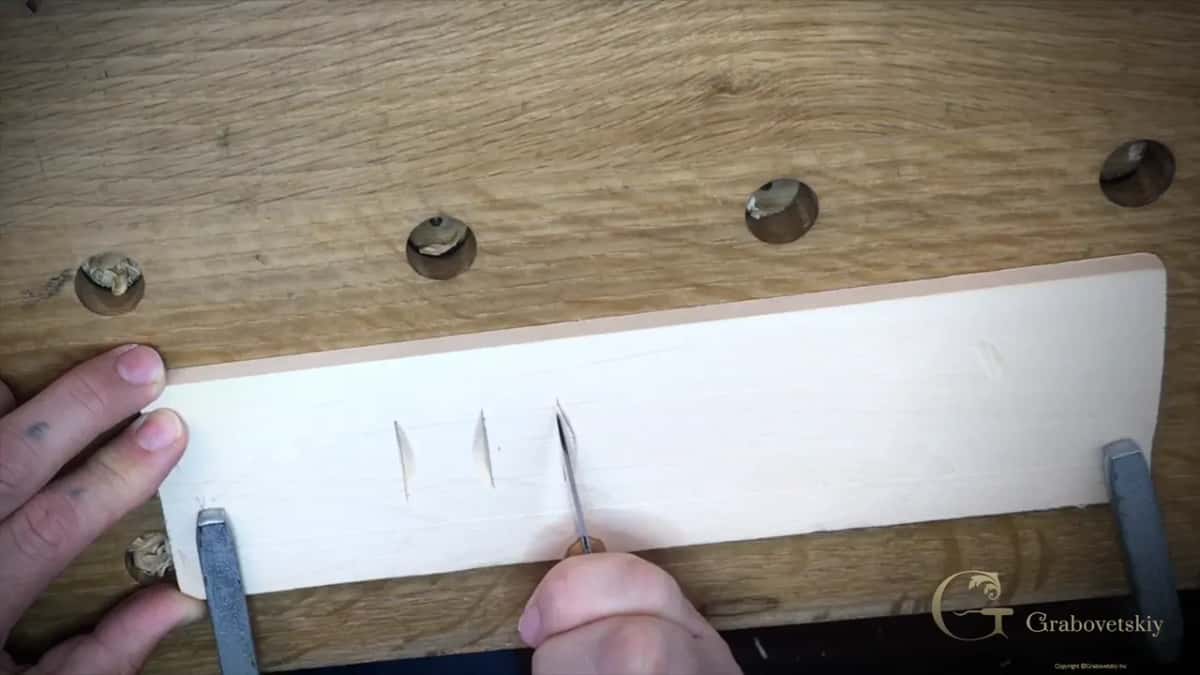
Both angles meeting in the middle, which makes a V groove.
One safety rule, and it is not negotiable. Your other hand never goes in front of the edge, not even when you are only steadying the work. Behind the blade, always. Years of teaching say the students who ignore it are the students who bleed.
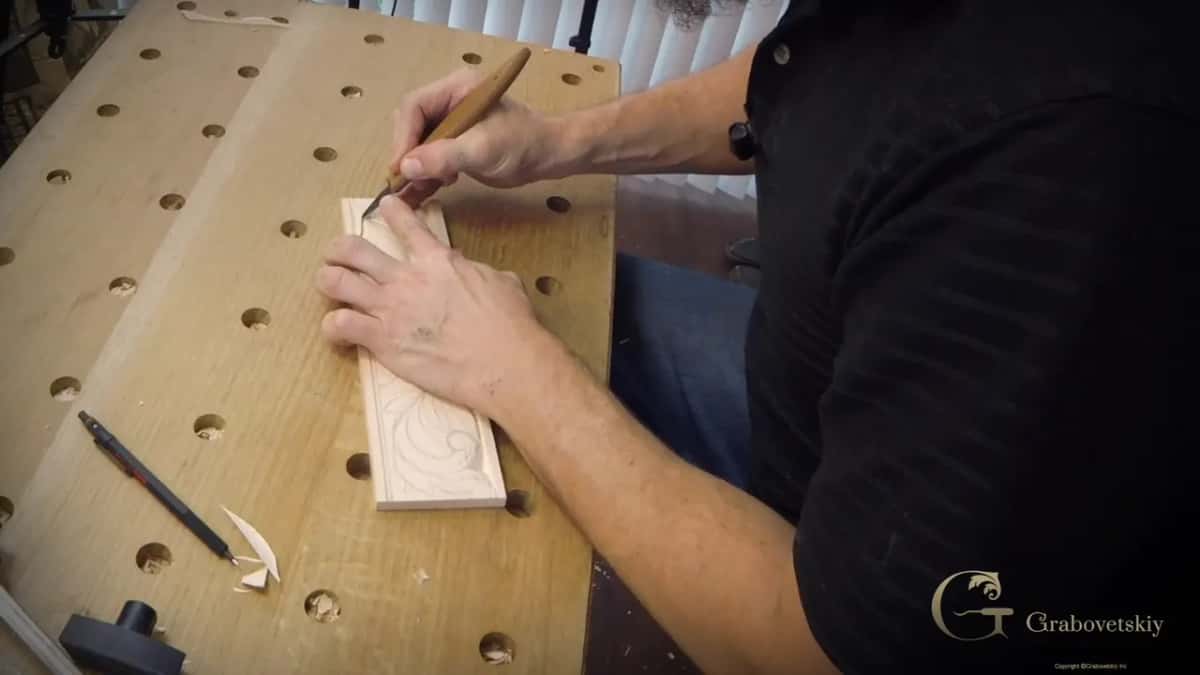
The steadying hand stays behind the edge. Every single time.
What can you carve with only those three cuts?
Sketch a stem with a few small leaves, then cut it with exactly the moves you just practised. Right angle, left angle, and a straight cut when a shape needs a hard stop.
For shapes this small, change your grip. Hold the knife the way you hold a pencil. Your fingers get much finer control that way, and the leaves are only a centimetre long.
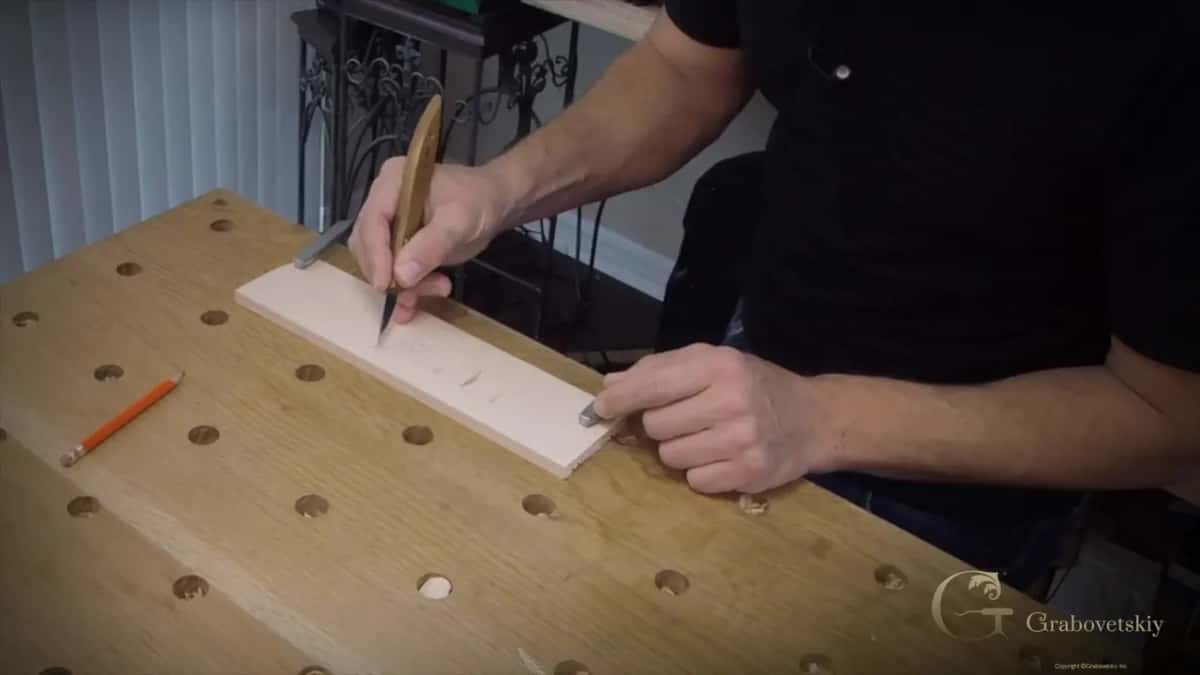
Pencil grip for small work. Those leaves are tiny.
When the stem is done, go for the second project, which is a short run of hand carved molding. Take a strip of basswood about 20mm wide and 10mm thick, roughly three quarters of an inch by three eighths. Divide it into equal spaces along its length. Mark a straight line across at every division, then a diagonal corner to corner inside each space.
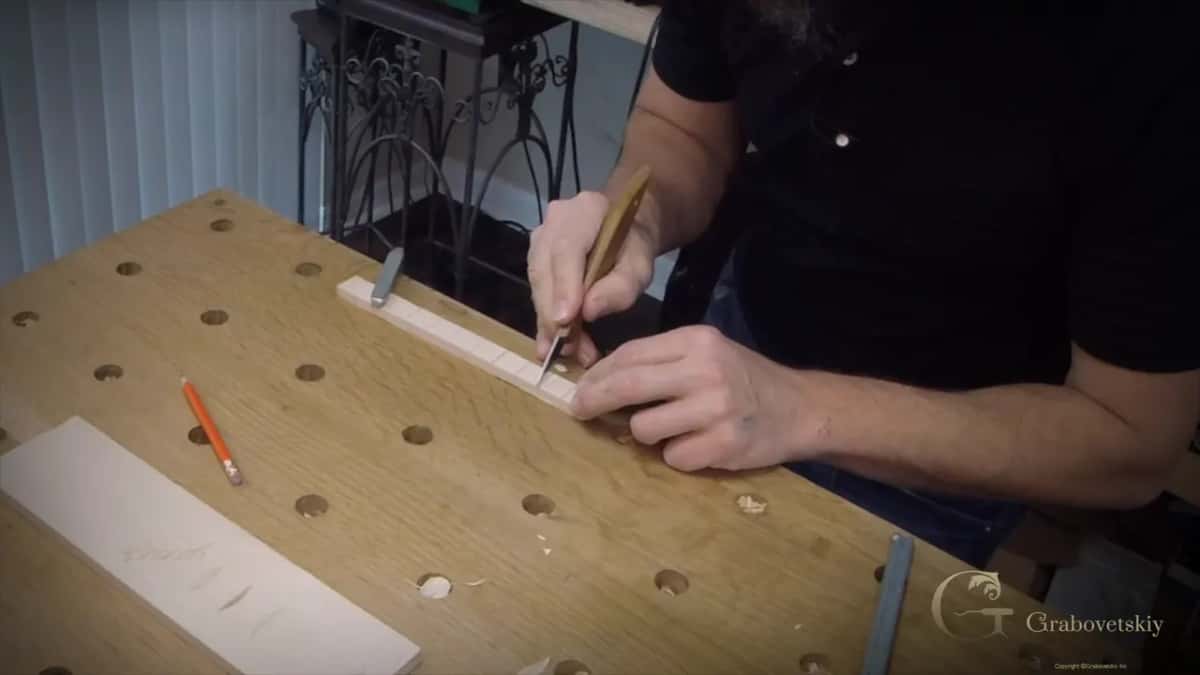
The strip, stepped off by eye into equal spaces.
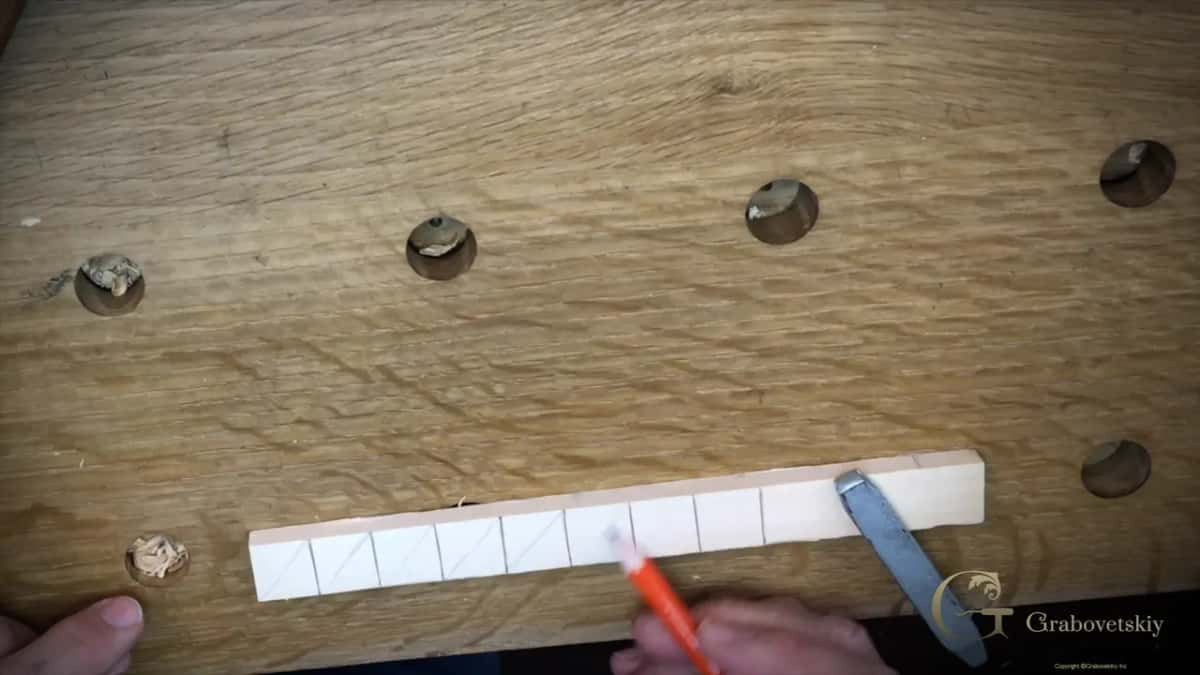
Corner to corner, inside every space. Now it is a pattern.
Take the vertical pass on every cross line, not deep. Then turn the knife point away from you and skew down along each diagonal, about two millimetres deep, working over toward the centre line. Flip the strip end for end and do the other side. Repeat the pass a couple of times if you need to, and expect to sweat, because this is genuinely a workout.
What comes off that strip is a molding you can find on Greek buildings and on old European chests. Hold it up in low side light and watch what happens.
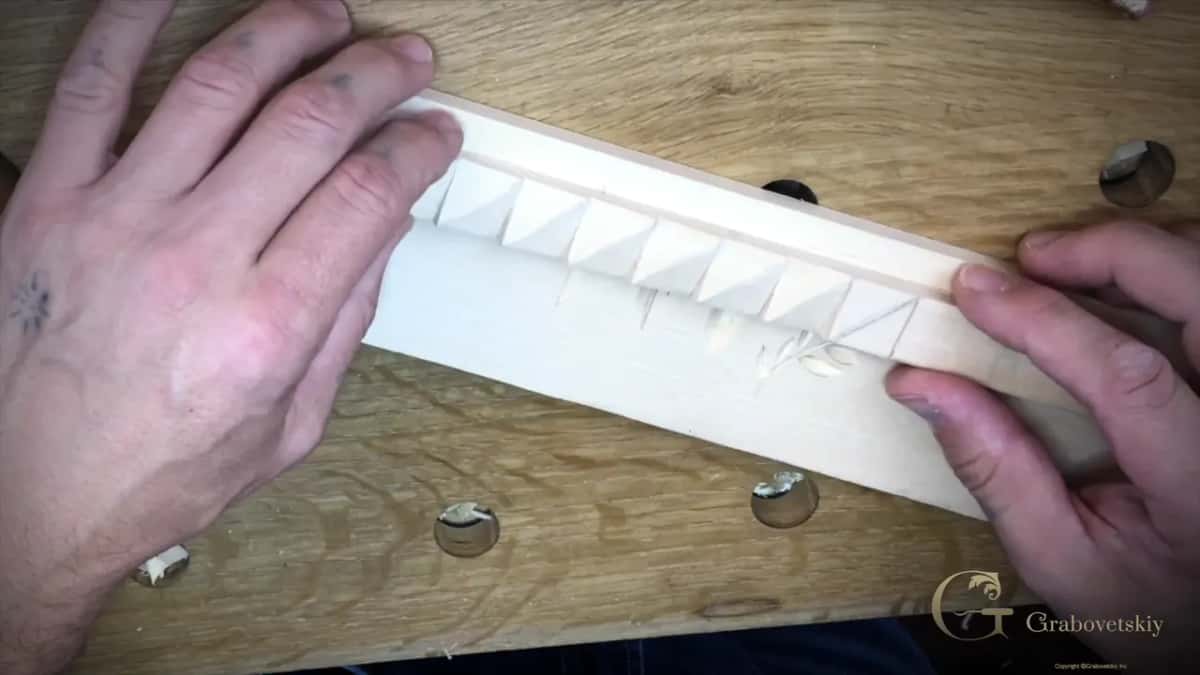
Raking light. The shadow is what people actually see.
That shadow is the entire trick of relief carving, and you just made it with one knife on your kitchen table.
Why is a length of molding a better first project than a spoon?
A molding repeats, and repetition is the only thing that ever taught a hand anything. A spoon does not repeat. One shape, carved once, and when it goes wrong you have spent three hours buying a single lesson.
This is where most beginner advice gets it backwards. The internet says start with a spoon, or a comfort bird, or a little gnome, because those are finished objects and finished objects feel like progress. I understand the appeal completely. But a beginner carving a spoon spends most of the session hollowing a bowl with a tool they cannot yet control, and the parts that actually train the hand are the few outside cuts at the end.
On a strip of molding you will make the same angled cut sixty times in an hour. By cut fifteen your depth steadies. Somewhere around forty, the hand quietly stops thinking about it. People call that muscle memory, and it only ever arrives through repeats.
First this, then that. The motto of mottos, for a carver.
David Esterly wrote that in The Lost Carving, after a year spent replacing a burned Grinling Gibbons carving at Hampton Court. He is talking about order. In carving you cannot go back, because every cut removes wood that is gone forever, and the whole craft is really the discipline of doing things in the right sequence.
The three cuts are the sequence. A molding drills them into your hand. Then comes the object.
Which style of carving should you go into after the practice board?
Pick the style that matches the tools you already own, not the style with the prettiest photos. A beginner holding a single knife has more options than they think, and a beginner with a chainsaw cannot carve a spoon no matter how much they want to.
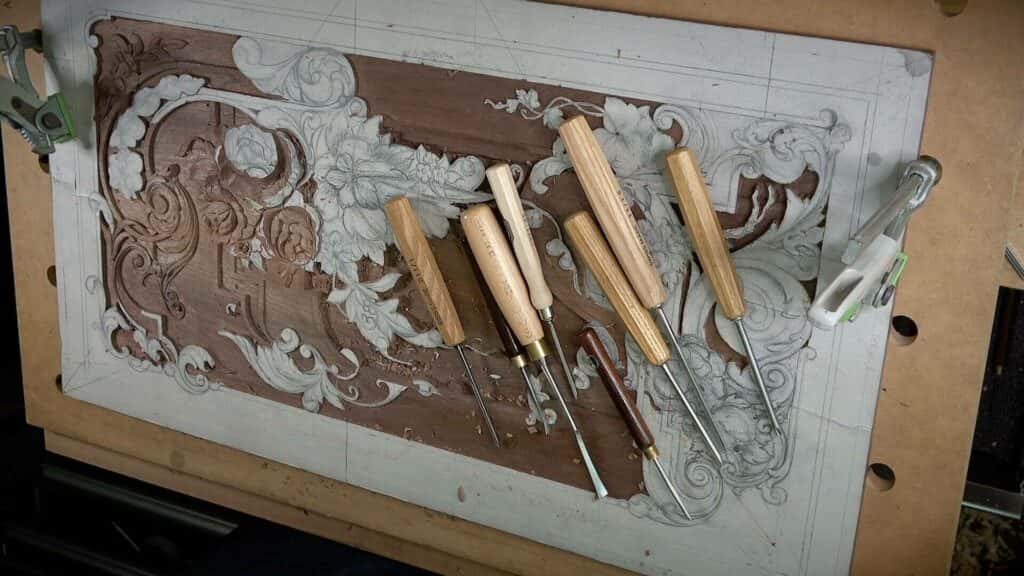
Low relief on furniture, and shallower than most people expect.
Style of carving | Typical things people make in that style | Tools needed | Honest difficulty for a raw beginner |
|---|---|---|---|
Moldings, borders, and leaf and scroll ornament | Knife alone | Easiest, and fastest to look good | |
Spoon and bowl | Kitchen spoons, scoops, small ladles, butter knives | Knife, hook | Easy shape, but hollowing needs practice |
Low relief panels | Boards, furniture aprons, plaques and door panels | Six gouges | Moderate, and most useful long term |
Boxes, geometric borders, rosettes, repeating star patterns | Same knife | Easy to start, unforgiving on layout | |
Carving fully round | Figures, animals, and small standing sculpture pieces | Hard, you must think in 3D | |
Bird and fish | Feather detail, fins, glass eyes, painted finishes | Fine tools | Slow, fussy, and it needs gear |
If I had to send one person in one direction, I would send them to low relief on a flat board. It teaches drawing, depth and shadow all at once, it hangs on a wall, and it leads directly to furniture work that people pay for.
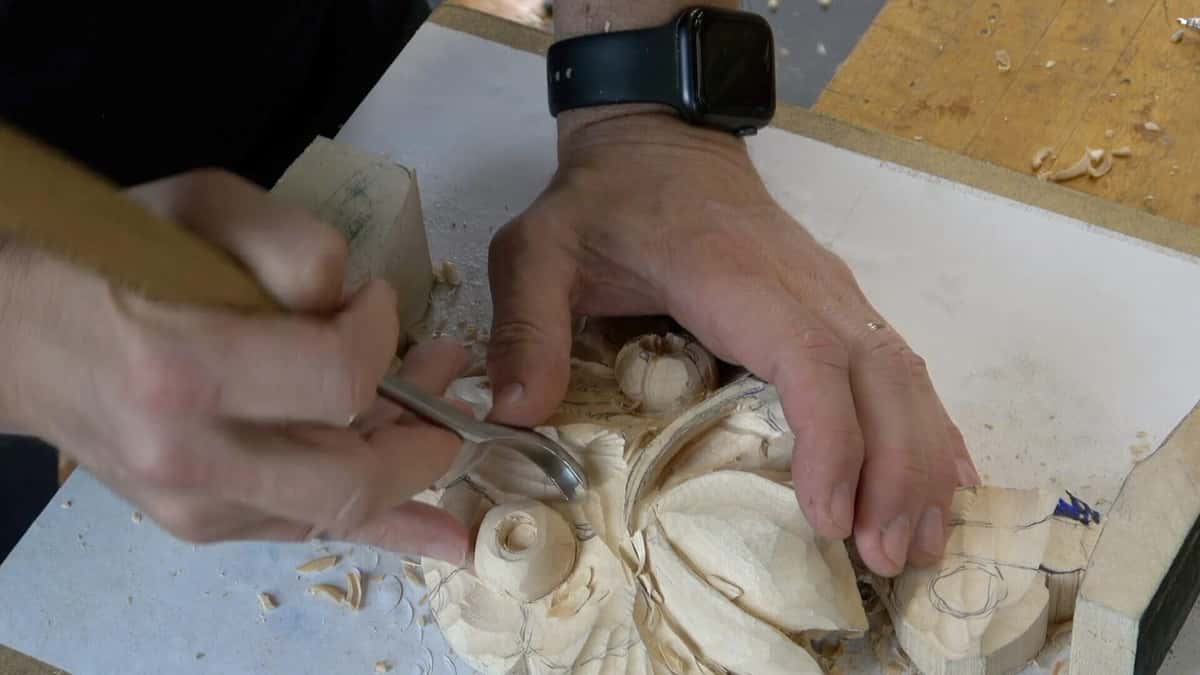
Relief work. A small gouge doing the modelling on a rosette.
When do you actually need your first gouge?
Buy a gouge when a shape you want needs a hollow, and not one day earlier. A knife cuts a V and it cuts a flat facet. What it cannot do is scoop.
My own teacher gave me a knife and nothing else, and he kept me on it for a long time before he handed over a gouge. I thought he was being difficult. He was building the only thing that mattered, which was the feel for depth, and once that was in my hands the gouge took about a week to learn.
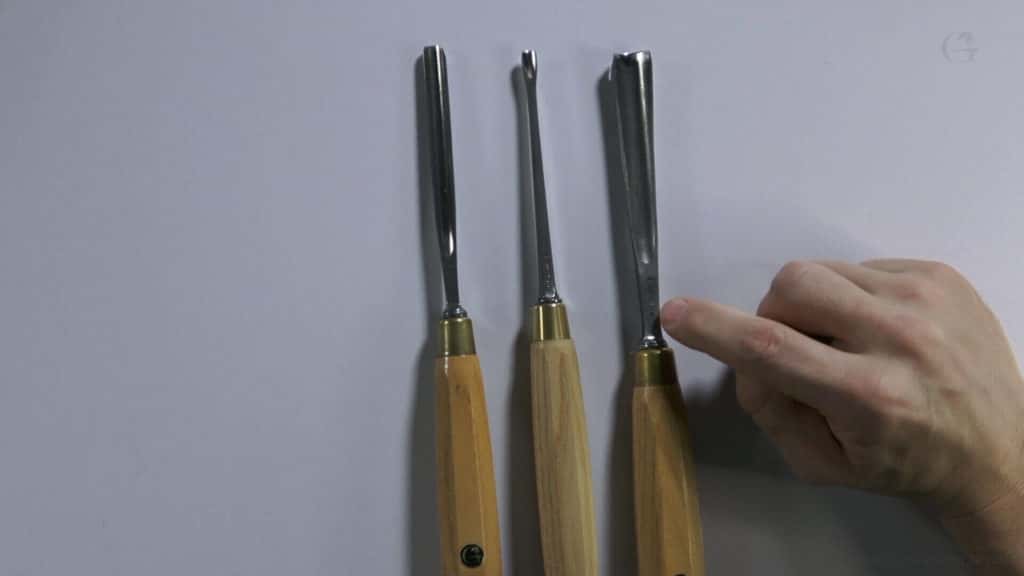
A straight gouge, a small veiner, a fishtail. Three shapes, three jobs.
When that day comes, buy three, not twelve. A number 9 gouge around 20mm wide takes waste away fast. For corners nothing else reaches, use a number 11 veiner at half a millimetre or one millimetre. Modelling gets done with a number 3 or 5 of medium width. A wall of gouges stands behind me in every video, and I still cut most of a panel with about six of them.
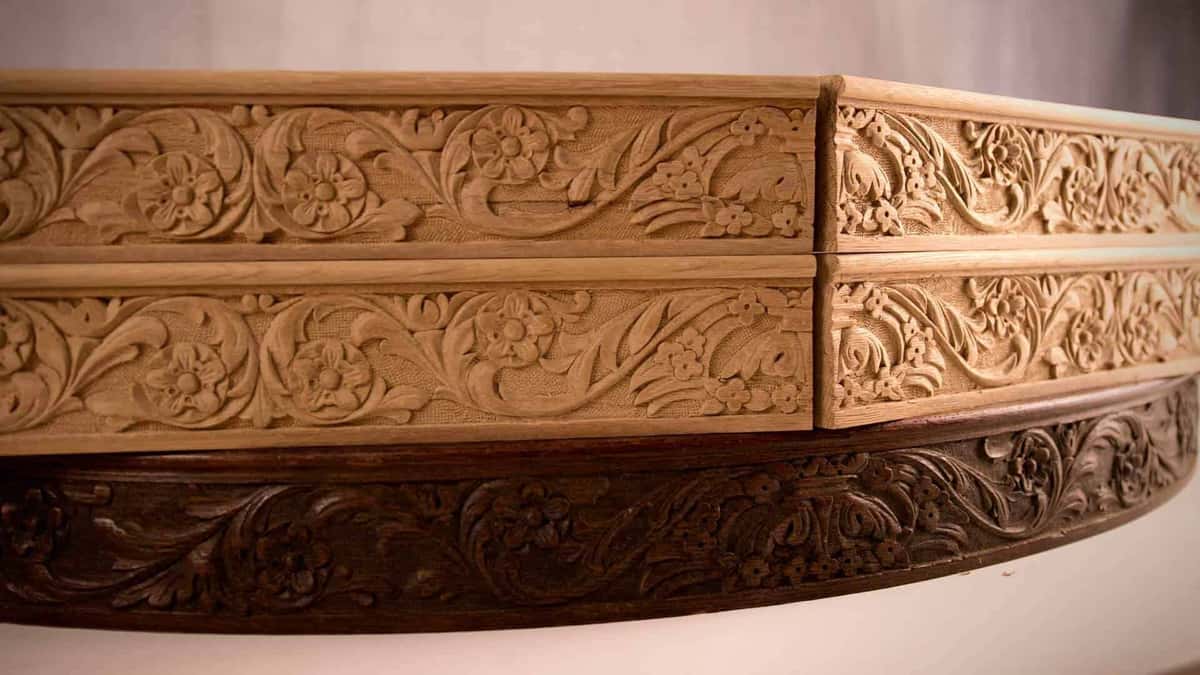
Miles of molding. Repeating ornament is where a carver earns a living.
Here is the part nobody warns you about. The moment you own gouges, you own a sharpening problem, because every one of those curved edges has to be honed and each shape wants slightly different treatment.
How sharp does a beginner's edge really have to be?
Sharp enough to slice end grain with no pressure. Harsh test, and almost every beginner is working well below it without knowing.
Take your knife to the end of a basswood offcut, where the fibres point straight at you. Push gently. A properly honed edge peels a curl off it. A dull edge skids, then digs, then crushes.
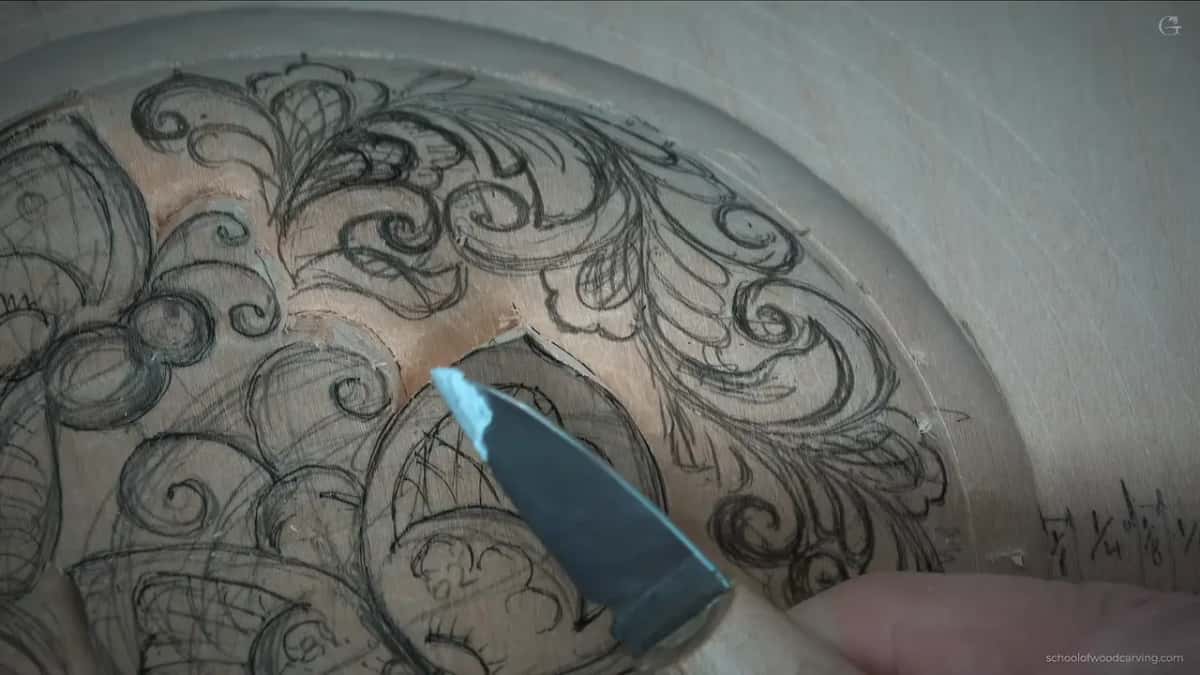
A quarter inch of paste on the strop, and it never needs more.
For the first month you do not need a grinder, a jig or a stone collection. You need a flat leather strop, a stick of honing compound, and the habit of stropping every fifteen minutes without being told. Six strokes each side. It takes ten seconds and it keeps you in the good part of the session.
Watching beats reading for this one, and the whole system is laid out in the tool sharpening course, and I have a free sharpening series I send people when they ask. Sharpening is where most beginners silently lose the fight, and it is the cheapest fight to win.
Which project should you commit to once the practice board is full?
Carve a board with an ornament on it, because it is a real object, it is flat, and it uses only what you have already learned. I film it as a kitchen cutting board with a bird and curling foliage, and about 99 percent of that project is a knife.
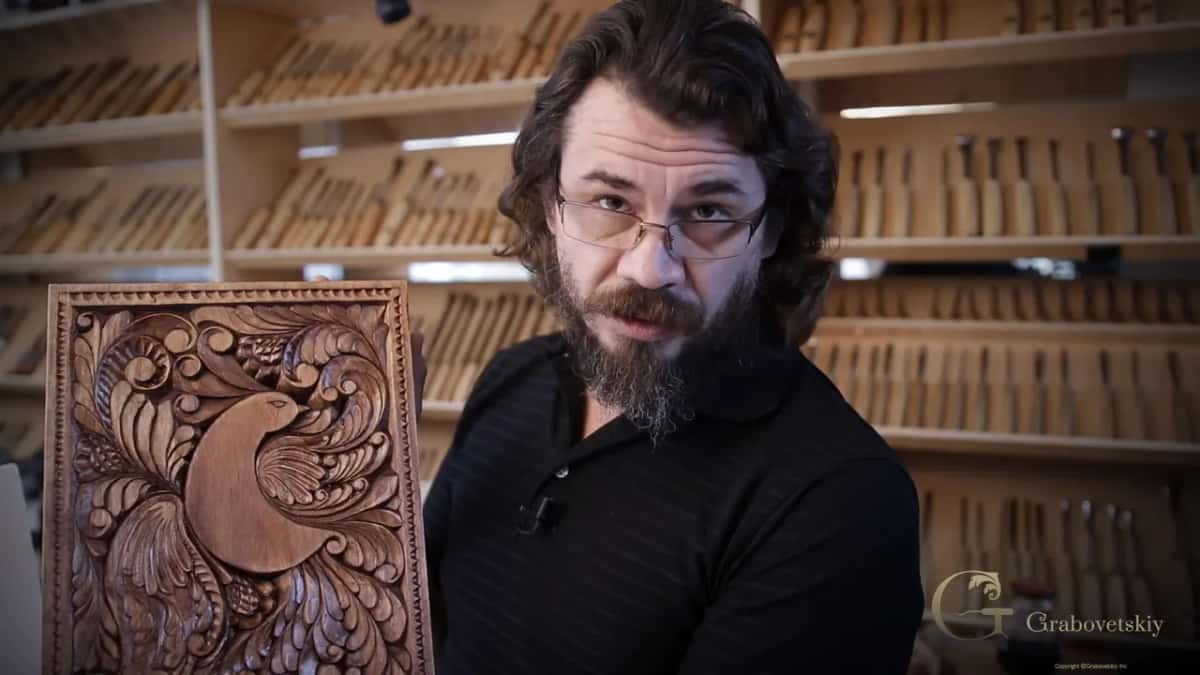
The finished board. Almost all of it came off a single blade.
Step 1, rule the borders
Find a basswood board around 10 by 13 inches, thicker if you have it, because thick stock stays flat. Rule a border a quarter inch in from every edge. Add a second line a quarter inch inside that, and a third an eighth of an inch inside again. You can do this with a rule, or you can rest your middle finger on the edge and let it run as a fence.
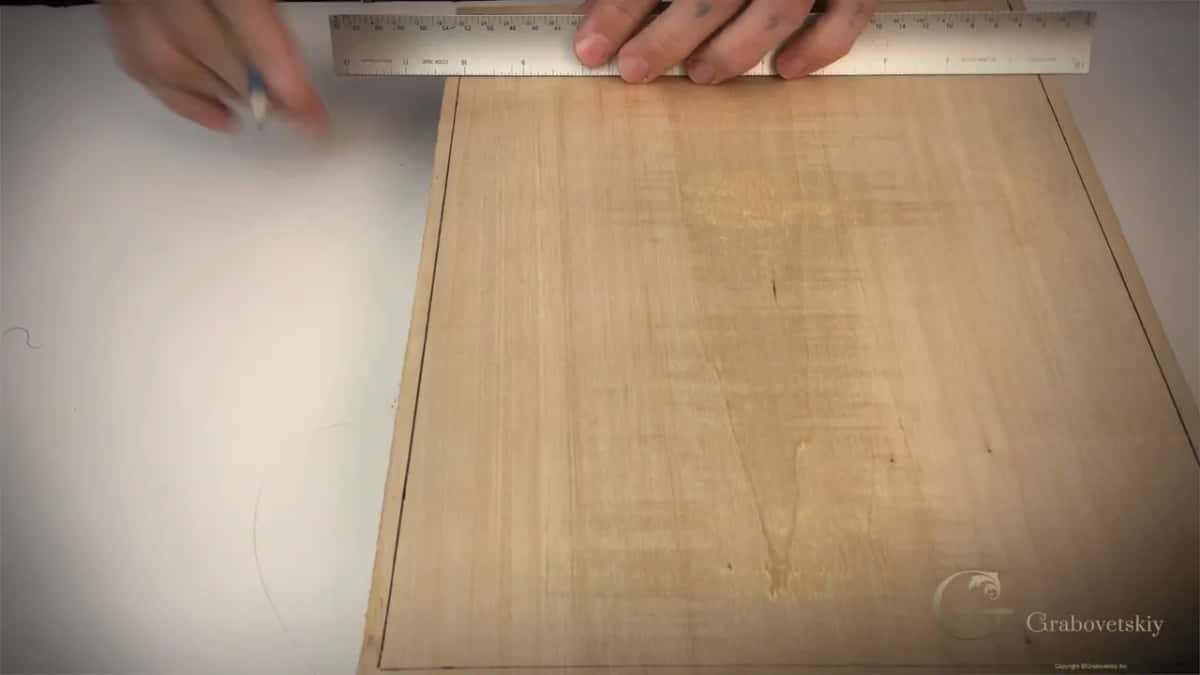
Borders first. The design is not allowed to cross these.
Step 2, draw the bird and fill the space
Sketch a simple bird body and a long tail in the middle. Realism is not the goal here. Then fill every empty space around it with curls and leaves until nothing is left bare, and keep the whole thing inside your boundary lines.
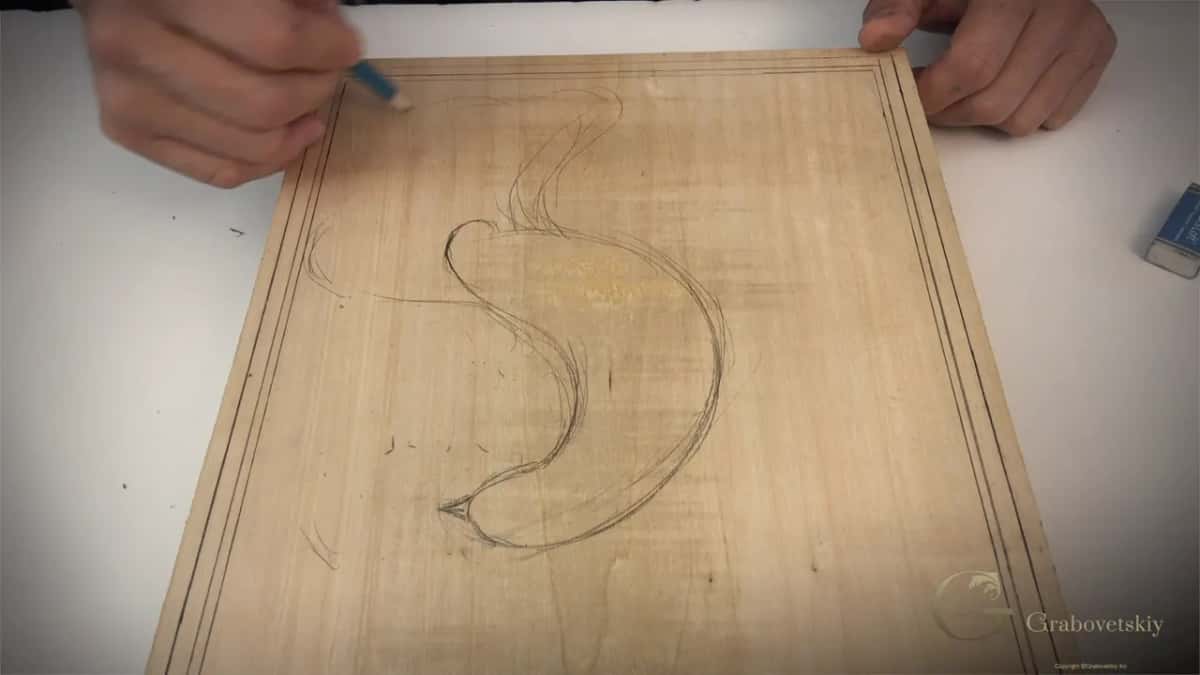
Start with the bird itself. Everything else grows out around it later.
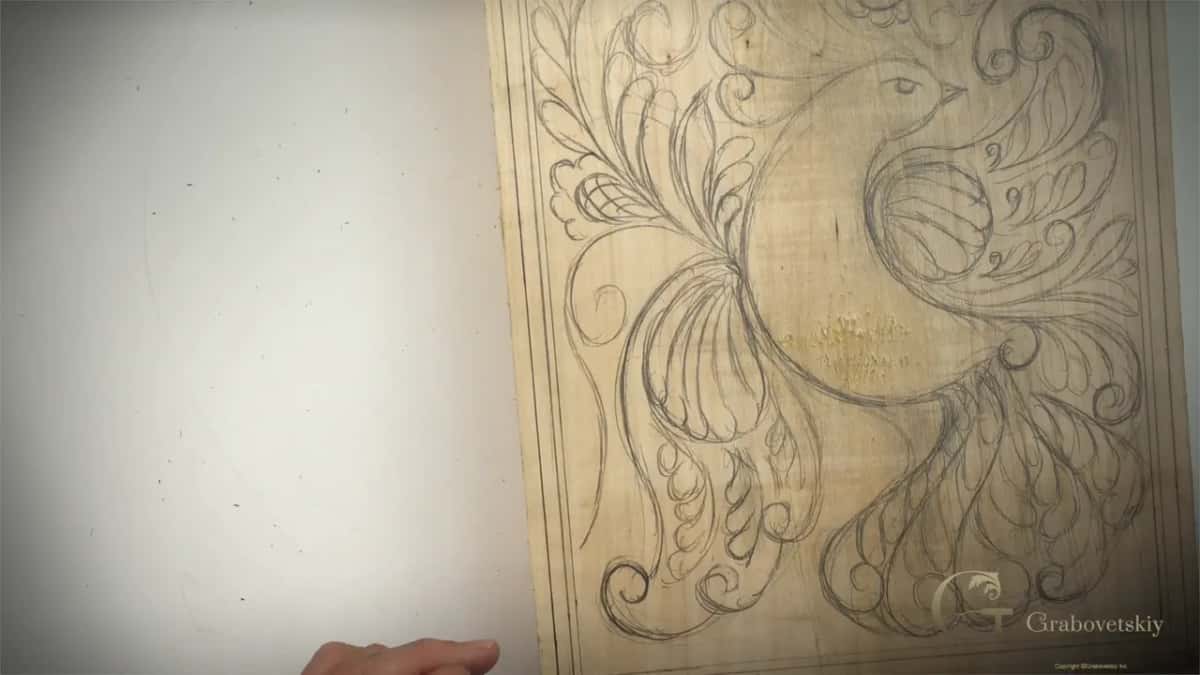
Nothing left bare. Old ornament almost never leaves a gap.
Step 3, outline everything at a low angle
Lay the knife over at a very low angle and follow every drawn line, cutting toward the shape. Then come back the other way and meet your own cut. When both passes meet, the waste snaps out and leaves a clean groove. Repeat the pass rather than forcing anything, always.
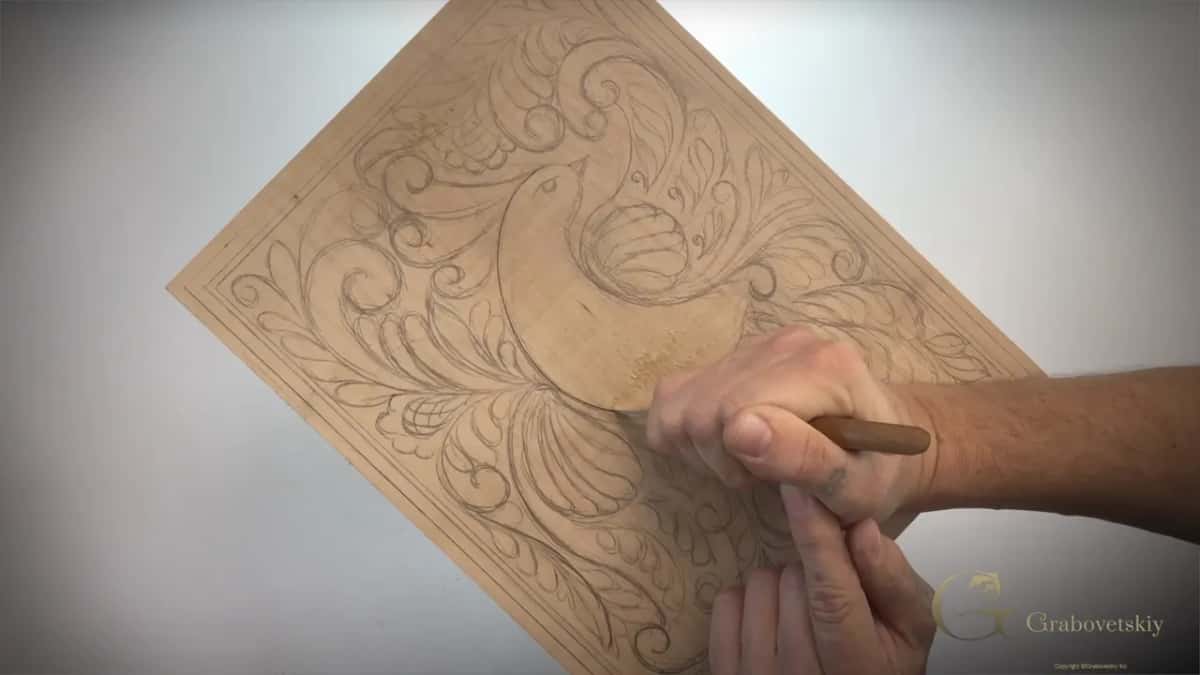
Low angle, following the drawing. Never force the chip.
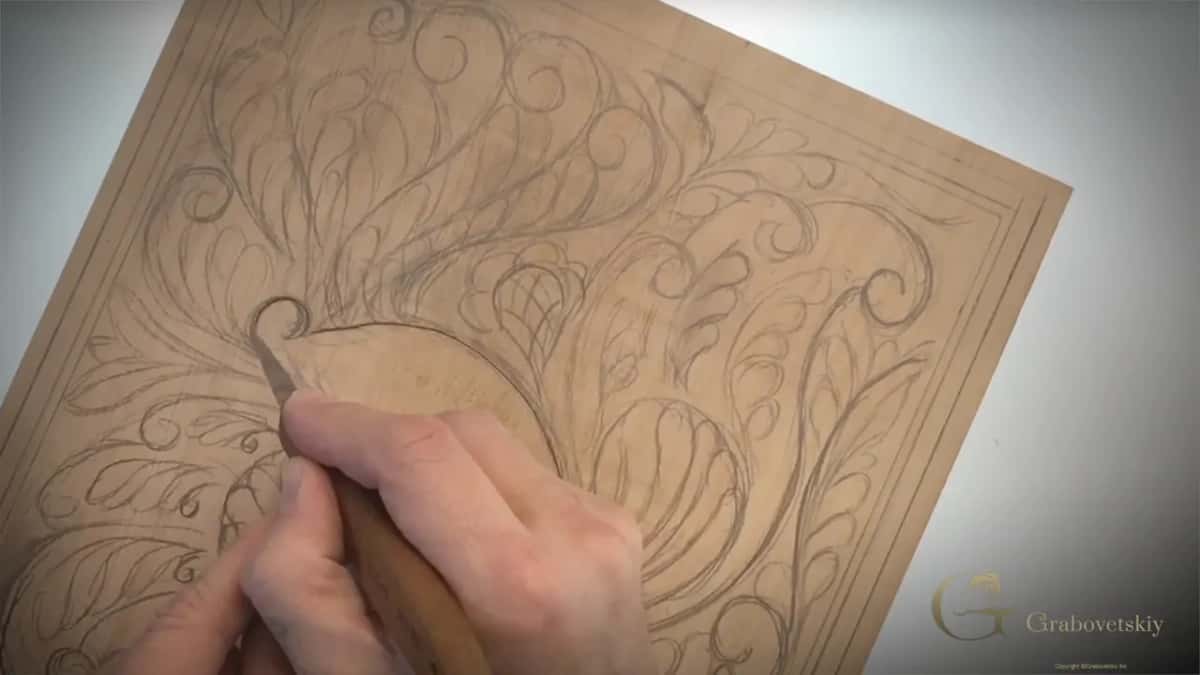
A curl, later called a volute, and it is everywhere in old ornament.
Step 4, clean it and then feed it
Do not sand a knife cut smooth, because sanding kills the crisp edges you worked for. Scrape it with the blade instead. I use a hollow stalk of Dutch reed for the last clean up, which is the same abrasive plant carvers used long before sandpaper existed, and Esterly wrote about it too.
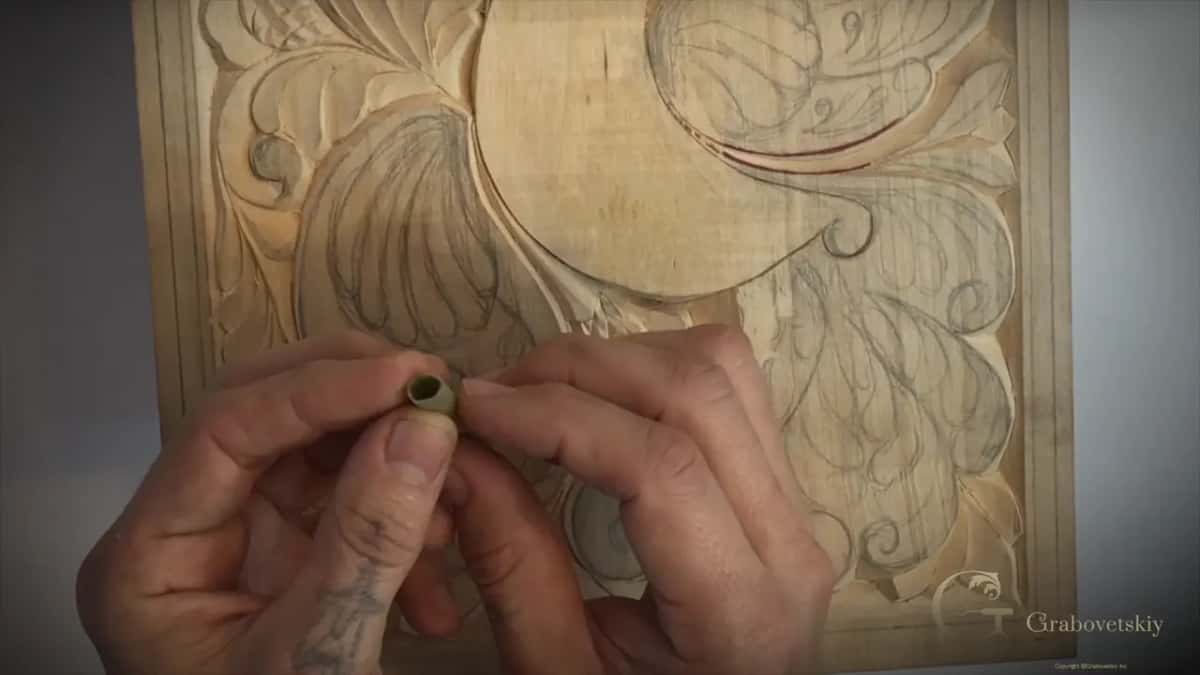
Dutch reed. Older than sandpaper, and kinder to a carved edge.
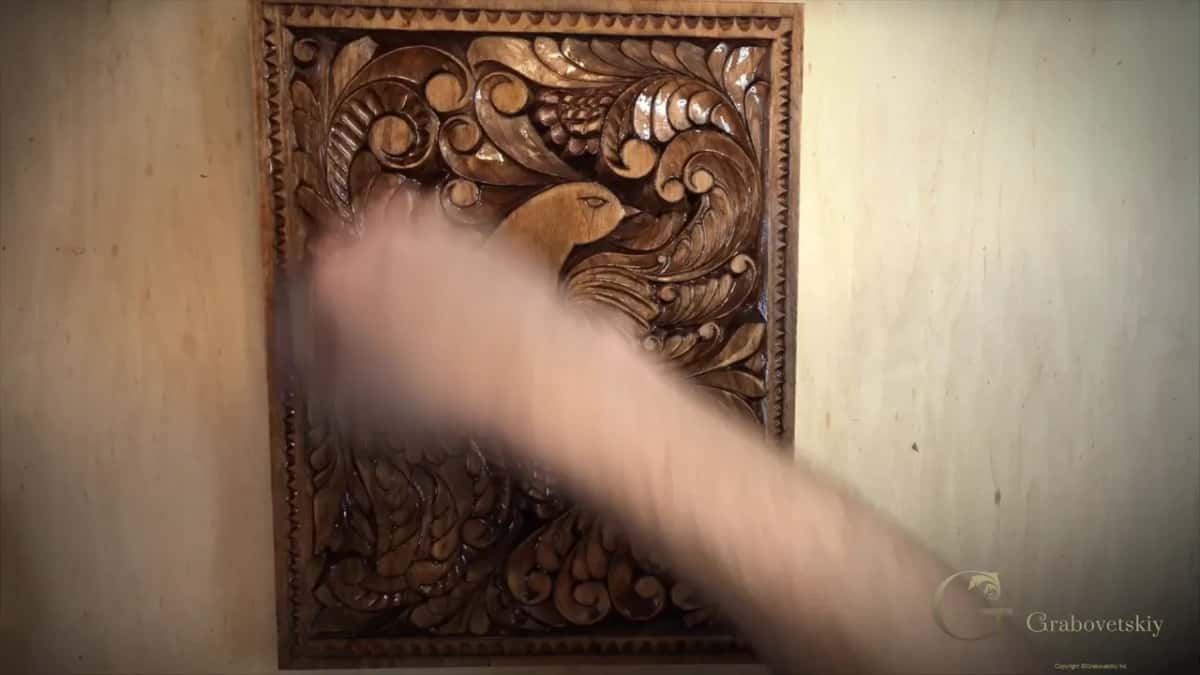
Plain mineral oil. This one goes in a kitchen.
Finish a board that touches food with plain food grade mineral oil. If you want colour, boil walnut shells or onion skins down into a stain, which is what people did before a hardware store existed. The whole project is filmed lesson by lesson inside the beginner carving course.
Want something smaller? The same skill works on a round blank, and my plate takes a 10 inch board, a fret saw and one knife for the ornament.
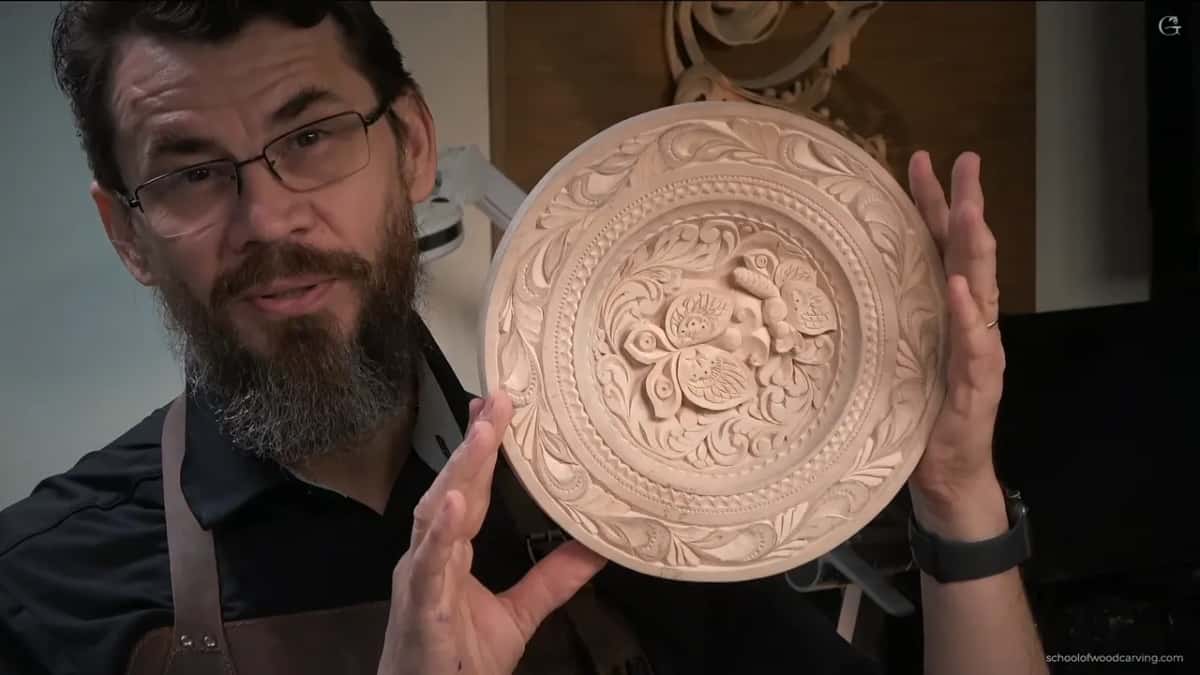
A carved plate. Two butterflies, thirteen curls, one knife.
What do beginners get wrong most often?
Nearly every beginner problem I see comes from one of six habits, and five of them cost nothing to fix. Thousands of student photos have come through my email, and the same things repeat.
The bad habit | How it actually shows up in wood | The fix | Roughly what the fix costs you |
|---|---|---|---|
A dulled edge | A chalky white line down every cut | Strop it | About ten seconds, every fifteen minutes |
Forcing chips out | Torn fibres and a ragged broken corner | Cut again | One more pass along that line |
Buying twelve tools | A gouge roll, none of them sharp | Use one | A month on the knife alone |
Starting on oak | Split edges and a lot of swearing | Buy basswood | One trip, and about ten dollars |
Skipping the drawing | A design that wanders off the board | Draw first | Twenty minutes with a soft pencil |
Cutting too deep | Holes where a shadow should have been | Stay shallow | Every single pass, from now on |
The last one is worth sitting with. Depth cannot be undone. You can always take more wood off tomorrow, and you can never put a single fibre back, which is the whole difference between carving and every other craft.
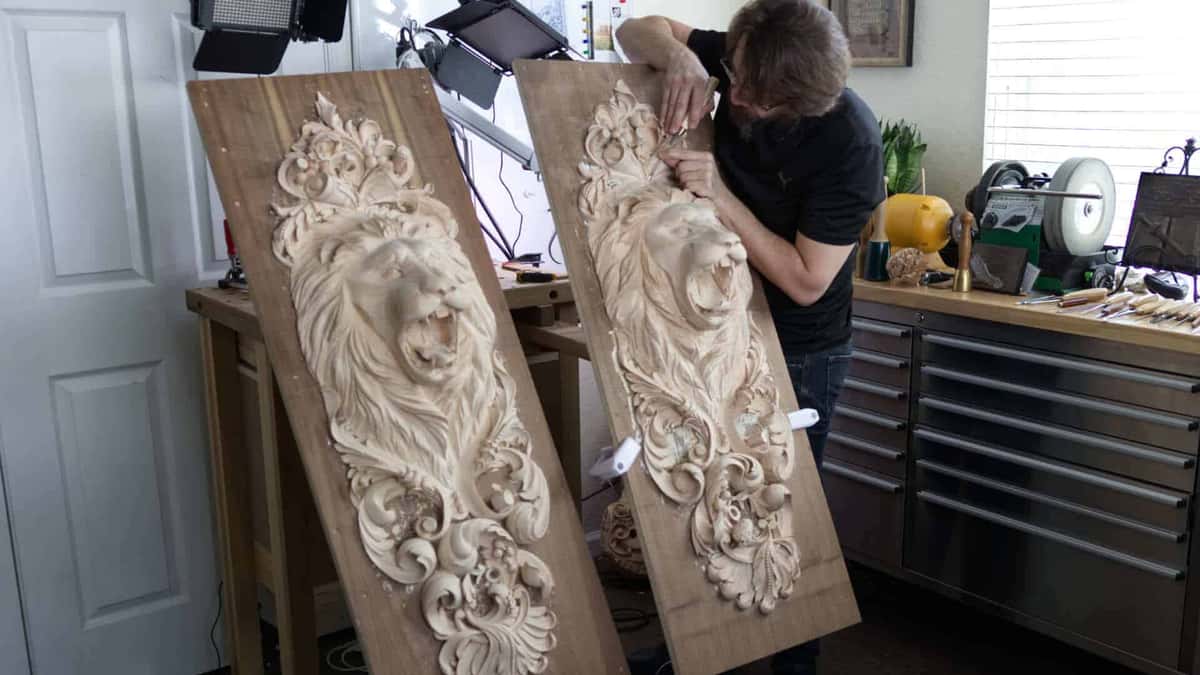
Two lion panels in progress, and the same three cuts scaled up.
How long before you carve something worth keeping?
Most people carve something they are willing to show inside two months, if they cut a few evenings a week. Anyone promising a number tighter than that is guessing, and I will not guess at yours.
A man wrote to me once asking exactly what level he would reach in one month, in two months, in a year. I could not answer him and I still cannot. Ask a gym what your arms will look like in March and you get the same silence. I can show you the movement. The doing is yours.
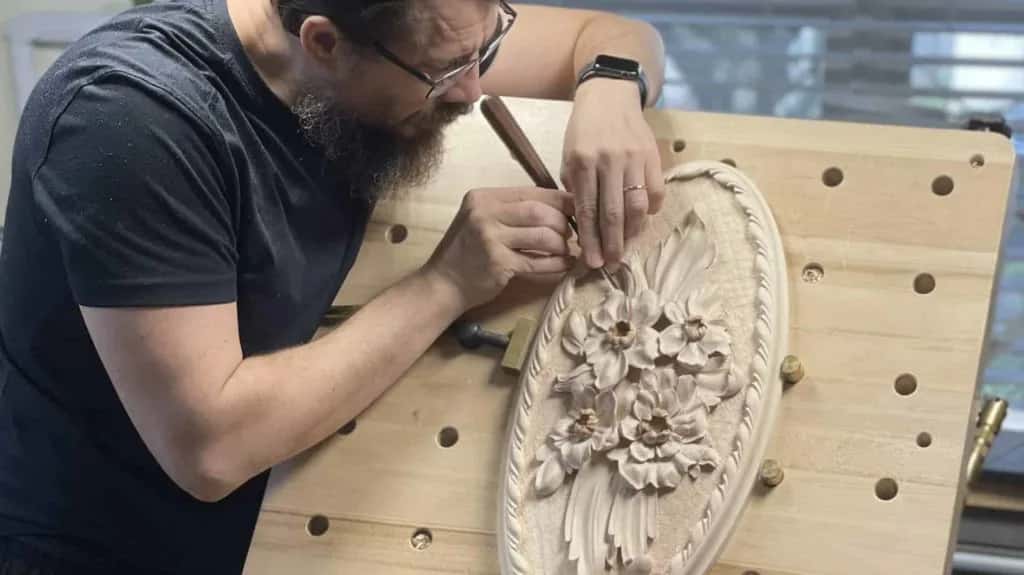
Forty years in, and I am still working on it.
What I can tell you is what the sessions look like. Evening one is three lines on a plank. Evening three is a stem with leaves. Somewhere in week two the knife stops fighting you and the chips start coming off clean, and you will notice it happen. Week four is a molding you would put on a picture frame. By week eight a carved board sits drying under a coat of oil in your kitchen.
I started on a white brick, at six years old, with a chisel I took from my grandfather's shop by the Volga. I had no idea what I was doing and I could not have told you the difference between relief and chip carving. That did not matter. What mattered was that I kept going back to the bench.
Somebody once asked me what the richest place on earth is. Not a country. It is a cemetery, because it is full of people who were given a talent and never spent an evening on it. Do not let that be the end of this.
Your first plank costs ten dollars, maybe twelve. Your knife costs about thirty. The three cuts cost you one evening, and after that you are no longer a person wondering whether they could carve.
The whole path, those three cuts through to Baroque acanthus, is what I show at the School of Wood Carving, and the first cuts course is exactly the sequence on this page, filmed over my own bench. I was named International Woodcarver of the Year, but the thing I am actually proud of is how many people have written to say they finally got a clean chip. For the knife I use, I wrote up the shapes and the steel in my notes on carving knives, and the maker is Pfeil in Switzerland.
Frequently asked questions
What is the easiest thing to carve for a beginner?
A short length of decorated molding is the easiest thing worth making, and it needs one knife and a strip of basswood. Every element repeats, so your hand gets sixty attempts in an hour instead of one. Beginners who start there tend to reach a finished object faster than beginners who start with an animal.
Do I need expensive tools to start wood carving?
One good knife around thirty dollars will carry you for months, and I made a living on mine for years. Spend your money on steel that holds an edge rather than on a large set of shapes you cannot yet control. A leather strop and honing paste matter more than a tenth gouge.
Which wood is best for a beginner to carve?
Basswood, sold as limewood in England and linden across much of Europe, is the standard beginner choice for good reason. Fibres are fine and even, the grain barely shows, and a sharp edge passes through without wandering. Butternut is a good second. Leave oak and walnut until later.
How long does it take to learn wood carving?
Cutting three evenings a week, most people make something presentable within about eight weeks. Real fluency takes years. Forty years in, I am still learning, and progress depends almost entirely on how often you sit down at the board rather than on any talent.
Is one knife really enough, or do I need a full set?
A single knife handles moldings, borders, leaf ornament, lettering and a great deal of shallow relief. Whole cultures across old Europe decorated chests, doors and boats with nothing else. Add a gouge only when a design asks for a hollow the knife physically cannot scoop out.
Should I use a pattern or draw the design myself?
Draw freehand from the start, even badly, because your eye needs the practice as much as your hand does. Patterns are useful later for complicated ornament and for keeping a design symmetrical. A wobbly line you drew teaches you more than a perfect line you traced.
Filed under
- basswood
- Beginner in Woodcarving
- Beginner in Wood Carving
- beginner wood carving projects
- Can you make a living as a beginner wood carver?
- Can you make money with wood carving?
- carving tools for beginners
- Do wood carvings make good gifts?
- gouge sharpening
- How do I start carving?
- How do you carve wood for beginners?
- How do you prepare wood for carving?
- How long does it take to learn wood carving?
- Is wood carving a good hobby?
- Is wood carving good for you?
- relief carving
- What are the different types of wood carving?
- What are the hobbies of wood carving?
- What do I need to know about safety when carving?
- What is the best way to learn wood carving?
- What is the best wood for carving?
- What is the easiest thing to carve from wood?
- What is the hardest wood to carve?
- What is the meaning of wood carving?
- What kinds of projects can I do with wood carving?
- What should I know before starting wood carving?
- What tools do I need to start?
- Wood Carving for Beginner
- Wood carving for beginners