

Alexander Grabovetskiy, woodcarver, School of Woodcarving · Published 2022
How do you carve an acanthus leaf from a picture?
Quick answer: Carving an acanthus leaf from a picture is reading one movement off the picture, carving it, then going back for the next. In lesson 5 a part that curls back in my picture went lower in the wood, and a small part that rolls uphill called for concave sides and a raised middle.
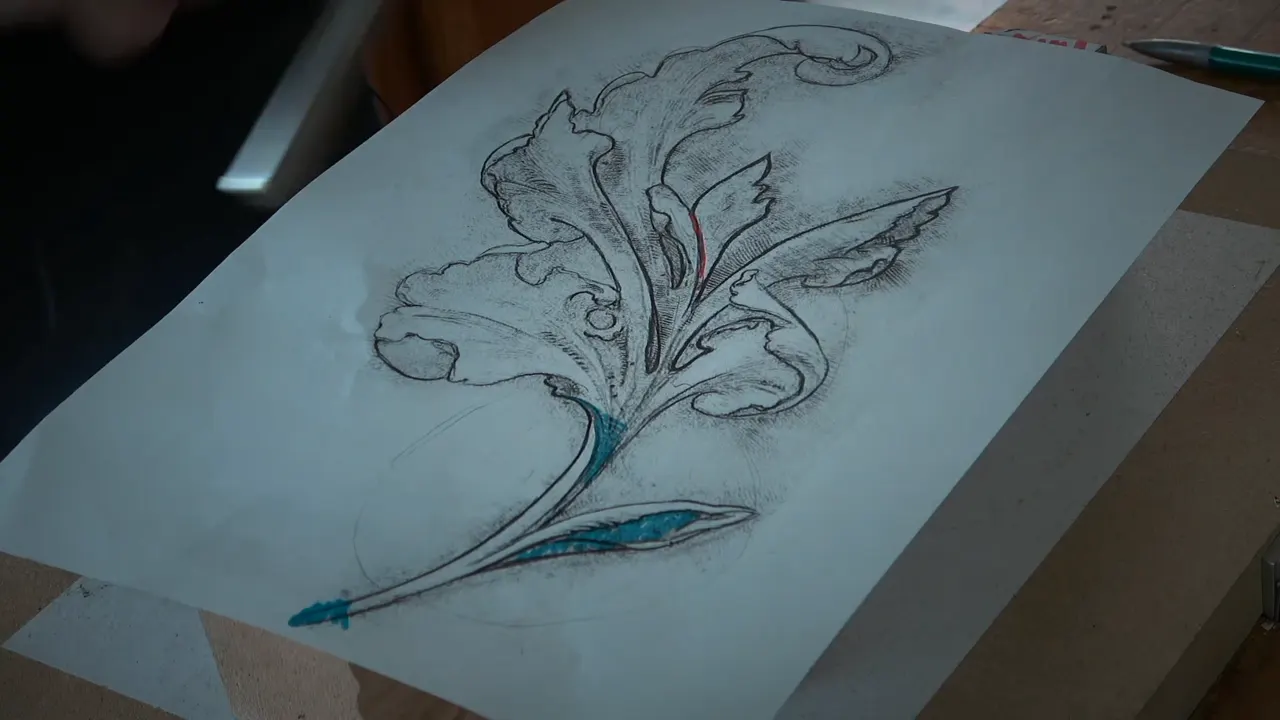
Working an acanthus off a picture, the way I did it in lesson 5, is going back to that picture again and again and digging into the wood whatever movement it shows. That acanthus leaf pattern was still doing work for me in lesson 5 of 8. One part curls back in it, so on my board that part went lower. Another small part rolls uphill, and that meant a concave on each side with a middle that rises. Three times in this lesson I sent the class back to the picture, and once to something I had shown them on paper.
Got a picture of an acanthus you'd love to carve? A block on your bench, sawn out and roughed? Then go back to that picture before you carve the next part, the way I kept doing with my class.
I'll go through those readings in the order they came up, what each one made me do, and the tool I took for it. In Carving Modern Acanthus we carve a leaf in relief from a 1903 design. This lesson is three videos of about eight minutes each, filmed with students in the room, so most of what follows is what I told them while the gouge was in the wood.

The readings of lesson 5 at a glance
Curling back in the picture meant lower in the wood, with the smaller #9.
One flat stretch got a low, a high, and lower again.
Rolling uphill meant a concave on both sides and a raised middle.
That small part came back later, on paper.
Partway in, I told everyone to go over the pattern again and redraw from it.
I said the raised ridge belongs to one type of acanthus only.
How should you read an acanthus leaf pattern while you carve?
I read it in pieces in this lesson, one part of the leaf at a time, right before the gouge went into that part. Right at the start, I worked at the micro level, with just the corner of the tool and some blending, and a pipe everywhere I looked. I said we would concentrate on that, and asked if they could see where I was at. We're going to have a roll again right here, I told them. Comprende? I was really happy with what we had done in that section.
The first reading of the picture came soon after. I sent them to it, where you can see some kind of movement going on, curling back, exactly the same as a section we had already done. At that moment the camera shows the picture itself, a shaded drawing on paper with its stem marked in blue.
That section had gone down. This one would go lower too, and kind of return backward.
Then I placed a line on the wood, in green, and asked whether the room could see it. Dark, maybe we can turn the lights, I said, and once it was better I told them that with the light, you can see it.
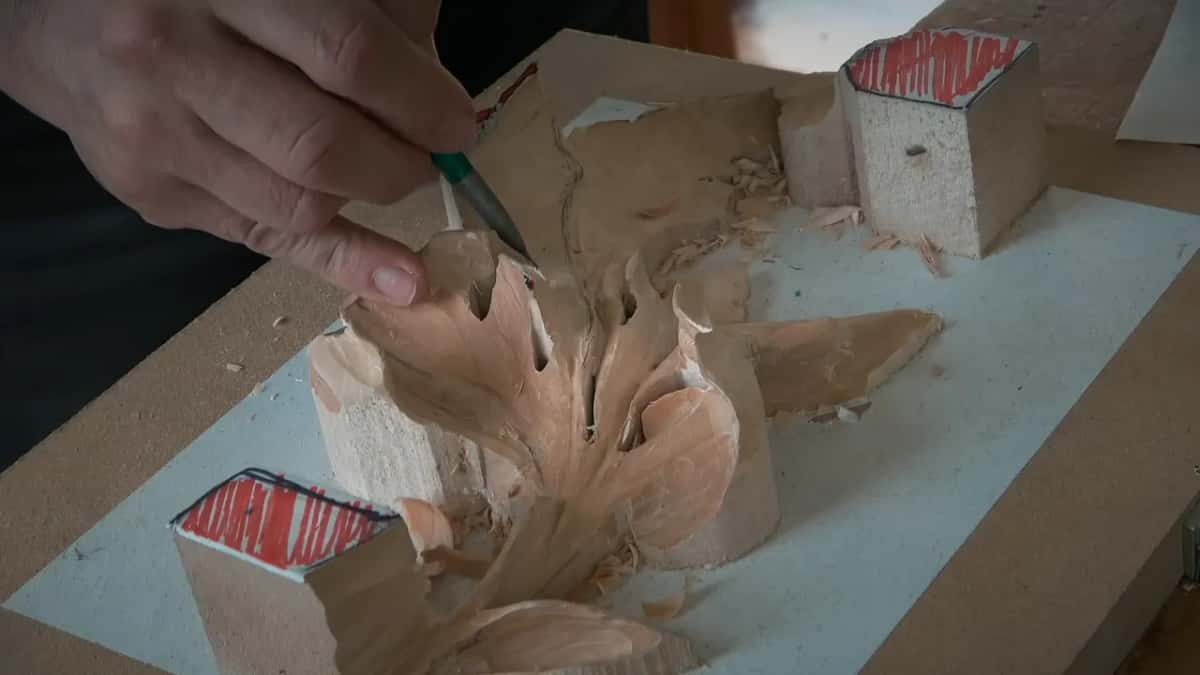
At one point I asked them straight out. I know you see it, but do you understand what I'm doing?
What does a part that curls back ask of the wood?
On my leaf it meant that part had to go down, and we were going to drop it. I took a #9, 10 mm, which is three eighths of an inch, and I dropped it carefully, carefully, carefully.
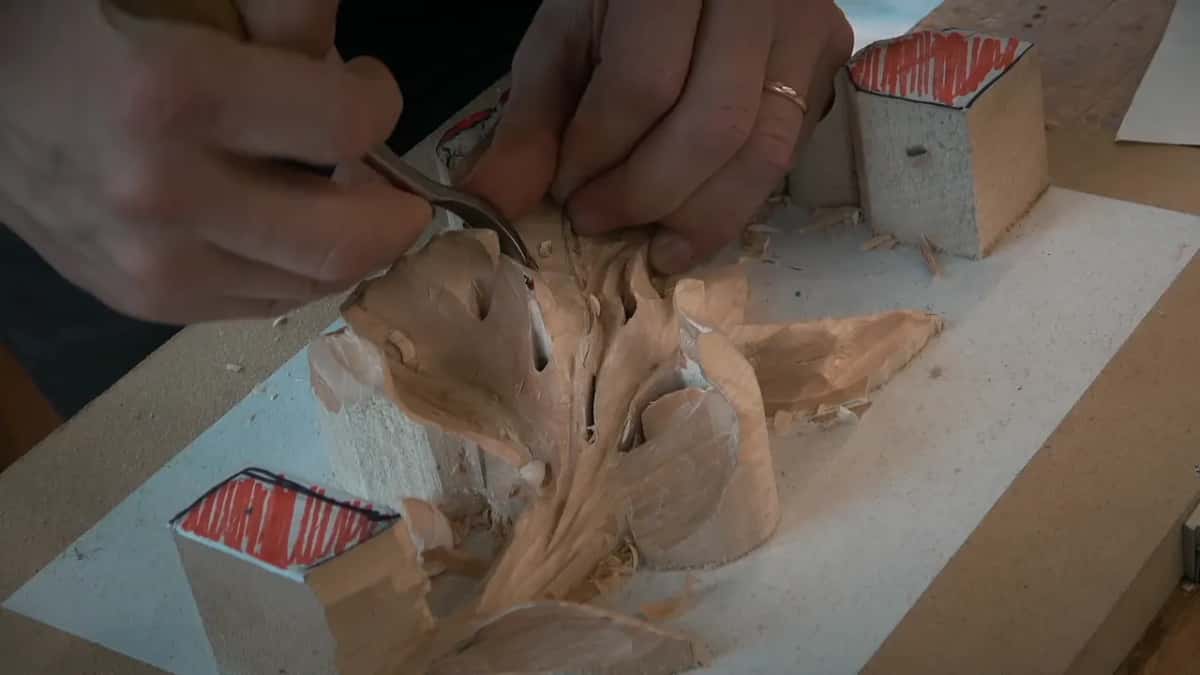
If the straight tool gives you trouble, I said, just grab a spoon gouge. For you that's a #9. In my case it was a #11, and I told them not to ask me why I brought the #11 instead of the #9. I like the #11, a #9 is harder to find, and I use them all the time.
But see what I'm doing, I said. I'm dropping it. What I was after was to see that shadow, the development of shadow.

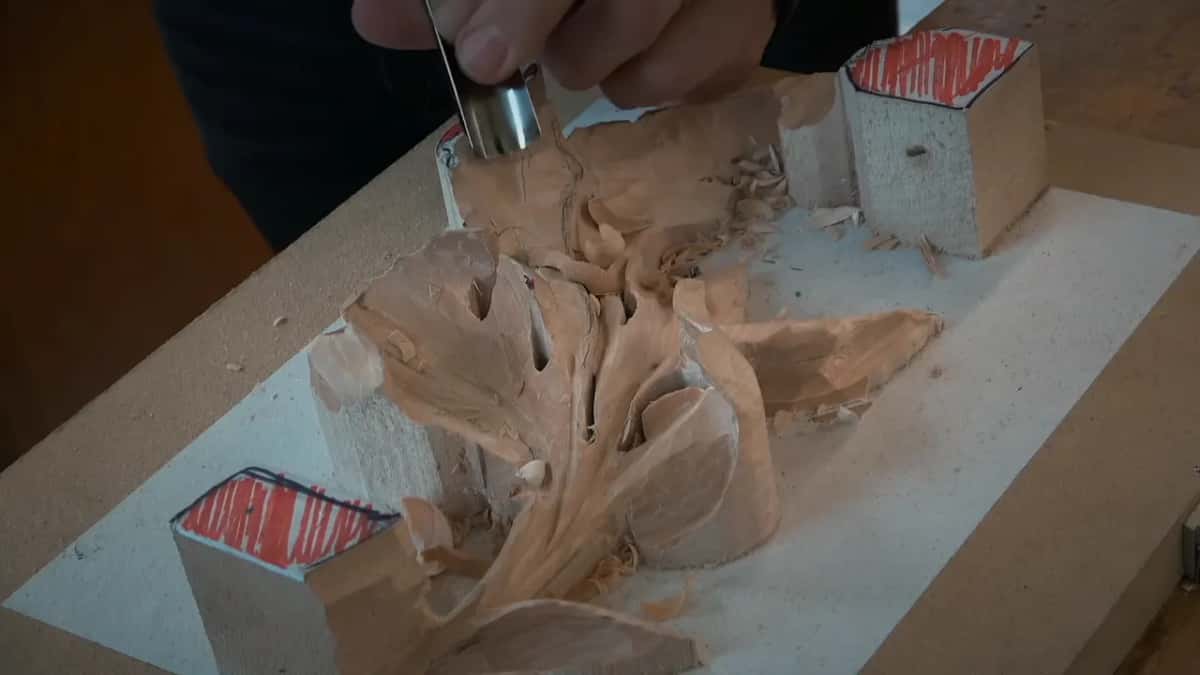
The next pass would go underneath that movement. Before it, I took some material out of the area with a big #9, 20 mm or three quarters of an inch, set that pass up in advance, and moved a little closer to the flipping motion.
What if that part still looks flat?
I told the class straight out. You know what, I said, I'm really not too happy that this part has been straight and flat.
I still wanted a 3D movement in it. That is a low, that is the high, and then we lower it down again, and even as a flipping motion it still looks nice. I don't want any flat areas, even from the side.
So I dropped it to about the same level as a piece right there, picked up the smaller #9 again, and made that flipping motion. Keep an eye on that section, I said, and maybe this camera shows it better. Near the end of that first video I showed them my hand placed really solidly on the board, with my thumb as the leverage point.
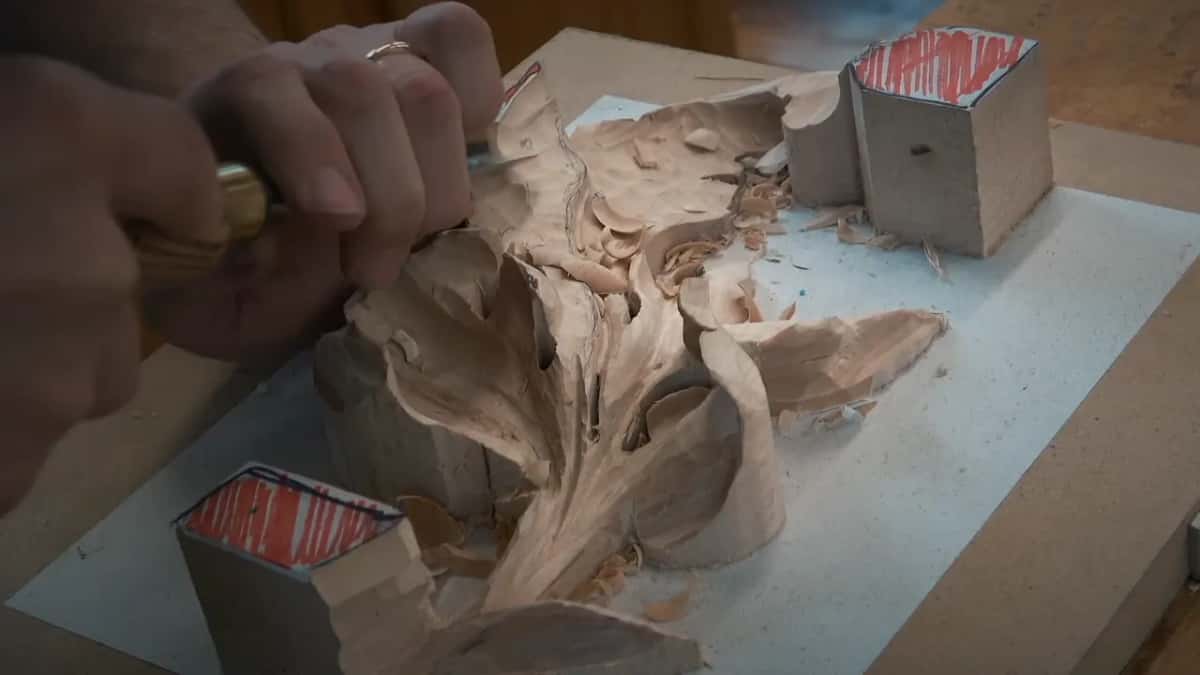
In the second video, on yet another stretch, I went back to the rolling motion we had done earlier and worked it with the tool upside down. Does it feel like it's rolling, I asked them.
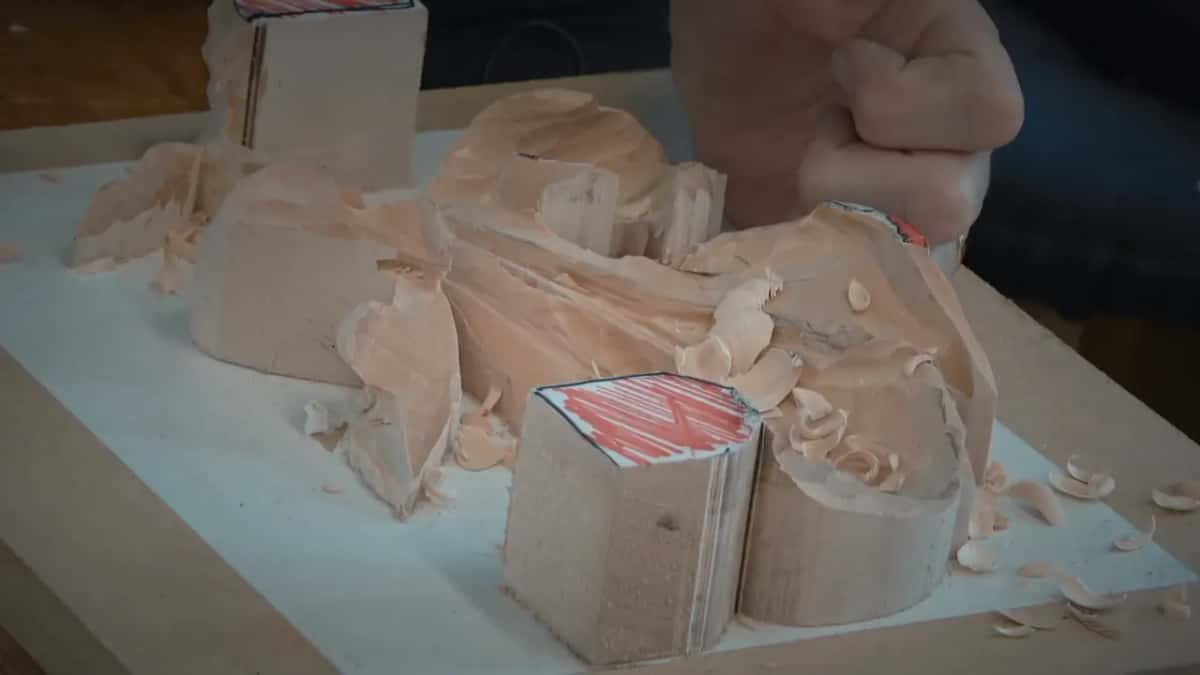
Later I looked at one more stretch from the side and asked how it looked. It's supposed to start low, go up to one inch, 25 mm, above the background, then drop back and ball just a little. Mine was kind of not nice there. I cleaned it again with a #7 in a rotation motion, and it turned into a really nice and beautiful transition.
What does it mean when a part rolls uphill?
On this leaf it meant concaves and a raised middle. I asked the class to take a look, please, at the picture, and see a little thing there. It's also like a rolling, I said. Uphill, it just rolls this way.
Which means, first of all, a concave, more concave on the inside, and then the middle part bulging, the same as we did in another section. This side concave, that side concave, and the middle raised up.
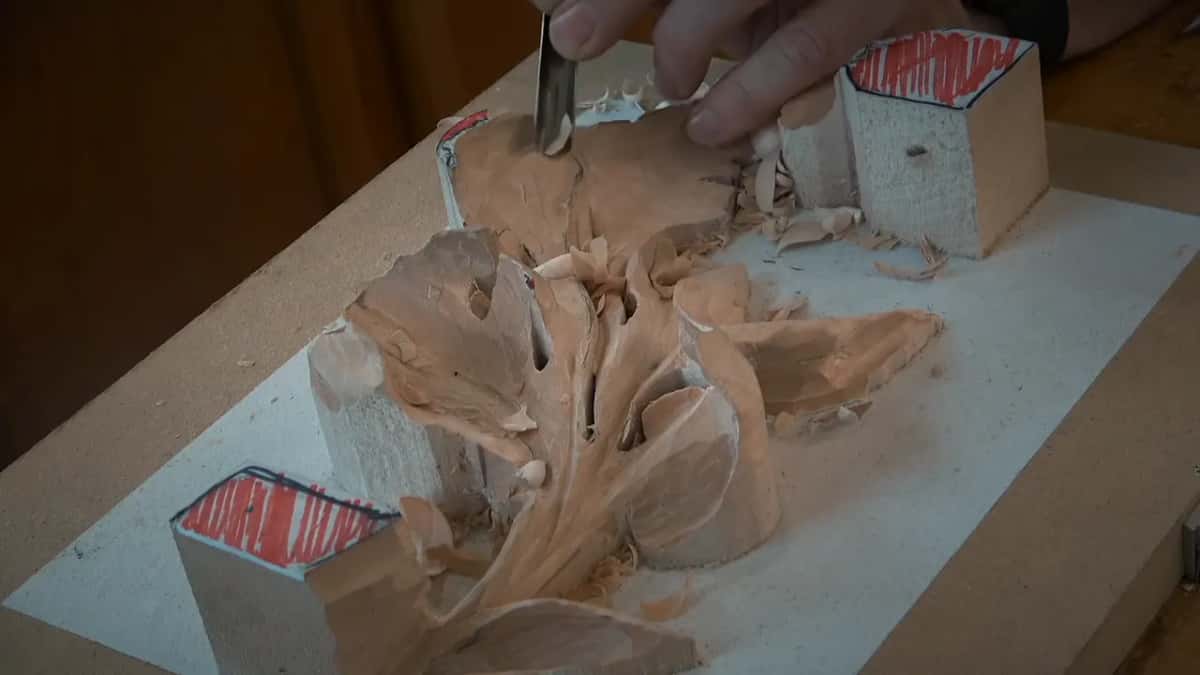
Before all of that, I wanted to drop it and make the overall convex more exaggerated. Right then it was too flat, and I didn't really like that. So I took a bigger tool, a #9 in my case, and excavated a little more than what I had.
I didn't take long passes. For me it's better to be careful.
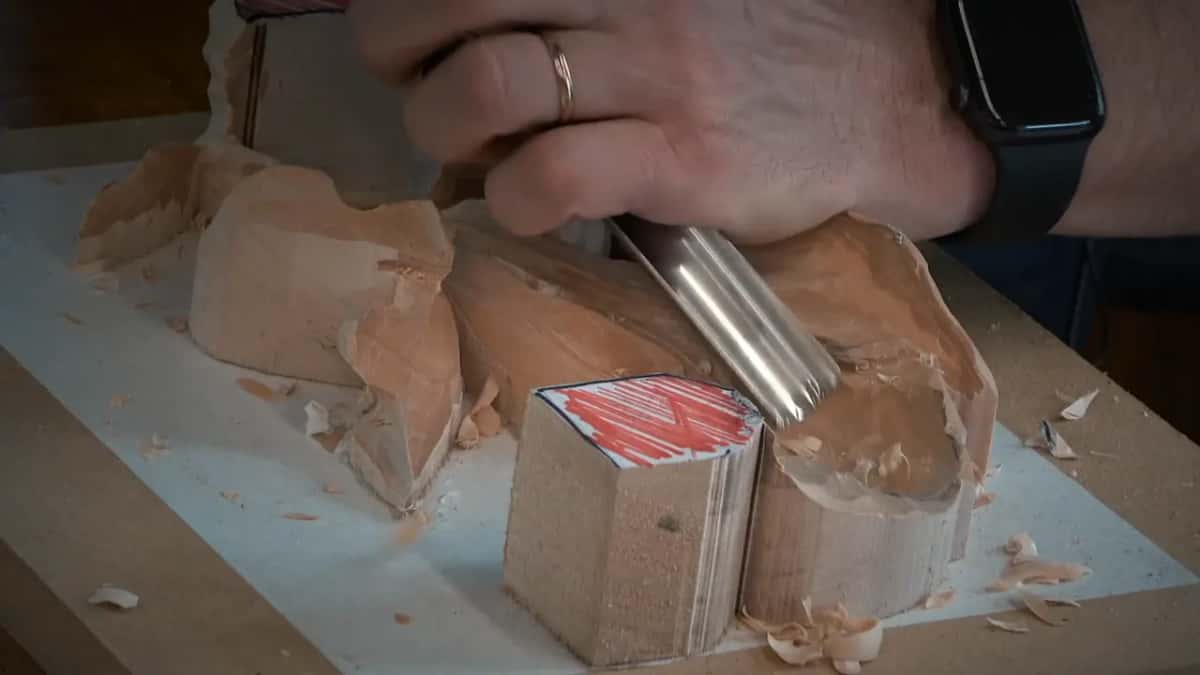
The big #9 there was the 20 mm one, and I warned them they would see some limitations with it. One was a marriage line, where the grain meets. Taking it from the opposite side was kind of hard in my case, and probably in yours too, I told them, since you're working on the same design. I blended it instead, attacking it from different points until I was happy, which doesn't have to be perfect at that point.
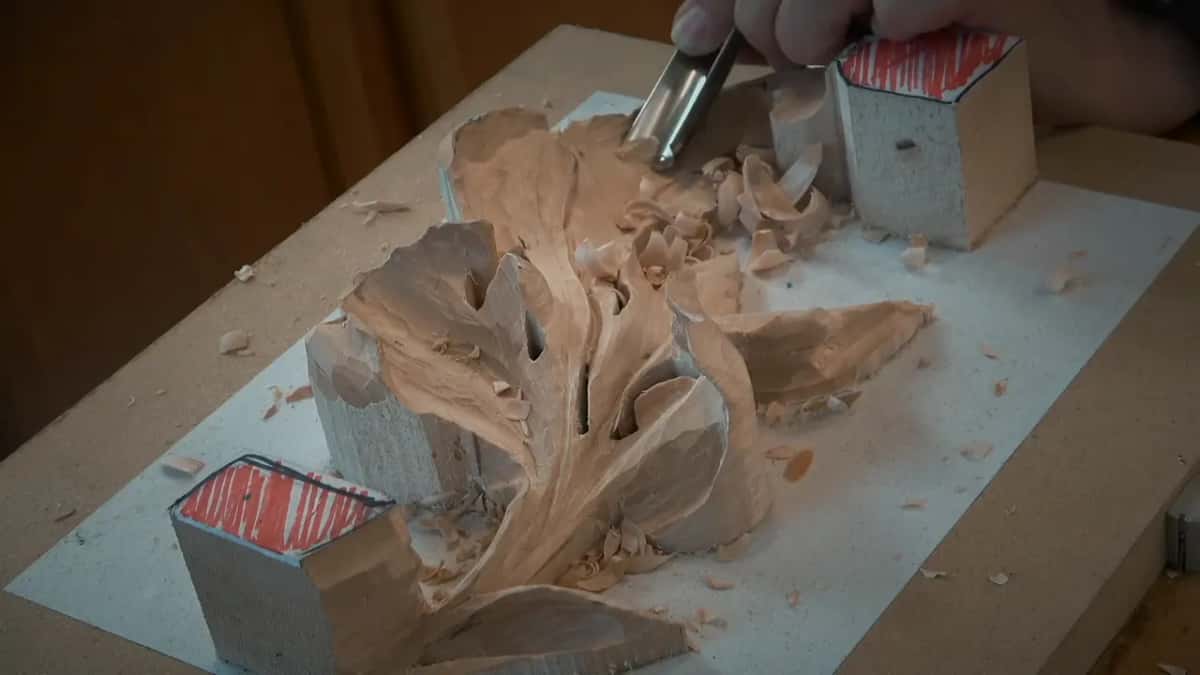
What do you call the little part in the picture?
I didn't name it in this lesson. Remember what I showed you on the paper, I asked, and had them see that same small part again. That part was going to sit right here on the wood.
On camera I held the drawing up and touched that small part with the tip of my pen.

My gouge had to go right along its side, whatever you call that little thing. It's a little thing, I told them. Call it whatever you call it.
Then, in one breath, I said I do not take a spoon and then that I'm going to take a spoon. In your case, I said to the room, it's a 10 mm #9, 3/8 in. I worked my way little by little without forcing, staying away from it slightly. If I change this way, I said, you're not going to be able to see it, so I raised my hand.
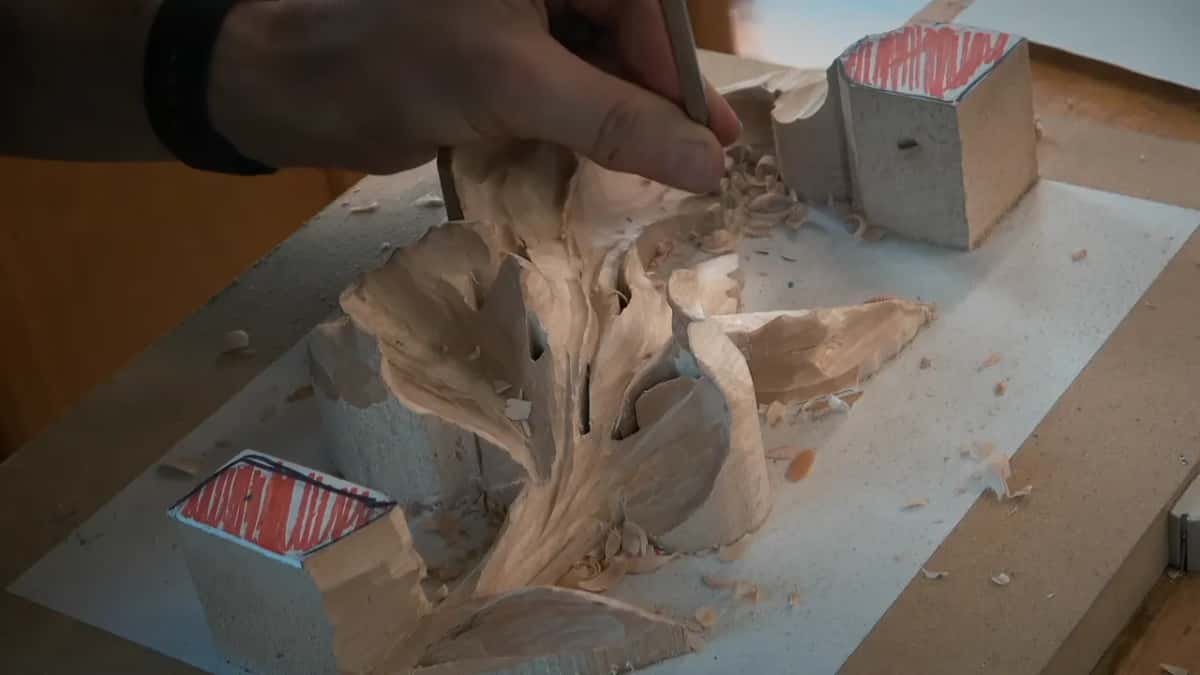
After that I wanted this ridge raised up, which meant excavating slightly more inside of it.
Is every acanthus leaf carved this way?
Only this type, I told the class. Right after I said I wanted that ridge raised, I added that this applies to that type of acanthus, and not every acanthus is going to be like that.
Earlier in the lesson I had the tool lying on my middle finger and said, look at that finger. That's the right way to use the middle finger, by the way. Then, on another part, I wanted the middle to bulge like I did before, with a little thing there raised up on the same idea. One case had been really extreme. This one would not be as extreme, only somewhat raised.
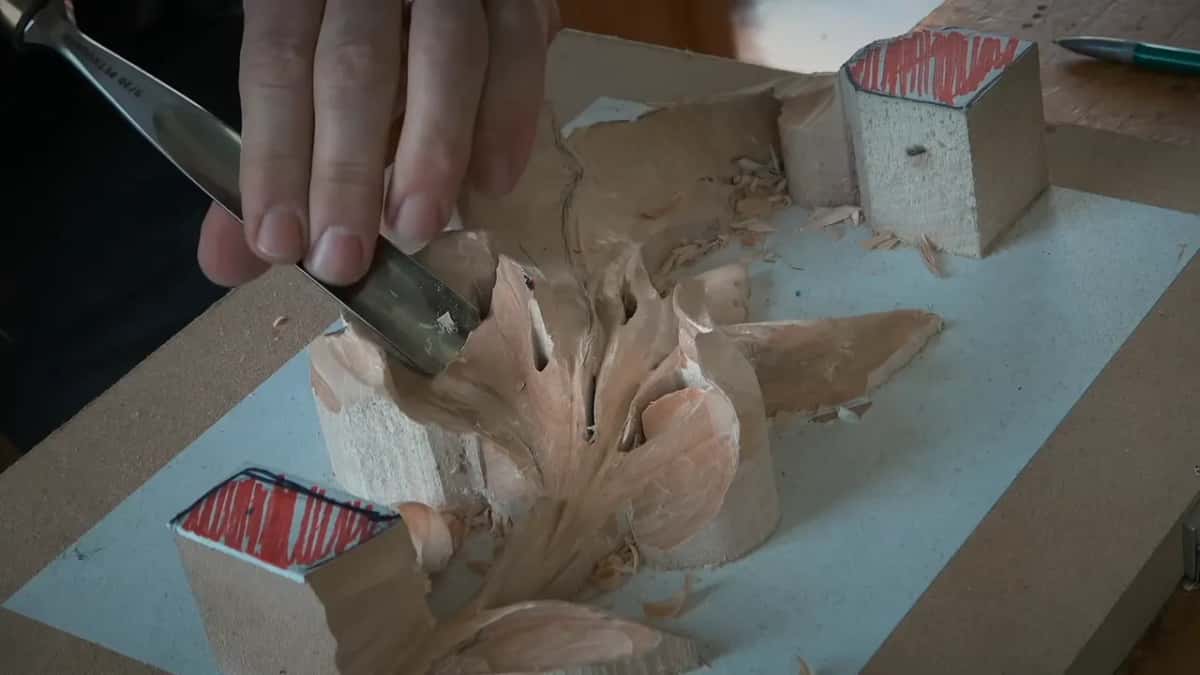
More shadows, I said, and it's really good for the eye. I took my previous #9 again and excavated right on the side of the middle part. If I have to drop that middle part, I will, I told them, though I don't want to drop it too much. Pretty much, I was trying to raise the ridge.
I had also told them that on the opposite side there has to be some kind of convex inside the leaf. I did not press that idea before, because I didn't want to overwhelm them. When you see a small little triangle area like this one, I said, that's the stopping point for the convex. I told them they could take a #9 of 20 mm (3/4 in) and excavate right along that movement, flowing all the way underneath the curve.

Everything's supposed to go to the same movement, I said. Don't create the straight line. Nothing is straight in nature. Everything curves. Excavate slightly, I told them, and don't excavate too much. It has to be a gradual movement, on both sides. Of course you have to attack it from the right position, not like me, but you should get the point.
The lesson before this one, lesson 4, works the same leaf.
When did the class redraw the lines?
Partway through the second video, right after I took care of a wavy spot, I said to look at the picture, look at the pattern, and just try to recreate it and redraw it.
In the last part of the lesson I asked them to look from different points of view, from different angles. One section didn't make sense to me. It goes backward, I said, so I excavated it a little more, rolled it backwards slightly, and thought it would give me more shadow. And if you have to attack from the opposite side, I said later, do it just like that.
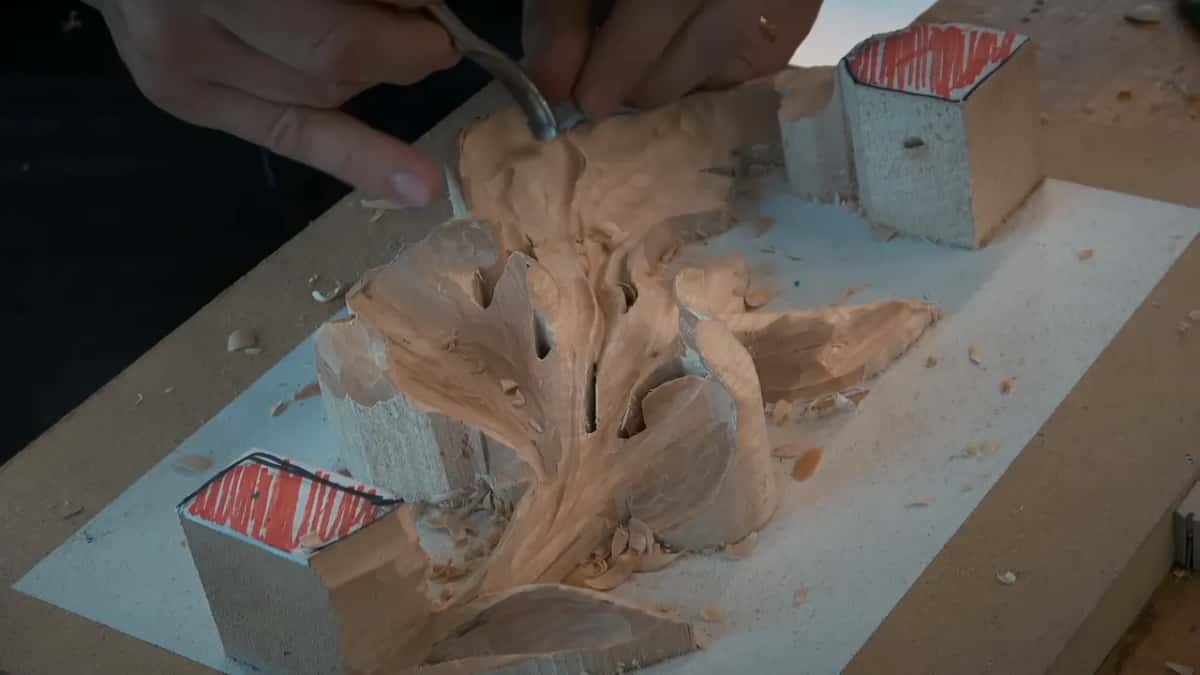
For that section I used my spoon, which in my case is a veiner, and in their case a gouge. By now, I said, you should know the difference. Before lesson 4, the leaf went through lesson 1, lesson 2 and lesson 3.
Which tool went with each reading?
These are the tools, in the order the lesson went.
Reading | Wood | Tool |
|---|---|---|
Part curling back | went lower, then a pass went underneath it | a #9 of 10 mm (3/8 in) |
Flat, straight stretch | got a low, a high, then lower again | the smaller #9 again |
Small uphill roll | overall convex first, then concaves on both sides | a bigger 20 mm #9 (3/4 in) |
Same part, paper | my gouge went beside it, slowly and without forcing | spoon gouge, a #9 for my students |
Another bulging middle | excavated beside it, dropping some if needed | my previous #9 |
The #7 I blended with was a 14 mm, about 9/16 in, in a slow rotation motion, riding on top.
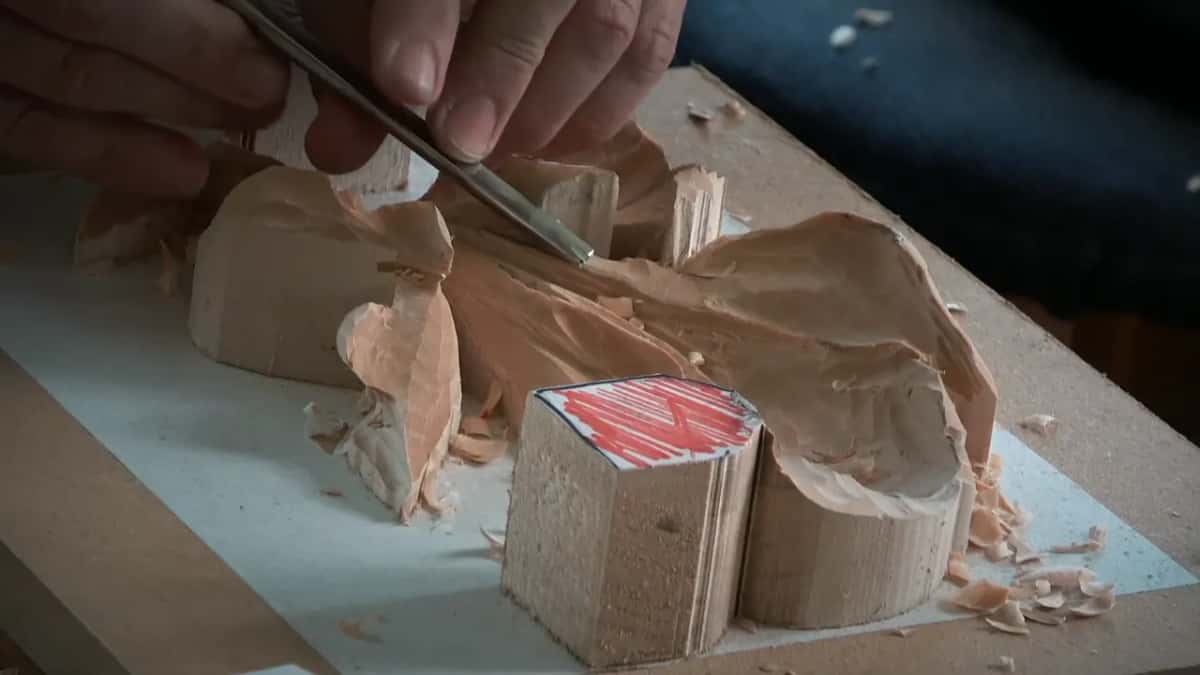
What was every reading after?
Shadow, as I kept saying. While I dropped the curling part, I said I really wanted to see that shadow develop. Near the end, I put it in three words. I'm after shadows.
Concaves and convexes are what give you shadows, I told them, and to create a convex you have to create concaves. When I rolled that one section back, I asked if they could tell how it was developing the shadow from that side. When more details came in closer to the end, I asked whether the shadow showed for them. To me it was casting a beautiful one.
By the end, the main concave in the middle was done, and my convex came next, right in the center part.
This lesson, the fifth of eight, works one leaf in three videos, with the class answering me back. You've got your own picture of a leaf? And your gouges sharp? Then come and watch each reading turn into carving.
If you'd rather read a different leaf, the Roman, Greek, Corinthian and Byzantine acanthus each have a course of their own. Principles of Design in Wood Carving is the course on design itself, and All About Tools for Wood Carving is about the tools.
Access opens every lesson of Carving Modern Acanthus and the rest of the school.
How it's done
- Find the movement in the picture. Before you carve the next part, find its movement in the picture. On mine, one part curled back.
- Place a line where it drops. Mark the line on the wood, with light enough to see it.
- Drop the curling part carefully. Take the smaller #9 and go slowly. Use a spoon gouge if the straight tool gives you trouble.
- Excavate slightly, on both sides. Keep it gradual and don't take too much.
- Make the overall convex bolder. When the part is too flat, take a bigger #9 and excavate a little more, with short, careful passes.
- Work beside the small part. Go right along its side with a spoon, a #9 for my students, little by little, without forcing.
- Redraw from the pattern. Partway in, return to the pattern and redraw the lines on the wood.
Frequently asked questions
How do you carve acanthus leaves?
In lesson 5 the leaf was already shaped deep, so the work was hollows and swells, the concaves and convexes that, as I said, give you shadows. Making a convex means carving concaves beside it. My #9, #7 and #11 did most of it, with a spoon gouge where a straight tool gave trouble.
Which gouge did you drop the curling part with?
On my leaf that was a #9 of 10 mm, three eighths of an inch, used carefully. When the straight tool gave trouble, I told everyone a spoon gouge was fine. Theirs was a #9, and mine was a #11.
What did you call the small part that rolls uphill?
I gave it no name in this lesson, and told my students to call it what they like. I showed it in the picture first, then on paper, and my spoon gouge went beside it a little at a time.
What to carve next